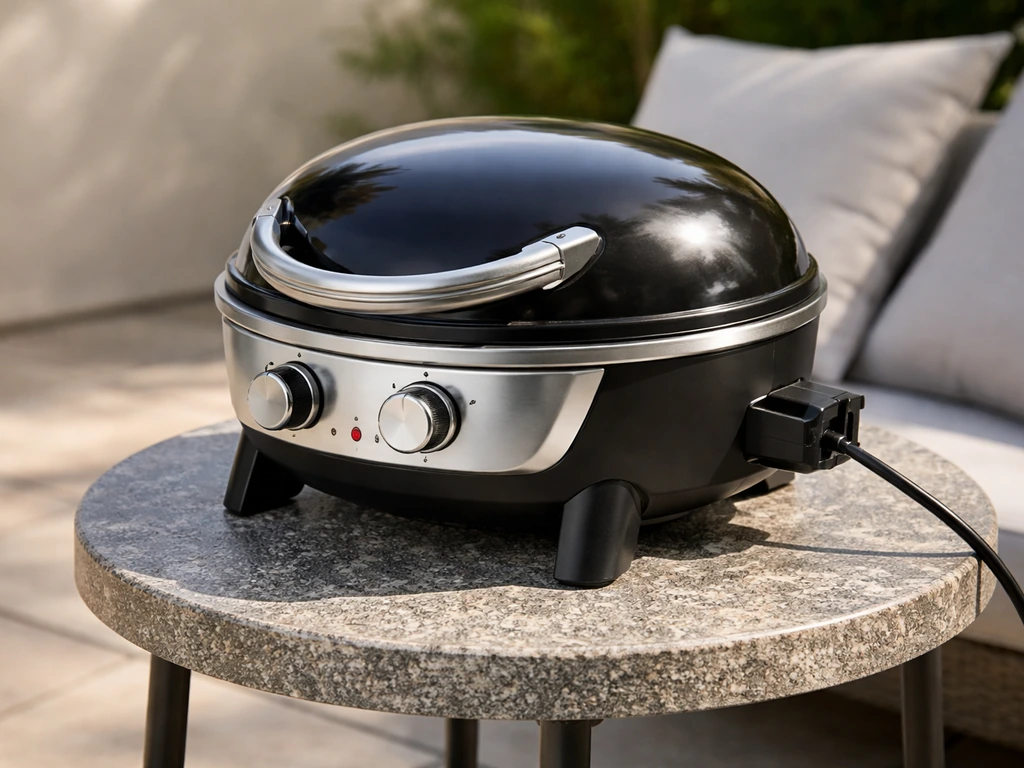
Plug the Char-Broil Patio Bistro Electric Grill into a properly grounded, GFCI-protected outdoor outlet, press the power button until the light ring turns blue, press the control knob and turn clockwise to your target temperature, press the knob to lock it in, close the lid, and wait 15 to 20 minutes for preheat. That is the core operating loop. Everything else, from safe placement to cleaning to fixing a grill that won't heat, builds on those basics, and that is exactly what this guide walks you through.
Char-Broil Patio Bistro Electric Grill How to Use Guide

Grant Mercer
3 May 2026
Safety checklist and what you need before turning it on
Electrical grills like the Patio Bistro have a short list of non-negotiable safety rules. Get these right before you ever plug in the cord.
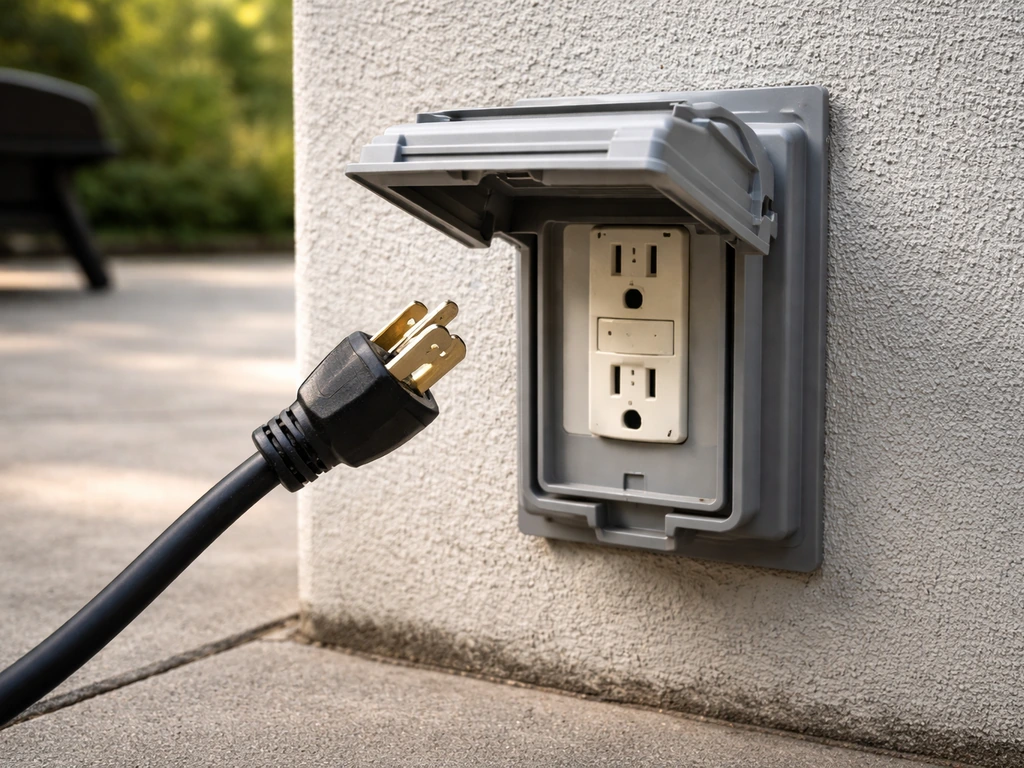
- Use a properly grounded, GFI (GFCI)-protected outlet. This is not optional. If your outdoor outlet does not have that protection, use one that does, or have an electrician add it.
- If you need an extension cord, it must be rated for outdoor use and marked with the suffix letter 'W' on the cord surface, along with a tag stating 'Suitable for use with outdoor appliances.' Keep the connection point dry and off the ground.
- Do not share the circuit with other high-draw appliances. The Patio Bistro can trip a household breaker if another large electrical product is running on the same circuit.
- Never immerse the cord, plug, controller, or heating element in water or any liquid. Wiping with a damp cloth is the cleaning method for electrical components, not soaking.
- Unplug from the outlet when the grill is not in use and before you clean it. Do not leave it plugged in between cooking sessions.
- Allow all parts to cool completely before removing or attaching anything, and before cleaning.
- Do not let the cord hang over the edge of a table or counter, and keep it away from hot surfaces.
- Never use the grill near a hot gas or electric burner or inside a heated oven.
Before each session specifically, check that the grease tray is empty and seated correctly under the drain hole. A full grease tray is a fire risk, and it only takes a moment to check.
Unboxing, assembly, and correct placement
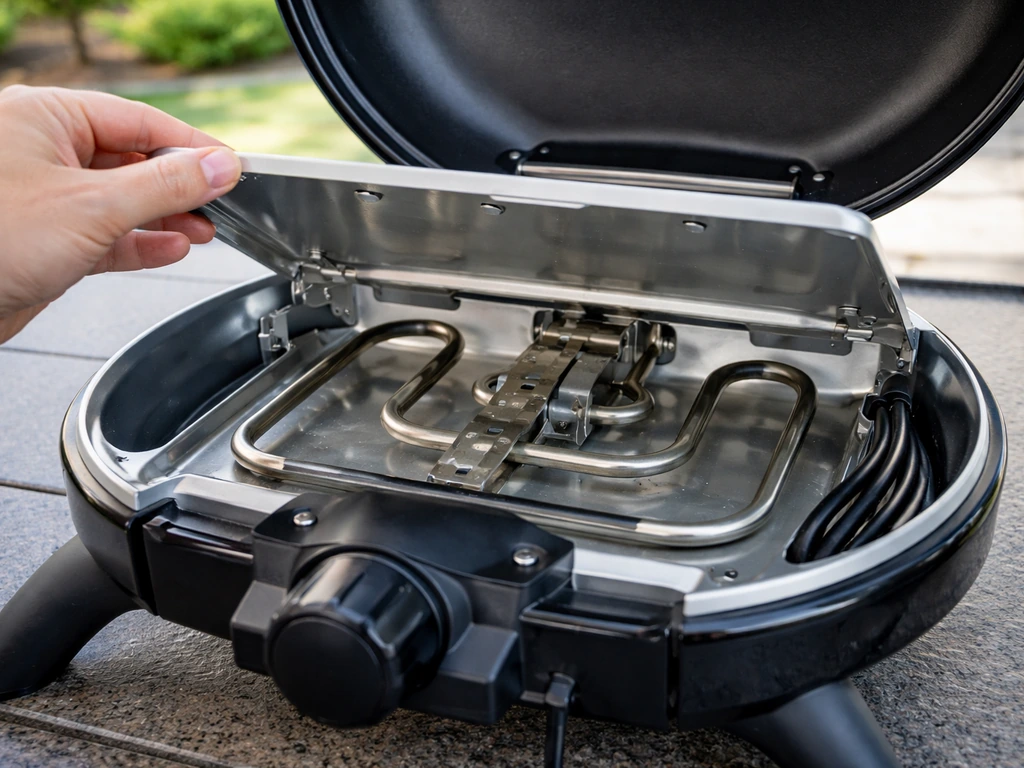
When you first pull the Patio Bistro out of the box, remove all packaging material and sale labels by hand. The manual specifically says not to use sharp tools to remove stickers. Beyond the obvious scratch risk, you do not want a blade anywhere near the porcelain grate or the heating element bracket.
Before you cook on it for the first time, wash the cooking grate with warm soapy water, rinse it thoroughly, and dry it completely. Do not put it back wet. After that, check that the controller is fully seated in the heating element bracket. This sounds minor but it is one of the most common reasons the grill fails to heat. The connection needs to be solid, not just roughly in place.
For placement, set the grill on a level, stable surface in an area clear of combustible materials. When using extension cords, CPSC warns that cords missing key safety characteristics can increase the risk of electrical shock or fire, and that outdoor extension cords should have jacketed or otherwise appropriate safety features extension cords lacking key safety characteristics can increase the risk of electrical shock or fire.
For charcoal grill patio safety, keep the grill away from combustibles and use safe, stable placement to reduce fire risk. The manual is direct about this: keep the surrounding area free of gasoline, flammable vapors, and any other combustible materials.
There is no specific inch measurement in the manual for clearance distances the way gas grills often specify, but use common sense: do not push it against a wall, fence, or patio furniture, and never use it indoors or in an enclosed space. When you are done cooking, store it in a weather-protected area or under a grill cover, and always unplug it first.
First-time use: initial preheat and understanding the controls
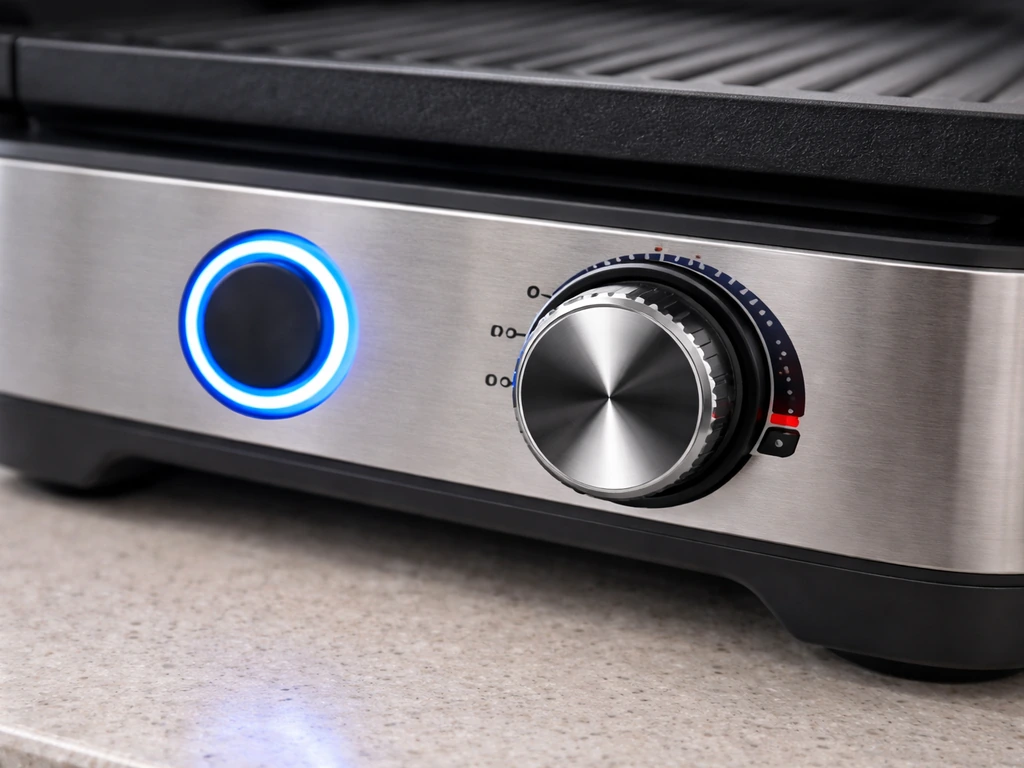
The Patio Bistro's controls are straightforward once you understand what the light ring and display are telling you. Here is how the system works.
What the controls actually do
| Control / Indicator | What it does |
|---|---|
| Power button (press) | Turns the grill on; light ring turns blue when the controller is ready |
| Power button (hold 3 seconds) | Turns the grill off; display goes dark; then unplug the cord |
| Control knob (press and turn) | Press the knob, then rotate clockwise to raise temperature or counterclockwise to lower it; each click is 5°F; press again to set the target temperature |
| Control knob (hold while on, no temp set) | Toggles the display between °F and °C |
| Light ring pulsing red | Grill is actively heating toward your set temperature |
| Light ring solid red | Set temperature has been reached; ready to cook |
| Temperature display alternating | Alternates between SET temp and ACTUAL temp until the target is reached |
For the very first use, do a dry preheat before you put any food on. Set the grill to a medium-high temperature, close the lid, and let it run for 15 to 20 minutes. This burns off any manufacturing residues and gives you a feel for how the light ring and display behave. Watch the ring pulse red and then go solid. That transition is your signal that the grill is ready. If your exact model variant came with a manual, check it for any model-specific first-use instructions, as some production runs include additional steps.
How to cook: preheat, heat settings, timing, and food handling
The cooking workflow step by step
- Plug the grill into your GFCI-protected outlet and confirm the grease tray is empty and in place.
- Press the power button. The light ring turns blue, confirming the controller is ready.
- Press the control knob, rotate to your desired temperature (each click = 5°F), then press the knob again to set it.
- Close the lid. The ring will pulse red as the grill heats toward your set temperature.
- Wait for the ring to go solid red. For most foods, preheat takes 15 to 20 minutes.
- Open the lid, place your food on the grate, and close the lid to cook. The manual is clear: cooking with the lid closed holds in heat and gives you complete, even cooking.
- Use a food thermometer to check doneness rather than guessing by time alone.
- To shut down, press and hold the power button for 3 seconds until the display turns off, then unplug the cord from the outlet.
Safe internal temperatures
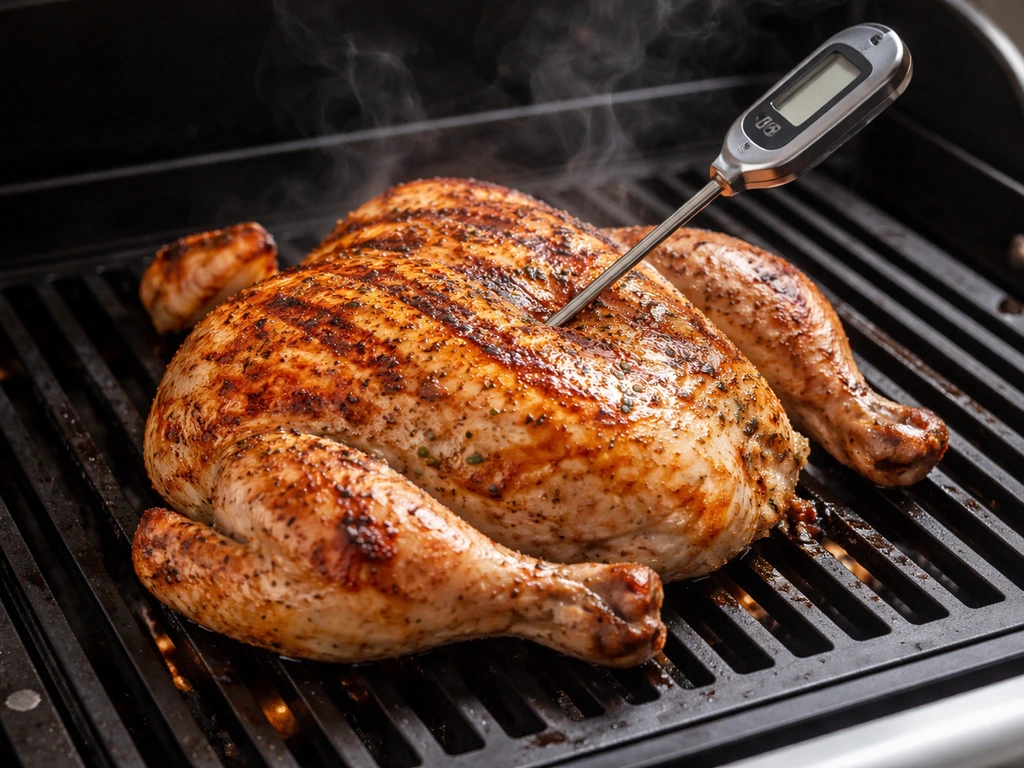
The Patio Bistro manual includes USDA food safety guidance directly. Whole poultry needs to reach 165°F internally. Beef, veal, lamb steaks and roasts, and pork chops can be cooked to 145°F with a 3-minute rest before cutting. For full, step-by-step results, follow a patio steak grilling routine that matches your grill type and steak thickness grill patio steaks. Use a probe thermometer, not the color of the meat, as your final check.
If you get a flare-up
Trim excess fat from meat before cooking to reduce grease buildup, which is the main cause of flare-ups on electric grills. If a flare-up does happen, reduce the controller setting and close the lid. If it continues, turn off the controller and unplug the power cord immediately. Do not try to manage an ongoing flare-up by fiddling with the food.
Cleaning and maintenance after you cook
Cleaning the Patio Bistro correctly is as important as operating it correctly. The electrical components make a few rules non-negotiable.
The rules that protect the electrical components
- Unplug the grill before you start cleaning anything.
- Let everything cool completely before you touch the controller, heating element, or bracket.
- Never immerse the controller or heating element in any liquid, ever.
- Clean the controller case by wiping it with a damp cloth and mild detergent or hot soapy water. That is all it needs.
- The heating element itself does not need cleaning. You can wipe the element bracket with a damp cloth and mild detergent, then dry it before the next use.
- Disconnect the electric cord and remove the heating element before cleaning that area.
Grate and grill body cleaning
- Do not clean the cooking grate while it is hot.
- Do not use a scraper, sharp tool, or putty knife on the cooking grate.
- Do not use abrasive oven cleaners, steel wool, or metal brushes on the porcelain grates or grill body.
- Do not clean the cooking grates in a dishwasher.
- Do not use sharp or pointed tools anywhere on the grill.
Reflector plate and grease system
Clean the reflector plate assembly and frame at least once a season, and more often if you grill frequently. The method is simple: brush any buildup downward and through the drain hole in the bottom of the grill, then wipe clean. Check and empty the grease tray every time before you cook.
When something goes wrong: troubleshooting the Patio Bistro
Most Patio Bistro problems come down to a small set of causes. If your Char-Broil Patio Bistro electric grill will not heat or behaves inconsistently, the troubleshooting steps in the Char Broil patio bistro electric grill problems guide can help you pinpoint the cause Patio Bistro problems. Work through these checks in order before assuming a part is dead. This is the same diagnostic approach used on any repairable electrical appliance.
Grill won't power on or the indicator light is not lit
- Check that the grill is plugged all the way into the outlet. It sounds obvious, but a loose plug is a real cause.
- Check the GFCI outlet itself. Press the reset button on the outlet face. If it trips again immediately, the outlet or the circuit has a problem that needs attention before you proceed.
- Check your household circuit breaker panel for a tripped breaker on the circuit the grill is using.
- Confirm the controller is fully seated in the heating element bracket. Pull it out and reseat it firmly. A partial connection will prevent power from flowing.
- Try a different outlet on a different circuit to rule out a wiring issue with your original outlet.
- If none of this restores power, the controller or heating element may be faulty and needs replacement, not a DIY repair on the electrical side.
Grill powers on but won't heat (or isn't reaching temperature)
- Confirm the controller is actually turned on and a temperature is set, not just plugged in.
- Reseat the controller in the heating element bracket. This is the single most common fix for a grill that powers on but does not heat.
- Make sure you are not sharing the circuit with another large appliance. The extra load can prevent the grill from drawing enough power.
- If using an extension cord, confirm it is rated for at least 15 amps and marked for outdoor use (the 'W' suffix). An undersized cord will starve the grill of power.
- Close the lid during preheat. Char-Broil support specifically flags open-lid preheating as a reason for poor heat performance. Keep it closed and wait the full 15 to 20 minutes.
- If the grill still does not heat after all of the above, the controller or heating element is likely faulty and will need replacement.
Uneven heat across the cooking surface
Uneven heat is usually a cooking-technique issue on electric grills. Make sure you are preheating with the lid closed for the full 15 to 20 minutes before adding food. Also check that the reflector plate is clean and properly seated, since grease buildup on one side of the reflector can create hot and cool zones. If the grate itself is warped, that can also cause uneven contact with heat. Check that the grill is sitting on a level surface too, as a tilted grill will pool grease and heat unevenly.
Finding the right manual for your specific model
The Patio Bistro Electric has been sold in several variants over the years, and control layouts and wattage ratings can vary between them. The model number is on a label on the bottom or back of the grill. Go to Char-Broil's official support site and enter that number to pull up the exact product guide PDF for your unit.
The guide includes the wiring diagram, the full parts list with part numbers, and the exact control sequence for your specific version. If you are dealing with a repair or a part replacement, having the right model-specific manual is not optional. The troubleshooting steps above cover common problems across the Patio Bistro line, but wattage, element specs, and controller versions differ, and ordering the wrong part is a frustrating and avoidable mistake.
If you run into problems that go beyond what is covered here, such as the grill behaving strangely after assembly or showing error codes, the Char-Broil Patio Bistro Electric Grill problems guide on this site covers known failure points and next steps in more detail. And if you are setting up a new grill space overall, the patio grill setup guide covers placement, surface types, and outdoor outlet requirements worth reviewing before your first cook.
FAQ
My Char-Broil Patio Bistro won’t heat, what are the first checks before I troubleshoot parts?
If the controller light never transitions to the ready state, first confirm the controller is fully seated in the heating element bracket (a loose seat is a common cause of no heat). Then verify the outlet is functioning and is GFCI-protected, test the grill on that outlet, and avoid extension cords unless your exact unit’s manual explicitly allows them.
How often should I lift the lid while grilling on the Patio Bistro electric grill?
For best results on an electric grill, preheat with the lid closed for the full recommended window, then add food and do not repeatedly lift the lid to “check progress.” Opening the lid resets the temperature, which can also make the cooking uneven and extend cook times.
Can I put anything in the grease tray to make cleanup easier?
For electric models like this one, keep the grease tray empty before each cook and confirm it sits correctly under the drain hole. Do not add liners or other materials into the tray that could block drainage, since grease needs a clear path to the bottom drain area.
What should I do if I get a strong smell or smoke the first time I use the grill?
Do a dry preheat before first use to burn off residues. If you smell strong burning odor the first time, stop and let the grill cool, then re-check that the cooking grate is seated correctly and the controller connection is fully engaged. Avoid scraping porcelain with tools and do not oil the grate heavily before preheating.
How do I adjust temperature if my food is browning too quickly on the Patio Bistro?
If food is cooking too fast or getting darker than expected, reduce the temperature setting at the controller knob and keep the lid closed during cooking. For thick cuts, cook longer at a lower setting rather than cranking higher, and use a probe to confirm internal doneness.
What is the correct response to flare-ups on this electric grill?
If you see flare-ups, reduce the controller setting and close the lid. If the flare-up continues, turn off the controller and unplug the grill immediately, then wait for it to cool before you inspect grease buildup and the reflector plate assembly.
Can I use the Patio Bistro electric grill on a covered patio or inside a screened area?
No, do not use it indoors or in an enclosed space, even with an open door or vent. It must be on a stable, level outdoor surface with the surrounding area kept free of gasoline, flammable vapors, and other combustibles.
What temperature targets should I use for doneness on the Patio Bistro?
Use a probe thermometer for final doneness checks rather than relying on color. This model’s USDA guidance commonly targets 165°F for whole poultry, and 145°F for certain pork and beef cuts with a rest period before cutting.
Why does the grill produce hot and cool spots, and what should I inspect?
If the grate looks warped or doesn’t sit evenly, that can cause uneven heat and poor contact with the heating area. Let the grill cool completely first, inspect seating, and if the grate is deformed, use the model-specific manual to order the correct replacement part.
What’s the safe cleaning routine, and what should never be cleaned with wet methods?
Unplug the grill first before cleaning. For routine maintenance, brush buildup downward and wipe the reflector plate frame area, then empty the grease tray before the next cook. Avoid washing electrical components or the controller, and do not use sharp tools near the porcelain grate or heating element bracket.
How do I make sure I’m using the right instructions for my specific Patio Bistro model?
The model number is located on a label on the bottom or back of the grill, and the exact guide depends on the specific variant (wattage and controller sequence can differ). Use that number to download the correct product guide, especially if you’re replacing parts or troubleshooting error behavior.