
Fine Sense patio heaters are OEM-sourced gas appliances sold through auction lots and resellers rather than a brand-direct retail channel, which means no official Fine Sense manufacturer website or downloadable owner's manual exists as of mid-2026. That gap is exactly why this guide exists. Using the standard owner-facing procedures that apply to any freestanding low-pressure propane patio heater, plus the relevant safety codes (ANSI Z21.97, NFPA 58, ANSI Z21.54), you can safely assemble, light, maintain, troubleshoot, and store your Fine Sense unit without a factory manual in hand. Work through each section in order the first time, then return to individual sections as needed.
Fine Sense Patio Heater Instructions: Owner's Complete Guide

Grant Mercer
6 Aug 2026
How to use this guide
This guide is structured so a first-time owner can follow it from unboxing to first flame, and so a returning owner can jump directly to a specific problem. If you are setting up a brand-new unit, read sections 2 through 7 in sequence before you touch a gas connection. If you are troubleshooting an existing heater that stopped working, go to the fault-diagnosis section after reviewing the safety checklist. Every procedure here is written for DIY homeowners with basic hand-tool experience and no specialized HVAC or gas-fitting background. Where a task requires a licensed technician or propane supplier, I say so clearly. Fine Sense shares construction DNA with a wide family of mass-market freestanding mushroom-head patio heaters, so if you have worked through the instructions for brands like Style Selections, PureHeat, or ChillChaser, you will find the layout and components very familiar.
Safety warnings and pre-check checklist
Before you open a gas valve, loosen a fitting, or strike an igniter, run through this checklist. Propane is heavier than air, pools at ground level, and ignites at concentrations as low as 2.1% by volume in air. A slow leak you cannot smell can build to a dangerous level in a few minutes in a sheltered space. Treat every gas connection as potentially live until you have physically confirmed it is not.
- Work outdoors only, never in a garage, shed, or enclosed patio with limited ventilation.
- Keep all ignition sources (cigarettes, lighters, extension cords sparking under load) away from the work area while gas is connected.
- Have a working ABC dry-chemical fire extinguisher within arm's reach during any lighting procedure.
- Confirm the propane cylinder valve is fully closed before you connect or disconnect the hose/regulator.
- Never use an open flame to check for gas leaks. Use soapy water or a calibrated combustible gas detector.
- Do not operate the heater within 3 feet (minimum) of combustible materials, overhead surfaces, or overhead structures.
- Check that the tilt safety switch is functioning before every use. A heater that stays lit when tipped over is a fire hazard.
- Inspect the LP hose for cracks, kinks, or abrasion every time before lighting. A hose with visible damage must be replaced before use.
- If you smell gas and cannot immediately identify and stop the source, move everyone away from the area and call your propane supplier or emergency services. Do not attempt to light the unit.
- If the cylinder was recently emptied or run dry, a licensed technician or your propane supplier must perform a pressure/leak test on the system before you relight. This is required in many jurisdictions under NFPA 58.
Identifying your Fine Sense model and serial number
Because Fine Sense units are sold through third-party channels rather than a brand portal, model and serial numbers are your primary tools for sourcing replacement parts and locating any supplier-specific documentation. Finding these numbers before you need a part saves a lot of frustration later.
Where to look for the label
- Base pole or lower tube: look for a foil or printed sticker on the inside face of the main vertical pole, roughly 6 to 12 inches above the base plate.
- Burner housing underside: a metal stamp or sticker is sometimes located on the underside of the emitter/burner head casting.
- Original carton: the box barcode label nearly always carries the model number and a SKU that can be used to trace the original supplier.
- Regulator body: a manufacturer code on the regulator can help identify the OEM source if the appliance label is missing.
Take clear photos of every label you find before assembly, especially if stickers are on parts that will be hidden once the unit is assembled. Photograph the full label including any certification marks (CSA, ETL, CE), as these tell you which safety standard the unit was tested to, typically ANSI Z21.97 / CSA 2.41 for decorative gas patio heaters or ANSI Z83.26 for infrared models. Store those photos in a phone album or email them to yourself. If you ever need to order a thermocouple, regulator, or burner assembly, those model and certification numbers are what suppliers need.
Visual identification of heater type
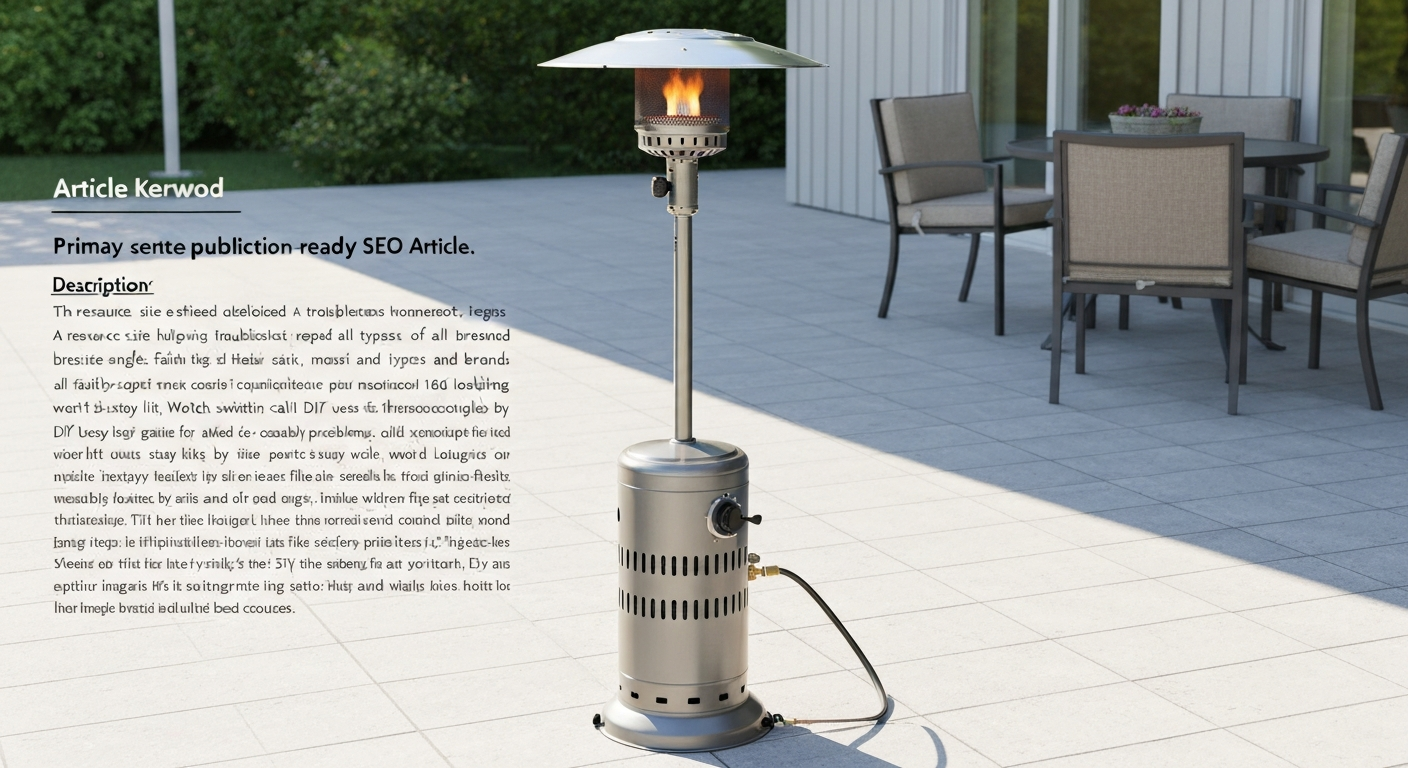
Fine Sense units in auction and resale listings include both a mushroom-head radiant burner style (with a domed reflector and visible flame ring) and an infrared tube/panel style. The distinction matters for troubleshooting because the infrared models use a ceramic or quartz emitter that glows orange rather than a visible open flame, and the ignition and thermocouple placement differ. If your heater has a domed stainless reflector at the top with a visible flame ring beneath it, you have the radiant mushroom-head type. If it has a flat or rectangular emitter panel or a U-shaped tube that glows, you have the infrared type. The lighting and troubleshooting steps in this guide apply primarily to the mushroom-head propane type, which is by far the more common Fine Sense listing.
Tools, consumables, and replacement parts to have ready
Gather everything below before you start assembly or any repair. Stopping mid-task with a gas connection half-made is exactly the situation you want to avoid.
| Item | Spec / Notes | Used For |
|---|---|---|
| Adjustable wrench or open-end wrenches | 3/4" and 7/8" cover most regulator fittings | Hose and regulator connections |
| Digital multimeter (DMM) | DC millivolt range required | Thermocouple/thermopile testing |
| Leak-check solution | Dish soap + water, or commercial gas-leak detector spray | All gas connection leak tests |
| Combustible gas detector (optional but recommended) | Reads in %LEL; any non-zero reading = gas present | Confirming no ambient gas before lighting |
| Phillips and flat-head screwdrivers | Standard sizes | Panel screws, electrode adjustment |
| Needle-nose pliers | Standard | Thermocouple terminal connections |
| Fine-grit emery cloth or wire brush | 220-grit or finer | Cleaning burner ports and electrode tip |
| Replacement thermocouple | Match length (usually 24" or 36") and tip style to original | Thermocouple replacement |
| Replacement LP hose/regulator assembly | QCC-1 / Type-1 ACME inlet; confirm BTU rating matches heater | Regulator replacement |
| Thread seal tape (PTFE / gas-rated) | Yellow gas-rated tape only, not white plumbing tape | NPT fitting seals |
| AA or D batteries (as applicable) | Check battery compartment label for size | Electronic igniter module |
| Replacement igniter electrode (model-specific) | Source via SKU from original carton or supplier listing | Igniter replacement |
Unboxing and assembly: base to reflector
Most Fine Sense mushroom-head units ship in four to six main sections: the base with wheels, the lower pole, the upper pole, the emitter/burner head assembly, and the reflector dome. Lay all parts on a clean, flat surface and match them against the packing list before you start. If no packing list is included, photograph all parts before assembly so you have a reference.
- Attach the base: secure the base plate or cross-base to the lower pole using the bolts provided. Tighten firmly but do not overtorque aluminum threads. If the base has wheels, attach the casters now.
- Stand the lower pole upright in the base and confirm it seats fully into the socket. Some units use a set screw on the side; finger-tighten it first and torque after you have confirmed the pole is plumb.
- Feed the gas supply hose/regulator assembly up through the hollow pole before joining the upper pole section. This step is easy to miss and forces a disassembly if skipped.
- Join the upper pole to the lower pole using the slip-fit collar or threaded coupler. Align any keyways or flats before tightening. A loose pole joint will allow the burner head to rotate in wind.
- Mount the emitter/burner head assembly onto the top of the upper pole. The head typically locks with a set screw or retaining ring. Confirm the gas inlet tube on the head aligns with the supply hose routed through the pole.
- Connect the gas supply hose from inside the pole to the burner head inlet. This is a flare or compression fitting on most units. Hand-tighten first, then snug with a wrench, one-quarter turn past hand-tight. Do not overtighten brass fittings.
- Mount the emitter screen or burner ring into the head housing. Most screens clip or screw into place. Confirm the burner ports face upward and are not obstructed.
- Attach the reflector dome: the dome typically sits on three or four mounting tabs around the top of the emitter housing and locks with a quarter-turn or screws. Confirm the dome is fully seated and does not wobble.
- Route the regulator end of the hose out of the lower access hole in the pole and confirm it reaches the propane cylinder position comfortably without kinking.
- Check all mechanical connections once more before adding fuel. The heater should stand level and plumb with no play in the pole joints.
Fuel and electrical hookups
Propane cylinder and regulator installation
Fine Sense patio heaters are designed for standard portable propane cylinders, almost always a 20 lb (5-gallon) BBQ-style tank. The regulator supplied with the unit will have a QCC-1 (Type-1 ACME) inlet, which is a hand-threaded left-hand-thread connection that mates with the standard valve on any 20 lb cylinder sold in North America. The regulator outlet is factory-set to approximately 11 inches of water column (about 0.4 psi), which is the nominal low-pressure setpoint for freestanding patio heater burners. Do not attempt to adjust regulator outlet pressure with a screwdriver; if the heater flame is unusually low or high with a full cylinder, replace the regulator rather than adjust it.
- Confirm the propane cylinder valve is fully closed (clockwise until it stops) before connecting.
- Place the cylinder on the base or in the base ring of the heater. The cylinder should sit level and be stable.
- Thread the QCC-1 regulator nut onto the cylinder valve by hand, turning clockwise (QCC-1 is a standard right-hand thread on the nut side, though the valve outlet itself is left-hand). Tighten firmly by hand until snug, then give it one additional quarter-turn with a wrench. Do not use excessive force.
- Run the hose along the pole without kinking it. Hose should have no sharp bends and should not contact the hot pole or any sharp edges.
- Confirm the hose-to-burner head fitting inside the pole is snug (you should have made this connection during assembly).
- Before opening the cylinder valve, prepare your leak-check solution.
Mandatory leak test before first use
This step is not optional. Apply soapy water (or commercial leak-detection spray) to every gas connection: the QCC-1 nut at the cylinder, the hose body and both ends, and the burner head fitting. Open the cylinder valve slowly, one full turn only. Watch each connection for 30 seconds. Bubbles, even small slow ones, mean gas is escaping. Close the cylinder valve immediately, disconnect the connection that leaked, inspect the threads and seating surfaces, and reconnect. If a connection continues to bubble after two reconnections, replace the hose/regulator assembly. Do not light the heater until every connection passes the bubble test with zero bubbles. After testing, leave the cylinder valve open at one turn for normal operation.
Battery and electronic igniter connections
Most Fine Sense units use either a piezo push-button igniter (no battery required) or a battery-powered electronic spark module. If your unit has a small battery compartment on the valve/control housing or on the pole near the control knob, open it and install fresh batteries in the correct polarity before attempting to light. AA alkaline is most common, but some models use D-cell or a 9V battery. Never use rechargeable NiMH batteries in a gas igniter module unless the manufacturer specifies them, as the slightly lower voltage (1.2V vs 1.5V) can result in a weak spark. If the igniter clicks but produces no visible spark at the electrode, replace the batteries before assuming the igniter is faulty.
Step-by-step lighting procedure
Follow this sequence every time you light the heater, not just the first time. For a broader set of step-by-step lighting visuals and general guidance, see the outdoor patio heater instructions reference. Skipping steps, especially the pre-light wait and the leak check, is how accidents happen.
- Confirm the heater is standing level and upright on a stable surface. The tilt safety switch will prevent lighting if the unit is leaning more than a few degrees off vertical.
- Confirm you are outdoors in a clear, ventilated area with no combustibles within 3 feet.
- Open the propane cylinder valve one full turn counterclockwise. Do not open it fully at this stage.
- Turn the control knob on the heater to the PILOT or START position (the symbol is typically a small flame icon or the word PILOT). On most units, you must push the knob in and hold it depressed while turning to reach the pilot position.
- With the knob pushed in and held at PILOT, press the igniter button or push the piezo trigger. You should hear a click and see a small pilot flame appear at the pilot burner tube. If you do not see a flame after three clicks, wait 60 seconds before trying again to allow any accumulated gas to dissipate.
- Once the pilot flame is lit, continue holding the control knob depressed for 30 to 45 seconds. This is the thermocouple heat-up period. The thermocouple tip must reach operating temperature to generate the millivolt signal that holds the gas valve open. Releasing too early is the single most common reason a newly lit pilot immediately goes out.
- After 30 to 45 seconds, slowly release the control knob. The pilot flame should remain burning. If it goes out, the thermocouple is not generating sufficient voltage. See the thermocouple troubleshooting section below.
- With the pilot burning steadily, turn the control knob from PILOT to the LOW or HIGH heat setting. The main burner should ignite from the pilot flame with an audible whomp. Adjust the knob to your desired output.
- Open the propane cylinder valve to its full open position now that the burner is confirmed lit.
- Observe the flame for two minutes. It should be steady and blue-orange at the burner ring with no yellow tipping or intermittent flickering. Flickering in calm conditions suggests a partially clogged burner port or low gas pressure.
Safety confirmations after lighting
- Verify the flame pattern is even around the full burner ring (no dead spots).
- Confirm the reflector dome is in place and not resting on or touching any combustible surface above.
- Check that no one has placed objects within the 3-foot clearance zone since you lit the unit.
- Verify the heater is not visibly tilting. If the tilt switch is working correctly, a significant lean should shut off the gas automatically.
Shutdown and safe cool-down
- Turn the control knob to the OFF position. The main burner and pilot flame will extinguish.
- Immediately close the propane cylinder valve fully clockwise. This removes all pressure from the hose and regulator and is the most important shutdown step.
- Leave the control knob in the OFF position. Do not reopen it after shutdown.
- Allow the heater to cool for a minimum of 30 minutes before covering, moving, or storing it. The reflector dome and emitter housing retain substantial heat and can melt a cover or scorch a surface if covered while hot.
- After 30 minutes, check the reflector dome, upper pole, and emitter housing by carefully approaching with the back of your hand (do not touch directly). When no radiant heat is felt, the unit has cooled sufficiently.
- If storing inside or under a cover, disconnect the propane cylinder from the regulator. Store the cylinder outdoors in a well-ventilated area, never in an enclosed space.
- Check the hose visually for any signs of heat damage or kinking before leaving the unit unattended.
Troubleshooting: symptom-by-symptom diagnosis
The table below maps the most common Fine Sense symptoms to their most likely causes and the correct fix sequence. Work through causes in the order listed; the first cause is almost always the simplest and most common.
| Symptom | Most Likely Cause(s) in Order | Diagnostic Test | Fix |
|---|---|---|---|
| Igniter clicks but no spark visible | 1. Dead batteries 2. Fouled electrode tip 3. Cracked electrode insulator 4. Electrode gap too wide | Check batteries with DMM; inspect electrode visually; measure spark gap | Replace batteries; clean tip with emery cloth; replace electrode; adjust gap to ~1/8" (3mm) or per label |
| Pilot lights but goes out when knob released | 1. Thermocouple not hot enough (released too soon) 2. Thermocouple tip misaligned with pilot flame 3. Thermocouple failed (low mV output) 4. Gas valve thermocouple seat dirty | Hold knob 45 s; check tip position; measure mV with DMM | Hold longer; reposition tip into inner blue cone of pilot; replace thermocouple if <20 mV open-circuit; clean valve seat |
| Main burner won't light from pilot | 1. Pilot flame too small to reach main burner 2. Low gas pressure / low cylinder 3. Main burner ports clogged | Observe pilot flame size; check cylinder weight; inspect ports | Check/replace regulator; refill cylinder; clean ports with soft brush |
| Flame unusually low or weak | 1. Regulator freeze-up or failure 2. Near-empty cylinder 3. Partially clogged burner orifice | Check cylinder weight; disconnect and inspect regulator inlet filter screen | Warm regulator with warm (not hot) water; refill cylinder; clean or replace orifice |
| Heater shuts off on its own | 1. Tilt switch triggered by unlevel surface or wind 2. Thermocouple intermittent contact 3. Low gas pressure causing pilot dropout | Test tilt switch continuity with DMM (closed when upright, open when tipped); check thermocouple mV | Level the heater; replace thermocouple; refill cylinder |
| Gas smell during operation | 1. Leak at cylinder-regulator connection 2. Damaged hose 3. Leak at burner head fitting | Soapy-water leak test on all connections | Retighten or reseat QCC-1 fitting; replace hose/regulator; tighten burner head fitting |
| No igniter click (silent) | 1. Dead batteries 2. Broken igniter wire 3. Failed igniter module | Check batteries; trace wire from module to electrode for breaks | Replace batteries; repair or replace wire; replace igniter module |
| Yellow or sooty flame | 1. Clogged burner ports 2. Incorrect air-to-gas mix (air shutter) 3. Damaged burner | Inspect ports; check air shutter opening | Clean ports; adjust air shutter; replace burner if corroded through |
Testing the thermocouple with a multimeter
A properly functioning thermocouple generates between 20 and 30 millivolts DC when its tip is fully immersed in a pilot flame. To test yours: set your digital multimeter to DC millivolt (mV) range, light the pilot and hold it burning for at least 60 seconds, then disconnect the thermocouple lead from the gas valve and measure open-circuit voltage between the lead tip and the outer body of the thermocouple. A reading below 15 mV means the thermocouple is failing and should be replaced. A reading of zero usually means either the tip is not in the flame or the thermocouple wire is broken internally. If your unit uses a thermopile (a multi-junction generator that powers a millivolt control circuit), the open-circuit output should be 250 to 750 mV. Anything under 150 mV on a thermopile indicates replacement is needed.
Testing and resetting the tilt switch
The tilt (tip-over) safety switch is a small ball-bearing or mercury-free pendulum switch mounted inside the base or lower pole section. Its job is to cut gas flow if the heater falls or leans dangerously. To test it: disconnect power or batteries, set your DMM to the continuity or resistance mode, and probe the two switch terminals. With the heater upright, you should get continuity (closed circuit, near-zero ohms). Tilt the heater approximately 30 degrees or more, and continuity should break (open circuit). If the switch reads open when the heater is upright, the switch has failed closed and the heater will not light until the switch is replaced. Never bypass or jumper a tilt switch. It is a critical safety device and circumventing it voids any certification the appliance carries and creates a genuine fire hazard.
Diagnosing a regulator or hose leak
If your leak test shows bubbles and reconnecting does not solve the problem, the issue is almost always either a nicked O-ring on the QCC-1 fitting, a cracked hose, or a failed regulator diaphragm. Run your finger along the entire hose length while it is under low pressure (cylinder open one turn, no ignition source nearby) feeling for any hissing. Look for visible cracks, especially near both end fittings where the hose bends during storage. A hose assembly compliant with ANSI Z21.54 / CSA 8.4 will have that standard marked on the hose body. If it does not, or if it is more than five years old, replace it regardless of appearance. Hose assemblies for standard 20 lb cylinder heaters are inexpensive and universally available.
When to stop and call a professional
Most patio heater repairs are genuinely DIY-friendly: replacing a thermocouple, a hose, a battery-spark module, or cleaning the burner are all straightforward tasks. However, call a licensed gas technician or your propane supplier if: you cannot locate and stop a gas leak after two attempts; the gas valve itself is leaking (gas smell directly from the valve body); the regulator is damaged, frozen, or was submerged in water; the cylinder was run completely empty (many jurisdictions require a certified pressure test before relighting after a run-dry event under NFPA 58); or if you see physical damage to the burner orifice or main gas valve that is not simply a replaceable part. Gas valve internals are not a homeowner repair item.
Routine maintenance schedule
A Fine Sense heater that is cleaned and inspected at the start and end of each outdoor season will outlast one that is used and stored without maintenance by several years. The schedule below covers the minimum tasks.
| Frequency | Task |
|---|---|
| Before each use | Visual hose inspection for cracks or kinks; confirm cylinder valve closed before connecting; verify heater is level |
| Monthly during season | Soapy-water leak test on all connections; wipe reflector dome with damp cloth; check battery level in igniter |
| Start of season | Full leak test; inspect and clean burner ports with soft brush; test tilt switch continuity; replace thermocouple if over 3 seasons old or if mV output is borderline |
| End of season | Full cleaning; inspect hose and replace if more than 5 years old or visibly damaged; lubricate pole threads lightly with anti-seize; store disconnected from cylinder |
Cleaning the burner ports
Spiders and insects are the number-one cause of clogged burner ports and gas orifices on patio heaters stored outdoors. At the start of each season, remove the burner ring (usually secured by two or three screws), and use a soft brass wire brush or a wooden toothpick to clear each port. Never use a steel wire in the orifice itself, as this can enlarge the precisely sized hole and permanently alter the fuel-to-air mixture. Compressed air is effective for blowing out loose debris from inside the burner manifold. After cleaning, reinstall the burner ring, confirm all screws are tight, and do a test light before putting the heater into regular use.
Parts identification and sourcing replacements
Because Fine Sense lacks a direct parts portal, your sourcing strategy depends on how precisely you can identify the original OEM. The certification marks on your appliance label (ETL, CSA) and any SKU or model code from the original carton are your primary search terms. Search those numbers on Made-in-China.com supplier listings, as Fine Sense units appear in supplier catalogs there. You can also take measurements directly from your failed part and cross-reference to universal replacement parts, which is how most patio heater repairs get done regardless of brand.
- Thermocouple: measure the overall length (tip to fitting end) and note the fitting thread size (most common is M8x1 or 7/16"-27 UNF for the valve connection). Universal thermocouples in 24" and 36" lengths cover the majority of patio heater applications.
- Hose/regulator assembly: confirm the BTU rating on the original (usually stamped on the regulator body) and the hose length. Match the QCC-1 inlet and NPT outlet size (3/8" is typical).
- Igniter electrode: bring the original to a gas appliance parts supplier for matching, or order by model SKU if traceable.
- Tilt switch: note the number of terminals (usually 2), the wire gauge, and the angle at which it trips. A universal patio heater tilt switch with matching trip angle is a direct substitute.
- Reflector dome and emitter screen: these are cosmetic and functional parts best sourced as original-match items using the model number from your carton label.
Storage and winterizing
- Shut down the heater using the full shutdown procedure above and allow it to cool completely.
- Close the cylinder valve and disconnect the regulator from the cylinder. Store the cylinder outdoors in an upright position in a ventilated area, away from heat sources and direct sunlight. Never store a propane cylinder indoors or in a vehicle.
- Clean the reflector dome, emitter housing, and pole with a damp cloth. Remove any rust spots on steel components with fine-grit sandpaper and touch up with high-temperature spray paint if needed.
- Inspect the entire gas hose for any weather cracking. If in doubt, replace it. A new hose is far cheaper than the consequences of a leak.
- If storing the heater outdoors year-round, use a UV-resistant patio heater cover. Confirm the heater is fully cool before covering.
- If storing in a shed or garage, disconnect the gas cylinder and leave it outside. Only the heater body (without cylinder) may go in an enclosed structure.
- At the start of the next season, perform the full start-of-season maintenance checks before relighting.
Safety codes and compliance notes
Freestanding patio heaters are governed by ANSI Z21.97 / CSA 2.41 (Outdoor Decorative Gas Appliances) or ANSI Z83.26 for infrared models. These standards define construction requirements and are the basis on which units are certified by third-party labs like ETL or CSA. For installation and use, NFPA 58 (Liquefied Petroleum Gas Code) and NFPA 54 / the International Fuel Gas Code set the rules your local authority having jurisdiction (AHJ) enforces. The practical owner-level implications are: keep minimum clearances as specified on the label (typically 3 feet to combustibles on the sides, 6 to 8 feet of overhead clearance), do not permanently pipe a portable unit to a fixed gas line without a permit and licensed installer, and if you have an out-of-gas event, have the system checked by your propane supplier before relighting, as required in many jurisdictions under NFPA 58.
Finding the official manual and additional documentation
As of mid-2026, there is no dedicated Fine Sense manufacturer website or documentation portal. Here is where to look for any available documentation. First, check ManualsLib.com using the full model number from your label. If Fine Sense is not listed, search for the OEM certification number printed on the label, as many OEM-manufactured units appear under the OEM name rather than the reseller brand. Second, search the Made-in-China.com supplier listing using the model or SKU, as some suppliers provide spec sheets or manual PDFs on request. Third, contact the auction house or reseller who sold the unit, as original boxed units sometimes included a paper manual that the reseller may still have on file. If you find a manual for a Fire Sense, Style Selections, or similar mass-market mushroom-head heater that matches your unit's physical layout and BTU rating, that manual's procedures and parts descriptions will be accurate enough to work from for gas connections, thermocouple testing, and routine maintenance, since these units share nearly identical construction.
For further reading on related brands and heater types, the instructions and troubleshooting procedures for ChillChaser, PureHeat, and Style Selections patio heaters cover very similar appliances and share the same core diagnostic steps. If you are working through electrical or battery-powered heat sources rather than gas, it is worth noting that some portable heaters in this category, such as the Thermacell Patio Shield, use a fuel cartridge system with its own ignition logic rather than a propane cylinder, so the lighting and troubleshooting steps differ significantly.
FAQ
What model-identification information is required to make an accurate owner-facing repair and maintenance article for Fine Sense patio heaters?
Exact model number, serial number, manufacturing/date code, label photos (data plate location and clear close-ups), heater type (freestanding pyramid, mushroom, infrared wall), fuel type (propane or natural gas), ignition type (piezo, electronic spark, battery), burner style (open radiant burner, infrared element), regulator/hose connection type (Type-1/QCC-1 ACME, POL, or NPT size), and any OEM part numbers stamped on key components. Also capture external dimensions, weight, and materials (stainless/painted steel, glass tube, ceramic emitter). If a data plate/manual is missing, document step-by-step visual ID cues and typical interchangeable part numbers.
Which measurements and numeric values must be sourced and published for safe assembly, hookup, testing and troubleshooting?
Gas regulator outlet pressure (typical LP portable regulators ≈11" W.C. / ~0.4 psi), inlet supply pressures allowed (propane cylinder full pressure and drop), hose/connector thread/spec (QCC‑1/POL, NPT size), thermocouple open-circuit mV (≈20–30 mV expected), thermopile output mV (≈250–750 mV expected), spark electrode gap (model-specific—common 1.4 mm to 3 mm), pilot flame size/position specs, expected burner manifold pressure under load, acceptable %LEL detection thresholds for leak detectors, and torque specs for critical fasteners if provided by OEM. Note: cite manufacturer specs where available and ANSI/NFPA code limits where applicable.
What step-by-step tests and diagnostic measurements are required (and in what order) to troubleshoot common faults?
Recommended test order and expected results: 1) Visual & safety checks (no damage, no corrosion, tilt switch intact). 2) Leak test (soapy-water on all gas joints; zero bubbles expected). 3) Gas presence test at regulator/hose using CGI (%LEL) — non-zero indicates leak or residual gas. 4) Regulator/hose flow check: confirm cylinder valve open, regulator click/pressure, and measure outlet pressure or check flame behavior. 5) Ignition check: observe ignition spark at electrode; if no spark, inspect igniter battery/wires. 6) Pilot flame verification: confirm pilot lights and envelops thermocouple/thermopile. 7) Thermocouple/thermopile DC mV test with DMM (open-circuit after 20–60 s of pilot heat). 8) Continuity test for tilt switch and any safety interlocks. 9) Burner manifold & main burner ignition under load. At each step record measured values and compare to model or typical pass/fail ranges (listed above). Stop and call a qualified tech if gas leak persists, regulator fails, or measured safety-device voltages are well below expected ranges.
Which industry standards and codes must be referenced or quoted in the article?
Include ANSI Z21.97 / CSA 2.41 for outdoor decorative gas appliances, ANSI Z21.54 / CSA 8.4 for gas hose connectors, relevant ANSI Z83.26 references for infrared heaters if applicable, NFPA 58 (Liquefied Petroleum Gas Code), NFPA 54 / International Fuel Gas Code (national fuel gas code), and any local plumbing/AHJ requirements. Also reference manufacturer-specific installation/owner manuals when available and Propane Education & Research Council (PERC) guidance for leak testing. State that local codes/AHJs override general guidance and that licensed installation may be required.
What source documents and manufacturer data are necessary to ensure accuracy and to cite for repair procedures and part replacements?
Official Fine Sense owner/installation manual and service manual or exploded parts diagram (if available), OEM parts lists with part numbers, regulator/valve datasheets (outlet pressure, connection type), gas hose assembly spec sheet (ANSI Z21.54 compliance), thermocouple/thermopile manufacturer specs, igniter module or piezo datasheets, tilt-switch/safety-device datasheets, and any third-party testing or listing reports (CSA/ANSI/ETL/UL) for the specific model. If Fine Sense OEM docs are not available, capture high-quality photos of labels and components and use equivalent-model manuals (e.g., Fire Sense) only as cross-reference—clearly note differences and uncertainties.
What tools, test equipment, parts and materials lists does the article need to provide for owners/DIYers?
Tools: adjustable wrench and correct-size open/box wrenches, screwdrivers, hex keys, needle-nose pliers, pipe thread tape rated for gas where appropriate (only for threaded appliance fittings if specified), torque wrench if OEM specifies torque, wire brush/steel wool for corrosion cleaning, towel/soft brush. Test equipment: digital multimeter (mV DC range), soapy-water leak solution spray bottle, combustible gas detector (%LEL or ppm), manometer or pressure gauge for low-pressure gas testing (inches W.C.), continuity tester. Parts/consumables: replacement thermocouple/thermopile, igniter electrode/battery, regulator/hose assembly (ANSI‑rated), replacement tilt switch, replacement or OEM burner head/reflector/emitter elements, high-temp gasket or seal kits. PPE: safety glasses, gloves, and a fire extinguisher nearby.