To safely assemble a gas patio heater, you route the internal gas hose through the post sections before closing them up, stack and secure the body from the base up, connect the regulator to the propane cylinder using only the supplied hose, then install the burner head and reflector last. If you ever need to disassemble your patio heater, reverse the steps carefully and follow the same leak-safety checks before the next reassembly. Once it's together, you do a soap-bubble leak test on every gas connection before you ever try to light it. Get those two things right, hose routing during assembly and a proper leak check before first use, and you'll avoid the most common mistakes that leave people with a heater that won't light or smells like gas.
Patio Heater Assembly Instructions for Gas Models

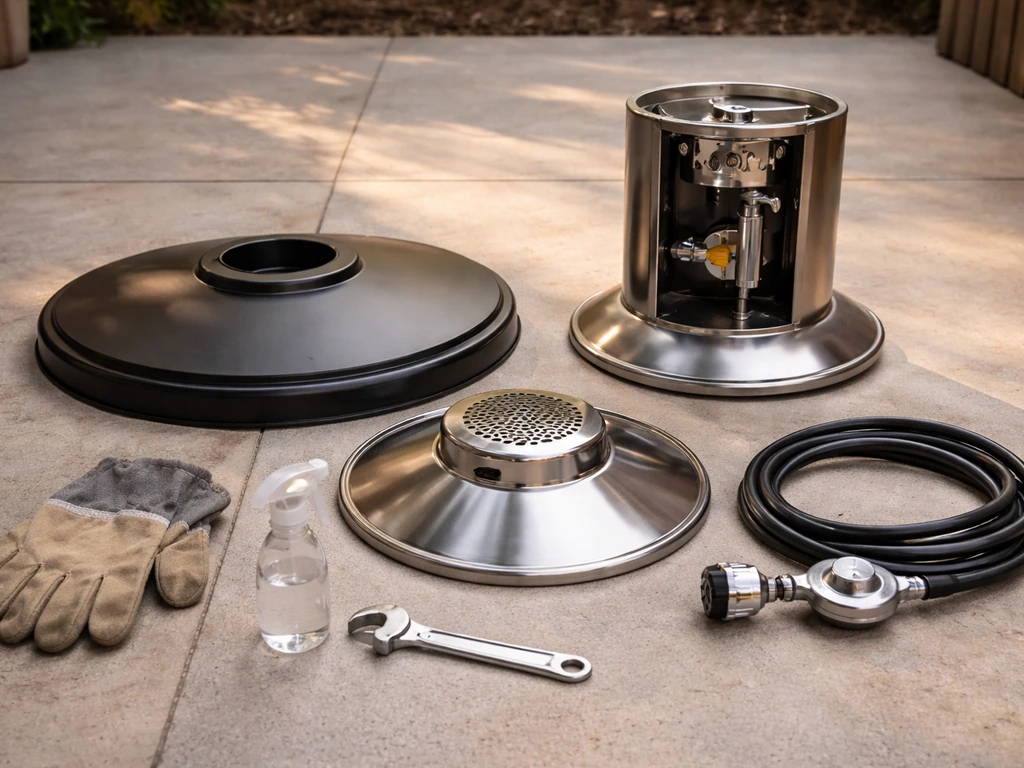
Before you start: tools, safety prep, and identifying your heater
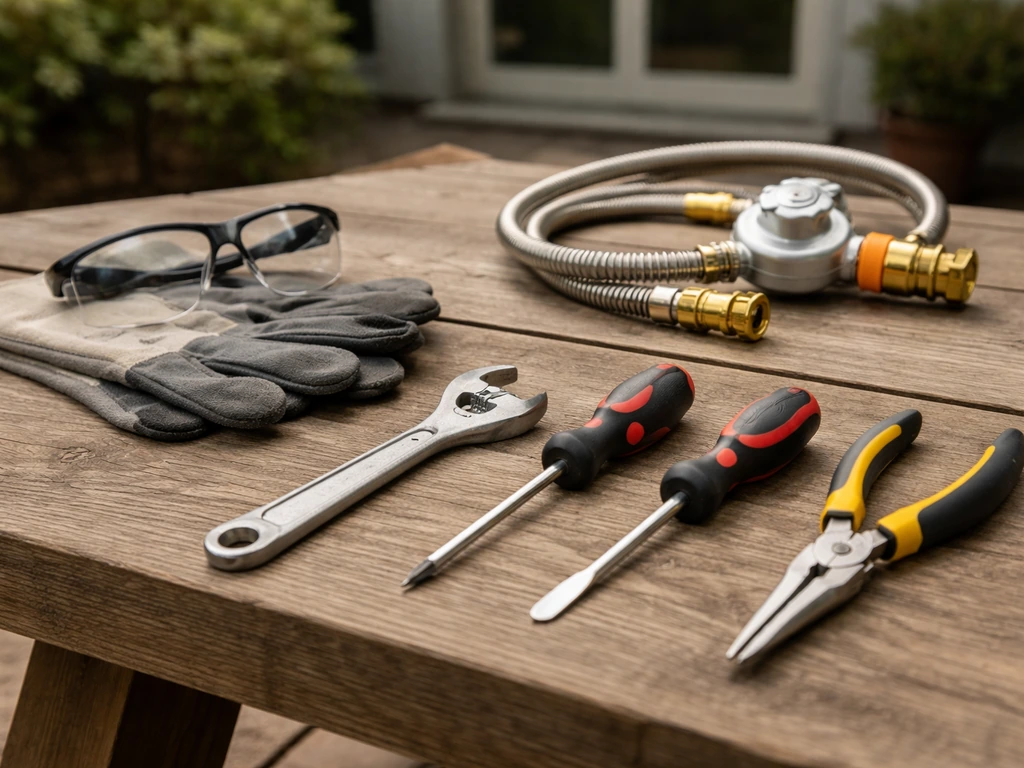
You don't need specialized tools. An adjustable wrench, a Phillips and flathead screwdriver, and needle-nose pliers will handle nearly every patio heater on the market. A few zip ties are handy for managing the internal hose. For the leak test, you'll mix up a simple soap solution at the end (more on that below).
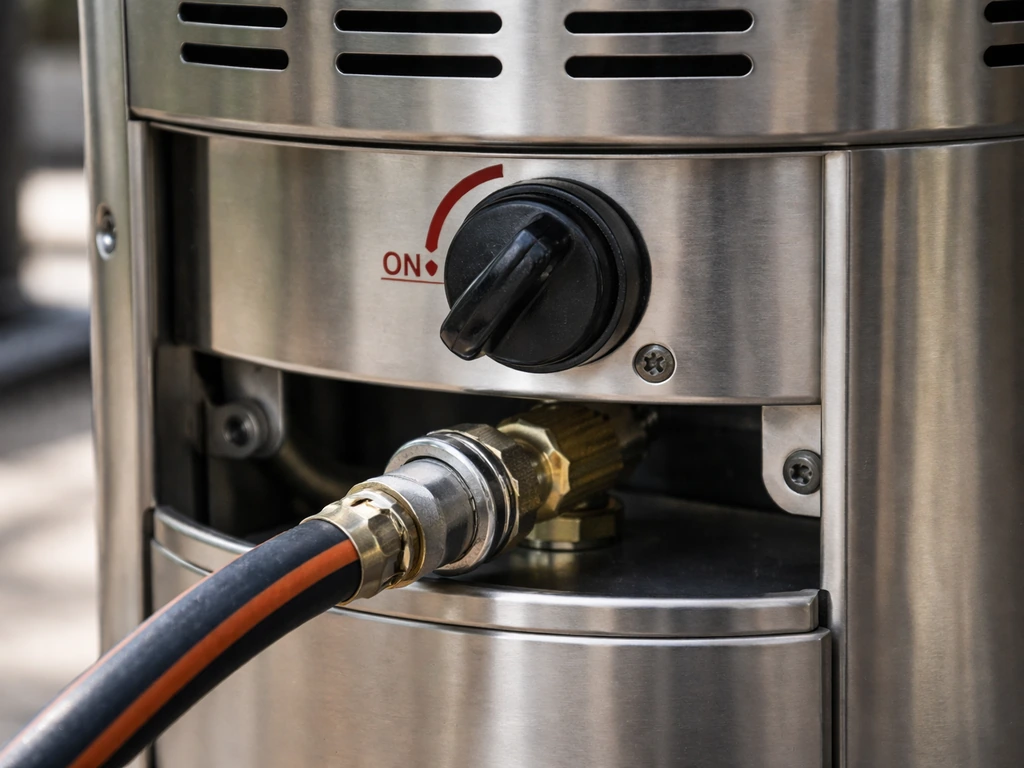
Safety prep matters more than the tools. Work outdoors in a well-ventilated area, never in a garage or enclosed space. Keep the propane cylinder upright at all times, even while you're carrying it to the work area. Do not connect the cylinder until the heater is fully assembled. The control knob, regulator valve, and cylinder valve should all be confirmed in the OFF position before any gas connection is made. If you have children or pets nearby, move them back before you connect the tank.
Identify your heater model before you open the box. The model number is usually printed on a sticker at the bottom of the base or on the side of the burner housing. Pull up the PDF manual for that exact model on the manufacturer's website or on a manual hosting site. Generic assembly videos are often close but not close enough, specific models have specific hose routing paths, screw placements, and knob orientation requirements that matter. If you have an AZ Patio Heaters or Paramount unit, the brand-specific sections below cover the key details.
- Adjustable wrench (for regulator connection)
- Phillips head screwdriver (body panels, reflector bracket)
- Flathead screwdriver (some control knob set screws)
- Needle-nose pliers (hose routing through post)
- Dish soap and water (leak test solution)
- Your model's manual — downloaded and open on your phone or printed out
One important clearance note before assembly: once it's running, a standard mushroom-style patio heater needs at least 24 to 36 inches of clearance from walls, ceilings, and combustible surfaces on the sides, and typically 36 inches or more above the reflector. Your manual will give the exact numbers for your model. Choose the final placement spot before you assemble so you're not dragging a built unit across the patio and scratching it up.
Gas patio heater assembly: the right order, step by step
The order below applies to virtually all freestanding mushroom-style propane patio heaters. If you want the full step by step flow for how to assemble outdoor patio heater units, follow the order below and double-check the hose routing before you connect the gas gas patio heater assembly. Deviate from this sequence and you'll typically end up having to partially disassemble the unit to route the hose correctly.
- Assemble the base and wheel assembly. Lay the base frame flat, attach the legs or casters using the supplied bolts, and stand the base upright. Tighten the base bolts fully — a wobbly base will trip the tilt switch later and shut the heater off mid-use.
- Insert the lower post section into the base. Most models drop the lower post into a collar on the base and secure it with a set screw or locking pin. Hand-tighten for now.
- Route the gas hose through the post sections before joining them. This is the step most people skip. Thread the connector hose down through the upper post section so the hose end exits at the bottom before you slide the upper and lower post sections together. If your heater uses a three-piece post, route the hose through all sections at this stage.
- Join the post sections together and secure them. Slide the upper post down onto the lower post, align any orientation marks (some models have a flat face forward), and tighten the connecting collar or screws.
- Mount the burner head assembly onto the top of the post. This is the unit that contains the control knob, valve body, and igniter. Before seating it fully, connect the hose end coming up through the post to the inlet fitting on the burner head. Hand-tighten the fitting, then give it a quarter-turn snug with your wrench.
- Seat and secure the burner head. Once the hose is connected, lower the head unit fully onto the post top and secure with the supplied bolts or locking pin.
- Install the emitter screen and burner tip if they ship separately. These usually press or twist into position on the underside of the burner head.
- Install the reflector hood. The reflector typically has three or four mounting tabs that hook onto the burner head frame. Align the tabs, seat the reflector, and thread in the reflector screws. Do not overtighten — the tabs can crack.
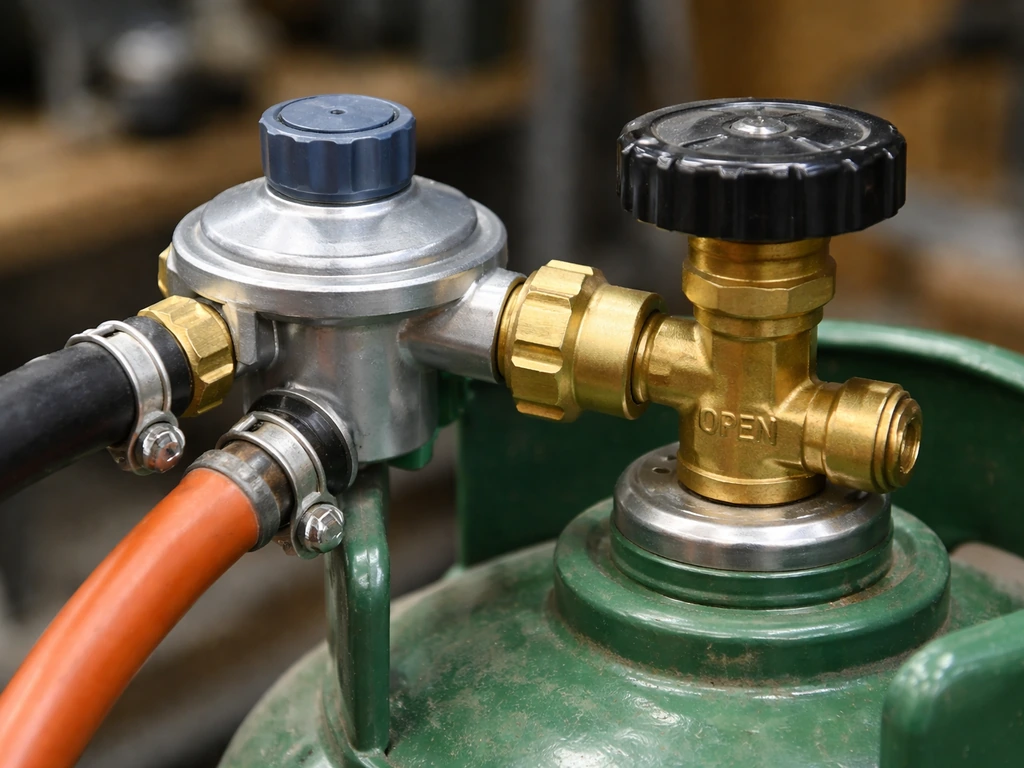
- Connect the regulator and hose to the propane cylinder. Use only the regulator and hose supplied with the heater. Hand-tighten the regulator fitting onto the cylinder valve (propane fittings are left-hand thread — turn counterclockwise to tighten), then snug it with your wrench. Do not use pipe tape on propane fittings.
- Go through all hardware a second time and tighten every bolt, screw, and fitting before you proceed to the leak test.
AZ Patio Heaters: what's different in their assembly
AZ Patio Heaters are one of the most common brands you'll encounter, and their manuals include a few model-specific requirements that are easy to miss if you're working from a generic guide.
The biggest one is knob orientation. On models like the HLDS01-CGT and HLDS01-CAL, when you mount the head assembly onto the post, the blank" rel="noopener noreferrer">control knob must be positioned above the decal on the post. AZ's manuals state this explicitly: 'The control knob on head assembly should be above the decal on post.' If you mount the head rotated 180 degrees, the knob ends up facing the wrong direction relative to the post label, and the whole unit looks wrong. More importantly, on some models the knob alignment also affects how the internal gas hose routes under tension. Rotate the head to the correct orientation before you tighten the mounting bolts.
Hose routing is also called out specifically in AZ manuals. The instruction is to insert the hose of the head assembly into the post during the head-mounting step, meaning the hose from the head drops down into the post cavity as you lower the head into position. On the HS-SS-PC model, the manual is explicit that the connector hose is slipped through the post components during the post assembly phase, not after the reflector is installed. If you've already put the reflector on before routing the hose, you'll need to remove it.
AZ Patio Heaters also specifies that you must use the pressure regulator and hose supplied with the appliance, not a third-party replacement from a hardware store. If that hose is damaged or missing, contact AZ directly for the correct OEM part. This matters because the regulator is matched to the valve and the BTU rating of the heater.
For AZ's leak test procedure specifically: mix approximately 2 to 3 ounces of solution using 1 part liquid dish soap and 3 parts water. Make sure all valves are in the OFF position. Apply several drops of the solution where the hose attaches to the regulator and where the regulator connects to the LP cylinder. Open the cylinder valve slowly and watch for bubbles. If bubbles appear, close the cylinder valve immediately, retighten or reseat the connection, and test again. AZ's guidance is clear that if bubbles continue after multiple attempts at tightening and reconnecting, the cylinder valve itself is likely defective and the cylinder should be returned to the retailer. Once the test passes with zero bubbles, turn the cylinder valve off, wipe off the soap solution, and proceed to the first light.
Paramount patio heaters: assembly and connection notes
Paramount Fitness patio heaters (models like the KLD7002S and L10-SS-P) follow the same general assembly sequence, but their manuals include a few details worth knowing before you start.
Like AZ units, Paramount models require you to route the gas inlet hose through the post during post assembly. The L10-SS-P manual specifically provides a routing diagram for how the hose runs through the post sections. Take a look at that diagram before you start stacking post sections so you understand which direction the hose needs to exit and which fitting it connects to at the burner head.
Paramount's leak test procedure closely mirrors the industry standard: connect the regulator assembly to the propane tank, ensure the heater valve is in the OFF position, then open the cylinder valve and apply soapy water to all gas connections. Paramount Fitness owner’s manuals for models like the L10-SS-P direct you to do a soapy water leak test on the gas connections and watch for bubble formation apply soapy water to all gas connections. The Paramount manual states that soap bubbles will appear at the site of any leak. If bubbles show up, close the cylinder valve, address the connection, and repeat the test. Do not proceed to lighting until the test shows no bubbles at any joint.
One note specific to Paramount units: their manuals are available on ManualsLib and the Paramount Fitness site. If you bought the heater secondhand and don't have the manual, searching the model number on ManualsLib will usually get you the full PDF within a minute. The reflector installation on Paramount models uses a slightly different tab pattern than AZ heaters, so if you're working from memory on a mixed-brand basis, double-check the reflector mounting points before forcing anything.
If it won't light or won't stay lit after assembly
Post-assembly ignition problems fall into a small set of causes. Work through them in order rather than guessing.
Heater won't ignite at all
- Cylinder valve is still closed — open it fully.
- Regulator didn't reset after being connected: turn everything off, disconnect the regulator from the cylinder, wait 30 seconds, reconnect, and try again with a slow turn of the cylinder valve.
- Igniter electrode is misaligned or the gap is too large — the spark should land about 3 to 4mm from the burner surface. If the electrode moved during assembly, bend it back carefully.
- Pilot orifice is blocked with a shipping plug or debris from the packaging — check the burner assembly for any foam or plastic bits.
Heater lights but shuts off immediately or within a few seconds
This is almost always either a tilt switch problem or a thermocouple problem, and the two components are wired in series. That means if either one fails, the gas valve drops and the flame dies. Here's how to tell which is causing it.
Start with the tilt switch. Check whether the heater is sitting on a perfectly level surface. Even a slight tilt on an uneven patio or deck can rock a freestanding heater enough to trip a sensitive tilt switch and shut the flame off. Place a small level on the base and adjust if needed. If the heater lights and stays lit on level ground but shuts off on your slightly sloped deck, the tilt switch is doing its job but your placement is off. Adjust the surface or use a leveling pad.
If the surface is level and it still shuts off, the thermocouple is the most likely culprit. The thermocouple is a small probe positioned in the flame that generates a tiny voltage to hold the gas valve open. If it wasn't seated properly during assembly, if the probe tip is too far from the flame, or if the thermocouple itself is faulty, the valve will close within seconds of lighting. Check that the thermocouple tip is positioned directly in the pilot flame path. If repositioning it doesn't help, the thermocouple almost certainly needs replacement, it's a straightforward DIY fix on most patio heaters and the part is inexpensive.
| Symptom | Most Likely Cause | First Fix to Try |
|---|---|---|
| No spark when pressing igniter | Dead igniter or bad electrode gap | Check electrode position and gap; replace igniter module if no spark |
| Sparks but won't light | No gas flow or blocked orifice | Check cylinder valve is open; inspect orifice for blockage |
| Lights, shuts off in 2-3 seconds | Tilt switch tripped or thermocouple issue | Level the heater; reposition thermocouple tip in flame |
| Lights, shuts off after 30-60 seconds | Thermocouple not heating up enough | Reposition thermocouple; replace if problem continues |
| Flame is very low or orange/yellow | Low gas pressure or partially blocked burner | Check regulator connection; clean burner ports |
Final safety checks, leak verification, and your first run-in
Do not skip this section. A heater that's assembled correctly but has a leaking connection is a genuine hazard. The steps below take about ten minutes and should be done every time you reassemble the unit or reconnect the gas supply.
Leak test: the only method that actually works
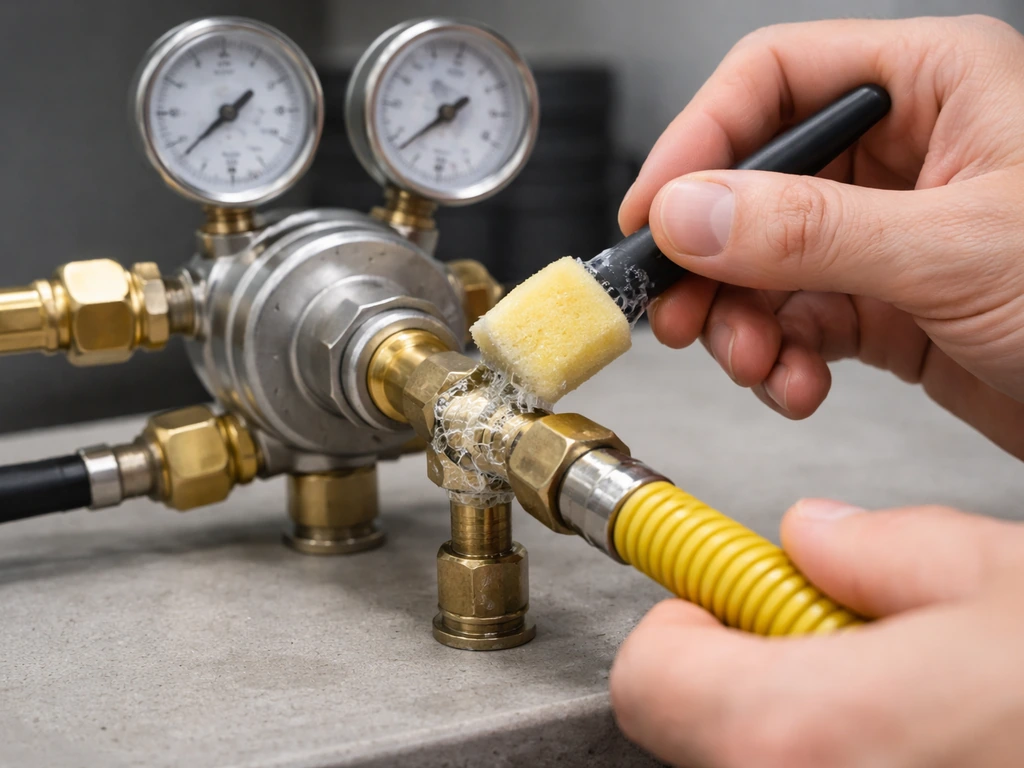
Mix 1 part liquid dish soap with 3 parts water in a small cup. Make sure all valves are in the OFF position. Connect the regulator to the cylinder if you haven't already. Slowly open the cylinder valve one full turn. Using a small brush, a dropper, or a soaked cloth, apply the soapy solution to: (1) the joint where the hose meets the regulator body, and (2) the joint where the regulator threads onto the cylinder valve. Watch for 15 to 30 seconds. Any bubbling, even slow or small bubbles, means gas is escaping. Close the cylinder valve immediately, retighten or reseat the leaking connection, and repeat the test. Don't proceed until both points show zero bubbles for a full 30 seconds. After the test passes, close the cylinder valve and wipe the connections dry.
Stability and tilt switch check
With the heater fully assembled, give the top of the unit a very gentle side-to-side push. It should feel planted and return to center without tipping. The tilt switch should not be audibly clicking with a light push. If the unit rocks noticeably, recheck that all base bolts are fully tightened and that the base is on a flat, solid surface. Adjust the placement if needed. Never operate a patio heater on a soft surface like grass or loose gravel where the base can shift.
Clearance verification
Before the first light, confirm your placement meets the clearance requirements in your manual. As a general rule: at least 24 to 36 inches to the sides from walls, railings, and combustibles, at least 36 inches above the reflector to any overhead structure (pergola, umbrella, awning), and not positioned near any mechanical air intakes, windows, or building openings. Never operate the heater in an enclosed space, screened room, or garage.
First light and run-in procedure
For the first run-in, open the cylinder valve fully, press and hold the control knob in, turn it to the pilot or ignite position, and press the igniter button repeatedly while holding the knob depressed. Once the pilot lights, hold the knob depressed for 30 full seconds to allow the thermocouple to heat up before releasing. If the flame holds, slowly turn the knob to the low setting and let the heater run on low for five minutes. This first run burns off any manufacturing residue and lets you confirm stable operation before turning it up to high. If the flame goes out when you release the knob, hold it longer on the next attempt, the thermocouple needs adequate time to reach operating temperature, especially on the first light of a new unit.
Once the heater is running stably, never leave it unattended. When you're done for the evening, turn the control knob to off first, then close the cylinder valve completely. This order purges the residual gas from the line before the cylinder is sealed, which is the correct shutdown procedure for any propane appliance.
If you're working with a specific brand and need more detail, the assembly process for units like Mainstays, Living Accents, Amazon Basics, and Fire Sense heaters follows the same core sequence described here, though each has its own reflector hood attachment method and knob alignment quirks. For Fire Sense models, use the brand manual to confirm the reflector hood attachment method and the correct orientation before you tighten everything down Fire Sense reflector hood attachment. For Amazon Basics patio heater assembly instructions, follow the brand-specific manual since hose routing and knob alignment can vary by model. The general steps above will get you through assembly; the brand-specific manuals fill in the gaps for the details that differ. If you need living accents patio heater assembly instructions for your exact model, follow the manual steps for hose routing, regulator hookup, and leak testing in the right order brand-specific manuals.
FAQ
What should I do if bubbles appear during the patio heater assembly instructions leak test? (Is it okay to keep tightening?)
If the soap test shows bubbles at the regulator-to-cylinder joint, do not keep tightening indefinitely. Close the cylinder valve, disconnect the regulator, inspect the cylinder valve connection for debris or a damaged O-ring, then reseat the regulator and retest. If you still see bubbles after multiple clean reseats, the regulator or cylinder valve is likely faulty and you should replace or return the defective part rather than continuing to operate.
Can I connect the propane cylinder before finishing assembly, or does it matter?
Yes, but only in the sense that the heater must be in fully assembled, final placement condition. If you connect the cylinder before the unit is assembled, you risk pulling or pinching the internal hose while you stack or mount components, which can cause leaks later. Stick to assembling first, then connect the cylinder and perform the leak test immediately before first light.
The heater won’t stay lit after first ignition, what should I check first according to patio heater assembly instructions?
If your heater lights but goes out when you release the knob, extend the “hold” time. On first light, hold the knob in for 30 seconds, then try again and hold a bit longer (for example 45 to 60 seconds) to allow the thermocouple to reach full operating temperature. If it still won’t stay lit after increasing hold time, reseat or reposition the thermocouple tip into the pilot flame path and retest.
Why does it matter if I use a third-party propane hose or regulator during assembly?
Do not use a different pressure regulator or a third-party hose. Even if the threads fit, mismatched regulation can alter gas flow and lead to poor ignition, uneven flame, or overheating risk. Use only the OEM regulator and hose that came with your specific model, and if they are missing or damaged, contact the brand for the correct replacement part.
What if I accidentally install the reflector before I route the internal gas hose?
If you discover you installed the reflector before routing the hose, do not force the hose under the reflector or try to “tuck it” while assembled. Remove the reflector, route the hose through the post as specified, then reinstall the reflector. Forcing the assembly can strain the hose, interfere with hose tension, and create a leak that may not show until after the first light.
How strictly do I need to follow clearance distances when using patio heater assembly instructions?
Clearances should be treated as a safety floor, not a guideline to follow loosely. If you are near a pergola, awning, or overhead cover, measure clearance from the top of the reflector to the lowest obstruction, and keep side spacing away from railings, walls, and combustibles. If your manual lists different numbers, use the manual values even if they are higher than the general rule.
What’s the best way to handle a slightly sloped patio surface so the tilt switch does not shut the heater down?
If your deck has an uneven surface, using a leveling pad or shims under the base is typically the safer approach than placing the heater on a soft or shifting surface. Do not operate it on grass, loose gravel, or anything that can compress or slide, because a small shift can trip the tilt switch and shut the flame off.
Do I need to do the leak test every time I reconnect the propane tank, or only on first assembly?
Yes. After any service, disassembly, cylinder change, or reassembly where gas connections are touched, repeat the soap-bubble leak check before lighting. A heater that previously passed a test can still fail later if a connection loosens, a seal is disturbed, or the internal hose was rerouted incorrectly during reassembly.
If my patio heater assembly feels wobbly after assembly, what checks should I do before lighting?
For most models, you should be able to gently push the top of the heater and feel that the base remains planted and returns to center without wobble. If it rocks, first confirm base bolts are tight and the heater is on a flat, solid surface. If rocking persists even on a level base, stop using the unit and inspect for missing or misinstalled base components that could affect stability.
What ventilation conditions are safe for gas patio heater assembly and first use?
For outdoor use, a “well-ventilated” area means not in an enclosed or semi-enclosed space with exhaust buildup. Avoid garages, screened rooms, and any area where airflow is limited, and keep the heater away from open windows, mechanical air intakes, and building openings where exhaust can be drawn indoors. If you smell gas at any point, shut off immediately and stop attempts to light until the leak is resolved.