Most patio heaters stop working for one of three reasons: no fuel getting through, a failed ignition component, or a safety sensor shutting things down. Before you order parts or call anyone, you can usually pinpoint which of those three it is in about ten minutes using nothing but your eyes and hands. This guide walks you through exactly that, starting with the safety steps you can't skip.
Patio Heater Not Working Troubleshooting Guide

Grant Mercer
4 May 2026
Safety checks first, do these before anything else
If you smell gas anywhere near the heater, stop. Turn the gas valve off immediately, move away from the unit, and don't attempt to relight anything while that smell is present. Don't use a match or lighter to check for leaks, ever. Once the area is ventilated and the smell is completely gone, you can start troubleshooting. If the smell persists, that's a job for a professional, not a DIY guide.
If the burner flame just went out, whether from wind or a malfunction, turn the heater fully off and wait at least five minutes before trying again. This isn't just a suggestion; it's in virtually every patio heater manual for a reason. Gas can accumulate in and around the burner assembly faster than you'd expect, and attempting ignition too soon creates a real explosion risk. Set a timer and step away.
- Turn off the gas supply valve and the control knob before inspecting anything.
- Let the heater cool completely if it was recently running — burner heads and emitter screens hold heat long after the flame is out.
- Never use an open flame to check gas connections or hoses for leaks; use soapy water or a dedicated leak-detection solution.
- Work in a ventilated area, especially with propane heaters, since propane is heavier than air and pools at ground level.
- If the heater has been tipped over, check it for physical damage before relighting — a bent frame or cracked hose is not a cosmetic issue.
Diagnosing why your patio heater won't start
The most useful thing you can do right now is figure out exactly where the failure is happening. 'Not working' covers a lot of ground. Is the heater completely dead with no response at all? Does it click but not ignite? Does it light and then go out after a few seconds? Each of those points to a different part of the system, so narrowing it down saves you from replacing parts you don't need.
| Symptom | Most likely cause | Where to look |
|---|---|---|
| No click, no spark, no response | Dead igniter, loose wire, or power issue (electric models) | Igniter electrode, wire connection, battery/power supply |
| Clicks but no ignition | No gas reaching pilot, air in line, or clogged pilot port | Gas supply, regulator, pilot orifice |
| Lights briefly then goes out | Thermocouple not heating up, tilt switch triggered, or overheat sensor | Thermocouple tip, tilt switch, sensor wiring |
| Manual light works, auto ignition doesn't | Igniter switch or igniter assembly failed | Igniter button and electrode assembly |
| No heat output but flame visible | Blocked emitter, wrong gas setting, or regulator issue | Emitter screen, regulator, gas pressure |
Run through that table and match your symptom before moving forward. If you're dealing with a tabletop unit or a specific brand like Hampton Bay or Fire Sense, the underlying components are the same, but the physical layout and part access differ slightly. If you’re dealing with a tabletop patio heater not working, start by confirming the fuel, ignition, and safety shutoff symptoms match the checks in this guide tabletop unit. The diagnostic logic here applies across all of them.
Ignition troubleshooting: manual vs. electronic systems
Most residential patio heaters use a piezo igniter, the same push-button spark mechanism you'd find on a gas grill. If your Hampton Bay patio heater igniter is not working, start by checking for spark at the igniter electrode and confirming the unit is getting power to the ignition system hampton bay patio heater igniter not working. Some commercial or higher-end units use an electronic ignition module powered by batteries or mains power. The diagnostic steps are slightly different for each.
Piezo (push-button) ignition
To test whether your piezo igniter is actually producing a spark, turn the gas completely off first, then press the igniter button and watch the electrode tip near the pilot assembly. You should see a small blue spark jump across the gap. If you see it, the igniter itself is fine, the problem is with gas delivery, not ignition. If there's no spark at all, the issue is in the igniter circuit.
- Turn off the gas valve completely.
- Locate the igniter electrode near the pilot or burner — it's a small ceramic-tipped rod positioned close to the burner head.
- Press the igniter button firmly and watch for a spark at the electrode tip.
- If no spark: check the wire running from the igniter button to the electrode. It's usually a push-on connector that works loose over time. Reseat it firmly.
- If still no spark after reseating the wire: check whether the electrode tip is cracked, heavily corroded, or coated in carbon buildup. Clean gently with fine sandpaper or a dry cloth.
- If the electrode looks fine but there's still no spark, the igniter switch or piezo module itself has failed and needs to be replaced.
Electronic ignition systems
Electronic ignition systems add a control board into the sequence, which means there's one more thing to check. The board receives a signal (often 24VAC), commands the igniter, and simultaneously opens the gas valve. If either the spark or the valve command doesn't happen, the heater won't light. Start by checking the obvious: batteries (if battery-powered) and whether the unit is getting power. From there, the diagnosis splits into whether you're getting spark (same test as above) and whether the valve is being commanded to open. If the spark is present but the valve won't open, the control board or valve is the likely failure point, and that typically goes beyond simple DIY.
Gas and control failures: thermocouple, regulator, valve, and fuel supply
Even with a perfect igniter, your heater won't start if gas isn't reaching the pilot. Work through the fuel supply from the tank toward the burner.
Check fuel and gas supply first
- Check that the propane cylinder isn't empty — lift it; a nearly empty 20lb tank feels noticeably light. If in doubt, swap it with a known full cylinder.
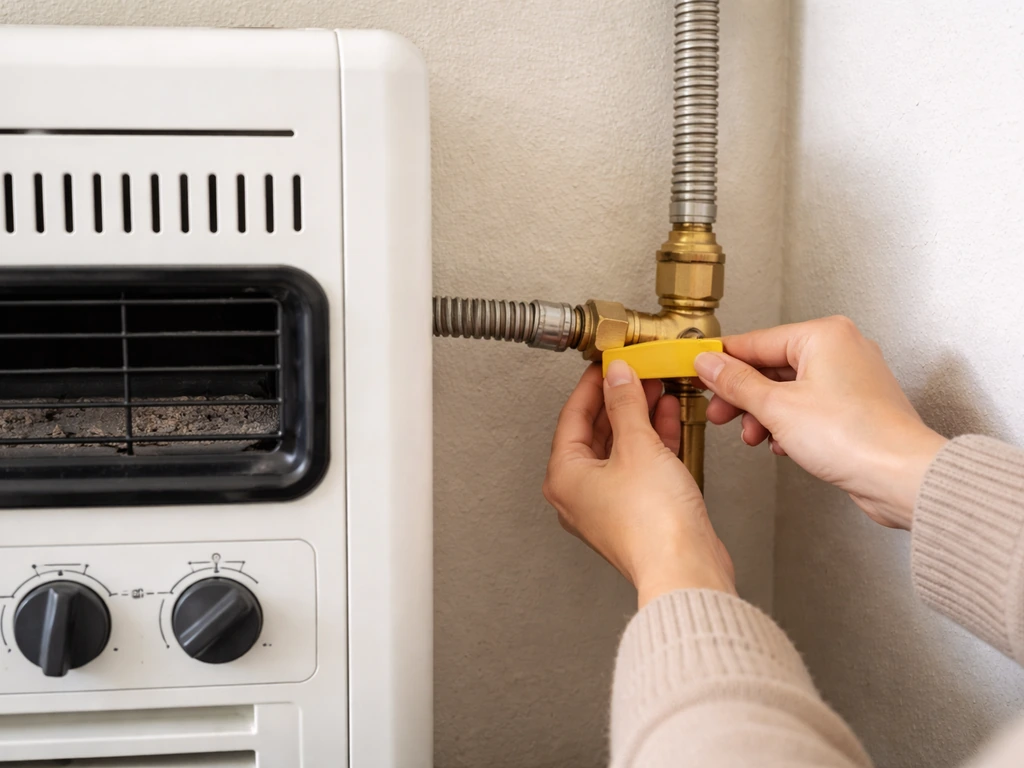
- Make sure the tank valve is fully open (counterclockwise), not just cracked open.
- Check the hose from the regulator to the heater for kinks, cracks, or obstructions. A bent hose drastically reduces flow.
- Inspect the regulator — if you recently over-tightened the connection or heard a hiss when connecting, the OPD (overfill protection device) on the tank may have tripped. Disconnect, wait 30 seconds, then reconnect slowly.
- If you just swapped in a new tank or reconnected the hose, there's likely air in the gas line. This is extremely common and routinely causes ignition failure on the first attempt after a reconnect.
Purging air from the gas line
Air trapped in the line after a new tank hookup is one of the most common reasons a patio heater won't ignite, and it's an easy fix that's often overlooked. Turn the control knob to the pilot position and press it in, holding it firmly. Keep holding it for one to two minutes (some manufacturers say up to two to three minutes) to push the air out of the line before you even attempt to spark the igniter. After that hold time, try the igniter. You may need to attempt ignition several times in sequence, this is normal.
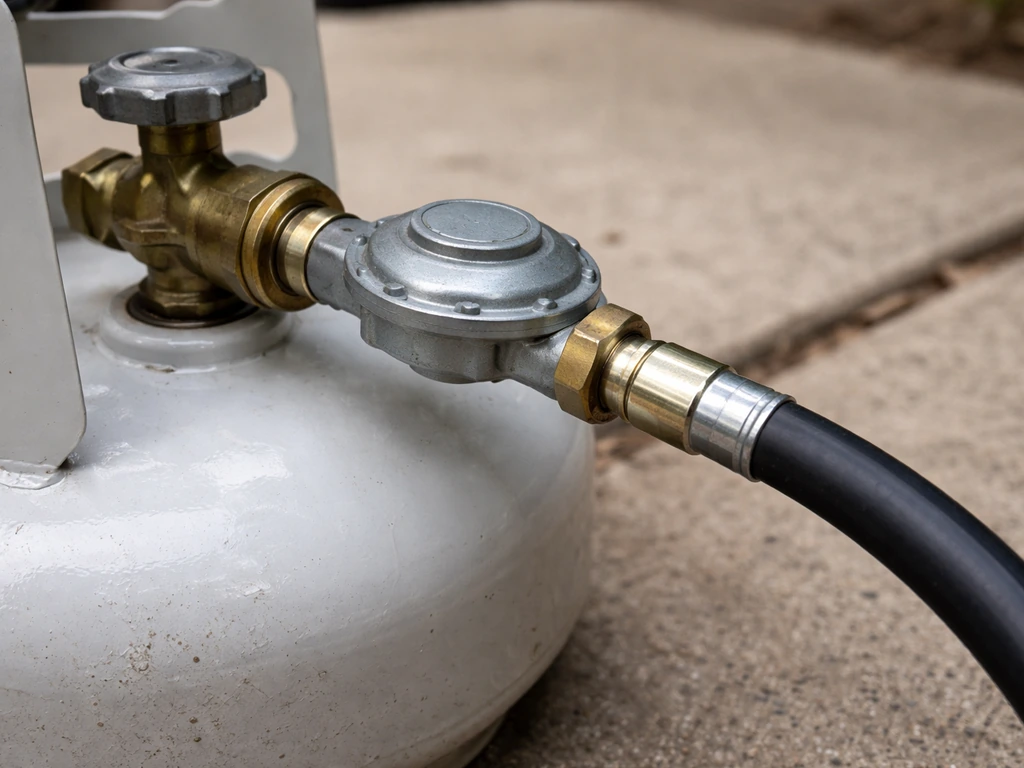
Regulator problems
The regulator reduces tank pressure to a usable level. If it's failed or in a locked-out state (which happens when gas flows too fast, like from a disconnected hose), you'll get little to no gas flow even with a full tank. Signs of regulator lock-out include a very weak flame or no ignition at all despite a full cylinder. To reset it: turn off the tank valve, disconnect the regulator from the tank, wait 30 seconds, reconnect slowly, then reopen the tank valve gently. If this fixes it temporarily but the problem recurs, replace the regulator, they're inexpensive and available at any hardware store.
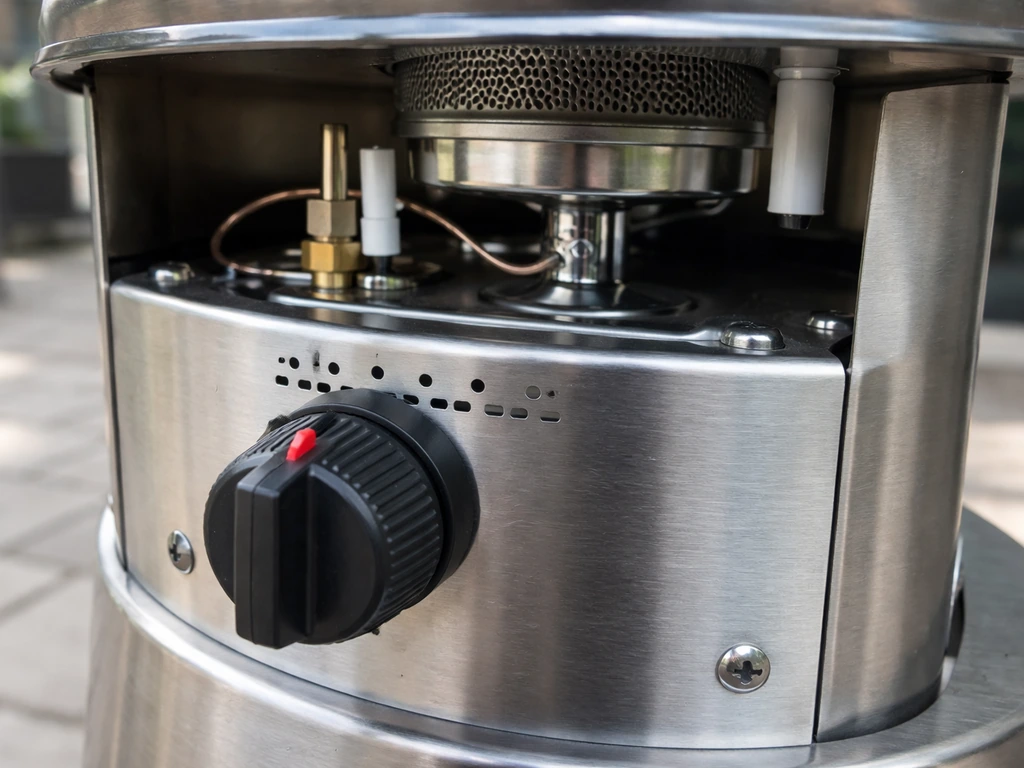
Gas valve and pilot assembly
A loose connection between the gas valve and the pilot assembly is a documented failure point, particularly on free-standing propane heaters. If the pilot orifice is blocked with debris or spider webs (yes, this happens constantly), gas can't reach the ignition point. With the gas off, use a can of compressed air to clear the pilot port. Don't use anything that could damage the orifice opening. If the gas valve itself is cracked, corroded, or mechanically failed, that's a replacement job, and given that it's a pressurized gas component, it should be replaced by someone with the right experience.
Won't stay lit: tilt switch, thermocouple, and overheat sensors

If your heater lights but shuts off within seconds of you releasing the control knob, this is a classic 'won't stay lit' symptom and it almost always traces back to two components: the tilt switch or the thermocouple. This can happen with an outdoor propane patio heater due to issues like clogged gas ports, regulator lock-out, or a failing thermocouple outdoor propane patio heater not working. Check the tilt switch first, because it's faster to test and easier to rule out.
Tilt switch
The tilt switch is a safety device that cuts gas flow if the heater is knocked over or tilted past a safe angle. Propane. com also advises keeping outdoor propane heaters away from foot traffic and exits to help reduce the chance of tipping heater is knocked over or tilted past a safe angle.
The problem is these switches can fail in the 'open' (tripped) position, even when the heater is sitting perfectly level. If the switch thinks the heater is tipped, it won't allow the gas valve to stay open. To check it: make sure the heater is on a completely level surface. Some troubleshooting guides recommend briefly bypassing the tilt switch with a jumper wire to confirm it's the culprit before replacing it.
If bypassing the switch makes the heater stay lit, replace the switch, don't leave it bypassed permanently.
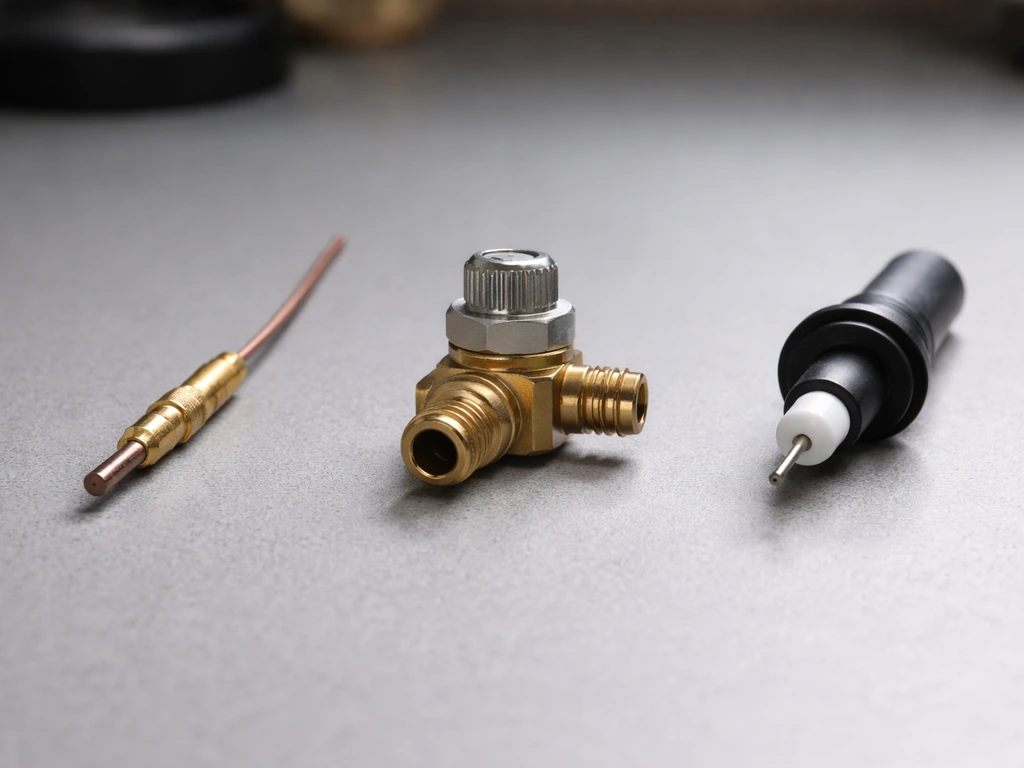
Thermocouple
If the tilt switch checks out fine and the heater still won't stay lit, the thermocouple is almost certainly the problem. The thermocouple is a small sensor with its tip positioned in the pilot flame. When the flame heats the tip, it generates a tiny millivolt signal that tells the gas valve to stay open. If the tip is fouled with carbon deposits, misaligned away from the flame, or the thermocouple itself has failed, that signal never arrives and the valve closes the moment you release the control knob.
- Turn the heater off and let it cool completely.
- Locate the thermocouple — it's a thin copper or steel tube with a small tip positioned at the pilot flame, usually held in place by a bracket or clip.
- Inspect the tip for black carbon buildup. If it's coated, gently clean it with fine steel wool or sandpaper until the metal tip is clean and bright.
- Check that the tip is actually positioned inside the pilot flame path — it needs direct flame contact to generate enough millivolts. Bend the bracket slightly if needed to reposition it.
- Relight and test. If the heater now stays lit, carbon fouling or misalignment was the issue.
- If it still shuts off after a few seconds despite a clean, correctly positioned tip, the thermocouple has failed and needs to be replaced. Thermocouples are inexpensive universal parts, typically under $15.
Overheat sensor
Some models also include an overheat or high-limit sensor that cuts power if the heater gets too hot. If this sensor trips, the heater will shut down and often won't restart until it cools. Let the unit cool fully (at least 20 to 30 minutes), then try again. If it trips repeatedly under normal conditions, the sensor itself may be faulty or airflow to the heater is being restricted.
Step-by-step DIY fixes you can do today
Here's the practical order of operations. Work through these in sequence rather than jumping around, it'll save you time and prevent you from replacing a part that isn't actually broken.
- Safety first: Turn off all gas valves, let the heater cool, and verify there's no gas smell before touching anything.
- Check your fuel: Confirm the propane tank is not empty and the valve is fully open. If in doubt, swap in a fresh cylinder.
- Inspect the hose and regulator: Look for kinks, cracks, or signs of damage. Reset the regulator by disconnecting it, waiting 30 seconds, and reconnecting slowly.
- Purge air from the line: If you just reconnected a tank, hold the control knob in the pilot position for one to two minutes before attempting ignition.
- Test the igniter: With gas off, press the igniter button and watch for a spark at the electrode. If no spark, check the wire connection to the electrode and reseat it. Clean the electrode tip if corroded.
- Clear the pilot port: With gas off, use compressed air to blow out the pilot orifice. Check for spider webs or debris in the burner head.
- Test the tilt switch: Place the heater on a completely level surface and check that it hasn't been triggered. Test by temporarily bypassing if you have the skills — replace if confirmed faulty.
- Clean and realign the thermocouple: Clean carbon from the tip, reposition it in the flame path, and retest. Replace it if cleaning doesn't resolve the 'won't stay lit' symptom.
- Attempt a full relight using proper procedure: Control knob to pilot position, press and hold, purge air, then spark the igniter. Hold the knob in for 30 to 60 seconds after the pilot lights before rotating to the main burner setting.
When to stop and call a professional
Some repairs aren't worth attempting yourself, and knowing when to stop is just as important as knowing the fix. Call a certified technician or replace the unit if you encounter any of the following:
- You smell gas after turning the valve off and ventilating — this indicates a leak in the hose, valve, or connection that needs professional attention.
- The gas valve itself is cracked, corroded, or physically damaged.
- The heater has been involved in a tip-over incident and there's visible damage to the gas line or burner assembly.
- Electronic ignition control boards have failed — board-level repairs require diagnostics beyond basic hand tools.
- The regulator fails repeatedly, which can indicate downstream blockage or internal valve damage.
- You've replaced the thermocouple and tilt switch and the heater still won't stay lit — at that point, the main gas valve is likely the culprit and that's a professional repair.
If you're dealing with a Fire Sense model specifically, the igniter assembly and thermocouple are common documented failures. Hampton Bay units have similar failure patterns but differ in how the tilt switch is accessed. Electric patio heaters follow a completely different diagnostic path since there's no gas system involved, those issues center on heating elements, thermal fuses, and control boards rather than anything covered here. If you’re specifically dealing with an electric patio heater not working, focus on the heating elements, thermal fuses, and the control board. The troubleshooting steps above apply primarily to gas-fired patio heaters, both freestanding propane and natural gas models.
The good news is that the overwhelming majority of patio heater failures come down to a handful of cheap, user-replaceable parts: an igniter electrode, a thermocouple, or a regulator. If you've worked through the steps above and identified your culprit, you're most of the way to a working heater without spending money on a service call.
FAQ
How can I tell if my patio heater not working is electrical vs gas related?
Look for responses when you press the igniter. A complete lack of any click or spark usually points to power to the ignition circuit (battery/mains connection), while a clicking sound with no ignition suggests spark is not reaching or gas is not flowing. If it ignites briefly then shuts off, that is more consistent with a safety hold-open failure like the thermocouple or tilt switch.
What should I do if the heater clicks but nothing lights, and I’m sure there’s fuel in the tank?
Do not keep clicking repeatedly. First, verify you can purge air by turning to the pilot position and holding it in for the manufacturer’s hold time (often 1 to 2 minutes). If it still won’t ignite, check for regulator lock-out and for pilot blockage (debris or webs), then re-test after clearing. Persistent failure after those checks usually indicates a gas valve command or control-board issue.
Is it safe to troubleshoot a patio heater not working indoors or in a garage?
No. Gas leak checks and ignition attempts should only happen in a well ventilated outdoor area. If you smell gas, shut off the tank or gas valve, leave the area, and ventilate fully before attempting any further troubleshooting.
My patio heater lights but won’t stay on, what’s the fastest thing to test first?
Confirm the heater is on a perfectly level surface, then check the tilt switch behavior before touching the thermocouple. A tripped or failing tilt switch can mimic a thermocouple problem by shutting gas immediately when you release the control knob.
Can a wind gust cause patio heater not working even if the igniter is fine?
Yes. Wind can blow out the flame or prevent stable pilot heating, which can lead to a fast shutdown. After any wind event, wait the required few minutes before retrying, ensure the pilot area is clear, and make sure the thermocouple tip is properly positioned in the pilot flame.
What if I recently refilled or swapped the propane tank and the patio heater won’t ignite?
Air trapped in the line is common right after a tank change. Turn the control to pilot, press and hold firmly for the extended purge hold time before using the igniter. If it seems worse after reconnecting, suspect regulator lock-out, reset it by disconnecting and reconnecting the regulator slowly, then try again.
How many ignition attempts are reasonable if my patio heater not working?
After a purge hold at pilot, attempt ignition in short sequences rather than continuously. If you do not get any pilot response after several reasonable tries, stop and move to gas flow checks (regulator, pilot blockage, valve command) because repeated igniter presses can increase risk if gas is accumulating.
What symptoms suggest I should stop DIY and call a technician?
Stop if you suspect a control board failure, if you confirm gas is reaching the system but the valve is not being commanded, or if you find a mechanically damaged or cracked gas valve or damaged wiring. Also call if the heater repeatedly trips an overheat/high-limit sensor under normal conditions.
Can I bypass the tilt switch to keep a patio heater working?
You should not leave it bypassed. While temporary bypassing is sometimes used as a confirmation test in guides, it removes a safety protection. If bypassing makes it stay lit, replace the tilt switch rather than operating with it defeated.
How do I clean the pilot area safely if debris is suspected?
With the gas fully off, clear the pilot port using compressed air and avoid tools that could change the orifice opening. If the pilot components are heavily fouled, do not scrape aggressively, instead consider replacement of the affected part if cleaning does not restore proper function.
Why does my electric patio heater not working have a different troubleshooting path?
Because there is no gas train, the likely failures shift to heating elements, thermal fuses, and the control board. If your unit is electric, avoid gas-system steps and focus on power supply, element continuity, and any resettable protection or thermal cutoff behavior.