If you need a patio heater today, your fastest path is to check Home Depot, Lowe's, Ace Hardware, or Walmart online right now, filter by "in-store pickup," and place the order before heading out. Home Depot offers free in-store pickup in as little as 2 hours on eligible items. Lowe's and Ace Hardware have similar same-day pickup through their websites and apps.
Patio Heater Pickup Today: Same-Day Setup and Safety

Grant Mercer
12 May 2026

The key is ordering online first so the store stages your unit before you arrive, rather than showing up and hunting the floor. While you wait for the "ready" notification, use the time below to make sure you're picking up the right heater and have everything you need to get it running safely tonight. For more patio heater tips, review the setup and safety steps before your first use tonight.
The patio heater meaning is simply the purpose and type of heater you’re choosing, such as propane, natural gas, or electric.
Fast path to a same-day patio heater pickup

Start with the retailer's website or app, not the store floor. Search "patio heater," then filter by your local store and availability for same-day or in-store pickup. Each retailer works slightly differently, so here's what to expect at each one.
| Retailer | How pickup works | Key tip |
|---|---|---|
| Home Depot | Order online, get a notification when ready (usually within 2 hours), then head in | Watch for the 'ready' email or app notification before driving over |
| Lowe's | Buy on Lowes.com or the app, choose free store pickup at your local store | Confirm whether your item goes to a locker or the service desk based on size |
| Ace Hardware | Check neighborhood store inventory on AceHardware.com, then place a pickup order | Verify fulfillment method on your order confirmation since details vary by store |
| Walmart | Use the Walmart app to place a pickup order and monitor 'ready' status | Use the app's arrival feature when you pull in so staff can bring it out |
Don't just show up cold. Stores stage pickup orders differently, and a tall mushroom-style propane heater sitting in a box is not going to be at the front register. Placing the order first means someone pulls it for you and you're not wandering the garden section for 20 minutes. Once you get the ready notification, go. Large heater boxes can sit in staging for only so long before staff need the space.
Choose the right heater type for your situation
Picking the wrong fuel type or size is the single biggest mistake people make on a same-day pickup. You can always troubleshoot a heater that won't light, but you can't easily fix buying a natural gas unit when you only have a propane tank on your patio. Get this decision right before you order.
Propane (LP) freestanding heaters
These are the tall mushroom-cap or pyramid-style heaters you see at restaurants. They run on a standard 20 lb propane tank (the same size as a BBQ grill tank), which usually lives in the base. They're portable, need no permanent installation, and are by far the most available type for same-day pickup. Most models put out 40,000 to 48,000 BTUs and heat an area of roughly 10 to 20 feet in diameter. If you just need heat on your patio tonight with no permanent setup, this is almost certainly what you want.
Natural gas heaters
Natural gas patio heaters connect directly to your home's gas line. They're great for permanent installations because you never swap tanks, but you won't find many at a big-box store ready for same-day pickup, and they require a gas line at the patio location and often a licensed installer depending on your local code. Also, the patio heater HS code you need can differ depending on whether the unit is natural gas, propane, or electric. If you're planning a permanent outdoor space, natural gas makes sense long-term, but it's not a realistic same-day solve unless you already have the line.
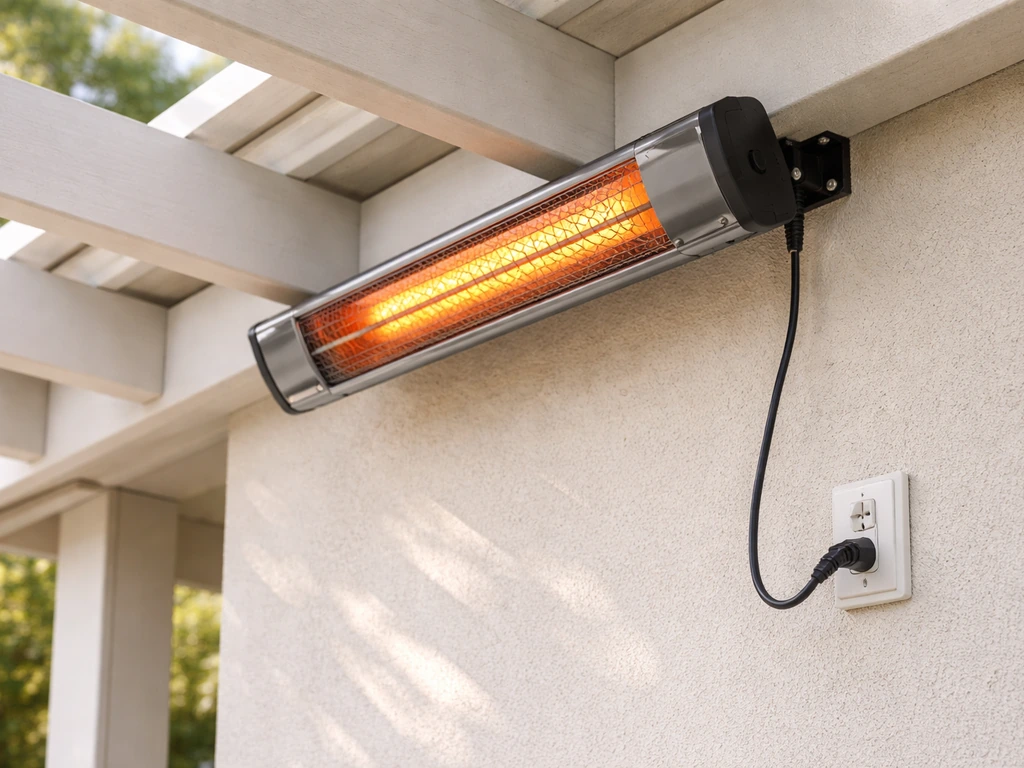
Electric patio heaters
Electric infrared heaters are a solid same-day option if your patio has a covered area or pergola with a nearby outlet. They typically wall-mount or hang overhead and run on 120V or 240V circuits depending on the model. The important detail: most residential-friendly electric patio heaters require a GFCI (ground fault interrupter) protected outlet, and some higher-wattage models need a dedicated 240V circuit. Check your outlet situation before you order one. Don't plug a 1,500-watt outdoor heater into an extension cord run from an indoor socket.
Quick comparison: which type fits your situation today?
| Heater type | Best for | Needs | Same-day availability | Typical BTU/output |
|---|---|---|---|---|
| Propane (LP) freestanding | Open patios, portability, no permanent install | 20 lb propane tank (not always included) | High — widely stocked | 40,000–48,000 BTU |
| Natural gas | Permanent outdoor setups with existing gas line | Gas line at patio, possible licensed install | Low — rarely in-store | 30,000–50,000 BTU |
| Electric infrared | Covered patios/pergolas with nearby GFCI outlet | GFCI outlet, possibly 240V circuit for larger models | Medium — good selection at major retailers | 1,500–5,000 watts |
For most people picking up today, propane LP is the default right answer. It's portable, requires no permanent work, and nearly every major hardware store stocks multiple models. If portability or a covered outdoor space is your priority, electric is a close second. Natural gas is a longer-term project.
Quick checklist before you leave for pickup
Run through this before you hit "place order" or walk out the door. These are the things people routinely forget, and they turn a same-day win into a frustrating trip back to the store.
- BTU output and coverage: Make sure the heater's BTU rating matches your space. A 40,000 BTU mushroom heater covers a roughly 20-foot diameter area. Going too small means you're cold; going too large for a covered space can be a fire hazard.
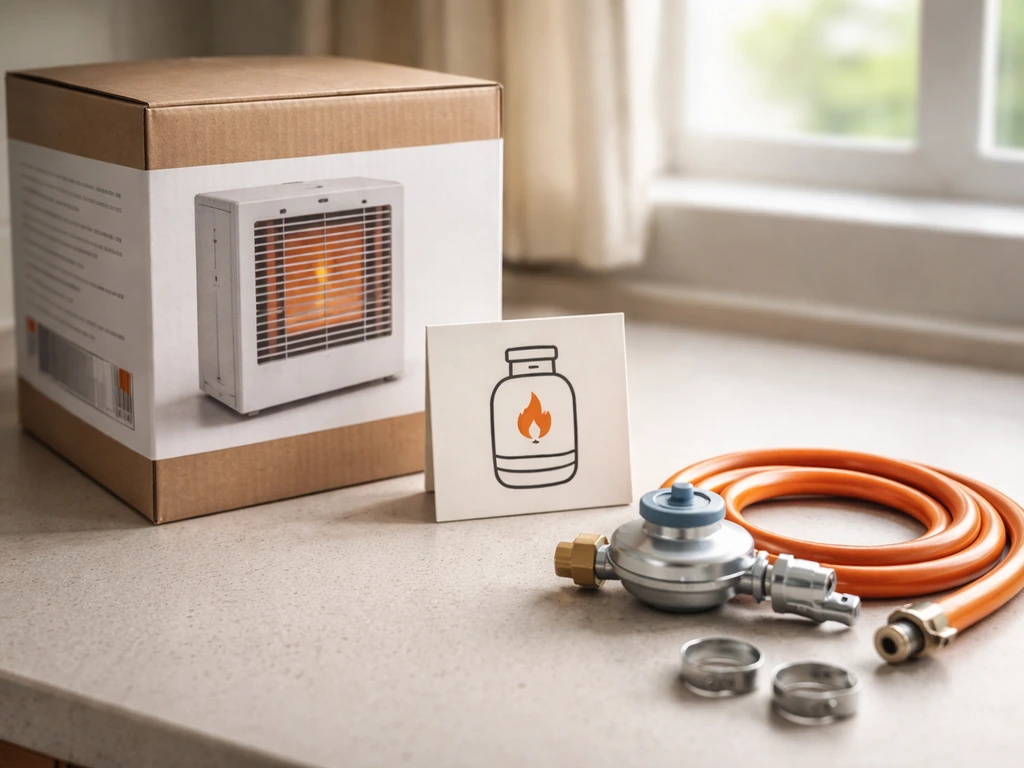
- Propane tank: Most freestanding propane heaters do NOT include the propane tank. You'll need a standard 20 lb LP tank. Buy a full one at the store or get it filled separately, and confirm it'll fit inside the heater's base compartment.
- Regulator and hose: Most heaters come with a regulator and hose. If yours is a replacement or a commercial-style unit, verify before you leave. The regulator must match the fuel type (propane/LP only), and you cannot substitute parts from other units.
- Ignition type: Does the unit have a push-button piezo igniter, a battery-powered electronic igniter, or a manual match-light? Know which one you're getting. Battery-powered igniters need batteries, often not included.
- Control and thermostat expectations: Some electric heaters have thermostats and multiple heat settings; most propane freestanding units are just a gas valve with a manual igniter. If you want temperature control, filter for that feature specifically.
- Clearance requirements: Check the manual's clearance rules for your model. Typical guidance (like Fire Sense's) is 48 inches of clearance from combustible materials, with at least 24 inches on the top and sides, but your exact model may differ. If you have a low deck cover or pergola, measure before buying.
- Electric outlet check (for electric heaters): Confirm you have a GFCI/GFI-protected 3-prong outdoor outlet near your install location. Don't assume a standard outdoor outlet qualifies without checking.
- Assembly tools: Most heaters need basic tools for assembly. A wrench, adjustable pliers, and a screwdriver are usually enough. Have them ready at home.
- Box size vs. your vehicle: Freestanding mushroom heaters come in tall, heavy boxes. Measure your trunk or truck bed before assuming it'll fit. Some stores offer delivery if your car won't take a 7-foot box.
Bring-home setup and first-fire safety steps
You got it home. Before you fire it up, do this right. Once you understand the setup steps, use them to run through a safe patio heater setup from start to first fire. Setup mistakes and skipped safety steps are where people get hurt and where heaters get returned unnecessarily. Take 20 minutes to do it properly.
For propane (LP) heaters
- Assemble fully before connecting any gas. Westinghouse, Fire Sense, and virtually every manufacturer says don't connect fuel until the unit is completely assembled and stable. Follow the assembly diagram in your manual step by step.
- Leak-test the LP tank BEFORE connecting it to the heater. Use a 50/50 soap and water solution on the tank valve and any existing fittings. Look for growing bubbles. If you see any, do not proceed. Bernzomatic's manual is explicit on this step and it applies to all LP setups.
- Connect the regulator and hose to the propane tank. Hand-tighten first, then snug with a wrench. Do not over-torque. Use only the regulator supplied with your heater. Manufacturers like Home Depot's branded units specifically warn against substituting regulators, even ones that appear to fit.
- Leak-test all connections after assembly. Apply soapy water to the regulator-to-tank connection, the hose connections, and the valve fitting on the heater itself. If bubbles appear at the hose or regulator connection, tighten that joint and test again. If bubbles persist, stop and don't attempt to light.
- Never leak test near an open flame, smoking, or with any ignition source nearby. This isn't a casual warning. LP gas is heavier than air and pools at ground level.
- Position the heater with proper clearance. Check your manual's exact clearance spec for your model. A common figure is 48 inches from combustible materials and 24 inches minimum on top and sides, but yours may differ. Never operate under a low deck, pergola, or umbrella that doesn't meet the clearance requirement.
- Open the gas valve slowly, wait 5 seconds to allow a small amount of gas to reach the burner, then follow your model's specific ignition procedure. Hold the control knob in the pilot position while pressing the igniter, and keep holding for 30 seconds after the flame appears to let the thermocouple heat up. If it doesn't stay lit, wait 5 minutes before retrying to let any accumulated gas dissipate.
- First-use fumes: Don't be alarmed by a brief odor on first use. Fire Sense's manual notes this and recommends not inhaling the initial fumes from a new heater. Make sure you're outdoors with good ventilation, which you should be anyway.
For electric heaters
- Fully assemble and mount the unit before plugging it in. Do not power it up partially assembled.
- Inspect the power cord and plug before you plug in. If there's any damage to the cord, plug, or heating tube, don't use it. Return it.
- Plug into a GFCI/GFI-protected 3-prong outdoor outlet only. Most outdoor outlets near patios and pool areas already have GFCI protection (look for the test/reset buttons on the outlet face). If yours doesn't, you need an electrician to add one before using the heater.
- Do not use an extension cord unless it is rated for outdoor use and matches the heater's amperage requirements. Most instruction manuals discourage extension cord use entirely.
- Turn the unit on according to the manual and verify it begins producing heat within 30 to 60 seconds. Infrared heaters glow orange/red when working correctly.
Common no-start / no-ignite / won't-stay-lit issues after pickup
These are the issues you're most likely to run into in the first hour with a new or newly assembled heater. Most of them are fixable in your driveway with no special tools.
Pilot won't light at all
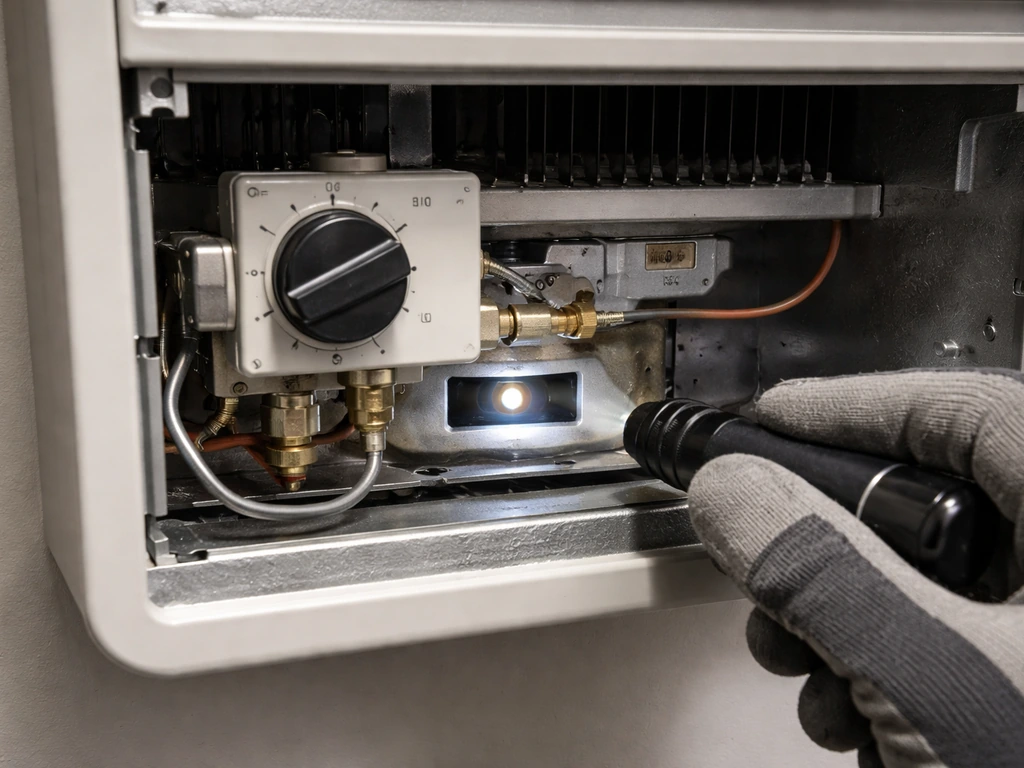
Go through this sequence before assuming the heater is defective. Fire Sense's own troubleshooting guide lists these as the most common causes: the gas valve is still in the OFF position, the propane tank is empty or wasn't opened, there's a blocked orifice, air in the supply line, or a loose connection. For a brand-new unit, air in the line is extremely common.
You may need to hold the knob in the pilot position for a full 30 to 60 seconds on first use to purge air and get gas flowing. If the igniter sparks but nothing catches, that's likely an air purge issue. If the igniter doesn't spark at all, check the battery (for electronic igniters) or try a long lighter at the pilot to isolate whether the issue is the gas supply or the igniter itself.
Heater lights but won't stay lit
This is the most common complaint after a new setup, and 90% of the time it's one of two things: you're not holding the knob long enough, or the thermocouple isn't getting enough heat from the pilot flame. When you hold the pilot knob in, you're allowing the thermocouple (a small metal probe positioned in the pilot flame) to heat up enough to send a signal that keeps the gas valve open. This takes 20 to 30 seconds minimum. If you let go too soon, the valve closes and the flame dies. Hold it longer than you think you need to.
If holding it longer doesn't fix it, the pilot flame may be misaligned with the thermocouple. The flame needs to directly envelop the tip of the thermocouple probe. On a new unit, the pilot assembly can get slightly shifted during shipping or assembly. Look at where the flame is and where the thermocouple tip is. If they're not aligned, carefully adjust the thermocouple bracket so the probe tip sits in the flame. This is one of the most common causes of a "won't stay lit" issue according to multiple heater brands and repair guides, and it's a 5-minute fix.
Tilt switch cutting power or gas
Most freestanding patio heaters have a safety tilt switch that cuts the gas if the heater leans past a certain angle. If your heater is on an uneven surface or if the switch is triggered during assembly, the unit will refuse to stay on. Make sure the heater is standing on a flat, level surface. If the ground is uneven, the tilt switch may be active even when the heater looks upright.
Try adjusting the feet or moving to a flatter spot. On some units, the tilt switch can get stuck or misaligned during shipping. Check your specific model's manual for the tilt switch location. On most mushroom-style heaters it's near the base.
Never bypass or disable the tilt switch. It exists to prevent a tip-over fire.
Thermocouple failure
If you've held the knob for a full 45 seconds, the pilot flame is correctly hitting the thermocouple tip, the unit is level, and it still drops out every time, the thermocouple itself may be faulty. On a brand-new heater this is uncommon but not unheard of. Thermocouples are inexpensive parts (usually under $15) and are generally user-replaceable. The key is identifying your exact model so you get the right one. Look for the model number on the label near the base or on the back of the control panel. Once you have it, you can look up a model-specific thermocouple guide rather than guessing.
Assembly and mode setting issues
On new heaters, a surprising number of "broken" reports come down to assembly errors: a gas line that wasn't fully tightened, a knob that was assembled in the wrong orientation, or a safety feature that's still engaged from the factory. If your heater has lighting controls, follow the patio heater lighting instructions for your exact model to avoid stuck valves and unsafe igniting.
Double-check that all gas connections are hand-tight plus a quarter turn with a wrench, that the control knob is going through its full range of motion without obstruction, and that no packing materials are blocking the burner or pilot area. Fire Sense’s manual copy on Manualzz also covers leak testing with a detergent and water solution, including checking hose or regulator connection leaks and re-testing afterward [gas connections are hand-tight plus a quarter turn with a wrench](https://www. manualzz. com/doc/3151863/fire-sense-60368--60485--60786--60788--61185--61444--6154...
). On electric heaters, make sure all heat settings and mode selectors are properly connected and that no wiring harnesses were left disconnected during assembly.
When to stop DIY and call for service
Most of the issues above are genuinely fixable by a careful DIYer. But there are situations where the right move is to stop, step back, and get professional help or simply return the unit. Here's where the line is.
- Persistent gas smell with no visible leak source: If you smell gas and your soapy water test doesn't pinpoint the leak, do not attempt to light the heater. Turn off the propane tank, move away from the area, and ventilate. A gas leak you can smell but can't find is a professional service call, not a DIY troubleshoot.
- Bubbles that won't stop after tightening: If you've tightened the regulator or hose connection twice and bubbles still appear, don't use the heater. The regulator may be defective. Return the unit or replace the regulator before proceeding.
- Sparks but strong ongoing smell of gas: This means gas is accumulating but not igniting. Do not keep trying. Shut off the gas, ventilate, and investigate before another attempt.
- Damaged or scorched wiring on an electric heater: A burned power cord, scorch marks near the heating element, or a tripped GFCI that won't reset are signs of an electrical fault. Stop using it and return or have it serviced. Don't try to splice or repair power cords on outdoor heating appliances.
- Heater worked once and now produces no heat at all on electric: This could be a failed heating element or an internal thermal cutoff. Element replacement is possible on some models but requires correct parts and careful disassembly. If you're not comfortable with that level of repair, return the unit while it's still within the return window.
- You can't identify the model or brand: If the model label is missing or illegible, you're guessing on parts and procedures. Find the model number before doing any repair. It's usually on a sticker near the base, on the back of the control panel, or stamped into the metal frame near the burner assembly.
If your issue isn't on the list above, the best next step is to look up your exact model. The brand and model number unlock the right manual, the right parts list, and the right troubleshooting steps for your specific unit. Treating a patio heater as a repairable appliance rather than something to throw away usually means you can fix it with one replacement part and 30 minutes, once you know exactly what you're working with. That model number is the starting point for everything.
If you're also thinking ahead to sizing your space correctly, understanding what output you actually need, or planning a more permanent setup, those decisions connect closely to getting your first-use experience right. The type of heater you pick today also determines what maintenance and repair path you'll follow later, so it's worth being deliberate even on a same-day purchase.
FAQ
What should I check at pickup to confirm I got the exact patio heater (fuel type and model) before leaving the store?
Verify the label near the base or control panel shows the same model number and fuel type you ordered (propane LP, natural gas, or electric). Also confirm the included parts count, especially the propane tank requirement and any regulator or hose components, since some kits are sold bundled and others are not.
If the heater’s not “ready” in the app yet, can I still grab it in store right away?
Usually not. Many locations only stage items after the system marks the order fulfilled, so walking the floor typically means you may find a different model or not get the exact item you ordered. Wait for the pickup confirmation, unless the store associate can pull the specific unit you ordered from the back.
How late is “same-day pickup” realistically if I order in the morning?
Same-day availability depends on local store labor and staging rules. If your app does not show a same-day pickup window at checkout, assume it might be next-day staging. To avoid losing the day, place the order early enough that you still have margin before the store’s pickup cutoff time.
Can I pick up a propane patio heater without buying a propane tank at the store?
You can, but only if you already have an appropriate 20 lb propane tank and compatible regulator setup for your model. Many mushroom-style heaters require the standard BBQ-size cylinder, and some packages are tank-only or regulator-only, so double-check what’s included to avoid finding out at home that a piece is missing.
What if the propane heater lights outside fine, but won’t stay on once I move it closer to the patio?
Recheck level and surface conditions after relocation. The tilt safety switch can trigger if the heater sits on uneven ground or shifted feet, even if it looks upright. Place it on a flat spot, ensure the base is stable, then relight and hold the knob long enough for the thermocouple to heat.
Is it safe to use an electric patio heater outdoors if the outlet cover is weatherproof?
It can be, but only if you plug into a GFCI-protected outlet and keep the plug connection protected from direct water spray. Avoid using extension cords, especially with higher-watt models. If the heater needs a dedicated 240V circuit, using the wrong outlet can prevent safe operation.
Can I use a propane patio heater under a covered patio or near a wall?
Use caution, because combustion gases still need ventilation. Keep the heater upright and follow the clearance guidance in your manual for walls, ceilings, and nearby materials. If you do not know the clearance requirements for your exact model, do not run it under an enclosed overhang.
If I get an igniter spark but no flame, do I immediately assume the heater is broken?
Not immediately. Air purging is common on first use with new propane setups, so try the correct lighting sequence and allow extra time holding the control in the pilot position for the air to purge. If it still fails after following the first-use steps in the manual, then move to checking gas supply (tank valve open, regulator connection, and line for leaks).
Do I need any special tools to fix common setup issues like alignment or loose connections?
Often no. For alignment, you may only need careful adjustment without removing major components. For gas connections, a small wrench is typically used to snug connections appropriately after hand-tightening, but avoid over-tightening and stop if you feel resistance or damage.
When should I stop troubleshooting and return the heater instead of replacing parts?
Stop and return if you cannot get stable operation after verifying fuel, proper lighting hold time, correct pilot-to-thermocouple alignment, and tilt-level placement, or if you smell gas. If you are uncomfortable confirming connections or troubleshooting safely, use the return process and do not attempt repeated repairs.