Safe patio heater use comes down to three things: knowing what type of heater you have (because the risks are completely different for propane, natural gas, and electric), running a quick pre-use check every single time you fire it up, and knowing exactly what to do when something goes wrong. This guide walks you through all of it, from identifying your heater and setting it up at the right clearances, to diagnosing the failure modes that actually cause fires and gas leaks, to the point where you should put down the wrench and call a pro.
Patio Heater Safety: DIY Checks, Troubleshooting, Storage

Grant Mercer
30 Apr 2026
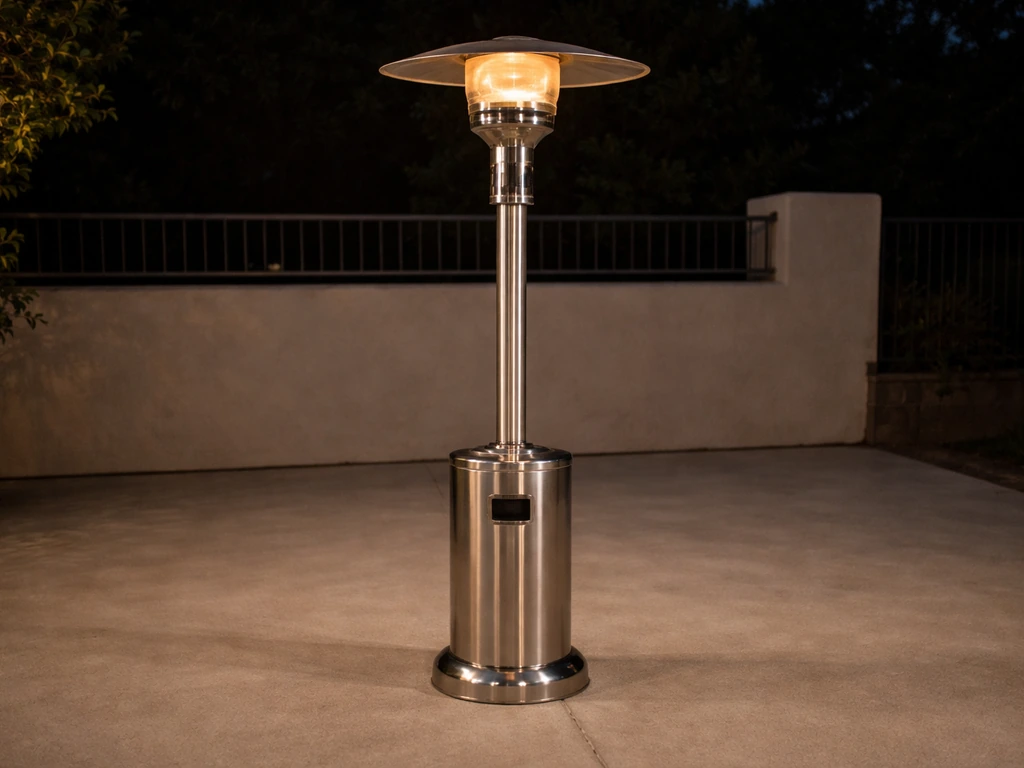
Figure Out What Kind of Heater You Have First
This matters more than it sounds. Propane, natural gas, and electric heaters share almost nothing in terms of safety risks or troubleshooting steps. Mixing up your approach is how accidents happen.
Propane (LP) heaters
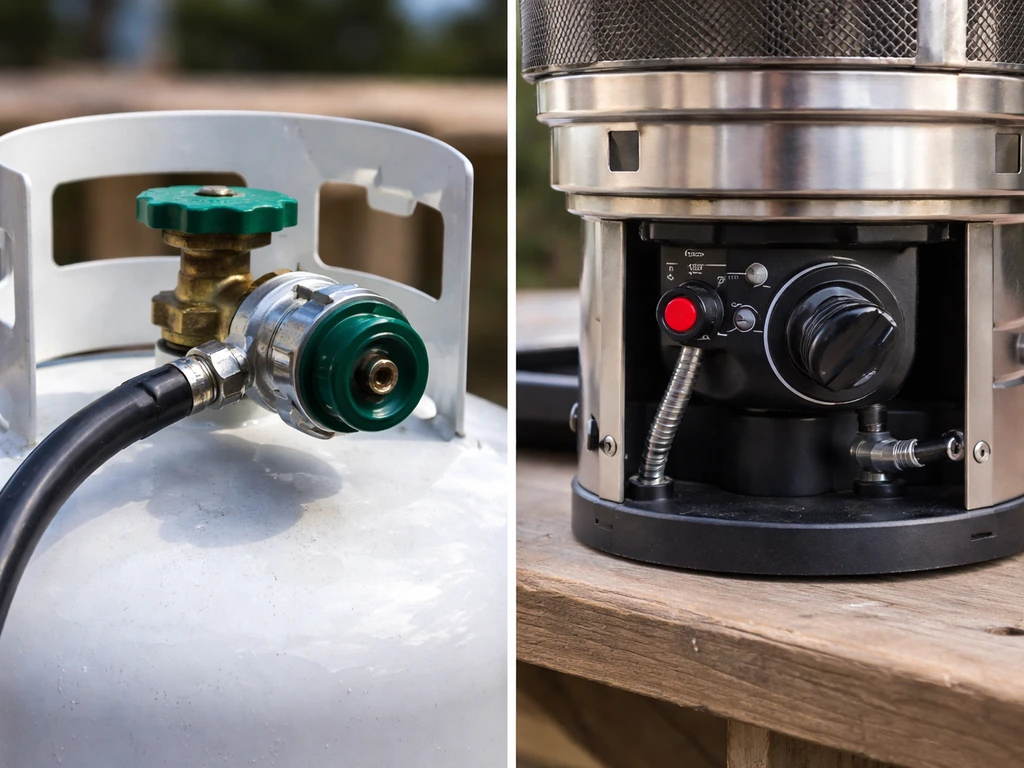
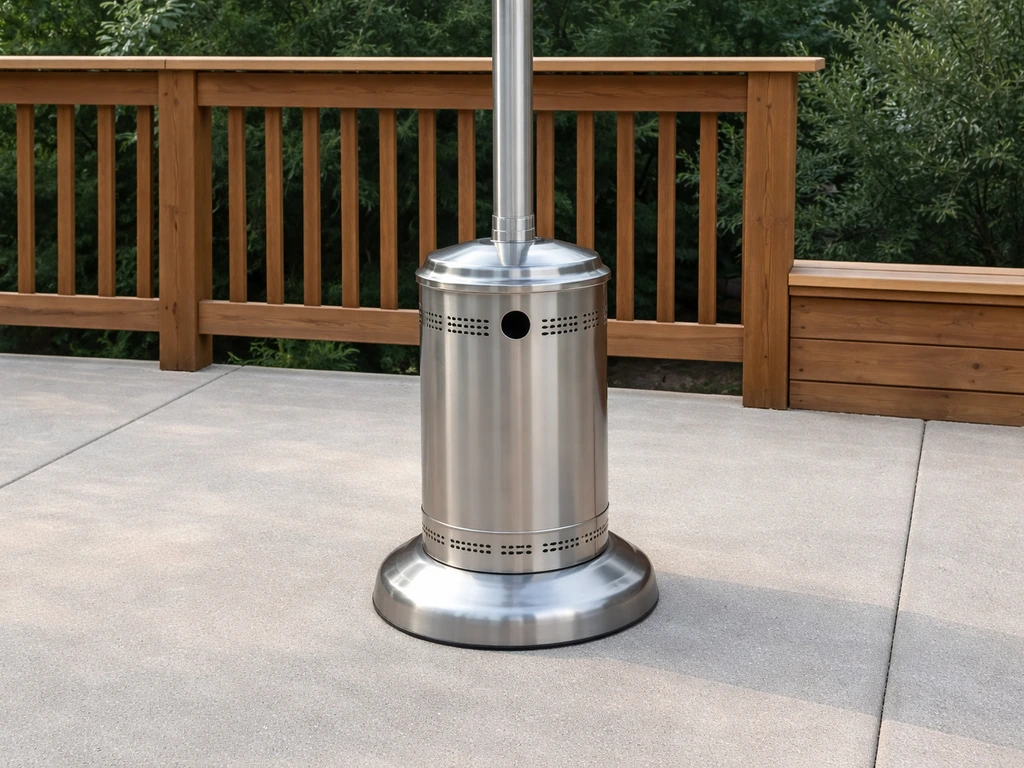
These are the most common freestanding patio heaters, usually the tall mushroom-top style or the tabletop version. They connect to a portable propane cylinder, most often a standard 20 lb tank that threads into a regulator at the base. If your heater has a hose connecting to a tank and you can pick up the whole setup and move it, it's almost certainly propane. The key risks are gas leaks at the hose and regulator connections, incomplete combustion from blocked burners, and tip-over fires.
Natural gas heaters
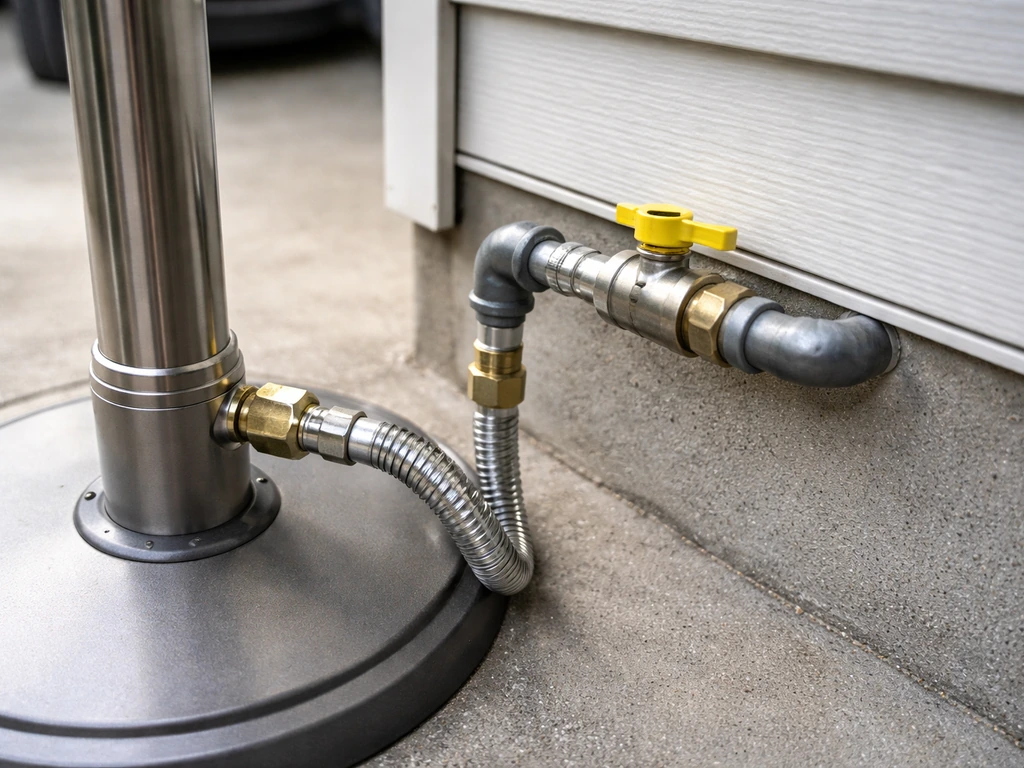
Natural gas heaters are permanently connected to your home's gas line via a rigid pipe or a fixed flexible connector. They don't use removable tanks. If your heater has a gas line running from the ground or wall into the base with no portable tank, you're on natural gas. These heaters can't be moved once installed. The leak risk is lower in good installations but the consequences of a leak are higher since you can't just turn a tank valve off and remove the fuel source.
Electric heaters
Electric patio heaters plug into a standard outlet (120V) or hardwired into a 240V circuit. There's no combustion at all. They're often wall-mounted, ceiling-mounted, or on a freestanding pole. The safety concerns are completely different: extension cord misuse, tripped GFCI circuits, overheating near combustibles, and water exposure to electrical components. Look for a power cord or conduit instead of a gas line and no igniter or burner assembly.
| Feature | Propane | Natural Gas | Electric |
|---|---|---|---|
| Fuel source | Portable LP tank | Fixed home gas line | Power outlet or hardwired circuit |
| Moveable? | Yes | No | Usually yes (plug-in types) |
| Main leak risk | Hose and regulator fittings | Fixed line connections | None (no combustion) |
| Combustion risk | Yes | Yes | No |
| Tip-over risk | High (freestanding) | Low (fixed) | Moderate (freestanding) |
| Primary DIY checks | Hose, regulator, burner, tilt switch | Connections, burner, thermocouple | Cord, outlet, element, GFCI |
Run These Checks Before Every Single Use
I know it feels like overkill every time, but most patio heater incidents happen because something changed since the last use: a hose got nicked, a spider built a nest in the burner, or the tank is low enough that the regulator is behaving erratically. Two minutes before you light it is much better than five minutes into an emergency.
For all heater types
- Check that the heater is stable and sitting level on a firm, flat surface. Freestanding heaters on uneven pavers or soft grass tip over more easily than you'd think.
- Look at the emitter screen or heat element for visible damage, warping, or debris (leaves, cobwebs, bird droppings). Clean it out before lighting.
- Make sure there's nothing combustible within at least 3 feet in any direction — tablecloths, cushions, umbrellas, overhead string lights. We'll cover exact clearances below.
- Confirm children and pets aren't going to be close to the heater while it's running.
For propane and natural gas heaters
- Inspect the entire gas hose from the tank or supply line to the valve. Look for cracks, kinks, abrasion marks, or any sections that look pinched or brittle. A hose that's been sitting outside for years in UV exposure can look fine and still be cracked internally.
- Check the regulator-to-tank connection (propane) or the fitting at the supply line (natural gas). These should be hand-tight plus a wrench turn, not just finger-tight.
- Do a soap-water leak test at every fitting before the season's first use and any time you've disconnected and reconnected the gas. Mix dish soap with water, apply it to each connection with a brush or sponge, then slowly open the gas valve. Bubbles mean a leak. Turn off the gas immediately and re-tighten or replace the fitting before proceeding.
- Make sure the control knob turns smoothly to OFF, LOW, and HIGH without sticking. A stuck valve is a red flag.
- Check that the igniter sparks when you press or turn it. No spark doesn't mean the heater is dangerous to use, but you need to know before you're fumbling around in the dark with a lighter.
For electric heaters
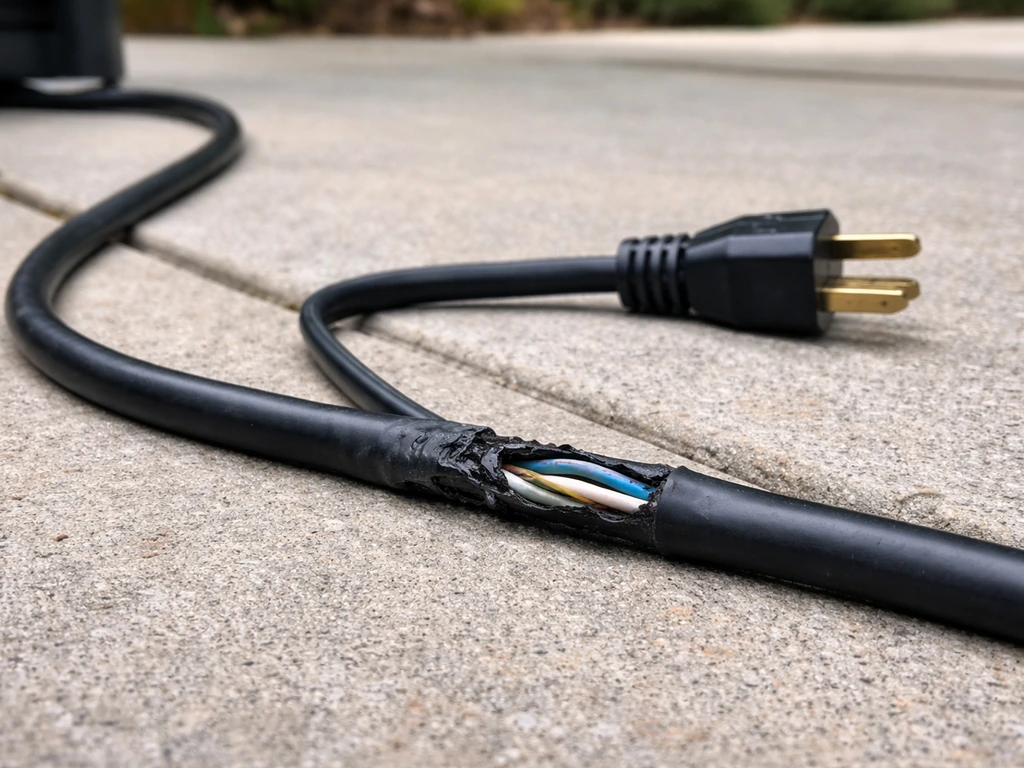
- Inspect the power cord for cuts, fraying, or melted insulation. Never use a damaged cord.
- Plug directly into a GFCI-protected outdoor outlet whenever possible. If you must use an extension cord, use a heavy-duty outdoor-rated cord (14-gauge or heavier) and never run it under rugs or through doorways.
- Check that the outlet GFCI is working by pressing the test and reset buttons.
- Look at the heating element or quartz tube for visible cracks or black burn marks, which suggest the element is failing.
Safe Setup and Placement: Clearances, Wind, Surfaces, and Enclosures
Clearance to combustibles
Every patio heater manual specifies minimum clearance distances between the heater and anything that can burn. These numbers exist because radiant heat from the burner head can ignite materials at distances that feel surprising. The specific clearances are marked on the heater itself or listed in the installation section of your manual, and those numbers always override any general guidance you read online. Always check patio heater clearance requirements in your manual before installing or relocating the heater, especially in covered or enclosed areas. That said, a commonly cited baseline for freestanding propane heaters is 3 feet from the sides and 3 feet from the top to combustible materials. For ceiling clearance, many mounted or overhead heaters specify 48 inches from the emitter to the ceiling. Always look up the exact figure for your model.
Keep the area under and immediately around the heater clear of paper, cardboard, fabric, and any other combustibles. This isn't just about the heat coming off the emitter head; it's also about tip-over risk. If a tall mushroom heater falls, the burner head hits the ground and whatever is nearby.
Floor surfaces and stability
Place freestanding heaters on flat, hard surfaces: concrete, pavers, or a solid wood deck. Grass, gravel, and soft soil are unstable. If you're on a deck, check that it's solid enough that the heater won't rock when someone walks nearby. Never place a patio heater on a surface that can itself catch fire, including a wooden deck that's been treated with flammable stain or sealer if there's any question about direct contact. The heater base shouldn't get dangerously hot, but the radiant head absolutely will.
Wind
Wind is a real hazard with patio heaters in two ways. First, it can blow out the flame on a gas heater, which triggers the thermocouple safety shutoff but also means you have a brief moment of unburned gas if the shutoff doesn't trip instantly. Second, gusty conditions can tip over a freestanding heater. If wind is strong enough that the flame is visibly being pushed to one side or you're concerned about stability, shut the heater down. Position the heater so it's sheltered if possible, away from gaps between structures that create wind tunnels.
Covered patios, pergolas, and enclosures
Using a patio heater under a covered patio, pergola, awning, or any partial enclosure requires extra caution. The ceiling clearance question is one of the most common things homeowners get wrong. You need to verify the clearance from the top of the emitter head to the ceiling or overhang against your heater's specification, every time the heater setup changes. Most patio heaters also publish a required clearance distance from the emitter to the ceiling, and you should follow that model-specific number clearance from the top of the emitter head to the ceiling. Beyond clearance, enclosed or semi-enclosed spaces restrict airflow, which raises the risk of incomplete combustion and carbon monoxide buildup with gas heaters. If you're using a gas heater under a covered patio, make sure at least two sides are fully open for ventilation. Never use a propane or natural gas heater inside a fully enclosed space like a garage, screened room with the panels down, or a tent.
Keep the heater away from foot traffic paths and exits. A heater positioned where people have to walk close to it to get in or out of a door is a tip-over waiting to happen.
Operating Safely: Lighting, Staying Lit, Shutoff, and Monitoring
The right lighting sequence
Follow your manual's lighting procedure exactly. That's not a generic thing to say: the sequence is specifically designed to flow gas through the safety controls in the right order. The general sequence for most freestanding propane heaters with a thermocouple safety system goes like this: open the tank valve slowly, set the control knob to the pilot or ignite position, press and hold the knob down to bypass the thermocouple while gas flows, ignite with the built-in piezo igniter or a lighter, continue holding the knob down for at least 30 seconds after the flame lights, then slowly release. That hold time is what heats the thermocouple enough to keep the gas valve open. Release too early and the flame goes out immediately.
If the burner doesn't light within about 30 seconds of attempting ignition, turn everything off. Let any accumulated gas fully dissipate for at least 5 minutes before trying again. This is not optional. The Fire Sense and Hiland manuals both explicitly require this 5-minute wait to prevent the risk of a gas explosion from igniting accumulated propane. Don't try to speed it up by waving your hand around or blowing. Just wait.
When the heater won't stay lit
If the heater lights but goes out immediately when you release the knob, the thermocouple isn't getting hot enough to signal the gas valve to stay open. This is one of the most common issues on older heaters and it's usually a maintenance or replacement problem, not a reason to bypass the safety system. blank" rel="noopener noreferrer">Hold the knob down longer (try 45 to 60 seconds), making sure the pilot flame is actually hitting the thermocouple tip. DesaTech’s patio heater manual also instructs you to hold the control knob depressed long enough for proper thermocouple and valve operation DesaTech Patio Heater Manual. If it still won't stay lit, the thermocouple may need cleaning or replacement. Never wedge the knob in the pressed position or try to defeat the safety valve. That safety exists to shut off gas if the flame goes out unexpectedly.
Proper shutoff
When you're done for the evening, turn the control knob to OFF first, then close the tank valve (for propane). Closing the tank valve first and letting the heater burn the line dry is acceptable too but turning the control to OFF is the minimum. Don't just close the tank valve and walk away leaving the control knob in the ON position; the valve and fittings remain under pressure and the knob isn't meant as your primary shutoff. If you won't be using the heater for more than a day or two, disconnect the propane tank entirely and store it upright in a ventilated outdoor space, never in a garage, basement, or enclosed area.
If you want to relight a heater that's been recently running but turned off, the PSA265 and similar standing-pilot designs specify waiting at least 5 minutes before relighting the pilot. A hot heater has residual heat and gas in the system; the delay gives everything time to stabilize.
What to watch for while the heater is running
- Flame color: a healthy propane or natural gas burner flame should be blue with some orange tips. A predominantly yellow or orange flame indicates incomplete combustion, often from a blocked burner or insufficient air in the venturi. This produces more carbon monoxide. Shut it down and inspect the burner.
- Any gas smell while the heater is running is not normal. A faint smell right at ignition for a second or two can happen, but if you smell gas while the heater is operating, shut it off and investigate before continuing.
- Unusual sounds: popping, rumbling, or hissing from the burner area are warning signs. A loud pop can indicate delayed ignition from gas buildup.
- Visible soot or blackening on the emitter screen or reflector that wasn't there before is a sign of incomplete combustion.
- If the heater shuts off unexpectedly and repeatedly, don't just keep relighting it. Something is triggering the safety system.
The Failure Modes That Actually Create Safety Risks
Most of the searches that bring people to a patio heater repair site come from real problems: the heater won't light, it won't stay lit, it keeps shutting off. These aren't just annoyances. Some of them are safety hazards if you respond the wrong way. Here's what's actually happening and what to do about it.
Failed ignition
If the igniter sparks but nothing lights, the most common causes are a closed or low-flow tank valve, a blocked pilot orifice (spider webs and dirt are the main culprits), or a regulator that's in flow-limiting mode because it was opened too fast. Try opening the propane tank valve slowly and completely. If the igniter itself isn't sparking, check the igniter tip for corrosion or debris, and check that the igniter wire is connected. A non-sparking igniter is a nuisance, not a danger on its own, but it means you need to use a lighter with care: hold flame to the pilot before opening the gas, don't open gas first and then search for a lighter.
Heater won't stay lit (thermocouple failure)
The thermocouple is a thin metal probe that sits in the pilot flame. When it gets hot, it generates a small electrical voltage that signals the gas valve to stay open. If the thermocouple is dirty, corroded, bent out of position, or worn out, it doesn't generate enough voltage and the valve closes, killing the flame. Symptoms: heater lights, you hold the knob, it seems to stay lit, but as soon as you release, it dies within 5 to 10 seconds. First check: is the pilot flame actually hitting the thermocouple tip? If the pilot orifice is partially blocked, the flame may be weak or misaligned. Clean the pilot assembly with compressed air. If that doesn't help, the thermocouple itself likely needs replacing. It's one of the more straightforward DIY fixes on most patio heaters and Hiland's manual specifically calls out thermocouple replacement as a user-level task.
Tilt switch problems
Freestanding patio heaters have a tilt (tip-over) switch that shuts off the gas if the heater leans beyond a safe angle. It's a critical safety feature. The symptom of a faulty tilt switch is a heater that shuts off even when it's standing perfectly upright. This is frustrating but the correct response is to test and replace the switch, not to bypass it. A bypassed tilt switch means your heater will keep running if it falls over, which is exactly the scenario that starts patio fires. A patio fire pit has similar fire risk concerns, so make sure you follow safe clearance and use practices each time you light it patio fire pit safety. Tilt switches are usually accessible from the base of the unit and can be tested with a multimeter. If yours is triggering when the heater is level, check whether the switch is physically damaged or whether something in the base (like an OPD valve issue on the tank) is causing the problem.
Gas leaks
Gas leaks are the most serious failure mode. The most common locations on a propane heater are the tank-to-regulator connection, the regulator-to-hose connection, and any fittings at the control valve. Run the soap-water test at every connection at the start of each season and any time you've disconnected and reconnected anything. If you find a leak at a connection, try re-tightening it. If the leak persists at a fitting that's fully tightened, the fitting or hose needs replacement, not more force. If you smell gas and can't immediately identify and stop the source, treat it as an emergency (see the section below on emergency steps).
Blocked burner and overheating risk
A partially blocked burner or venturi tube restricts airflow and disrupts the gas-to-air mixture, producing an incomplete, yellow-orange flame that generates carbon monoxide. Outdoors this is less immediately dangerous than indoors, but in a covered patio or semi-enclosed space, CO can accumulate. Insects (particularly spiders and mud daubers) love to nest in the venturi tube during the off-season. Before the first use of the season, remove the burner assembly and inspect the venturi tube and pilot orifice. Use compressed air to clear any blockages. Never use wire or a metal probe to clear an orifice; you'll enlarge it and permanently alter the gas/air mixture.
Electronic safety lockout (infrared tube heaters)
Some infrared tube heaters have more sophisticated ignition control boards. If the board doesn't sense a flame after an ignition attempt, it enters a soft lockout mode, sometimes for as long as 30 minutes, before retrying. The ReVerberRay RVA2 manual documents this behavior explicitly: failed ignition triggers a lockout cycle before the system tries again, and eventually a hard lockout if repeated attempts fail. Don't keep cycling power trying to override this. The lockout is the system telling you something isn't working. Check for gas supply, igniter function, and flame sensor wiring before resetting.
Seasonal Maintenance and Storage Safety
Sunglo's technical guidance recommends annual inspection as a minimum, and that's the right baseline. The heaters that develop serious problems are almost always ones that got put away dirty at the end of the season and brought back out without any inspection. Budget 30 minutes at the start of each season and another 15 at the end.
Start-of-season checklist
- Inspect the hose and regulator. Look for cracking, brittleness, and discoloration. Propane hoses should be replaced every 5 years or sooner if you see any physical damage. Regulators should be replaced if they've been involved in a tip-over, exposed to excessive heat, or are more than 10 years old.
- Clean the burner assembly, venturi tube, and pilot area. Remove the burner and use compressed air to blow out debris. Check for insect nests in the venturi tube. Clean carbon buildup around the burner ports with a soft brush.
- Inspect the emitter screen (for mushroom heaters) for warping, holes, or corrosion. A damaged emitter screen can fall apart under heat and drop hot material.
- Test the tilt switch by carefully tilting the heater to a noticeable angle. The gas should shut off. If it doesn't, stop using the heater until the switch is replaced.
- Do a full soap-water leak test on all gas connections before the first use.
- Check all structural bolts and joints on freestanding heaters. Outdoor heaters loosen over time from vibration and wind, and a wobbly heater is a tip-over hazard.
- Test the igniter and verify spark at the pilot. Clean the thermocouple tip with fine steel wool if you had stay-lit problems at the end of last season.
End-of-season storage
- Disconnect the propane tank and store it outdoors in a ventilated location, away from any heat source, ignition source, or enclosed space. Never store propane tanks in a garage or basement.
- Clean the heater before covering it. Debris and moisture trapped under a cover accelerates corrosion and creates ideal conditions for insects to nest.
- If storing the heater indoors (shed, garage), make sure the propane tank is disconnected and not stored with it.
- Use a weather-resistant cover that allows some airflow so moisture doesn't get trapped inside.
- For natural gas heaters that stay installed year-round, have the gas shutoff valve inspected annually and make sure the valve operates freely.
Mid-season checks
After any tip-over, any storm, or any time the heater behaves unexpectedly, do a mini inspection before the next use: check for physical damage, re-run the soap-water leak test, and verify the tilt switch is functioning. A heater that fell over may have a kinked hose or a damaged regulator that isn't obvious from the outside.
When to Stop DIY and Call for Service
I'm a strong believer in fixing your own patio heater. Most common problems, from a bad thermocouple to a blocked burner to a worn tilt switch, are genuinely within reach of a careful homeowner with basic tools. But there are lines you shouldn't cross.
Stop and call a qualified gas technician if:
- You have a gas leak you can't resolve by re-tightening fittings. If a connection leaks after being properly tightened, the fitting, hose, or regulator needs professional replacement.
- Your heater has been involved in a fire, even a small one. Internal damage may not be visible and the regulator and valve may be compromised.
- You need to work on the gas valve itself. Disassembling or adjusting the main gas control valve is not a DIY task. If the valve is stuck, leaking at the valve body, or not closing fully, that's a professional repair.
- You're on a natural gas system and have any concerns about the supply line fittings, shutoff valve, or connections at the house. Natural gas line work typically requires a licensed plumber or gas fitter.
- The heater produces a persistent yellow-orange flame, heavy soot, or you notice symptoms of carbon monoxide exposure (headache, dizziness, nausea) while using the heater. Discontinue use immediately.
- After following the manufacturer's troubleshooting steps, the ignition system on an electronic tube heater is still entering hard lockout. Board-level diagnostics and replacement require specific knowledge of the control system.
- The heater is more than 10 to 15 years old and has multiple issues. At some point the cost and risk of DIY repair on an aging heater exceeds the value, and a professional assessment (or replacement) is the safer call.
Emergency steps: suspected gas leak or fire
If you smell gas and can't immediately identify that it's coming from a loose fitting you can fix right now, treat it as a gas emergency. Outdoor patio heater safety also means knowing how to respond quickly when you suspect a gas problem or fire. Don't try to find the source by sniffing around or lighting a match. Don't switch any lights or appliances on or off. Don't use your phone anywhere near the suspected leak area.
- Move everyone (people and pets) away from the area immediately, moving upwind if possible.
- If you can safely reach the propane tank valve or gas shutoff without entering the gas-affected area, close it. If you can't do it safely, leave it and evacuate.
- Get to a safe location at least 100 feet away where you can't smell gas.
- Call 911 from the safe location. For natural gas, also call your utility company's emergency line.
- Do not re-enter the area until emergency responders say it's safe.
- If there is an active fire, call 911 immediately and evacuate. Do not attempt to fight a propane fire yourself. A burning propane tank can rupture.
One important note on propane leaks specifically: propane is heavier than air and can pool at ground level, which means you might not smell it if it's accumulated in a low spot. It can also saturate porous outdoor furniture or deck materials and become temporarily undetectable. If you've had a significant leak event, have the area inspected before resuming use of any ignition source in that space.
FAQ
Is it safe to run a patio heater under a partially enclosed roof as long as it is “outdoors”?
Not automatically. You still need the manufacturer’s specific emitter-to-ceiling clearance, and you need ventilation that keeps combustion products from accumulating. As a practical rule, keep at least two sides fully open, avoid locations where wind can’t sweep through, and never use a gas heater in a fully enclosed area like a garage or a screened room with openings down.
Can I use a patio heater if I only have a small clearing between it and my furniture or railing?
Use the heater’s listed clearance numbers, not a generic “3 feet” baseline. If your manual specifies larger side or top distances, reduce combustibles instead of squeezing the heater closer, because radiant heat can ignite materials even when the flame itself seems far away.
What should I do if the heater won’t stay lit, but the pilot flame looks fine?
Confirm the pilot flame actually contacts the thermocouple tip, then verify the thermocouple position. If it still shuts off immediately after releasing the knob, the thermocouple may be worn or the pilot orifice may be partially restricted, a weak pilot can look “present” but not deliver enough heat.
If my propane heater has a tiny hiss or I suspect a small leak, can I just tighten the fitting and light it?
Do not light. Tighten only if the leak is identified at a connection you can access, then re-test with soap-water. If the leak persists after being properly tightened, replace the hose or fitting, and let gas fully dissipate before any ignition attempt.
Why does the manual say to wait 5 minutes if it fails to ignite?
Because unburned propane can accumulate in the burner area. If you attempt ignition again too quickly, that accumulated gas can ignite suddenly. Wait the full interval, keep faces and ignition sources away, then try again only after confirming the control is off.
Can I use an extension cord with an electric patio heater if it reaches the patio outlet?
Only if the manual allows it, and choose a cord rated for outdoor use and the heater’s power draw. Avoid daisy-chaining cords or running them where they can be pinched or come into contact with hot heater surfaces, overheating at the cord connections is a common failure mode.
My tilt switch shuts the heater off even though it is standing straight. What could cause that?
A physically damaged tilt switch or an issue inside the base can trigger it while level. Since bypassing is unsafe, test the switch per the manual, check for damage after transport or storms, and also consider tank valve or regulator issues if the heater behavior seems tied to fuel changes.
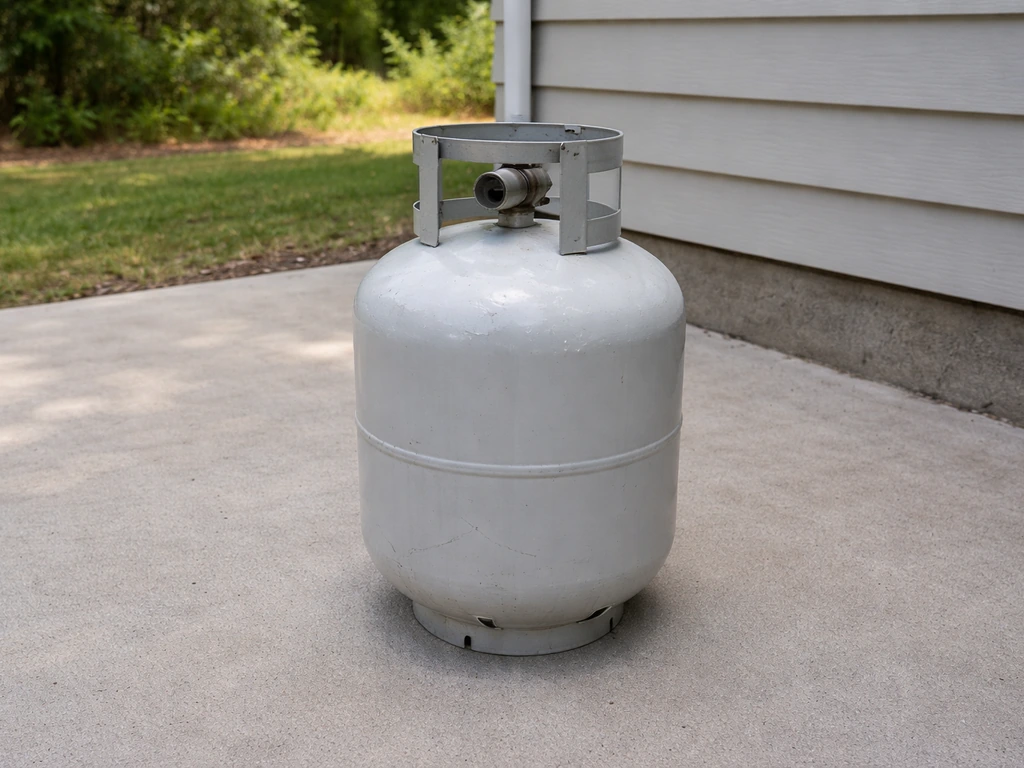
Is it okay to store a propane cylinder indoors if it is empty or “mostly empty”?
No. Keep it upright in a ventilated outdoor space. Even when a tank seems empty, residual propane can be present and hazardous, and storage in garages, basements, or enclosed areas increases the risk of accumulating gas.
After a storm or tip-over, do I need to do more than visually inspect the heater?
Yes. Do a mini inspection before the next use: look for hose kinks or base damage, run a fresh soap-water leak test at the relevant connections, and verify the tilt switch reacts correctly. A damaged regulator or kinked hose might not be obvious to the eye.
How long should I clean insects out of the burner before my first use of the season?
Inspect before the first use each season, and take the extra step of checking the venturi tube and pilot orifice. Insect nests can form during storage, and clearing them with compressed air is safer than probing with metal tools, which can permanently alter gas-air mixing.
If the heater enters lockout after failed ignition, should I keep resetting it to “make it work”?
No. Lockout is the control telling you a fault condition persists. Don’t repeatedly cycle power, instead check gas supply, igniter operation, and flame sensing wiring or the flame presence, then wait and reset only after the suspected cause is addressed.
What if I smell gas but it is windy and I cannot locate where it is coming from right away?
Treat it as an emergency. Do not try to locate the source by sniffing closely or using ignition, do not toggle lights or appliances, and keep your phone and activity away from the suspected leak area until the source is identified and shut off safely.