If your patio heater lights but won't stay lit the moment you release the control knob, the thermocouple is almost always the reason. If you're troubleshooting common problems with patio heaters, a pilot that lights but won't stay on is one of the most common thermocouple-related symptoms to check first.
Patio Heater Thermocouple Problems: Fix It Today

Grant Mercer
19 May 2026
It's a thin metal rod that sits in the pilot flame, generates a tiny voltage (usually 25–30 millivolts), and uses that signal to tell the gas valve it's safe to stay open. No heat on the tip, no voltage, no gas. The good news is that most thermocouple problems are fixable in under an hour with basic tools, and a replacement part typically costs less than $15.
For table top patio heater models, replacement parts like thermocouples and matching pilot assemblies are typically the key components to look up first table top patio heater replacement parts.
How the thermocouple actually works (and why it fails)
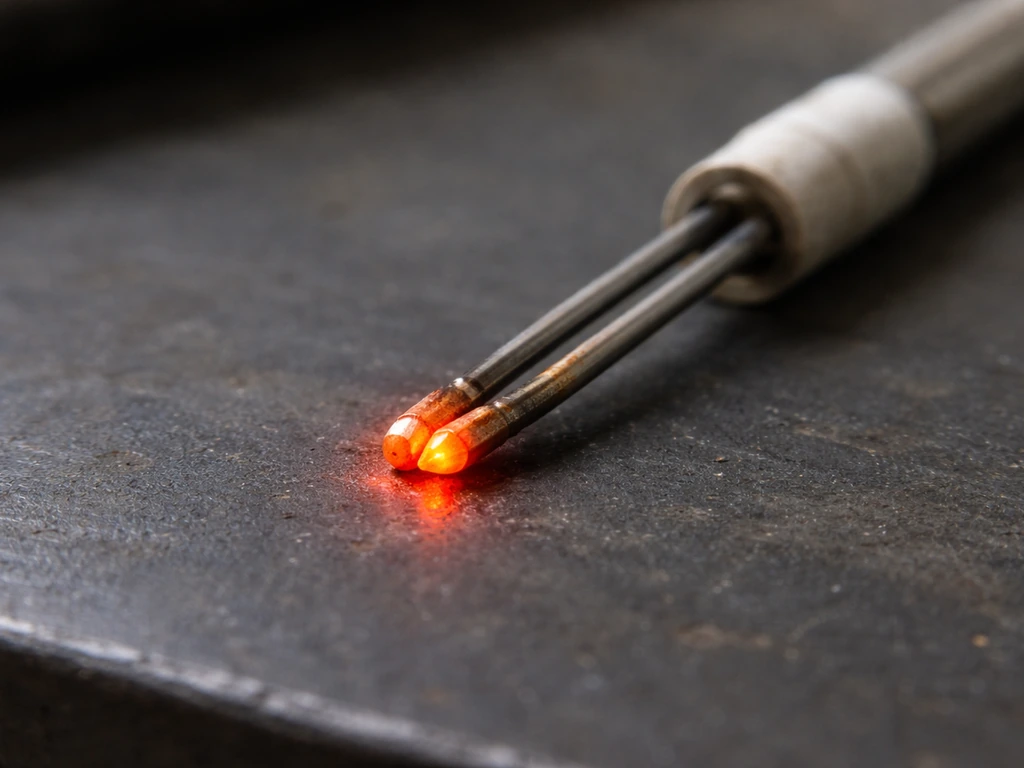
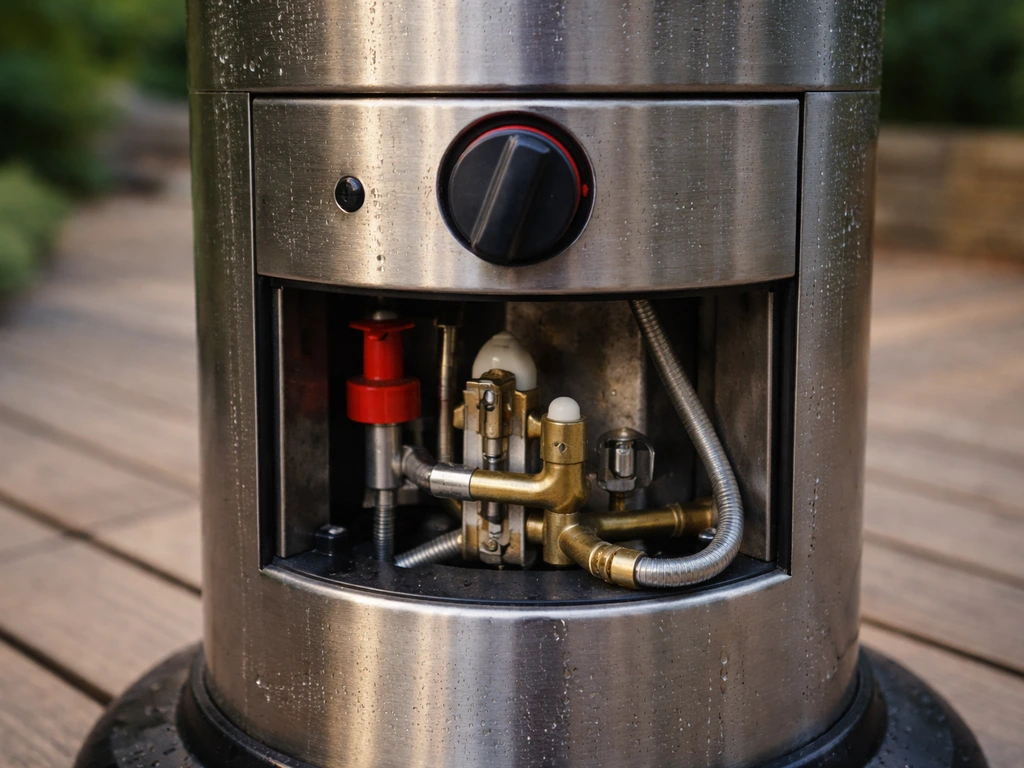
The thermocouple is a simple but clever safety device. Two dissimilar metals are joined at the tip, and when that junction gets hot from the pilot flame, it produces a small DC voltage, typically in the 25–30 millivolt range. That voltage flows down a thin cable to the gas valve, where it energizes a small electromagnet (sometimes called a thermomagnetic safety valve or EPU).
In Robertshaw thermomagnetic safety valves, the magnet assembly is held open by voltage generated by a thermocouple heated by the pilot flame, and when the thermocouple cools and voltage drops the valve closes the pilot and main gas voltage flows down a thin cable to the gas valve.
That magnet holds the gas valve open. The instant the pilot flame goes out, the thermocouple cools, the voltage drops, the magnet releases, and the valve snaps shut. You can't override it. This is exactly the behavior the system is designed to have.
Failure usually happens in one of three ways. First, the thermocouple tip gets coated with soot, corrosion, or debris (spider webs are a surprisingly common culprit after the heater has been in storage), which insulates the tip and reduces heat transfer. Second, the connection between the thermocouple cable and the gas valve gets loose or oxidized, dropping the millivolt reading below the threshold the valve needs to stay open.
Third, the thermocouple itself simply wears out after years of heating and cooling cycles, and its output degrades below that roughly 25 mV minimum. A fourth possibility, less common but worth knowing, is that the thermocouple output is actually fine but the gas valve's internal EPU is failing. That distinction matters for diagnosis.
Quick diagnosis: symptoms that point to the thermocouple
Before pulling anything apart, run through this symptom checklist. These are the signs that consistently point to the thermocouple rather than another issue like a clogged orifice, a tilt switch fault, or a low gas supply.
- Heater lights fine when you hold the knob down but goes out within 30–60 seconds of releasing it
- Pilot flame ignites but the main burner never opens, even after a full 30-second hold
- Pilot flame is weak, yellow, or flickering rather than a steady blue cone wrapping around the thermocouple tip
- You can see visible corrosion, black soot buildup, or physical damage on the thermocouple rod
- The heater sat unused for a season and now won't hold a pilot (debris buildup is a classic cause here)
- The connection nut where the thermocouple cable meets the gas valve is visibly loose or finger-tight
If the pilot won't even ignite in the first place, that's more likely an igniter or gas supply issue than a thermocouple problem. Similarly, if the heater lights and runs but produces a yellow or uneven flame at the main burner, that's a separate issue worth looking into. The thermocouple specifically causes the pilot-won't-hold behavior.
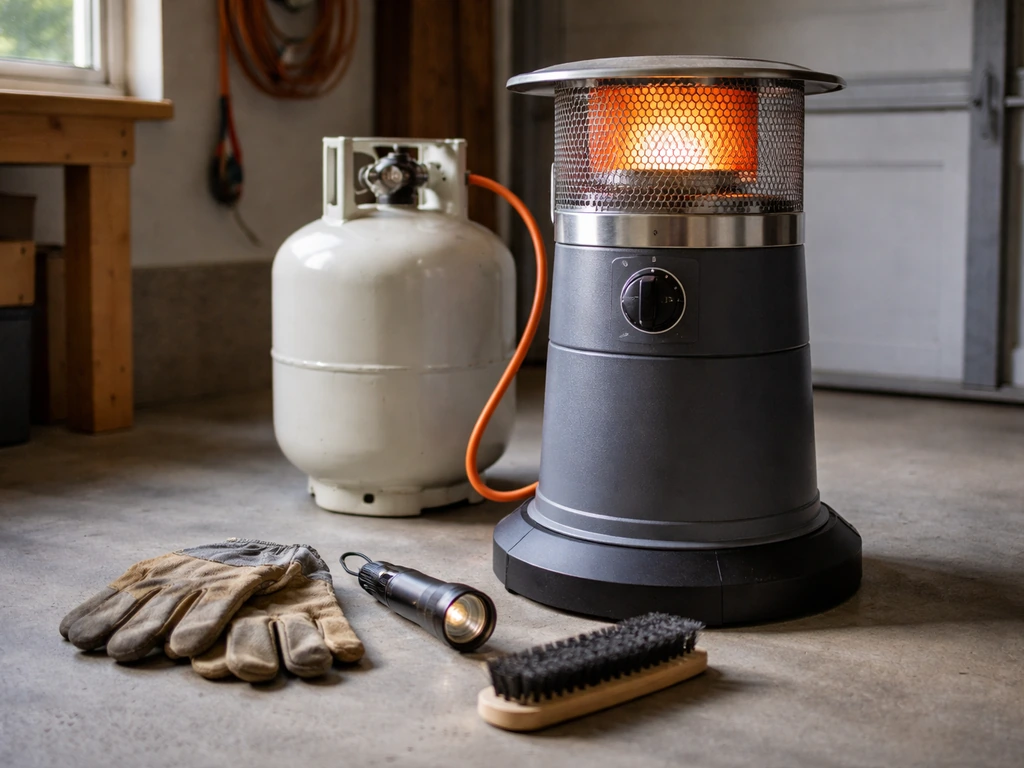
Tools and safety steps before you touch anything
Do not skip the safety steps. For leak checking, apply a soapy solution to the regulator/cylinder and hose/regulator connections and look for bubbles, as described in the Lowes patio heater operating guide blank" rel="noopener noreferrer">apply a soapy solution to check for leaks at regulator/cylinder and hose/regulator connections. Propane is not forgiving of shortcuts. Here's what you need before starting any work.
- Turn the heater's control knob to OFF and close the propane tank valve completely
- Disconnect the regulator from the tank if you'll be removing any gas line components
- Let the heater sit for at least 5 minutes so any residual gas dissipates
- Work in a well-ventilated area, away from open flames or sparks
- If you smell gas at any point during this process, stop immediately, move away, and call your propane supplier or emergency services before continuing
Tools you'll need: an adjustable wrench or the correct open-end wrench for your thermocouple nut (usually 3/8" or 7/16"), a multimeter capable of measuring DC millivolts, a soft cloth or fine steel wool for cleaning, and a can of compressed air. If you're doing a replacement, you may also need a Phillips screwdriver to access the pilot assembly housing.
Step-by-step checks: start here before buying anything
- Check the thermocouple connection at the gas valve. Find where the thin copper-jacketed cable from the thermocouple screws into the valve body. This connection should be hand-tight plus about a quarter turn with a wrench. If it's loose, snug it up. Loose connections cause oxidation at the contact surface, and oxidation drops the millivolt signal below what the valve needs.
- Visually inspect the thermocouple tip. It should be positioned so the pilot flame directly envelopes the tip, not just grazes it. If the tip is bent away from the flame path, bent away from the pilot hood, or sitting below the flame, that's your problem. You can carefully bend the rod back into position with your fingers, but be gentle since the rod is fragile.
- Check whether the pilot flame is actually strong enough. A weak or lifting pilot flame won't heat the thermocouple tip adequately. Make sure your propane tank isn't nearly empty and that the orifice on the pilot assembly isn't clogged.
- Measure the thermocouple output with your multimeter. Set the meter to DC millivolts. Light the pilot and hold the knob for 30 seconds. Disconnect the thermocouple cable from the gas valve and touch the meter probes to the thermocouple terminal and the valve body (ground). A working thermocouple should read at least 25 mV with the pilot fully lit. Below 20 mV means the thermocouple is too weak to reliably hold the valve open and should be replaced.
- If the thermocouple reads adequate millivolts (25 mV or higher) but the pilot still won't hold when the knob is released, the problem is likely inside the gas valve itself (the EPU or thermomagnetic assembly). That's a different repair path, covered below.
Cleaning and adjusting: fix it before replacing it
A lot of thermocouple problems that look like failures are actually just debris and positioning issues. Before ordering a replacement, run through this cleaning process, especially if the heater was stored for several months.
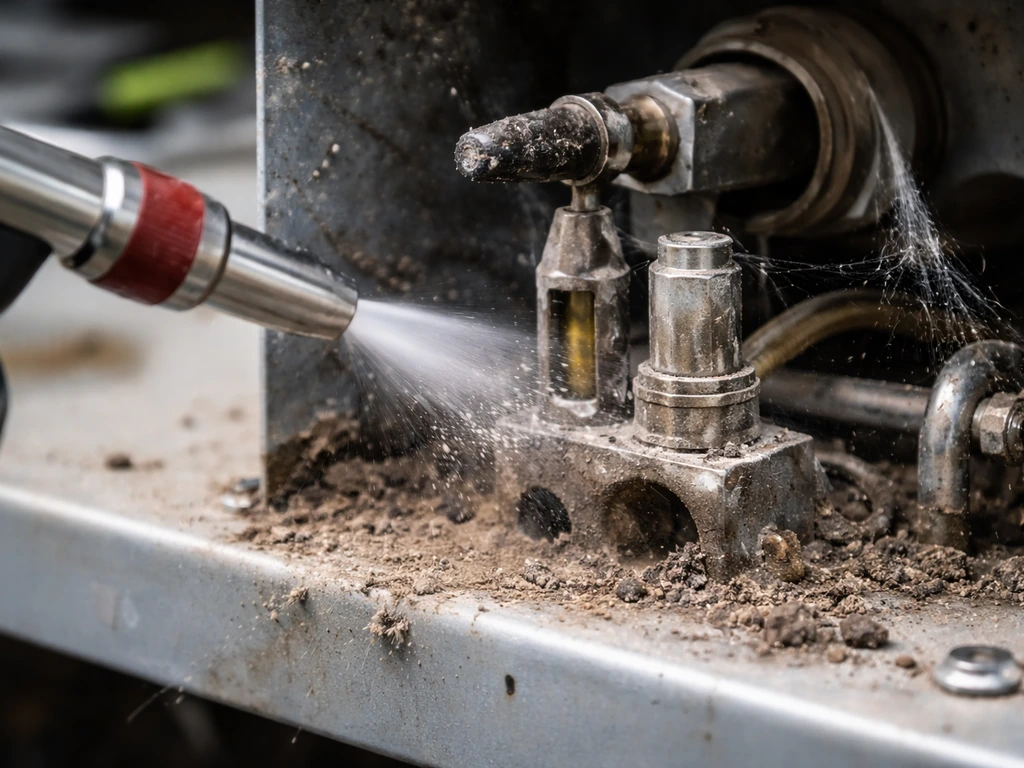
- Use compressed air to blow out the pilot assembly area. Spider webs and dust inside the pilot hood are extremely common and can disrupt the flame enough to prevent consistent thermocouple heating.
- Clean the thermocouple tip with fine steel wool or a soft cloth. Gently rub the tip to remove soot and oxidation. Don't use sandpaper or abrasives that could damage the metal.
- Clean the thermocouple connection terminal. The small threaded tip that screws into the gas valve can develop an oxidized film that increases resistance and drops the millivolt signal. A light polish with steel wool and a dry cloth restores good contact.
- Inspect the pilot orifice and tube for blockage. Use compressed air to clear any debris. Some manuals specifically call out cleaning or replacing the orifice if the pilot flame is weak.
- Reassemble, reconnect the gas supply, and test. Light the pilot, hold for a full 30 seconds, and slowly release the knob. If it holds, you're done.
Flame position is the detail most people overlook. The thermocouple tip needs to be in the hottest part of the pilot flame, which is the blue cone area, not just touched by the outer edge. If your pilot flame is strong but the heater still won't hold, look closely at where the tip sits relative to the flame. Some pilot assemblies have a small bracket that positions the thermocouple rod, and if that bracket is bent or the rod has shifted, the tip ends up in a cooler part of the flame and the voltage output drops.
Replacing the thermocouple: getting the right part and installing it
Identifying the correct replacement
Thermocouple compatibility matters more than most people expect. The wrong length can put the tip too far from or too close to the pilot flame. The wrong connection fitting won't seat properly in the gas valve. Here's how to find the right one.
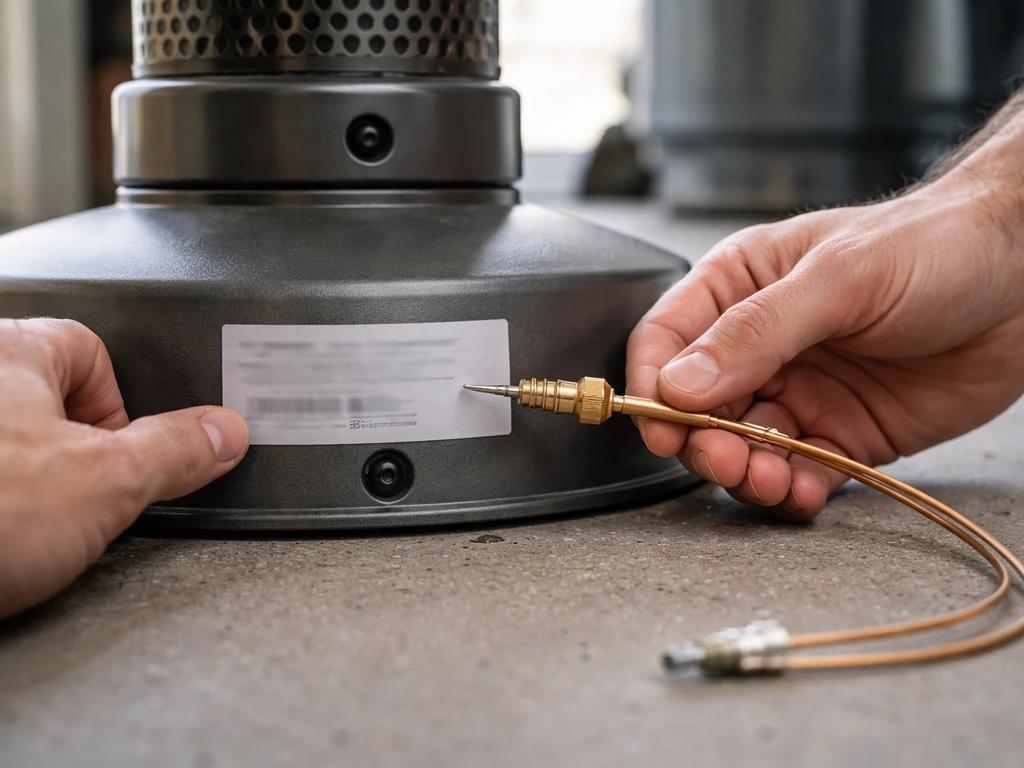
- Find your heater's model number. It's usually on a sticker on the base pole, the burner housing, or underneath the emitter hood. Write it down.
- Check the owner's manual or the manufacturer's website for a listed replacement part number. Brands like AZ Patio Heaters, Fire Sense, Blue Rhino, and Uniflame all publish parts lists. If your manual lists a specific thermocouple part number, use it.
- If you can't find a part number, measure the existing thermocouple. The two key dimensions are total length (tip to end of cable) and the connection fitting type (most patio heaters use a standard push-in or screw-in millivolt thermocouple). Bring the old one with you if buying in store.
- Universal replacement thermocouples are available at most hardware stores and work fine as long as the length and fitting type match. Lengths commonly used in patio heaters range from 18 to 36 inches.
Installation steps
- Confirm gas is off and the tank valve is closed.
- Unscrew the thermocouple connection nut from the gas valve, turning counterclockwise. Keep track of any small washers.
- The other end of the thermocouple, the tip, is usually held in position by a bracket or clip at the pilot assembly. Slide or unscrew it free.
- Route the new thermocouple the same way the old one ran, following the same path along the burner pole or housing to avoid kinks.
- Seat the tip in the pilot assembly bracket so it sits in the flame path. Firm finger pressure should lock it in place.
- Hand-tighten the connection nut at the gas valve, then snug it with a wrench. Do not over-tighten, which can damage the connection.
- Reconnect the gas supply and perform a leak check before lighting. Mix a few drops of dish soap with water and apply it to the regulator-to-hose connection and the hose-to-valve connection. Bubbles mean a leak. Tighten the connection or replace the fitting before proceeding.
- Light the pilot according to your manual (typically: knob to PILOT, press and hold, push igniter, hold for 30 seconds, release slowly). The pilot should stay lit.
- Turn the knob to the desired heat setting and confirm the main burner fires.
Thermocouple vs. gas valve: knowing the difference
This is an important distinction. If you've cleaned the thermocouple, confirmed proper flame position, checked the connection, and still measured a solid 25 mV or more at the thermocouple terminal, but the pilot still won't hold when you release the knob, the problem is not the thermocouple. It's the internal EPU (electromagnetic power unit) inside the gas valve. That's the component that receives the millivolt signal and holds the valve open. When it fails, the valve won't stay open even with a good thermocouple signal.
| Symptom | Likely Cause | Fix |
|---|---|---|
| Pilot won't hold, thermocouple reads below 20 mV | Weak or failed thermocouple | Replace thermocouple |
| Pilot won't hold, thermocouple reads 25+ mV | Gas valve EPU failure | Replace gas valve or heater |
| Pilot weak/lifting off thermocouple tip | Low gas, clogged orifice, or bad regulator | Check tank level, clean orifice, test regulator |
| Pilot won't hold, tip not in flame path | Thermocouple misaligned | Reposition tip in pilot bracket |
| Pilot holds but main burner won't open | Gas valve main valve fault | Replace gas valve or call service |
When to stop DIY and get professional help (or replace the heater)
Most thermocouple repairs are well within DIY scope. But some situations call for stopping, and it's important to recognize them.
- You smell gas at any point during the repair, especially near connections. Apply soapy water to check connections, but if the smell persists or bubbles appear and tightening doesn't resolve it, close the tank valve and call your propane supplier. Do not turn the gas back on yourself after a confirmed leak.
- You've replaced the thermocouple and confirmed good millivolt output, but the pilot still won't hold. The gas valve's internal components need service or the whole valve needs replacing. Gas valve internals are not a reasonable DIY repair.
- You find cracked or brittle gas line hose, damaged regulator components, or any visible damage to the burner assembly or pilot tubing. Don't attempt to patch these. Replace the damaged component with a manufacturer-specified part or retire the heater.
- The heater is older and parts are no longer available. If you can't find a matching thermocouple or the gas valve is discontinued, continuing to operate a patched heater is not a safe long-term solution.
- Your heater's manual specifically states not to attempt repairs (some do). That's usually because the assembly is designed as a sealed unit and field repairs can compromise safety interlocks.
If you're at the point of needing a new gas valve and your heater is more than 5 to 7 years old, it's often more practical to replace the entire heater rather than source and install a valve. Replacement thermocouples and pilot assemblies are usually available and affordable, but gas valve replacements can cost nearly as much as a new entry-level heater.
For persistent ignition problems that don't trace back to the thermocouple specifically, or if you're also dealing with flame color issues like a yellow or unsteady main flame, those are separate but related problems worth investigating. They often share root causes with thermocouple failures, like low gas pressure or a partially clogged pilot assembly, but they need their own diagnostic steps to resolve properly.
FAQ
How do I measure millivolts at the thermocouple without damaging the wiring or the gas valve connection?
Confirm you are measuring DC millivolts from the thermocouple output terminals (not across the gas valve coil), use the correct polarity probes, and avoid letting the probe tips short adjacent metal parts. If the reading jumps around while holding the knob, it usually points to an intermittent connection or a partially cracked thermocouple wire rather than a steady output failure.
What millivolt reading should I treat as “good” versus “bad” for patio heater thermocouple problems?
Treat roughly 25 to 30 mV as the typical “healthy” range, below about 20 to 25 mV as suspect. Also consider that an otherwise good thermocouple can temporarily dip lower if the pilot flame is weak or if the tip is not fully in the hottest inner blue cone.
Can I clean the thermocouple tip aggressively, or will that make it worse?
Gentle cleaning only. Use a soft cloth first, then very light abrasion if needed. Avoid sanding down the metal at the tip or removing the joined junction area, because that can reduce heat transfer or alter the junction, leading to lower voltage even if the old mess is gone.
If I clean the thermocouple and the pilot still won’t hold, how can I tell whether the bracket positioning is wrong?
After relighting, visually check that the tip sits in the blue cone area, not the outer edge. If your pilot has a positioning bracket, make sure it is straight and that the thermocouple rod is not rotated or shifted upward, downward, or sideways. A small shift of a few millimeters can move the tip out of the hottest zone and drop the millivolt output.
My thermocouple looks fine, but the reading is low, what are the most common causes besides the thermocouple itself?
Check for oxidation or looseness at the connection to the gas valve terminal, inspect for a frayed or corrosion-prone section of the thermocouple cable, and confirm the pilot flame is actually strong enough. Also verify there is no soot on the pilot burner ports that weakens the pilot even if it still lights.
Should I replace the entire pilot assembly or just the thermocouple for patio heater thermocouple problems?
If the heater uses a combined pilot assembly and the thermocouple is difficult to match by length or fitting, replacing the whole pilot assembly can be faster and more reliable. Replace only the thermocouple when you can confirm exact part matching, the pilot base and tubing are clean, and the pilot burner orifice is not the suspected issue.
What if the pilot holds briefly after I release the knob, then shuts off after a few minutes?
That pattern often indicates the thermocouple signal is marginal. The connection may be slightly oxidized (initial voltage seems ok, then drops as the junction cools), or the tip may not fully reach the hottest pilot zone. Recheck millivolts after the heater has been running briefly, not only at ignition.
Can a weak battery-powered igniter be confused with thermocouple problems?
Yes. If the pilot fails to ignite, that points more toward igniter, electrode gap, or gas supply than the thermocouple. But once the pilot lights, if it immediately extinguishes when you release the knob, that is the classic thermocouple-held valve behavior.
How do I know if the gas valve EPU is failing instead of the thermocouple?
If you clean the tip, confirm proper flame positioning, and measure a solid output around the expected range at the thermocouple terminal, yet the burner still shuts off when you release the knob, the problem is more likely inside the gas valve (EPU). In that case, swapping the thermocouple would be a waste, focus on the gas valve diagnosis.
What’s the safest way to handle propane while troubleshooting a thermocouple?
Turn off the propane at the tank, let the system cool completely, and check for leaks after any reconnection using soapy water on fittings. Keep the area ventilated and avoid lighting attempts if you smell gas or see bubbles, since a leak can exist independently of the thermocouple issue.
Why does my pilot flame look normal but the heater still won’t stay lit?
“Normal looking” can still be insufficient for the thermocouple junction. The pilot may light and burn, but if the tip is not in the hottest inner blue cone, the thermocouple voltage can fall below the gas valve threshold. Reposition and remeasure millivolts, even when the flame appearance seems acceptable.
When should I stop DIY work and consider replacing the whole heater instead of chasing patio heater thermocouple problems?
If the heater is older (roughly 5 to 7 years or more) and you end up needing a gas valve, replacing the heater is often more cost-effective than sourcing and installing a valve. Also consider replacement if you repeatedly find multiple failing components (pilot assembly plus valve or multiple connection repairs) rather than a single fix.