
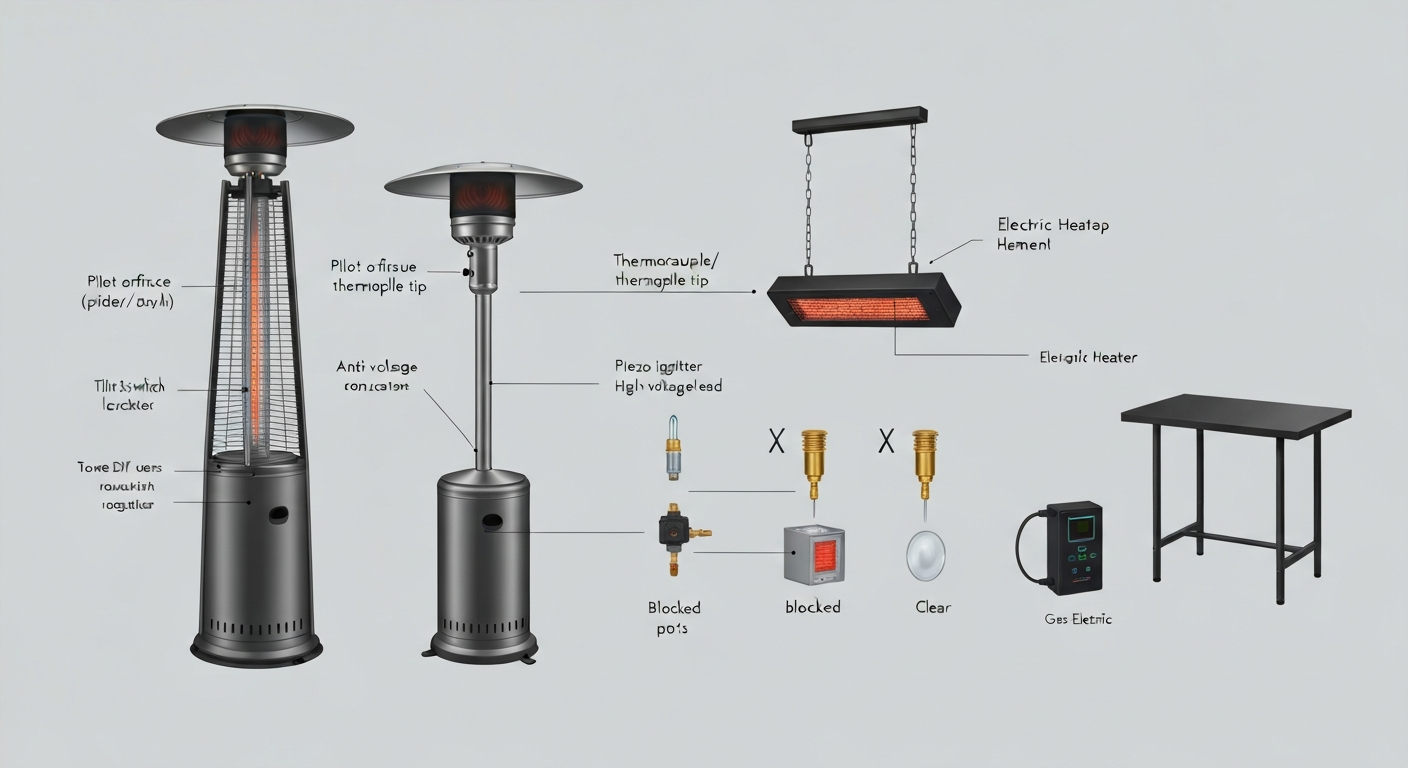
Most patio heater problems come down to a short list of culprits: a blocked pilot orifice, a worn thermocouple, a tripped tilt switch, or a regulator that has locked out. None of those are expensive to fix, and most take under an hour with basic hand tools. This guide walks you through every common failure mode on propane, natural gas, and electric patio heaters, in the order you should check them, so you can stop guessing and start fixing.
Common Problems with Patio Heaters: Repair & Troubleshooting

Grant Mercer
8 Aug 2026
Who this guide is for and what heaters it covers
This is written for homeowners and DIYers who want to troubleshoot their own patio heater without calling a technician. You do not need HVAC training, but you should be comfortable using a multimeter, a wrench, and basic hand tools. The guide covers the four most common residential patio heater types: freestanding and hanging propane heaters, natural gas patio heaters plumbed to a permanent line, 120V electric infrared heaters, and table-top propane heaters. Brand-specific references include AZ Patio Heaters (HLDS01 series), Hiland, Fire Sense, Hampton Bay, Bromic, and Mr. Heater, but the diagnostic logic applies to virtually any brand. Where a repair requires a licensed professional, that is stated plainly.
Safety before you touch anything
Before you open any panel, disconnect any hose, or probe any wire, stop and deal with fuel and power. For gas heaters, turn the control knob to OFF, then close the tank valve or the inline shutoff on a natural gas line. Wait at least five minutes before you start inspecting anything. For electric heaters, unplug the unit from the wall. Do not just switch it off at the heater. If you smell gas after shutting everything off, leave the area, avoid switching any lights or devices, and call your gas utility from a safe distance. Do not re-enter until the area has been ventilated.
Carbon monoxide (CO) is the non-negotiable reason to take a yellow or sooty flame seriously. A steady yellow flame means incomplete combustion and CO production. If your heater has been running with a yellow flame indoors, in an enclosed patio, or under a low overhang, ventilate the space and do not use the heater again until the combustion issue is resolved. A persistent yellow or sooty flame is not a nuisance; it is a hard stop. Public health guidance and NFPA codes both identify this as a sign to take the appliance out of service immediately.
Keep these safety rules in place for every repair session: work outdoors or in a well-ventilated area, keep a fire extinguisher within reach, wear safety glasses when working around burners or compressed air, and never use an open flame to check for gas leaks. If you are working on a natural gas heater connected to a permanent line and the issue is in the gas supply piping itself (not the appliance), stop and call a licensed plumber or gas technician. Appliance-level repairs are fine for a careful DIYer; touching the gas supply line is not.
Fast diagnostic checklist: triage your heater in ten minutes
Run through this checklist in order before pulling anything apart. Most problems reveal themselves by step four or five, which saves you unnecessary disassembly.
- Confirm the fuel source: propane tank is not empty (weight the tank or use a gauge), tank valve is fully open, natural gas shutoff is open.
- Check the control knob: is it fully in the OFF position before you attempt to light? Trying to light from a half-turned position is the single most common 'it won't work' call.
- Look for a tripped tilt switch: is the heater standing straight and level? Even a slight lean can trip the anti-tilt interlock on most freestanding models.
- Inspect the igniter: press the piezo button and watch the electrode tip for a visible spark. No spark means igniter or electrode problem.
- Attempt the pilot lighting sequence: turn to PILOT, depress knob, hold for 60 seconds after the pilot lights, then release. If the pilot goes out on release, the thermocouple is the prime suspect.
- Check the flame color once lit: steady blue flame is correct; yellow, orange, or flickering flame points to a blocked burner, low gas pressure, or combustion air problem.
- Perform a soap-water leak test: brush soapy water on all hose connections, the regulator inlet, and the valve inlet with the gas on. Bubbles mean a leak that must be fixed before any other repair.
- For electric heaters: plug into a known-good outlet, check the circuit breaker, and look for a thermal cutout reset button on the heater body (many models have one near the element).
Print or screenshot this list and work through it systematically. Each step either solves the problem or eliminates a cause, so by the time you finish you know exactly where to focus.
Tools and tests you will need
You do not need a fully equipped workshop. Here is what actually gets used during patio heater repairs, with a note on what each tool is for.
- Digital multimeter (DMM): set to the millivolt (mV) DC range to test thermocouple and thermopile output. A $20 meter from a hardware store is sufficient.
- Adjustable wrench and a set of open-end wrenches (3/4" and 7/8" cover most regulator fittings): for disconnecting and reconnecting gas connections.
- Dish soap and water in a spray bottle: the only safe leak-detection method. Never use an open flame.
- Flashlight or headlamp: pilot orifices and thermocouple tips are in dark recesses. You need both hands free.
- Heavy-duty non-metal pipe cleaners and a can of dry compressed air: for cleaning blocked pilot orifices and burner ports without enlarging them. Never use wire brushes or metal picks on orifice edges.
- Replacement thermocouple or thermopile: keep one on hand. These are under $15 at hardware stores and are the most common wearing part on gas patio heaters.
- Replacement piezo igniter module: the second most common wearing part, available for most brands as an OEM or aftermarket unit.
- Smartphone or tablet with the heater's PDF manual pulled up: model-specific hold times, electrode gaps, and wiring diagrams save a lot of guesswork. If you do not have yours, manufacturer websites and parts-lookup sites carry them for most current models.
Ignition and lighting problems: no click, weak spark, dead igniter
No spark when you press the igniter button is one of the most common complaints. It sounds alarming but it is usually a mechanical failure in the piezo module or a wiring or grounding issue, not a problem with the gas valve. Here is how to work through it.
Step 1: check the electrode tip and gap
Look at the electrode tip near the pilot or burner. It should be clean, with no heavy carbon buildup, and positioned close to the burner ground point. Electrode gaps in the range of 3/32 to 1/8 inch are typical for patio heater igniters, but check your manual for the exact spec. A gap that is too wide produces no visible spark; a gap that is too narrow can short out the spark before it jumps to the ground point. Gently bend the electrode back into spec if it has moved. Wipe any carbon off the tip with fine steel wool or a dry cloth.
Step 2: check the wiring harness
The high-voltage wire from the piezo module to the electrode is often the failure point rather than the module itself. Inspect the wire for cracks, melted insulation (from being too close to the burner), or a loose push-on connector at either end. A broken or disconnected wire produces the same symptom as a dead igniter module. Reseat any loose connectors and replace any wire that shows damage.
Step 3: test the piezo module directly
Disconnect the wire at the electrode end, hold it about 1/4 inch from a bare metal part of the heater chassis (a good ground), and press the igniter button. If you see a spark jump to the chassis, the module works and the problem is at the electrode end (gap, position, or wire run). If no spark jumps to the chassis, the piezo module is dead and needs to be replaced. Piezo igniters are not repairable; they are replaced as a unit. Order by model number or bring the old one to a hardware store to match the connector type.
Step 4: chassis ground check
The spark needs a complete path from electrode to ground. If the heater chassis has a lot of paint, corrosion, or a non-conductive coating on the ground point near the electrode, the spark has nowhere to go even with a working module and electrode. Lightly sand the ground contact point near the burner to expose bare metal. This fixes a surprising number of 'no spark' problems on heaters that sat outside for a season.
For more detail on specific lighting sequence failures across different brands, the patio heater lighting problems guide on this site goes deeper into model-specific quirks.
Pilot won't stay lit or flame goes out intermittently
If the pilot lights but goes out the moment you release the control knob, or the main burner runs for a few minutes and then shuts off unexpectedly, you are almost always looking at one of three things: a thermocouple that is not generating enough millivolts, a pilot flame that is not hitting the thermocouple tip correctly, or a regulator that has gone into over-pressure lockout. Start with the simplest and cheapest check first.
Pilot hold time: are you holding long enough?
The AZ Patio Heaters HLDS01 manual, and nearly identical Hiland manuals for the same platform, specify holding the control knob depressed for 60 seconds after the pilot flame appears. Many people let go after 10 or 15 seconds. The thermocouple needs that full time to reach operating temperature and generate enough voltage to hold the gas valve open. If you have not been holding for a full 60 seconds, do that before anything else. Time it on your phone.
Pilot flame alignment
The tip of the thermocouple probe must sit inside the pilot flame, not beside it or below it. If the thermocouple has shifted (from previous disassembly, from thermal expansion over many cycles, or from being bumped), the flame will heat the side of the probe rather than the tip, producing lower millivoltage. Look at the pilot from the side. The inner blue cone of the flame should envelop the thermocouple tip. Bend the thermocouple bracket gently to reposition it if needed.
Blocked pilot orifice
Spiders and insects are notorious for nesting in pilot orifices during storage or between uses. A partially blocked orifice produces a small, weak pilot flame that cannot adequately heat the thermocouple. Shut off the gas, allow everything to cool, then use a non-metal pipe cleaner and a short burst of dry compressed air to clear the orifice. Never use a pin or wire to ream the orifice; even tiny deformations to the orifice edge change the flame pattern and can make the problem worse.
Regulator lockout
Many propane regulators have an over-pressure protection feature that locks out if the tank valve is opened too quickly. The symptom is a very weak flame or no gas flow at all, even with a full tank. Fix: close the tank valve completely, turn the heater control knob to the full open or high position for 30 seconds to bleed any pressure in the hose, then turn the control back to OFF. Slowly reopen the tank valve (take about five seconds for the last quarter turn). This resets most regulator lockouts. If the problem persists, the regulator itself may be faulty and needs replacement.
Thermocouple and flame-sensing failures
The thermocouple is a small, inexpensive probe that generates a millivolt signal when heated by the pilot flame. That signal holds the gas valve open. When the thermocouple fails or weakens, the gas valve closes and the pilot (and main burner) goes out. This is the single most common repair on any standing-pilot gas patio heater, and it is fully within DIY territory.
How to test a thermocouple with a multimeter
Set your DMM to the DC millivolt range. Disconnect the thermocouple lead from the gas valve (it threads off with a wrench, usually 7/8 inch). Touch the meter probes to the thermocouple connector and the outer body of the thermocouple lead. Light the pilot manually (using a long lighter through the access port) and hold the flame on the thermocouple tip. After about 60 seconds, a healthy thermocouple should read 20 to 30 mV open-circuit. For manufacturer test ranges and detailed multimeter procedures, see Honeywell/Resideo – Thermocouple/Thermopile product data & tech guidance. A thermopile (used on millivolt-controlled heaters with no standing pilot, and on many remote-controlled models) should read 250 to 750 mV. A reading below the minimum, or no reading at all, means replace the thermocouple.
Also do a loaded test: reconnect the thermocouple to the valve and measure at the valve terminals. Voltage under load will be lower than open-circuit. If the voltage collapses to near zero under load, the thermocouple may actually be within spec but the connection at the valve is adding enough resistance to drop the voltage below what the valve needs to stay open. Clean the threaded connection and retighten to a snug fit (fingertight plus a quarter turn, not overtorqued).
Replacing a thermocouple
Replacing a thermocouple on a patio heater is straightforward. Shut off the gas and let the heater cool completely. Unscrew the old thermocouple from the gas valve. Slide the probe out of its bracket at the pilot assembly. Take the old thermocouple to a hardware store to match the length and connector type, or order by model number from the manufacturer's parts page. Install the new one in reverse order, making sure the tip is positioned in the pilot flame path. Universal thermocouple kits work for most brands. Tighten the connection at the valve snugly but do not overtorque the soft copper fitting. Test the pilot hold before reassembling any panels.
Cleaning a thermocouple
Before replacing, try cleaning. Carbon and oxidation on the thermocouple tip can insulate it from the flame and reduce output. Use fine-grit sandpaper or a Scotch-Brite pad to lightly scuff the tip, removing any dark scale. Wipe clean with a dry cloth. This sometimes revives a thermocouple that tests marginal and gets you through a season before replacement.
If your heater uses a thermopile rather than a simple thermocouple, the testing method is the same but the numbers are different. The dedicated patio heater thermocouple problems guide on this site covers thermopile-specific diagnostics in more depth.
Regulators, hoses, and fittings
The regulator reduces the high pressure from the propane tank to the working pressure the heater is designed for. A failing or locked-out regulator is a very common cause of weak flame, no flame, or a heater that runs at low output. Hose deterioration is a safety issue as much as a performance issue.
Leak detection: the soap test
Mix dish soap with water (roughly equal parts) in a spray bottle. With the gas on and the heater in the OFF or PILOT position, spray every gas connection: the tank valve outlet, the regulator inlet fitting, the hose connections at both ends, and the inlet to the gas valve on the heater. Watch for bubbles. A slow, steady stream of bubbles indicates a leak at that joint. Shut the gas off immediately, tighten or replace the leaking fitting, and retest before lighting anything. A leak that cannot be stopped by tightening the fitting requires replacing the component.
Pressure symptoms and regulator replacement
Low flame output despite a full tank almost always points to one of two things: a locked-out regulator (see the reset procedure in the pilot section above) or a regulator that has simply worn out. A regulator that freezes up (ice forming on the outside during use) is working hard and may be near the end of its life, or may indicate a partially frozen tank valve in cold weather. If the lockout reset does not fix low output and the hose tests clean, replace the regulator. Always use the regulator specified for your heater model. Hiland and AZ Patio Heaters manuals both specify using only the supplied regulator/hose assembly and warn against substituting a different flow rate or pressure rating.
Hose inspection and replacement
Inspect the LP hose every season. Look for cracks, cuts, abrasion, kinks, or any area that looks flattened or stiff. Run your hand along the length; you should not feel any soft or swollen spots. If the hose is more than five years old, replace it as a precaution regardless of appearance. Hoses can develop micro-cracks that do not show bubbles on the surface test but will allow slow leaks over time. The Hiland HLDS01 manual specifically warns to check hose routing to ensure it is not kinked or pinched, which can restrict flow and mimic a regulator problem.
Tilt switch and safety-interlock faults
All freestanding gas patio heaters sold in the US after a certain date include an anti-tilt switch, a safety device that shuts off the gas valve if the heater tips past a preset angle. It is required under CSA/ANSI Z83.26 (the standard referenced on nearly every patio heater sold today) and is documented in virtually every OEM manual including AZ, Hiland, and Fire Sense models. When the switch malfunctions, the heater shuts off even on a level surface, or occasionally fails to shut off when it actually tips, which is more dangerous.
Diagnosing a tilt switch fault
If your heater lights and then shuts off within 30 to 90 seconds for no obvious reason, check the floor surface first. A slightly uneven patio, one leg of the base on a grout line, or a warped base can keep the tilt switch just at or over its trip angle. Move the heater to a flat surface and retry. If it still shuts off, the tilt switch itself is the next suspect. Locate the switch housing, usually at the base of the pole or inside the lower housing. Disconnect the wiring connector and use your multimeter on the continuity or resistance setting to test across the switch terminals with the heater perfectly level. You should see continuity (closed circuit) when level. Tip the heater slightly and confirm the circuit opens. If the switch shows open even when the heater is perfectly level, the switch has failed in the open position and needs replacement.
Replacing a tilt switch
Tilt switches are model-specific in terms of the trip angle and connector type, but they are generally inexpensive (under $20) and available through OEM parts pages or appliance parts suppliers. Never bypass or disable a tilt switch. It is a required safety device, and disabling it creates a fire hazard. Replace it with an identical or manufacturer-approved substitute.
Yellow flame, sooty deposits, and combustion problems
A healthy patio heater burns with a predominantly blue flame. Yellow or orange flame means the fuel-to-air ratio is off: too much gas, not enough air, or both. The practical result is incomplete combustion, carbon monoxide production, and soot deposits on the emitter screen or reflector. Do not ignore this.
Blocked burner ports
Clogged burner ports are the most common cause of yellow flame. Dust, spider webs, and carbon deposits build up in the small holes around the burner ring and restrict gas flow through individual ports, disrupting the flame pattern. Shut off the gas and let the heater cool completely. Remove the reflector and emitter screen per your manual's disassembly instructions. Inspect the burner ring. Use a non-metal pipe cleaner to clear each visible port hole, then blow out the entire burner with dry compressed air. Do not use a wire brush or metal pick. After cleaning, the ports should each produce a discrete blue cone when relit.
Air shutter adjustment
Some patio heater burners have an air shutter or air mixer at the base of the burner tube where gas enters. If this shutter has been bumped closed, the gas-to-air mixture goes rich and the flame turns yellow. Loosen the shutter setscrew, light the heater, and gradually open the shutter while watching the flame until the blue color is established across all ports, then lock the setscrew. Not all models have an adjustable shutter; check your manual.
If cleaning the burner and adjusting the shutter does not restore a blue flame, the issue may be gas supply pressure or a partially blocked main orifice. A full treatment of yellow flame diagnosis is covered in the patio heater has yellow flame guide on this site.
Electric patio heater problems
Electric infrared patio heaters are simpler mechanically but have their own failure points. The most common are a failed heating element, a tripped thermal cutout, or a faulty thermostat or control board.
Heater does not turn on
Start with the basics: is the outlet working (plug in something else)? Is the circuit breaker for that outlet intact? Check the thermal cutout reset button, usually a small red or black button on the back or underside of the heater housing. Many electric patio heaters have a manual reset thermal cutout that trips if the heater overheats, which can happen if the ventilation slots are blocked or if the heater was run face-down or against a wall. Press the reset button, let the heater cool for 10 minutes if it was recently hot, and retry.
Heater turns on but produces little or no heat
If the indicator light comes on but the element does not glow, the element itself has likely failed. Use your multimeter on the resistance (ohms) setting to test the element. Disconnect the heater from power completely, locate the element leads, and measure resistance across them. A working quartz or carbon fiber infrared element typically shows 10 to 60 ohms depending on wattage. An open circuit (OL or infinite resistance) means the element is burned out and needs replacement. Elements are available for most brands and are the most commonly replaced part on electric models.
Table-top patio heater specific issues
Table-top propane heaters share most failure modes with their freestanding siblings but have a few quirks. They use smaller 1-lb disposable cylinders or adapter hoses to 20-lb tanks, and the regulator is integrated or very short. The tilt switch on table-tops is especially sensitive because these heaters are lighter and easier to knock over. Many table-top models do not have a standing pilot at all; they use a push-button piezo igniter and a thermocouple in direct contact with the main burner flame rather than a separate pilot. This means if the main flame goes out and the thermocouple cools, the valve closes automatically and safely.
Parts availability varies more for table-top models. Brands like Fire Sense and Mr. Heater publish parts listings and exploded diagrams, and Bromic provides model-specific technical documents including wiring diagrams and part numbers for its premium table-top and hanging heaters. For less common brands, the table top patio heater replacement parts guide on this site covers where to find compatible parts and how to cross-reference generic components.
How different heater types compare across common problems
| Problem | Propane (freestanding) | Natural gas | Electric | Table-top propane |
|---|---|---|---|---|
| No ignition / no spark | Piezo module, electrode gap, chassis ground | Same as propane; also check gas supply valve and line pressure | Thermal cutout, element failure, circuit breaker | Piezo module or electrode; 1-lb cylinder empty or valve closed |
| Pilot won't stay lit | Thermocouple, pilot orifice blockage, hold time | Same; also check supply pressure from utility | N/A (no pilot) | Thermocouple position, orifice blockage |
| Heater shuts off unexpectedly | Tilt switch, thermocouple dropout, regulator lockout | Tilt switch, thermocouple dropout, supply pressure drop | Thermal cutout trip, element failure | Tilt switch very sensitive; thermocouple dropout |
| Weak or low flame | Regulator lockout/failure, partially closed tank valve, hose restriction | Low line pressure, partially closed shutoff, blocked orifice | N/A | Regulator lockout, partially blocked orifice, near-empty cylinder |
| Yellow / sooty flame | Blocked burner ports, blocked air shutter, low gas pressure | Same; check manifold pressure | N/A (no combustion) | Blocked burner ports, partially closed air inlet |
| Gas leak at fittings | Hose, regulator connection, valve inlet | Permanent piping connections; call a pro | N/A | Cylinder connection, regulator fitting |
| Parts availability | Good; many universal parts and OEM options | Good; same valve and thermocouple parts | Moderate; element and control board sourcing varies | Variable; brand-specific, some universal crossovers available |
Finding parts and manuals
Before you order any part, pull the model number from the rating plate (usually on the base or lower housing) and download the PDF manual if you do not already have it. Manufacturer websites for AZ Patio Heaters, Hiland, Fire Sense, Hampton Bay, Bromic, and Mr. Heater all publish manuals and parts listings, and ManualsLib carries many legacy models. Bromic in particular publishes full exploded-view diagrams with part numbers for its Platinum and Tungsten series, which makes exact part identification easy. For Hampton Bay models sold through Home Depot, the product page usually links the manual, and the heaters are designed to comply with ANSI/CSA Z83.26, so the parts listings are model-specific.
For generic wearing parts (thermocouples, piezo igniters, hose and regulator assemblies), hardware stores carry universal versions that fit most brands. Match the thread type and length for thermocouples, and match the BTU rating and inlet/outlet connections for regulators. When in doubt, order OEM; the difference in cost is usually small and eliminates compatibility guesswork.
Preventive maintenance schedule
Most patio heater problems are preventable. Here is a realistic maintenance schedule based on what actually causes failures.
| Task | Frequency | Why it matters |
|---|---|---|
| Inspect hose for cracks, kinks, and abrasion | Every season (before first use) | Prevents leaks and fire risk |
| Perform soap-water leak test on all gas connections | Every season and after any disassembly | Catches slow leaks before they become dangerous |
| Clean pilot orifice with pipe cleaner and compressed air | Every season | Spiders and insects nest here over winter; blocked orifice causes most pilot failures |
| Clean burner ports with pipe cleaner and compressed air | Every season or when yellow flame appears | Blocked ports cause yellow flame and CO production |
| Check thermocouple tip condition and position | Every season | Early detection prevents mid-season failures |
| Test tilt switch function with multimeter | Every season | Safety device; a stuck-open switch means no auto-shutoff if the heater falls |
| Inspect and clean electrode tip; check electrode gap | Every season | Prevents 'no spark' at the start of the season |
| Replace hose and regulator assembly | Every 3-5 years or if hose shows any damage | Hose materials degrade over time even if no visible cracks |
| Store heater covered and upright in a dry location | Off-season | Prevents orifice infestation, corrosion, and UV damage to hose |
| For electric heaters: vacuum ventilation slots and inspect element leads | Every season | Dust buildup causes thermal cutout trips; cracked insulation on leads is a shock hazard |
When to stop and call a professional
Most of what this guide covers is genuine DIY territory. But there are situations where stopping and calling a licensed gas technician or electrician is the right call, not a sign of failure.
- You smell gas and cannot identify the source after a full soap test: do not keep troubleshooting. Shut off the supply, ventilate, and call your gas utility or a licensed technician.
- The gas valve body itself is leaking (not at the fittings, but through the valve body): gas valves are not repairable in the field. Replace the valve or the heater.
- You have a natural gas heater connected to a permanent supply line and the problem is in the supply piping, the meter, or any buried or in-wall component: this requires a licensed plumber or gas technician under NFPA 54 and local codes.
- The heater has been physically damaged in a fire, flood, or significant impact: internal damage may not be visible. Have it inspected before use.
- You replaced the thermocouple and the pilot still will not hold, and the soap test shows no leaks: the gas valve itself may be failing. Gas valve replacement is technically DIY on many units, but if you are not confident, the cost of a service call is worth it.
- Any electric heater repair that involves the internal wiring beyond replacing a plug or a thermal cutout: if the control board, wiring harness, or element mounting involves work inside a live enclosure, call an electrician.
A patio heater is a repairable appliance, not a disposable one. With the diagnostic approach in this guide and a $15 thermocouple or a $10 piezo module, you can fix the vast majority of failures that send people to the hardware store looking for a replacement unit. Start with the checklist, work in order, and you will have your heater running again faster than waiting for a service appointment.
FAQ
What is a fast diagnostic flow/checklist I can follow before attempting repairs?
Quick checklist: 1) Safety first: turn off fuel/electric supply and move people away. 2) Visual inspection: check for obvious damage, loose wires, regulator/hose condition and spiders/nests. 3) Fuel supply: confirm propane tank valve open, tank not empty, or natural gas supply on. 4) Ignition/pilot: try standard lighting sequence per your manual; note symptoms (no spark, weak spark, pilot lights then dies, burner lights but yellow/sooty flame). 5) Leak check: soap-and-water test on hose/regulator connections with fuel on (bubbles = leak). 6) Electrical: check batteries (if battery igniter), fuses, and wiring. 7) Clean: remove debris from pilot/burner ports, reflector and air passages. 8) Test components: spark at electrode, thermocouple/thermopile mV with a multimeter, regulator operation (pressure/drop under load). 9) Run a short test: relight, observe flame color and stability. 10) If any combustion safety issue (yellow flame, soot, strong gas smell, pilot won’t stay lit after checks), shut off and call a pro.
My heater won’t spark or there’s no click when I press the igniter. What should I check?
Steps: 1) If battery-powered igniter, replace batteries. 2) For piezo/push igniters, inspect the electrode tip for soot/corrosion; clean gently with fine emery or soft cloth and restore correct gap (typical ~3/32"–1/8" but check your manual). 3) Check wiring and connector continuity to the igniter module. 4) Verify chassis grounding — poor ground can prevent spark. 5) Test for spark: with burner access panel removed and fuel off, observe electrode while pressing igniter; if no spark, replace igniter module. 6) If there is a spark but burner won’t light, check for blocked orifices or insufficient gas flow.
I hear clicking but the burner won’t light or the spark is weak. Why and how do I fix it?
Causes and fixes: 1) Weak spark often from corroded electrode tip, wrong gap, or high-resistance wiring — clean/replace electrode and tighten/replace connectors. 2) Wet or sooted electrode reduces spark — clean and dry. 3) Loose ground or cracked insulated boot increases resistance — repair ground and replace bad wiring. 4) If spark present but no flame, clean pilot/orifice and check gas supply/regulator pressure. 5) Replace the igniter assembly if spark is intermittent after cleaning and wiring checks.
Pilot lights but won’t stay lit after I release the control knob. What do I do?
Common causes: misaligned or weak pilot flame, dirty pilot orifice, faulty thermocouple/thermopile, or defective gas valve. Steps: 1) Clean pilot orifice with a non-metal pipe cleaner and compressed air. 2) Ensure pilot flame properly envelops thermocouple tip — adjust pilot shield/position per manual. 3) Hold control knob per manual (commonly ~60 seconds) to warm thermocouple; if pilot still dies, test thermocouple/thermopile with a multimeter (mV ranges: thermocouple ~20–30 mV, thermopile up to ~250–750 mV open-circuit). 4) If voltage low or inconsistent, replace thermocouple/thermopile assembly. 5) If thermocouple tests good, the gas valve/valve electronics may be faulty — stop and call a professional if unsure.
How do I test and replace a thermocouple or thermopile safely?
Testing: 1) Turn off gas and allow cooling. 2) Disconnect thermocouple/thermopile lead at the gas valve (refer to manual). 3) Set a DMM to mV and connect leads to the thermocouple/thermopile terminals. 4) Light the pilot and heat the tip for the manufacturer-specified time, note open-circuit mV (thermocouple ~20–30 mV; thermopile ~250–750 mV). 5) If voltage is below expected range, replace the component. Replacement: buy an OEM or compatible part matching length, threads and connector type; install per manual ensuring the tip sits in the pilot flame and connections are tight. After replacement, perform the hold test to confirm pilot stays lit. If unsure, call a pro.
What should I do if the heater lights but won’t stay lit only when it tilts or after movement?
Likely causes: faulty tilt switch (anti-tilt safety interlock), loose mounting or harness connectors. Steps: 1) With power/gas off, inspect the tilt switch location and wiring for damage or corrosion. 2) Clean connectors and verify switch actuates mechanically (use a multimeter continuity check while tilting unit). 3) If switch fails to open/close correctly, replace the switch assembly following the manual. 4) Check that the heater is mounted/placed on a stable, level surface and that any movable joints are secure. If replacement or wiring inside the control box is required and you are not confident, hire a licensed technician.