
Assembling a Hampton Bay patio heater takes most people 30 to 60 minutes with basic hand tools, and the process is the same whether you have a freestanding 48,000 BTU model like the NCZH-G-SS or a compact tabletop unit like the PG155T. You build from the ground up: base, pole sections, emitter head, then propane hookup and a mandatory leak test before you ever strike the igniter. This guide walks through every step in that sequence, flags the bolt sizes listed in the official hardware pack, and covers first-light procedure plus the most common problems you'll hit if the burner won't stay lit. For similar step-by-step pyramid patio heater assembly instructions, refer to the manufacturer's assembly guide for pyramid-style models.
How to Assemble Hampton Bay Patio Heater: Step-by-Step Guide

Grant Mercer
14 Jul 2026
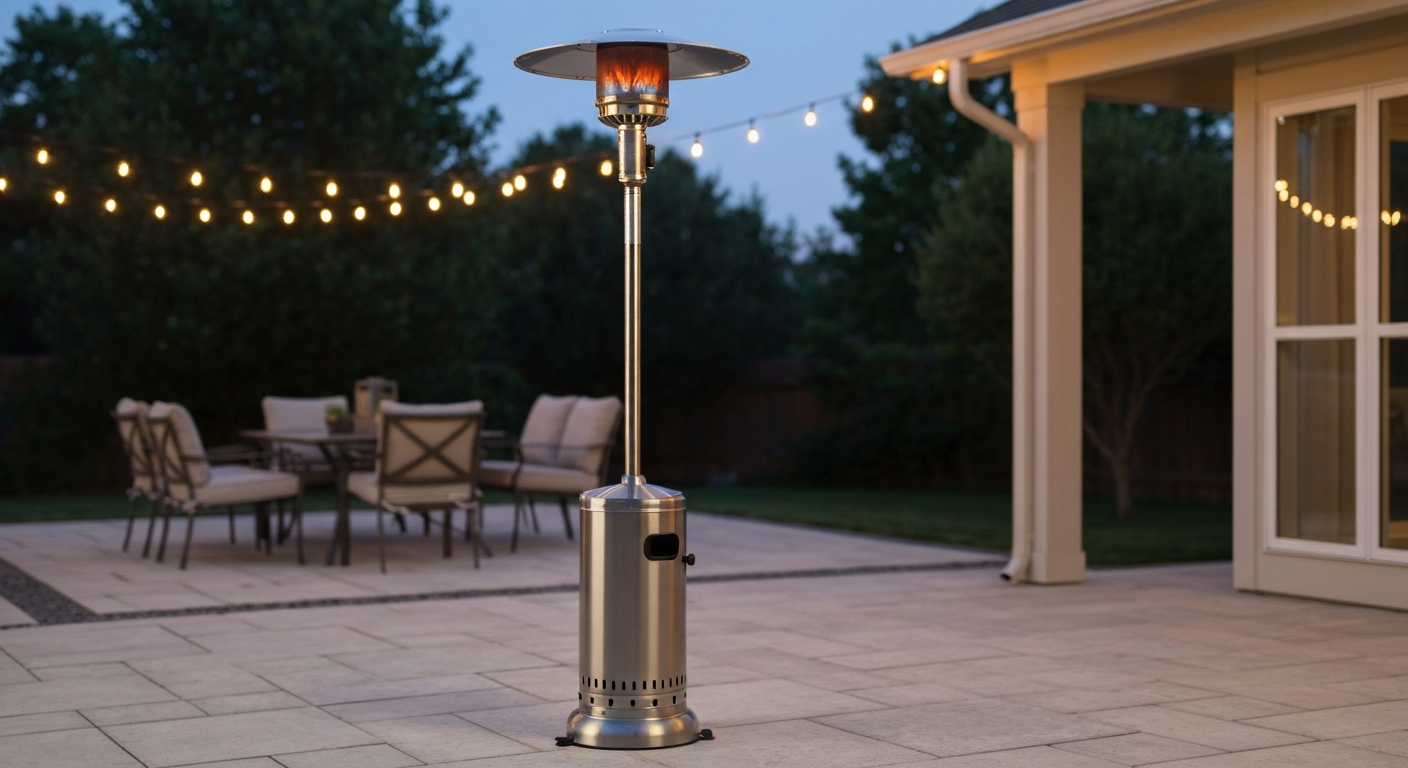
What this guide covers
This article covers two Hampton Bay patio heater configurations: freestanding floor-standing models (the NCZH-G series being the most widely sold, rated at 48,000 BTU and designed to heat roughly 200 square feet) and tabletop models (such as the HPS-C-PC and PG155T, rated at 11,000 BTU). The assembly sequences differ meaningfully between the two types, so each gets its own step-by-step section below. I also cover the propane hookup, the soapy-water leak test that the official Hampton Bay Use and Care Guide requires, first-time ignition, and the troubleshooting scenarios that come up most often: igniter failure, burner won't stay lit, tilt switch trips, and thermocouple issues. If you are assembling a different brand with a similar design, the structure here will look familiar since East Oak, Foowin, Mainstays, Pamapic, and Pyramid freestanding heaters follow essentially the same build sequence.
Safety before anything else
Propane is heavier than air, which means a leak pools at ground level and ignites without warning. Before you connect any gas, read this section fully. The Hampton Bay Use and Care Guide mandates outdoor use only, and that is not a suggestion. Never assemble or test this heater in a garage, shed, or enclosed porch.
- Clearances: Keep combustible materials at least 3 feet from the sides of the heater and at least 2 feet from the top (emitter head). This applies during operation and must be maintained permanently, not just at first use.
- Propane cylinder: Use only OPD (Overfill Protection Device) equipped cylinders, as required under NFPA 58. A standard 20 lb tank fits freestanding models. Never store a connected cylinder indoors.
- Tilt switch: Hampton Bay freestanding heaters include a tip-over safety device that cuts gas if the unit tilts. Do not bypass it, do not tape it, and do not assume it replaces common-sense placement on a firm, level surface.
- Ventilation: Even outdoors, position the heater away from walls, overhangs, and overhead structures. Overhead clearance of at least 2 feet is the minimum; more is better.
- If you smell gas: Close the cylinder valve immediately. Do not touch any switches or open flames. Leave the area. Call your gas supplier or fire department. Do not re-enter until cleared.
- Personal protective equipment: Wear safety glasses during assembly (fasteners under spring tension can snap). Leather or nitrile gloves are useful when handling the reflector panel hardware, which has sharp edges fresh from the packaging.
- Children and pets: Keep them clear of the workspace during assembly and never leave the heater unattended while lit.
Time, difficulty, and decisions before you start
Freestanding assembly runs 45 to 60 minutes for most people working alone. Tabletop assembly is faster, typically 15 to 25 minutes. Difficulty is low if you are comfortable with basic hand tools. You do not need any gas or HVAC experience; the propane connection is a simple hand-tightened fitting with a standard POL or acme thread depending on model year. A few decisions are worth making before you open the box:
- Placement surface: Freestanding models need a firm, level surface. Concrete or composite decking is ideal. Soft ground requires a paver base or the heater will lean after a season. Check level before you commit to a spot.
- Propane tank size: The NCZH-G-SS freestanding model uses a standard 20 lb (5 gallon) propane tank that sits inside the base cabinet. A 1 lb disposable cylinder does not work for freestanding models. Tabletop units like the PG155T use a 1 lb disposable cylinder unless you add an adapter hose.
- Regulator: Both model families ship with a pre-assembled regulator. Do not substitute a high-pressure regulator. The factory-supplied one is matched to the burner orifice.
- Color and finish: If you have the stainless-steel variant (NCZH-G-SS) versus the bronze or black finish, the assembly steps are identical but the reflector panel attachment screws may differ in finish. Check the hardware bag against the parts diagram before sorting.
Tools and parts checklist
The Hampton Bay Use and Care Guide hardware list identifies fasteners by letter designation. Here are the key items from the official parts breakdown for the freestanding NCZH-G series, alongside what you need to have ready. Nothing in this list requires specialty tools.
| Item | Spec / Description | Notes |
|---|---|---|
| AA bolts | M6 x 10 mm | Used at base panel joints |
| DD bolts | M6 x 22 mm | Pole section connections |
| CC bolts | M8 | Emitter head mounting |
| HH washers | M8 | Used with CC bolts at head |
| FF reflector studs | Threaded stud, size per model | Secure reflector panels to head |
| GG wing nuts | Finger-tighten only | Reflector panel retention |
| Regulator and hose | Pre-assembled, factory supplied | Do not substitute |
| O-rings | Included in hardware bag | Inspect before use; keep one spare |
Tools you need from home: an adjustable wrench or a set covering 10 mm and 13 mm, a Phillips-head screwdriver (PH2), and a flathead screwdriver. A rubber mallet is optional but helpful for seating pole sections. Have a cup of dish soap and water ready for the leak test. Keep at least one spare O-ring from a hardware store on hand; if you drop or nick the one in the bag, assembly stops until you have a replacement.
Identifying your model and reading the parts diagram
The model number is printed on a label on the base or the lower pole section. For freestanding units, look for NCZH-G or NCZH-G-SS. For tabletop units, look for PG155T or HPS-C-PC. The full model number matters when you are ordering replacement parts or downloading the correct manual from Home Depot's product page, because hardware dimensions and the parts diagram do change between variants.
The parts diagram in your manual uses letter codes (A through roughly R on most models) to label each major component. Key ones to identify before you start: the base cabinet (A), lower and upper pole sections (typically C and D), the emitter head assembly (E or F depending on model), the reflector panels (shown as a set), the regulator assembly, and the cylinder housing or tank door. Match every physical part in your box to a letter on the diagram before assembly. If anything is missing, contact Hampton Bay Customer Service at 1-855-HD-HAMPTON before proceeding. Shipping a partially assembled unit back is far more work than resolving a missing bolt at the start.
One variation worth noting: some NCZH-G units include a wheel kit (two wheels and a handle bracket for portability), and some do not. If yours has wheels, they attach to the base before the base is loaded with the propane tank. The parts diagram will show whether your specific model includes them.
Preparing your workspace and pre-assembly checks
Set up on a clean, flat surface with enough room to lay all parts out around you. A 6-foot by 6-foot area works well. Do not assemble on grass if you can avoid it; small fasteners disappear immediately. Lay a moving blanket or cardboard down to protect the finish while parts are horizontal.
- Check level: Use a bubble level or a phone app on the floor where the heater will live. A heater that tilts even slightly will trip the tilt switch during normal use.
- Inspect for shipping damage: Before discarding any packaging, check the emitter head glass, the reflector panels, and the pole sections for bends, cracks, or dents. Document any damage with photos before contacting Hampton Bay.
- Count and sort hardware: Lay out every bolt, washer, and nut from the hardware bag. Match them to the letter codes in the manual. It is much faster to find a missing fastener now than halfway through assembly.
- Verify the regulator O-ring: The factory regulator ships with an O-ring seated in the fitting. Look at it. If it is cracked, flattened, or missing, replace it before the first gas connection.
- Confirm the base weight plan: The freestanding base cabinet has a lower tray designed to hold sand or gravel (typically 20 to 30 lbs recommended) for stability. Decide now whether you are filling it or relying on deck anchors, because loading weight after the heater is upright is awkward.
Step-by-step assembly: freestanding models (base to burner)
This sequence follows the Hampton Bay NCZH-G Use and Care Guide. Times per step are estimates based on working alone with a standard tool set.
Step 1: Assemble the base cabinet (10 minutes)
Lay the base panels flat and connect them using the AA bolts (M6 x 10). The base panels form a box that will house the propane tank. Hand-tighten the bolts first to get everything aligned, then snug them down with a 10 mm wrench. Do not over-torque; the panels are sheet metal and the threads strip easily. Once the base box is square, attach the access door (the panel with the hinge) using the designated hinge screws from the hardware bag. If your unit includes the wheel kit, attach the wheel bracket and wheels to the base bottom now using the provided M6 bolts before standing the base upright.
Step 2: Attach the lower pole to the base (5 minutes)
The lower pole section passes through a collar at the top of the base cabinet. Some models use a set screw to lock the pole; others use a bolt-and-tab system. Use the DD bolts (M6 x 22) here. Orient the pole so that the gas inlet fitting at the bottom of the pole aligns with the opening in the base cabinet where the regulator hose will route. Tighten with a 10 mm wrench. The pole should feel solid with zero side wobble when done.
Step 3: Connect the upper pole section (5 minutes)
Slide the upper pole over the lower pole. The two sections telescope together and are typically secured with a bolt through both poles. Again, use DD bolts. Make sure the gas tube running through the interior of the lower pole lines up with the corresponding tube in the upper pole before tightening. On the NCZH-G-SS stainless model, this connection has a small alignment tab; seat the tab before inserting the bolt or the joint will sit crooked.
Step 4: Mount the emitter head assembly (10 minutes)
The emitter head (which contains the burner, thermocouple, and igniter) slides onto the top of the upper pole. Use the CC bolts (M8) with HH washers. You will need a 13 mm wrench or socket here. The head is heavier than it looks, so having a second person hold it while you insert and start the bolts saves frustration. Do not fully tighten yet; you need the head to rotate freely while you attach the reflector panels.
Step 5: Attach the reflector panels (10 minutes)
The reflector panels clip or bolt onto the FF studs around the perimeter of the emitter head and are secured with GG wing nuts. Finger-tighten the wing nuts only. The manual is explicit that over-tightening the wing nuts cracks the reflector panel tabs. Once all panels are on, rotate the head assembly to your preferred position (most people face the opening away from the prevailing wind) and tighten the CC head bolts fully.
Step 6: Connect the regulator and propane hose (5 minutes)
Route the regulator hose from the base cabinet up through the interior of the pole to the burner inlet fitting. The connection at the burner is typically a standard flare fitting that tightens clockwise with a wrench. The connection at the propane cylinder is a POL or acme fitting that threads on counter-clockwise (left-hand thread). Hand-tighten the cylinder connection first, then give it one-quarter turn with a wrench. Do not use thread tape on these fittings; the O-ring provides the seal. Make sure the control knob on the head is in the OFF position before you open the cylinder valve.
Step 7: Perform the leak test (5 minutes, mandatory)
This step is not optional. Mix a solution of dish soap and water (roughly 1 part soap to 4 parts water) and apply it generously with a brush or cloth to every gas connection: hose-to-burner fitting, hose-to-regulator fitting, and regulator-to-cylinder fitting. Traeger’s support page 'Gas Leak – Traeger Support (leak‑test and safety advice)' endorses the same soapy‑water application to connections with the cylinder valve ON and stresses performing the test outdoors with all open flames extinguished. Open the cylinder valve slowly. Watch for bubbles. If you see any bubbles at any connection, close the cylinder valve immediately, disconnect, inspect the O-ring, and reconnect. Do not light the heater until the leak test shows zero bubbles at all connections. Once the test passes, close the cylinder valve and wipe off the soapy water before operation.
Step 8: First-time ignition (5 minutes)
Open the cylinder valve fully. Push the control knob in and rotate it to the HIGH position. While holding the knob depressed (this opens the gas valve and bypasses the thermocouple safety circuit), press the igniter button repeatedly, up to 5 to 7 presses, until the main flame ignites. Once lit, keep the control knob depressed for approximately 10 seconds before releasing. This allows the thermocouple to heat up and hold the gas valve open. If the burner goes out when you release the knob, turn the control to OFF and wait at least 5 full minutes before trying again. Residual gas needs time to clear. If ignition fails three times in a row, do not keep trying. Go to the troubleshooting section below.
Step-by-step assembly: tabletop models
Tabletop Hampton Bay heaters like the PG155T are significantly simpler to assemble. The entire process takes 15 to 25 minutes. The package contents for the PG155T include the main body with burner pre-installed, a heat reflector, a wire guard, the regulator and hose, and hardware for the guard and reflector. There is no multi-section pole to build.
Tabletop assembly sequence
- Place the main body upright on a stable, heat-resistant surface. Tabletop heaters generate significant downward heat; do not place on plastic furniture. A concrete table, metal cart, or stone surface works well.
- Attach the wire guard to the body using the provided bolts and screws. This guard protects against contact with the hot glass and must be in place before operation.
- Attach the reflector dome to the top of the unit. On most PG155T units this is a push-and-lock or bolt attachment at the top of the emitter.
- Connect the regulator hose to the gas inlet on the body (hand-tight, then one-quarter turn with a wrench). For a 1 lb disposable cylinder, screw the cylinder into the regulator fitting clockwise until snug.
- Perform the full soapy-water leak test at the hose-body connection and the cylinder-regulator connection, identical to the freestanding procedure.
- Ignite using the same hold-and-press method: knob to HIGH while depressed, press igniter, hold 10 seconds after flame appears.
If you want to run a tabletop model from a larger 20 lb cylinder instead of 1 lb disposables, you need an adapter hose with the correct acme fitting on one end and the appliance fitting on the other. Hampton Bay does not include this with the unit, but it is a standard accessory available at hardware stores. Use the same leak test procedure any time you make or change a gas connection.
Tabletop conversion note
Some Hampton Bay freestanding models are sold with a tabletop conversion kit, which swaps the base cabinet and pole for a compact stand that sits on a table or deck rail. If your unit came with this accessory, assemble the short stand using the same bolt and washer hardware from the main pack, mount the emitter head directly to the stand post, and then follow the tabletop connection and leak-test steps. The BTU output and ignition procedure do not change.
Propane hookup details and what can go wrong
The most common assembly error I see is someone over-tightening the cylinder connection and damaging the O-ring, then wondering why the leak test keeps showing bubbles. The O-ring does the sealing work. If you see bubbles at the cylinder fitting after re-seating and hand-tightening plus one quarter turn, remove the regulator, inspect the O-ring under good light, and replace it if it is flattened or nicked. A pack of replacement propane regulator O-rings costs under two dollars at any hardware store and is worth having before you start.
Another real-world issue: regulator frost or freeze. If you run the heater at high output for an extended period (over an hour continuously), the regulator body can frost over and the flame drops to a very low level. This is not a fault; it is a normal behavior caused by the rapid pressure drop as propane vaporizes. The fix is to turn the heater down or off for 10 to 15 minutes to let the regulator warm up. If this happens frequently in cold weather, the tank itself may be too cold. Warming the cylinder slightly (moving it from a cold shed to ambient outdoor temperature for 30 minutes) helps.
Troubleshooting the most common problems
The NCZH-G owner's manual includes an explicit troubleshooting table. Here is that information organized by symptom, with the real-world context I would add from hands-on experience.
| Symptom | Most Likely Cause | Fix |
|---|---|---|
| Igniter clicks but no flame | Empty or closed cylinder, or igniter electrode gap is too wide | Check cylinder valve is fully open; check electrode tip is 3-5 mm from burner port; replace igniter if electrode is cracked |
| Flame lights then goes out when knob is released | Thermocouple not heated long enough, or faulty thermocouple | Hold knob in for a full 10 seconds after flame appears; if still fails, thermocouple likely needs replacement |
| Heater tips over and shuts off | Tilt switch activated (working as designed) | Stand the heater upright on a level surface; the tilt switch resets automatically when upright; wait 5 minutes before relighting |
| Low or yellow flame | Clogged burner orifice or low tank pressure | Turn off, let cool, use a thin wire to clear the orifice; check tank level; check for regulator frost |
| Gas smell but no leak found at connections | Cylinder valve not fully closed when heater is off, or cylinder O-ring failing | Fully close cylinder valve after every use; inspect cylinder collar O-ring; replace cylinder if valve is damaged |
| Flame will not reach full height | Regulator in lock-out mode from a previous quick-open of cylinder valve | Close cylinder valve, wait 30 seconds, reopen slowly and smoothly; fast opening triggers OPD lockout |
The tilt switch is worth addressing directly because it causes a lot of confusion. Hampton Bay freestanding heaters have a mercury or ball-bearing tilt switch mounted in the base or lower pole. If the heater tilts past a set angle (usually around 15 degrees from vertical), the switch opens and cuts gas. The heater does not restart on its own. You need to right the unit, wait at least 5 minutes for residual gas to clear, and then follow the full ignition procedure again. If the tilt switch trips repeatedly on a level surface, the switch itself may be misaligned or faulty, which is a straightforward replacement using the part number in your manual.
Routine maintenance and safe storage
Hampton Bay patio heaters need minimal maintenance but a few habits extend their life significantly. At the start of each season: inspect the gas hose for cracks, kinks, or abrasion; check the burner screen and orifice for spider webs or debris (spiders love the warmth of a stored burner); wipe down reflector panels with a damp cloth; and test the igniter. After each use in wet weather, dry the emitter head area before covering.
- Always close the cylinder valve after use, not just the control knob on the heater.
- Disconnect the propane cylinder before storing the heater in any enclosed space. The official Hampton Bay guidance states stored cylinders must be kept outdoors.
- Cover the heater with a weather-rated cover when not in use. Water intrusion into the burner causes corrosion that clogs the orifice.
- Check the reflector panel wing nuts at the start of each season; they vibrate loose over time.
- If the igniter stops producing a spark, the fix is almost always replacing the AAA battery (if battery-powered) or re-gapping the electrode tip. This is a 5-minute job and replacement igniters are inexpensive OEM parts.
- For thermocouple replacement, order by model number from Home Depot or contact Hampton Bay Customer Service at 1-855-HD-HAMPTON. The manufacturer (Jiangsu Gardensun Furnace Co., Ltd.) also accepts technical and parts inquiries if OEM sourcing is needed.
Finding your manual and replacement parts
The Hampton Bay Use and Care Guide for your specific model is available as a PDF download from the product page on Home Depot's website. For an alternative step-by-step walkthrough and diagrams, see Pamapic patio heater assembly instructions. If you have a Mainstays 7-foot patio heater, search for Mainstays 7 foot patio heater instructions on the retailer's product page to download that model's PDF manual Mainstays 7-foot patio heater instructions. For similar step-by-step guidance for a different brand, see foowin patio heater assembly instructions for a comparable walkthrough and parts list. Search by the model number printed on your unit's label. For parts, the same product page links to the replacement parts list. If a part is no longer listed, Hampton Bay Customer Service (1-855-HD-HAMPTON) is the right call; they can cross-reference older model numbers to current parts. For OEM technical queries, the manufacturer contact information printed in the NCZH-G manual (Jiangsu Gardensun Furnace Co., Ltd.) is an option if you need engineering-level specifications.
If you are working on a different brand with a similar layout, the assembly logic and troubleshooting steps here overlap considerably with guides for comparable freestanding and tabletop heaters from other manufacturers. The propane hookup, leak test, and thermocouple troubleshooting procedures are essentially universal across the category.
When to call a professional
Most Hampton Bay patio heater issues are genuinely DIY-fixable: igniter swap, thermocouple replacement, orifice cleaning, O-ring replacement, tilt switch reset or swap. What is not a DIY job: a damaged or corroded gas valve body, a cracked or kinked internal gas tube inside the pole, any situation where you smell gas and cannot identify the source after a thorough leak test, and any repair involving the main burner orifice sizing (changing orifice size to a non-spec part voids safety compliance under ANSI Z21.58 standards and creates real combustion hazards). If a gas smell persists after you have closed all valves and verified connections, leave the area, do not operate any switches, and call your gas supplier or fire department. That instruction comes directly from the Hampton Bay Use and Care Guide and it is there for a good reason.
FAQ
What core manufacturer documents are required to create a safe, accurate assembly and troubleshooting guide for Hampton Bay patio heaters?
Official Hampton Bay 'Use & Care' and Owner's Manuals for the specific model(s) (e.g., NCZH‑G series, Model #68164 / Item #1001362427, and tabletop manuals such as PG155T). These manuals contain the exact safety warnings, minimum clearances, parts lists/hardware identifiers, step‑by‑step assembly instructions, regulator/hose hookup procedure, soap‑solution leak test, ignition/first‑light procedure, troubleshooting tables and the manufacturer's customer/support contact information. (Source: Hampton Bay Use & Care / owner manuals and Home Depot product pages.)
Which safety standards and codes must be cited or followed when producing a safety‑compliant guide?
Applicable propane and appliance standards such as NFPA 58 (Liquefied Petroleum Gas Code) and relevant appliance/regulator standards (e.g., ANSI Z21.x series references for outdoor gas appliances and OPD cylinder requirements). These govern cylinder storage, OPD use, regulator requirements and general safe installation practices and should be cited alongside all manufacturer instructions. (Source: NFPA 58 and appliance/regulator standards references.)
What exact safety and clearance information must be verified and included?
Model‑specific 'Outdoor use only' warning; minimum clearances (example from Hampton Bay manuals: minimum 3 ft (≈1 m) from sides and 2 ft (≈0.6 m) above the heater, but verify per model manual); do not use under low overheads or enclosed structures; keep combustibles away; do not store connected cylinders indoors; emergency actions if you smell gas (leave area, call supplier/fire dept.). These are mandatory and must match the printed manual wording. (Source: Hampton Bay Use & Care guides.)
What specific, repeatable propane hookup and leak‑testing steps must be included?
Step sequence from the manual: ensure all control knobs and regulator valves are OFF; connect regulator to propane cylinder according to manufacturer instructions; open cylinder valve only when ready to test; apply soapy‑water solution to regulator/hose and regulator/cylinder connections and observe for bubbles; if bubbles appear shut off cylinder, tighten/fix connections and retest; perform leak test outdoors and away from open flames. Reproduce manual sequence precisely. (Source: Hampton Bay Use & Care manuals and corroborating industry leak‑test guidance.)
What exact ignition and first‑time lighting procedures are required to be reproduced?
Manufacturer procedure: with cylinder valve ON and control knob in OFF until gas flows per manual, press and hold the control knob, press the igniter button several times until the burner lights, continue holding the control knob (typically ~10 seconds) before releasing to ensure thermocouple senses flame; if burner fails or goes out, shut off gas and wait the specified safe interval (e.g., 5 minutes) before retrying. Use the model manual's wording for timing and safety prompts. (Source: Hampton Bay NCZH‑G owner manual.)
Which troubleshooting causes and remedies must be included and verified?
Model manual troubleshooting table items such as: 'Burner will not light' (check cylinder valve, regulator, empty tank, clogged orifice); 'Won't stay lit' (thermocouple/tilt switch issues, insufficient pre‑heat time, regulator problems); 'Gas odor' (perform emergency steps); 'Weak flame' (low gas pressure, frozen/regulator malfunction, clogged injector). Each cause/solution should be validated against the model's troubleshooting table and manufacturer guidance before inclusion. (Source: Hampton Bay owner manuals and documented troubleshooting lists.)},{