
Yes, you can shorten many freestanding propane patio heaters, but only the pole section, and only if your model was assembled with a removable pole coupler. The gas hose, regulator, and any internal fuel lines are strictly off-limits for DIY modification. On most consumer mushroom-style and tower heaters (Hampton Bay, Fire Sense, AZ Patio Heaters, and similar), the center pole is split into two sections joined by screws or bolts, with a flexible hose routed through the inside. If that's how your heater is built, shortening it is a structural task, not a gas-fitting task, and a careful DIYer can do it safely. If your heater has solid, threaded gas pipe acting as the structural pole, stop there and call the manufacturer or a licensed technician.
How to Shorten a Propane Patio Heater Safely: DIY Guide

Who this guide is for
This guide is written for homeowners and hands-on renters who want to reduce the height of a freestanding propane patio heater for practical reasons: a low pergola or overhead cover, a deck with height restrictions, or simply wanting a more compact setup without buying a whole new unit. You need basic hand-tool comfort (drill, wrenches, a metal-cutting tool) but no gas-fitting license or HVAC background. I am not going to walk you through anything that touches the regulator, hose assembly, or internal gas valves, because those are not DIY territory.
The two heater styles covered here are the freestanding mushroom (or top-hat) heater with a wide reflector dome and a single center pole, and the freestanding tower or pyramid heater with a tapered or straight tower housing. Both styles use fundamentally the same pole architecture on consumer models: a lower pole that sits in the base, an upper pole that carries the burner head, and a mechanical joint between them. The methods in this guide apply to both styles with minor differences called out where they matter.
Warranty, safety codes, and permit reality
Before picking up a single tool, you need to know what you are agreeing to. Many manufacturer warranties explicitly state that customers who disassemble internal heating or gas parts will void their warranty. Hampton Bay's language is typical: take apart the heater and try to fix internal heating or gas parts and coverage is gone. If your heater is under warranty, contact the manufacturer first. They may sell a shorter replacement pole, recommend an authorized service center, or tell you the modification is not supported.
On the code side, NFPA 58 (the LP Gas Code) and NFPA 54/ANSI Z223.1 (National Fuel Gas Code) are the national references that most local jurisdictions adopt. These codes govern everything involving LP appliances, including hose assemblies, regulators, and leak testing. Full pressure testing above 14 inches of water column (roughly 0.5 psi) is generally code-level work requiring a licensed contractor and, in many places, an inspector. The soapy-water bubble check described later in this guide is appropriate for homeowners after reassembly. Anything beyond that is professional territory. Check your local municipality's requirements before starting, especially if you are in a state or city with strict mechanical licensing rules.
The safe bottom line: modifying only the structural pole sections while leaving the factory hose, regulator, and gas connections fully intact keeps this project on the right side of both safety and most warranty language. The moment you cut, splice, replace, or tamper with any gas-carrying component, you have crossed into licensed-tradesperson work.
Check your manual and model first
Your heater's owner's manual is the single most important document for this project. It shows the exact pole assembly sequence, the fastener sizes used at the pole joint, how the hose is routed through the pole, and the exact dimensions of each pole section. If you no longer have the paper manual, look for the model number on the rating plate, usually found on the base or lower pole section. Then search the manufacturer's website or use a manual lookup resource to pull the PDF. The assembly diagram pages are what you need: they show whether your pole uses bolted couplers, screws through a sleeve, or a different connection style. If you need model-specific propane patio heater instructions, search the manufacturer's support site with your model number.
If you cannot find the manual, call the manufacturer's support line with your model number and ask two specific questions: (1) Is the pole joint mechanically fastened and separate from the gas supply hose? and (2) Does the company sell a shorter replacement pole for this model? Some brands, particularly commercial-grade units like Bromic (which uses 304-grade stainless-steel poles), sell replacement pole sections as accessories, which makes this project almost trivially easy. For the rest, you need to do some manual reading before committing.
The practical shortening methods, compared
There are really four approaches worth considering, and one important thing to rule out immediately. Do not attempt to shorten the regulator hose assembly, reroute internal fuel lines, or modify the gas valve in any way. Those components are certified as a unit and are not user-serviceable. The four practical options are: replacing a pole section with a shorter tube of matching diameter, cutting and re-threading the existing pole, swapping to a shorter head-assembly pole if the manufacturer sells one, or using a telescoping or adjustable pole replacement. For a broader DIY overview of propane patio heater construction and safety, see how to make a propane patio heater. Each has a different difficulty level and risk profile.
| Method | How it works | Pros | Cons | Tools needed | Difficulty | Risk level |
|---|---|---|---|---|---|---|
| Replace pole section with shorter tube | Buy steel or stainless tube matching the pole OD, cut to target length, transfer coupler hardware | No threading required; preserves factory fastener holes | Must find matching tube OD/wall thickness; requires accurate measurement | Tape measure, tube cutter or hacksaw, drill, file/deburring tool, fasteners | Moderate | Low (if hose length allows) |
| Cut and re-thread existing pole | Cut existing pole to shorter length, re-cut threads on end with a pipe die | Uses original material; no sourcing required | Not suitable for thin-walled tubing; easy to ruin the pole; requires threading equipment | Angle grinder or hacksaw, pipe die set, threading oil, vise, file | Hard | Moderate (structural risk if threads are poor) |
| Swap head assembly to shorter factory pole | Order manufacturer-sold shorter pole; swap head and hose routing | Factory-engineered fit; preserves certification | Only available for select models/brands; may cost as much as a new heater | Basic hand tools only | Easy | Very low |
| Telescoping or adjustable replacement pole | Replace fixed pole with aftermarket adjustable-height tube and coupler kit | Reversible; adjustable for future use | Must confirm gas-hose length; hardware must be structurally rated | Tape measure, drill, wrenches | Easy-to-Moderate | Low if hose routing is undisturbed |
The removable-pole method, step by step
The method that works on the widest range of consumer heaters is replacing one pole section with a shorter tube of the same diameter. Here is how I approach it, broken into phases you can check off as you go.
Phase 1: Measure and plan before you buy anything
With the heater assembled and the propane cylinder disconnected (hand-close the cylinder valve, then disconnect the regulator fitting), measure the total assembled height from the floor to the top of the reflector dome. Decide your target height. Then disassemble the pole at the factory joint and measure each pole section individually, including the hose that runs through them. The hose length is your hard constraint: your new, shorter pole combination cannot be so short that the hose becomes taut or kinked between the regulator at the base and the burner head. Most factory hoses have several inches of slack built in, but you need to confirm that before cutting anything. Note the outside diameter (OD) and wall thickness of both pole sections, and photograph the coupler hardware before disassembly.
Phase 2: Source the replacement tube
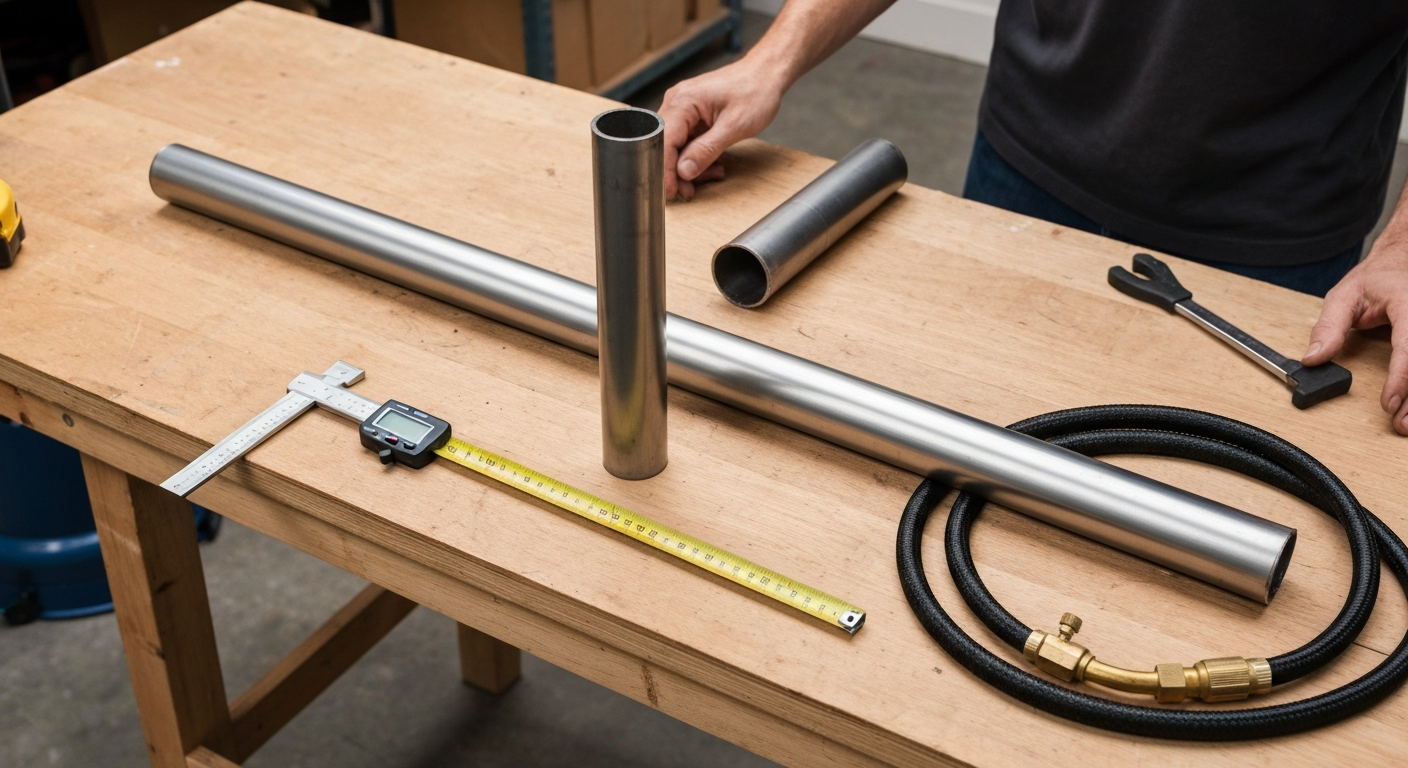
Most consumer mushroom heaters use a powder-coated steel pole with an OD between 1.5 inches and 2 inches. Match the OD exactly. For stainless models, match the grade as closely as possible (304 stainless is common). Round steel tube or DOM (drawn-over-mandrel) steel tube from a metal supplier or hardware store works well. Bring your original pole section to the store or confirm the OD with a caliper before ordering. The wall thickness should match closely so the coupler sleeve or collar fits correctly. You will also need fasteners matching the originals: many consumer models use M6 or M8 metric machine screws, sometimes 3/16-inch imperial fasteners. Check your parts list in the manual.
Phase 3: Cut the replacement tube
Cut the new tube to your calculated shorter length using a pipe or tube cutter for the cleanest, squarest cut. If you use a hacksaw or angle grinder with a cutoff wheel, clamp the tube firmly in a vise and use a square or guide to keep the cut perpendicular. A non-square cut creates a gap at the coupler joint that can rack the pole under load. After cutting, deburr both the inside edge (ID) and outside edge (OD) of the cut end thoroughly with a round file or deburring tool. Sharp internal burrs will abrade the hose as it passes through, which is a hazard you do not want to create.
Phase 4: Transfer the coupler and drill fastener holes
Slide the factory coupler sleeve (if applicable) onto the new tube and position it to match the original overlap depth. Mark and drill new fastener holes to align with the coupler. Use a center punch before drilling to prevent the bit from walking on the curved surface. Match the original hole diameter exactly. If the original pole used a through-bolt, drill completely through both walls. If it used a screw into a tapped hole, you may need to tap the new tube wall, so confirm wall thickness is adequate for thread engagement (at least 1.5 times the fastener diameter is the general minimum).
Phase 5: Route the hose and reassemble
Feed the flexible gas hose back through the new shorter pole section exactly as the original manual shows. The hose should move freely through the tube without pinching at either end. Reassemble the pole joint using the original fasteners (or new fasteners of the same grade and size). Reconnect the burner head to the upper pole per the manual's steps. Make sure all mechanical pole fasteners are snug but not over-torqued, particularly on thin-wall tubing. Reattach the reflector dome or tower panels as applicable.
Phase 6: Leak test and stability check before you light it
Reconnect the regulator to the propane cylinder hand-tight (blank" rel="noopener noreferrer">QCC/Type-1 fitting threads left-hand: turn counterclockwise to tighten). Slowly open the cylinder valve. Mix a few drops of dish soap with water in a small container and apply the solution generously to every gas connection: the regulator-to-cylinder joint, the hose connections at the regulator end, and the hose connection at the burner head. Watch for 30 seconds. Any growing bubbles indicate a leak. If you see bubbles, close the cylinder valve immediately, disconnect, and identify the loose or damaged fitting. Never test for leaks with a flame. This is explicit in every manufacturer manual I have seen and is required by NFPA 58.
Once the leak check passes, check structural stability. With the cylinder seated in the base, push gently on the heater head from the side. The unit should not rock or tip. If the heater feels top-heavy or unstable after shortening (which is unlikely since you are reducing the lever arm, not increasing it), re-examine how the pole joint is seated in the base collar. Also verify the tilt switch, if your heater has one, is still in its correct position and orientation after reassembly. A displaced tilt switch will cause the heater to cut out on its safety circuit even when standing upright.
When to stop and call a professional
Some situations make this project a clear stop: if your heater's pole sections are joined by threaded gas pipe rather than mechanical fasteners and a separate routed hose, do not proceed. If you are considering fuel changes, check guidance on whether you can convert a propane patio heater to natural gas before attempting any modifications. If the hose shows any cracking, stiffness, or damage when you pull it through the pole, replace it with a manufacturer-specified hose assembly before continuing. If you find the pole sections are too thin-walled to drill cleanly without deforming, do not try to thread them with NPT dies either: thin-wall tubing does not have enough material for safe thread engagement, and a failed structural thread on a gas appliance is a real hazard. See Engineer Fix, “Can You Thread EMT Conduit?” which explains that EMT or other thin‑wall tubing is not suitable for standard tapered pipe threads (NPT) because the thin wall cannot provide adequate thread engagement or structural strength blank" rel="noopener noreferrer">Engineer Fix — “Can You Thread EMT Conduit?” (explains EMT/ thin‑wall conduit is not suitable for standard pipe threads). If your leak test produces bubbles at any connection and you cannot eliminate them by snugging the fitting, call the manufacturer or a licensed LP gas technician.
Practical alternatives if modification is not right for you
If your heater's design does not lend itself to pole modification, or if the warranty situation makes you hesitate, there are cleaner solutions. Many manufacturers sell tabletop or pedestal-mounted propane heaters in the 30-to-40-inch height range that solve the clearance problem without any modification. Repositioning the heater on a raised platform or angling it to heat a seating area from the side can also solve a low-clearance problem without any cutting. If you need the heat output of a full-size unit but have persistent height constraints, a wall-mounted or ceiling-mounted infrared unit may be worth the investment.
Tools and parts checklist
Below is a consolidated list of everything you are likely to need for the removable-pole replacement method. Have all of this on hand before you start disassembly so you are not leaving an open heater while you make a hardware run.
- Steel or stainless round tube matching the original pole OD and wall thickness (cut to your target length or buy slightly long and cut to fit)
- Pipe or tube cutter (preferred) or hacksaw with a metal-cutting blade and a firm vise
- Tape measure and digital caliper (for confirming OD, wall thickness, and hose slack measurements)
- Center punch and hammer
- Drill with metal-rated drill bits matching original fastener diameter
- Round file and flat file (or a combined deburring tool) for inside and outside edge cleanup
- Replacement fasteners matching original grade, thread pitch, and length (M6 or M8 metric machine screws are common on most consumer models; confirm in your manual)
- Thread tap and tap handle if re-tapping holes in new tube (match original thread spec exactly)
- Torque wrench or driver with a torque adapter for consistent fastener tightening
- Dish soap and water in a small spray bottle or cup for the leak test
- Safety glasses and cut-resistant gloves for all metal-cutting steps
- Permanent marker for layout and measurement marks on the tube
| Part | Typical spec / dimension | Notes |
|---|---|---|
| Round steel or stainless tube (replacement pole) | OD: 1.5" to 2"; wall thickness: 0.065" to 0.120" | Match OD exactly to original; heavier wall is more durable but check coupler fit |
| Pole coupler sleeve or collar | ID to slide over pole OD; length 3" to 6" | Reuse factory coupler if possible; source matching sleeve if original is damaged |
| Machine screws (pole fasteners) | M6 x 12mm or M8 x 16mm (metric); or 3/16" imperial — confirm in manual | Use stainless steel grade for outdoor use; match original thread pitch |
| Flat washers and lock washers | To match fastener diameter | Prevent fastener loosening from vibration and thermal cycling |
| Thread tap | Match original fastener thread (e.g., M6 x 1.0 or M8 x 1.25) | Only needed if drilling and tapping new holes rather than through-bolting |
| Cutting oil or tapping fluid | General-purpose metalworking fluid | Use for drilling and tapping to extend bit/tap life and improve cut quality |
Image suggestion: a side-by-side photo of an original two-piece pole section next to a cut replacement tube of the same diameter, with the coupler sleeve laid alongside, clearly shows what 'matching OD' means in practice. A second photo showing the flexible gas hose pulled through the open pole before reassembly helps readers understand why the hose length check in Phase 1 matters. A close-up of a soapy-water leak test at the regulator fitting, showing clear (non-bubbling) connections, is useful for the Phase 6 section.
A few things worth knowing about your specific heater
Consumer models from Hampton Bay, Fire Sense, and AZ Patio Heaters represent the majority of heaters I see questions about, and they all share the same basic architecture: upper and lower pole joined by screws (often M6 or M8), hose routed through the center, regulator at the base connecting to a QCC/Type-1 cylinder valve. The good news is that hose slack is generally generous on these units because the factory designs them to accommodate minor assembly variations. The typical flexible hose runs 60 to 72 inches on a standard-height unit, and most shortening projects remove 6 to 12 inches from one pole section, which is well within the available slack.
Stainless-steel commercial models behave differently. Brands like Bromic are built to tighter tolerances, use 304-grade stainless poles, and are more likely to have manufacturer-sold pole accessories or replacement sections. If you own one of those, check the accessory catalog before fabricating anything yourself: a factory-fit shorter pole will be a cleaner, safer, and likely cheaper solution.
One last point on the gas connection side: the standard Type-1/QCC-1 regulator fitting used on virtually all consumer 20-lb cylinder setups threads onto the cylinder valve hand-tight in the left-hand direction. It is a common mistake to over-tighten with a wrench and damage the soft brass threads. Hand-tight is genuinely all that is required, and it is all the manuals specify. Reconnect it exactly as you found it after any disassembly. For step‑by‑step instructions on attaching and securing a cylinder and regulator, see how to connect propane tank to patio heater.
FAQ
Quick answer: can a homeowner safely shorten a propane patio heater (mushroom or tower)?
Short answer: Often yes — but only if the heater’s center pole is a removable mechanical assembly (common on consumer 'mushroom' and tower models) and you shorten by removing or replacing a pole section or swapping to a shorter pole without altering the regulator, hose, or internal gas piping. Do not modify regulators, internal fuel lines, or internal sealed gas components — those alterations are likely unsafe and will void warranties and may violate codes. If the pole is thin‑walled tubing and mechanically fastened (screws/bolts and a routed hose), the common removable‑pole method is typically feasible for a competent DIYer who follows the steps and safety checks in the manufacturer’s manual.
What safety, warranty and legal checks should I do before starting?
1) Read your heater owner’s manual and parts diagram for pole‑joint details and explicit warnings (many manuals say 'do not alter' and that repairs must be done by qualified service persons). 2) Verify the pole is a removable/mechanical joint with the hose routed through it (not a factory‑threaded gas‑pipe joint or enclosed rigid piping). 3) Confirm the regulator/hose assembly is the factory or manufacturer‑specified unit and plan not to alter it. 4) Check local codes: major changes to gas piping or pressure testing may require a licensed contractor or permit (referenced standards: NFPA 58 / NFPA 54). 5) Understand warranty terms: disassembling internal gas components or altering fuel parts commonly voids warranty. If in doubt, contact the manufacturer or a licensed gas appliance service tech.
Which practical methods exist to shorten a freestanding heater (comparison)?
Practical homeowner methods (ranked safest/simple to riskier): 1) Replace the pole with a shorter factory or third‑party replacement pole designed for the model (recommended). 2) Remove one pole section and reassemble using the existing coupler (the removable‑pole method). 3) Use a telescoping or adjustable pole accessory designed for the heater. 4) Cut the existing pole and re‑thread or re‑couple (possible but requires metalworking skill and may weaken the tube or create unsafe joints — avoid if it requires altering internal gas piping). 5) Swap the head assembly to a lower‑mounted head if a compatible head exists. Never alter regulators or internal fuel lines; if the head or hose needs re‑routing that changes sealed gas components, stop and call a pro.
Tools and parts checklist (what you’ll need for the common removable‑pole method)
Tools: adjustable wrench, socket set, hex/Allen keys, screwdrivers, pipe/tube cutter or hacksaw (if trimming minimal OD/length), deburring tool/round file, measuring tape, permanent marker, torque driver (for machine screws), metal clamps or bench vise, soap solution and spray bottle for leak checks, bubble/soapy water method. Parts/consumables: replacement shorter pole or spare pole section, M6/M8 machine screws or factory fasteners (match original), stainless/self‑locking nuts or threadlocker to factory spec, rubber washers/grommets if present, anti‑seize or light machine oil for threads, touch‑up paint for exposed steel, replacement rubber feet or base weight if stability changes. PPE: safety glasses, gloves, hearing protection if cutting metal.
Precise measurements and planning before cutting or removing a section
1) Measure total assembled height and desired final height. 2) Check pole joint type and usable inside clearance for hose routing. 3) Measure the length of removable section(s) and confirm how many inches can be removed without interfering with base/regulator clearance and safe burner head position (maintain manufacturer‑specified clearances to combustibles and minimum standoff heights from floor/ground). 4) Leave enough pole length so the hose remains unstressed and the regulator stays accessible. 5) Record exact screw sizes and spacings. If removing more than one section or trimming more than 2–3 inches from thin‑wall tubing, consider replacement pole or professional help.
Step‑by‑step: common removable center‑pole method (safe DIY workflow)
1) Read the manual and disconnect the propane cylinder. Work outdoors in a well‑ventilated, flame‑free area. 2) Remove any decorative reflector and burner head fasteners per manual so the head and control assembly can be supported. 3) Support the head assembly on a soft surface; unbolt the pole joint fasteners (retain all fasteners and note their positions). 4) Pull the hose down through the pole carefully — the hose in many models is continuous and will slide out when the pole halves separate. 5) Remove the unwanted pole section (or swap in a pre‑measured shorter pole). If you must shorten a tube, mark the cut line, clamp squarely, and cut with a tube cutter or fine metal blade. 6) Deburr the inner and outer edges, re‑ream the ID so the hose can pass smoothly and won’t be abraded. 7) Reassemble pole using factory fasteners or identical replacements, routing the hose the same way it was originally routed; torque fasteners to the manual’s spec if provided. 8) Reattach head assembly and reflector per manual. 9) Reconnect the cylinder and perform a soap‑bubble leak test at all external fittings per the owner’s leak‑check instructions.