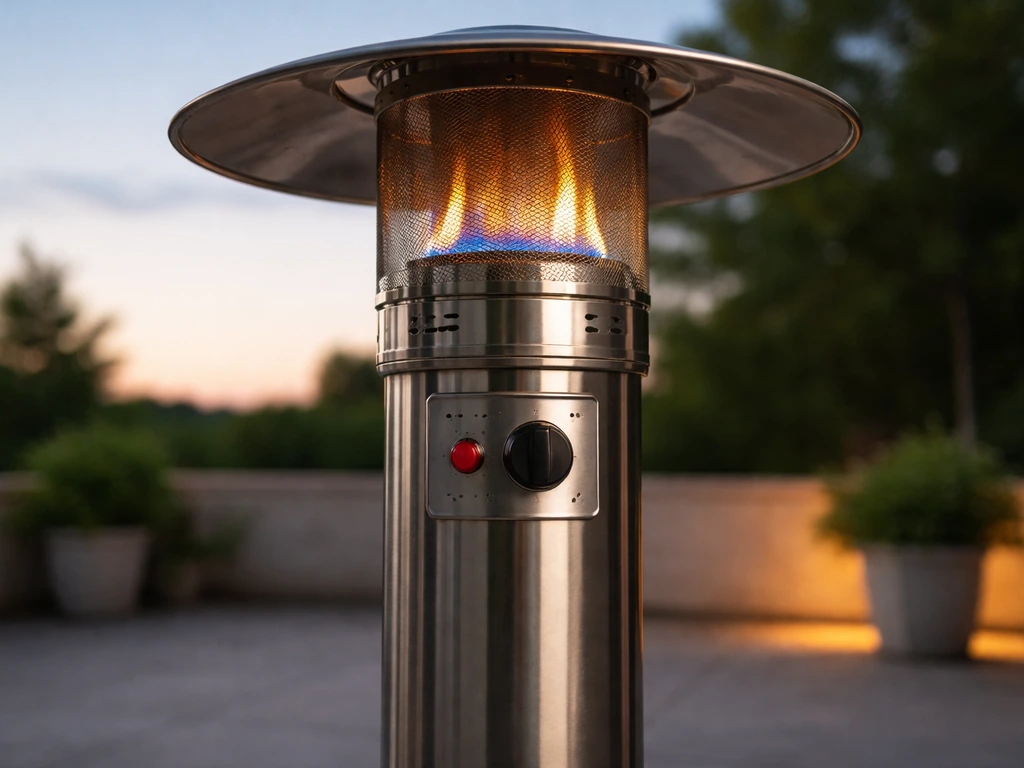
To start most propane patio heaters, turn the control knob to the pilot or ignition position, press and hold it in, then press the igniter button once per second until the flame lights. Keep holding the knob in for about 30 seconds after the flame appears, then slowly release it. If the flame stays, turn the knob to your desired heat level. That's the core sequence for the overwhelming majority of standing-pilot and electronic-ignition patio heaters on the market today.
How to Start Patio Heater Safely Step by Step

Grant Mercer
11 May 2026
Before you light it: safe setup and checks
Don't skip this part. A few minutes of setup and checking will save you from a dangerous situation or a frustrating ignition failure. Most startup problems trace back to something that should have been caught before the knob was ever turned.
Location and clearances
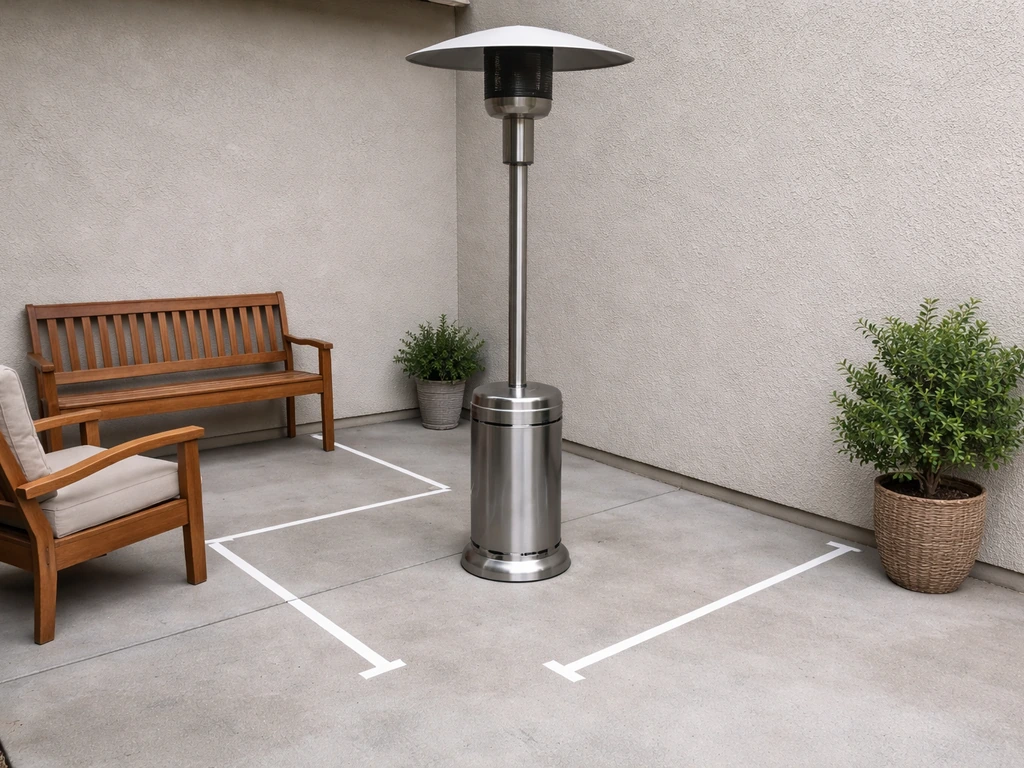
Patio heaters are outdoor-only appliances, full stop. Never run one in a garage, screened porch, tent, or any partially enclosed space, even if the door is open. Carbon monoxide has no smell and it will kill you before you realize anything is wrong. Once you've confirmed you're outside, check your clearances. Most manuals specify at least 5 inches (12.7 cm) of clearance from the burner head air intake to any structure, and additional side clearances from walls, fences, and overhead surfaces. Check your specific manual for the exact numbers since they vary by model. Keep the heater away from dry plants, fabric furniture, umbrellas, and anything else that can catch fire.
Also check the weather. If it's genuinely windy, the heater isn't going to run reliably and it could be a hazard. Many manufacturers, including Nexgrill, explicitly say to turn off the heater and the gas cylinder valve during strong and windy weather. A light breeze is fine; sustained gusts are not.
Fuel and connection checks
Check that the propane tank is not empty. A full 20 lb cylinder typically gets you 8 to 10 hours of runtime at medium heat. If the tank feels very light and you're not sure, weigh it. An empty 20 lb tank weighs about 17 lbs on its own; a full one weighs around 37 lbs. Make sure the regulator is properly threaded onto the tank valve, hand-tight and snug. A loose regulator is one of the most common causes of no-gas situations.
Once connected, do a quick leak check before you even try to light it. Mix a small amount of dish soap with water, open the tank valve slowly, and brush or spray the soapy solution around the regulator connection and the valve fitting. Bubbles forming means you have a leak. If you see bubbles, close the tank valve immediately and do not attempt to light the heater until you've fixed the connection or replaced the regulator. This is not optional.
Identify your patio heater type and controls
Before you touch the knob, know what you're working with. The startup sequence is slightly different depending on your ignition system, and confusing the two leads to frustration or flooding the system with unburned gas.
| Ignition Type | How You Recognize It | What Drives the Startup |
|---|---|---|
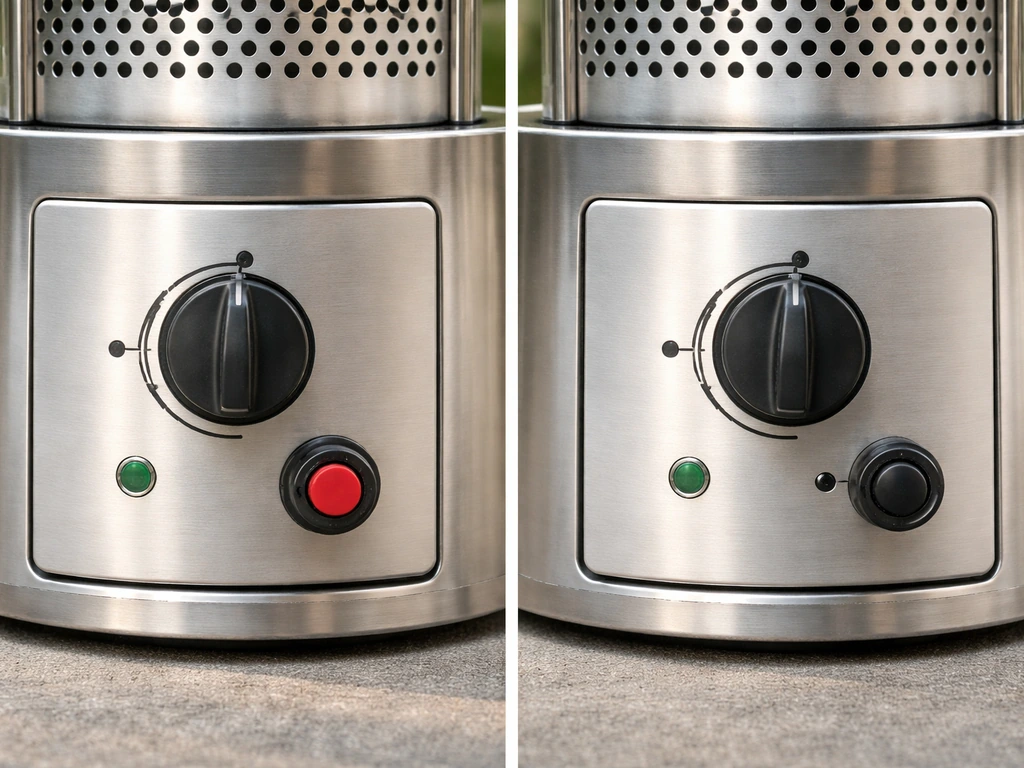
| Electronic/Piezo Push-Button | A separate red or black igniter button near the control knob | Pressing the button creates a spark to ignite gas; no separate pilot flame to establish first |
| Standing Pilot with Thermocouple | A separate small pilot flame assembly; knob has a PILOT position separate from OFF and HIGH/LOW | You light the pilot manually or with a built-in igniter, hold it lit to heat the thermocouple, then open the main burner |
| Match/Manual Light | No igniter button at all; just a knob and a small port or opening near the burner | You bring a lit match or lighter to the burner port while opening the gas flow |
| Electric/Infrared (plug-in) | A power cord, no propane tank; may have a remote or wall switch | Flip the power switch or press the on button; no flame or gas involved |
Most freestanding mushroom-style heaters use a push-button piezo igniter combined with a thermocouple safety system. Tabletop and smaller portable heaters often share the same design. If you have a brand-specific heater like a Hampton Bay, Hiland, or Fire Sense model, the core sequence is the same but the knob labeling, button placement, and hold time can vary. The sections below cover the universal procedure, with notes on where those differences matter.
Step-by-step lighting and startup procedure
This procedure covers the most common setup: a freestanding propane patio heater with a push-button igniter and thermocouple. If you're specifically looking for how to start a Hiland patio heater, the same safety checks and knob sequence apply, but you should follow the exact steps in your model's manual. If you want a quick Hampton Bay-specific walkthrough, look for your model’s exact control steps and follow the same safe startup order how to start hampton bay patio heater. If you have a match-light model, skip the igniter button step and substitute a long-reach lighter held near the burner opening.
- Open the propane tank valve by turning it counterclockwise, slowly, about one full turn. You don't need to open it all the way.
- Wait about 5 seconds for gas to reach the regulator and valve. Don't wait too long or gas will accumulate.
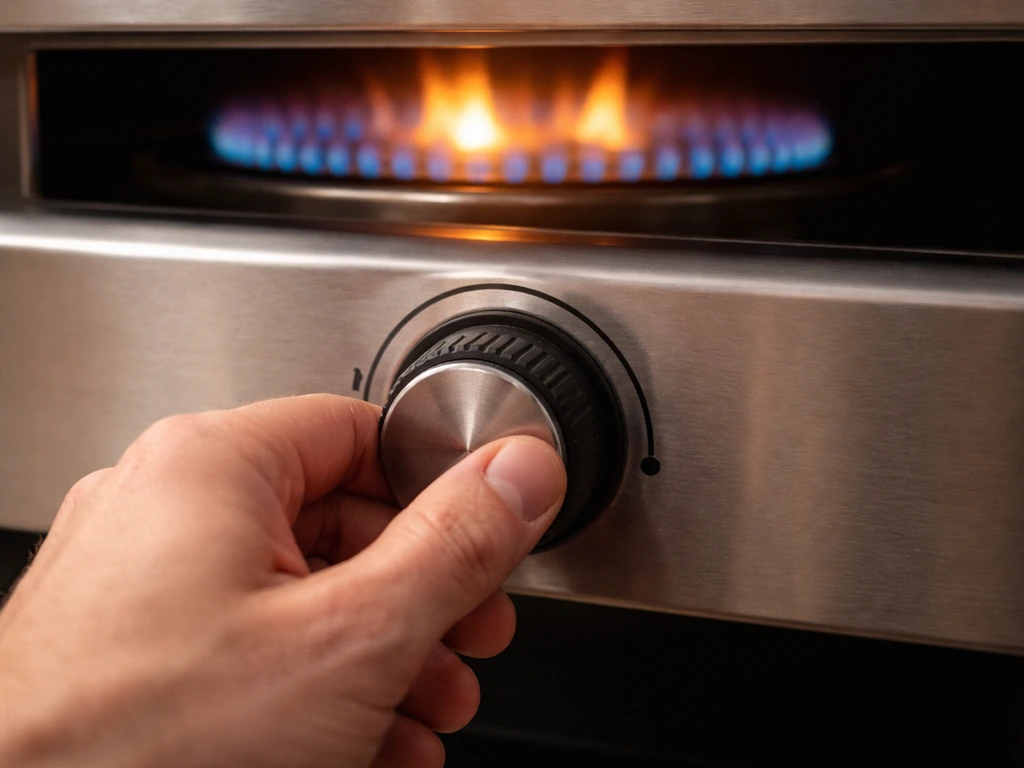
- Turn the control knob to the PILOT or ignition position (often marked with a flame symbol or the word PILOT). On many heaters, you push the knob in while turning it.
- Press and hold the knob in toward the heater body. This manually holds the gas valve open, bypassing the thermocouple safety until the thermocouple heats up.
- While holding the knob in, press the igniter button firmly and repeatedly, about once per second. You should hear a click with each press. Watch the burner head for a flame.
- The moment the flame appears, keep holding the knob in. This is the step most people rush. Hold it for a full 30 seconds so the thermocouple tip gets hot enough to generate the small electrical current that keeps the gas valve open on its own.
- After 30 seconds, slowly release the knob. If the flame stays lit, you're good. If it goes out, repeat from step 3. On the second attempt, hold the knob in a bit longer before releasing.
- Once the pilot or main flame is stable, turn the knob from PILOT toward your desired heat setting: LOW, MEDIUM, or HIGH. The main burner should ignite with a soft whomp sound.
If your heater has been sitting unused for a season, the first startup can take a few extra igniter clicks because there's air in the gas line. This is normal. Keep clicking and holding. If after 8 to 10 attempts across two tries you're still getting no flame, move to the troubleshooting section below.
One important note: if the heater was just running and you turned it off, wait at least 5 minutes before relighting. This allows residual gas to dissipate and prevents a potentially dangerous ignition surge when you try to restart.
Turning it on after it's running: adjusting heat and airflow
Once your heater is running, the control knob is your main tool. Turning it toward HIGH increases gas flow and heat output. Turning it back toward LOW reduces it. Most mushroom-style heaters put out between 40,000 and 48,000 BTUs at full output, which is enough to heat a 20-foot diameter area on a calm night. For everyday use, medium heat is plenty and it extends your tank life significantly.
Airflow matters more than most people realize. Even a well-running heater loses most of its warmth in a stiff breeze because the radiant heat gets pushed sideways before it reaches you. If you're feeling cold even with the heater on HIGH, check the wind direction and reposition the heater so it's between you and the wind, or add a windbreak. Don't enclose it.
Some electric infrared heaters have a heat-angle adjustment so you can tilt the element toward occupants. If yours has this feature, adjust it after startup, not before, because a cold element positioned too close to a surface can still discolor it once it warms up.
If it won't start: quick troubleshooting
Work through these checks in order. Most no-start problems fall into one of four categories: no gas, no spark, a tripped safety device, or a bad component.
No gas reaching the burner
- Tank valve closed or barely open: open it one full turn counterclockwise.
- Empty tank: weigh it or swap it.
- OPD (Overfill Protection Device) tripped: this happens when you open the valve too fast. Close the tank valve completely, disconnect the regulator, wait 30 seconds, reconnect, then open the valve very slowly. This resets the OPD.
- Regulator failure: if you hear no gas flow hiss when you open the valve and the OPD reset didn't help, the regulator may have failed. They're inexpensive and replaceable.
- Kinked or blocked gas hose: inspect the hose from tank to valve for any kinks, crushing, or visible damage.
No spark from the igniter

- Dirty or corroded igniter tip: the small metal electrode at the burner head gets coated with grease and oxidation. Clean it with fine-grit sandpaper or a wire brush. The gap between the electrode and the burner should be about 3 to 4 mm.
- Cracked or broken igniter wire: trace the wire from the button down to the electrode and look for any damage.
- Dead piezo module: the piezo igniter is a small replaceable part. If you hear no click at all when pressing the button, the module itself may have failed. A universal replacement costs a few dollars.
- Use a long-reach lighter as a temporary workaround: hold it near the burner opening and turn on gas while pressing the knob in, as you would in the normal sequence.
Tilt switch or anti-tip device activated
Almost every freestanding patio heater has a tilt safety switch, usually located in the base. If the heater tips past a certain angle (typically 15 to 30 degrees), this switch cuts the gas. It doesn't always reset on its own. Make sure the heater is on a level, stable surface, then check whether the switch itself has a manual reset tab or button near the base.
On some models, you simply need to set the heater upright and level for the magnetic or mechanical switch to reset. If the switch is stuck or faulty, it will keep shutting down the heater even when it's level. A multimeter test across the switch terminals will tell you if it's open (failed) or closed (working). Replacement tilt switches are a common, affordable repair.
If it lights then goes out: thermocouple and tilt switch fixes
If the heater lights when you hold the knob but dies the moment you release it, the thermocouple is almost certainly the issue. The thermocouple is a thin metal probe positioned so its tip sits directly in the pilot flame. When it gets hot, it generates a tiny millivolt current that tells the gas valve it's safe to stay open.
PHMSA notes that many propane cylinders include an overfilling prevention device (OPD) safety shutoff built into the filling valve to help prevent dangerous overfilling thermocouple is a thin metal probe positioned so its tip sits directly in the pilot flame.
If the thermocouple is dirty, bent out of position, or worn out, the flame goes out every time you release the knob.
Diagnose and fix a thermocouple problem
- Look at the pilot assembly with a flashlight. The thermocouple tip should be sitting directly in the path of the pilot flame, not off to the side.
- If it's misaligned, gently bend it back into position. The tip needs to be in the flame, not just near it.
- If it looks correctly positioned but still won't hold, clean the tip with fine steel wool to remove any oxidation or carbon buildup.
- If cleaning and repositioning don't fix it, the thermocouple itself has likely failed. Test it with a multimeter set to millivolts: heat the tip with a lighter and check for a reading of at least 25 to 30 mV. Less than that means it needs replacement.
- Replacing a thermocouple is a straightforward repair. The part costs $5 to $20 depending on the model. You'll unscrew the old one from the gas valve connection and the pilot bracket, then thread in the new one. Match the length and connector type to your original.
Tilt switch causing intermittent shutoff
If the heater runs for a few minutes and then shuts off without any obvious cause, a failing tilt switch is a prime suspect, especially on older heaters or ones that have been moved around a lot. The switch can become intermittent, cutting out even when the heater is level. Test continuity across the switch with a multimeter. If it's reading open when the heater is upright and level, the switch needs replacement. Do not bypass or permanently disable the tilt switch. It exists to shut off gas if the heater falls over, and that's a safety function worth keeping.
Maintenance tips to prevent repeat startup problems
Most startup headaches are maintenance failures in disguise. A little attention a couple of times per season keeps everything working reliably.
- Cover the heater when not in use: a cover keeps the igniter electrode, burner ports, and thermocouple free of moisture, spider webs (a classic burner blockage), and debris.
- Clean the burner head and emitter screen at the start of each season: use a dry brush to clear out insect nests and debris from the burner venturi tube and air intake ports. Blocked ports cause weak flames and ignition failures.
- Inspect the igniter electrode and gap every season: clean off carbon with fine sandpaper and check that the gap is 3 to 4 mm. Adjust or replace as needed.
- Check the gas hose and regulator annually: look for cracks, brittleness, or any sign of damage. Hoses degrade with UV exposure and age. Replace every 3 to 5 years as a general rule.
- Leak-test the connections every time you swap a tank: the 30-second soap-and-water check is worth doing every single time, not just on new installations.
- Store the heater with the tank disconnected if possible: during off-season storage, disconnect the regulator and store the tank upright outdoors or in a dedicated outdoor storage area away from heat sources.
- Keep the tilt switch mechanism clean: dust and debris can cause the switch to stick in an open or closed position. A shot of electrical contact cleaner keeps it moving freely.
If you've worked through all of the above and the heater still won't start or stay lit, it's time to stop and get a technician or simply replace the unit. Older heaters with corroded gas valves, cracked orifices, or failed thermocouples that are no longer available as parts aren't worth pushing. Gas appliances that don't respond to the standard diagnostic steps aren't DIY territory anymore, and a new heater is considerably cheaper than a trip to the emergency room.
FAQ
Should I do a leak check every time, or only the first time I set up my patio heater?
Use an outdoor leak test even if it was working recently. If the valve has been closed for days, a regulator connection can loosen slightly during transport or storage. Open the tank valve slowly during the test, and if you see bubbles anywhere on the regulator or valve fitting, stop lighting and tighten per the manual or replace the regulator.
My patio heater clicks but won’t stay running, could it be the tilt switch instead of the igniter?
Tilt-switch shutdown can look like an ignition problem because it cuts the gas shortly after you try to light. Place the heater on a hard, level surface (not grass or uneven pavers), verify the base is upright, then check for a manual reset tab or button near the base before attempting another ignition sequence.
What should I do if I keep trying to ignite and it still won’t light (or I smell gas)?
Don’t keep pressing the igniter rapidly if you smell gas or you see no flame after multiple holds. The safe approach is to turn the knob back to OFF, close the tank valve, wait several minutes to let gas dissipate, then retry the full startup sequence only after you confirm there is no active gas odor.
How can I tell whether the problem is the thermocouple versus the gas supply?
If the heater lights while you hold the knob but goes out when you release it, that usually points to the thermocouple not staying hot. Clean the pilot area carefully and confirm the thermocouple tip sits in the pilot flame. If it still won’t hold, the thermocouple is often worn and may need replacement.
What are the most common control-knob mistakes people make when trying to start a patio heater?
If your heater has multiple knobs or a knob plus a separate ignition button, always follow the manual’s labeled positions (often PILOT, IGNITE, and OFF). Common mistake is turning to HIGH before ignition, or pressing the igniter without selecting the pilot/ignition position, which can flood the burner area with unburned gas.
Can I adjust the heat direction or tilt before starting, or should I do it after it lights?
Yes, but only after startup and only if the element is safe to adjust on your model. For electric infrared heaters with a tilt or heat-angle feature, adjust after the unit is already producing heat to avoid discoloration or warping on contact with nearby surfaces while cold.
How long should I wait after turning the heater off before trying to restart it?
If it was recently running and you shut it off, wait at least 5 minutes before relighting. This reduces the chance of an ignition surge from residual gas, especially on models with standing-pilot systems.
What’s the best way to confirm my propane tank isn’t empty when the heater won’t start?
If you’re unsure how full your cylinder is, weigh it if possible, and avoid relying on temperature or “feel” alone. A full 20 lb propane cylinder is about 37 lb total, while an empty one is about 17 lb, so even a simple scale check can prevent repeated no-gas startup attempts.
Why does my heater light but then shut off in windy weather?
Sustained gusts can cause the flame to blow away, triggering safety shutdown and making it seem like ignition is failing. Reposition the heater so the wind hits it from the side or behind, use a non-enclosing windbreak, and avoid operating during strong wind conditions per the manufacturer guidance.
Is it ever safe to use a patio heater inside a screened porch or under a covered patio?
Most freestanding heaters should not be enclosed, used in a tent, or used in any partially enclosed space. Even with ventilation, carbon monoxide risk remains, and radiant heat can overheat nearby materials, so treat outdoor-only as a hard rule.