
If you own a Kichler Basics patio fan, you can handle most assembly, wiring, and repair tasks yourself with basic hand tools, a multimeter, and the right model-specific manual. This guide walks you through everything from pulling the label off the motor housing to diagnosing a humming motor or a dead remote receiver, so you can fix the fan on a Saturday afternoon instead of waiting on a service call.
Kichler Basics Patio Fan Repair & DIY Guide: Wiring, Parts

Grant Mercer
22 Jul 2026
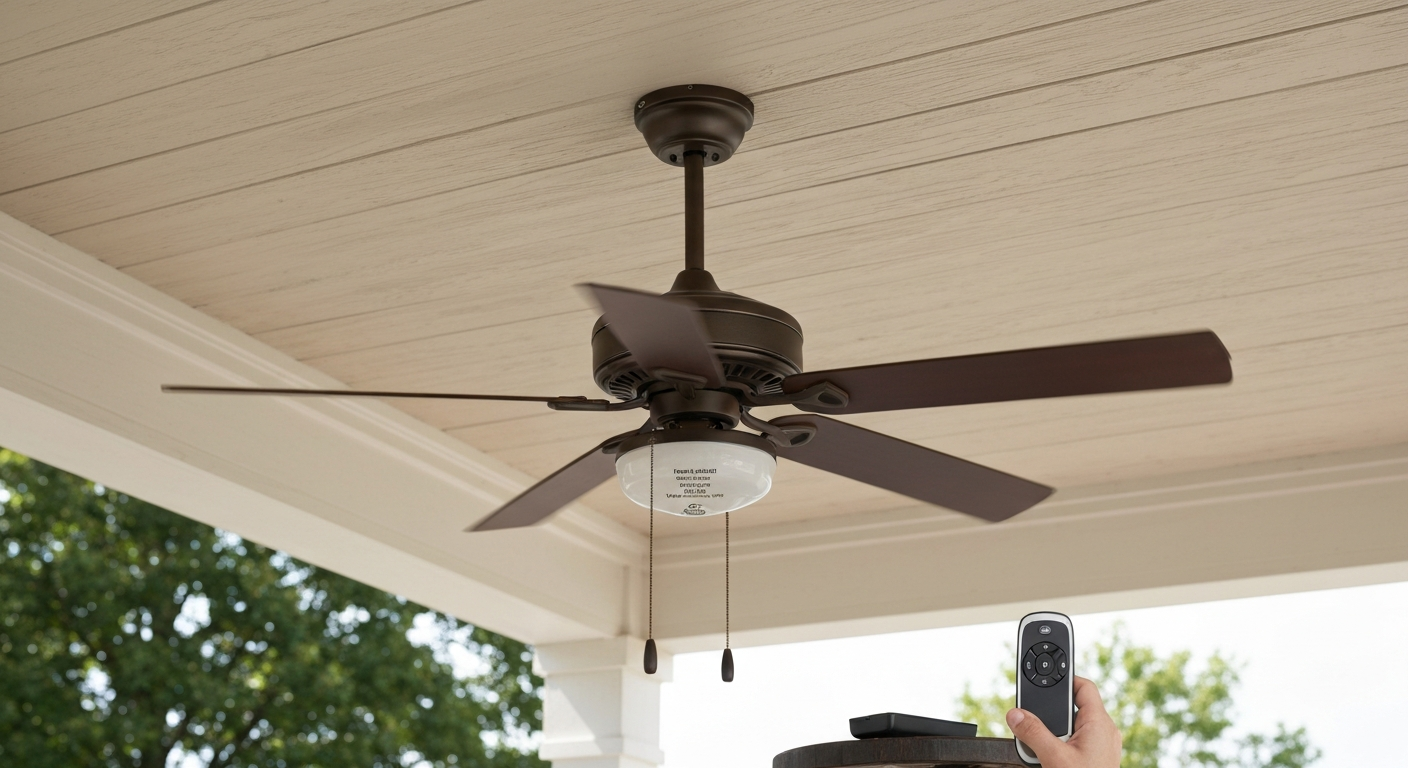
Who this guide is for and what it covers
This guide is for homeowners and DIYers who have a Kichler Basics outdoor ceiling fan installed (or boxed up in the garage), and who want clear, repair-focused instructions without handing the job to an electrician for routine work. I cover model identification, manual lookup, safe wiring, step-by-step assembly, all the common faults I see with these fans, and how to use your patio fan alongside an outdoor heater without creating a hazard. If you already use or troubleshoot other brands of patio heating equipment, a lot of the electrical safety fundamentals here will feel familiar, even if the specific fan hardware differs.
Safety first: electrical, ladder, and outdoor fan precautions
Before you touch any wiring or climb a ladder, stop and lock out the circuit. Go to the breaker panel, flip the circuit breaker for the fan location to OFF, and then verify the wires are dead at the outlet box with a non-contact voltage tester. Do not rely on a wall switch alone. Switches interrupt one conductor; the neutral and sometimes the hot are still energized at the box depending on how the circuit is wired. I have seen plenty of DIYers get bit assuming the switch made it safe.
- Always trip the breaker and confirm dead conductors with a voltage tester before opening the canopy or touching wires.
- Use a ladder rated for your weight plus tools. For ceiling heights above 9 feet, use a step ladder with a work tray rather than balancing parts on a rung.
- Kichler Basics patio fans are rated Damp, not Wet. Never install one where it will be exposed to direct rain, sprinkler overspray, or dripping water. A sheltered covered patio qualifies as a damp location; an open pergola that gets rained on does not.
- The outlet box must be listed for fan support and rated to hold at least 50 lb of moving weight. A standard light-fixture box is not acceptable for a ceiling fan.
- If you are working on a sloped ceiling above 12 feet, or if the existing wiring looks improvised or burned, stop and call a licensed electrician.
- Outdoor fans live in humidity, insects, and temperature swings. Inspect mounting hardware, blade brackets, and wire connections at least once a year for corrosion or loosening.
The damp vs. wet distinction matters legally and practically. Under NEC 410.10 and UL location definitions, a 'damp' location is one protected from weather but subject to condensation and humidity, such as a covered porch or carport soffit. A 'wet' location is subject to dripping, splashing, or flowing water. Kichler Basics patio fans carry a Damp rating, which means they are listed for covered outdoor installations but should never be placed where water can contact them directly. If your jurisdiction's Authority Having Jurisdiction (AHJ) classifies your specific install location as a wet location, you need a wet-rated fan, full stop.
Identifying your Kichler Basics model and key specs
Kichler's Basics family covers a range of 52-inch outdoor ceiling fans. The six most common Basics SKUs I encounter are model numbers 330015, 330016, 330017, 330018, 330019, and 330020. Each has a 52-inch blade span, but they differ in finish, motor type, and whether they ship with a light kit or remote receiver. The model number is your most important piece of information because it determines which manual applies, which replacement parts are compatible, and whether your fan is damp-rated for a specific installation.
The model number label is on the motor housing, inside the canopy, or on a sticker on the downrod bracket. On most Kichler Basics fans, you will find a white or silver label inside the canopy cover once you remove the two canopy screws. It lists the model number, blade span (52 inches on all Basics models I have worked on), motor specifications, and the UL listing and location rating. Write this number down before you order any parts or pull up a manual, because many Basics parts are not cross-compatible even within the same product family.
| Spec | Kichler Basics (330015-330020 range) | Notes |
|---|---|---|
| Blade span | 52 inches | All current Basics patio models |
| Location rating | Damp Rated | Covered outdoor use only; not wet locations |
| Mounting type | Downrod or close-to-ceiling | Model and ceiling height dependent |
| Motor | AC induction (most models) | Check tech specs tab for HP/RPM on your SKU |
| Light kit | Optional / included depending on SKU | Must be listed for use with specific model |
| Remote/receiver | Included or add-on depending on SKU | DIP switch settings vary by model |
Finding the official manual and looking up your model
Kichler includes a printed installation and owner's manual in the box with every Basics fan. If yours is missing, the fastest path is Kichler's own product page. Go to kichler.com, search your model number, and click the 'Docs + Warranty' tab on the product page. That tab links directly to the PDF installation document. The manual for model 330019, for example, covers mounting options, wiring diagrams for the remote receiver, a full troubleshooting table, and a parts exploded-view with part numbers. See the Kichler 52" BASICS PRO DESIGNER, Instruction Manual (Troubleshooting & Electrical Connections) for the official wiring diagrams, troubleshooting table, and exploded parts view Kichler 52" BASICS PRO DESIGNER — Instruction Manual (Troubleshooting & Electrical Connections). Other Basics models use very similar but not identical diagrams, so always pull the manual for your specific SKU.
If the Kichler product page for your exact model number no longer exists (this happens with discontinued SKUs), look for the manual PDF on retailer sites that carry or carried Kichler fans. Searching your model number followed by 'instruction manual PDF' usually surfaces a mirrored copy. The manufacturer also has a customer contact line and a parts/help section on their website where you can request documentation directly. Keep the PDF saved to your phone or a folder you can access in the garage, because you will refer to the wiring diagram more than once.
Tools, replacement parts, and where to source them
Tools you will need
- Non-contact voltage tester (mandatory before any wiring work)
- Phillips and flathead screwdrivers (both sizes, as Kichler uses both)
- Adjustable pliers or small slip-joint pliers for canopy hardware
- Wire strippers and wire nuts (if re-terminating any conductors)
- Digital multimeter with capacitance function (for motor/capacitor diagnostics)
- Ladder rated for your ceiling height
- Blade-balancing kit (available at hardware stores or online for a few dollars)
- Torque screwdriver or driver with bit set (for blade bracket screws)
Replacement parts: OEM vs. aftermarket
For anything structural or electrical, use OEM Kichler replacement parts when possible. This matters most for the remote receiver, capacitor, and motor subassembly. Kichler's website has a Light Kits and Parts section for ceiling fans that lists compatible light kits, remote kits, and replacement accessories by fan model. When you order a receiver or light kit, confirm it is 'listed and marked suitable' for your specific Basics model number, because the receiver's DIP switch configuration and wiring harness connector vary. Aftermarket blades are generally fine as long as the blade pitch, blade iron hole spacing, and weight match your original spec. For capacitors, match the exact microfarad (µF) rating and voltage rating printed on the old capacitor. Do not substitute a higher-µF unit thinking it will run better. It will not, and it can damage the motor windings.
You can order OEM Kichler parts through Kichler's website, authorized dealers, or by calling their customer service line. Part numbers you will typically need to look up include the blade set (listed as a unit in the manual's parts table), the blade irons, the remote receiver module, the capacitor (listed by µF and voltage), and the light kit assembly. Write down the part numbers from your manual's exploded-view diagram before you call or order online.
Unboxing and pre-install inspection checklist
Do not carry the box up the ladder and start installing. Open it on the floor first and go through this checklist. I have caught cracked blade irons, dented canopies, and missing hardware bags before the fan ever went up, which saved a return trip down the ladder.
- Confirm the model number on the box matches the model number printed on the motor housing label.
- Count all blades. A 52-inch Basics fan ships with five blades on most SKUs. Check your parts list.
- Check that the hardware bag is sealed and complete. Lay out screws, nuts, and brackets and compare to the manual's parts list.
- Inspect the canopy and mounting bracket for dents or cracks.
- Inspect each blade iron (the metal arm that connects blade to motor) for bends or pre-drilled holes that are off-center.
- Check the downrod is the correct length for your ceiling height (see the mounting section below).
- If a light kit is included, confirm the lens and bulb socket assembly are undamaged.
- If a remote receiver is included, locate the DIP switch access point and check the manual for the default frequency setting.
- Confirm the outlet box at the ceiling is listed for fan support. Look for the words 'Acceptable for Fan Support' or a fan icon stamped on the box. If it says 'For Use With Outlet Boxes' or nothing about fans, replace it before proceeding.
Step-by-step assembly: bracket, downrod, canopy, and blades
The assembly sequence for Kichler Basics fans follows the same order whether you are installing model 330015 or 330020. Variations are called out in your model-specific manual. Work on the floor for everything you can before going up the ladder.
- Assemble the mounting bracket onto the fan-support outlet box at the ceiling. Most Kichler Basics brackets use two screws through the bracket ears into the box mounting ears. Tighten firmly.
- Thread the downrod through the canopy (canopy faces down over the downrod). Insert the downrod into the motor housing top and secure with the hitch pin and cotter pin as shown in your manual. Do not skip the cotter pin. It is the safety retention.
- Route the fan wires (typically black, white, blue, and green/bare) up through the downrod. Leave at least 6 inches of wire extending above the canopy for connection.
- Hang the motor assembly by hooking the ball at the top of the downrod into the bracket's ball socket. The ball should seat fully and rotate slightly to confirm proper seating.
- Make wire connections as described in the wiring section below, then tuck wires into the canopy and secure the canopy to the bracket.
- Attach blade irons to the motor housing. Each blade iron mounts with two screws into the motor's blade-iron tabs. Tighten to snug, not strip.
- Attach blades to the blade irons. Each blade uses two screws through the blade iron into the blade mounting holes. Align carefully so the blade sits flush on the iron.
- If installing a light kit, attach the light kit housing to the bottom of the motor with the supplied screws, connect the light lead (blue wire from motor or receiver to light kit), install bulbs, and attach the lens.
- Restore power at the breaker and test all functions before final torque check.
Mounting options: standard ceiling, sloped ceiling, and low-clearance installs
Choosing the wrong mount for your ceiling is one of the most common mistakes I see, and it causes wobble, noise, and in bad cases, stress on the canopy hardware. Here is how to decide.
Standard flat ceiling with downrod
For ceiling heights of 8 feet or more, use the standard downrod. NEC and manufacturer guidelines recommend a blade clearance of at least 7 feet from the floor to the blade path for safety. On an 8-foot ceiling, a 6-inch downrod typically works. On a 9-foot ceiling, use a 12-inch downrod. Kichler sells longer downrods separately if the included length is insufficient for your space. Measure your ceiling height, subtract the motor housing height (roughly 10 to 12 inches for most Basics models), subtract 7 feet of desired blade clearance, and that gives you the minimum downrod length.
Sloped ceiling
Kichler Basics fans are compatible with sloped ceilings using an angled mounting adapter (also called a sloped ceiling adapter or vaulted ceiling kit). The ball-and-socket mount at the bracket allows the motor to hang plumb even if the bracket itself is on a slope. Your manual specifies the maximum slope angle the fan is rated for, typically up to 45 or 52 degrees. If your ceiling slope exceeds that, do not guess. Contact Kichler for a solution or consult an electrician. The adapter hardware is not the same as a standard install, and the canopy must be able to pivot to close against the angled surface.
Low-clearance or close-to-ceiling (hugger) install
If your ceiling is exactly 8 feet and you want to maximize clearance, some Kichler Basics models support a close-to-ceiling mount that eliminates the downrod. Check your specific model's manual before assuming this is possible. Not all Basics SKUs support the hugger configuration. In close-to-ceiling mode, the canopy mounts directly to the outlet box bracket, and the motor hangs inches below the ceiling. This reduces airflow efficiency slightly because the motor is close to the ceiling surface, but it is structurally acceptable when the manual supports it. Do not improvise a hugger mount on a model designed only for downrod mounting. The canopy and wiring path are not designed for it and you will have trouble closing the canopy over the connections.
| Ceiling Type | Recommended Mount | Key Consideration |
|---|---|---|
| Flat, 8 ft | Standard downrod, 6-inch | Achieve 7 ft blade clearance from floor |
| Flat, 9 ft | Standard downrod, 12-inch | Longer downrod may need separate purchase |
| Flat, 7 ft 6 in or less | Close-to-ceiling (if model supports it) | Confirm manual permits hugger mode before installing |
| Sloped, up to 45-52 degrees | Angled sloped-ceiling adapter | Check max slope angle in your model's manual |
| Sloped, beyond rated angle | Do not install without pro consultation | Exceeds hardware design limits |
Wiring your Kichler Basics patio fan
Wiring is where most DIYers slow down, but the Kichler Basics wiring diagram is actually straightforward once you understand what the remote receiver is doing. Most Basics patio fans ship with or are compatible with a canopy-mounted receiver that handles both fan speed and light dimming from the remote. Here is how the connections work.
Standard remote-receiver wiring (most Basics models)
The receiver sits inside the canopy and acts as the intermediary between your house wiring and the motor/light. From the manual for model 330019 (which represents the typical Basics wiring layout): connect the motor's black wire to the receiver terminal labeled 'TO MOTOR L'; connect the motor's white wire to the receiver terminal labeled 'TO MOTOR N'; connect the motor's blue wire (the light lead) to the receiver's light output lead. From the house side: connect the house hot (black) to the receiver terminal labeled 'AC IN L'; connect the house neutral (white) to the receiver terminal labeled 'AC IN N'; connect all ground wires (green from fan, bare or green from house) together and secure to the ground point in the box or the green screw on the bracket.
Before you tuck the receiver into the canopy, check the box fill. NEC Article 314.16 requires you to count conductors and fittings to confirm the outlet box has enough cubic-inch capacity. A receiver adds bulk, and if the box is already at or near its rated fill, you may need a larger box. Count each insulated conductor entering the box as one unit, each device (switch, receptacle) as two, internal clamps as one, and the ground conductors together as one. Multiply by the conductor gauge factor (2.0 cubic inches per 14 AWG conductor, 2.25 per 12 AWG). Online NEC box-fill calculators make this quick. If the receiver plus existing wires exceed the box's rated cubic inches, you need a larger or extension box before proceeding.
Wiring without a remote receiver
If your model does not include a receiver or you are installing a replacement without one, the connections go directly: house hot to motor black, house neutral to motor white, motor blue (light lead) to a switched hot if you want separate control, and all grounds bonded together. This configuration requires a dual-switch wall setup to control fan speed and light separately, or you rely on the pull chains. Check your model's manual to confirm it supports direct-wire operation without a receiver. Some Basics models with integrated electronics are not designed for direct wiring.
DIP switch settings for the remote and receiver
If your remote is not controlling the fan after installation, the most common cause is a DIP switch mismatch between the remote handset and the receiver in the canopy. Both units have a set of small DIP switches (typically four switches in a row) that must be set identically. Your manual shows the switch positions. The default from the factory is usually all switches in the same position (all up or all in the 'ON' direction), but if you have multiple fans or your neighbor has the same model, you need to set a unique combination to prevent cross-interference. Access the receiver DIP switches through the canopy, and the remote handset switches through the battery compartment cover.
Troubleshooting common Kichler Basics patio fan faults
Work through this list in order. Most issues are in the first few checks, and jumping to a capacitor replacement when the breaker was tripped is a waste of time.
Fan won't start at all
- Check the circuit breaker. Reset if tripped.
- Check that the remote or wall switch is actually sending a signal. Replace remote batteries.
- Verify DIP switch settings match between remote and receiver.
- Confirm wire connections inside the canopy are tight. Loose wire nuts are a leading cause of intermittent failure outdoors, where thermal cycling loosens connections over time.
- Test voltage at the receiver's AC IN terminals with the power on (carefully, with a meter, not your fingers). If there is no voltage, the problem is upstream in the switch or breaker.
- If voltage is present at the receiver input but the fan still does not run, the receiver is likely failed. Replace it with the OEM-matched receiver for your model.
Fan hums but blades don't turn
A hum with no blade movement almost always points to a failed run capacitor. The capacitor provides the phase shift that starts and runs the motor. When it fails, the motor sees full voltage (hence the hum) but cannot develop starting torque. Turn off the breaker, discharge the capacitor by bridging its terminals with a 20k-ohm resistor for 30 seconds before touching it, then remove it and measure its capacitance with a multimeter set to the capacitance function. If the reading is more than 10 percent below the labeled µF value, or if the capacitor is visibly bulged or has leaked, replace it. Match the exact µF rating and voltage rating from the label. Do not upsize.
Fan wobbles or vibrates
Wobble has three common causes: a blade that is bent or warped, a blade iron that is bent, or a blade that is out of balance. Start by checking that all blade-iron screws and blade screws are tight. Loose screws are the number-one wobble cause, and they loosen faster outdoors because of wind load and thermal cycling. Next, measure the tip-to-ceiling distance for each blade with a ruler. All tips should be within 1/8 inch of each other. A blade that measures noticeably lower or higher has a bent iron or warped blade. Replace the iron or blade as needed.
If all hardware is tight and all tips are even but the fan still wobbles, use a blade-balancing kit. See How to Balance a Ceiling Fan | The Home Depot for step-by-step instructions on using a blade-balancing kit and applying stick-on weights to correct wobble. These inexpensive kits include a plastic clip you slide along one blade at a time while running the fan at medium speed. When you find the blade and position that reduces wobble, replace the clip with the included adhesive weight at that spot. This process takes 10 to 15 minutes and fixes the majority of residual wobble cases.
Light kit not working
- Confirm the blue motor lead is connected to the receiver's light output (or to a switched hot if no receiver).
- Check that the bulb is properly seated and not burned out.
- If the fan has an LED array rather than a socket bulb, check that the LED driver module connection inside the light kit housing is secure.
- If the receiver controls the light, try resetting the receiver per the manual (usually a power cycle with the wall switch).
- Confirm the light kit is listed as compatible with your specific Basics model. An incompatible kit may not connect properly or may be underpowered.
Remote stops responding over time
Outdoor receivers are more vulnerable to moisture and insects than indoor units. If the remote worked initially and then gradually or suddenly stopped, open the canopy and visually inspect the receiver for moisture damage, corrosion on the terminals, or insect intrusion. In humid climates I have found mud dauber wasp nests inside canopies of fans as young as one season old. Clean any debris carefully, check all connections, and if the receiver board shows corrosion or burn marks, replace it. Also replace the remote batteries even if they seem new. Alkaline batteries can lose voltage unevenly in heat.
Repair procedures: blades, capacitor, motor, and pull chain
Replacing blades or blade irons
- Turn off and lock out the circuit at the breaker.
- Remove the two screws attaching the blade to the blade iron, then remove the two screws attaching the blade iron to the motor housing. Keep hardware organized per blade position.
- Compare the new blade or iron to the old one for length, hole spacing, and pitch angle before installing.
- Reinstall in reverse order. Torque blade-iron-to-motor screws firmly but do not strip them. Kichler uses a medium-thread self-tapping screw into an aluminum motor tab on some models.
- After replacing all needed blades, check tip-to-ceiling distance on all blades and run the balancing procedure.
Replacing the run capacitor
- Turn off and lock out the circuit at the breaker.
- Open the canopy and locate the capacitor (a small cylindrical or oval plastic component with two or more wire leads).
- Discharge the capacitor: bridge the terminals with a 20k-ohm, 2-watt resistor held in insulated pliers for at least 30 seconds. Do not short the terminals directly.
- Note the µF value and voltage rating on the capacitor label. Photograph it.
- Disconnect the capacitor leads, noting which color lead connects where (photograph this too).
- Install the new capacitor with identical µF and a voltage rating equal to or greater than the original.
- Reconnect leads, tuck wiring back into the canopy, restore power, and test.
Replacing the pull chain switch
On Kichler Basics models that use a pull chain for speed control (rather than relying entirely on the remote), the pull-chain switch is inside the motor housing switch cup. To replace it, lock out the breaker, remove the canopy, lower the motor, and open the switch cup using the small Phillips screw or snap tabs depending on your model. The pull-chain switch is a 3- or 4-speed rotary switch with push-on terminals. Note the wire colors on each terminal before disconnecting. Pull-chain switches are generic components available at hardware stores and online; match the number of speeds and confirm the amp rating equals or exceeds the original.
Motor subassembly replacement
Motor replacement on a Kichler Basics fan is covered under Kichler's warranty for the motor subassembly, so before you buy a motor, check whether your unit is within the warranty period. If the motor hums, overheats, smells burned, or has failed after capacitor replacement, contact Kichler customer service before purchasing a motor. If the fan is out of warranty, OEM motor replacements are available through Kichler's parts channel. Full motor swaps on these fans are within DIY scope but take the better part of an hour: you will remove blades, disassemble the canopy, transfer wiring to the new motor, and reinstall everything in sequence.
Routine maintenance and seasonal care
An outdoor ceiling fan that runs from spring through fall in a humid climate needs more attention than one in a dry environment. Here is the maintenance schedule I follow for Kichler Basics fans.
| Interval | Task | What to look for |
|---|---|---|
| Monthly (during use season) | Wipe blades with a dry or slightly damp cloth | Dust, pollen, mold on blade surfaces |
| Monthly | Listen for new noise or vibration changes | Early sign of a loosening screw or failing capacitor |
| Each spring (start of season) | Tighten all blade-iron screws and blade screws | Screws back off from seasonal temperature swings |
| Each spring | Inspect wiring inside canopy | Corrosion, insect intrusion, loose connections |
| Each spring | Check canopy and mounting bracket hardware | Rust on screws, cracks in canopy |
| Each fall (end of season) | Clean blades thoroughly and apply a thin coat of paste wax | Protects against humidity and mold over winter |
| Each fall | Remove remote receiver batteries if fan is stored or unused over winter | Prevents battery leak damage inside handset |
| Every 2-3 years | Inspect receiver board for corrosion | Early replacement is cheaper than chasing intermittent faults |
For fans in coastal or high-humidity environments, I recommend checking and tightening hardware every 60 days rather than monthly. Salt air corrodes aluminum motor tab threads faster than you expect, and a screw that strips out on a salt-air fan can require a motor housing replacement for what started as a five-cent fix.
Using your Kichler Basics patio fan with an outdoor heater
A lot of homeowners who have a patio heater want a ceiling fan in the same space, especially for shoulder-season evenings where the heater warms the air but the air needs to move. You can absolutely run both at the same time, but the placement and airflow direction matter for safety and efficiency.
The most important rule is clearance. Most freestanding and tabletop propane heaters require a minimum horizontal clearance of 3 feet from any combustible material, including the fan blades in their rotation path. Do not mount the fan directly above a freestanding mushroom-style patio heater. Refer to Zubri patio heaters instructions for model-specific clearance and safety guidance when pairing a heater with your fan. For heater-specific installation and clearance guidelines, see the Trustech patio heater manual. For specific heater installation and safety details, consult the Kirkland Signature patio heater manual for clearance and maintenance guidance. Hot exhaust gases rising from the heater can heat the motor housing over time, and in the unlikely event the heater's tip-over protection fails, you do not want a fan directly in the flame path. If your heater is a wall-mounted infrared panel type, follow the clearance spec in that heater's manual and confirm the fan blades pass well outside it.
For airflow direction: in winter or cool weather, run the fan in reverse (clockwise from below) at low speed to push warm air down from the ceiling without creating a wind-chill effect. This is the setting that works best with a patio heater because it circulates the heater's warm output down to occupant level without blowing cool air over people. In warm weather, run the fan in the standard counterclockwise direction at medium or high speed to create evaporative cooling.
If you are also managing thermocouple failures, tilt-switch issues, or ignition problems on the heater side of your setup, those are separate repair tasks from the fan work described here. Troubleshooting a heater that won't stay lit, dealing with a failed igniter, or diagnosing a thermocouple on gas heaters from brands like Blue Rhino, Shinerich, or others involves its own safety protocols and diagnostic sequence. See the Shinerich patio heater manual for heater-specific safety and troubleshooting steps. For heater-specific safety, troubleshooting, and parts, consult the Blue Rhino patio heater manual. The electrical safety habits from this fan guide, particularly locking out the circuit and confirming safe conditions before touching components, carry over directly to any repair work on the heater.
When to stop DIY and call a professional
Most Kichler Basics fan work is reasonable DIY territory. But there are clear stopping points where calling a licensed electrician is the right move, not a defeat.
- The outlet box at the ceiling is a standard light-fixture box and cannot be replaced from below (requires attic access or opening the ceiling).
- The existing house wiring is aluminum conductors rather than copper. Aluminum wiring requires special connectors and handling that most DIYers should not attempt.
- You find burned insulation, melted wire nuts, or scorch marks inside the canopy or at the outlet box.
- The existing wiring does not have a ground conductor, or you cannot determine which conductor is hot and which is neutral.
- The ceiling is over 12 feet and requires a tall ladder plus a helper, and you do not have both.
- After capacitor replacement, the motor still hums and does not start. This may indicate a failed motor winding requiring motor replacement or professional diagnosis.
- You are in a jurisdiction that requires a permit for ceiling fan installation, and you are not comfortable pulling one. Check with your local building department.
Kichler's own guidance echoes this: their installation FAQ states that if you are uncomfortable at any point, contact a licensed electrician or a local Kichler dealer. That is good advice. The fan is a repairable, long-lasting appliance when treated right. A wiring mistake or an improperly supported box is a fire or fall hazard. Know the line.
FAQ
Which specific Kichler Basics patio fan models and SKUs must I identify and collect specifications for?
Collect every Basics-family SKU sold for outdoor/covered-patio use (example 330015–330020 and similar 52" SKUs). For each model gather published blade span, blade count, blade material, motor type, finish options, weight, hub-to-ceiling height, damping/wet/damp rating, included accessories (downrod length, light kit, remote/receiver), and the product page ‘Tech Specs’ and ‘Docs + Warranty’ sections from Kichler’s product pages or authorized retailer PDFs.
What official manuals and documents are authoritative and required for safe, model-specific instructions?
Download the model-specific installation/owner manual and installation sheet (PDF) for each SKU (these contain safety rules, parts lists, exploded views, mounting options, wiring diagrams, receiver dip-switch/RF pairing, torque specs, troubleshooting). Also capture the product page ‘Docs + Warranty’ PDF links and any accessory compatibility documents (light-kit/remote part lists) from Kichler and verified retailer mirrors.
Which Kichler resources cover replacement parts, light kits, remotes and how do I confirm compatibility?
Collect Kichler’s Light Kits & Parts pages and the fan’s installation manual exploded-parts list/part numbers. Gather the manufacturer’s accessory compatibility notes (listed/marked suitability statements) and Kichler customer-care replacement-parts/contact pages to source OEM parts and verified part numbers.
What wiring diagrams and receiver wiring details must be captured and reproduced for guidance?
Extract the exact OEM wiring/receiver diagrams from each model’s installation sheet: motor leads (black to motor hot L, white to motor neutral N, blue to light lead), receiver AC-in L and N, grounding, and light-kit wiring. Also collect receiver-specific diagrams (wire colors, terminal labels, remote/pairing steps) for any factory remote kits used with Basics models.
What code, safety and mounting support information must I research and include?
Gather manufacturer instructions requiring a listed fan-support box or structural support (minimum rated moving weight, typically ≥50 lb), NEC box-fill and ceiling-support guidance (NEC Article 314 and 314.27), and Kichler’s installation warnings. Also collect UL definitions for dry/damp/wet locations and industry commentary (e.g., EC&M) to explain where damp-rated Basics fans may be used and when a wet-rated unit or AHJ approval is required.
What electrical testing and capacitor/motor diagnostic materials are necessary?
Collect the model manual’s troubleshooting checklist plus independent capacitor testing/replacement guides: safe isolation and discharge procedures, multimeter capacitance testing steps, replacement part spec matching (µF and voltage rating), PPE and lockout steps. Also gather motor-failure signs and OEM guidance on motor subassembly warranty and replacement procedures.