
You can convert some propane patio heaters to natural gas, but not all of them, and the answer depends almost entirely on whether your specific model was designed by the manufacturer to be converted. If a factory conversion kit exists for your heater, the job is doable for a handy DIYer: you swap the orifice jet, replace or reconfigure the regulator, connect to a natural gas supply line, and test carefully. If no manufacturer kit exists, stop there. Swapping a generic jet from a hardware bin and hoping for the best is genuinely dangerous and violates every relevant code.
Can You Convert Propane Patio Heater to Natural Gas, How

Grant Mercer
19 Jul 2026
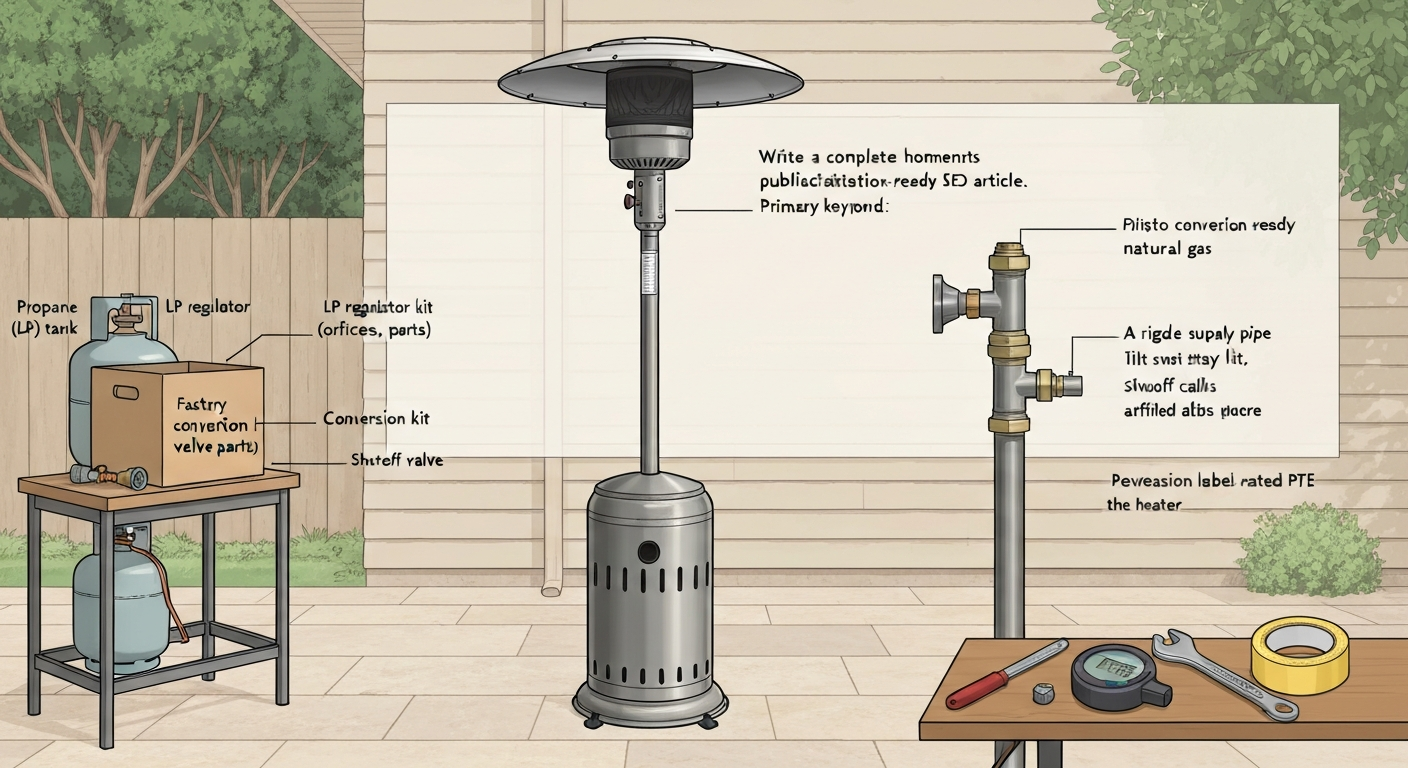
When conversion is possible and when it is not
The short version: conversion is only safe and legal when three things align. First, the manufacturer must offer a listed conversion kit for your exact model. Second, the completed installation must comply with NFPA 54 (National Fuel Gas Code) and your local jurisdiction's requirements. Third, the converted heater must pass a proper pressure and leak test before it is put back into service. If any of those three conditions cannot be met, you need to either hire a licensed gas fitter who can take on the liability, or buy a heater that is factory-rated for natural gas.
CSA/ANSI Z83.26, the standard that governs gas-fired outdoor infrared patio heaters in North America, explicitly permits manufacturers to design heaters for field conversion and includes Annex D, which defines the construction and labeling requirements for appliances that come with optional listed conversion kits. This means standards-compliant conversion exists as a category. It does not mean every heater on a patio is convertible. Manufacturers like Bromic (kit BH8280050 for portable LP-to-NG) and Mr. Heater (Fuel Conversion Kit F200294 for LP-to-NG) publish and sell these kits. Mr. Heater publishes a factory Fuel Conversion Kit (F200294) for LP-to-NG conversions on its product page titled "Mr. Heater, Fuel Conversion Kit LP to NG product page." Mr. Heater — Fuel Conversion Kit LP to NG product page. If your brand does not have one, no third-party workaround is a substitute.
| Scenario | Conversion possible? | What to do |
|---|---|---|
| Manufacturer sells a listed conversion kit for your model | Yes, with proper installation and testing | Buy the kit, follow this guide, test thoroughly |
| Manufacturer makes a NG version of your model but no conversion kit | Generally no | Consider selling and buying the NG model |
| No-name or discontinued heater with no kit available | No | Replace with a factory NG heater |
| Older mushroom-style heater with cast burner, no data plate | No | Do not attempt conversion |
| Commercial heater with certified factory kit and gas fitter required | Yes, but not DIY | Hire a licensed gas fitter |
Safety warnings you need to read before touching anything
Natural gas and propane both kill. Carbon monoxide poisoning, fire, and explosion are not hypothetical risks on a project like this, they are the direct result of one missed step. Read this section fully before you open a toolbox.
- Work outdoors or in a fully ventilated space. Never work on gas appliances in an enclosed garage or shed.
- Carbon monoxide (CO) has no smell and no color. An improperly sized orifice or a partial blockage can produce dangerous CO levels even with a flame that looks normal. Install a CO detector within 10 feet of the heater's operating position before first use after conversion.
- Natural gas supply lines are not portable like propane tanks. Once your heater connects to house piping, a gas leak anywhere between the meter and the burner stays live until you shut off the supply at the meter or the nearest upstream valve. Know where your gas shutoff is before you start.
- Clearances matter. Even after conversion, the heater's listed clearance-to-combustibles does not change. Most mushroom patio heaters require 36 inches of clearance above and 24 to 36 inches to the sides. Check your data plate and manual.
- The anti-tilt switch and tip-over shutoff on your heater are required safety devices under the same CSA/ANSI Z83.26 standard. Never bypass, remove, or disable them during or after conversion. If the tilt switch fails after reassembly, the heater must not be used until it is repaired.
- The thermocouple or flame sensor is your heater's other critical safety device. It cuts the gas valve if the flame goes out. If either of these devices is damaged during disassembly or does not reset properly after conversion, stop and diagnose before lighting the heater.
- Do not use pipe dope (thread sealant compound) on flare fittings. Use only yellow PTFE gas-rated tape or a manufacturer-approved pipe-thread sealant on NPT threads. Never use white plumber's PTFE tape on gas lines.
- After any gas work, test every joint with a soap-bubble solution or a calibrated combustible-gas detector before ignition. Never test for leaks with a flame.
Compatibility checklist: heater types, orifices, and pressure
Propane (LP) and natural gas (NG) are not interchangeable fuels from a hardware standpoint. They burn at different pressures, different air-to-fuel ratios, and through different orifice sizes. Understanding these differences is what the compatibility check is built around.
Pressure: LP vs. NG
Propane appliances operate at a regulator outlet pressure of approximately 11 inches of water column (in. W.C.), which is about 0.40 psi. Natural gas appliances operate at approximately 7 in. W.C. supply pressure (roughly 0.25 psi) with a manifold pressure that is often around 3.5 in. W.C. or whatever your manufacturer specifies. These are not interchangeable settings. Running an LP orifice on NG supply pressure starves the burner. Running an NG orifice on LP pressure produces an oversized, sooty, potentially dangerous flame.
| Fuel | Typical supply pressure | Typical manifold pressure | Orifice size relative to NG |
|---|---|---|---|
| Propane (LP) | 11 in. W.C. (~0.40 psi) | Manufacturer-specified, typically 10–11 in. W.C. | Smaller (higher pressure requires smaller orifice) |
| Natural Gas (NG) | 7 in. W.C. (~0.25 psi) | Manufacturer-specified, often ~3.5 in. W.C. | Larger (lower pressure requires larger orifice) |
Heater types and convertibility
Freestanding mushroom-style patio heaters (the tall propane-cylinder-base models) are the most commonly converted type because they have a straightforward burner assembly and orifice. If you need guidance on physically shortening a freestanding propane patio heater for storage or clearance, see how to shorten a propane patio heater. Tabletop propane heaters can be converted if a kit exists, but their smaller size often means less accessible components. Infrared tube heaters and radiant heaters with ceramic panels are sometimes convertible with manufacturer kits but have more complex burner assemblies. Any heater that runs on a 1-lb disposable canister is not a candidate for natural gas conversion under any circumstances.
The compatibility questions to answer before buying anything
- Does your manufacturer sell a listed conversion kit specifically for your model number? (Check the manufacturer's website and call them if needed.)
- Does the heater's data plate show an inlet pressure specification and a BTU rating? (You need this to verify the NG supply at your site meets the requirement.)
- Does your home's natural gas supply reach the patio location, and what is the available pressure at that point? (Have your gas utility measure this if you are unsure.)
- Is your supply line adequately sized for the heater's BTU demand? A typical mushroom patio heater runs 40,000 to 50,000 BTU/hr. Your supply pipe sizing must support that load at the end of the run.
- Does your local jurisdiction require a permit for a new natural gas appliance connection? (Most do. More on this below.)
Manufacturer kits, warranties, and liability
Manufacturer conversion kits are not optional accessories. They are the legal and practical boundary between a compliant installation and a voided warranty with potential liability attached. Mr. Heater's manuals state explicitly that the conversion kit shall be installed by a qualified service person, and failure due to improper fuel conversion is not covered under warranty. Bromic's warranty is a 1-year limited parts and workmanship warranty, and like most manufacturers, it excludes damage caused by unauthorized modifications. GE and most major appliance manufacturers use nearly identical language: improper installation or fuel conversion voids the warranty and can cause fire, explosion, or CO poisoning.
What this means in practice: if you use a factory kit, follow the manufacturer's instructions exactly, and have the work inspected where required, you are working within the system. If you improvise, you own every outcome. Beyond warranty, if a converted heater causes property damage or injury, your homeowner's insurance carrier will ask whether the appliance was properly converted and inspected. A non-listed, non-permitted modification is a very difficult position to defend.
Some manufacturers require that even a factory kit be installed by a licensed gas fitter or qualified service technician rather than a DIYer. Read your specific kit instructions before assuming you can do this yourself. When the instructions say 'qualified service agency,' that is not just legal boilerplate. Take it at face value.
Pre-conversion checklist
Do not buy parts or start disassembly until every item on this checklist is confirmed. Skipping this step is how people end up with an unusable heater or an unsafe installation.
- Locate the heater's model number and serial number from the data plate (usually on the base or burner housing). Write them down.
- Download or obtain the original manufacturer's manual for your exact model. If you cannot find it, the manufacturer's website or a manual resource site is your first stop.
- Contact the manufacturer or check their website to confirm a conversion kit exists for your model. Get the kit part number in writing.
- Order the factory conversion kit. Do not substitute generic orifices or regulators.
- Check your local jurisdiction's permit requirements. In most U.S. jurisdictions, connecting a new appliance to a natural gas line requires a permit and inspection. Call your local building department.
- Verify your existing outdoor gas supply line (if any) is sized and rated for the heater's BTU demand at the full run length from the meter.
- Confirm the supply pressure at the connection point meets the heater's NG inlet requirements. Your gas utility can measure this or provide the nominal pressure for your service.
- Inspect the heater's condition. Look for rust, cracked burner components, damaged igniter wires, and a functional anti-tilt switch. Do not convert a heater that needs other repairs. Fix those first.
- Gather all tools and materials listed in the next section before starting work.
- Plan your natural gas connection route and confirm it meets local code for pipe type, burial depth (if applicable), and fitting types.
Parts and tools you will need
Parts
- Manufacturer's factory LP-to-NG conversion kit for your model (includes NG orifice jets/injectors, valve conversion hardware, and a required conversion label that must be affixed to the heater after work is complete)
- Listed flexible gas appliance connector, ANSI Z21.24/CSA 6.10 rated, in corrugated stainless steel (CSST) or corrugated metal tubing, in the appropriate diameter and length for your installation. Do not exceed the maximum connector length specified by the manufacturer or local code, typically 3 to 6 feet for appliance connectors.
- Shutoff valve: a listed 1/4-turn ball valve in the correct pipe size, installed in an accessible location upstream of the appliance connector
- Pressure regulator: if your house pressure exceeds the heater's maximum inlet pressure, you need an additional appliance regulator; many factory kits include one
- NPT fittings in the correct size for your supply line and heater inlet (commonly 3/8-inch or 1/2-inch NPT; confirm on your heater's data plate or manual)
- Yellow PTFE gas-rated thread seal tape (not white plumber's tape)
- Pipe-thread sealant (gas-rated, if required by your fitting type)
- Conversion label from the kit (must be affixed to the heater per CSA/ANSI Z83.26 requirements)
Tools
- Digital manometer or U-tube water manometer (essential for verifying inlet and manifold pressure; standard pressure gauges are not accurate enough for readings in the 3.5 to 11 in. W.C. range)
- Adjustable wrench and pipe wrenches (two, for holding fittings while tightening)
- Open-end wrenches in sizes matching your orifice fittings (typically 7/16-inch to 9/16-inch for common jet sizes)
- Screwdrivers: flathead and Phillips in multiple sizes for burner housing panels
- Soap bubble solution or commercial leak-detection fluid (do not use dish soap concentrate; use a product rated for gas leak detection)
- Combustible gas detector (battery-operated; a worthwhile investment for any homeowner doing gas work)
- Thread-seal tape applicator or small brush for pipe sealant
- Marker or masking tape for labeling components during disassembly
- Flashlight or headlamp
- Camera or phone to photograph assembly before disassembly
A note on flexible connectors vs. hard-piping
For a permanent natural gas patio heater installation, you have two options for the final connection: a listed flexible appliance connector (the braided or corrugated stainless line that connects the fixed supply pipe to the heater) or hard-piping the heater directly. Flexible connectors are easier, but they have rules. They must be listed (look for the ANSI Z21.24 or Z21.45 stamp), they must not be routed through walls, floors, or ceilings, they must not be in contact with other piping or concealed, and they have a maximum length. Hard-piping in black iron or CSST is more permanent and is required in some jurisdictions for outdoor installations. When in doubt, ask your local building department which they require before you buy materials.
How to read your heater's label and manual
Before you order a single part, spend five minutes with your heater's data plate and manual. The data plate is a metal or adhesive label, usually riveted or glued to the base column, the burner housing, or the underside of the emitter. It tells you everything critical about what the heater needs.
- Model number and serial number: required to order the correct conversion kit and confirm you have the right manual
- Fuel type as manufactured: confirms this is an LP heater
- Input BTU rating: you need this to verify your gas supply line can deliver enough flow
- Inlet pressure specification: gives you the minimum and maximum supply pressure the heater requires, typically expressed in in. W.C. (e.g., 'NG: 7.0 in. W.C. nominal, 5.0 min. / 10.5 max.')
- Manifold pressure: some plates list this separately; it is the pressure measured downstream of the gas valve at the burner
- Listing marks: look for CSA, AGA, or UL marks confirming the heater is listed to a safety standard
- Conversion label space: some heaters have a blank label area or a note reading 'For conversion see conversion kit instructions,' which is a strong sign the unit was designed to be convertible
In the manual, look for a section titled 'Fuel Conversion Instructions,' 'Conversion Kit,' or 'Gas Conversion. For model-specific steps and safety details, consult the manufacturer's propane patio heater instructions. ' Mr. Heater and Bromic both include these sections in their manuals for convertible models. This section will list the required kit part number, the NG orifice size or part number, the required manifold pressure for NG, and any valve adjustment procedures. Manufacturer documents such as Blodgett HV‑100G specifications, example giving orifice diameter and manifold pressure values list NG orifice diameters and required manifold pressures for specific BTU ratings blank" rel="noopener noreferrer">Blodgett HV‑100G specifications — example giving orifice diameter and manifold pressure values. If the manual has no such section, conversion is not supported by the manufacturer.
Step 1: shut off the supply, depressurize, and disassemble safely
This first phase is the most important one. You are handling a propane-fueled appliance that may have residual gas in the lines, a pressurized regulator, and components that have been heat-cycled repeatedly. Rushing through this step is how accidents happen. Follow these actions in order and confirm each one before moving to the next. For step-by-step DIY instructions on building a propane patio heater, see how to make a propane patio heater.
- Turn the burner control knob to OFF. Confirm the flame is completely out and has been out for at least 5 minutes before proceeding.
- Turn the propane tank valve clockwise to the fully closed position. Do not just reduce flow, close it completely.
- With the tank valve closed and the control knob still at OFF, turn the control knob to the HIGH or ON position and attempt to light the heater. It should not light. If it does, your tank valve is not fully sealed and must be replaced before proceeding. If it does not light and quickly fails (as expected), this confirms the line is depressurizing. Turn the knob back to OFF.
- Disconnect the regulator from the propane tank. Unscrew the regulator fitting counterclockwise (note: standard propane QCC1/Type-1 fittings are right-hand thread). Set the propane tank at least 10 feet away from the work area.
- Move the heater to a well-ventilated outdoor workspace. Do not work in an enclosed space.
- Wait 10 minutes. Allow any residual gas in the regulator and gas line to dissipate naturally. Do not use a flame to test for residual gas.
- Use a combustible gas detector to confirm no gas is present near the burner, control valve, and regulator inlet before touching any fittings.
- Take photos of the burner assembly, wiring, thermocouple position, and regulator connection before disassembling anything. You will refer to these during reassembly.
- Remove the emitter guard or reflector dome as required by your model to access the burner head. Most mushroom-style heaters use three to six screws on the reflector ring and a center bolt on the emitter screen. Keep all hardware in a labeled container.
- Identify the main orifice or injector: it is the small brass fitting at the base of the burner venturi tube, usually a hex-head fitting threaded into the gas manifold. This is what you are replacing. Do not remove it yet. Simply confirm its location and confirm you can access it with the correct wrench size before proceeding to the conversion steps.
Swapping the orifice and reconfiguring the regulator
With the heater safely disassembled and confirmed gas-free, you can now perform the actual conversion. Work from your conversion kit instructions at every step. The following describes the general process, but your kit's instructions supersede anything here.
- Remove the LP orifice/injector using the correct open-end wrench. Turn it counterclockwise. It will likely be tight from heat cycling. Do not use excessive force or a shifting wrench that can round the hex. Keep the old orifice as a reference.
- Compare the old LP orifice to the new NG orifice from your kit. The NG orifice will have a visibly larger hole. This size difference is not trivial: NG orifices are larger because NG has lower energy density per cubic foot than LP, and the lower supply pressure means a larger opening is needed to deliver the same BTU rate.
- Apply a small amount of yellow gas-rated PTFE tape to the threads of the new NG orifice (if it is an NPT thread type; do not apply tape to flare or compression fittings). Thread it in by hand first to avoid cross-threading, then tighten firmly with the correct wrench. Do not overtighten and crack the brass.
- If your conversion kit includes valve conversion hardware (a common component in Mr. Heater-style kits), follow the valve conversion instructions from the kit exactly. These steps vary by model and valve type. Some valves require only an orifice swap; others require a pressure-spring replacement or valve-body conversion to adjust the regulated pressure.
- Replace the LP regulator with the NG regulator or regulator assembly included in your kit, or reconfigure the existing regulator if the kit instructions permit that. Remember: LP regulators output approximately 11 in. W.C., and your NG appliance needs approximately 7 in. W.C. supply. Using the wrong regulator will cause incorrect combustion.
- Connect the flexible gas appliance connector (CSST or listed corrugated connector) between the heater's gas inlet and the fixed NG supply shutoff valve. Apply gas-rated PTFE tape to all NPT male threads. Tighten all connections firmly. Do not kink or bend the flexible connector sharply.
- Affix the conversion label from the kit to the heater in the location specified by the kit instructions. This label is required by CSA/ANSI Z83.26 and documents that the heater has been converted. Do not skip this step.
Pressure testing, leak testing, and first light
Never skip pressure and leak testing. This is not an optional step. Every fitting you touched has the potential for a leak, and a gas leak outdoors can still cause ignition or accumulate in adjacent enclosed spaces.
- Open the upstream natural gas shutoff valve slowly. Listen for any hissing.
- Apply leak-detection solution to every fitting you touched: the orifice fitting, all NPT connections at the gas valve, the flexible connector fittings at both ends, and the shutoff valve connections. Watch for bubbles for at least 30 seconds at each joint. Any bubble growth, no matter how slow, is a leak that must be fixed before continuing.
- Use a combustible gas detector as a secondary check, sweeping it slowly under and around all joints. Some small leaks produce bubbles too slowly to see immediately but register on a detector.
- Connect a digital manometer to the appliance's inlet pressure tap (usually a 1/8-inch NPT port on the gas valve body; your kit instructions will identify it). With the gas supply open but the burner off, record the static supply pressure. It should be within the range specified on the heater's data plate for NG.
- Light the heater following the normal ignition procedure for your model. With the burner operating, record the manifold pressure at the manifold pressure tap. Compare it to the manufacturer's specified NG manifold pressure from the conversion kit instructions. The reading should be within plus or minus 0.2 in. W.C. of the specified value.
- Observe the flame. A correct NG flame on a patio heater should be blue at the base with some yellow-orange tips on the outer edges, steady, and not lifting off the burner head. A flame that is mostly yellow or orange indicates incomplete combustion (too rich, possible orifice blockage, or low air intake). A flame that lifts off or blows out easily may indicate too much pressure or an air adjustment issue.
- Check the flame at multiple settings if your heater has a variable control. The flame should remain stable from low to high.
- Let the heater run for 15 minutes and re-check all joints with leak-detection solution while the gas is warm and at operating pressure.
Troubleshooting common problems after conversion
| Symptom | Likely cause | Fix |
|---|---|---|
| Yellow/orange sooty flame | Orifice too large, insufficient combustion air, or partially blocked venturi | Verify correct NG orifice is installed; clean venturi tube; check air shutter adjustment per manual |
| Flame lifts off burner or blows out | Supply pressure too high, or air shutter open too far | Check inlet pressure with manometer; adjust air shutter; verify regulator setting |
| Heater will not stay lit, thermocouple trips | Thermocouple not heated adequately by new flame position, or flame too small | Check orifice size against kit spec; verify manifold pressure; check thermocouple tip position relative to flame |
| Low heat output compared to propane | Correct for NG at same BTU rating; or supply pressure below minimum | Verify supply pressure meets minimum inlet requirement; check pipe sizing for adequate flow |
| Gas smell after conversion | Leak at a fitting | Re-test all joints with leak solution; tighten or re-tape and reseal as needed; do not operate until resolved |
| Igniter sparks but no light | Air in the new gas line needs to purge | Allow gas to flow for 30 seconds before attempting ignition; if still no light, check orifice is correctly installed |
| Anti-tilt switch shuts off heater unexpectedly | Switch damaged during disassembly or out of adjustment | Test tilt switch function per your model's manual; replace if faulty before using heater |
Permits, inspections, and local code requirements
NFPA 54 (National Fuel Gas Code) and NFPA 58 (Liquefied Petroleum Gas Code) both require that appliances converted to a different gaseous fuel be properly converted, adapted, and tested before being placed in service. In practical terms, this means most U.S. local jurisdictions require a permit when you connect a new appliance to a natural gas supply line, even if the line already exists. Some jurisdictions require a permit even for a fuel-type conversion on an existing connection.
Call your local building department before starting work and ask two questions: Do I need a permit to connect a natural gas patio heater? and Does fuel-type conversion require inspection? The answers vary by city and county. Getting this wrong exposes you to issues with insurance claims and property sales. The permit process is usually simple and inexpensive for a single appliance. An inspector will verify that your connection uses listed materials, that a shutoff valve is accessible, and that the appliance is properly installed and tested. Think of the inspection as a free second set of eyes on your work.
Time and cost estimates
| Item | Estimated cost (USD) | Notes |
|---|---|---|
| Manufacturer conversion kit | $30 to $120 | Varies widely by brand; Bromic and Mr. Heater kits are in this range |
| Listed flexible gas connector (CSST, 1/2-inch x 36-inch) | $15 to $35 | Buy listed (ANSI Z21.24 stamped), not generic |
| 1/4-turn ball valve shutoff | $10 to $25 | Gas-rated, same size as supply line |
| NPT fittings and PTFE tape | $5 to $15 | Yellow gas-rated tape only |
| Digital manometer rental or purchase | $30 to $60 purchase; free at some tool libraries | Essential; do not skip pressure verification |
| Leak detection solution | $5 to $10 | Use rated gas-leak detection product |
| Permit fee (if required) | $25 to $150 | Varies by jurisdiction |
| Total DIY estimate | $95 to $415 | Assuming factory kit available and supply line already runs to the patio |
| Licensed gas fitter installation (if DIY not permitted) | $150 to $400 labor | Plus parts; varies significantly by region |
Conversion typically takes 2 to 4 hours for a DIYer working carefully with the manual open, including disassembly, orifice swap, connection, and testing. If you need to extend or add a gas supply line to the patio, that is a separate project with its own permit requirements and cost.
When to call a licensed gas fitter instead
There are situations where the right call is to hand this project to a professional, and recognizing those situations before you start is part of working safely.
- Your conversion kit instructions explicitly state 'qualified service agency' or 'licensed gas technician' for installation. This language is a hard stop for DIY.
- You need to run a new natural gas line to the patio. New gas piping almost always requires a licensed plumber or gas fitter in the U.S., and must be inspected.
- Your supply pressure is uncertain or inconsistent. If your gas utility cannot confirm adequate pressure at the connection point, a gas fitter with a manometer can diagnose this properly.
- The heater has other unresolved issues (failed thermocouple, damaged burner, tilt switch problems) that complicate the conversion. Fix those separately first, or let a professional handle the complete job.
- You are not comfortable working with gas appliances. That is not a criticism. Gas work has real consequences. The cost of a professional installation is far less than the cost of a gas-related incident.
Alternatives to converting your existing heater
If your heater is not convertible, or if the cost of conversion plus a supply line extension approaches the price of a new heater, it is worth comparing your options honestly.
- Buy a factory natural gas patio heater: Many manufacturers offer the same models in both LP and NG configurations. A factory NG heater is fully listed for that fuel, carries a full warranty, and requires only a proper connection to your supply line.
- Sell or repurpose the LP heater: A working propane patio heater has good resale value. Selling it and applying the proceeds toward a factory NG model is often the cleanest solution when no conversion kit exists.
- Keep the LP heater with larger tanks: If natural gas supply to the patio is expensive to run, a 100-lb propane cylinder (instead of the standard 20-lb tank) extends refill intervals significantly and reduces the frequency of tank swaps. This is a practical middle ground for seasonal or occasional use.
If you are also working through the broader setup of your patio heater, including how to connect a propane tank correctly, how to assemble a new unit from scratch, or how to shorten a heater for a lower-clearance space, those topics connect directly to the same safety principles covered here. Getting the fuel connection right, whether LP or NG, is the foundation of every other maintenance task on these appliances.
FAQ
Can a homeowner convert a propane (LP) patio heater to natural gas (NG)?
Sometimes — but only when the heater and manufacturer permit it. Many modern outdoor infrared and tube patio heaters are designed to be convertible and manufacturers sell factory conversion kits (orifice jets, valve conversion hardware, labels). If the heater’s manual or data plate expressly allows field conversion with a manufacturer‑approved kit, a careful DIYer can perform the job if local code and the manufacturer permit homeowner installation. If the manufacturer forbids conversion, or no listed kit exists for that model, do not convert.
How do I quickly tell if my heater is convertible?
Check three sources in order: 1) the owner’s manual and fuel conversion section; 2) the heater data plate/spec label (lists fuel type and conversion allowance); 3) the manufacturer’s website or support line for a model‑specific conversion kit. If the manual requires a ‘qualified service person’ to install the kit, treat it as a job for a licensed gas fitter unless you are that qualified person.
Compatibility checklist — what must match or be possible before converting?
1) Manufacturer approval/listed conversion kit for that exact model. 2) Burner and orifice arrangement that accepts the NG orifice supplied by the kit. 3) Gas‑valve/regulator compatibility or a valve conversion included in the kit. 4) Inlet pressure and manifold pressure requirements: many NG conversions expect ~7 in. W.C. supply and manufacturer‑specified manifold pressure (verify in manual). 5) Fittings/threads you can legally adapt to your home gas supply (NPT/approved connectors). 6) Physical clearances and ventilation remain compliant with the heater rating post‑conversion. 7) Local code allows the homeowner to perform the conversion if you plan to DIY.
What parts and tools are typically required?
Parts (kit or equivalent): manufacturer conversion kit or NG orifice(s), valve conversion hardware if required, conversion label/sticker, NG‑rated pressure regulator if original regulator is LP‑only, listed flexible gas connector or hard‑piping and shutoff valve, approved fittings/adapters matching appliance inlet threads (usually NPT). Tools: adjustable wrenches, correct‑size hex/socket for orifice, leak‑test solution or detector, calibrated manometer or digital pressure gauge (for 0–1 psi/0–15 in W.C. range), screwdrivers, thread sealant approved for gas (pipe dope for gas or PTFE gas‑rated tape), safety glasses, and work gloves.
Step‑by‑step conversion (summary for a typical convertible model)
1) Read the heater manual and kit instructions fully; confirm you have the model‑specific kit. 2) Turn off home gas supply and the heater; disconnect LP cylinder if present. 3) Ventilate work area and remove power to any electrical ignition. 4) Disassemble access panels to reach orifice(s) and gas valve per manual. 5) Remove LP orifice(s) and install manufacturer‑supplied NG orifice(s) torqued to the specified value. 6) Install valve/regulator conversion parts per kit (replace regulator if kit requires). 7) Attach approved NG flexible connector or hard‑pipe the appliance to an NG shutoff valve with correct NPT fittings. 8) Reinstall panels and apply the conversion label supplied by kit (required). 9) Turn on gas at the service cock and perform leak test at all joints. 10) Light burners per manual and measure inlet/manifold pressure with a manometer; adjust regulator/valve to manufacturer‑specified manifold pressure. 11) Observe flame pattern and perform combustion checks; tweak as instructed. 12) Record work, keep kit documentation with appliance and comply with permit/inspection requirements.
What exact pressure values should I expect after conversion?
Typical reference values: natural gas supply/manifold arrangements commonly use about 7 in. W.C. supply pressure (≈0.25 psi) with manufacturer‑specified manifold pressure (often around 3.5–7 in. W.C. depending on design). Propane commonly uses higher pressures (≈11 in. W.C.). Always use the pressures specified in your heater’s manual and verify with a calibrated manometer; do not rely on typical values alone.