To secure a patio heater, you need to do three things at once: get the base physically stable on level ground, make sure every bolt and bracket in the assembly is properly tightened, and confirm the fuel connection is snug and blank" rel="noopener noreferrer">leak-free. Electrical Safety First also advises keeping patio heater cables tidy to avoid trip hazards that can lead to the heater tipping and potentially creating a fire risk blank" rel="noopener noreferrer">physically stable on level ground. Miss any one of those and you either have a heater that tips in a gust or one that's quietly leaking gas. This guide walks you through all three, starting with identifying what type of heater you have, because the fix looks a little different depending on whether you're dealing with a freestanding propane tower, a tabletop unit, or a wall-mounted model.
How to Secure a Patio Heater: Prevent Tipping and Safe Setup


First: figure out which type of heater you're working with
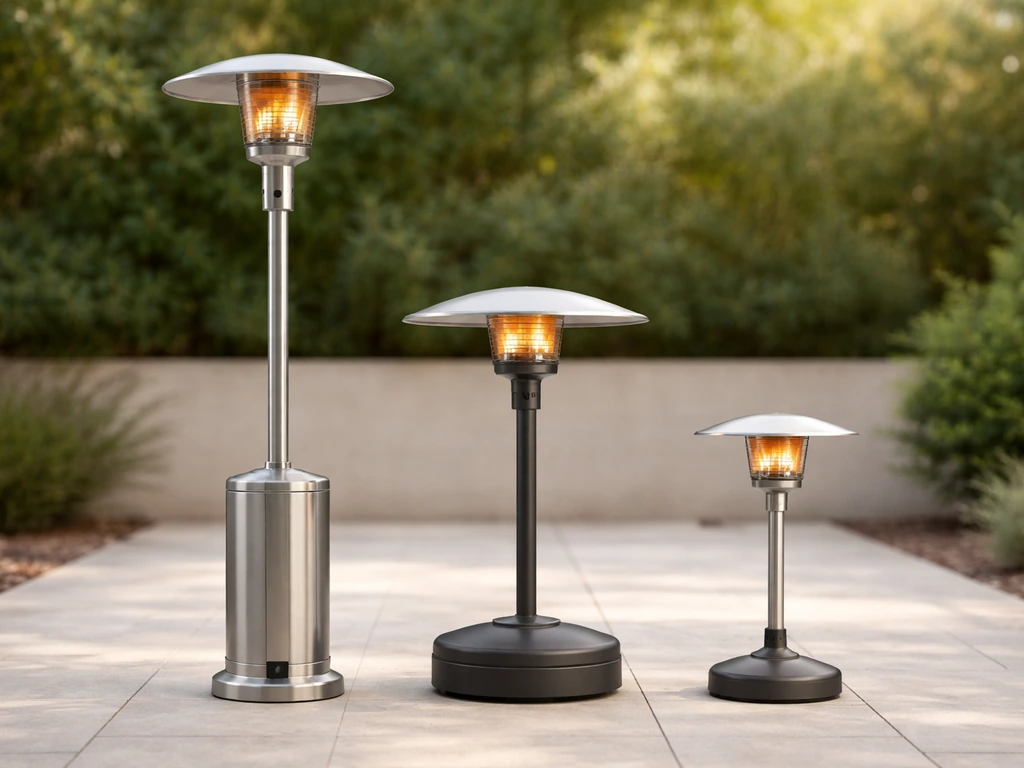
Before you grab a wrench, take 30 seconds to identify your heater type. The stabilization approach is completely different depending on the format, and using the wrong method wastes time or creates new problems.
| Heater Type | How It Stands | Main Security Concern |
|---|---|---|
| Freestanding propane (mushroom-top tower) | Sits on a wheeled or flat base, usually weighted with a water/sand reservoir | Tips in wind, wobbles on uneven surfaces, 20 lb tank must be secured inside the pole |
| Tabletop propane or electric | Sits directly on a table surface, small 1 lb cylinder or cord at base | Slides or gets knocked over, cylinder can loosen, cords create trip hazards |
| Wall-mounted or ceiling-hung | Brackets bolt to a structure, usually electric or natural gas | Bracket hardware loosens over time, clearance to combustibles must be maintained |
| Pedestal/freestanding electric | Stands on a base like a propane tower but uses a power cord | Cord creates a trip hazard that can pull the unit down; base ballast is critical |
The vast majority of homeowners asking this question have a freestanding propane tower heater with a 20 lb cylinder inside the pole. That's the format this guide focuses on most, but the principles apply across the board. If you have a mounted heater, jump straight to the assembly and hardware section, because your biggest risk is bracket failure rather than tipping.
Stabilize the heater right now: level ground, base setup, and anti-wobble steps
A heater that wobbles before you even light it is already a problem. The fix usually takes less than five minutes if you know what to look for.
Choose the right surface
Freestanding patio heaters should always be placed on a hard, flat, level surface: concrete, pavers, a solid deck, or a tile patio. Storing a patio heater safely means keeping it on a stable, clean surface and protecting the unit from moisture and wind when it's not in use how to store patio heater. Placing a heater on grass, gravel, or soft soil allows the base to sink unevenly, and that's one of the fastest ways to end up with a tipped-over unit and a fire. Even a slight slope is enough for a heavy propane tower to creep and fall in moderate wind. If your only option is an uneven surface, get a rubber anti-fatigue mat or a patio heater pad to create a flat base, then verify the unit is plumb (straight up) before walking away.
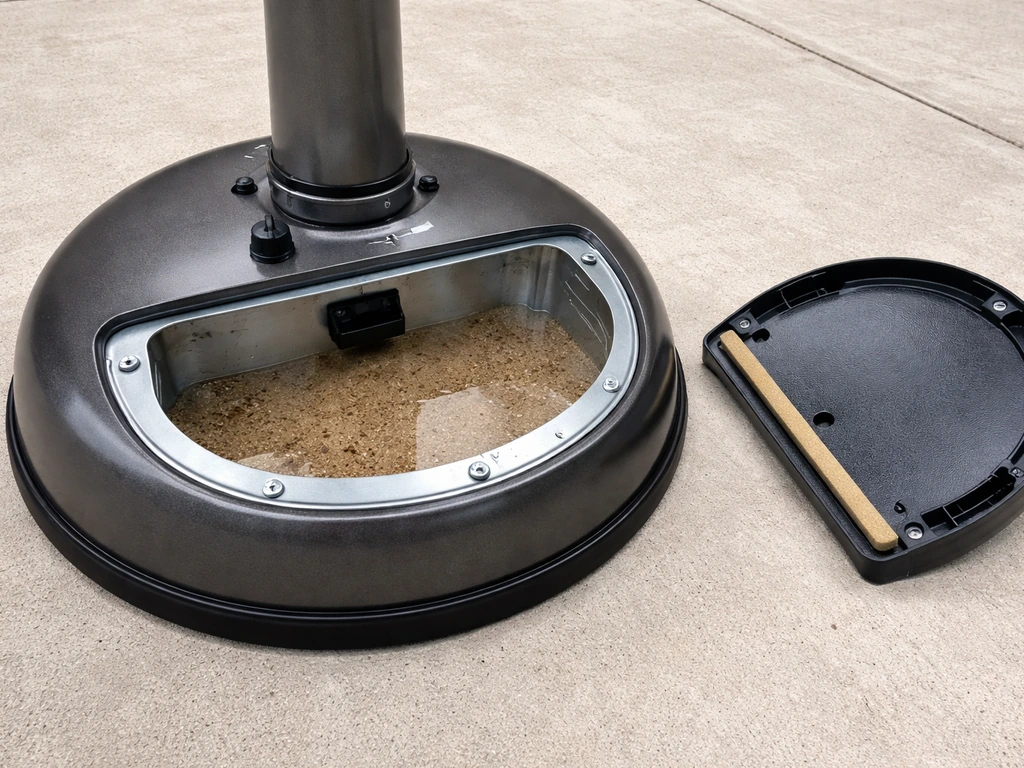
Fill or check the base ballast
Most freestanding propane towers have a hollow base designed to be filled with sand or water for ballast. If yours has one and it's empty, that's a big part of why the heater is unstable. Check the fill port on the base (usually a rubber plug or screw cap on the side). Fill with dry sand for a permanent setup or water for a portable one. Sand is heavier and won't freeze or evaporate. A fully ballasted base dramatically lowers the heater's center of gravity and makes it much harder to tip. Check your manual for the recommended fill weight, but most bases hold 20 to 40 lbs of sand.
Check all four feet and the anti-wobble adjustment
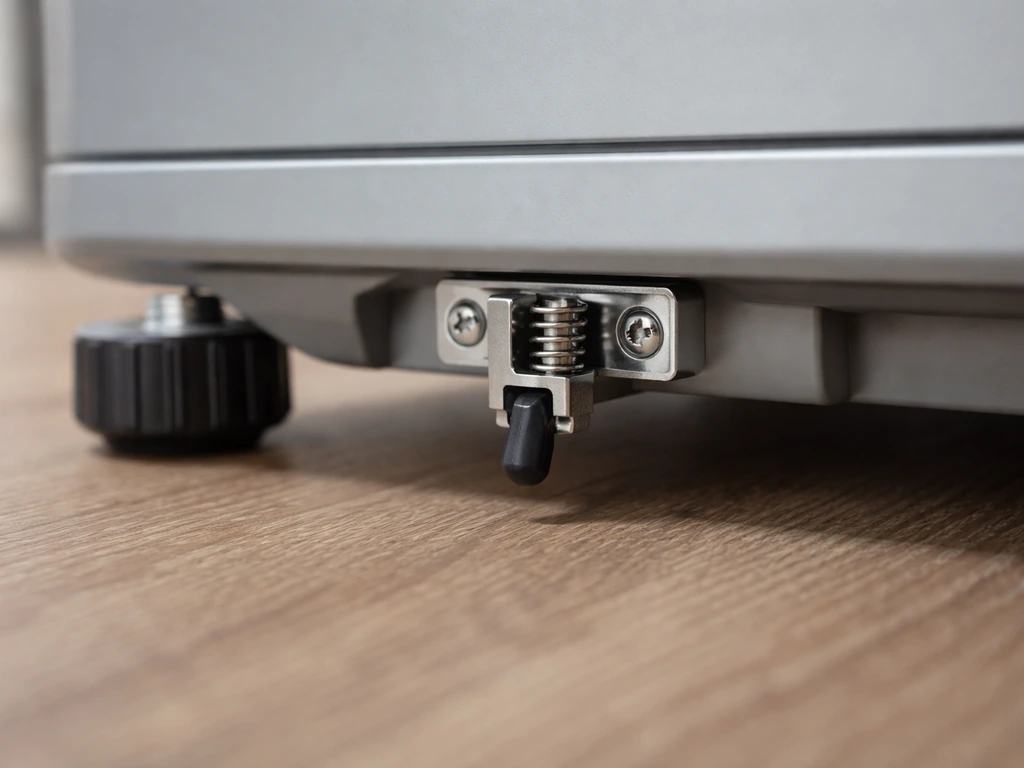
Most heater bases have three or four leveling feet or rubber pads. Get down and look at each one. If any foot isn't making full contact with the ground, or if a rubber pad is missing or compressed unevenly, the heater will rock. Some models have adjustable leveling feet you can twist to compensate for slight surface imperfections. If a rubber foot is missing, replace it before using the heater: a metal foot on a hard surface slides easily, and a missing pad throws off the balance. If the base itself is bent or cracked, that's a structural issue and the heater should not be used until the base is replaced.
Anti-tip features: what to check and use
Many modern freestanding heaters have a built-in anti-tilt switch that shuts off the gas valve if the unit tips past a certain angle. This is a safety net, not a stabilization system. The switch is typically a small mercury or ball-bearing device near the base of the burner assembly. If you can, verify yours works by gently tilting the heater a few degrees while it's off: you should hear or feel a small click, and when you restore it upright, the switch resets. If yours doesn't have an anti-tilt switch or you're not sure, that's extra reason to focus hard on physical stabilization. Do not rely on the tilt switch as your only safeguard.
Secure the fuel tank and check all hose and regulator connections
A loose propane cylinder rattling inside the heater pole is both a stability problem and a safety hazard. Get this right every time you swap a tank.
Securing the cylinder inside the pole
On a standard freestanding tower, the 20 lb propane cylinder sits upright inside the lower pole section, and the pole door closes around it. The cylinder should sit flat on the base platform with no rocking. A flat emitter is the burner style used on some patio heaters, where heat is produced from a broad, flat surface rather than a single tube what is a flat emitter on a patio heater. Some models include a cylinder strap, retaining clip, or bracket to prevent the tank from shifting. If yours has one, use it every time. If the strap is missing, check your manual for the part number and order a replacement, or use a heavy-duty zip tie or hook-and-loop strap as a temporary fix. A loose cylinder shifts the heater's center of gravity unpredictably and can stress the regulator hose.
Connecting the regulator properly
The LP regulator connects to the cylinder valve via a hand-wheel fitting. On most common heaters (including Patio Comfort and similar designs), you turn the black hand-wheel clockwise until the connection is snug. No tools needed. The key word is snug: it should feel firm and stop naturally. Do not crank it with pliers. If you can wiggle the regulator fitting after tightening, something is wrong: check for a damaged o-ring, cross-threading, or a missing QCC bushing. A Reddit-confirmed failure point is a missing small bushing inside the QCC1 fitting that prevents the coupling from clamping properly, leading to an unreliable seal. If your regulator feels loose even when tightened, inspect the fitting carefully before going any further.
Leak testing the fuel connection (do this every time)

This step is non-negotiable after any tank swap or regulator reconnection. Mix a soapy solution (roughly 70% water and 30% dish soap, ideally a foaming type), apply it generously to every connection point: the regulator-to-tank fitting, both ends of the hose, and the valve body. With all burner valves in the OFF position, slowly open the cylinder valve one full turn. Watch the soapy solution for 15 to 30 seconds. Any bubbling means a leak. Turn the cylinder valve off immediately if you see bubbles, hear hissing, or smell gas. Never use an open flame to check for leaks. A lighter near a leaking fitting has caused serious injuries. For safely lighting the heater, many people use a long stem lighter for patio heaters to keep their hand away from the burner area lighter near a leaking fitting. Fix the leak (retighten, replace the o-ring, or replace the hose/regulator) before attempting to light the heater.
- Apply soapy solution to: regulator-to-tank fitting, both hose ends, valve body, and relief valve
- Open cylinder valve slowly with all burner valves OFF
- Watch for bubbles for at least 15 to 30 seconds
- Bubbles or hissing: close tank valve immediately, ventilate the area, find and fix the leak before proceeding
- Never test for leaks with a flame or lighter
Proper assembly and hardware: tightening, brackets, and missing parts
A surprising number of stability problems come down to assembly done too fast at the beginning. Loose leg bolts, a pole section that isn't fully seated, or a missing hardware piece can make a heater feel wobbly even on a perfect surface.
Check and retighten the leg-to-base bolts
Most freestanding heaters attach three or four support legs to the base plate using M8 bolts (or similar metric hardware). These bolts vibrate loose over time, especially if the heater gets moved around frequently. Grab each leg and try to wiggle it. Any movement means those bolts need tightening. Use the right size socket or Allen key (check your manual, it's usually M8 for most consumer tower heaters). Tighten in a star pattern if there are multiple bolts per leg so the base sits flat. While you're at it, check that the pole sections are fully locked into each other: most tower heaters have a twist-lock or set-screw system at the pole joints that can work loose.
Mounted heater brackets: what to inspect
If you have a wall-mounted or ceiling-hung heater, the bracket hardware is your entire stability system. Inspect every mounting bolt annually and after any extreme weather. Wall anchors in stucco or drywall can loosen as the structure flexes. If the heater wobbles at all when you push it gently, remove it, reinspect the anchors, and re-mount using appropriately rated hardware for your wall type (masonry anchors for brick or concrete, structural screws into studs for wood-framed walls). Check the clearance to combustibles at the same time: your manual will specify minimum clearances on all sides and in front of the heater. These numbers are there because heat can ignite nearby materials even without direct flame contact.
Missing parts and cross-referencing your manual
If your heater is missing a strap, bolt, cap, or bracket, don't just skip it. Look up your model's manual (most manufacturers post them as PDFs) and identify the exact part. Many stabilization problems trace back to a missing or substituted piece from the original kit. Common culprits include the reflector retaining ring (which keeps the top assembly from tilting), the pole set-screw that locks the upper and lower sections together, and the regulator hose retaining clip that keeps the hose from sagging and pulling on the tank fitting.
Weatherproofing and wind safety: placement, weights, and covers
Wind is the number one reason a properly assembled heater still tips over. Even a heater that's perfectly stable on a calm day can become dangerous in a gust because the large reflector dish on top acts like a sail.
Smart placement to reduce wind exposure
Position the heater so the reflector dish faces away from the prevailing wind direction, or place the unit near a wall or fence that provides a natural windbreak. Keep it out of open corners or gaps in fencing where wind funnels and accelerates. If you're on a rooftop deck or exposed balcony, a freestanding propane tower heater is genuinely a poor choice for windy conditions: consider a wall-mounted electric unit instead for those situations.
Adding weight and anchoring options
Beyond filling the base with sand (covered earlier), you can add external weight using purpose-made patio heater base weights or heavy sandbags looped over the base legs. Some homeowners use bungee cords or ratchet straps to loosely tether the heater base to a deck post or anchor point: this won't stop it from tipping but will stop it from falling completely over and rolling. There are also commercial stake-style anchoring kits designed for patio heaters if you have a permanent installation on a grass or gravel surface. For permanent setups on concrete, lag-bolt anchor brackets bolted through the base into the slab are the most secure option available. For permanent setups on grass or gravel, you can use stake-style anchoring kits mentioned in how to anchor patio heater to reduce the tipping risk.
Using a cover when the heater isn't in use
A fitted cover protects the heater from rain and UV damage, but it also reduces the sail effect when the heater is stored outside unused. A cover that fits tightly over the reflector dish helps prevent it from acting as a wind catch during a storm. Make sure the heater is completely cool before covering it, and always close the cylinder valve and disconnect the regulator when covering and storing the heater for any extended period. For longer storage, bringing the heater indoors or into a shed is always better than leaving it outside covered.
Safety checks before you light it
Run through this checklist every single time before you open the cylinder valve. It takes about two minutes and it's the difference between a safe evening outside and a very bad situation.
- Confirm the heater is on a flat, hard, level surface with no rocking
- Verify the base ballast is filled (sand or water) if your model has a fill port
- Check that all leg bolts are tight and the pole sections are locked together
- Make sure the cylinder is sitting flat inside the base and is secured with its strap or clip
- Confirm the regulator hand-wheel is tightened clockwise to snug (no tools, no gaps)
- Inspect the hose for cracks, kinks, abrasion, or discoloration: replace any damaged hose before use
- Perform a soapy water leak test with all burner valves OFF before lighting
- Verify the heater is at least 3 feet from any combustible materials on all sides (check your manual for exact clearances)
- Confirm the igniter clicks or your long-stem lighter is ready before opening the gas valve
- Test that the tilt switch resets properly if your model has one
When to stop and get help instead of pushing through
Stop and do not attempt to light the heater if: you smell gas and can't find or fix the source, the regulator fitting won't tighten properly even after inspecting the o-ring and threads, the hose has visible damage or is older than 5 years and you're not sure of its condition, the base is cracked or structurally damaged, or the heater tips or leans even after all stabilization steps. A cracked base or a regulator that won't seal are not DIY fixes: they need replacement parts from the manufacturer. Using the heater in that state is genuinely dangerous. When in doubt, replace the component rather than work around it.
Still shifting, tipping, or won't run right? Quick troubleshooting
If you've gone through all of the steps above and something still isn't right, here's how to diagnose the most common remaining issues quickly.
| Symptom | Likely Cause | Fix |
|---|---|---|
| Heater wobbles on a flat surface | Loose leg bolts or uneven leveling feet | Retighten M8 leg bolts; adjust or replace leveling feet |
| Heater tips in moderate wind | Base not ballasted or heater in a wind tunnel | Fill base with sand; reposition away from wind gaps |
| Cylinder rattles inside the pole | Missing or broken cylinder strap | Replace strap or use a hook-and-loop restraint temporarily |
| Regulator feels loose after tightening | Missing QCC bushing, damaged o-ring, or cross-threaded fitting | Inspect fitting for damage; replace o-ring or full regulator if threads are stripped |
| Soapy water bubbles at the hose connection | Loose fitting, cracked hose, or faulty regulator | Retighten; if bubbles persist, replace the hose and regulator assembly |
| Heater won't stay lit after lighting | Anti-tilt switch triggered or thermocouple issue | Confirm heater is level and tilt switch is resetting; check thermocouple connection |
| Won't ignite after tank swap | Cross-threaded regulator or regulator in over-pressure lockout | Disconnect, wait 60 seconds, carefully reconnect regulator; check for cross-threading |
| Upper pole section rotates or droops | Set-screw not tightened | Locate and tighten the pole set-screw per your manual |
If the anti-tilt switch is shutting the heater down even when the unit appears level, the switch itself may be faulty or out of calibration. That's a repair worth doing: a failed tilt switch that doesn't shut off gas when the heater actually tips is far more dangerous than one that's overly sensitive. Check the manufacturer's manual for the switch location and whether it's a user-replaceable part on your model.
One final note: securing a patio heater properly is connected to a few other good habits. Anchoring it to a fixed point (especially on a windy deck), storing it correctly in the off-season, and knowing how to keep it from tipping in the first place are all part of the same safety routine. If your setup involves any of those scenarios in more depth, those topics are worth exploring alongside this guide. A heater that's physically stable, correctly assembled, and with a leak-free fuel connection is one you can actually enjoy without watching it nervously every time the wind picks up.
FAQ
What should I do if my patio heater wobbles even after tightening the bolts?
If you find any rattling after assembly, stop and check three things in order: the leveling feet or pads (they must all be making full contact), the pole joints (twist-lock or set-screws fully engaged), and the cylinder retention (strap or clip installed so the tank cannot shift). If the base looks straight but you still get wobble, re-seat the legs and re-tighten using the correct socket size, then re-check that the cylinder is flat on the base platform.
Can I use shims or scrap blocks to level a patio heater base?
Yes, but only for leveling. You can use a rubber anti-fatigue mat or purpose-made patio heater pad to create a flat surface, but do not put shims, bricks, or stacked boards under the base to “raise one side.” Shims can crush or shift, and the heater’s center of gravity changes, making tipping more likely.
How often should I run a soapy leak test after setup?
Do a bubble test any time you replace the tank, disconnect and reconnect the regulator, or notice odor that might be gas. Also repeat it if you tightened the regulator and still feel any movement at the fitting. If you find bubbling, close the cylinder valve immediately and replace the faulty part instead of trying to “make it seal” with more force.
What if my regulator feels loose even after tightening by hand, can I tighten harder with pliers?
No. The hand-wheel fitting is meant to be snug by hand. If you need tools to tighten it, the threads are likely cross-threaded, the correct sealing bushing may be missing, or the o-ring is damaged. Over-tightening can deform the coupling and worsen sealing, so the right move is to inspect for the correct bushing, clean the threads, and replace the o-ring if needed.
Is it safe to try lighting the heater if it tips slightly during setup?
If the heater leans or tips during testing, do not attempt to light it. First, verify the surface is truly level and hard (pavers, concrete). Then confirm the base ballast is filled if your model has a sand or water reservoir, and check all leveling feet/pads are present and not compressed unevenly. If the base is cracked or bent, replace the base or the entire heater assembly rather than trying to compensate.
What are the exact safety steps when I change a propane tank on a patio heater?
For a tank swap, you should always keep the burner valves OFF, close the cylinder valve after any leak check, and never change fittings while gas is flowing. After installation, perform the full soapy-bubble test at every connection point before turning any burner controls on. If you hear hissing or see bubbles, stop immediately and replace the affected hose/regulator component.
How can I tell if my patio heater hose is too old or damaged to use?
Replace the regulator hose if it shows cracking, stiffness, fraying, brittleness, or any wetness or residue near the ends. Age matters too, if the hose is older than about 5 years or you cannot confirm its age. If you are unsure, treat it as unsafe, replace it with the manufacturer-specified part, and then re-test for leaks after installation.
My heater shuts off even when it looks level, is my anti-tilt switch the problem?
If the anti-tilt switch is shutting the heater down on level ground, first make sure the unit is not slightly out of plumb (measure straight up, not just “feels level”). If it’s truly upright and the problem persists, the switch may be faulty or miscalibrated, so it likely needs a parts replacement through the manufacturer rather than repeated attempts to bypass it.
What’s the safest anchoring method for a permanent patio heater installation?
For permanent installations, the most secure approach depends on your surface. On concrete, bolt anchor brackets through the base into the slab. On grass or gravel, use a stake-style anchoring kit designed for patio heaters, but install stakes fully and periodically re-check tension after soil settles or after heavy weather.
Should I cover the heater while the cylinder is still connected?
Keep a cover on hand for rain and UV, but only cover after the heater is fully cooled. Before covering for longer periods, close the cylinder valve and disconnect the regulator so the unit is not left connected to gas. Also choose a cover that fits tightly enough to reduce the reflector’s wind-catching effect.