If your patio heater won't light, won't stay lit, or is heating poorly, most of the time you can fix it yourself in under 30 minutes with no special tools. The most common culprits are a dirty or misaligned thermocouple, a clogged burner or venturi tube, a tripped tilt switch, or an empty/low tank with a regulator that's gone into bypass mode. This guide walks you through every major symptom, from first-time setup all the way to the "stop and call someone" warning signs, so you can get heat back on tonight without making things worse. For choosing, using, and maintaining the right heater safely, follow this patio heater guide next.
Patio Heater Tips: Quick Safe Setup and Repair Today

Grant Mercer
24 Jun 2026
Choosing the right setup: gas, propane, or electric
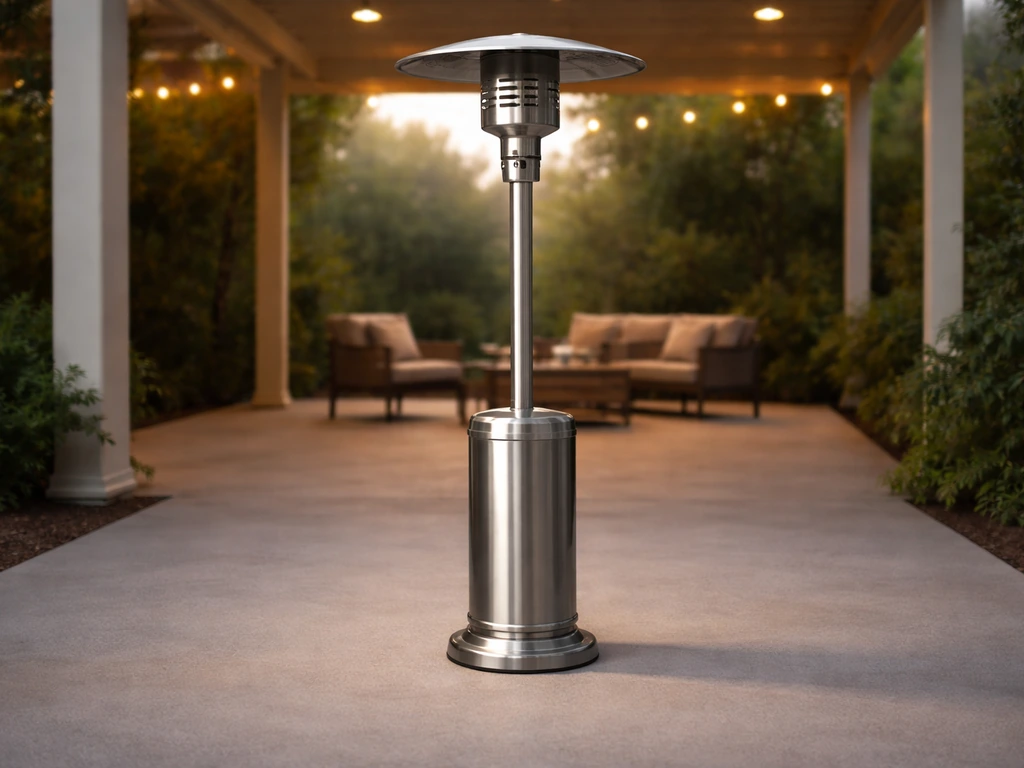
Before you troubleshoot anything, it helps to know what you're working with, because the failure modes are completely different across heater types. If you are wondering what a patio heater meaning is, it refers to an outdoor heating appliance used to keep seating areas comfortable heaters types. A standard freestanding propane patio heater runs on a 20 lb tank and outputs around 40,000 BTUs, which is enough to heat roughly a 20-foot diameter area (about 314 square feet). That's the classic mushroom-style heater you see on restaurant patios. Natural gas models work the same way internally but run off a dedicated gas line, which means no tank swaps but also no moving the unit around. Electric infrared heaters have none of the combustion components at all, so if you have one and it's not working, the thermocouple and tilt switch troubleshooting below doesn't apply to you.
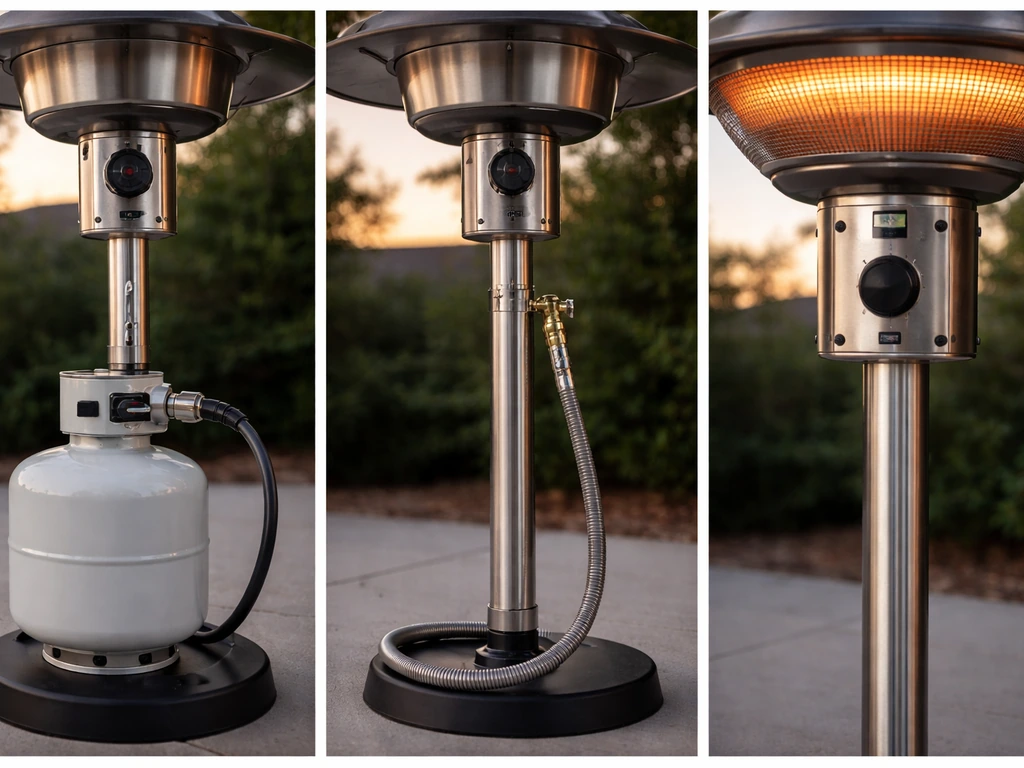
For propane heaters, the tank, regulator, and burner assembly are the three things that cause almost every problem. For natural gas models, the regulator is typically fixed by the utility and your troubleshooting focuses on the burner, valves, and safety sensors. Electric heaters are simpler mechanically but come with their own electrical hazards. If you already know which fuel type you have, you can use this patio heater setup guidance to follow the right steps for assembly, ignition, and safety checks. Throughout this guide, I'll flag which tips apply to which type.
| Feature | Propane | Natural Gas | Electric |
|---|---|---|---|
| Typical output | 40,000 BTU (full-size) | 40,000+ BTU (varies) | 1,500–5,000W (~5,100–17,000 BTU) |
| Portability | Yes, tank-based | No, fixed line | Yes (corded) |
| Main failure points | Tank, regulator, thermocouple, igniter | Valve, thermocouple, igniter, burner | Element, wiring, controls |
| CO risk indoors/enclosed | High — never use indoors | High — never use indoors | None |
| DIY repair complexity | Moderate | Moderate to high | Low to moderate |
My recommendation for most homeowners: if you're buying new today and mainly want something for a covered patio or backyard gathering, a propane mushroom heater in the 40,000 BTU range gives the best balance of heat output and flexibility. If you want a patio heater pick up today, focus on local propane or electric options so you can set it up quickly without delays shopping new today. If you're setting up a permanent outdoor dining area and have a gas line nearby, a natural gas model eliminates tank anxiety. Electric is a good pick for covered or semi-enclosed spaces where running a gas appliance isn't practical, though your heat radius is smaller.
Safety checks and placement before you do anything else
Clearance is the one thing that genuinely cannot be eyeballed. The CF-6000 manual also stresses that you must follow the clearance distances on the nameplate and in the user manual and not guess the required spacing from combustibles. Most manufacturer manuals (Fire Sense, Mr. Heater, and others) specify a minimum of 48 inches of clearance from combustible materials above and around the heater, with some models allowing 24 inches on the sides and 24 inches on top as an absolute minimum. Check your specific manual's nameplate and clearance table, because these numbers vary by model. For help sizing the right unit for your space, use this patio heater size guide to estimate output and coverage. The NPS recommends at least 6 feet from any hazard for outdoor event use. When in doubt, give it more room.
- Keep the heater at least 48 inches from patio umbrellas, string lights, awning edges, and furniture fabric
- Never place a propane or natural gas heater inside a garage, tent, screened porch, or any enclosed structure — carbon monoxide builds up fast and is odorless
- On windy days, position the heater so the wind hits the side, not directly up the center column — a headwind blows the flame out and triggers the thermocouple safety shutoff
- Make sure the heater is on a flat, level surface so the tilt switch doesn't trip — even a slight lean on soft ground can cause nuisance shutoffs
- Check that the hose and regulator aren't kinked, pinched under furniture legs, or sitting against a hot surface
- If you're using the heater near a covered area, crack at least one side open for airflow — even "outdoor" gas heaters need ventilation to prevent CO accumulation
Before every session, do a quick soapy water leak test on the regulator connection and hose. Brush soapy water over every fitting while the tank valve is barely cracked open. Bubbles mean a leak. Tighten the fitting, retest, and if bubbles persist, replace the hose or regulator before lighting anything. If you smell gas and can't immediately identify the source, close the tank valve, move away from the heater, and don't use any electrical switches or open flames nearby.
Lighting and ignition tips (and what to do when it just won't light)

Most propane patio heaters use the same basic lighting sequence: open the tank valve, push and hold the control knob in the pilot/low position (this bypasses the thermocouple), press the igniter button, and hold for 15 to 30 seconds after the flame catches before slowly releasing the knob. If the flame goes out when you release, that's not an ignition problem, that's a thermocouple issue, and I cover that in the next section.
If you're getting no spark at all when pressing the igniter button, the problem is almost always one of three things: a dead igniter, a corroded or wet electrode tip, or a wire that's come loose from the igniter module. Pull the igniter wire at both ends and reseat it firmly. If the button clicks but no spark appears at the electrode (look down into the burner area with the tank valve closed and no gas flowing), the electrode tip is probably corroded. Clean it with fine-grit sandpaper or a wire brush, making sure the gap between the electrode and the burner is about 3 to 5mm. Still nothing? The igniter module itself needs replacement, which is a straightforward swap on most models.
If you're getting a spark but the gas isn't catching, first make sure the tank has fuel and the valve is actually open. Then check whether you've given the system enough time to purge air, especially if the tank is new or was just reconnected. On some models, you need to hold the control knob in pilot position for up to two minutes before sparking to let gas reach the pilot orifice. The Patio Comfort manual, for example, explicitly tells you to hold and wait until you smell gas before attempting ignition. If you are checking parts or compliance paperwork, you may also need the patio heater hs code for shipping or customs Patio Comfort manual. If you've waited and still nothing happens, the pilot orifice may be clogged. A clogged orifice is easy to spot: you get a spark and can smell a little gas, but the flame is tiny or won't hold. Clear it with a thin strand of wire (never a drill bit, which can enlarge the orifice) or replace it.
- Close tank valve and let any residual gas clear for 5 minutes before trying again after a failed attempt
- Open tank valve slowly all the way, then back off a quarter turn
- Push and hold the control knob to PILOT — hold it in for 30 to 60 seconds before sparking
- Press igniter button repeatedly (3 to 5 clicks) while continuing to hold the knob
- Once flame appears, keep holding the knob for 15 to 30 more seconds, then slowly release
- Turn to LOW first before going to HIGH — sudden full-gas flow can overwhelm a marginal flame
If it lights but won't stay lit
This is the most common complaint I hear about gas patio heaters, and it almost always comes down to one of four things: the thermocouple, the gas valve, the flame sensor circuit, or the tilt switch. The symptom looks identical in all four cases: you get a flame when you hold the knob, but the moment you let go, the flame dies.
The thermocouple
The thermocouple is a small probe that sits in the pilot flame. When it gets hot, it generates a tiny electrical current that signals the gas valve to stay open. If it's dirty, bent away from the flame, or just worn out, it won't generate enough current and the valve snaps shut the moment you release the knob. The first fix to try is repositioning it: the tip should be sitting directly in the hottest part of the pilot flame. If it looks clean and is properly positioned but still fails, clean the tip lightly with fine steel wool (with the gas off and everything cool), reconnect the thermocouple lead at the gas valve, and try again. If it still won't hold, the thermocouple is faulty. Replacements are cheap (usually $10 to $20) and are universal on most patio heaters.
The tilt switch
Many freestanding patio heaters have a tilt switch in the base that cuts gas flow if the heater tips over, which is a legitimate safety feature. The problem is that a faulty or sticky tilt switch can trigger even when the heater is perfectly upright. To test it, locate the tilt switch (usually a small mercury or ball-bearing unit in the base), verify that both lead wires are connected, and gently rock the heater to confirm it's actually level. If the switch has corroded contacts or a broken housing, it needs to be replaced. Bypassing a tilt switch permanently is not something I'd recommend, because it exists to prevent a fire if the heater falls over.
Gas valve and flame sensor
On some heaters, especially newer models with electronic controls, there's a separate flame sensor (different from a thermocouple) that's part of the ignition board sequence. If that sensor is dirty or failing, the control board interprets it as "no flame" and closes the gas valve even though you can see fire. This is the same principle Trane describes in their commercial HVAC flame sensor guidance. On patio heaters with this setup, lightly cleaning the sensor rod with steel wool (when cold and disconnected) often fixes it. If the gas valve itself is sticking or faulty, that's a harder fix. You can confirm a valve problem if you're certain the thermocouple and tilt switch are both fine but the heater still won't hold a flame. At that point, replacing the gas valve assembly is the next step, though this is toward the edge of straightforward DIY depending on your heater's design.
Common operational issues: poor heat, blowing out, and strange smells
Heater runs but doesn't put out much heat
Low heat output is almost always a fuel flow problem. On propane heaters, the regulator can go into a bypass/safety mode if the tank valve was opened too fast. To reset it: close the tank valve, disconnect the regulator from the tank, wait 30 seconds, reconnect, and this time open the tank valve very slowly. If that doesn't fix it, check the tank level. A 20 lb tank running below roughly 20% tends to have pressure issues, especially in colder weather. On any gas heater, clogged burner ports or a blocked venturi tube will also cut output dramatically, and that's covered in the maintenance section below.
Flame keeps blowing out in wind
Patio heaters are not designed for operation in strong winds. Most will struggle when sustained wind exceeds 10 to 15 mph at the burner level. Repositioning the heater so the wind comes from the side rather than straight up the column is the easiest fix. Some models have a wind guard around the emitter head that can be repositioned. If the flame is extinguished by wind, turn the heater off completely and wait at least 5 minutes for any accumulated gas to dissipate before relighting. Fire Sense and Patio Comfort both spell this out in their manuals: don't try to relight immediately after a wind blowout.
Gas smell or suspected leak
A faint smell of propane when you first open the tank valve is normal, but if the smell is strong, persistent, or gets worse after the heater is running, treat it seriously. The Ohio Propane Gas Association is clear on this: do not open or turn on the propane supply valve if you smell gas, even if the odor seems to lessen. Close the tank valve, move away, and don't use any light switches, lighters, or your phone near the heater until you're away from the area. Common leak spots are the regulator-to-tank connection, the hose connection to the valve body, and any fitting that has been disconnected and reconnected recently. Use the soapy water test on all of them when conditions are safe.
Unusual yellow or sooty flame
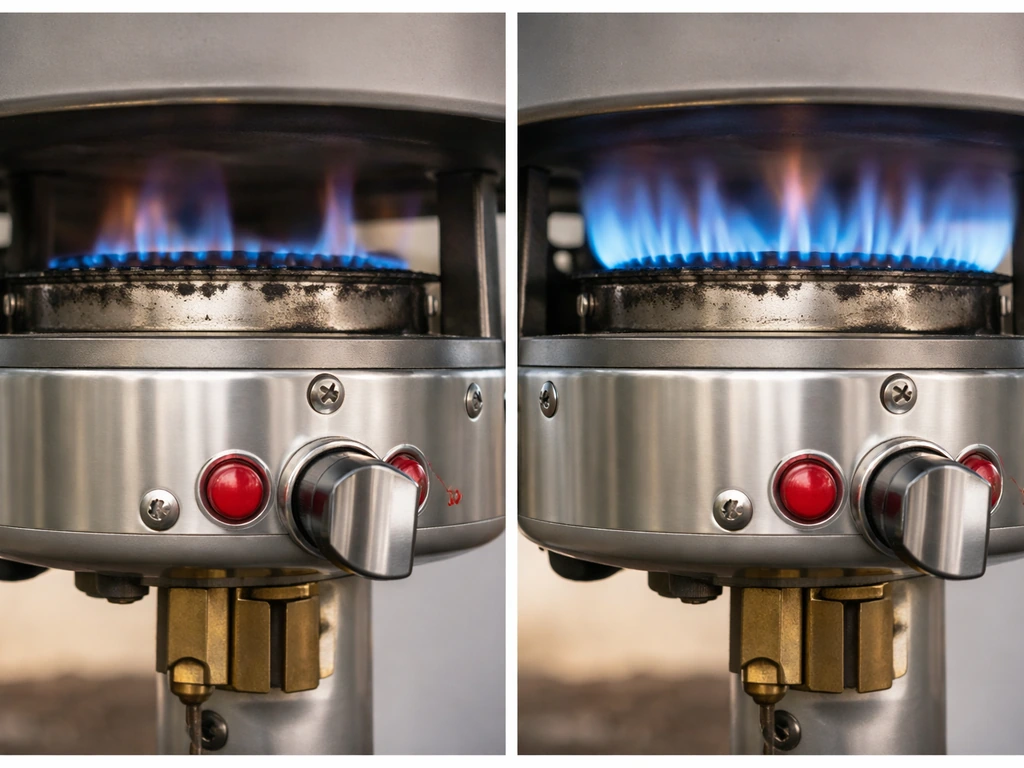
A healthy propane flame is mostly blue with a small orange tip. A large yellow, lazy, or sooty flame signals incomplete combustion, usually from a clogged burner or restricted air intake. This also produces more carbon monoxide than normal. Don't run the heater in this state. Clean the burner ports and venturi tube (more on that below) and retest. If the flame stays yellow after cleaning, there may be an orifice or air-shutter issue that needs closer inspection.
Electric heater smells like burning
A brief burning smell when an electric patio heater is first turned on after months in storage is normal. It's usually dust burning off the element. It should clear within a minute or two. If the smell is strong, electrical, or plastic-like, or if it persists beyond a couple of minutes, turn the heater off at the wall outlet, not just the unit's switch. Unusual odor from an electric heater can indicate a wiring issue, a loose connection, or a failing element, and those need a closer look before the heater goes back into service.
Maintenance and seasonal tune-up
Most patio heater problems are preventable with a short maintenance session at the start and end of the season. Here's what I do every spring before the first use and every fall before storage.
Burner and venturi tube cleaning
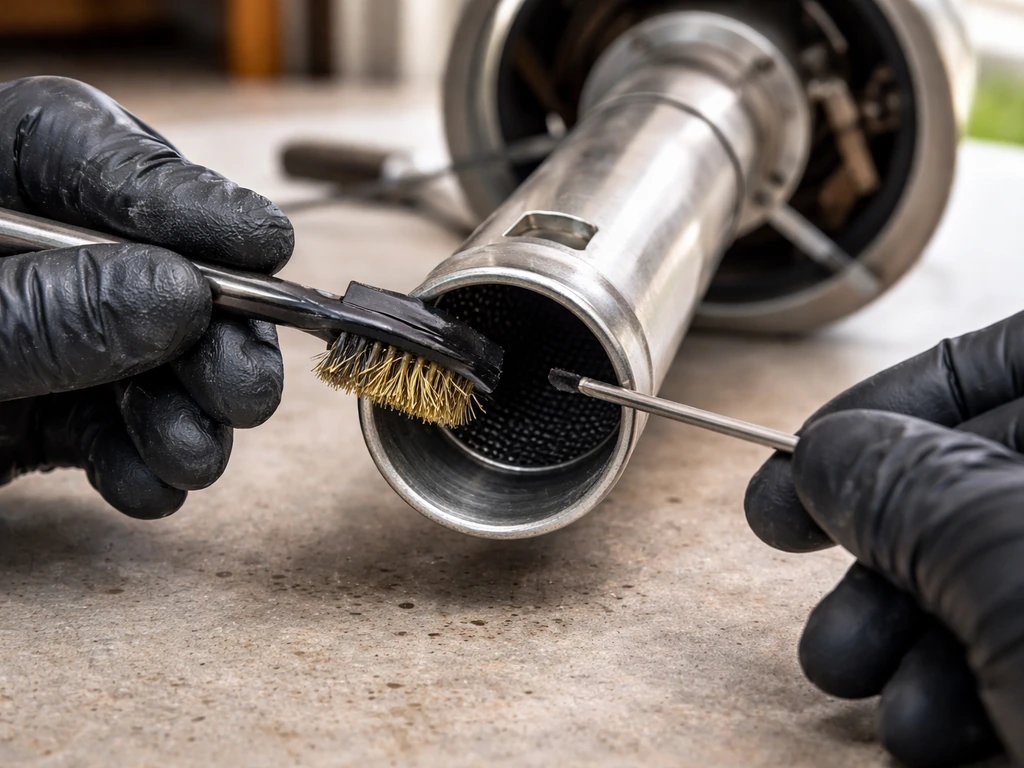
Spider webs and insect nests in the venturi tube are one of the most common causes of performance problems in patio heaters that have been stored. The Endless Summer manual specifically calls this out, and I've seen it firsthand: a small spider nest can block enough airflow to make a perfectly good burner perform terribly. With the gas off and the heater cool, remove the burner assembly (usually 3 to 4 screws), hold it up to light, and look through the venturi tube. If it's blocked, clear it with a pipe cleaner. Clean the burner ports with a stiff brush or compressed air, making sure each port hole is fully open. Reassemble and check the flame pattern: it should be even across all ports.
Regulator and hose inspection
Check the hose for cracks, brittleness, or kinking. A hose that's been stored in freezing temperatures repeatedly will eventually crack. Run your hand along the full length and look for any spots where the outer jacket is damaged. The regulator itself doesn't require regular maintenance, but it should be replaced every 5 to 10 years or any time you notice reduced output that doesn't clear up after the reset procedure described above. Always connect a regulated gas supply, never direct tank pressure without a regulator, as heater valves are not rated for unregulated pressure.
Thermocouple and igniter check
At the start of each season, visually inspect the thermocouple tip for corrosion or carbon buildup and clean it lightly if needed. Verify that the tip is positioned in the pilot flame path. Check the igniter electrode for corrosion and confirm the gap looks correct. Check all wiring connections from the igniter button to the module and from the thermocouple to the gas valve, because vibration and thermal cycling over a season can loosen push-on connectors.
Controls, fittings, and exterior
Work the control knob through its full range (pilot, low, high) a few times to check for stiffness or grinding. Clean the exterior of the heater head and reflector with a damp cloth. If the reflector is heavily oxidized or damaged, it will reduce heat projection noticeably. Check that the base is stable and all hardware is tight, paying attention to the tilt switch mounting if your model has one. Run a soapy water leak test on all fittings before the first light of the season.
When to repair it yourself and when to stop
Most patio heater repairs, including thermocouple replacement, igniter replacement, tilt switch replacement, venturi cleaning, and regulator replacement, are reasonable DIY jobs. Parts are generally inexpensive and widely available. The repairs get riskier when they involve the gas valve assembly, the main burner orifice, or any internal gas line fitting that you can't verify with a proper leak test afterward.
Stop what you're doing and call a qualified gas appliance technician if any of the following apply:
- You can smell gas and can't locate the source after a careful soapy water test of all external fittings
- The hose or regulator shows physical damage (cracks, melted areas, burned spots)
- The control valve is leaking gas past the stem when in the OFF position
- You see a sooty yellow flame that doesn't clear up after cleaning the burner
- Anyone nearby reports symptoms of carbon monoxide exposure: headache, dizziness, nausea, or confusion while the heater is running
- The heater has been knocked over and the burner head or gas fittings show visible damage
- Any internal wiring on an electric heater shows burn marks, melting, or a burning plastic smell that doesn't go away
Carbon monoxide from a malfunctioning gas heater is invisible and odorless, and the CDC is straightforward about this: CO poisoning can happen faster than most people expect. If you even suspect a combustion problem and can't confirm the heater is working normally, don't use it until you've identified the cause. A $15 CO detector near your outdoor seating area is a worthwhile addition regardless.
For many heaters, especially budget models that are 8 to 10 years old, the repair vs. replace calculus is worth thinking through honestly. If the gas valve and thermocouple both need replacing on a heater that's already showing rust and a cracked hose, the parts cost alone can approach 40 to 60% of the price of a new unit. If the heater has sentimental value or is a quality commercial-grade unit, repair makes sense. For a basic department-store model past its prime, replacement is often the practical call. Check whether your model's manual and parts are still available, because a heater with no replacement parts or documentation support is harder to keep repairing safely over time.
FAQ
Patio heater tips question: My propane heater stays lit only while I hold the knob. What does that usually mean?
If your heater extinguishes when you release the knob, first assume it is a safety sensing issue (thermocouple/flame sensor, or tilt switch), not a “bad ignition” problem. The quick test is to hold the knob longer (15 to 30 seconds is typical), then clean and reposition the sensing element, and only after that consider the gas valve.
Patio heater tips: What should I do right after wind knocks the flame out?
For propane, avoid relighting immediately after a wind blowout. Turn it off and wait at least 5 minutes to let any accumulated gas dissipate, then restart using the normal lighting sequence. This reduces flash risk and helps you diagnose whether the original flame failure was wind related or sensor related.
Patio heater tips: Do the thermocouple and tilt-switch checks apply to electric heaters too?
Electric models can have a different failure pattern than gas models. If the heater smells strongly, you see sparking, the outlet or cord feels hot, or the odor persists past a minute or two, shut off at the wall outlet (not just the unit switch) and stop using it until you inspect the cord, connections, and heating element.
Patio heater tips: Where exactly should I apply the soapy water leak test?
“Soapy water leak test” applies beyond the regulator connection. Check every junction that includes a seal or fitting, especially after any part replacement or reassembly. If you see bubbles, tighten once and retest, if bubbles continue, replace the hose or regulator rather than continuing to run it.
Patio heater tips: I smell propane but I can’t find the exact leak, what’s the safest next step?
If there is a leak smell but you cannot pinpoint it, shut the tank valve first, move away, and do not use any ignition sources or even electrical switches in the area. Afterward, only proceed when the system is leak-free. Repeated “quick fixes” like tightening without retesting can worsen seal damage.
Patio heater tips: My flame looks yellow and sooty. Can I just run it for a little while?
If the flame is yellow or sooty, do not keep using the heater in that condition. Yellow flame often indicates incomplete combustion from restricted airflow, clogged ports, or a blocked venturi, and it can increase carbon monoxide risk. Clean the burner ports and venturi, then check whether the flame returns to mostly blue with a small orange tip.
Patio heater tips: I get a spark, but it won’t light. What’s the fastest thing to verify?
A corroded or mis-set electrode gap can cause “spark but no ignition.” Clean the electrode tip with fine abrasion, confirm the electrode-to-burner gap is roughly 3 to 5 mm, then check that the igniter wiring is seated at both ends. If spark still fails, the igniter module likely needs replacement.
Patio heater tips: My propane heater takes forever to light after reconnecting the tank, is that normal?
Yes, “purging air” can be the reason. If the tank is new or was recently reconnected, hold the knob in the pilot position longer, some models require up to two minutes and you may need to wait until you smell gas before attempting ignition. If you still get no pilot, check the pilot orifice for blockage.
Patio heater tips: What maintenance step actually fixes weak heating from clogged airflow?
The venturi tube can be blocked by insects or webs, which reduces airflow and performance. With the heater cooled and gas off, remove the burner assembly, clear the venturi opening using a pipe cleaner, and brush the burner ports so each port hole is fully open before reassembly.
Patio heater tips: What order should I try thermocouple checks versus replacement?
If you suspect the thermocouple but want to avoid repeated swaps, do the mechanical checks first. Verify the tip is correctly positioned in the pilot flame path, clean it lightly if needed, and resecure the connection at the gas valve. Only replace after repositioning and cleaning still fail to keep the flame after releasing the knob.
Patio heater tips: My heater seems to trip the tilt switch even when it’s upright. What’s the proper fix?
Tilt switches usually have no “adjustment” that solves a sticking fault safely. Instead, gently confirm level and verify both wires are connected, then replace the switch if the contacts are corroded or the housing is damaged. Avoid bypassing it permanently, it is there to prevent gas flow if the heater tips.
Patio heater tips: How do I know when the gas valve is the real problem, not the sensors?
If both fuel supply and sensors test fine, and the heater still refuses to stay lit, the flame sensing circuit may be in an electronic control path (for some models) or the gas valve can be sticking. DIY repair is getting to the edge when the gas valve assembly is involved, so ensure you can perform a full leak test afterward and consider a technician if you are not confident.
Patio heater tips: Weak heat, but the heater lights fine. What should I check first on propane?
Reduced heat can happen when the tank is low, especially below about 20% on a 20 lb propane tank, and in colder weather pressure drops are more noticeable. Also confirm you opened the tank valve slowly to avoid regulator bypass/safety mode, then try the reset procedure before assuming a clogged burner.
Patio heater tips: Is any propane odor normal once it’s running?
A persistent faint propane smell after the heater starts, or any smell that gets stronger, should be treated as an active leak, not “normal.” Shut off by closing the tank valve, move away, and recheck regulator-to-tank, hose-to-valve, and all recently disconnected fittings with soapy water.
Patio heater tips: How should I think about coverage beyond the heater’s BTU rating?
For sizing, don’t rely only on the heater’s stated BTU. Coverage depends on ceiling height, wind exposure, and how open the seating area is, which is why clearance and placement matter. Use the heater size guide logic and position the heater so wind hits from the side when possible.
Patio heater tips: When should I repair versus replace, if I’m seeing multiple parts fail signs?
A practical decision tip: if you are replacing multiple gas components (for example thermocouple and gas valve) and you already have visible safety wear like a cracked hose or heavy rust, repair costs can approach a large fraction of a new unit. If parts availability or documentation support is unclear for your exact model, replacement is often the safer long-term move.
Patio heater tips: If I buy a CO detector, where should I place it and what should it change?
A CO detector is a good addition even if everything “seems fine,” especially for enclosed or semi-enclosed areas. Place it near the area where people sit, follow the detector’s placement guidance, and do not run the heater if you ever suspect abnormal combustion (like persistent yellow soot or repeated flame issues).