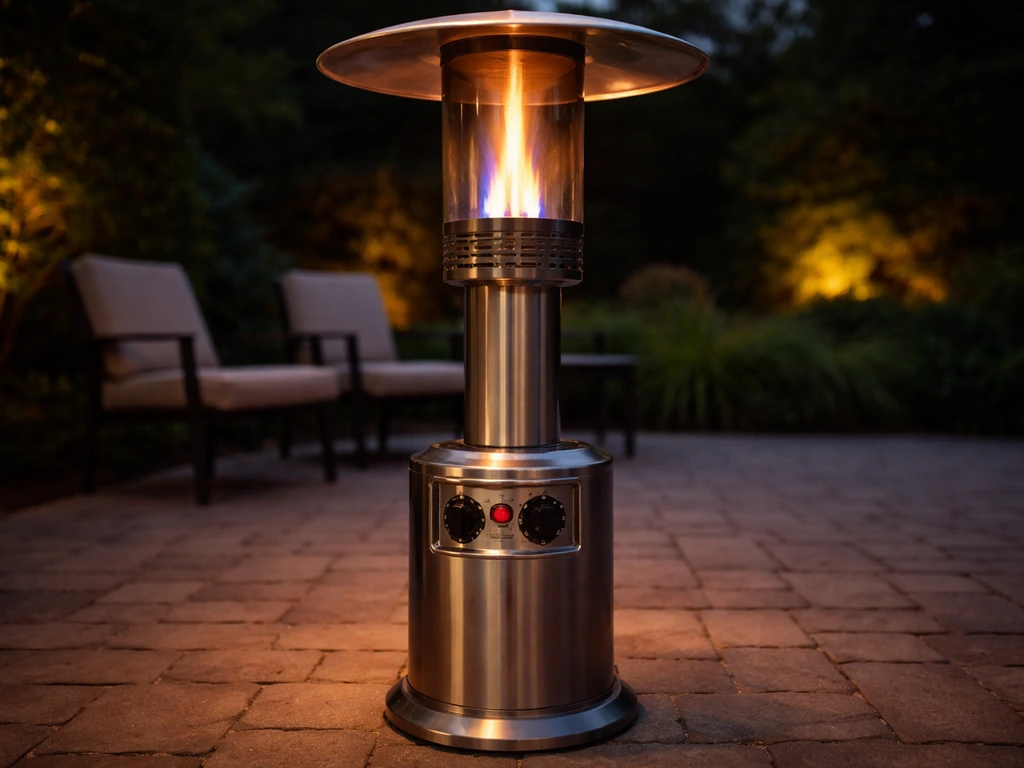
For most patios, a 40,000 BTU propane tower heater handles a roughly 10-by-10-foot area comfortably, while a natural gas model in the same range works better if you want a permanent setup and don't want to deal with tanks. Install temporary heating devices with clearance to combustible material, and provide ventilation to ensure proper combustion in confined spaces [clearance to combustible material and ventilation for proper combustion in confined spaces](https://www. osha. gov/laws-regs/regulations/standardnumber/1926/1926.
Patio Heater Guide: Choose, Set Up, and Fix Problems

Grant Mercer
24 May 2026
154). If yours isn't working, the fix is usually one of three things: a tripped tilt switch, a dirty thermocouple, or a clogged pilot orifice. This guide covers both sides: how to pick the right heater for your space and how to diagnose and fix the most common failures yourself without calling a technician.
This guide covers both sides: how to pick the right heater for your space and how to diagnose and fix the most common failures yourself without calling a technician patio heater tips.
Safety and readiness checks before you do anything else
Whether you're setting up a new heater or pulling a broken one apart, run through these checks first. Skipping them is how small problems become serious ones.
- Smell for gas before touching anything. If you detect propane or natural gas near the heater, shut off the fuel supply at the tank or valve, move everyone away, and ventilate the area for at least 10 minutes before returning. Do not attempt any repair until the smell is completely gone.
- Check your clearances. Your owner's manual lists the minimum distance from combustible materials (walls, awnings, umbrellas, fabric furniture) specific to your model. Those numbers override any general advice you've read elsewhere. If you've lost the manual, the manufacturer's website usually has a PDF version.
- Never operate a gas patio heater in an enclosed space. This includes garages, sunrooms with limited airflow, screened enclosures, or any area where combustion air is restricted. Confined spaces cause incomplete combustion, producing carbon monoxide. If your space is partially enclosed, treat it that way and ensure proper ventilation before operating the heater.
- Turn off all fuel before inspecting. For propane units, close the tank valve. For natural gas, close the inline shutoff closest to the heater.
- Let the heater cool completely before any hands-on inspection. Emitter screens and burner assemblies retain heat long after shutdown.
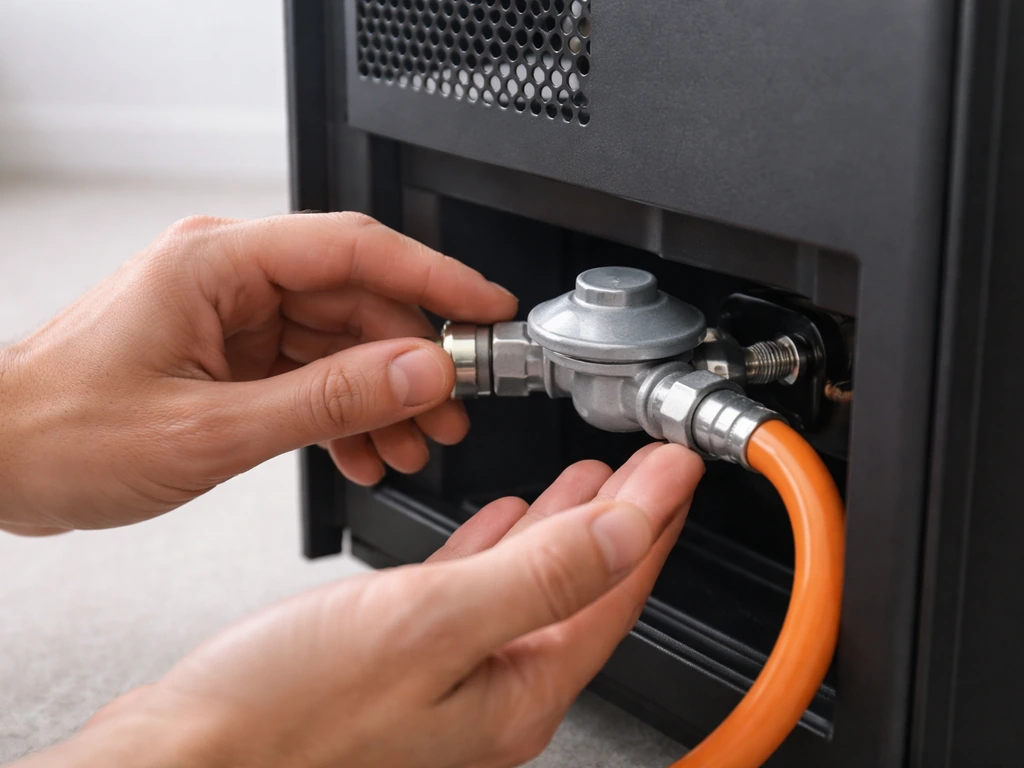
- Check the regulator and hose for cracks, kinks, or brittleness before each season. A cracked hose is a replacement, not a repair.
- Test the tilt switch function by gently tilting the heater about 30 degrees. You should hear a click or the unit should cut off if lit. If the switch doesn't respond, address it before using the heater.
- Inspect the emitter screen for debris, spider webs, or insect nests, especially at the start of the season. These are a genuine fire hazard and a common ignition blocker.
How to choose the right patio heater for your space
The single biggest mistake people make is buying based on price or looks rather than matching the heater to the actual space. Here's how to think through it properly.
Match BTUs to your patio size
A rough rule: you need about 1 BTU per cubic foot of outdoor space for mild climate heating, but outdoor BTU calculations are less precise than indoor ones because heat escapes in every direction. For practical purposes, use square footage as your baseline. A 200-square-foot open patio works well with a single 40,000-to-46,000 BTU tower heater. If you are wondering what a patio heater meaning is, it generally refers to an outdoor heating appliance designed to warm seating areas.
A larger covered patio of 400 square feet or more may need two units or a ceiling-mounted system rated at 50,000 BTU or higher. If your patio is partially enclosed (pergola, windbreak panels, privacy walls), you'll retain heat better and can use a lower BTU unit effectively. The size guide topic covers this in more detail if you want to go deeper on the calculations.
If you want a clear starting point for the math behind these BTU and coverage choices, use a patio heater size guide.
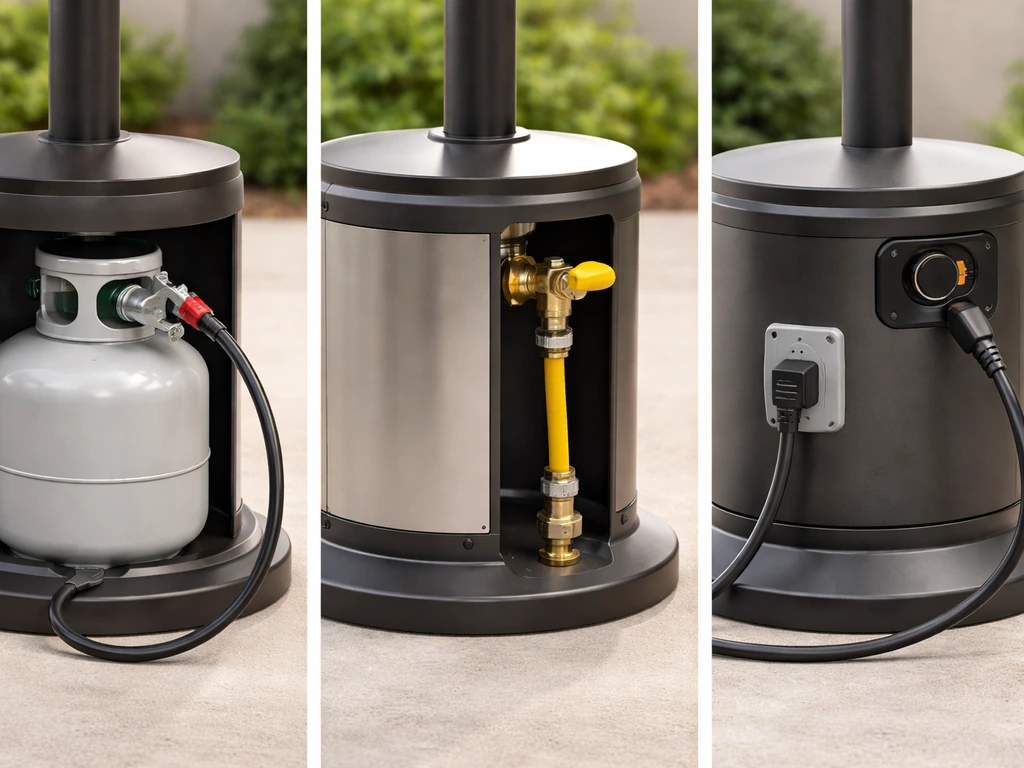
Fuel type: propane vs natural gas vs electric
| Fuel Type | Best For | BTU Range | Key Tradeoff |
|---|---|---|---|
| Propane (tank) | Renters, portability, no gas line | 30,000–48,000 BTU | Tank refills every 8–10 hours at full output; ongoing cost |
| Natural Gas (piped) | Permanent patios, frequent use, convenience | 30,000–50,000+ BTU | Requires gas line installation; not portable |
| Electric (infrared) | Covered patios, quiet neighborhoods, low maintenance | 1,500–5,000W (5,100–17,000 BTU equiv.) | Lower heat output; works best in enclosed or semi-enclosed spaces |
For most homeowners who want flexibility, a propane tower heater is the easiest starting point. If you use your patio more than three or four times a week during cool months, the convenience of a piped natural gas heater usually justifies the installation cost over a season or two. Electric infrared units are the easiest to maintain (no gas components to fail) and work surprisingly well under a covered patio where the radiant heat bounces off surfaces. If you're importing or selling a unit, the patio heater HS code can determine how it is classified for shipping and customs.
Features that actually matter
- Tilt/tip-over shutoff: This is non-negotiable for freestanding propane units. It's an automatic safety valve that cuts gas flow if the heater tips past a set angle, typically around 30 degrees. Verify it's present and test it before first use.
- Ignition type: Electronic push-button ignition is far more convenient than manual match-light, and it means you're not holding a flame near an open gas valve. Some premium units have auto-reignition if the flame blows out.
- Heat shield and emitter design: A good quality emitter screen distributes heat evenly rather than throwing it in one direction. Mushroom-top tower heaters are the most common design for good reason: they cast heat in a 360-degree radius.
- Regulator quality: Cheap regulators fail faster and can cause inconsistent gas pressure, which shows up as hard starting or a flame that won't stay lit. Replaceable regulators are a practical advantage.
- Weather resistance rating: If your heater stays outside, look for powder-coated or stainless steel construction. Aluminum components corrode faster in coastal or humid climates.
- CSA or ETL certification: Confirms the heater has passed standardized safety testing. Skip any unit that lacks a recognized certification mark.
Setup and basic maintenance so it doesn't fail on you
A properly set-up and maintained patio heater rarely fails. Most of the troubleshooting calls I see are preventable with 10 minutes of seasonal maintenance.
Initial setup checklist
- Assemble the unit completely before connecting any fuel. Finger-tight fasteners on gas components are a hazard; follow your manual's torque guidance or snug firmly with a wrench.
- Perform a leak test before first ignition. Apply soapy water (dish soap works fine) to every gas fitting, the regulator connection, and the valve body. Open the tank or supply valve slowly and watch for bubbles. Any bubbling fitting needs to be tightened or replaced before you proceed.
- Connect the regulator to a full or nearly full propane tank. Low tank pressure is the cause of more 'won't ignite' calls than any component failure.
- Set the heater on a firm, level surface. Many tilt switches are sensitive enough that a slightly tilted heater on uneven pavers will prevent ignition.
- Read the lighting instructions for your specific unit before the first use. The sequence (pilot hold time, valve positions, ignition timing) varies between models and getting it wrong is the most common cause of first-use frustration. If you've lost your manual, the lighting instructions topic has general guidance that covers most tower heater designs.
- After first ignition, let the heater run for 5 minutes, then recheck all gas fittings with soapy water while it's operating.
Seasonal maintenance (do this every year)

- Clean the emitter screen with a dry brush or low-pressure compressed air. Remove any debris, insect nests, or oxidation buildup.
- Inspect the thermocouple tip for carbon buildup or corrosion. Light sandpaper (400-grit) can clean a dirty tip, but a thermocouple that's more than 3–4 years old or visibly degraded should just be replaced. They're typically under $15.
- Check the pilot orifice with a flashlight. A partially blocked orifice is the second most common ignition failure after thermocouple issues. Clean it with a fine wire brush or a manufacturer-approved orifice cleaning tool, never a drill bit (it enlarges the orifice permanently).
- Inspect the gas hose and regulator for cracks, UV degradation, or brittleness. Replace the hose every 3–5 years regardless of appearance if the unit lives outdoors.
- Test the tilt switch function.
- Wipe down all exterior surfaces, check all bolts and fasteners for looseness (vibration from wind and use works them loose over time), and touch up any rust spots on powder-coated parts with heat-resistant paint.
Troubleshooting: won't ignite at all
When the heater does nothing when you push the ignition button, or the pilot won't catch, work through these in order. If the unit is refusing to light, also review the patio heater lighting instructions so you follow the correct ignition and pilot steps for your model. Don't jump to replacing parts until you've confirmed the simpler causes.
- Check the propane tank level. A tank that reads 'low' or has been sitting for a season may have pressure too low to allow ignition. Try a fresh or known-full tank before anything else.
- Check that the tank valve is fully open. One full counter-clockwise turn is usually enough; some people crack it a quarter turn and wonder why there's low pressure.
- Purge the line. If the heater has been sitting unused, air in the gas line prevents ignition. Hold the pilot button down for 10–15 seconds to purge air before attempting to ignite.
- Inspect the igniter electrode. The electrode is the small metal rod that sits near the pilot. It should be clean, dry, and positioned 3–5mm from the pilot hood (check your manual for the exact gap). Carbon buildup on the electrode tip prevents spark. Clean it with a dry cloth or fine emery cloth.
- Test for spark. In a dim or shaded area, push the ignition button with the unit off (no gas flowing) and watch for a visible spark at the electrode. No spark means either the igniter button is faulty, the wire is disconnected, or the electrode needs replacement.
- Check the pilot orifice. Even a partial blockage from a spider web or debris will prevent the pilot from lighting. Remove the burner assembly (with gas off and unit cool) and inspect the orifice with a flashlight.
- Check the thermocouple position. The thermocouple tip must be directly in the pilot flame path. If it's bent away from the flame, the safety system won't register a flame even if one exists, and the gas valve will close. Gently reposition the thermocouple tip so it sits in the outer edge of the pilot flame.
Troubleshooting: lights but won't stay lit
This is the most common complaint I see, and the thermocouple is responsible for the majority of these cases. The symptom is consistent: the pilot or main burner lights, you release the control knob, and the flame goes out within a few seconds to a minute.
Thermocouple diagnosis and fix

The thermocouple is a small safety device that generates a tiny millivolt signal when heated by the pilot flame. That signal tells the gas valve it's safe to stay open. If the thermocouple is faulty, dirty, or positioned wrong, the valve closes and the flame dies. Here's how to confirm it:
- With the heater off and cool, visually inspect the thermocouple tip. It should be copper-colored and relatively clean. Heavy carbon buildup, corrosion, or a cracked tip are visual failure signs.
- Check the thermocouple position again. The tip needs to be in the hottest part of the pilot flame, which is usually the outer cone. If it's too far in or too far out, it won't reach operating temperature (around 750°F minimum for most units).
- Test the thermocouple output with a multimeter. Set it to millivolts DC. Disconnect the thermocouple from the gas valve. Have a helper hold the pilot on manually while you measure output at the thermocouple lead. A healthy thermocouple produces 25–35 millivolts when hot. Below 20 millivolts, replace it.
- Replace the thermocouple if it fails the millivolt test or is visually degraded. Universal replacement thermocouples are sold at most hardware stores for $10–$20. Match the thread size and length to your original. Replacement takes about 15 minutes with a small wrench.
Other causes of flame dropout
- Low gas pressure: A nearly empty propane tank drops pressure as it empties, causing the flame to run weak and eventually go out. Replace or refill the tank.
- Faulty regulator: Regulators can fail in a 'low flow' mode where pressure is consistently below spec. If you've ruled out a low tank and the thermocouple tests fine, swap the regulator. A new one costs $15–$40 depending on BTU rating.
- Wind: Strong or gusty wind can overwhelm the pilot flame, especially on cheaper units with minimal shielding around the pilot assembly. Repositioning the heater or adding a windbreak often solves this.
- Partially blocked main burner orifice: If the main burner lights briefly then goes out, the orifice may be partially blocked. With gas off and unit cool, remove and inspect the orifice, then clean carefully with a non-enlarging method.
Troubleshooting: won't turn on or keeps shutting off unexpectedly
If the heater refuses to start at all or shuts off without warning during use, the tilt switch is usually the first thing to check. But there are a few other culprits worth knowing about.
Tilt switch problems
The tilt switch (also called an anti-tip safety device) is a mercury or mechanical switch that cuts gas flow if the heater tips past a safe angle. It's an important safety feature, but it's also a common failure point and a source of false trips.
- First, check that the heater is actually level. Even a few degrees of lean on uneven ground can trip the switch. Move the heater to a flat surface and try again.
- Locate the tilt switch. On most tower heaters it's near the base, sometimes inside a small housing near the control panel. Your manual will show its location.
- With gas off, disconnect the tilt switch wire connector and use a multimeter to test continuity. In the upright position, a functioning switch should show continuity (closed circuit). When tilted beyond its threshold, it should open the circuit. If it shows no continuity when upright, the switch has failed.
- Replace a failed tilt switch. It's a direct swap in almost all cases, and replacement parts are usually under $20. The wiring connector is typically a simple 2-pin plug.
- If the switch tests fine but the heater still won't start, the problem may be an intermittent connection in the switch wiring harness. Inspect the wires for cracking, pinching, or loose connectors at both ends.
Other shutoff causes
- Overheat protection: Some heaters have a thermal cutoff that trips if the unit overheats, often from running too close to a wall or ceiling. Allow it to cool completely, move it to a properly cleared location, and try again.
- Faulty gas valve: The gas valve itself can fail internally, causing intermittent shutoffs. This is less common but does happen in older units. A gas valve replacement is a borderline DIY repair (see the section below on when to call a professional).
- Battery ignition module: On battery-powered electronic ignition units, weak batteries cause inconsistent behavior including failed starts and mid-operation issues. Replace the batteries (usually AA or AAA) before assuming a component failure.
- Wind-caused flame dropout triggering safety shutoff: Some heaters have electronic flame supervision that shuts down the gas valve if the flame is lost. If this happens consistently in breezy conditions, it's a location issue, not a component failure.
When to DIY and when to call for service
Most patio heater repairs are genuinely DIY-able. If you need a replacement quickly, plan your patio heater pick up today so your outdoor space stays comfortable while repairs get handled. The components are simple, replacement parts are cheap, and the skill requirement is basic: blank" rel="noopener noreferrer">read the manual, use a multimeter, follow gas safety rules. But there are clear lines where DIY stops being a good idea.
Repairs you can confidently do yourself
- Thermocouple replacement
- Tilt switch replacement
- Electrode and igniter replacement
- Regulator and hose replacement
- Cleaning pilot orifice and emitter screen
- Adjusting thermocouple position
- Replacing ignition batteries
Stop and call a professional for these
- You smell gas and can't identify or stop the source after shutting off the supply valve.
- The gas valve body itself is leaking (bubbles at the valve body, not at a fitting).
- You've replaced the thermocouple and regulator and the heater still won't stay lit, suggesting an internal gas valve fault.
- The heater has been involved in a tip-over incident with an open flame and you're not sure if internal damage occurred.
- Any repair that requires breaking into the sealed gas valve assembly.
- Natural gas line connections at the supply side (anything before the heater's shutoff valve is licensed work in most jurisdictions).
How to prevent repeating the same failure
The heaters I've seen fail repeatedly almost always share the same root causes: they're stored outdoors uncovered (letting spiders nest in orifices and moisture attack the thermocouple), they run on low-pressure tanks too long, or they're never cleaned between seasons. A 10-minute inspection at the start of each season and a proper cover when not in use eliminates probably 80% of common failures.
If you're troubleshooting a unit that failed last season too, check whether it's the same component failing again. Repeated thermocouple failures often mean the thermocouple is positioned wrong or the pilot flame is running too lean, not that you got a bad part. Repeated ignition failures often point to a partial orifice blockage that was never fully cleared.
Your next steps decision path
- Start with the safety checks above every time before any repair or first seasonal use.
- If selecting a new heater, match BTUs to your actual square footage, pick the right fuel type for your setup, and verify it has a tilt shutoff and a recognized safety certification.
- For setup, follow the lighting instructions for your exact model and perform a soap-water leak test before every season.
- If it won't ignite: check fuel level, purge air, inspect the electrode and pilot orifice, then confirm spark.
- If it lights but won't stay lit: test and replace the thermocouple first, then check gas pressure and the regulator.
- If it won't turn on or shuts off randomly: test the tilt switch, check the surface levelness, and replace batteries on electronic ignition units.
- If you've worked through all of the above and the heater still fails, or if you ever smell gas you can't account for, stop and call a licensed technician. A service call is cheaper than a gas incident.
FAQ
How do I tell whether I should use a propane or natural gas patio heater for my space?
Start with how long and how often you’ll run it. If you use the patio only occasionally, propane is usually simpler. If you use it weekly in cool months, natural gas can be cheaper over time because you avoid tank swaps, but it also requires a stable gas line and correct exterior shutoff planning.
What patio size measurement should I base my BTU estimate on, open area or the whole yard?
Use the seating area you want warmed, not the entire yard. A patio heater warms most effectively where people sit and where the radiant heat can bounce off nearby walls or the underside of a cover, so overestimating can leave you with an oversized unit that cycles or crowds the space.
Is there a difference in troubleshooting an electric patio heater vs a gas tower heater?
Yes. The thermocouple, pilot orifice, and tilt switch steps in the guide apply to gas models. For electric units, failures are more often caused by power supply issues, a tripped breaker, loose wiring at the heater base, or infrared emitter problems, so the gas-specific checks won’t help.
My heater lights, but shuts off shortly after I release the knob, what does that usually mean?
That pattern strongly suggests a safety sensor issue, most commonly a thermocouple problem or incorrect flame contact with the pilot. Confirm the pilot flame is actually heating the sensor tip, and clean any residue before concluding the part is defective.
What should I check first if the heater won’t ignite at all?
Verify you’re following the correct ignition sequence for your exact model, then inspect the basics before replacing anything. Check the fuel supply or valve position, confirm gas is reaching the control area, and look for a clogged pilot orifice or contamination that blocks pilot flow.
How can I tell if my thermocouple problem is really the part, or an adjustment/flame issue?
If the same heater repeatedly fails thermocouple-related symptoms after a replacement, it’s often flame positioning or airflow causing poor heating. Compare the pilot flame appearance to what your manual specifies, and make sure the thermocouple is seated and oriented so the pilot consistently heats its sensing end.
Why does my patio heater trip the tilt switch even though it isn’t obviously tipping?
False trips often happen when the heater is installed on an uneven surface, a leg is obstructed, or the unit rocks slightly due to wind or patio slope. Level the base, ensure the anti-tip area isn’t blocked, and avoid placing it on soft decking that can shift.
Can using a low-pressure propane tank cause ignition or shutdown problems?
Yes. If a tank runs low, regulators can struggle to maintain consistent pressure, which can lead to weak pilot flames, delayed ignition, or a shutdown after you release the control. Make sure you start with a properly filled tank, and don’t keep retrying if the flame behavior looks weak.
How often should I clean my patio heater to prevent the common failures described?
At least once at the start of each season. The guide notes that a short seasonal inspection and cleaning prevents most recurring issues, so focus on clearing debris, checking the pilot area, and ensuring the burner and orifices are free of spider webs and dust.
What’s the safest way to store a gas patio heater during the off-season?
Store it covered and protected from moisture, preferably in a way that prevents insects from getting into the burner and pilot openings. Leaving it outdoors uncovered is a common reason for repeated thermocouple and ignition failures, since moisture and nesting debris can interfere with flame and sensor contact.
When should I stop DIY troubleshooting and call for service?
If you smell gas, can’t reliably identify why the pilot or burner won’t stay lit, or you suspect a damaged gas valve, regulator, or major leak. Also stop if your troubleshooting involves altering safety components beyond cleaning, since incorrect assembly can create a hazard.
Does wind affect how well a patio heater performs and how big I should size it?
Yes, wind changes how much heat escapes and can also disturb the pilot flame, leading to nuisance shutdowns. If your patio is exposed, consider sizing on the higher side and using a partial windbreak (where allowed), or place the heater where wind won’t blow directly across the burner and pilot area.