The Westinghouse WES31-15110 (full model number WES31-15110BLK) is a 1500-watt freestanding infrared electric patio heater, not a gas unit. That distinction matters enormously before you start troubleshooting, because the manual covers electrical components like heating elements, thermal cutoffs, and overheat protection rather than thermocouples, gas valves, or pilots. The 9-page owner manual for this model covers assembly, basic operation, safety clearances, and a short troubleshooting table. If you need it today, it is available as a downloadable PDF from Westinghouse's support site and from several major retailers including Northern Tool, where the model is listed by its full suffix WES31-15110BLK.
Westinghouse WES31-15110 Patio Heater Manual Guide

Grant Mercer
14 Jun 2026
Make sure you have the right model before doing anything else
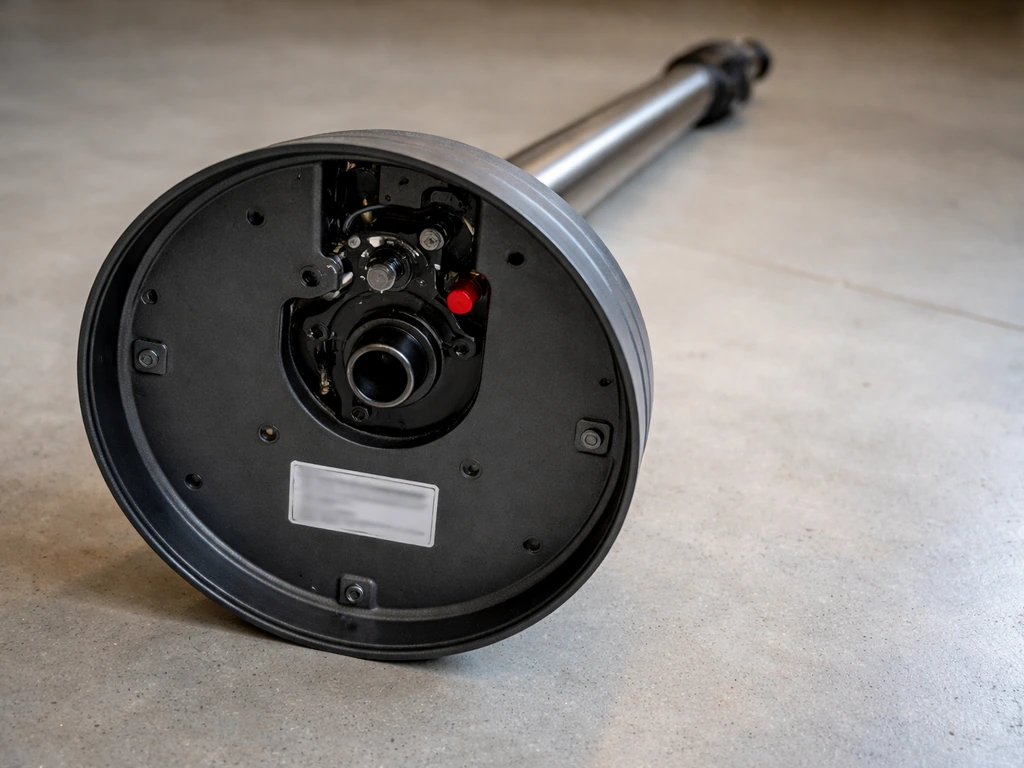
Before you download a manual or order a part, confirm your heater is actually a WES31-15110BLK. The label is on the underside of the base or on the rear of the pole assembly. You are looking for "WES31-15110BLK" printed next to "Model" or "Model No." The specs that confirm you have the right unit are: 1500W rated output, 120V / 60Hz power supply, and infrared electric heat (no gas connection of any kind). If your label shows a different suffix or a propane connection, your manual will be different and the troubleshooting steps below will not all apply. Westinghouse does make other freestanding electric patio heaters, and their manuals differ by revision and wattage, so an exact match on the model string is worth the 30 seconds it takes.
Where to find the correct manual right now
The fastest route to the official PDF is through Westinghouse's product support page. Search for "WES31-15110BLK" (include the BLK suffix) and download the instruction manual directly. If you still need the Westinghouse 1500W freestanding patio heater manual, this is the fastest way to get the correct PDF for your model download the instruction manual. If that page is down or slow, Northern Tool's product listing for this model also links the same PDF. The file is about 9 pages and includes an assembly diagram, safety section, operating instructions, and a troubleshooting chart.
If you want a physical copy, the easiest option is to download and print it yourself. There is no separate printed manual sold as a standalone part for this heater. When searching, use the full model string "WES31-15110BLK" rather than just "WES31-15110" because search engines and support databases use the color-suffix version as the primary key. Dropping "BLK" sometimes returns manuals for unrelated models.
Assembly and first-time setup (the manual summarized)
If your manual is missing and you are assembling the heater for the first time, here is what the documentation covers. The WES31-15110BLK ships disassembled in two main pieces: the base/pole assembly and the heater head. You will need a Phillips screwdriver and the hardware bag included in the box.
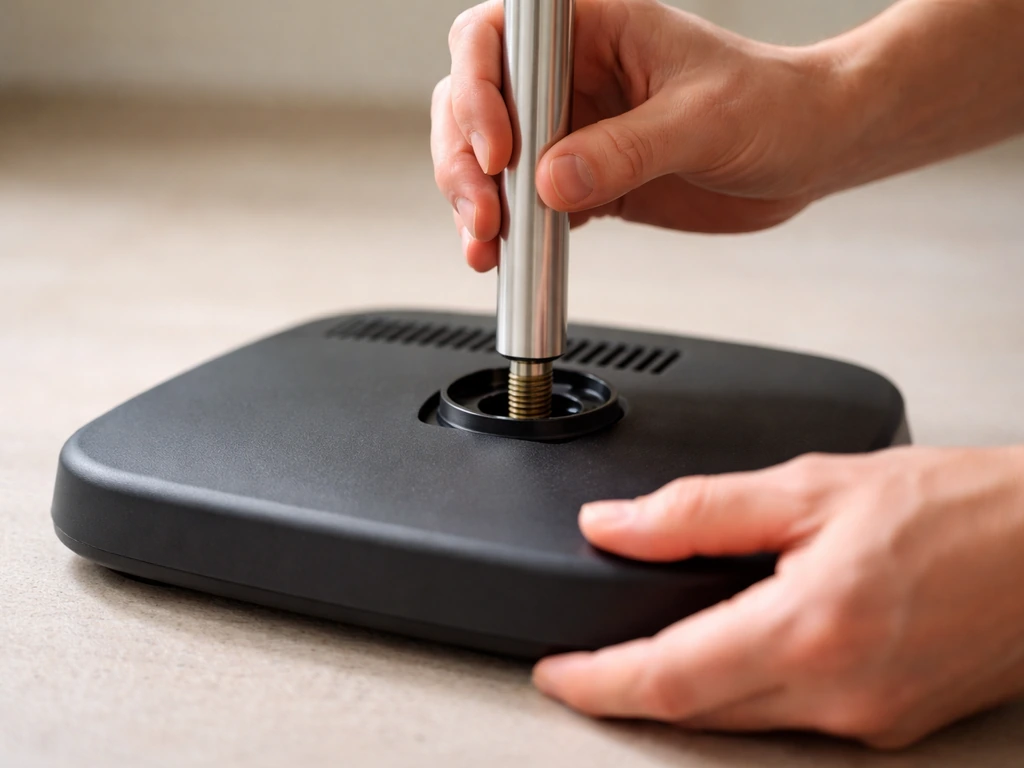
- Lay the base flat and thread the vertical pole into the base socket, tightening the retention bolt so the pole does not rotate or wobble.
- Route the power cord down through the inside of the pole before attaching the heater head. This keeps the cord protected and out of the way.
- Attach the heater head to the top of the pole using the bracket and bolts in the hardware bag. The head should pivot on the bracket so you can tilt it to the desired angle. Tighten firmly but do not overtorque aluminum hardware.
- Confirm the tilt-lock mechanism engages at your chosen angle. The head should hold position without drifting.
- Plug the power cord into a grounded 120V outlet. Do not use an extension cord unless it is a heavy-duty outdoor-rated cord of 14 AWG or thicker and no longer than 25 feet.
- Before turning the unit on, stand back and visually inspect all connections. No wires should be pinched between the head bracket and the pole.
The manual specifies a minimum clearance of 24 inches on all sides and 36 inches overhead. Do not place the heater under an awning, umbrella, or low overhang. The infrared element reaches very high surface temperatures within seconds of startup, and anything closer than those clearances is a fire risk.
Safety checks before you ever plug it in
This heater runs on 120V household current at 1500 watts, which draws about 12.5 amps. That is close to the limit of a standard 15-amp circuit. Before your first use, check these four things:
- Use a dedicated or lightly loaded 15-amp circuit. If the circuit also runs other high-draw appliances, you will trip the breaker repeatedly and stress the wiring.
- The outlet must be a GFCI-protected outdoor outlet. The manual requires this. If your outdoor outlet does not have the Test/Reset buttons on it (or is not downstream of a GFCI breaker), do not use the heater there.
- Inspect the power cord for cracks, fraying, or any sign of rodent damage before every use. A damaged cord on a 1500W appliance is a serious shock and fire hazard.
- Never use the heater indoors, in a garage, or under any enclosed structure. The unit produces radiant heat and can ignite materials that are not obviously close to the heating element.
- The heater has a built-in tip-over switch (overheat protection). Do not defeat or tape over this switch. It is a safety device, not a quirk.
Won't turn on, won't heat, or shuts off immediately: what to check
Most WES31-15110BLK problems fall into three categories: the unit does not power on at all, it turns on briefly then cuts out, or it produces less heat than expected. Here is how to work through each one systematically.
Heater does not power on
- Check the wall outlet first. Plug in a lamp or phone charger to confirm the outlet has power. If the GFCI outlet has tripped, press the Reset button on the outlet face.
- Check your home's breaker panel. A 1500W load on startup can trip a marginal breaker. Reset it once. If it trips again immediately, stop using that circuit and call an electrician.
- Inspect the heater's power cord connection at both ends. The plug should seat fully into the outlet with no looseness.
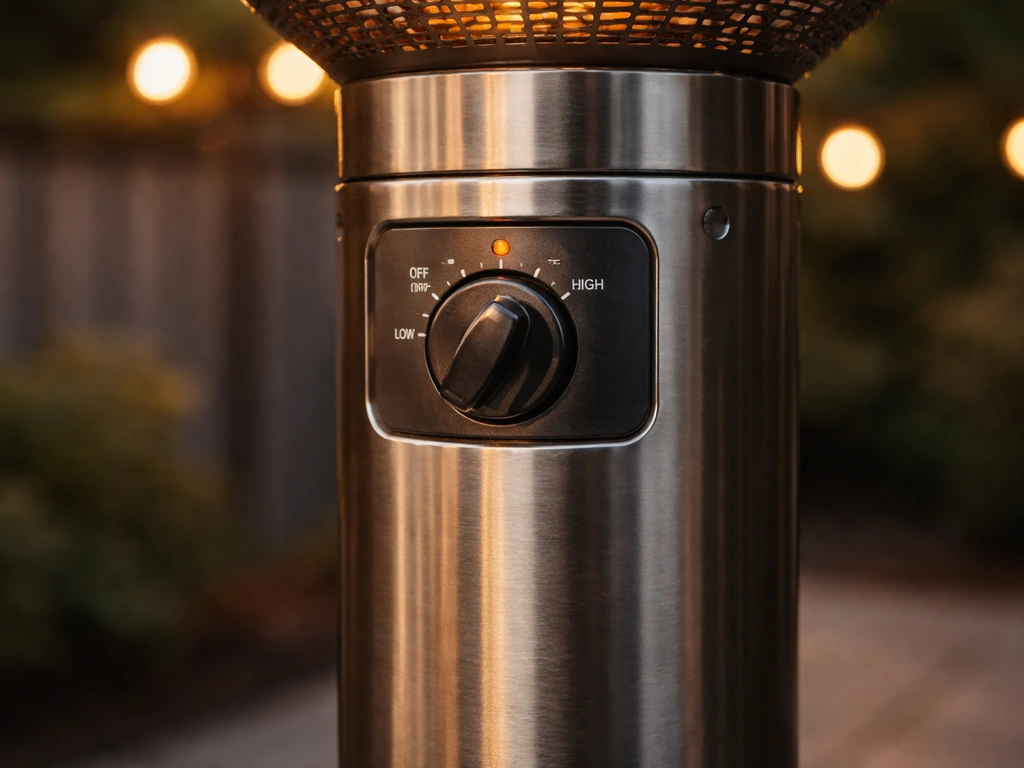
- Look at the control knob or switch on the heater. Some units require you to turn the knob past a click to the first heat setting before the element activates. If the indicator light is on but there is no heat after 60 seconds, the element or thermal fuse may be faulty.
Heater turns on but shuts off after a few seconds or minutes
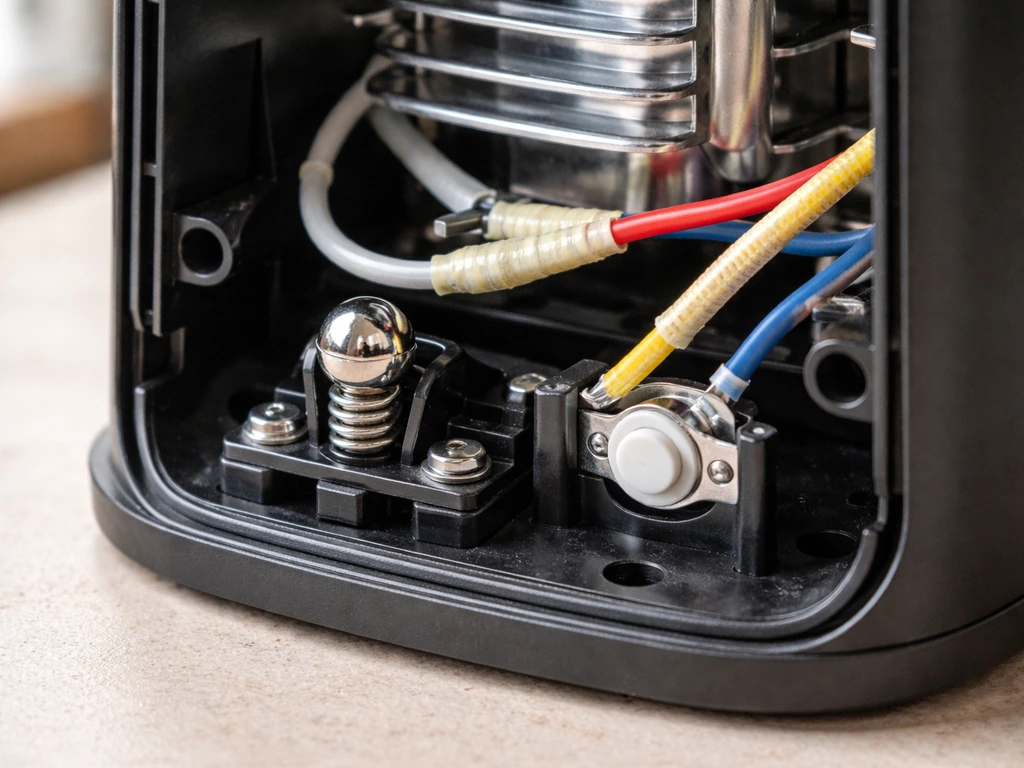
This is the most common complaint and the manual points to two culprits: the tip-over safety switch and the thermal overload cutoff. The tip-over switch is a small ball-bearing mechanism inside the base. If the heater is on an uneven surface or the base is not fully stable, the switch interprets minor movement as a tip-over event and kills power. Set the heater on a completely flat, firm surface and test again. If it still shuts off on a flat surface, the tip-over switch itself may be stuck or faulty.
The thermal overload cutoff trips when the heater runs hotter than its rated operating temperature. This can happen if the ventilation slots on the heater head are blocked, if the heater is being used too close to a wall or fence, or if the ambient temperature is already very high. Let the unit cool completely (15 to 20 minutes), clear any obstructions around the head, move it further from walls, and try again. If the overload trips repeatedly under normal clearances, the cutoff itself may be out of spec and need replacement.
Heater runs but heat output is low
If the indicator light is on and the element glows but warmth seems weak, the quartz infrared tube may be degrading. These elements do dim over time. You can visually inspect through the front guard: the tube should glow a consistent bright orange-red across its length. Dark spots or a dull, patchy glow indicate an element that needs replacement. Also check that the reflector behind the element is clean. A reflector coated in grease or grime from outdoor cooking nearby will cut radiated heat output noticeably. Wipe it with a dry cloth when the unit is unplugged and fully cool.
Common problems at a glance
| Symptom | Most Likely Cause | First Action |
|---|---|---|
| No power at all | Tripped GFCI outlet or breaker | Reset outlet or breaker; test with another device |
| Shuts off after a few seconds | Tip-over switch activated | Place on flat firm surface; check switch |
| Shuts off after a few minutes | Thermal overload cutoff tripped | Cool 20 min; clear clearances; retry |
| Glows but little heat | Degraded infrared element or dirty reflector | Inspect element glow; clean reflector |
| Indicator light on, no glow | Failed heating element or internal fuse | Replace element or thermal fuse |
Replacement parts and when to stop DIYing
The components most likely to need replacement on the WES31-15110BLK are the infrared quartz heating element, the thermal cutoff fuse (a small ceramic fuse in-line with the element circuit), and the tip-over switch. Search for replacement parts using the full model number WES31-15110BLK. Westinghouse's customer support line can confirm compatible part numbers, and several appliance parts suppliers stock compatible quartz infrared tubes in the 1500W / 120V spec. When ordering, confirm the element length and wattage match exactly, because a slightly different element wattage will cause repeated overload trips.
Replacing the heating element and thermal fuse are reasonable DIY tasks if you are comfortable working with unplugged appliances and can use a multimeter to confirm continuity. Always unplug the heater and wait 30 minutes before opening the heater head housing. Test the thermal fuse with a multimeter set to continuity mode: a good fuse shows near-zero resistance; a blown fuse shows open circuit. Replacing it requires desoldering or removing a push-on terminal, which is basic repair work. The quartz tube itself clips into ceramic holders and swaps out in about 10 minutes once the guard is removed.
Stop and call a licensed electrician or appliance repair tech if: the power cord or internal wiring is visibly burned or melted, the heater trips your home's breaker rather than just its own cutoff, you find scorching on the plug or outlet, or any repair requires working on the main circuit board (if present on your revision). These are not safe DIY scenarios. The heater costs around $100 to $150 at retail, so if the repair estimate approaches that, replacement is the more practical call.
A note on related Westinghouse models
Westinghouse sells several freestanding electric patio heaters with similar names and specs, and their manuals are not always interchangeable. If you found this guide while looking for documentation on a different variant, guides covering the broader Westinghouse electric patio heater lineup and the general Westinghouse 1500W freestanding patio heater series cover the overlapping models and some shared troubleshooting steps. The core electrical safety rules and overload troubleshooting logic apply across the family, but assembly diagrams and part numbers will differ, so always verify your exact model label before ordering parts or following assembly steps.
FAQ
What’s the safest way to test why my westinghouse WES31-15110BLK turns off after a few seconds?
Start with the basics the manual implies: confirm the heater is on a level surface, clear at least 24 inches on all sides and 36 inches overhead, then try again after a full cool down (15 to 20 minutes). If it still shuts off immediately on a flat surface, treat the tip-over switch as the first suspect, because it can trip even without movement.
Can I use an extension cord with the westinghouse WES31-15110BLK?
Use only the factory power cord and plug directly into a properly rated 120V outlet. Because the unit draws about 12.5 amps (near a 15-amp limit), a long or undersized extension cord can cause voltage drop or overheating, which can mimic overload or make the heater behave inconsistently.
Why does the heater feel weaker on very hot days, even if it turns on normally?
The thermal overload cutoff can be triggered more easily when ambient temperatures are already high. If you notice reduced warmth without a total shutoff, wait for the surrounding air to cool, keep the heater farther from walls or fences, and ensure the head ventilation slots are unobstructed.
My indicator light is on but the infrared tube does not glow. What should I check first?
First confirm the heater head is receiving power by checking that the element glows through the guard, then unplug and inspect for an obviously loose or damaged connection. If the tube is not glowing at all, the quartz heating element or in-line thermal cutoff fuse is often the next logical suspect, not the exterior controls.
What symptoms suggest the thermal cutoff fuse is blown versus the tip-over switch?
A blown thermal cutoff fuse typically results in the heater not heating properly, often with no sustained glow and no normal heat output after reset. A tip-over issue tends to shut power off based on stability, so it may behave differently when you place the base on a slightly uneven surface.
How can I tell if my model label is mismatched before ordering parts or using the wrong manual?
Look for the full string “WES31-15110BLK” next to “Model” or “Model No.” on the underside of the base or the rear of the pole assembly. If you see a different suffix or any indication of gas/propanes, stop and find the exact manual and parts for that label, because the electrical components and troubleshooting logic will not match.
Is it normal for the quartz infrared tube to dim over time?
A gradual dimming can be normal as elements age, but it should still glow fairly uniformly. If you see dark spots, patchy dull areas, or inconsistent brightness across the tube length, that’s a strong signal the element needs replacement rather than just “normal aging.”
What’s the best cleaning approach for the reflector and guard without reducing performance?
Unplug the heater and let it fully cool, then wipe the reflector with a dry cloth to remove grease or grime. Avoid adding moisture or using cleaners that can leave residue, because residue can reduce radiated output and may create hot spots when reheated.
When should I stop DIY troubleshooting and call a professional?
Call an electrician or appliance repair tech immediately if the breaker trips, if you see burned or melted wiring or a scorched plug/outlet, or if you cannot confirm continuity of the fuse and need deeper internal wiring work. Also stop if any part replacement would require working on a main circuit board, if your revision has one.
What should I do if the troubleshooting chart in the manual doesn’t seem to match my symptom exactly?
Translate your symptom into the manual’s three main categories: no power, brief power then cutout, or weak heat. Then double-check the environment and setup (clearances and ventilation slots) first, because many “electrical” faults in practice are triggered by blocked airflow or installation too close to nearby surfaces.