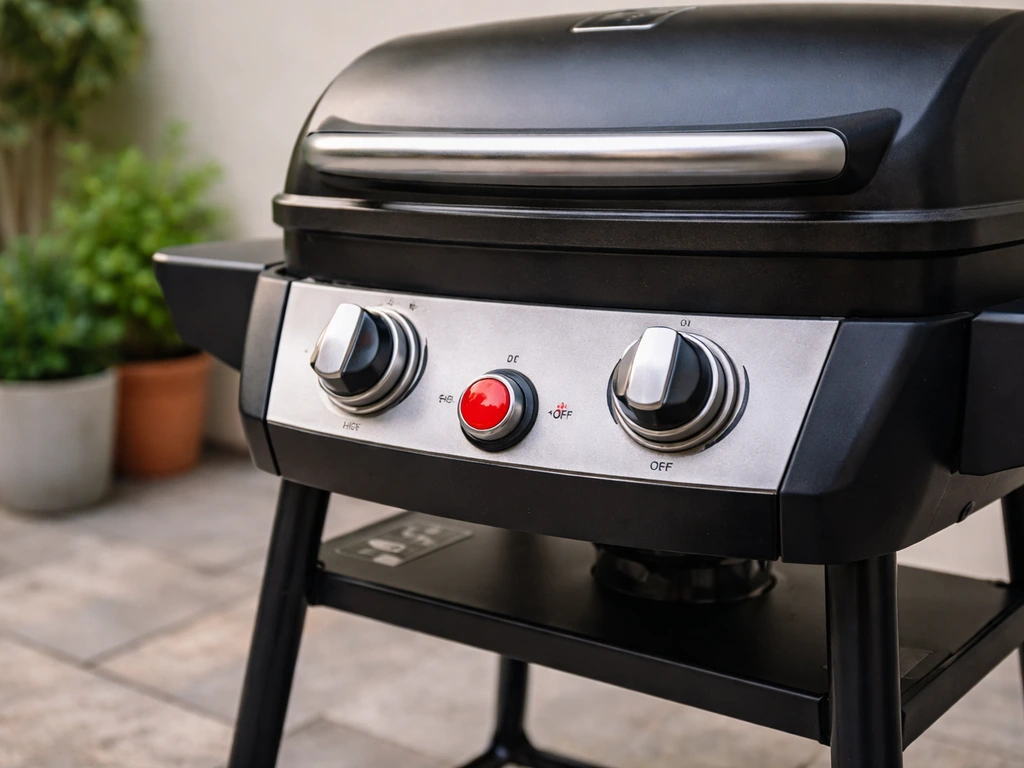
The Char-Broil Patio Bistro 240 is a compact propane grill, and the instructions you need depend on which exact model number you own. The two main variants covered by the product manual are 14601900 and 14601903, while the assembly instructions document covers 14601901 and 14601902. Get that number right first, then everything else in this guide, from first assembly to lighting to diagnosing why it won't stay lit, applies cleanly to your specific unit.
Char-Broil Patio Bistro 240 Instructions for Safe Lighting

Grant Mercer
30 May 2026
Find Your Exact Model Before You Do Anything Else
Char-Broil made several versions of the Patio Bistro 240, and they are not identical. The product manual dated 11/14/13 (document number 42805145) covers models 14601900 and 14601903. There is a separate assembly instructions document (42805154, dated 01/15/2014) that covers 14601901 and 14601902, including regional variants with suffixes like C1 through C4. There is also a Patio Bistro 240B variant listed separately on Char-Broil's product pages. Using the wrong manual means you could follow assembly steps or ignition procedures that simply do not match your unit.
Your model number is on a sticker on the back or underside of the unit, usually near the bottom of the cart body or on the grease tray area. Write it down before you go hunting for a manual online. If you have model 14601900, Char-Broil's parts catalog lists it as the "Patio Bistro Tru-Infrared 240 Gas - Black," and you can confirm you are looking at the right replacement parts and documentation by matching that exact number.
If your manual is missing, the PDF versions are available directly from Char-Broil's support site. Search using your full model number including any suffix. The assembly instructions and the product operation manual are two separate documents, so make sure you have both if you are starting from scratch. The assembly guide covers getting it physically built; the product manual covers operation, safety, and troubleshooting.
Safety Checks Before You Touch the Gas or Igniter
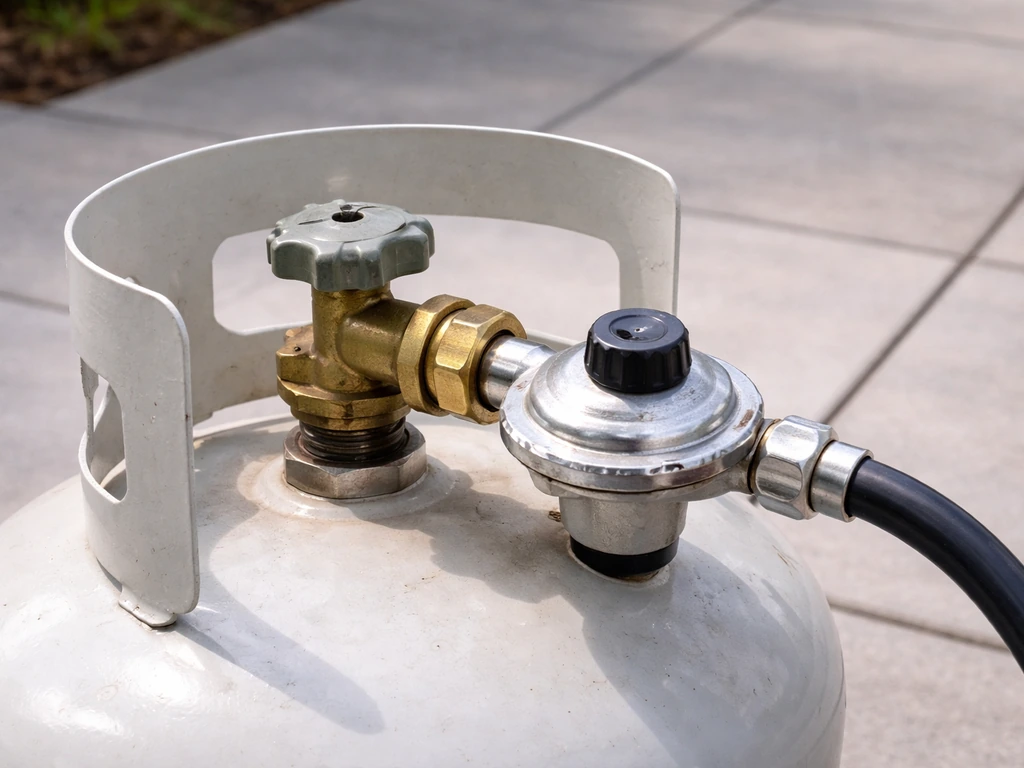
Do not skip this section even if you are in a hurry. The Patio Bistro 240 runs exclusively on LP (propane) gas using the regulator and valve assembly that came with the unit. The manual is explicit: this is not a universal LP/NG unit, and you should not swap in a different regulator or attempt to convert it to natural gas. All safety requirements must conform to ANSI Z223.1/NFPA 54 and, if you are in Canada, CSA B149.1 or B149.2.
Before every use, and absolutely before the very first use or any time you reconnect the propane cylinder, run a soap leak test. Mix a 50/50 solution of mild dish soap and water, apply it with a clean paintbrush to every connection point indicated in the manual (regulator connection, hose connections, cylinder valve), then slowly open the cylinder valve. Watch for growing bubbles, not just foam. If you see bubbles expanding and growing, that is a leak. Close the cylinder valve immediately, do not attempt to light the grill, and do not move the cylinder near any ignition source. Work outdoors in a well-ventilated area and keep the area clear of open flames and cigarettes while testing.
- Never store the LP cylinder in an enclosed space like a garage, carport, covered porch, or any building.
- Never leave a propane cylinder in a vehicle where it can overheat from sunlight.
- If you see grease or hot material dripping onto the hose, regulator, or valve, turn off the gas at the cylinder immediately. Do not relight until you have found and corrected the cause and re-run the soap test.
- Perform the leak test every single time you exchange or refill the cylinder, not just the first time.
- Do not use an open flame to check for leaks, ever.
Assembly: From the Box to Ready to Light
If you are working from the assembly instructions document (for models 14601901/14601902), you will have a step-by-step illustrated guide. For the 14601900/14601903 product manual, some assembly steps are included within the main manual. In either case, the general build order is the same: assemble the cart frame first, then mount the grill body, then attach the lid, then connect the burner components, and connect the LP regulator last. Do not connect the propane cylinder until every other assembly step is complete.
- Lay out all parts and hardware and check them against the parts list in your manual before starting. Missing a bolt now is easier to handle than discovering it mid-assembly.
- Assemble the cart frame and shelves per the illustrated steps, making sure all bolts are snug but not overtightened to the point of stripping the threads.
- Mount the grill body to the cart frame and secure all fasteners.
- Attach the lid and hinge hardware. Make sure the lid opens and closes freely without binding.
- Connect the burner(s) and make sure each burner tube is properly seated and engaged with its corresponding control valve orifice. This is a common miss: a burner that is not fully engaged will cause ignition failure later.
- Route the igniter wire to the electrode and connect it securely. Check that the electrode tip is positioned correctly near the burner port.
- Attach the regulator and hose assembly to the grill. Do not cross-thread: hold the coupling nut so the nipple centers in the cylinder valve, then tighten to a full stop.
- Do not attach the propane cylinder yet. First visually inspect all connections and verify nothing is pinched or misrouted.
- Now attach the LP cylinder. Once connected, perform the full soap leak test before attempting to light.
A note on the ignition system: the 14601900 uses a Surefire electronic ignition. The igniter switch module and the electronic ignition module for Surefire are both listed as serviceable parts in Char-Broil's parts catalog, so if the igniter is dead out of the box, it is replaceable. More on that below.
How to Light It (and Why It Might Not Spark)
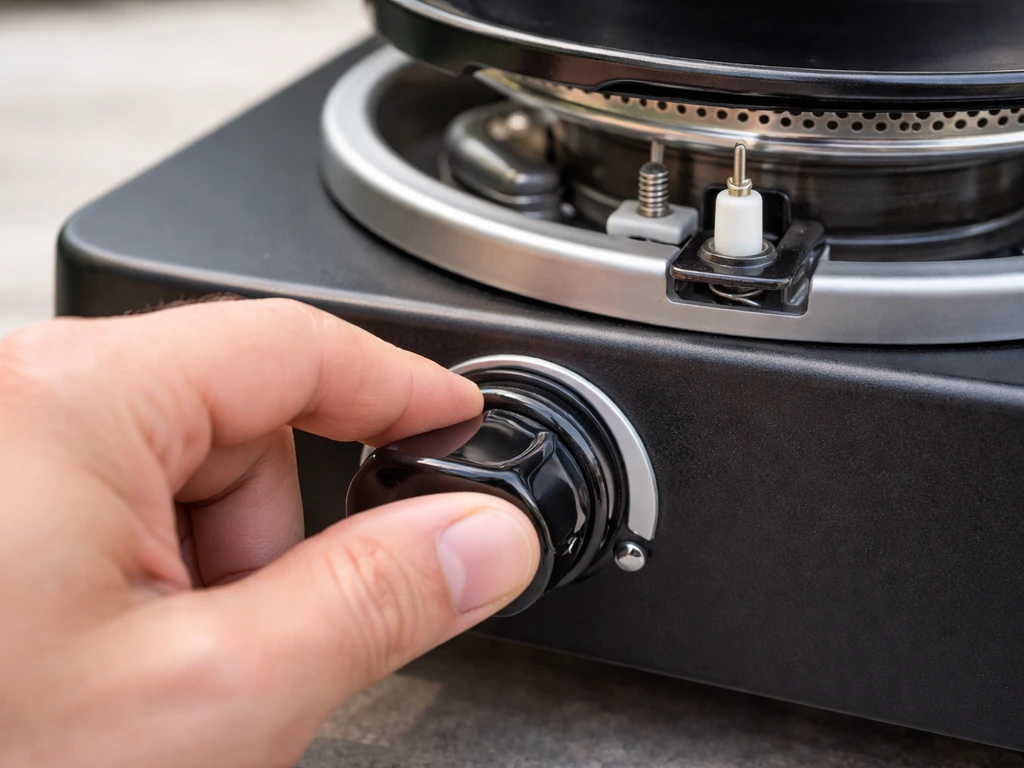
Lighting the Patio Bistro 240 is straightforward once the LP cylinder is connected and leak-tested. Open the cylinder valve fully, then press and hold the burner knob in, turn it to the HIGH or LIGHT position, and press the igniter button. You should hear a click and see a flame establish within one or two seconds. If it does not light on the first click, release the knob, wait 5 seconds to let any accumulated gas clear, then try again. Do not keep clicking repeatedly with the knob held open, because you will flood the burner with gas.
If the igniter clicks but nothing lights, or if there is no click at all, you have an ignition problem. The manual's troubleshooting section breaks this into two categories: gas-side problems and electrical-side problems.
Gas-Side Ignition Problems
| Symptom | Likely Cause | Fix |
|---|---|---|
| Clicks but no flame, no gas smell | Cylinder valve not fully open or LP coupling not fully tightened | Open valve fully; disconnect and reconnect coupling nut, centering the nipple, tighten to a full stop |
| Clicks but no flame, faint gas smell | Vapor lock at LP coupling nut | Disconnect regulator, wait 30 seconds, reconnect and retry |
| Flame appears then immediately dies | No gas flow or obstruction in burner | Check that burner tube is fully engaged with valve orifice; clear any debris from burner ports |
| Trying wrong burner | Lighting a burner that is not connected to the active knob | Consult your manual diagram to confirm which knob controls which burner |
| Low or no flame after cylinder refill | Vapor lock from overfill or pressure trip | Turn off all knobs and cylinder valve, disconnect regulator, wait 1 minute, reconnect, re-leak-test, retry |
Electrical-Side Ignition Problems
| Symptom | Likely Cause | Fix |
|---|---|---|
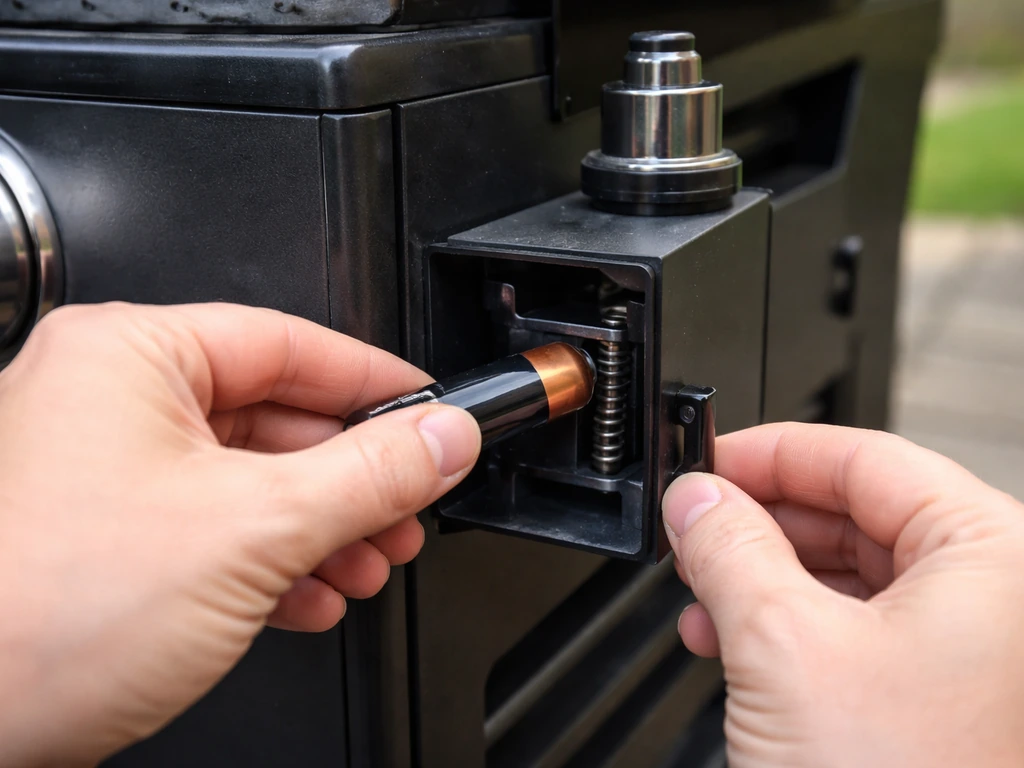
| No click when button pressed | Dead battery (if battery-powered igniter) | Replace the AA battery in the igniter module |
| Weak or intermittent click | Loose or disconnected wire at igniter or electrode | Trace the wire from the igniter switch module to the electrode; reseat any loose connectors |
| Click sounds but spark visible in wrong place | Cracked electrode body (spark jumping to the crack, not the tip) | Replace the electrode; this is a listed serviceable part |
| No spark, wire checks out | Wire shorting between igniter and electrode along its run | Inspect the wire for spots where it contacts bare metal; reroute or replace |
| Electrode sparks but does not light burner | Electrode tip not positioned correctly near burner port | Adjust electrode tip position so it sits within a few millimeters of the burner port |
| Residue on electrode | Cooking grease coating the tip, preventing spark | Clean the electrode tip with a dry cloth or fine brush; do not use water |
If the electronic ignition module on the Surefire system fails entirely, Char-Broil does sell a replacement electronic ignition kit for the Bistro 240. Char-Broil also produced an instructional video specifically for this replacement (related to a recall-era ignition kit update). The replacement procedure involves disconnecting the LP tank as one of the final steps (Step 14: reinstall the LP tank; Step 15: attach the LP regulator), meaning you work on the ignition components with the gas fully disconnected, then reconnect gas and re-test. Follow that order exactly.
As a backup, the manual also covers match lighting. If the electronic ignition is dead and you need to cook while waiting on a part, you can use a long match or fireplace lighter inserted through the match-light hole (if your model has one). This does not apply to Surefire-only configurations, so check your manual's match-lighting section to confirm it is an option for your variant.
It Lights But Won't Stay Lit: What to Check
A flame that lights and then dies within a few seconds is one of the most common Patio Bistro 240 complaints, and it almost always comes down to one of a handful of causes. Unlike a patio heater with a traditional thermocouple and tilt switch (which you would find on a freestanding tower heater), the Patio Bistro 240 is a gas grill, so its "won't stay lit" causes are a little different. But many of the same principles apply.
Low-Flame and Vapor Lock
A sudden drop in gas flow after the first light is almost always a vapor lock or pressure regulation issue. Modern LP regulators have a safety bypass that trips if they sense a sudden pressure drop (which happens when you open the cylinder valve too fast or if the knob was left open). The fix: turn off all burner knobs, close the cylinder valve, disconnect the regulator from the cylinder, wait at least 30 seconds, reconnect carefully (centered nipple, tightened to a full stop), then open the cylinder valve slowly before trying to light again. The manual specifically directs this procedure for low-flame conditions.
Flame Blowout in Wind
The Patio Bistro 240 is a relatively compact unit and can be sensitive to wind. The manual lists "flames blow out" as a distinct troubleshooting item. If you are consistently losing the flame in outdoor conditions, try repositioning the grill so the lid or body shields the burner from the prevailing wind direction, or cook with the lid partially closed. This is not a malfunction; it is a positioning issue.
Flashback and Burner Engagement
Flashback (a flame that burns inside the burner tube rather than at the ports) is a safety issue and causes the burner to go out or burn erratically. It is usually caused by a burner that is dirty or has damaged ports, or by debris getting inside the tube. If you see an unusual flame pattern at the base of the burner rather than across the burner surface, shut the grill down, let it cool, and inspect the burner tube for spider webs, food debris, or rust damage. This is a known issue with grills that sit outside between uses.
One Burner Won't Light from the Other
The manual specifically calls out the case where one burner fails to cross-light from an adjacent burner. The typical cause is a carry-over obstruction between the burners, either a blocked port or a misaligned burner position. Clean the burner ports with a wire brush (when cold and with gas off), confirm both burners are properly seated, and verify the carryover channel between them is clear.
Keeping It Working: Maintenance and Inspection
Most ignition and flame problems on the Patio Bistro 240 are preventable with basic seasonal maintenance. This grill is often used on patios and balconies where it sits exposed to weather and insects between sessions, and those are exactly the conditions that cause blockages and corrosion.
- Inspect burner tubes for spider webs and insect nests at the start of every season and after any long period of non-use. A small mirror or flashlight helps. Clear any blockages with a pipe cleaner or compressed air before lighting.
- Brush burner ports with a stainless wire brush to remove rust and carbon buildup that can block flame or cause flashback.
- Wipe the electrode tip with a dry cloth after every few cooks to prevent grease buildup that kills the spark.
- Inspect the igniter wire run from the switch module to the electrode. Look for any spots where the insulation has cracked, melted, or worn through from contact with the grill body. A damaged wire is a frequent cause of intermittent or failed sparking.
- Check the regulator hose for cracks, kinks, or brittleness, especially if the grill has been stored in cold temperatures. Replace the hose and regulator assembly if you see any visible damage.
- Clean the grease tray and grease cup regularly. A full grease cup overflows onto the burner area and can cause persistent flare-ups or, in the worst case, allow grease to contact the hose or regulator.
- Run a full soap leak test at the start of every season, not just when you swap cylinders.
- If any metal parts show heavy rust, especially on the burner itself, inspect them closely. Surface rust on cast iron or stainless is normal, but a burner with corroded-through ports needs replacement.
Replacement parts for model 14601900 are available through Char-Broil's parts portal, including the igniter switch module and the electronic ignition module for the Surefire system. If you are troubleshooting an electric ignition on a Char-Broil electric patio caddie, the right replacement parts and the correct procedure usually come from the model-specific manual electronic ignition module. Having the model number on hand makes ordering fast and ensures you get the right part without guessing.
Stop DIY Here: When to Call for Service
There are situations where the right answer is to stop, step away from the grill, and call Char-Broil customer support or a qualified service technician. These are not being overly cautious; they are the line between a fixable repair and a dangerous situation.
- You smell gas when all knobs and the cylinder valve are fully closed. This indicates a leak in the regulator, hose, or valve body. Do not attempt to light the grill. Move the cylinder to an open outdoor area away from structures and ignition sources, and contact Char-Broil support.
- The soap test shows growing bubbles at the regulator or hose connections and retightening does not resolve it. Replace the entire hose and regulator assembly; do not use the grill until replaced and re-tested.
- You see a persistent grease fire that does not go out when you close the lid and shut off the gas. Evacuate the area and call emergency services if it escalates.
- The burner or valve shows physical damage, corrosion through the metal, or deformation from a flare-up. These are not field-repairable.
- Grease or hot material contacted the hose, regulator, or valve and you cannot visually confirm the components are undamaged. When in doubt, replace before using.
- The ignition module or valve was modified by a previous owner in a way that does not match the factory configuration. Do not attempt to use or reverse-engineer a non-standard modification.
- You cannot reliably determine whether the unit is a recalled version based on your model number. Char-Broil issued a recall affecting some Bistro 240 units, and Char-Broil's consumer recall information line can confirm if your unit is affected before you use it.
The Patio Bistro 240 is a genuinely repairable grill, and most ignition and flame issues have straightforward DIY solutions. But propane appliances have a clear stop point for home repair, and that point is any symptom involving uncontrolled gas flow or physical damage to the gas delivery system.
If you have gotten this far and are still unsure, the related guides on how to use the Char-Broil Patio Bistro and the full assembly instructions walk through additional detail that may close the gap. If you need the Masterbuilt MPS 20B Patio 2-Portable Propane Smoker manual, the correct document will match your unit’s exact configuration.
If you need the exact procedure for your model, use the char-broil patio bistro 240 assembly instructions document that matches your model number and suffix full assembly instructions. For the Char-Broil Patio Bistro electric grill manual, use the model number to find the correct PDF and troubleshooting steps. When it comes to gas, being certain is always worth the extra step.
FAQ
How do I confirm I have the right manual if my model number has a suffix like C1 through C4?
Use the full model number exactly as shown on the sticker, including any suffix. The suffix can indicate regional configurations, and the operation manual and assembly guide may list different parts in the same general process. If you are unsure, match the manual’s model list to the exact number before you start any disassembly.
What should I do if the soap bubble test shows bubbles but I cannot tell exactly where the leak is coming from?
Recheck each connection point one at a time in the order listed in your manual (regulator connection first, then hose connections, then cylinder valve). If bubbles continue at multiple points, stop and do not attempt to light. The fastest safe decision aid is to replace the suspected hose or regulator components rather than trying to “tighten until it stops,” especially if the leak is near the cylinder valve connection.
Can I store the propane cylinder attached to the grill after testing or between cooking sessions?
Typically, no. After leak testing or when finished cooking, close the cylinder valve and follow the manual’s guidance for detaching and storing the tank in a ventilated outdoor area away from heat and ignition sources. Keeping the regulator attached outdoors can increase weather and insect intrusion into the fittings.
What is the correct way to open the cylinder valve to avoid vapor lock or tripping the regulator safety bypass?
Open the cylinder valve slowly, not quickly, and make sure all burner knobs are turned to the OFF position before opening. After that, follow the normal lighting sequence. If the grill still lights briefly then dies, repeat the regulator reconnection procedure (disconnect, wait, reconnect centered, tighten fully stop, then open slowly).
My igniter clicks, but I do not see a flame. How can I tell whether I should keep trying to light or switch to match lighting?
If you hear repeated clicking with no flame and you suspect gas is not reaching the burner ports, wait the manual’s recommended clearance time between attempts and then switch strategies. Use match lighting only if your manual’s match-lighting section indicates your specific variant supports it, and never attempt to clear a flooded burner by repeated clicking.
Is it safe to light the grill immediately after reconnecting the propane cylinder?
No, you should not. First ensure the rest of the assembly is complete and do a fresh soap leak test any time you reconnect the cylinder. Then open the cylinder slowly and allow for a controlled ignition attempt, with a short pause between tries if ignition does not occur.
What should I inspect first if a burner lights but shuts off again after a few seconds?
Start with gas flow and pressure behavior rather than ignition parts. Confirm the cylinder valve is fully opened, the regulator is connected tightly and correctly, and the burners are turned on in the correct sequence. Then check for wind-related flame loss and burner cleanliness, because both can mimic regulator issues by reducing flame stability.
Can wind cause the flame to go out even if the grill is otherwise working correctly?
Yes. The Patio Bistro 240 is sensitive because it is compact, and outdoor airflow can pull flames away from the burner ports. If the flame repeatedly blows out in the same wind direction, reposition the grill to use the lid or body as a wind shield, or cook with the lid partially closed if that matches your manual’s recommendations.
What does flashback look like, and what is the immediate action if I suspect it?
Flashback typically shows an abnormal flame pattern inside the burner tube or burning back along the tube rather than steady flame at the burner ports. If you suspect it, shut the grill down right away, let it cool fully, then inspect the burner tube for debris, spider webs, or damaged ports before attempting to light again.
If one burner will not cross-light the other, how can I tell whether it is a blockage versus a misalignment problem?
Clean and inspect both burners and the carryover area between them first. If the carryover channel is clear and burners are properly seated but the issue persists, check that the burner assemblies are aligned as the manual indicates. A blocked port or misaligned burner can both prevent transfer, so confirm seating before replacing parts.
How often should I clean the burner ports and burner tube to prevent ignition and “won’t stay lit” issues?
Clean at least at the start of each season and after long storage. If the grill sits exposed to insects and weather on a balcony or patio, do a quicker inspection for debris before the first lighting of the season, because spider webs and food residue are common causes of erratic flame and flashback.
When is it the right time to stop troubleshooting and call for service?
Stop if you detect ongoing leaks that do not resolve after rechecking connections, if you find physical damage to any gas line, hose, regulator housing, or burner tube, or if you have uncontrolled gas smell or symptoms you cannot tie to a safe, reversible cause. In those cases, a qualified technician is safer than replacing parts by guesswork.