Starting a Char-Broil Patio Bistro takes about 60 seconds once you know the sequence: turn the LP cylinder valve on slowly, push and rotate the control knob to the HIGH position, then press the igniter button while holding the knob in. If it doesn't catch in 5 seconds, release, wait 5 minutes, and try again. The exact steps vary slightly depending on whether you have a gas or electric model, so the first thing to nail down is which version you're working with.
How to Use Char-Broil Patio Bistro: Start-Up Guide

Grant Mercer
19 Jun 2026
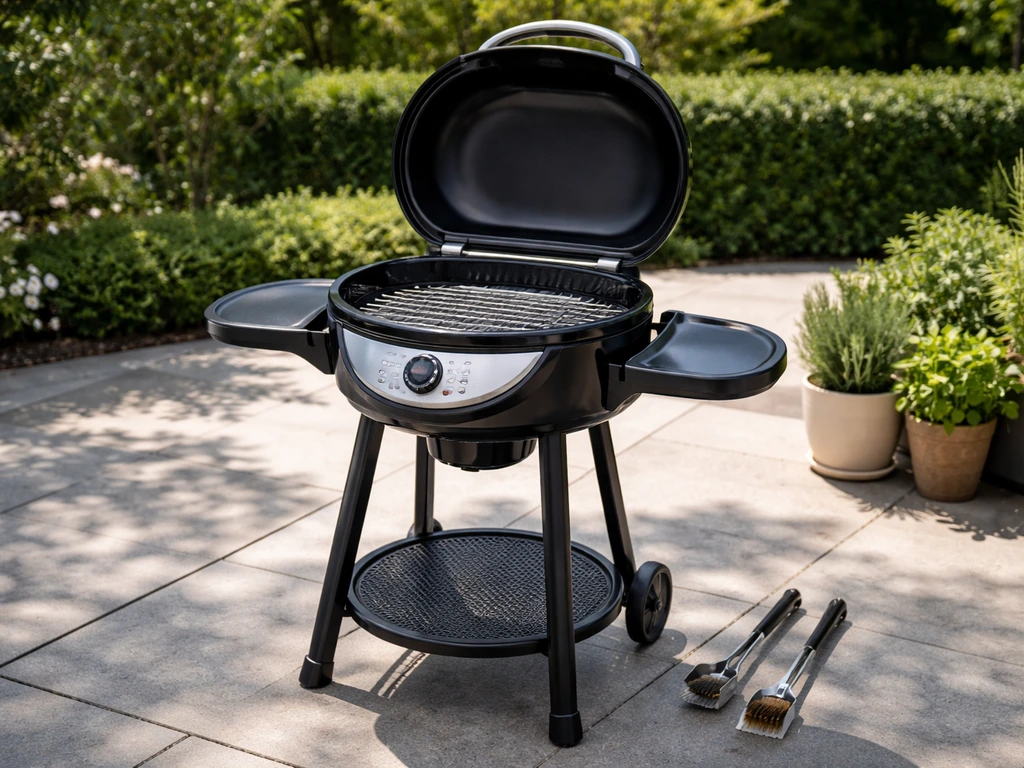
Figure out which Patio Bistro you have first
The Char-Broil Patio Bistro comes in two fundamentally different versions: an LP gas model and an electric model. They look similar but operate completely differently. Getting the startup wrong because you're following the wrong instructions is one of the most common reasons people get stuck.
| Feature | Gas (LP) Patio Bistro | Electric Patio Bistro |
|---|---|---|
| Fuel source | Propane LP cylinder (connects underneath or at rear) | Standard 120V electrical outlet |
| Control knob | Single knob with HIGH/MED/LOW positions; must push and turn | Rotary dial with temperature range markings |
| Ignition system | Push-button electronic igniter or match-light | Glow igniter element; no open flame |
| Common size | 240 sq in cooking surface (most popular model) | 180 or 240 sq in versions |
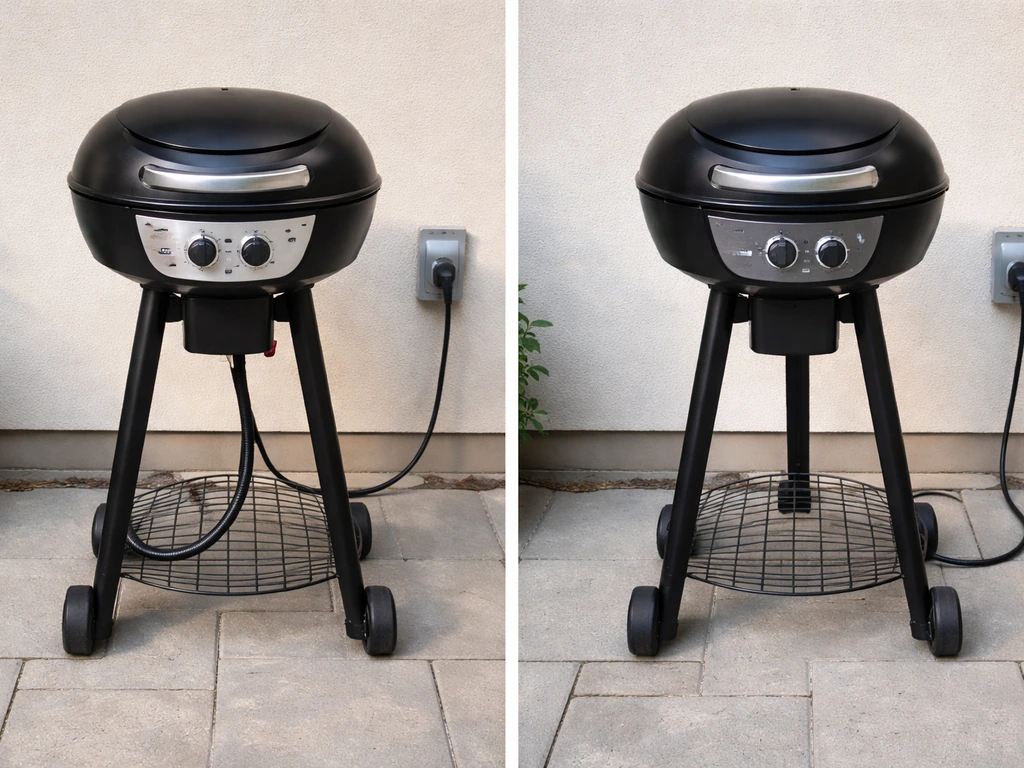
| Identifier | LP cylinder attachment point visible; regulator hose present | Power cord coming from unit body; no cylinder |
Check the back or underside of the unit for a regulator hose or propane fitting. If it's there, you have a gas model. If you see a power cord, you have the electric version. The model number is also printed on a label on the back panel or inside the lid. The Patio Bistro 240 refers to the cooking area in square inches and is the most widely sold gas variant. Knowing your exact model matters because the ignition sequence, troubleshooting steps, and even the assembly instructions differ between them. If you have the electric version, the startup is simpler but the troubleshooting path is different.
How to turn on and start the Char-Broil Patio Bistro
Gas (LP) model startup
Before you do anything else, position the grill outdoors in a well-ventilated area and make sure the lid is open. Never attempt to light a gas grill with the lid closed. This is not a suggestion, a gas buildup inside a closed lid can ignite explosively when the igniter fires.
- Open the grill lid fully before touching any controls.
- Turn the LP cylinder valve counterclockwise (slowly — about one full turn) to open the gas supply. Opening it fast can trip the regulator's flow-limiting safety valve, which will starve the burner of gas. If that happens, close the valve, wait 30 seconds, and reopen slowly.
- Wait 5 seconds after opening the valve to let gas flow establish through the regulator and hose.
- Push the control knob in firmly and rotate it counterclockwise to the HIGH position. You must push it in to release the safety interlock — if you just turn it without pushing, nothing will happen.
- While holding the knob pushed in at HIGH, press the igniter button once per second. You should hear a click and see a flame establish at the burner within 3 to 5 seconds.
- If ignition occurs, continue holding the knob in for about 5 to 10 seconds to allow the thermocouple (the small metal probe near the flame) to heat up and signal the valve to stay open. Release the knob slowly. If the flame goes out when you release, the thermocouple hasn't warmed up enough — push the knob back in, relight, and hold it longer this time.
- Once the flame is stable, adjust the knob to your desired heat level (HIGH, MED, or LOW) and close the lid to preheat. Allow 10 to 15 minutes for the grill to reach cooking temperature.
Electric model startup
The electric Patio Bistro is more straightforward. If you need the electric model troubleshooting steps, the Char-Broil electric Patio Bistro caddie manual can walk you through common checks. Plug the unit into a grounded 120V outdoor outlet (GFCI-protected is ideal). Open the lid, turn the control dial to the desired temperature setting, and the heating element will begin warming immediately. There is no open flame, no gas, and no igniter to worry about. If the unit doesn't heat up within a couple of minutes, check the outlet, check that the cord is fully seated, and make sure no thermal cutoff has tripped, more on that in the troubleshooting section below. The 5-second rule from Char-Broil's guidance (if ignition does not occur in 5 seconds, turn controls off and wait 5 minutes) applies specifically to the gas model.
When it won't spark or ignite at all
If you press the igniter button and hear no click, or you hear a click but see no spark, work through these checks in order. Most ignition failures are simple fixes that don't require any parts.
- Check the LP cylinder valve: Make sure it's open. It sounds obvious, but a partially closed valve or a freshly swapped cylinder that wasn't fully opened is the cause of a surprising number of 'won't light' calls.
- Check the regulator: If you opened the cylinder valve too fast, the regulator's built-in excess-flow limiter may have tripped. Close the cylinder valve completely, disconnect the regulator, wait 30 seconds, reconnect, then reopen the valve very slowly.
- Check the igniter electrode: The small ceramic-tipped electrode sits near the burner. Look for cracks in the ceramic, corrosion on the metal tip, or debris bridging the gap. Clean the tip with a dry cloth or fine steel wool. The gap between the tip and the burner should be roughly 3/16 inch (about 5mm). If the ceramic is cracked, the electrode needs replacing.
- Check the igniter battery or piezo module: Many Patio Bistro models use a battery-powered electronic igniter. If clicking sounds weak or absent, replace the AA battery (typically located in a small compartment near the igniter button). If the unit uses a piezo igniter (no battery), the module itself may have failed.
- Try a match or lighter as a backup: If the igniter is the problem but you need to cook today, use a long-reach lighter or a fireplace match. Hold the flame near the burner port, then push and rotate the control knob to HIGH. This confirms whether the ignition system is the issue or whether gas flow is the problem.
- Check for blocked burner ports: If gas is flowing (you can hear or smell it faintly) but the flame won't catch, the ports in the burner may be clogged. See the maintenance section below for how to clean them.
There is one important safety note here: Char-Broil issued a recall on certain Patio Bistro gas grill models related to the electronic ignition firing unexpectedly, which can cause burns. If your unit is covered by that recall and hasn't been repaired, stop using the igniter and contact Char-Broil directly before proceeding. Check the recall status using the model and serial number on the back label.
When it lights but won't stay on
This is actually the more frustrating failure because it feels like the grill is working, then isn't. The three main causes are a cold or faulty thermocouple, a stuck or dirty gas valve, and airflow problems in the burner or venturi tube.
Thermocouple issues
The thermocouple is a safety device. It's a small probe that sits in the flame, generates a tiny electrical signal when hot, and tells the gas valve it's safe to stay open. If it's cold, dirty, misaligned, or worn out, the valve closes and the flame dies within seconds of releasing the control knob. The fix: when you light the burner, hold the control knob pushed in for a full 15 to 20 seconds before releasing. If the flame still dies, the thermocouple tip may be coated in grease or soot. Turn everything off, let it cool, and clean the tip with fine steel wool or a dry cloth. If cleaning doesn't help, the thermocouple needs replacement, this is a straightforward DIY repair and inexpensive parts are widely available.
Gas valve problems
If the thermocouple tests fine but the flame still drops out, the valve itself may be sticking or partially blocked. This is less common but does happen on older units or units that sat unused for a season. You can try cycling the knob through its full range a few times to work the valve mechanism, but if the valve is genuinely failing, it needs to be replaced rather than repaired. This is a reasonable DIY job if you're comfortable disconnecting the gas supply, but if you're unsure, a grill repair technician is the right call.
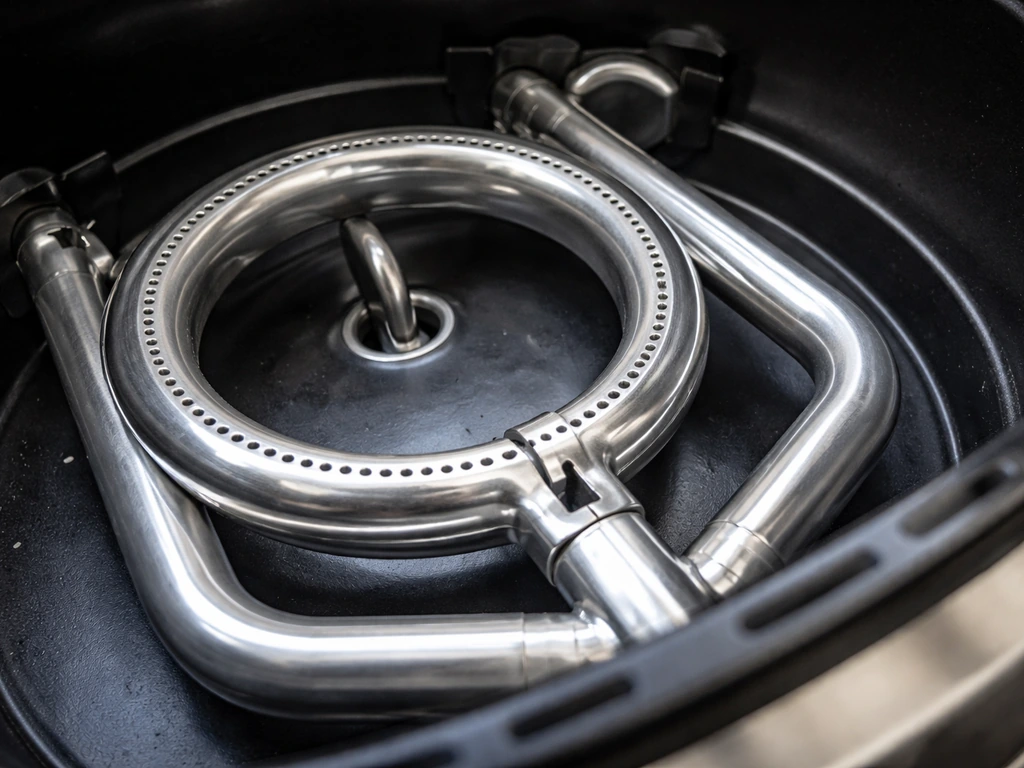
Blocked venturi or spider nests
The Char-Broil Patio Bistro 240 manual calls this out explicitly with a 'SPIDER ALERT' warning, and for good reason. Spiders and other insects are attracted to the residual gas smell in the venturi tube (the tube that mixes air with gas before it reaches the burner). A nest or web inside that tube restricts airflow, causes uneven flames, and can create a dangerous flashback condition where flame travels back toward the valve. If your grill sat unused for more than a few weeks, especially outdoors, check the venturi tube before the first use of the season. The burner cleaning steps in the next section cover how to clear it.
Safety checks and best practices every time you use it
These aren't optional. Working with LP gas means taking a few minutes to verify everything is safe before you cook. The Patio Bistro manual also recommends leak testing before first use and at least once a year, including every time the cylinder is changed or disconnected, using a soapy solution on hose and connection points and shutting the gas off immediately if bubbles indicate a leak blank" rel="noopener noreferrer">428051861560190115601902ASSEMBY_GUIDE. It's quick once it becomes a habit.
- Always cook outdoors and in a well-ventilated space. Never use an LP grill in a garage, covered porch, or enclosed area, even with a door open.
- Do a soap-bubble leak test before the first use, after every LP cylinder change, and at least once a year. Mix dish soap and water, apply it to the regulator connection, hose, and valve fittings with the gas valve open. Bubbles mean a leak. Turn the gas off immediately and do not use the grill until the leak is fixed.
- Keep the grill at least 3 feet from any structure, railing, overhang, or combustible surface.
- Never leave a lit grill unattended.
- Keep children and pets away from the grill while in use and for at least 15 minutes after shutting it off — the exterior surfaces stay hot.
- If you smell gas strongly and can't identify the source immediately, close the cylinder valve, back away from the unit, and do not try to light it. Call Char-Broil support or a technician.
- Shut off the LP cylinder valve first, then turn the control knob to OFF after cooking. This burns off residual gas in the line cleanly.
After-use and first-use maintenance
Cleaning after each use takes five minutes and prevents 90% of the problems described above. After first use is especially important because manufacturing residues and protective coatings burn off and can leave deposits on burners and grates.
Cleaning the grates and grease tray
While the grill is still warm (not hot), brush the cooking grates with a grill brush to remove food residue. Remove the grease tray once cooled and wipe or wash it with warm soapy water. A blocked grease tray is a fire hazard and also blocks access to the burner for cleaning.
Cleaning the burner and ports
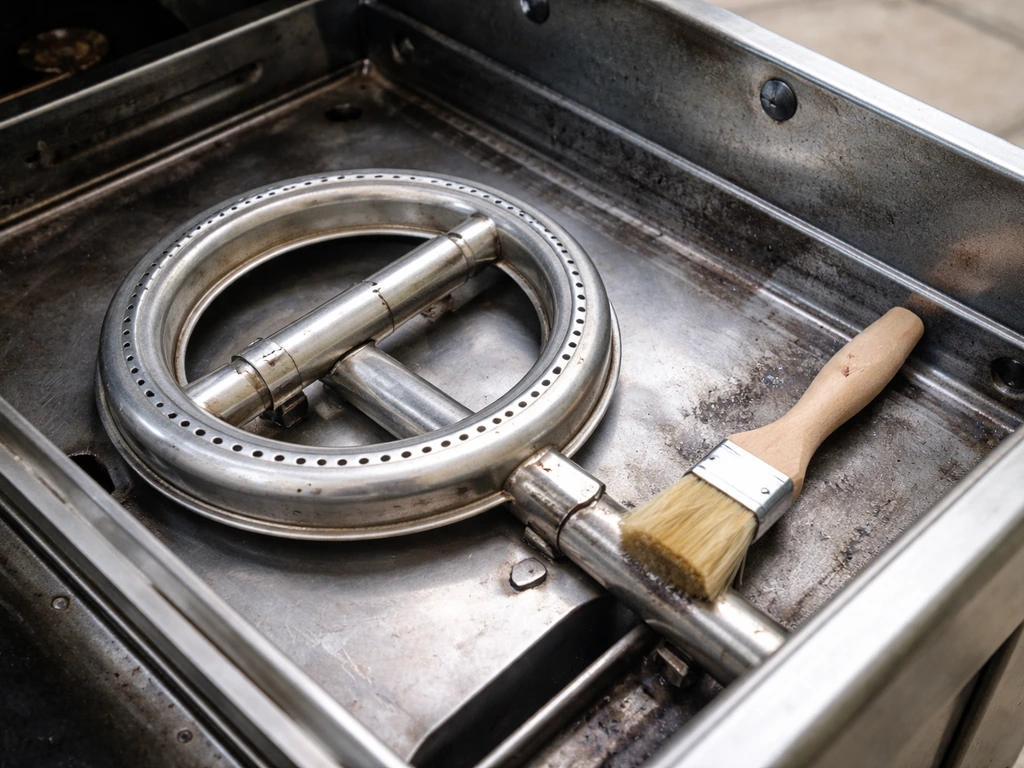
Do this at the start of each season or any time you notice uneven flames. Turn the gas off at the control knob and at the LP cylinder, then disengage the regulator. Remove the grease tray and any cooking components to expose the burner. Remove the nuts securing the burner to lift it out. Use a straightened paper clip or stiff wire to clear any blocked ports along the burner tube, work gently so you don't enlarge the holes. Blow compressed air through the venturi tube to dislodge any spider webs or debris. When reinstalling, make sure the burner tube re-engages fully over the valve opening, this is a critical alignment step that the Patio Bistro 240 instructions specifically highlight. A misaligned burner will produce weak, uneven, or dangerous flame patterns.
Storage
If you're storing the grill with the LP cylinder still connected, keep it outdoors in a ventilated area out of reach of children. If you need to bring the grill indoors (a garage, basement, or shed), the LP cylinder must be turned off at the valve, disconnected from the regulator, and stored separately outdoors. An LP cylinder should never be stored inside any enclosed structure. Cover the grill with a weather-resistant cover to keep insects out of the venturi tubes during storage.
Quick reference: if X happens, do Y
| Symptom | Most likely cause | Fix |
|---|---|---|
| No click from igniter | Dead battery or failed piezo | Replace AA battery or piezo module; use match as backup today |
| Click but no spark | Dirty or cracked electrode | Clean tip; check ceramic for cracks; adjust gap to ~5mm |
| Spark but no flame | Regulator tripped or gas not flowing | Close cylinder valve, wait 30s, reopen slowly; check valve is actually open |
| Flame dies when knob released | Thermocouple cold or dirty | Hold knob in for 20 seconds after lighting; clean thermocouple tip |
| Flame low or uneven | Blocked burner ports or venturi | Clean ports with wire; blow out venturi tube; check for spider nest |
| Smell gas but no flame | Leak or improper sequence | Do soap-bubble test immediately; turn off cylinder valve; do not light |
| Grill lights but flickers repeatedly | Airflow obstruction or valve issue | Clean venturi; if persists, have valve inspected |
If you're working through the Patio Bistro 240 specifically, the assembly and burner alignment instructions are worth reviewing in full, since several startup problems (especially uneven flames and won't-stay-lit issues) trace back to how the burner was seated during initial assembly. The electric version has its own separate set of controls and startup steps, and if you landed here looking for those, the electric Patio Bistro manual covers the specific dial settings and thermostat behavior in more detail. Either way, with the startup sequence down and these troubleshooting paths in hand, you should be cooking today.
FAQ
What should I do if I attempt ignition and smell gas but the burner will not light?
No, for gas models you should not light with the lid closed. Keep the lid open until the burner is fully lit and stable, then close it only if your cooking method calls for it. If you ever notice a delayed “whoosh” sound, stop, turn the controls off, and wait several minutes before trying again.
How many ignition attempts are safe before I stop and troubleshoot?
On the gas model, ignition timing matters: if it does not catch within about 5 seconds, release the knob, turn controls off, and wait 5 minutes to let gas clear. Repeating rapid attempts without waiting is a common reason for flareups or a burst of flame.
I press the igniter and hear nothing, what should I check first?
For the gas version, the igniter button should create either an audible click or visible spark near the electrode, but you can still have a bad connection. If you get no click at all, check that you are holding the control knob in (some units interrupt ignition unless the valve is engaged) and then inspect battery condition if your model uses one.
The burner lights briefly, then goes out as soon as I release the knob, why?
For gas models that keep going out after lighting, verify the knob-hold time. Hold the control knob pushed in for a full 15 to 20 seconds so the thermocouple heats and the valve stays open. Releasing early is one of the most frequent causes of a flame that dies.
Why do I get uneven flames or multiple flame gaps on the Patio Bistro?
If uneven flames show up, inspect two things before changing parts: the burner seating and the burner ports. A burner that is even slightly misaligned over the valve opening can cause weak or patchy flame, and clogged ports can create “missing” spots that look like a gas problem.
Do I need to check the venturi tube even if the grill was covered?
Yes, insects can block airflow pathways, especially when the grill sits. Even if you cleaned recently, do a quick venturi tube check before the first use of a season and after extended outdoor storage, then clear any webs or debris before attempting ignition.
Can I clean the burner and venturi tube right after cooking?
Never use water to clean hot burners or to clear a spider blockage while the grill is warm. Wait until the grill is cool, brush grates first, and then clean the burner and venturi with dry methods (like brushing and compressed air) so you do not force moisture into components.
How does a grease tray issue affect start-up and flame behavior?
A grease tray that is blocked or not seated correctly can both increase flare risk and interfere with access for cleaning. Make sure it is fully in place and clear before cooking, and wipe or wash it with warm soapy water once cooled.
My electric Patio Bistro does not heat, what are the most common non-repair causes?
For the electric model, confirm you have a grounded 120V outdoor outlet, and that any GFCI device has not tripped. Also make sure the cord is fully seated and undamaged, then allow a couple of minutes for heating before assuming there is a fault.
Can I store the LP cylinder attached to the grill in a garage or basement?
If the gas cylinder must be stored indoors for any reason, do not do it. LP cylinders should be shut off at the valve, disconnected, and stored separately outdoors in a ventilated area, never inside a house, garage, basement, or shed.
What should I do if my grill might be part of the Patio Bistro ignition recall?
If your model is part of the electronic ignition firing recall, do not keep experimenting with the igniter. Stop using the igniter, locate the model and serial number on the back label, and contact Char-Broil for recall instructions before further use.
What’s the best way to confirm correct burner alignment after cleaning?
Yes, the manual’s advice about burner alignment matters, especially for the 240 gas variant. Before reassembling, ensure the burner tube fully re-engages over the valve opening, then visually verify positioning so the flame pattern is strong and consistent at each port.