
Most Char-Broil Patio Bistro electric grill problems come down to one of three things: a tripped GFCI outlet, a failed 1750 W heating element, or a dead power controller. Before you assume the grill is toast, work through the electrical supply first. In my experience, about half of these grills that "won't heat" are actually fine. The problem is upstream, at the outlet or the cord, and it takes five minutes to confirm. This guide walks you through every step, from the wall outlet to the heating element itself, with real resistance values and a clear stopping point if a repair moves beyond safe DIY territory.
Char-Broil Patio Bistro Electric Grill Problems: Quick Fixes

Grant Mercer
7 Aug 2026
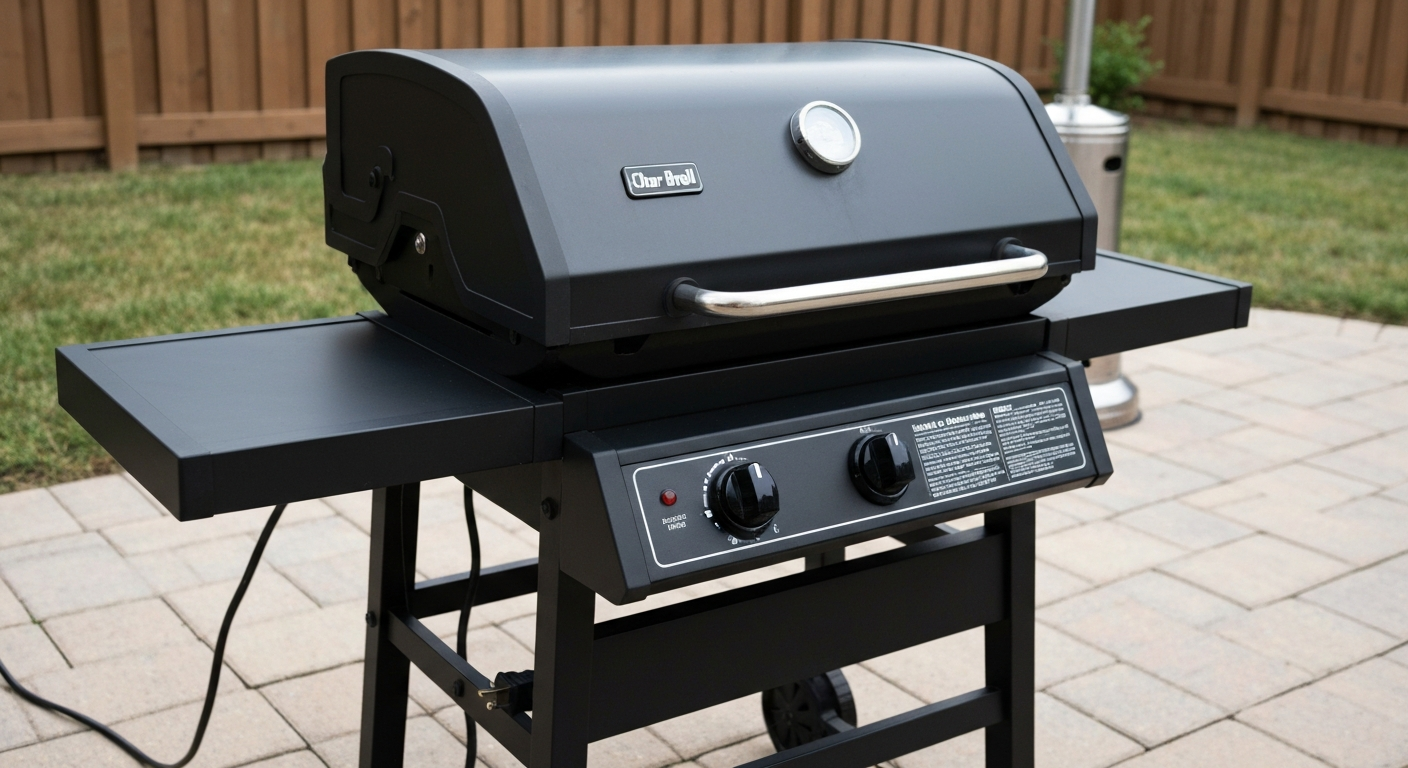
Who this guide is for and how to use it
This article is written for homeowners and DIYers who own a Char-Broil Patio Bistro electric grill (including model 10601578, the Patio Bistro Infrared Electric Grill) and are dealing with a specific symptom: the grill won't power on, won't heat, heats weakly, heats unevenly, shows indicator problems, or smells like burning. You don't need an electrician's license to follow this. You need a multimeter, basic hand tools, and a willingness to work carefully. Every section builds on the previous one. If you're brand new to the grill and haven't checked the setup basics yet, it's worth reviewing the assembly and first-use steps before diving into diagnostics, since a lot of "problems" turn out to be setup errors.
Quick symptom checklist
Find your symptom in the table below. The right column tells you where to jump in this guide so you're not reading sections that don't apply to your situation.
| Symptom | Likely Cause(s) | Where to Start |
|---|---|---|
| Grill won't power on at all | No power at outlet, tripped GFCI, dead controller, blown fuse | Electrical checks section |
| Indicator light won't come on | No power at outlet, controller not fully seated, reset needed | Power-on and indicator tests |
| Grill powers on but produces no heat | Failed heating element, open thermostat, controller fault | Heating element diagnostics |
| Weak heat / takes forever to reach temp | Partial element failure, low-rated extension cord voltage drop, thermostat drift | Electrical checks, then element test |
| Uneven heating (hot spots / cold spots) | Partial element failure, warped element, debris blocking infrared plate | Uneven heating section |
| GFCI trips immediately when grill is plugged in | Element or cord insulation failure, ground fault in controller | Electrical checks and element test |
| Burning smell or sparks on startup | Grease or debris on element, insulation damage, loose terminal | Safety rules first, then cleaning and inspection |
| Controller light stays on but no heat builds | Thermostat stuck open, element dead, poor connection at controller pins | Element and thermostat diagnostics |
Safety rules before you touch anything
Electric grills are safer than gas in some ways, but they can still bite you. The Patio Bistro draws roughly 14.6 amps at 120 V (1750 W divided by 120 V = 14.6 A). That's nearly the full load of a 15-amp household circuit, and it's enough current to cause a serious shock or start a fire if you're careless. For related guidance on safe grill placement and combustible clearance, see charcoal grill patio safety. Read these rules before you start, not after.
- Unplug the grill from the wall outlet completely before opening any panel, disconnecting any wire, or touching the element. Do not rely on the control knob being in the off position.
- Let the grill cool for at least 30 minutes after its last use before inspecting internal components. The element and surrounding metal retain heat longer than you'd expect.
- Never perform resistance or continuity tests on a powered circuit. Your multimeter's resistance function reads with its own internal battery. Power in the circuit will damage the meter and can shock you.
- Wear insulated work gloves when handling the element assembly. Edges can be sharp, and residual heat can cause burns.
- Do not immerse the power cord, controller, or any electrical component in water. The Char-Broil manual specifically calls this out.
- Always use a GFCI-protected outlet for this grill, especially outdoors. NEC 210.8 requires GFCI protection for outdoor dwelling-unit receptacles. This isn't optional.
- If you find melted insulation, charred wiring, or a cracked controller housing, stop. Those conditions require professional service or part replacement before the grill is used again.
- Keep a fire extinguisher rated for electrical fires (Class C) nearby when doing any live-outlet testing.
Tools and parts to have ready
You don't need a truck full of tools for this. The Char-Broil assembly guide lists a Phillips screwdriver and a small adjustable wrench or nut driver as the primary tools, and that covers most of what you'll need for inspection and part swaps. For electrical diagnostics, add a basic digital multimeter.
| Item | What It's Used For | Notes |
|---|---|---|
| Digital multimeter (DMM) | Voltage at outlet, resistance/continuity of element and cord | Any auto-ranging DMM works; Fluke, Klein, or similar are reliable |
| Phillips screwdriver | Removing and reinstalling element cover, control panel screws | Standard #2 size handles most fasteners on this grill |
| Small adjustable wrench or nut driver | Loosening terminal nuts on element leads | Char-Broil assembly guide specifies this as a required tool |
| Insulated work gloves | Handling element assembly and sharp sheet metal | Light electrical gloves rated 1000 V minimum |
| Replacement heating element (OEM part #29104575) | Swap if element tests open or measures far outside ~8.23 Ω | 1750 W, 13-1/4" x 15-1/4"; verify fit for your model before ordering |
| Replacement power controller (120 V) | Swap if controller fails all tests and element checks out fine | OEM part references: CHR29104578 / Power Controller 120v Electric Bistro |
| Replacement power cord or plug | Replace if cord insulation is cracked or plug prongs are corroded/damaged | Match gauge and amperage rating of original |
| Wire brush and degreaser | Cleaning element area, grates, and grease tray | Prevents burning smells and debris-related faults |
| Flashlight or headlamp | Inspecting inside the grill body and around terminals | A headlamp keeps both hands free |
| Zip ties or cable clips | Re-securing any cord routing after reassembly | Prevents chafing against hot metal edges |
Basic setup and first-use checks
A surprising number of Patio Bistro complaints are actually first-use or reassembly issues. Before any electrical diagnosis, confirm the physical setup is correct. For a step-by-step patio grill setup checklist, see patio grill setup. If you've recently moved the grill, reassembled it after storage, or this is its first time out of the box, run through these checks first.
Assembly verification
Confirm that the element assembly is properly seated in its mounting brackets and that the element leads are connected to the controller terminals with no loose nuts. The controller module should click firmly into the control panel slot. A partially seated controller is one of the specific fault conditions listed in Char-Broil's own troubleshooting checklist, and it's easy to overlook after reassembly.
Placement and ventilation
The Patio Bistro is designed for outdoor use with clear airflow around the unit. Don't run it in an enclosed garage or tight alcove. While it's electric rather than gas, the cooking surfaces get very hot and require clearance from combustibles. Keep it on a stable, level surface so the grease tray doesn't shift and create a mess or a fire risk.
Preheating routine
On first use and after any long storage period, run the grill on high for 10 to 15 minutes with the lid closed before cooking. For cooking tips like how to grill patio steaks after your initial preheat, see our step-by-step guide. If you're planning to cook steaks on the grill but want stovetop tips, see our guide on how to cook patio steaks on the stove for a great indoor alternative. This burns off any manufacturing residue or storage dust from the element and infrared plate. A bit of smoke and smell during this burn-off is normal and not a sign of a problem. If the smell is sharp, chemical, or accompanies visible sparks, shut it down and inspect.
Extension cord guidance
Char-Broil's product guide is direct on this: use no extension cord if you can avoid it. If you must use one, it needs to be an outdoor-rated (W-A marked), UL-approved cord with a 3-prong grounded plug, rated for at least 15 amps. For runs up to 50 feet, use 12 AWG or 14 AWG wire. Never daisy-chain extension cords. The reason this matters so much is the current draw. At 14.6 amps, a thin or long cord causes a voltage drop that shows up as weak or no heat, and an undersized cord can overheat and become a fire hazard.
Step-by-step troubleshooting flow
Follow this order. Each step is quick, and working through the list in sequence prevents you from replacing parts that aren't actually broken. I've seen people replace a perfectly good element when the actual problem was a tripped GFCI that took 20 seconds to reset. Estimated times are realistic for someone moving at a careful, methodical pace.
- Confirm the grill is fully unplugged and cooled (2 minutes)
- Visually inspect the power cord and plug for damage (2 minutes)
- Test the wall outlet with a known-good device (1 minute)
- Locate and reset the GFCI outlet if applicable (2 minutes)
- Check the circuit breaker panel for a tripped breaker (2 minutes)
- Re-seat the controller module and check all connections (5 minutes)
- Plug in and test grill power-on and indicator behavior (3 minutes)
- If no heat, isolate and resistance-test the heating element (10 minutes)
- If element passes, test the controller / thermostat assembly (10 minutes)
- If a part fails testing, replace OEM part and retest (20 to 40 minutes depending on part)
- If cause is unclear or wiring is damaged, stop and contact Char-Broil or a qualified appliance technician
Electrical checks: outlet, plug, GFCI, cord, and breaker
This is where you start every single time, no exceptions. Char-Broil's own troubleshooting checklist lists outlet and GFCI verification as the first steps before anything else, and it's good advice. Working outward from the wall and inward toward the grill is the fastest way to isolate the problem.
Verify the outlet
Plug a lamp, phone charger, or any other small appliance into the same outlet. If that device also doesn't work, the problem is the outlet or the circuit, not the grill. If the test device works fine, the outlet has power and you move to the next check.
Find and reset the GFCI
Outdoor outlets are required by code to be GFCI-protected, and many indoor kitchen and garage circuits are too. NEC 210.8(F) requires GFCI protection for outdoor receptacles serving dwelling units, which supports the manufacturer's guidance to use the grill only on GFCI‑protected circuits when used outdoors. The GFCI receptacle itself may be somewhere other than the outlet you're using. It could be on a different outlet along the same circuit. Look for a receptacle with TEST and RESET buttons, usually in the garage, kitchen, or near an outdoor entry point. Press the RESET button firmly until it clicks. If it trips again immediately when you plug the grill back in, that's a fault signal. It means the grill has an insulation leak or ground fault. Don't keep resetting and trying. That tripping behavior tells you to move on to the cord and element inspection below.
Inspect the plug and power cord
With the grill unplugged, look at the plug prongs. Are they discolored, corroded, or bent? A darkened or pitted prong indicates a heat or arcing event and the cord should be replaced before the grill is used again. Run your hand along the full length of the power cord, feeling for stiff sections, kinks, or cracks in the insulation. Pay special attention to the first six inches from the plug and the point where the cord enters the grill body, since those are the highest-stress points. Any visible damage to insulation means cord replacement.
Check the circuit breaker
Remember that this grill draws about 14.6 amps on a circuit typically rated for 15 amps. If anything else is on that circuit, it's easy to trip the breaker. Go to your electrical panel and look for a breaker that's in the middle "tripped" position rather than fully on or fully off. Flip it fully to OFF first, then back to ON. If it trips again immediately when the grill starts, you have either a circuit fault or too many loads on that branch. The grill should ideally be on a dedicated 15-amp outdoor circuit.
Continuity test on the power cord with a multimeter
If the cord looks physically intact but you still suspect it, here's how to check it. Unplug the grill completely. Disconnect the cord's internal leads from the controller terminals (or element, depending on your model's wiring). Set your multimeter to the continuity or low-ohms setting. Touch the probes to each end of the same conductor: one probe on a plug prong, the other on the corresponding wire end. A good conductor reads near zero ohms or gives a continuity beep. An open reading on any conductor means the cord is broken internally and needs replacement. As Fluke's guidance notes, always zero out (short together) your test leads before measuring to subtract lead resistance from your reading.
Power-on and indicator tests
Once you've confirmed the outlet is live, the GFCI isn't tripping, the cord looks clean, and the breaker is on, it's time to check the grill's own power-on behavior. These tests are done with the grill plugged in but with you standing clear of the cooking area.
Testing control knob positions and the indicator light
Plug the grill in and turn the control knob to the LOW setting first. The indicator light on the controller should illuminate. If it doesn't, check that the controller module is fully pushed into the control panel slot. A partially seated controller is a known issue on this model. It doesn't click dramatically into place, so it's easy to assume it's seated when it isn't. Press it firmly and try again. If the indicator still doesn't light on any knob position, suspect the controller module itself.
Reset switches and what they mean
Some Patio Bistro configurations include a thermal reset or overheat protection that must be manually reset after a thermal event. Check your model's product guide for a reset button location, usually on or near the controller. If the grill overheated during a previous session and shut itself off, the indicator may stay dark until the reset is pressed. Let the grill cool completely first, then press and release the reset button before attempting to power on again.
Audible signs and what they mean
A soft click when you first turn the knob is normal. It's the controller engaging. A loud pop, buzzing, or crackling sound at startup is not normal and usually points to a loose terminal connection arcing, debris on the element, or a failing controller. Buzzing that persists through operation at low or medium settings often indicates a partially failed element, where only part of the resistance wire is still intact and the current path has changed. In both cases, unplug immediately and move to the element inspection steps.
Heating element and thermostat diagnostics
If the grill powers on and the indicator lights but there's no heat or very weak heat, the element or thermostat assembly is the next target. The Patio Bistro uses a 1750 W element assembly (OEM part #29104575), and the thermostat or probe assembly works alongside the power controller to regulate temperature.
How to resistance-test the heating element
This is the most important test in the whole guide. Do it right and you'll know definitively whether the element is good or dead.
- Unplug the grill completely and allow it to cool for at least 30 minutes.
- Remove the element access panel or grill grates to expose the element assembly and its lead wires.
- Disconnect the two element leads from the controller terminals. Note or photograph which wire goes to which terminal before disconnecting.
- Set your multimeter to the low-ohms range (the 20 Ω range works well).
- Short your two test leads together and note the reading. This is your lead resistance, typically 0.1 to 0.5 Ω. You'll mentally subtract this from your element reading.
- Touch one probe to each of the two element terminals.
- A good 1750 W element at 120 V should read approximately 8.2 Ω (calculated from R = V² / P = 120² / 1750). A cold element might read slightly lower due to temperature. A reading well above 10 Ω or an open/OL reading means the element has failed and needs replacement.
- Next, set the meter to the highest ohms range or use the continuity function. Touch one probe to an element terminal and the other to the bare metal chassis of the grill. This tests for a ground fault. The reading should be open (OL or no continuity). Any measurable resistance between the element and ground means there's an insulation breakdown, which explains persistent GFCI tripping.
Thermostat and temperature control diagnostics
If the element measures correctly at around 8. From the power/voltage relationship (P = V^2 / R), the expected cold-element DC resistance for a 1750 W heating element on 120 V is R = 120^2 / 1750 ≈ 8.23 Ω (Derivation of R = V^2 / P, textbook source) Derivation of R = V^2 / P (Ohm’s law and power relations) — textbook / educational source. 2 Ω and shows no ground leakage, but the grill still won't heat, the power controller or thermostat assembly is the likely culprit. The power controller (120 V, part reference CHR29104578) is the module that receives your temperature input from the knob and regulates power to the element. You can do a basic sanity check by carefully re-examining the controller's input wiring and pin connections for corrosion or loose contacts. If any controller pins look burned or corroded, cleaning the contacts with fine-grit sandpaper and reseating may restore function. If the controller appears physically intact but still delivers no power to a known-good element, the controller module itself should be replaced.
Uneven heating and weak output fixes
Uneven heating is usually a physical issue rather than an electrical one, though a partial element failure can create hot and cold zones. Start by removing the cooking grates and infrared plate (if your model has one) and inspecting the element surface visually. Look for sections that appear different in color from the rest, either lighter from burnout or darker from heavy grease carbonization. Heavy grease buildup on the infrared emitter plate is one of the most common causes of uneven heat distribution on the Patio Bistro, and it's completely fixable with a good cleaning.
Weak output that affects the entire cooking surface often traces back to the extension cord situation described earlier. Measure the voltage at the outlet while the grill is running at high (use your multimeter on the AC voltage setting, keeping your hands clear of live parts). Voltage at the outlet should be 115 to 125 V. If it's reading below 110 V under load, you have a supply voltage issue from either the cord or the circuit, and the element is receiving less power than it needs to reach full temperature.
Replacing common parts
Replacing the heating element
The element assembly (OEM part #29104575) is sold as a unit and is designed to be replaced by the end user. Once you have the replacement in hand, unplug the grill and cool it, disconnect the two element leads at the controller, remove the fasteners holding the element bracket to the firebox, slide out the old element, slide in the new one, reconnect leads to the same terminals, and reassemble. Torque the terminal nuts snugly but don't overtighten. Do a cold-resistance check on the new element before closing everything up, just to confirm the part isn't defective out of the box.
Replacing the power controller
The 120 V power controller module unplugs or disconnects from the control panel. On most Patio Bistro configurations, you'll remove two to four screws from the control panel cover, photograph the wiring connections, disconnect the leads, and pull the controller out. Install the replacement by reversing the process. The replacement should match the original module's voltage rating (120 V) exactly. Don't substitute a controller from a different model without confirming compatibility with Char-Broil's parts lookup for your specific model number.
Replacing the power cord
If the cord is damaged, source a replacement that matches the original's wire gauge and amperage rating. Given this grill's 14.6 A draw, a replacement cord should be rated for at least 15 A and use 14 AWG or heavier conductors. Route the new cord through the same path as the original, using any strain-relief clamps or clips that were present, and secure it away from hot metal surfaces.
Cleaning and maintenance to prevent future failures
Most recurring problems on the Patio Bistro are preventable with simple, regular maintenance. Grease accumulation on the element and infrared plate doesn't just cause uneven cooking. It's a fire and electrical hazard. When grease carbonizes onto the element terminals, it can cause arcing and eventually short the element to ground, which shows up as persistent GFCI tripping.
- After every 3 to 4 cooking sessions, remove the grates and wipe the grease tray. A full grease tray can overflow onto the element during cooking.
- Periodically inspect the element surface for heavy carbonized buildup. A gentle scrub with a wire brush after the grill has fully cooled removes most of it.
- Check the power cord routing every season. Make sure it hasn't shifted to rest against any hot metal surface.
- Inspect the controller module's connection pins once per season for corrosion. A light spray of electrical contact cleaner and a firm re-seating keeps the connection solid.
- If you store the grill outdoors, use a cover rated for outdoor appliances. Moisture intrusion into the controller or element terminals is one of the top causes of insulation failure and GFCI tripping on grills that sit outside all year.
- At the start of each grilling season, do a quick cold-resistance check on the element. It takes three minutes and tells you whether the element survived winter storage.
Finding manuals and replacement parts
Char-Broil maintains an online parts catalog and manual library at charbroil.com. Enter your model number (such as 10601578) in the parts search to find the exploded diagram, parts list, and OEM part numbers for the element assembly, power controller, thermostat probe, and other components. Third-party parts suppliers including GrillParts.com and ApplianceFactoryParts also stock the 1750 W element (part #29104575) and list them as in-stock items, often with faster shipping than ordering directly. When ordering, double-check the part dimensions: the correct element for this model is 13-1/4" x 15-1/4". A mismatched size won't physically fit in the element bracket.
When to stop and get professional help
There's a clear line between DIY-reasonable and beyond-reasonable on this grill, and I want to be direct about it. If you find melted or charred internal wiring, a cracked controller housing with heat damage visible inside, or any indication that a fault has affected the grill's chassis or frame connections, stop and don't use the grill again until a qualified appliance repair technician has inspected it. These aren't conditions you patch with electrical tape.
For warranty claims, Char-Broil's limited warranty typically covers manufacturing defects for 1 to 2 years depending on the model, and requires proof of purchase. Check your manual for exact terms. If your grill is within that window, contact Char-Broil customer service before doing any part replacements yourself. Performing unauthorized repairs can void the remaining warranty. You'll need your model number, serial number, and purchase receipt. Register your product on the Char-Broil website if you haven't already, since it streamlines any warranty service request.
Comparing repair vs. replace
The Patio Bistro is a repairable appliance, not a disposable one. The two most common failure parts, the element and the controller, are both available as OEM service items. Here's a quick cost-versus-complexity view to help you decide whether a repair makes sense.
| Failed Part | DIY Repair Difficulty | Approximate Part Cost | Repair Time | Worth Repairing? |
|---|---|---|---|---|
| Heating element (1750 W, #29104575) | Easy | $30 to $50 | 20 to 30 minutes | Yes, almost always |
| Power controller (120 V) | Easy to moderate | $25 to $45 | 15 to 25 minutes | Yes, if grill is otherwise in good condition |
| Power cord | Easy | $10 to $20 | 15 to 20 minutes | Yes |
| Melted / charred internal wiring harness | Beyond DIY scope | Variable | Requires technician | Depends on age and overall condition |
| Cracked or heat-damaged housing/chassis | Not DIY repairable | N/A | Replacement unit advised | No |
The bottom line is that a Patio Bistro with a dead element or a failed controller is nearly always worth fixing. The parts are cheap, the process is straightforward, and the grill itself is solid hardware. The only time replacement makes more sense than repair is when the electrical fault has caused structural heat damage to the chassis or wiring harness, because at that point you're no longer dealing with a single failed component.
FAQ
What authoritative information should I gather before writing a safety‑first troubleshooting and repair article for the Char‑Broil Patio Bistro electric grill?
Collect the model‑specific owner’s manual, official parts/BOM pages for the exact Patio Bistro model(s) you cover (e.g., Char‑Broil model 10601578), OEM part numbers for element and controller, and the assembly/installation guide. Also gather manufacturer safety and extension‑cord guidance, stated electrical ratings (120 V, 1750 W), and any official troubleshooting checklist from Char‑Broil. These sources establish safe operating limits, required precautions (GFCI use, unplug before servicing), and correct replacement parts.
Which authoritative sources are most important and why?
Priority sources: 1) Char‑Broil owner’s manual/product guide (safety, troubleshooting, extension cord guidance, warranty terms) — primary manufacturer authority. 2) Char‑Broil parts/BOM pages (exploded view, part numbers, power controller and element specs) — needed for accurate replacement instructions. 3) Manufacturer assembly guide (tool list, controller mounting, wiring access). 4) Multimeter and electrical safety manufacturer guidance (e.g., Fluke) for DMM/continuity test procedure and meter safety. 5) GFCI manufacturer instructions (reset/test/behavior) and NEC/industry guidance for outdoor GFCI requirements. 6) Reputable parts resellers (GrillParts, ApplianceFactoryParts) to confirm part availability and dimensions.
What electrical ratings and math must be clearly stated and used for verification?
State the grill’s rated voltage and power: 120 VAC and 1750 W (from OEM documentation). Use P=V×I to compute expected steady‑state current: I = 1750 W ÷ 120 V ≈ 14.6 A (shows it nearly fully loads a 15 A circuit). Use R = V^2 / P to compute expected cold‑element resistance: R ≈ 120^2 / 1750 ≈ 8.2 Ω. Include these as benchmarks when interpreting DMM measurements (continuity and resistance).
What step‑by‑step electrical checks should the article include (safety first)?
Provide a clear, numbered flow with safety warnings: 1) Safety prep: move grill outdoors, cool and unplug, wear PPE, avoid wet conditions. 2) Quick live checks before opening: verify outlet with a known good device; check controller fully seated; reset/check GFCI (follow device TEST/RESET procedure). 3) If safe and permitted, disconnect power and open access per manual. 4) With power removed, isolate the element from the controller (disconnect leads). 5) Use a properly rated DMM: verify leads on open circuit, then measure element resistance between terminals — expect ≈8.2 Ω. 6) Measure each terminal to chassis/ground — should be open/infinite; any low reading suggests leakage. 7) Inspect cord, plug, controller for burn, pin corrosion, loose wiring, and smell. 8) Reassemble and test only after confirming repairs and safe wiring. Emphasize never to perform resistance tests with power applied and to follow meter safety guidelines.
What continuity and resistance verification steps and pass/fail thresholds should be given for the heating element?
Detail isolation and measurement steps: 1) Unplug and disconnect element leads so the element is electrically isolated. 2) Set DMM to low‑ohms and zero/verify leads. 3) Measure across the two element terminals; expected ≈8.2 Ω (allow tolerance ±20–30% for cold measurement and multimeter accuracy). A reading of open/infinite or very high resistance indicates an open/failed element. 4) Measure each element terminal to chassis/ground; expect open/infinite. Any measurable continuity to ground (low ohms or consistent leakage) indicates insulation failure and the element should be replaced. Note that exact measured resistance varies with temperature and manufacturing tolerance; use the theoretical value as a guide not an absolute.
What controller/power‑module tests and inspections should be included?
Include visual inspection and basic functional checks: 1) Visual: check controller housing, connector pins, burned components, melted plastic, and water intrusion. 2) Plug/system checks: verify controller fully seated in panel; test outlet and GFCI. 3) With power removed, check continuity through the power cord (hot and neutral) from plug to controller input; look for breaks or high resistance. 4) If accessible and safe, test controller output pins for expected behavior using manufacturer docs (or substitute: swap with known good controller if available). 5) If controller trips GFCI immediately when plugged in, advise unplugging other loads and testing — persistent immediate trip likely indicates internal leakage in the controller or element and requires replacement or professional service.