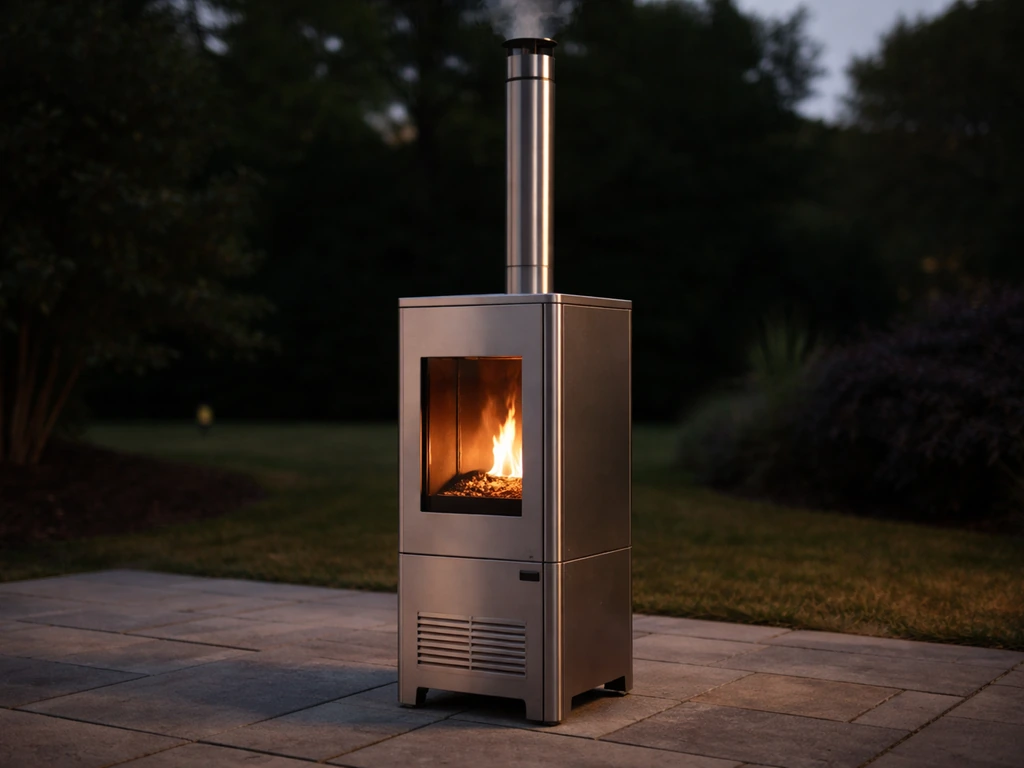
If you have the FlamePro 81"H Steel Patio Pellet Heater (Costco item 1713430), the manual you need is the one distributed by GHP Group Inc., the manufacturer behind this unit. The fastest way to confirm you have the right version is to match the item number 1713430 on your manual's cover or parts list, verify the 75,000 BTU rating and the 18–20 lb pellet hopper capacity, and check that the dimensions listed (80.7"H x 23.22"L x 20.87"W, 73.5 lb) match your physical unit. If any of those don't line up, you may have a different revision or a related FlamePro model, and using the wrong manual for ignition or assembly steps can create real safety problems.
FlamePro 81H Steel Patio Pellet Heater Manual Guide

Grant Mercer
9 Jun 2026
Identifying your exact FlamePro 81"H model and version
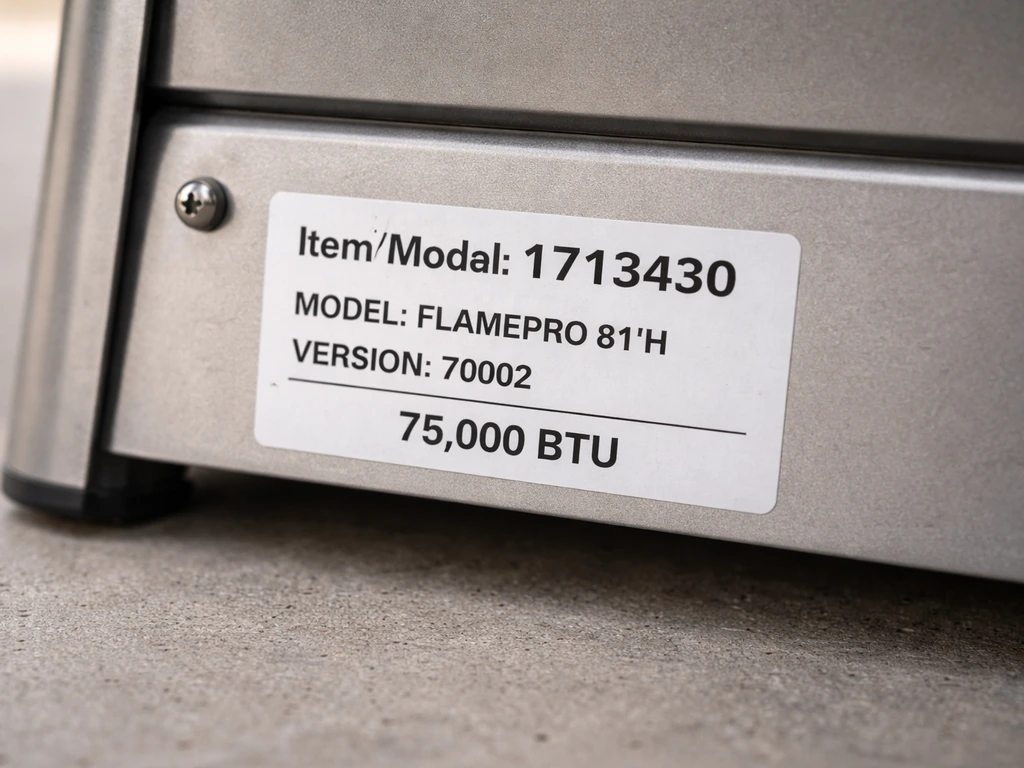
Start by looking at the label on the back or underside of the base. You're looking for three things: the item or model number (should read 1713430), a BTU rating (75,000 BTU), and a manufacturing date code. That date code matters because GHP Group occasionally revises manuals between production runs, and the ignition procedure or parts diagram can change between versions even when the product looks identical on the outside.
The physical specs are your next confirmation layer. This heater stands 80.7 inches tall and has three chimney sections (upper, middle, and lower) plus a grate firepot assembly. If your unit has a different chimney section count or a different hopper location, you may be looking at a different FlamePro pellet heater model entirely. The hopper on the 1713430 sits at the base and feeds via a gravity-automatic, non-electric system, meaning there is no electric auger motor. That detail is critical: if your heater has a powered auger, you have a different model and need a completely different manual.
- Item number: 1713430 (confirm on the product label or original Costco receipt)
- BTU output: 75,000 BTU
- Hopper capacity: 18–20 lbs of wood pellets
- Feed system: continuous non-electric gravity-automatic (no motor, no auger)
- Ignition type: manual, using a match or lighter plus a small amount of lighter fluid
- Height: 80.7 inches with three chimney sections assembled
- Weight: 73.5 lbs fully assembled
- Manufacturer: GHP Group Inc.
If all of the above match your unit, you have the right heater. Now go find the right manual. If you need the member's mark gas patio heater manual specifically, use the same process to confirm your exact model and version before following any instructions Now go find the right manual..
Finding the right manual for item 1713430
The most reliable place to get the correct manual is directly from GHP Group. Email them at [email protected] or call 1-877-447-4768 (Monday through Friday, 8:00am to 4:30pm Central). When you contact them, give them the item number 1713430 and your manufacturing date if you have it. They can confirm which manual revision applies to your specific unit and email you the PDF directly. This is the single most accurate path, especially if you're troubleshooting a problem and need to be certain you're reading the right fault codes or wiring diagrams.
Searching online for PDF mirrors is a secondary option. Sites like Manualzilla host GHP Group manuals, and a search for "FlamePro 1713430 manual" or "FlamePro pellet patio heater GHP manual" will often surface a usable PDF. One example is that Manualzilla mirrors GHP Group manuals and can include common safety and clearance sections such as minimum fresh-air opening guidance, though you still need to verify the 1713430 and 75,000 BTU match your unit blank" rel="noopener noreferrer">Manualzilla host GHP Group manuals. If you are looking specifically for a Paramount venturi spiral flame propane patio heater manual, the correct document will depend on the exact model revision shown on your unit FlamePro 1713430 manual. When you open any PDF you find online, immediately check that it references item 1713430 and 75,000 BTU on the cover or in the specifications table. If either number is missing or different, close it and keep looking. A mismatch in the pellet feed diagram alone can cause an assembly failure or a fire risk.
The Costco product page for item 1713430 sometimes links directly to a manual or assembly document in the "Documents" or "Specifications" section at the bottom of the listing. Check that first before going anywhere else, since Costco's version will be the exact production-run document that shipped with the heater. Other pellet patio heater manuals on this site, like the general FlamePro pellet patio heater series or manuals from comparable units, can provide useful cross-reference context but should never be substituted for the 1713430-specific document.
Safety checks before you touch anything
Before you follow any instruction in the manual, run through these pre-checks. Pellet patio heaters combine an open flame with a fuel-feed mechanism, and skipping safety steps is how minor problems become emergencies.
- Location check: The heater must be outdoors or in a covered open-air space with significant ventilation. Never operate it in an enclosed patio, garage, or any space that restricts fresh air. A good rule of thumb is that you need a large, unobstructed fresh-air opening, roughly 1.5 square feet of airflow at minimum. If you can't feel natural airflow at the location, move the heater.
- Clearance check: Keep a minimum of 3 feet of clearance on all sides from combustible materials (furniture, wood decking, fabric, siding). The chimney top needs at least 4–5 feet of vertical clearance from any overhead structure like a pergola or umbrella. Check the label on your unit for exact clearance specs, which override general guidance.
- Pellet check: Use only dry, low-ash hardwood pellets rated for heating use. Wet or low-quality pellets cause ignition failures and excessive ash buildup. Never use charcoal, briquettes, or compressed sawdust logs.
- Structural check: The heater should be on a level, non-combustible surface. The unit weighs 73.5 lbs fully assembled and is top-heavy. Confirm it is stable and will not tip. Many pellet heaters have a tilt switch that shuts the unit down if it tips, but that's a safety net, not a substitute for proper placement.
- Shutdown readiness: Before lighting, know how to extinguish the heater. For this unit, that means stopping pellet flow by closing or blocking the hopper feed and allowing the existing pellets to burn down. Do NOT use water to extinguish a pellet fire. Keep a fire extinguisher rated for wood fires (Class A) within reach.
- Inspect the firepot and chimney: Look inside the grate firepot and all three chimney sections. Clear out any old ash, debris, or leftover wet pellets from previous use before lighting. A blocked chimney is a serious fire hazard.
Assembly and first-burn setup
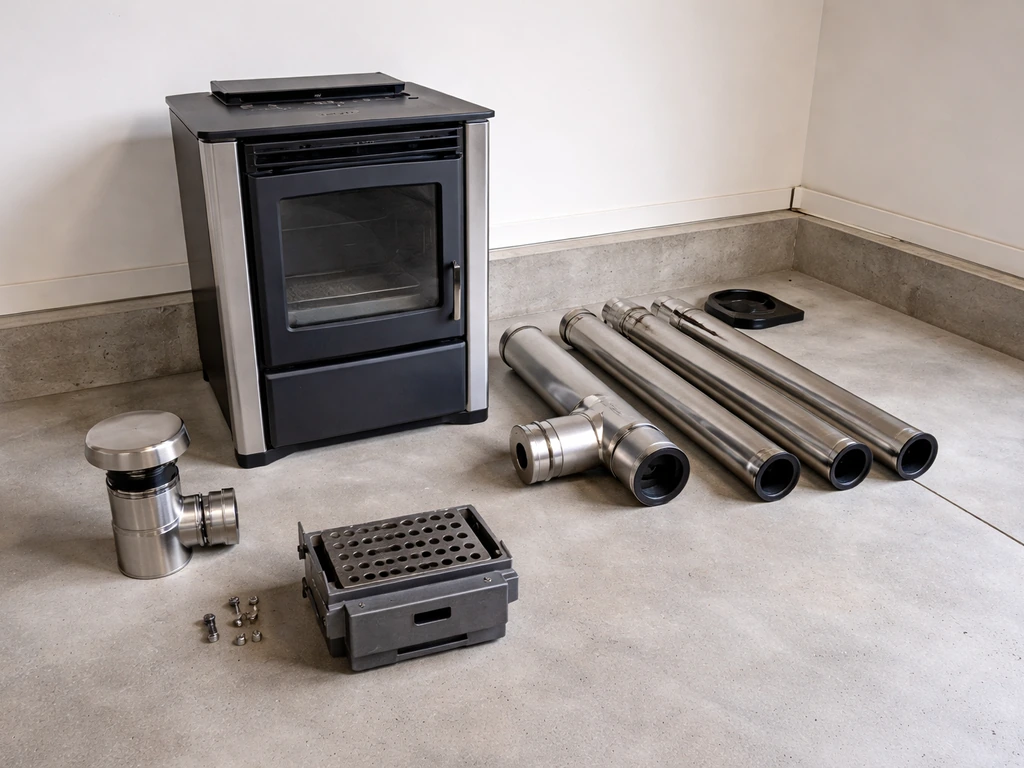
The 1713430 ships partially disassembled. Assembly is straightforward but the order matters, especially for the chimney sections and the firepot placement.
Putting it together
- Set the base unit on a flat, level surface. Do not tip or tilt it during assembly.
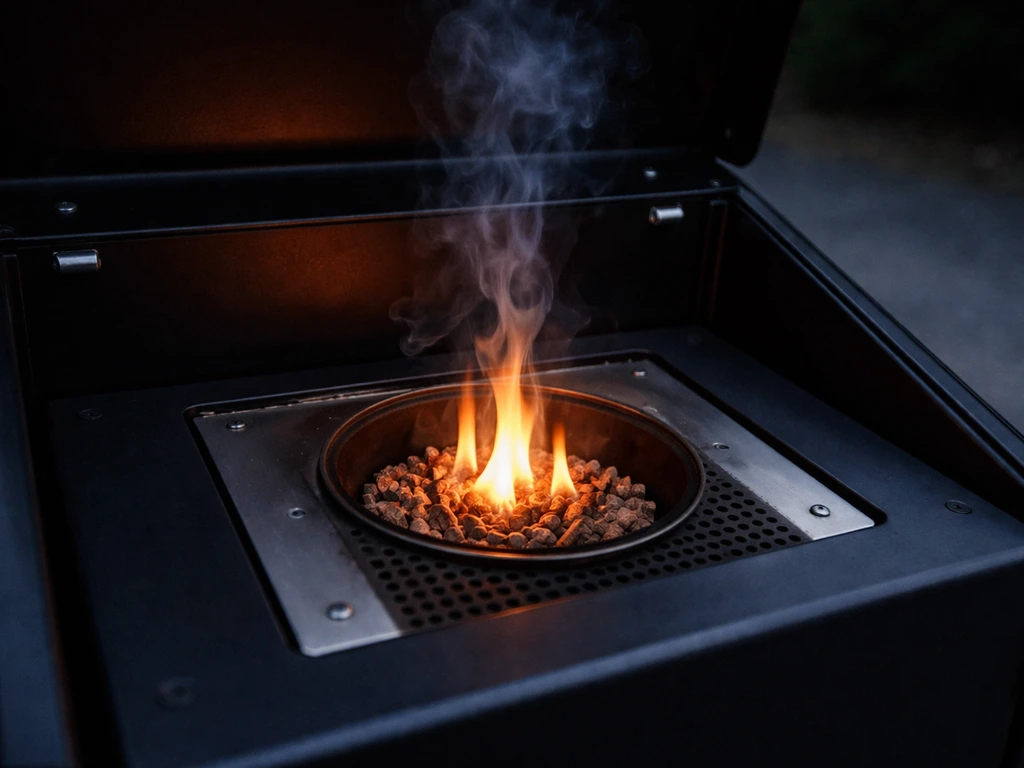
- Install the grate firepot into the combustion chamber at the base of the unit. It should seat securely and not wobble. The firepot is where pellets collect and burn, so it must be correctly seated for proper airflow.
- Attach the lower chimney section to the base collar. Most FlamePro chimney sections use a twist-lock or slip-fit connection. Hand-tighten any fasteners; over-tightening can crack the collar.
- Attach the middle chimney section to the lower, then the upper section to the middle. The chimney sections must be fully seated and aligned vertically. A crooked chimney restricts airflow and causes combustion problems.
- Fill the pellet hopper with dry hardwood pellets. The hopper holds 18–20 lbs. Do not overfill past the marked fill line. Because this is a gravity-feed system, pellets slide down into the fire chamber passively, so there is no auger mechanism to adjust or prime.
- Confirm the gravity feed path is clear: tilt the unit slightly (with a helper, carefully) and check that pellets flow freely toward the firepot opening. If they jam, inspect for an obstruction in the feed tube before proceeding.
- Check all chimney connections are secure one more time before lighting.
First burn procedure
The first burn on a new unit will produce some smoke and odor from manufacturing oils burning off the metal surfaces. This is normal and not a malfunction. Do the first burn outdoors and stand back for the first few minutes.
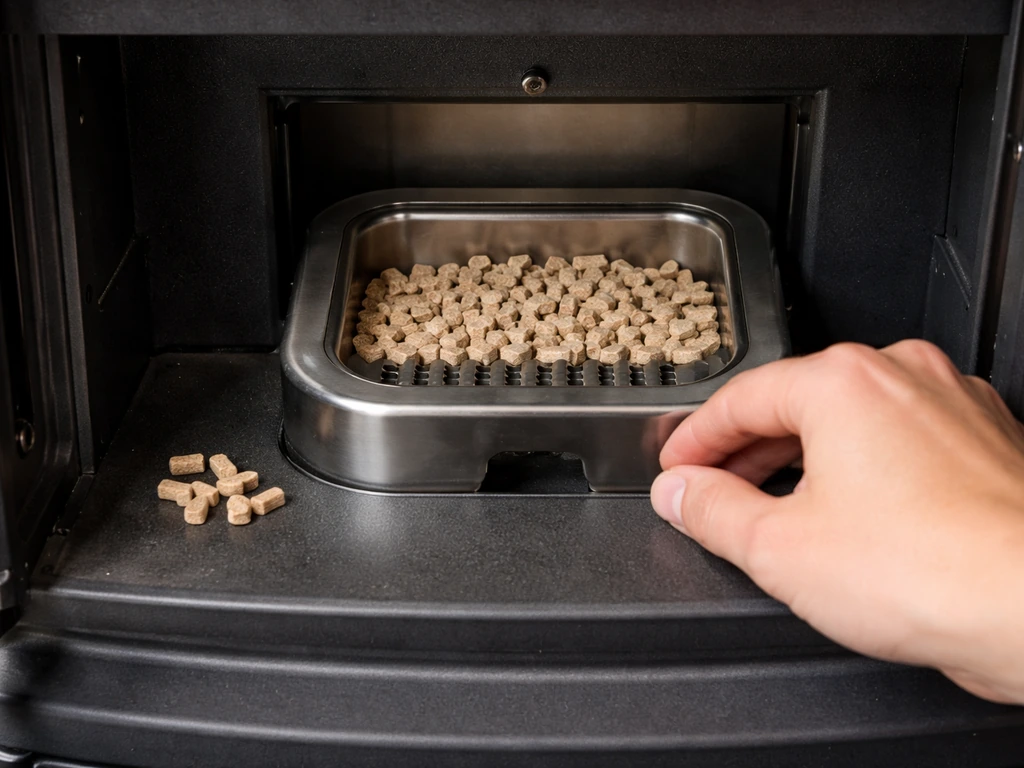
- Place a small pile of pellets (roughly a handful) directly in the grate firepot.
- Apply a very small amount of lighter fluid to the pellets in the firepot, following the amount specified in your manual. This is a manual-ignition unit, so lighter fluid is the intended starting method, not an improvised workaround.
- Allow the lighter fluid to soak in for 30–60 seconds before lighting. Do not add more lighter fluid to a flame that is already lit.
- Use a long-handled lighter or long match to ignite the pellets from the side of the firepot opening. Keep your face away from the opening.
- Once the starter pellets are burning steadily, the gravity feed system will begin dropping additional pellets into the fire automatically. You should see the flame grow and stabilize within 5–10 minutes.
- Observe the flame for the first 15 minutes. A healthy flame should be bright orange-yellow, steady, and venting cleanly up the chimney. Heavy black smoke, excessive popping, or a flame that keeps dying indicates a problem with pellet quality, firepot seating, or airflow.
Operating the heater and reading what the manual tells you
The FlamePro 1713430 is intentionally simple: no electronics, no thermostat, no digital controls. Operation is managed by controlling pellet feed volume (how much fuel reaches the firepot) and natural draft airflow through the chimney. The manual's operating section will cover how to adjust the feed rate if your version has an adjustable feed gate, and how to partially close off airflow to dampen the heat output. If your unit has neither of those controls, heat output is essentially fixed at the pellet burn rate.
Ignition problems
If the heater won't ignite at all, work through these in order: Are the pellets dry? Moisture-laden pellets won't light reliably even with lighter fluid. Did you use enough lighter fluid? Too little and the pellets won't catch before it burns off. Is the firepot clear of ash from a previous burn? Even a thin layer of ash can block airflow and prevent ignition. Is the chimney clear and fully assembled? Draft is everything on a gravity-fed pellet heater. A partially assembled or obstructed chimney means no draft and no sustainable flame.
Won't stay lit
A flame that lights and then dies within the first few minutes almost always points to one of three things: pellet feed blockage, airflow restriction, or wet/poor-quality pellets. Check the gravity feed tube for a pellet jam first since this is the most common cause. If pellets are jammed, let the unit cool completely, clear the blockage manually, and try again with fresh dry pellets. If the feed is clear and the heater still dies, inspect the chimney joints for gaps that would break the draft. A loose chimney section lets cold air into the system and collapses the flame.
Fault codes and indicator behaviors
Because this heater has no electronic control board, there are no digital fault codes. What you're reading instead is physical behavior: flame color, smoke output, and burn consistency. Heavy black smoke means incomplete combustion (usually wet pellets or restricted airflow). White or gray smoke at startup is normal. A loud popping or crackling beyond typical wood burning can mean pellets are wet or the firepot is cracked. If you see flame coming from a chimney joint rather than the top of the chimney, stop immediately and inspect for a loose or cracked section.
DIY diagnostics for the most common failures
Tilt switch
Some versions of this heater include a tilt safety switch that shuts down the pellet feed if the unit tips beyond a safe angle. If your heater suddenly stops feeding pellets but seems otherwise fine, check whether the unit is perfectly level. Even a slight lean on soft ground can trip a sensitive tilt switch. To test the switch: ensure the heater is level, then check whether pellet flow resumes. If the unit is level but the feed still won't work, the tilt switch itself may be faulty or stuck in the open (tripped) position. Consult your manual's parts diagram to locate the switch, and test continuity across its terminals with a multimeter (with the unit fully cooled and any fuel burned out). A good tilt switch reads closed (continuity) when the heater is level.
Thermocouple and temperature sensor issues
The 1713430 is a manual-ignition, non-electric gravity-feed system, which means it likely does not have a thermocouple or electronic temperature sensor in the traditional gas-heater sense. However, if your specific production version includes any safety cutoff sensor (check the manual's wiring or parts section), a failed sensor will prevent the heater from sustaining operation or shut it down immediately after lighting. The symptom looks exactly like a feed problem or an ignition failure, which is why identifying your exact manual version matters so much. If the unit behavior still seems like an ignition or feed problem, use the flame pro pellet patio heater manual for your exact revision, since the safety cutoff sensor notes and wiring differences can be version-specific. If a sensor is present, test it with a multimeter for continuity and compare to the spec in your manual.
Ignition system
Since ignition on this unit is manual (match or lighter plus lighter fluid), there is no electric igniter to fail. If you are having ignition trouble, the diagnostic is entirely about the fuel and airflow system. The checklist: dry pellets, correct lighter fluid amount, clear firepot, clear feed path, full chimney assembly, and the heater positioned in a location with adequate airflow around it. Work through those in order before assuming a component has failed.
Airflow and fan
The base unit on the 1713430 relies on natural convective draft through the chimney rather than a powered fan. If the draft is weak, the most common causes are: a chimney section that isn't fully seated, a chimney that is too cold (harder to establish draft in very cold weather), or wind conditions that are blowing directly down into the chimney top. On windy days, the heater's performance will vary. Some users add a chimney cap to reduce wind interference. If you suspect the draft is the problem, light the heater and hold a lit match near the bottom air intake. You should feel a gentle inward draw. If you feel no draw, inspect every chimney joint from bottom to top.
Maintenance schedule and keeping this heater running season to season
After every use
- Allow the heater to burn down completely and cool fully before touching it.
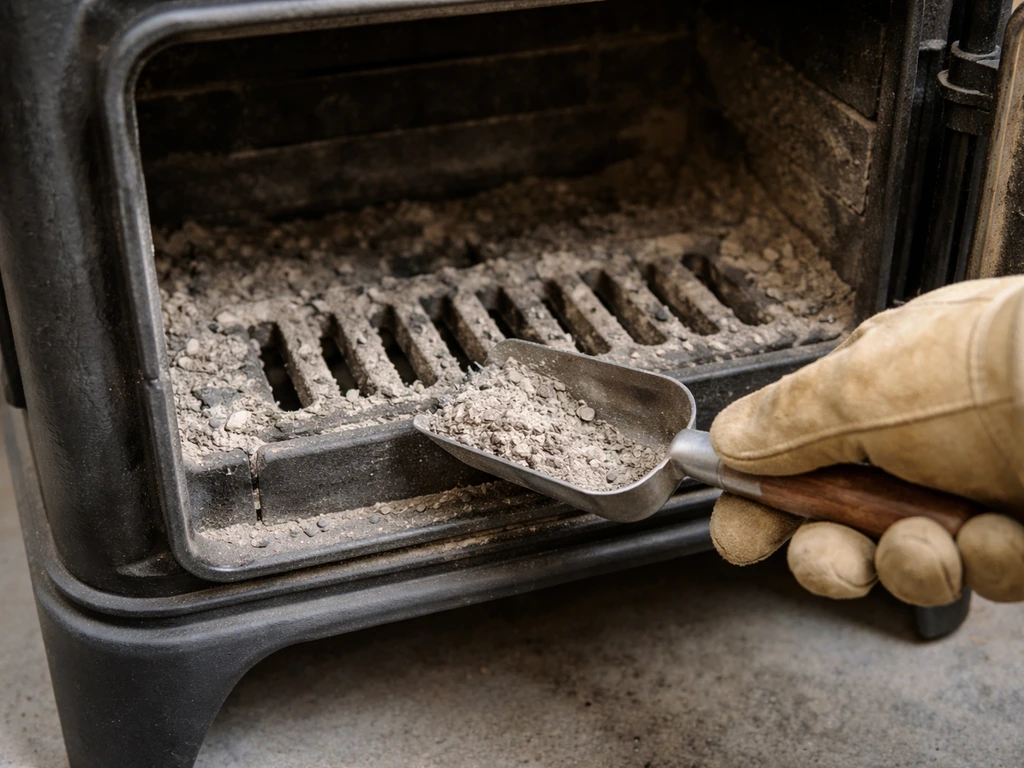
- Remove ash from the grate firepot with a small ash scoop or vacuum designed for ash. Do not let ash accumulate across multiple burns.
- Check the pellet feed path for any jammed or clumped pellets and clear them while the unit is cool.
Monthly during the season
- Inspect all three chimney sections for cracks, warping, or loose connections. Tighten or replace any compromised section before the next use.
- Check the gravity feed tube for pellet dust buildup. Compacted pellet dust can partially block the feed path and cause inconsistent flame.
- Inspect the exterior steel body for rust spots, especially at joints and the base. Treat any rust early with high-temperature paint to prevent structural weakening.
- Check the firepot grate for cracks or warping from heat cycling. A warped firepot changes airflow patterns and makes ignition harder.
End of season and storage
- Burn off all remaining pellets until the hopper and feed tube are completely empty. Do not store the heater with pellets in the hopper since moisture will swell and degrade them, potentially jamming the feed system.
- Do a thorough ash cleanout of the firepot and the base of the chimney sections.
- Wipe down all metal surfaces with a dry cloth to remove moisture and ash residue.
- Store the heater in a dry, covered location or use a weather-resistant cover sized for an 81-inch unit. Even steel rated for outdoor use will rust faster in prolonged wet storage.
- Before storing, make a note of any components that showed wear during the season (cracked firepot, loose chimney joint, sticky feed gate) so you can address them before the next burn season rather than discovering the problem on the first cold evening of fall.
When to stop DIYing and call GHP Group
Call GHP Group customer service at 1-877-447-4768 if: the firepot or chimney sections are structurally cracked and you cannot source direct replacement parts, the feed mechanism is damaged beyond a simple obstruction clearing, or the heater shows any sign of structural compromise at the base that could cause a tip-over under normal use. This is a 73.5 lb steel heater that operates at 75,000 BTU, and a structural failure during operation is not a DIY repair scenario. GHP Group is the manufacturer and carries parts for this unit. Other brands like Member's Mark, Bond, Master Forge, and Paramount all have similar support paths through their respective manufacturers, but for the FlamePro 1713430, GHP Group is your direct contact. For a Master Forge patio heater, use the matching manual so your ignition, parts, and troubleshooting steps line up with your exact production version Master Forge patio heater manual. If you are working on a Bond propane patio heater instead, use the correct Bond propane patio heater manual for that model's specific setup and safety checks.
Your next steps right now
If the heater won't ignite today, start with the simplest check: confirm your pellets are dry by breaking one open and checking for moisture or softness. Then clear the firepot of any old ash, reassemble the chimney sections fully, and retry with the proper lighter fluid amount from the manual. That combination solves the majority of ignition failures on this heater. If it lights and dies within a few minutes, your next diagnostic is the pellet feed path. Let the unit cool, inspect for a jam or compacted pellet dust, clear it, and relight. If you're still stuck after both of those steps, get the correct manual from GHP Group directly, confirm your unit's version, and work through the manual's troubleshooting section with the specific part diagrams for your production run.
FAQ
Can I use a FlamePro 81H manual from another revision or from a similar model if the BTU rating matches?
Yes, but only if you can verify the hopper, chimney section count, and that it is gravity-fed with no powered auger. If your heater has an electric auger or a different hopper placement, follow the specific revision for that hardware, because the firepot and feed-path diagrams can differ even when BTU and the look of the housing match.
Is it safe to run the FlamePro 81H indoors during the first burn to break it in?
Do not start it indoors for the odor and smoke that occurs on the first burn. Use a fully outdoor location with clearance around the chimney, and keep people and pets at a safe distance for the first 5 to 10 minutes while oils burn off. If you smell unusually strong fumes after the initial period, stop and let it cool before investigating pellet quality and chimney seating.
What should I check first if the heater lights but goes out after a few minutes?
Check three areas in order: (1) the firepot for ash that blocks openings, (2) the gravity feed tube for a pellet bridge or compacted dust, and (3) every chimney joint from bottom to top to confirm there are no gaps. Even a small air leak can break draft and cause the flame to die shortly after ignition.
If there are no digital fault codes, how do I know whether the problem is ignition, feeding, or a safety cutoff?
The heater can appear to shut down without an electronic fault code if draft is weak or if a mechanical safety switch trips. Watch whether pellets stop feeding versus whether the chimney is still producing smoke, then confirm the unit is level and inspect chimney joints. If you suspect a safety cutoff sensor, only test it with the heater fully cooled and compare to the continuity values or test steps in your exact manual revision.
How can I test a tilt safety switch on the FlamePro 81H safely and correctly?
A multimeter test is most useful when the heater is fully cooled, empty of pellets, and safely isolated. Confirm the switch is accessible in your specific manual’s parts diagram, then test continuity only across the intended terminals. A reading that does not change when you gently tip the unit to its defined limit can indicate a stuck switch, but do not bypass it.
What should I do if flames appear near the chimney joints?
If you see flame coming from a chimney joint (not from the top of the chimney) or you notice burning around seams, stop immediately, cool the unit, and re-seat the chimney sections. Loose sections are a common cause, but cracked sections also happen, and continued operation risks a more serious failure at the base.
Why does performance change a lot in windy weather, and can I use a chimney cap?
Because the system has no powered auger and relies on natural draft, wind direction and chimney obstruction matter. On windy days, the flame can become inconsistent if wind is blowing directly down the chimney top. Some owners use a chimney cap, but confirm cap compatibility with your specific revision so you do not restrict airflow.
How much lighter fluid should I use, and can too much cause ignition issues?
If the heater won’t ignite after you confirm pellets are dry and the firepot is cleared, verify the correct lighter fluid type and the amount your manual specifies. Too little fluid may burn off before pellets ignite, too much can lead to flare-ups and incomplete combustion. After any failed attempt, let it cool before adding pellets or relighting.
Can I replace damaged parts with parts from another seller or another FlamePro version?
The manual’s specifications match the production run, so mixing parts between revisions can be unsafe. If you need replacement chimney sections, firepot parts, or the feed mechanism, order the item numbers referenced in the manual for your exact 1713430 revision, not just the same generic component name.
How reliable is the match-test for draft, and what if I feel little or no draw?
The “gentle inward draw” test is a quick draft check, but it is not a complete fix. If you feel no draw, inspect the chimney joints, ensure the chimney is fully seated, and check that the chimney is not obstructed. In very cold conditions, draft establishment can be slower, so give it a few extra minutes before concluding there is a fault.