
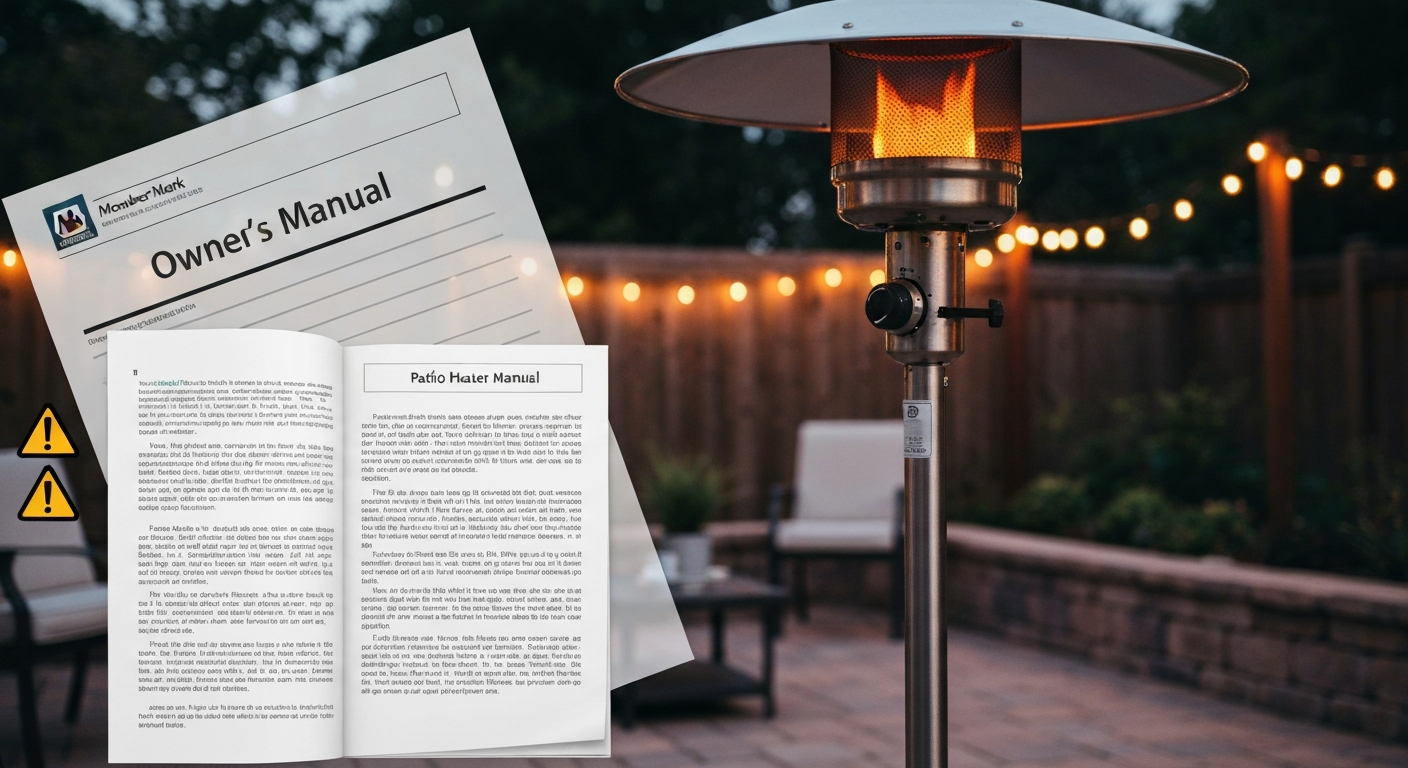
If you own a Member's Mark gas patio heater from Sam's Club and need the manual, you can download the official PDF directly from Sam's Club's content CDN or mirror sites like Manualzz. The two most common models are the PG188H and PG195H, both made by Guangdong Chant Group Inc. and sold under the Member's Mark label. This guide walks you through finding and using that manual, assembling the heater correctly, running safe startup checks, and diagnosing the most common faults including failed ignition, pilot that won't stay lit, tilt switch trips, and thermocouple failures.
Member's Mark Gas Patio Heater Manual: Assembly, Operation & Troubleshooting

Grant Mercer
19 Jul 2026
Who this guide is for and what it covers
This is written for homeowners and DIYers who bought a Member's Mark gas patio heater at Sam's Club and need practical help, not a customer-service runaround. Whether you lost the paper manual, are assembling the unit for the first time, or are trying to fix an ignition problem without paying a technician, everything you need is here. I'll cover model and serial identification, where to get the official PDF, full assembly with tool and parts lists, pre-start safety checks including a gas leak test, step-by-step startup, and a detailed diagnostic flow for every common flame fault. I'll also point out where the repair is straightforward enough to do yourself and where it's smarter to stop and call the manufacturer's customer service line.
How to identify your Member's Mark patio heater model and serial number
Before you download anything or order a part, you need the exact model code. Member's Mark heaters use codes like PG188H, PG195H, and similar alphanumeric strings that look nearly identical on the shelf but can have different burner heads, regulators, and part numbers. Getting the wrong manual is a genuine problem because the parts lists and torque specs differ between models.
Where to find the rating label
The rating label is almost always on the lower pole section, facing inward toward the base. On some units it is attached to the base casting itself. The label is usually a silver or white sticker that lists the model number, serial number, BTU input rating, gas type (LP/propane), and the CSA certification mark. On the PG188H and PG195H, the label also shows the manifold pressure spec of 11 inches W.C. and the injector size.
- Check the inner face of the lower pole section first, about 6 to 12 inches above the base ring.
- If not there, look on the inside rim of the base weight ring or under the base cap.
- On LED table models, there is sometimes a secondary label on the underside of the tabletop.
- The Sam's Club item number printed on your receipt or membership account order history will also help you match the manual PDF on the Sam's Club site.
What to photograph before you do anything else
Take a clear photo of the entire rating label, the control knob and burner housing from the front, and the regulator/hose assembly. If you ever need to call Chant's customer service line at 1-855-CHANT-US (1-855-242-6887), having these photos on your phone saves a lot of back-and-forth. The model code (e.g., PG195H) and the serial number are both needed when ordering replacement parts like the thermocouple (part #2409043), ignition pin (part #2409604), or tilt switch (part #2310662).
Where to download or request the official Member's Mark gas patio heater manual
Sam's Club hosts the official owner's manuals as PDFs on their content delivery network. The fastest way to find yours is to search 'Member's Mark patio heater [your model number] manual PDF' directly on samsclub. For another helpful reference, see the Bond Propane patio heater manual for similar setup, safety, and parts information. com or via Google pointing to the samsclub.com domain. The PG188H manual is publicly accessible and covers assembly, safety, leak testing, parts list, and the warranty section. If the Sam's Club link is broken or returns a 404, Manualzz (manualzz.com) mirrors the OEM manuals for both the PG188H and PG195H and is free to download without registration. If you need the Paramount Venturi Spiral Flame propane patio heater manual, consult its official PDF for model-specific assembly, safety, and parts diagrams. If you also need instructions for pellet-fuel units, see the flame pro pellet patio heater manual for model-specific assembly and maintenance details.
- Sam's Club product page: search your model number at samsclub.com and scroll to the 'Documents' or 'Manuals' tab on the product listing.
- Manualzz.com: search 'Member's Mark PG195H' or 'PG188H' for a mirrored PDF of the OEM manual.
- Manuals.plus: hosts the LED table variant's user manual as a free PDF.
- Direct manufacturer contact: Guangdong Chant Group Inc. via the customer service number 1-855-242-6887 can mail or email a manual if you have proof of purchase.
- Sam's Club member services: if you purchased through your membership account, log in and check your order history for a document link attached to the item.
If you want a printed copy, open the PDF in your browser and print at 100% scale. The manual is typically 20 to 30 pages. Print the parts-list page and keep it with your tools, because it has the part numbers you'll need if something fails. Do not rely on a third-party printout that doesn't show the CSA certification mark or the manufacturer's customer service number. Those unofficial copies sometimes omit safety warnings or carry outdated part numbers.
Tools, replacement parts, and hardware checklist before assembly
The official manual estimates about 30 minutes for assembly on the table and LED variants. That estimate assumes everything is organized and you have the right tools ready. In practice, if you're laying out hardware on a driveway without a plan, it takes longer and you're more likely to cross-thread a fitting or miss a bolt. Lay everything out before you start.
Required tools
- Adjustable wrench or open-end wrench (typically 5/8" or 3/4" for gas fittings)
- Magnetic-head Phillips screwdriver (a magnetic tip is specifically called out in the PG188H manual to hold screws during overhead installation)
- Flat-head screwdriver for hose clamps if present
- Multimeter with millivolt DC range (needed for thermocouple and tilt switch testing, not assembly)
- Soapy water in a spray bottle or small brush (for leak testing after gas connection)
Safety gear
- Work gloves to handle sheet-metal reflector edges
- Safety glasses during assembly and when testing gas fittings
- No open flames, cigarettes, or sparks anywhere near the work area during gas connection and leak testing
Spare parts worth having on hand
You don't need to pre-order parts before assembly, but if your heater is a few seasons old or was stored improperly, having these on hand means you won't be waiting on shipping when you want to use the heater. All part numbers below are from the official PG188H/PG195H parts list.
| Part Name | Part Number | Why You Might Need It |
|---|---|---|
| Thermocouple | #2409043 | Most common cause of pilot not staying lit |
| Ignition Pin | #2409604 | Worn tip causes weak or no spark |
| Tilt Switch | #2310662 | Fails open and shuts off pilot unexpectedly |
| Regulator/Hose Assembly | Manufacturer-specified only | Required if hose is cracked, kinked, or aged |
| AA Batteries (2x) | Standard | Electronic igniter models require fresh batteries for reliable spark |
Step-by-step assembly instructions
Work on a flat, stable surface. An open driveway or patio is fine. Keep children and pets away. Do not connect the propane cylinder until every mechanical connection is complete and you are ready to do the leak test. This is not a suggestion; it is a safety rule.
Step 1: Unpack and inventory hardware
Remove all components from the box and lay them out. Check every bag of hardware against the hardware contents list in your manual. Member's Mark manuals list bolt sizes explicitly, so count them now. A missing bolt is much easier to solve before assembly than after. Identify the base, lower pole, upper pole, emitter/burner head assembly, reflector, and the regulator/hose assembly.
Step 2: Base and lower pole assembly
Place the base on the ground and insert the lower pole into the base collar. Align the bolt holes and hand-tighten the bolts first to make sure nothing is cross-threaded, then snug them down with a wrench. Do not over-torque. Most Member's Mark base bolts are M8 or M10 hardware; the manual will show the exact size. Some base designs use a locking pin instead of bolts. If yours does, make sure the pin seats fully and the spring clip engages.
Step 3: Upper pole and gas tube connection
Slide the upper pole onto the lower pole and align the internal gas tube connections. On PG188H and PG195H models, the gas tube passes through the center of the pole and connects via a threaded fitting between the upper and lower sections. Hand-thread this fitting first, then use a wrench to snug it. You will leak-test this joint later. Secure the pole collar with the provided bolts.
Step 4: Burner head installation
Mount the burner head assembly onto the top of the upper pole. The head assembly includes the burner, control knob, igniter, thermocouple, and tilt switch. Align the base of the head with the pole top and secure with the provided screws. A magnetic-head screwdriver is useful here because some screws must be started overhead. Connect the gas tube at the top of the upper pole to the inlet on the burner head, hand-thread first, then wrench-snug.
Step 5: Reflector installation
The reflector is the large cone-shaped or dome-shaped cover that sits above the burner. Most Member's Mark models use a three-piece or two-piece reflector that clips or screws together around the burner housing. Handle reflector edges with gloves. Seat all sections evenly and tighten the retaining screws or clips uniformly so the reflector is centered over the burner. A misaligned reflector can affect heat distribution and, in some configurations, can contact the burner if it shifts during use.
Step 6: Gas connection
Connect the regulator/hose assembly that came with the heater to the inlet at the base of the pole. Always use the supplied regulator and hose, or a manufacturer-specified replacement. The official manual for the Outdoor LP Gas Patio Heater (PG188H), Specifications (Manifold Pressure 11 in. W.C.; use supplied regulator/hose) specifies 11 in. W.C. manifold pressure and requires using the supplied regulator/hose assembly Outdoor LP Gas Patio Heater (PG188H) — Specifications (Manifold Pressure 11 in. W.C.; use supplied regulator/hose). The manual is explicit on this: the required manifold pressure is 11 inches W.C. for LP operation, and a mismatched regulator can deliver too much or too little pressure, causing unsafe operation or a flame that won't stay lit. Hand-thread the POL fitting onto your 20-lb propane cylinder, then tighten with a wrench. LP fittings use a left-hand thread (counter-clockwise to tighten). Do not connect the cylinder valve yet.
Pre-start safety checks and gas leak testing
This section is not optional. A gas leak is not always detectable by smell alone, and propane is heavier than air, meaning it accumulates at ground level. Run through every check below before you ever attempt to light the heater.
Visual inspection checklist
- Inspect the entire hose from regulator to heater base for cracks, abrasions, kinks, or crushed sections. Replace the hose if you find any damage; do not patch it.
- Confirm the regulator body shows no visible cracks or corrosion.
- Verify all pole connections and the burner head mounting screws are snug.
- Check that the reflector is seated evenly and no hardware is missing.
- Confirm the control knob is in the OFF position before opening the cylinder valve.
- Make sure the heater is on a level, stable surface. The tilt switch will trigger if the unit is leaning more than a few degrees.
How to perform the soapy-water leak test
The PG188H and PG195H manuals require this test every time you connect a new propane cylinder and after any re-assembly. Mix a few drops of dish soap in water in a spray bottle or use it with a brush. Open the propane cylinder valve slowly (one full turn). Do not attempt to light the heater yet. Apply the soapy water to every gas connection: the POL fitting at the cylinder, the regulator body, the hose connection at the base of the heater pole, the internal pole tube junction, and the gas inlet at the burner head. Watch for bubbles. Even slow, small bubbles indicate a leak.
- If bubbles appear at the POL fitting: close the cylinder valve, remove and re-thread the fitting carefully, re-test.
- If bubbles appear at the hose or regulator: close the cylinder valve, replace the hose/regulator assembly. Do not use the heater until it is replaced.
- If bubbles appear at a pole tube junction: close the cylinder valve, disassemble that section, inspect the threads, re-thread and re-tighten, re-test.
- If no bubbles appear at any connection after 60 seconds: the system is leak-free and you can proceed to startup.
- Never use an open flame to check for gas leaks.
Per ANSI Z223.1 / NFPA 54 and the CSA B149.1 standards referenced in the Member's Mark manuals, these are the baseline safe-installation requirements for outdoor LP gas appliances. Meeting them is not optional and is required by local codes in most jurisdictions.
Startup and normal operation procedures
Member's Mark gas patio heaters use either a piezo push-button igniter or an electronic (battery-powered) igniter depending on the model. The startup sequence is similar for both but differs slightly. The sequence below is based on the official manual for the PG188H, PG195H, and the LED table variant.
Standard startup sequence
- Confirm the control knob is in the OFF position and the cylinder valve is closed.
- Open the propane cylinder valve slowly (one full turn, counter-clockwise).
- Push the control knob in and rotate it to the PILOT position. You should feel a slight resistance.
- With the knob held in at PILOT, press the igniter button repeatedly (or continuously if electronic) while slowly counting 30 to 60 seconds. This purges air from the line. You may smell a brief whiff of gas; this is normal during purging.
- Continue holding the knob at PILOT. When the pilot lights, you'll see a small blue flame at the pilot orifice near the thermocouple tip.
- Hold the knob in at PILOT for 10 to 15 seconds after the pilot lights. This heats the thermocouple so it generates enough millivoltage to hold the gas valve open.
- Slowly release the knob. If the pilot stays lit, rotate the knob to LOW to light the main burner, then adjust to HIGH if desired.
- If the pilot goes out when you release the knob, the thermocouple has not reached operating temperature yet. Repeat steps 3 through 7, holding the knob longer at PILOT.
Electronic igniter battery check
If your model uses an electronic igniter, weak batteries are the most common reason for no spark or a weak orange spark instead of a sharp blue one. The igniter typically takes two AA batteries housed in a compartment on the control housing or lower pole. Replace them at the start of each season. If you press the igniter and hear no clicking at all, check the battery compartment first before assuming the igniter itself is faulty.
Flame height and tilt/auto-shutdown features
Once the main burner is lit, rotate the control knob between LOW and HIGH to adjust flame height. The PG195H is rated at 45,000 BTU input at HIGH. For outdoor use in moderate wind, LOW or mid-range settings produce a more stable flame. The tilt (tip-over) safety switch automatically cuts the gas supply if the heater tilts beyond its safe angle. This is a protection feature, not a malfunction. If the heater shuts off unexpectedly after a bump or on uneven ground, move it to a level surface, turn the knob to OFF, wait 60 seconds, and restart using the full startup sequence above.
Troubleshooting ignition and flame problems
Most Member's Mark gas patio heater failures come down to four things: a dead igniter, a fouled or failed thermocouple, a tripped or failed tilt switch, or a regulator/gas supply issue. The diagnostic flow below walks through each symptom systematically. Work through it in order. Skipping steps wastes time and can send you replacing the wrong part.
Safety reminder before any diagnostic work: close the propane cylinder valve and allow the heater to cool completely before opening any access panels, touching the thermocouple, or handling wiring. Propane is heavier than air and accumulates at ground level. Work in a well-ventilated outdoor space, never in an enclosed garage or shed.
Symptom 1: No spark when pressing the igniter
- Check the battery compartment. Replace both AA batteries with fresh ones even if the old ones seem good. Weak batteries produce no audible click from the electronic igniter module.
- Listen for a clicking sound when you press the igniter. No click at all usually means a dead igniter module or broken wire. A click with no visible spark points to a fouled or misaligned ignition pin.
- Inspect the ignition pin (part #2409604) tip. The ceramic insulator should be clean and uncracked. The electrode tip should have a 3 to 5 mm air gap between it and the burner housing. A carbon-fouled tip can be cleaned gently with fine sandpaper or a small wire brush.
- Check the wire from the igniter button to the ignition pin for visible damage or loose connectors. Reconnect any loose terminals.
- If the pin and wiring are intact but there is still no spark, the igniter module itself may have failed. Replace it.
Symptom 2: Spark fires but pilot won't light
- Confirm the propane cylinder is not empty. Reconnect a known-full cylinder and retry.
- Make sure you are holding the knob at PILOT while pressing the igniter and that you are purging for the full 30 to 60 seconds. A new hose connection always has air in the line.
- Check that the cylinder valve is fully open (counter-clockwise, one full turn).
- Inspect the pilot orifice for spider webs, debris, or rust. This is a common problem on heaters stored outdoors without a cover. A blocked pilot orifice produces no gas flow to the pilot even when everything else is working. Use a fine needle or compressed air to clear it. Do not use anything that could enlarge the orifice.
- If gas flows (you can briefly smell gas at the pilot area during purging) but the spark doesn't bridge to the pilot flame, check the spark gap again as described in Symptom 1.
Symptom 3: Pilot lights but won't stay lit when you release the knob
This is the most common complaint on Member's Mark heaters and on nearly every standing-pilot gas patio heater on the market. When you release the control knob and the pilot dies, the gas valve's safety circuit has not received enough signal to stay open. Two components are responsible: the thermocouple and the tilt switch. Either one can prevent the valve from holding open. The cross-wire bypass test below identifies which one is the problem.
- Close the cylinder valve completely. Let the heater cool. This step is mandatory before any wiring work.
- Access the control head assembly. Locate the thermocouple lead and the tilt switch wires where they connect to the gas valve.
- Set your multimeter to DC millivolts. Reconnect the thermocouple only (not the tilt switch), open the cylinder valve, light the pilot, and hold the knob at PILOT for 60 seconds. With the pilot lit and the thermocouple hot, measure the millivolt output across the thermocouple terminals. A working thermocouple should read roughly 20 to 50 mV open-circuit. If you get a reading well below this range or zero, the thermocouple is failing.
- If the thermocouple reads normal but the pilot still won't hold, the tilt switch (part #2310662) is likely stuck open (failed). To confirm: with the gas isolated and the heater cool, unplug the tilt switch connector and use a short jumper wire to bypass the tilt switch terminals temporarily. This is a diagnostic-only test, not a permanent modification. Restore gas, attempt startup. If the pilot now holds when you release the knob, the tilt switch has failed and needs replacement.
- Replace only the faulty component. Do not leave the bypass jumper in place. The tilt switch is a critical safety feature.
- If both the thermocouple reads low and the tilt switch tests open, replace both. They are inexpensive parts and replacing them together saves a repeat repair call.
Tilt switch reset and continuity check
Before you replace the tilt switch, check whether it simply needs a reset. For step‑by‑step tilt‑switch testing and reset instructions, see tilt‑switch testing / reset instructions (Heater Advisor). Place the heater on a perfectly level surface and allow it to settle for a minute. Some tilt switches are mechanical mercury or ball-bearing designs that reset by returning to level. With the heater cool and the cylinder valve closed, use your multimeter on continuity mode: probe both terminals of the tilt switch. A working tilt switch in the upright position should show continuity (closed circuit). If you get an open circuit with the heater level, the switch has failed and needs replacement. The part number for the PG188H/PG195H tilt switch is #2310662, available through the manufacturer's customer service line.
Symptom 4: Pilot holds but main burner won't light or flame is too low
- Make sure you are rotating the knob from PILOT to LOW (not directly to HIGH). Some valves require a deliberate rotation through LOW before HIGH.
- Check the propane cylinder level. A nearly empty cylinder delivers lower pressure, which can light the pilot but fail to open the main burner valve fully.
- Inspect the regulator. If the cylinder is full but flame height is consistently low, the regulator may be in a 'lock-out' state. This happens when the cylinder valve is opened too quickly, triggering the regulator's internal flow limiter. Close the cylinder valve, turn the control knob to HIGH to bleed residual pressure, wait 30 seconds, then close the knob to OFF and re-open the cylinder valve slowly (quarter-turn per second). This resets most regulators.
- If low flame persists after regulator reset, check manifold pressure if you have a manometer. The correct spec is 11 inches W.C. for LP. A reading significantly below that indicates a failing regulator that needs replacement.
- Check the main burner ports for blockage. Spider webs and debris are the leading cause of uneven or low main burner flames on stored heaters. Remove the burner head assembly, inspect the ports, and clear any blockage with compressed air or a soft brush.
Quick-reference diagnostic table
| Symptom | Most Likely Cause | First Diagnostic Step | Fix |
|---|---|---|---|
| No spark at all | Dead batteries or igniter module | Replace AA batteries | New batteries or igniter module |
| Spark fires, pilot won't light | Blocked pilot orifice or empty cylinder | Check cylinder, inspect orifice | Clear orifice with needle or replace cylinder |
| Pilot lights, won't hold on release | Thermocouple or tilt switch failure | Millivolt test on thermocouple; continuity test on tilt switch | Replace thermocouple (#2409043) or tilt switch (#2310662) |
| Pilot holds, main burner won't light | Regulator lockout or empty cylinder | Reset regulator; check cylinder level | Regulator reset or new cylinder |
| Main burner lights but flame is low | Regulator pressure low or burner ports blocked | Check manifold pressure (spec: 11" W.C.) | Replace regulator or clear burner ports |
| Heater shuts off after tip or bump | Tilt switch triggered (normal operation) | Level the surface, restart | No fix needed; tilt switch is working correctly |
When to stop and call for help
Most of what is covered above is genuine DIY territory. Replacing a thermocouple, tilt switch, or igniter pin is no more complicated than replacing a light switch. But there are a few situations where you should stop and contact Guangdong Chant Group's customer service at 1-855-242-6887 instead of proceeding. These include: any persistent gas smell after confirmed leak testing, a visibly damaged or corroded gas valve body, a hose or regulator that shows heat damage or melting, and any situation where the gas valve itself appears to be the fault (it passes no gas even when all downstream components check out). Gas valve replacement on a portable heater is not a standard DIY repair, and attempting it incorrectly creates a real safety hazard.
Finding replacement parts and exploded diagrams
The parts list in the official PG188H and PG195H manuals includes part numbers for every serviceable component. The quickest route to ordering is to call 1-855-CHANT-US (1-855-242-6887) with your model number and the part number from the manual. The manufacturer ships replacement parts directly. For exploded-view assembly diagrams, the Manualzz PDF of the PG195H manual includes a labeled diagram that identifies every numbered component by position, which is useful when you are trying to identify a part visually rather than by name.
Warranty and support overview
Member's Mark gas patio heaters carry a 1-Year Limited Warranty for the original purchaser. The warranty covers parts replacement only; labor is excluded. To make a warranty claim, retain your Sam's Club receipt or membership order record as proof of purchase. Contact the manufacturer's customer service at 1-855-242-6887 and be ready to provide your model number, serial number, and purchase date. The warranty does not cover damage from misuse, improper storage, use of non-approved gas types, or parts replaced with non-manufacturer-specified components.
Seasonal maintenance and storage
Doing a few maintenance steps at the start and end of each season prevents most of the ignition and flame problems covered above. This is where most heater problems actually originate: a unit stored uncovered with the cylinder attached through winter, then pulled out in spring with a fouled pilot orifice and a tilt switch corroded to the open position.
End-of-season steps
- Turn the control knob to OFF and close the cylinder valve. Let the heater run until the pilot and main burner go out to purge residual gas from the hose.
- Disconnect the regulator from the propane cylinder. Store the cylinder outdoors in an upright, ventilated location away from heat sources.
- Clean the reflector and burner housing with a dry or lightly damp cloth. Remove any insect nests or debris from the burner ports.
- Inspect the hose for cracks or stiffness caused by cold-weather storage. Replace it if there is any doubt.
- Cover the heater with a fitted outdoor cover to prevent moisture and debris from entering the burner assembly and pilot orifice.
- Store in a covered, ventilated area. Do not store indoors with the propane cylinder attached.
Start-of-season checks
- Inspect all fasteners and pole connections for rust or looseness. Tighten as needed.
- Check the hose and regulator visually before connecting.
- Inspect the pilot orifice and main burner ports for spider webs and debris.
- Replace the igniter batteries before the first use of the season.
- Connect a fresh propane cylinder and run the full soapy-water leak test before lighting.
- Test the tilt switch by gently tilting the heater while lit; the flame should extinguish within a few seconds. If it does not, the tilt switch needs attention.
How this compares to other gas patio heater manuals
Member's Mark manuals follow the same general structure as most OEM gas patio heater documentation, which makes cross-referencing useful when a specific diagram or procedure is unclear. The thermocouple and tilt switch troubleshooting steps in this guide apply broadly across brands because the underlying millivolt pilot system is nearly universal in this product category. If you are also working with or comparing a Bond propane patio heater, a Master Forge patio heater, or a Paramount Venturi spiral flame propane patio heater, the startup sequence and safety-check procedures are functionally the same, though part numbers and regulator specs will differ. For a comparable pellet-heater manual, see the FlamePro 81-H steel patio pellet heater manual. Always verify specifications against the manual for your specific model rather than assuming cross-brand compatibility on parts like regulators, thermocouples, or tilt switches.
The CSA/ANSI Z83.26 standard for gas-fired outdoor infrared patio heaters (current edition: Z83.26-20, reaffirmed 2025) sets the maximum inlet and outlet pressures and allowable cylinder configurations that all compliant heaters must meet. The Member's Mark units are CSA-certified, meaning they have been independently tested to this standard. If you are researching whether a replacement regulator or hose is appropriate, the Z83.26 standard along with the manifold pressure spec in your manual (11 inches W.C. for LP) are the two authoritative references to check against.
FAQ
Where can I download the official Member’s Mark (Sam’s Club) gas patio heater owner’s manual (printable PDF)?
Official Member’s Mark owner’s manuals are published by Sam’s Club and mirrored on manual libraries. Primary official PDF links: Sam’s Club product PDF for PG188H (Official): https://scene7.samsclub.com/is/content/samsclub/980032946-patio-heater-pg188h-2016. Mirrored/manual‑host copies include PG195H on Manualzz: https://manualzz.com/doc/53813945/member-s-mark-pg195h-instruction-manual and other models on Manuals.plus (example LED‑table model): https://manuals.plus/asin/B0BDMT7XJH.pdf. If the exact model PDF is not available online, contact Sam’s Club/Member’s Mark customer service (see Warranty/Support entry) to request a copy.
How do I identify the model and serial number on my Member’s Mark patio heater?
Locate the data plate or sticker on the heater — typically on the burner housing, under the reflector/hood, or on the pole near the control head/base. The plate lists model (e.g., PG188H or PG195H), SKU, manufacturer (often Guangdong Chant Group Inc.), input BTU rating and a serial number. If the plate is missing, check the original box, receipt, Sam’s Club order history, or take a clear photo of the heater and compare features (reflector size, LED table, control layout) to the manual PDFs linked above to match model.
What tools and prep are required before assembling my Member’s Mark gas patio heater?
Prepare a clean, level work area and have two people for safe assembly. Typical required tools (as listed in official manuals): adjustable wrench, open/box wrench set, magnetic‑head Phillips screwdriver, pliers. Estimated assembly time appears in manuals (~30–60 minutes depending on model). Verify you have all hardware from the parts bag (bolts, washers, nuts) and the supplied regulator/hose assembly before starting.
Step‑by‑step high‑level assembly procedure (quick checklist).
1) Unpack and inventory parts vs. the manual’s hardware list. 2) Assemble base and pole per numbered steps (insert and tighten bolts but do not overtighten). 3) Mount control head/burner assembly to the pole and secure. 4) Install reflector/hood and any accessory table/LED components. 5) Connect regulator/hose to the heater manifold per manual and hand‑tighten the cylinder coupling; use provided wrench to secure. 6) Install the propane cylinder in the base or connect external cylinder per manual. 7) Perform the soap‑and‑water leak test on all fittings before lighting. Refer to the model’s numbered assembly steps and torque/hardware callouts in the official PDF for exact fastener sizes and sequence (see Sam’s Club PDF: https://scene7.samsclub.com/is/content/samsclub/980032946-patio-heater-pg188h-2016).
How do I perform the required leak test after assembly or cylinder change?
Turn OFF all heater controls and cylinder valve. Mix soap and water solution. Open the cylinder valve slowly. Apply the soap solution to all hose/regulator and connection points (regulator-to-cylinder, regulator-to-heater, threaded fittings). Look for steady bubbles indicating a leak. If bubbles appear: shut off cylinder, tighten connections, replace faulty hose/regulator, or contact customer service. Manuals explicitly require using the supplied regulator/hose assembly or manufacturer‑specified replacement. Never use a flame to check for leaks.
What is the correct startup/lighting procedure for Member’s Mark LP patio heaters?
Follow the owner’s‑manual lighting sequence for your model (common sequence across models): 1) Ensure heater is on a level, stable surface and outdoors in a well‑ventilated area. 2) Open the propane cylinder valve slowly. 3) Turn control knob to PILOT, depress and hold; press the piezo igniter repeatedly (or press igniter button) until the pilot lights. 4) Continue holding the control for 10–60 seconds (manual specifies exact hold time — commonly 10–60 sec) to heat the thermocouple/thermopile, then release; pilot should remain lit. 5) Rotate control to LOW then HIGH to light the main burner. If pilot does not light, follow troubleshooting flow (see Ignition Troubleshooting entry). Exact button names/timings are in each model manual (examples: https://manuals.plus/asin/B0BDMT7XJH.pdf and https://manualzz.com/doc/53813945/member-s-mark-pg195h-instruction-manual). Do not attempt indoors.