
To start a Hampton Bay propane patio heater, turn the control knob to OFF, open the tank valve, push and hold the knob in while turning it to HI, then press the red igniter button repeatedly until the burner lights. Hold the knob depressed for 30 full seconds after the flame catches, then slowly release. If nothing lights after a few tries, wait 5 minutes before attempting again so any accumulated gas can dissipate. That sequence covers most Hampton Bay freestanding mushroom-style models, but the exact steps vary by ignition type and whether you're on propane or natural gas. This guide walks through every variant.
How to Start Hampton Bay Patio Heater: Safe, Step-by-Step Guide

Grant Mercer
13 Jul 2026
What this guide covers and why safety comes first
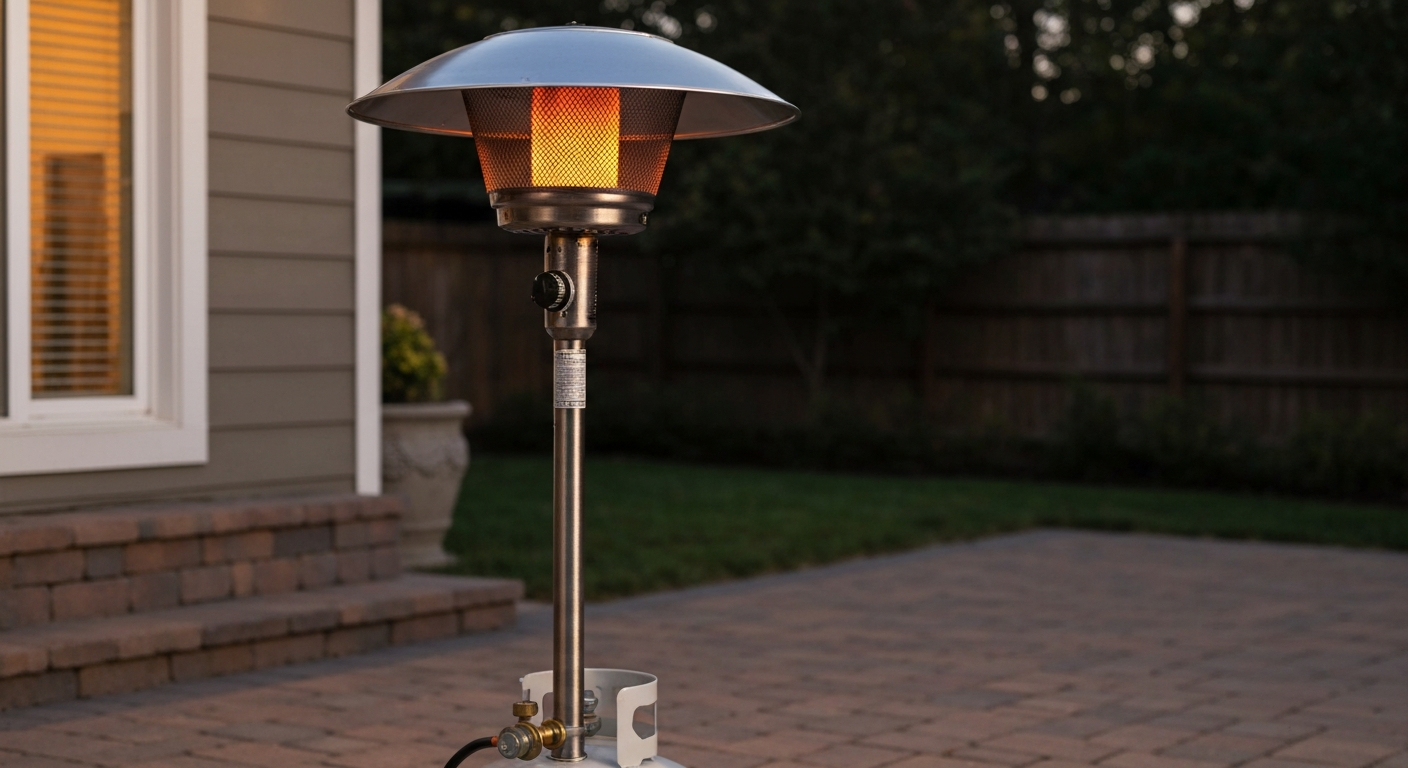
This article covers Hampton Bay propane and natural-gas patio heaters sold through Home Depot, focusing on the most common freestanding mushroom-head models: the PH01-SS series and the 38,200 BTU HD22 family (HD22, HD22MB, HD22ST, HD22SG, HD22SS), along with the 48,000 BTU NCZH-G-SS. You'll get a pre-start checklist, step-by-step ignition procedures for piezo/push-button and battery-module ignition types, manual match-lighting as a fallback, and a troubleshooting section covering the most common startup failures. If you've ever stared at a heater that just won't light, this is the guide to bookmark.
Before anything else: Hampton Bay heaters run on combustible fuel. Every manual I've seen from them makes this point clearly, and I'll repeat it here. These heaters are for outdoor use only. Using one in a garage, screened porch, or any enclosed space creates a carbon monoxide hazard that can be fatal. Keep the area well ventilated, check your connections for leaks every single time you connect a new tank, and never skip the 5-minute wait after a failed ignition attempt. Gas can pool around the base of the heater fast, and a stray spark into that gas pocket is dangerous.
Before you begin: tools, parts, and a quick safety checklist
You don't need much to light a Hampton Bay heater, but having a few things on hand will save you a trip back inside mid-process.
- A filled propane cylinder (or confirmed natural-gas supply for NG models)
- The manufacturer-supplied regulator and hose (Hampton Bay manuals explicitly say not to substitute an adjustable third-party regulator on propane models)
- A spray bottle or small brush with soapy water for the leak test
- A long-reach lighter or long fireplace matches as a manual fallback
- The correct battery for your sparker module (AA or AAA depending on model — check your manual)
- A flat, level, hard surface for the heater to stand on
- The model's Use & Care manual, either the paper copy or downloaded PDF from Home Depot
Run through this checklist before touching the igniter. It takes two minutes and it's worth it every time.
- Heater is assembled completely and all fasteners are secure
- No visible damage to hose, regulator, burner screen, or reflector
- Propane tank is not expired and has fuel (shake it — a full 20 lb tank weighs about 37 lbs total)
- Regulator and hose are the factory-supplied set, not a third-party replacement
- All knobs are in the OFF position before connecting the tank
- Heater is on a hard, level surface outdoors, clear of overhead combustibles
- Wind speed is below the manufacturer's stated limit (usually around 10–12 mph for most models)
- Tilt switch has been confirmed functional (more on this below)
Pre-start assembly and safety checks
Gas supply and tank connection
Thread the regulator handwheel onto the tank valve by turning counter-clockwise (propane tank fittings are left-hand threaded). Tighten it firmly by hand only, no wrenches needed on the CGA-510 fitting. For natural-gas models, confirm the supply valve on the gas line is fully closed before making any connection, and tighten the flare fitting with an appropriately sized wrench (usually 5/8 inch). Check that the hose has no kinks, cracks, or scorch marks. If the hose shows any damage, replace it before proceeding, do not patch a gas hose with tape.
Leak test (do this every time on a new connection)
Mix a few drops of dish soap with water in a spray bottle. Open the tank valve slowly (about a half turn), then spray or brush the soapy solution at three points: the regulator-to-cylinder connection, the hose-to-regulator connection, and the hose-to-heater valve connection. Watch for 30 seconds. Bubbles mean a leak. If you see bubbles, close the tank valve immediately, tighten the connection, and retest. If bubbles persist after tightening, do not try to light the heater. Contact Hampton Bay customer service or take the regulator and hose assembly to a qualified gas technician. This test is called out specifically in both the PH01-SS and HD22 Use & Care manuals, and it's one I'd never skip.
Tilt switch and stable placement
Hampton Bay freestanding heaters have a tilt (tip-over) safety switch built into the base. If the heater tips or leans beyond a set angle, the switch cuts gas flow automatically. This is a genuinely useful safety feature, but it also causes confusion when people try to light a heater that's sitting on slightly uneven ground. Set the heater on a hard, flat surface. If it rocks even slightly, adjust the leveling feet if your model has them, or reposition it entirely. If the tilt switch is triggered mid-use by a bump or a gust, you'll need to set the knob to OFF, let it sit for 5 minutes, then restart the full ignition sequence.
Quick start: lighting a propane Hampton Bay patio heater
This sequence applies to most Hampton Bay propane mushroom heaters with a push-button or battery sparker. For a complete walk-through, see how to ignite patio heater (resource ID 72b9d4e4-4551-4879-b4c1-38baf0f0649b). For a clear, step-by-step walkthrough on how to start patio heater units in general, see how to start patio heater. If your model has a different ignition type, skip down to the ignition types section for specifics. For a quick walkthrough on how to turn on a patio heater, see our step-by-step guide.
- Make sure the control knob is in the OFF position
- Open the propane tank valve slowly — one full turn counter-clockwise is enough
- Wait 10–15 seconds for gas to reach the valve
- Push the control knob in firmly and turn it to HI (some models label this position 'Ignite')
- Keep the knob fully depressed and press the red igniter button repeatedly — one press per second works well
- When the flame lights, continue holding the knob in for 30 full seconds (count it out — releasing early is the number one reason heaters go out immediately after lighting)
- Slowly release the knob and confirm the flame stays lit
- Adjust to your desired heat level by turning the knob toward LO
- If the flame does not light after several igniter presses, release the knob, turn it to OFF, and wait 5 full minutes before trying again
- On first use or after a cylinder change, hold the knob in for 2 minutes on the first attempt to purge air from the line
Quick start: lighting a natural-gas Hampton Bay patio heater
Natural-gas Hampton Bay models follow a similar ignition sequence but skip the tank connection steps. Because the gas supply is continuous from a building line, you do not need to purge air after a cylinder change. However, if the heater has been disconnected from the supply line for any reason, perform the soap bubble leak test on the new connection before lighting.
- Confirm the supply line shutoff valve is open
- Check all hose and fitting connections with soapy water if this is the first use of the season
- Set the control knob to OFF and wait 5 minutes if the heater was recently used or the flame went out on its own
- Push and hold the control knob in, turn to HI or the 'Ignite' position
- Press the igniter button repeatedly while holding the knob in
- When the burner lights, hold the knob depressed for 30 seconds
- Release slowly and confirm the flame is stable
- Adjust flame height with the control knob
- To shut off: turn knob to OFF, then close the supply valve at the shutoff if the heater will not be used for an extended period
One natural-gas-specific note: if the heater sits unused for a full season, have the supply connection and hose inspected by a qualified gas technician before first use. Natural-gas lines and fittings can develop slow leaks from corrosion or UV degradation over winter, and the stakes are higher than with a portable propane tank you can simply move away.
Ignition types explained: piezo, battery module, and manual match
Hampton Bay heaters have shipped with three different ignition systems over the years. Knowing which one you have determines exactly what you should and shouldn't do when it won't light.
| Ignition Type | How it works | Common Hampton Bay models | Fallback if it fails |
|---|---|---|---|
| Piezo push-button (no battery) | Mechanical striker generates a spark when the red button is pressed — no battery required | PH01-SS and many older freestanding models | Manual match or long-reach lighter through burner access gap |
| Battery-powered electronic module | A battery-fed ignition module fires a spark at the pilot; battery is housed in a compartment on the pole or base | HD22 family (HD22, HD22MB, HD22ST, HD22SG, HD22SS), NCZH-G-SS | Manual match or long-reach lighter; replace battery first |
| Manual match only (no igniter) | No built-in sparker; requires an external flame at the pilot point | Some older or budget models | Long fireplace match or long-reach lighter every time |
If you're unsure which type you have, look for a battery compartment somewhere on the pole. If there's a small plastic housing with a screw cap or slide door, you have a battery module. If there's a red rubber button on or near the control knob with no battery compartment, you have a piezo. If there's neither, it's manual match.
Pilot and push-button (piezo) models: exact sequence and tips
Piezo igniters are simple and reliable but have a couple of quirks worth knowing. The spark happens at the tip of the igniter electrode near the pilot orifice. If that electrode is dirty, bent, or the gap is too wide, you'll hear the click but get no usable spark at the gas stream.
- Set control knob to OFF and open the propane valve
- Push the knob firmly inward — you should feel it click in about 3–5 mm
- While holding it in, turn the knob to HI
- Press the red igniter button once per second. Watch the pilot area for a spark — you should see a small blue flash at the pilot orifice each time
- Keep pressing until the pilot catches (usually within 5–8 presses on a healthy unit)
- Once lit, keep the knob depressed for the full 30 seconds to heat the thermocouple; this is what allows the gas valve to stay open when you release the knob
- Release the knob slowly. If the flame dies immediately, the thermocouple needs more time or is failing
- Adjust to desired output
Piezo tips from experience
- If you hear clicking but see no spark, the electrode tip may be coated with corrosion or spider webs. Remove the emitter head access panel (usually three screws), locate the electrode, and clean the tip gently with a dry cloth or fine-grit sandpaper.
- Check the gap between the electrode tip and the pilot hood: it should be roughly 3–4 mm. A gap that's too wide or too narrow will produce a weak or absent spark.
- If the piezo button feels mushy or doesn't click at all, the striker mechanism inside the button housing has failed. These are replaceable as a unit — look up your model number with 'piezo igniter' for Hampton Bay-compatible parts.
- Cold weather below about 40°F can make propane vapor pressure low enough to slow ignition. Try cupping your hand briefly around the regulator to warm it, or bring the tank indoors for 30 minutes before use.
Electronic battery ignition module models: exact sequence and tips
The HD22 family and several other Hampton Bay models use a battery-powered spark module mounted on the pole. Home Depot product listings, including the Hampton Bay 38,200 BTU Heat‑Focusing Swivel Patio Heater (Home Depot product listing), list the factory-installed ignition as an "electronic instant ignition system" or "piezoelectric ignition". Hampton Bay's manual for these models is specific about the battery: install it before attempting ignition, use the correct size (check your model's manual, typically a single AA or D cell), and replace it for storage. A weak battery is by far the most common reason I see these heaters fail to ignite after sitting through winter.
- Locate the sparker battery compartment on the pole, usually about mid-height. Open it, check the battery is installed with correct polarity, and confirm it's not corroded or dead.
- Install a fresh battery if there's any doubt. Alkaline AA or D cells (per your model) are fine; avoid cheap carbon-zinc batteries in this application.
- Set the control knob to OFF and open the cylinder valve
- Push and hold the control dial firmly toward the 'Ignite' position (some models have a separate Ignite mark between OFF and LO)
- While holding the dial in, press the spark button. The HD22 manual specifies holding the dial pressed for at least 10 seconds and up to 20 seconds maximum during the ignition attempt.
- If the pilot lights, you'll see a small flame at the pilot tube. Continue holding the dial for at least 10 seconds after ignition to seat the thermocouple.
- Release the dial slowly. If the flame holds, turn to your desired output. If it drops out, the thermocouple wasn't hot enough — try again holding a full 20 seconds.
- If three attempts produce no spark at all, move to the manual match fallback below.
Manual match fallback (applies to all ignition types)
Hampton Bay manuals explicitly support manual lighting as a safe fallback when the sparker fails. Use a long fireplace match or a long-reach lighter, never a short match. Locate the access gap at the base of the burner emitter head (usually a small opening in the mesh or a hole in the lower part of the burner housing). Thread the lit match or lighter flame through that gap toward the pilot orifice. Turn the control dial to the Ignite position while holding it in, and hold it for the same 10–30 seconds as with the electronic method. If the flame doesn't catch within one attempt, withdraw the match, turn the knob to OFF, and wait 5 full minutes before trying again.
Battery module tips
- Always replace the battery at the start of each season, even if it tested 'good' last fall. A battery that sat in a cold outdoor compartment for 6 months often fails under load even if it reads 1.5V on a meter.
- If you're getting rapid-fire clicking (the module keeps sparking on its own even after the flame lights), that usually means the module's control board is faulty or the module is wet. Dry it out thoroughly before diagnosing further.
- Corrosion in the battery compartment from moisture intrusion is common on Hampton Bay pole-mounted modules. Clean the contacts with a cotton swab and a small amount of isopropyl alcohol, then apply a thin coat of dielectric grease to prevent recurrence.
- If the module clicks weakly or irregularly, the issue is almost always the battery or corroded contacts — not the module itself. Rule those out before ordering a replacement module.
Troubleshooting common startup failures
Most Hampton Bay ignition failures fall into a handful of categories. Here's how to diagnose them systematically rather than guessing.
| Symptom | Most likely cause | DIY fix | Call a tech if... |
|---|---|---|---|
| No spark at all when pressing igniter | Dead battery (battery module), failed piezo striker, disconnected igniter wire | Replace battery; inspect wire connection; replace piezo unit | Spark electrode is cracked or the module doesn't respond to a new battery |
| Spark fires but flame won't catch | No gas reaching pilot: tank empty, valve not open, clogged pilot orifice, air in line | Confirm tank has fuel and valve is open; purge air by holding knob 2 min; clean orifice with compressed air | Gas smell is strong but still no ignition (possible regulator failure) |
| Flame catches then dies immediately on release | Thermocouple not heating fully — released knob too soon, thermocouple dirty or failing | Hold knob in for a full 30 seconds after ignition; clean thermocouple tip with fine steel wool | Thermocouple replaced and flame still drops out within seconds |
| Heater lights then shuts off mid-use | Tilt switch triggered, wind extinguished pilot, thermocouple weakening | Level the heater; shelter from wind; test tilt switch by tilting deliberately to confirm it cuts gas | Tilt switch activates on a level surface (possible faulty switch) |
| Weak or yellow flame | Low gas pressure, clogged burner orifices, regulator issue | Check tank level; clean orifices with pipe cleaner or compressed air; confirm correct regulator is fitted | Replacing orifice or regulator does not restore flame quality |
| Constant clicking after flame lights | Ignition module stuck, wet module, faulty electronic board | Dry out battery compartment; check for moisture ingress; replace battery | Clicking persists with a new battery and dry compartment |
| Gas smell without flame | Leak at connection, over-pressurized regulator, stuck open valve | Close tank valve immediately, ventilate area, perform soap bubble test on all connections | Bubbles at connections that persist after tightening, or smell is strong indoors — leave the area and call your gas utility |
Cleaning the burner orifice and pilot assembly
Insects, spider webs, and mud daubers love patio heater burner tubes and pilot orifices. It's the most common maintenance issue I run into on heaters that sat through an off-season. With the gas supply closed and the heater cool, remove the emitter head to access the burner assembly. Use a heavy-duty pipe cleaner or a shot of compressed air (from a can of computer duster works fine) to clear the burner holes. Do not use a sharp metal probe in the pilot orifice, you'll enlarge it and permanently affect the flame. A wooden toothpick or a soft pipe cleaner is enough to dislodge most blockages.
Thermocouple replacement
If the heater consistently lights but dies within 5–10 seconds of releasing the knob, and you've confirmed you're holding the knob in for the full 30 seconds, the thermocouple is the most likely culprit. Thermocouples are inexpensive (usually under $15) and replaceable by a careful DIYer. Turn the gas supply off completely, let the heater cool, and follow your model's manual for thermocouple location. The thermocouple threads into the gas valve and clips into the pilot bracket. Unthread the old one, thread the new one finger-tight plus a quarter turn with a wrench, and clip the tip into the pilot flame position. Retest using the standard ignition sequence.
Regulator and low gas pressure
Hampton Bay propane heaters ship with a fixed-pressure regulator matched to the heater's burner orifice size. The manuals are explicit: do not substitute an adjustable regulator, even if it's rated for the right BTU range. An adjustable regulator set too low produces a weak, yellow flame. One set too high can produce an unsafe oversized flame. If your original regulator was lost or replaced, source a direct OEM replacement using your model number. If you suspect regulator failure (the gas flow sounds weak even with a full tank and open valve), the regulator is a replaceable assembly and not expensive. But if you're unsure, a gas technician can test delivery pressure in under 10 minutes.
Maintenance that prevents ignition problems
Hampton Bay recommends servicing their heaters annually or every 100 hours of use, and after any extended storage period. In practice, a 20-minute pre-season check covers most of what causes ignition failures.
- Replace the sparker battery at the start of every season, regardless of whether it seems fine
- Inspect the hose and regulator for cracks, UV damage, or kinks; replace the hose if it shows any deterioration
- Clean all burner holes and the pilot orifice with a pipe cleaner or compressed air
- Wipe the thermocouple tip with a dry cloth to remove carbon buildup
- Check the igniter electrode gap (should be 3–4 mm) and clean any corrosion from the tip
- Lubricate the control knob threads very lightly if it feels stiff — use a silicone-based lubricant only, never petroleum grease near gas fittings
- Store the heater with the regulator disconnected from the tank and the battery removed from the sparker module
- Cover the heater during storage to prevent insects from nesting in the burner tube
How Hampton Bay compares to Hiland and Fire Sense
Hampton Bay, Hiland, and Fire Sense are all freestanding propane mushroom heaters sold through big-box and online retailers, and they share a very similar basic design. The ignition sequence for a Hiland propane heater is almost identical to Hampton Bay's piezo models: push, hold, press igniter, hold 30 seconds. For step-by-step instructions specific to Hiland units, see how to start a Hiland patio heater. Fire Sense models vary a bit more, with some using a rotary control and others using a push-to-ignite button similar to Hampton Bay's HD22 family. For step-by-step instructions, see how to turn on Fire Sense patio heater. The core difference is parts availability: Hampton Bay parts are stocked at Home Depot, which makes replacement regulators, thermocouples, and igniter modules easier to source locally. Hiland parts tend to require ordering from the manufacturer or specialty suppliers, and Fire Sense parts can be harder to find for older models. If you're comparing brands for a new purchase with repairability in mind, Hampton Bay's Home Depot parts pipeline is a practical advantage.
When to call a technician instead of DIYing
Most Hampton Bay ignition problems are genuinely DIY-friendly: battery swaps, cleaning orifices, replacing a thermocouple, and testing the tilt switch are all reasonable tasks for a careful homeowner with basic tools. But there are situations where I'd put the tools down and call a qualified gas technician. If you have a persistent gas smell that doesn't resolve after closing the supply valve and tightening connections, don't try to diagnose it yourself, leave the area and call your gas utility or a technician. If your gas valve body or regulator is leaking (bubbles at the valve body itself, not just at the hose connections), the valve needs professional replacement. Any repair involving the internal gas passages of the valve body, the burner manifold, or the natural-gas supply line is outside reasonable DIY scope and is explicitly called out in Hampton Bay's own manuals as work for a qualified gas technician. Hampton Bay and Home Depot both provide customer service contacts in the manuals and on product pages for parts sourcing and service referrals.
Also worth knowing: Hampton Bay has issued product recalls in the past for outdoor gas products, including a 2018 recall on a specific fire pit table model due to a missing heat shield. The Consumer Product Safety Commission recorded a February 21, 2018 recall of the Hampton Bay Cross Ridge 50,000 BTU fire pit table (model G‑FTB51057B) sold at Home Depot due to a missing heat shield CPSC recall (Feb 21, 2018) of Hampton Bay Cross Ridge fire pit table, model G‑FTB51057B. If you own an older Hampton Bay heater and haven't checked the CPSC recall database recently, it's worth five minutes to search by model number before relying on it for a full season. A recalled appliance should be addressed before use regardless of whether it currently lights.
A note on safety standards and regulations
Propane-fueled heaters in the US are governed by NFPA 58 (LP-Gas Code) for cylinder handling and storage, and NFPA 54 (National Fuel Gas Code) for appliance installation and gas piping. Hampton Bay's manuals are designed to align with these standards, which is why their instructions match broad industry guidance. For natural-gas installations specifically, local building codes may require a permitted installation and inspection. If you're connecting a Hampton Bay heater to a permanent natural-gas line rather than a portable propane cylinder, check your local codes before proceeding.
FAQ
What are the quick, general steps to safely start a Hampton Bay propane patio heater?
1) Place heater on a hard, level surface outdoors and clear combustibles per the manual. 2) Confirm full assembly, hose/regulator installed and undamaged. 3) Close the cylinder valve, then connect the regulator to the tank and tighten per manual. 4) Perform a leak test with soapy water at regulator/tank and hose connections—bubbles = leak; if present, close valve, tighten and retest. 5) Open the tank valve slowly. 6) Set control knob to OFF, then push in and turn to IGNITE or HI. 7) Depress the knob and press the igniter (piezo/spark button) repeatedly until the burner lights; keep the knob depressed for the manufacturer-specified time (typically 10–30 seconds). 8) If sparker fails, follow manual’s safe manual-light procedure (long match/long-nose lighter), wait 5 minutes between attempts if unsuccessful.
How do I start a Hampton Bay heater with a push‑button piezo or battery sparker (typical propane models)?
Install the correct sparker battery if required. With the cylinder valve closed, connect the regulator, perform a leak test, then open the tank valve. Push in and turn the control knob to the IGNITE/HI position, hold it depressed, and press the spark/piezo button repeatedly until ignition. Keep the control depressed for the time specified in the manual (commonly 10–30 seconds). If it won’t light with the sparker, follow manual lighting instructions with a long match or lighter and follow the wait times between attempts.
What is the ignition sequence for Hampton Bay natural‑gas (hard‑piped) patio heaters?
For natural‑gas units with electronic or battery‑powered igniters, confirm gas supply to the appliance, ensure shutoff valves in the line are closed, then open the appliance manual instructions: turn the heater control to OFF, open the gas supply at the house valve, set control to IGNITE and press the sparker or follow the electronic module sequence. If equipped with an electronic module, follow the model-specific startup prompts. If the pilot will not light, follow the same safety wait times and troubleshooting steps as with propane models. For any in‑line piping work or gas valve replacement, use a qualified gas technician (NFPA 54 guidance).
What pre‑start safety and assembly checks should I perform every time?
- Confirm outdoor use only and maintain manufacturer clearances. - Verify heater is fully assembled, stable, and on a level surface. - Inspect hose, regulator, fittings and burner for damage, debris, or insect nests. - Ensure supplied regulator is used (do not substitute adjustable regulators). - Perform a soap‑water leak test at all connections before opening the tank. - Check sparker battery (if applicable). - Ensure tilt/anti‑tip switch is functional and unit is upright. - If unit was disassembled or cylinder changed, purge air per manual (some models ask you to hold the control depressed longer on first start).
How do I do a proper leak test on a propane Hampton Bay heater?
With the cylinder valve closed and regulator attached, apply a soapy‑water solution to the regulator/cylinder connection and hose fittings. Open the tank valve slowly. Look for continuous bubbling—if you see bubbles, close the tank valve, tighten fittings, and retest. If leaks persist, turn off the cylinder, do not use the heater, and contact customer service or a qualified technician.
What are the most common ignition problems and quick diagnostic checks?
Common issues: no spark, constant clicking, won’t stay lit, weak flame, or frequent shutoffs. Quick checks: - No spark: verify sparker battery, clean spark electrode, check wiring to igniter module. - Constant clicking: moisture or debris on igniter, or a stuck ignition switch; dry/clean igniter area and replace battery. - Won’t stay lit/weak flame: check gas supply and tank pressure, regulator function, clogged burner ports, or faulty thermocouple/pilot. - Frequent shutdowns: verify tilt switch position and ensure unit is level; check for flame‑failure device faults. - Low flame: ensure tank isn’t nearly empty and hose/regulator aren’t kinked.