
The Mainstays 7-foot propane patio heater (model MS44-305-004-01, also sold under stock number GAD1450W) is a 48,000 BTU freestanding tower heater that comes flat-packed and needs full assembly before it will run. The official manual from Blue Rhino covers every step, but it is dense and easy to misread on the gas-connection and leak-test sections, which are the two places where mistakes actually matter. This guide walks through the whole process in order: safety rules, parts check, assembly, gas hookup, leak test, first light, and what to do when something goes wrong.
Mainstays 7 Foot Patio Heater Instructions: DIY Guide - Safety & Troubleshooting

Grant Mercer
24 Jul 2026
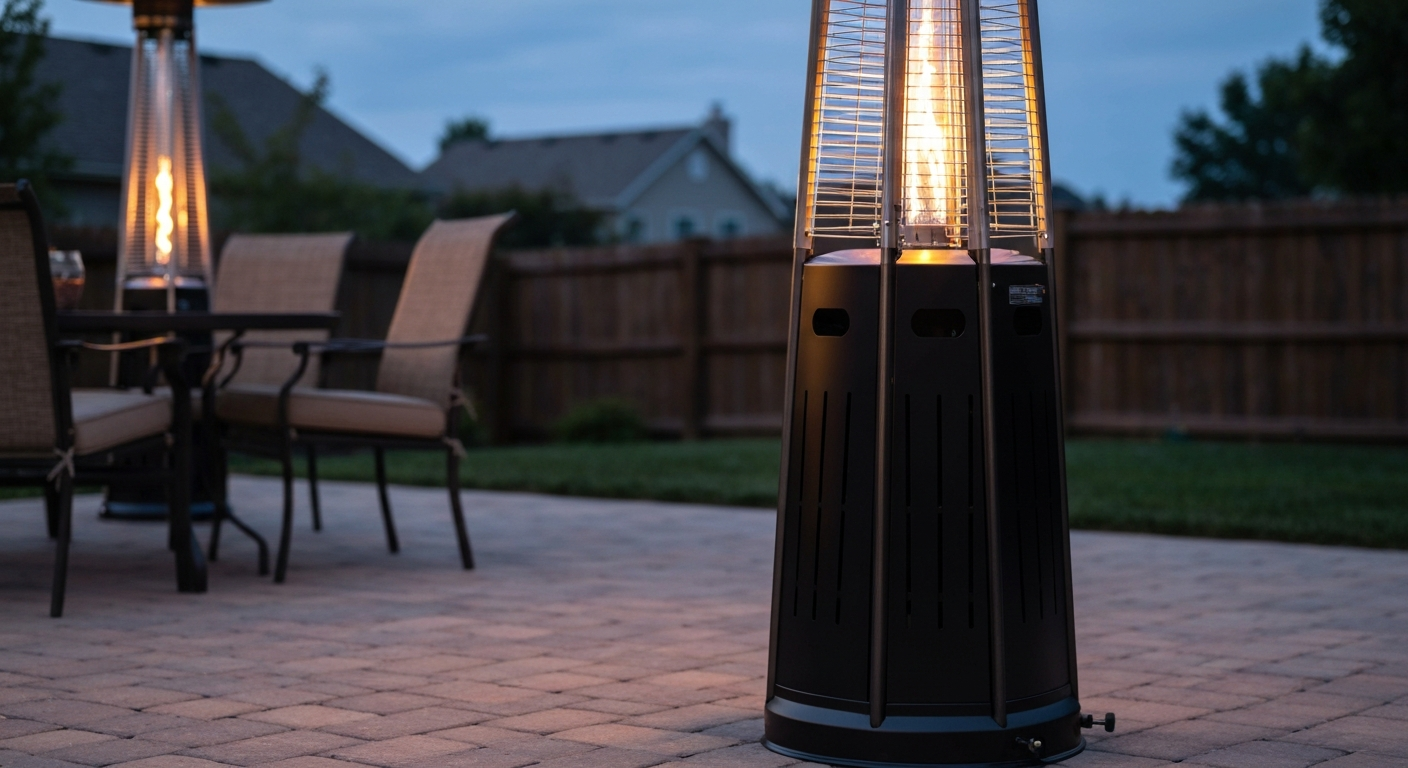
Safety warnings you need to read before you touch anything
Propane is heavier than air, meaning a small leak pools at ground level and can ignite without warning. Before you unbox a single part, read these points carefully. They are not generic boilerplate: several of them come directly from the MS44-305-004-01 manual and from NFPA 58 (the LP-gas code) referenced in that manual.
- Outdoor use only, always. Carbon monoxide from an LP-gas flame in an enclosed or semi-enclosed space is lethal. Patios with solid roofs and three or more walls are not safe locations for this heater.
- Ten-foot minimum clearance. The manual explicitly prohibits operating or lighting the heater within ten feet (3.05 m) of walls, structures, overhangs, or combustible materials.
- No open-flame leak tests. Never use a match, lighter, or any flame to check for a gas leak. Soapy water only.
- LP gas only. This unit is NOT compatible with natural gas. Using natural gas on an LP regulator will cause a dangerous overpressure condition.
- Emergency shutoff: close the cylinder valve first, not the control knob. Turning the valve on the tank off cuts gas at the source. Know where it is before you open the tank for the first time.
- PPE for assembly: safety glasses when tightening connections and snugging fasteners; cut-resistant gloves when handling sheet-metal reflector edges.
- Keep a fire extinguisher rated for Class B fires (flammable gases and liquids) within reach any time you are working with propane.
- If you smell gas at any point: stop, close the cylinder valve, move everyone away, and do not operate any electrical switches. Call your LP supplier or emergency services before returning.
The MS44-305-004-01 manual also references ANSI Z223.1/NFPA 54 (National Fuel Gas Code) and CSA B149.1/B149.2 as the installation code baselines. If you are in the U.S., your local authority having jurisdiction may have adopted one or both. For a backyard patio heater this rarely involves a permit, but it is worth knowing the standard your heater was designed to.
Find your model number and get the factory manual
Before you order a part or follow anyone's assembly diagram, confirm you have the right manual for your specific unit. For a similar walkthrough, see how to assemble Hampton Bay patio heater (step-by-step guidance for comparable tower-style units). Mainstays patio heaters are manufactured through Blue Rhino and have been sold under several model numbers across different Walmart seasons. The 7-foot, 48,000 BTU black model currently in circulation is MS44-305-004-01 (stock number GAD1450W). The Walmart item number is 3233451676. You will find the model and serial number on a label on the lower pole section or on the base frame, usually stamped on a silver or white sticker. Write both down before you start.
To download the factory PDF, search for 'MS44-305-004-01 manual' or 'GAD1450W owner manual' on ManualMachine or ManualsLib. The official 20-page document from Blue Rhino is free to view and download. Alternatively, parts.BlueRhino.com has a model-lookup tool that connects you to the correct manual and parts list simultaneously. If your model number differs from the one above (some seasons used slightly different suffixes), match the stock number and BTU rating before proceeding with any steps here.
Verified parts inventory: check the box before assembly
Open the box on a clean, flat surface and lay every part out before you begin. Missing a single fastener bag now is much less frustrating than discovering a missing nut when you are halfway through assembly. The MS44-305-004-01 exploded parts diagram lists the following components. Part IDs in parentheses are the internal Blue Rhino numbers used when ordering replacements.
- Base frame with integrated cylinder cabinet (double-door access panel, pre-assembled)
- Lower pole section
- Upper pole section
- Emitter screen / heat emitter assembly
- Reflector / top cap assembly
- Burner head assembly (includes pilot housing, part 58-23-224)
- Burner (part 58-23-223)
- Lava rock bag (part 58-23-220)
- Regulator and hose assembly (part 58-23-226)
- Control knob / valve assembly (pre-installed on upper pole in most shipments)
- Piezo igniter wire and igniter button
- Thermocouple assembly (pre-routed with burner head in most units)
- Anti-tilt / dump switch assembly
- Hardware bag: typically contains M6 and M8 bolts, flat washers, lock washers, and hex nuts for pole and emitter connections
- Instruction sheet / quick-start card (separate from the full manual)
If any of these parts are missing or visibly damaged, do not attempt assembly. Contact Blue Rhino customer service or Walmart before proceeding. Using a damaged regulator hose, for example, is not a minor shortcut: it is a gas leak waiting to happen.
Tools and materials you will need
- Adjustable wrench or combination wrenches (10 mm and 13 mm cover most fasteners on this heater)
- Phillips-head screwdriver (#2)
- Flat-head screwdriver (#2, for panel clips on some base variants)
- AA batteries (2x) for the Piezo igniter if the unit uses a battery-assisted igniter variant; check your specific unit
- Dish soap and water in a spray bottle or small bowl (leak test)
- Pipe-thread sealant tape (PTFE / yellow gas-rated tape) — have it on hand, though the regulator connection on this unit is a hand-tight ACME fitting that does NOT use thread tape; the tape is useful if you ever replace a threaded fitting elsewhere
- Torque wrench or beam-type torque adapter (optional but helpful for snugging pole bolts to consistent tension without over-tightening aluminum threads)
- Permanent marker or masking tape (for labeling parts if you separate them before assembly)
- Safety glasses and cut-resistant gloves
Site decisions and prep before you build
Where you place this heater matters more than most people realize. The assembled unit stands 86.6 inches tall (just under 7 feet 3 inches) with a footprint of 31.5 x 31.5 inches. The reflector at the top extends the thermal radius significantly, so you need at minimum ten feet of clearance to any wall, overhang, or fabric overhead. That rules out most pergolas with fabric roofs and any placement under a low eave.
Place the heater on a level, non-combustible surface: concrete, pavers, or tile. If you are placing it on a wood deck, use a heater mat rated for LP-gas appliances underneath. An unlevel surface is also a tilt-switch issue waiting to happen: the anti-tilt safety is designed to trip if the heater tips past a certain angle, and it will nuisance-trip repeatedly if the surface is uneven. Check level before you anchor.
The base cabinet accepts a standard 20-lb LP cylinder (also called a BBQ grill tank). The manual specifies a precision-filled standard LP grill gas tank with an Acme Type 1 external threaded valve (the same valve on any standard grill cylinder). See POL / Acme (Type 1) Valve and Fitting Reference, McMaster-Carr (propane fitting overview/specs) for a concise comparison of Type‑1 (ACME/QCC) external nuts used on modern 20‑lb grill cylinders and older internal POL fittings that require a wrench POL / Acme (Type 1) Valve and Fitting Reference — McMaster-Carr (propane fitting overview/specs). Do not use a 1-lb camping canister, a 100-lb cylinder, or a POL-valve tank without an adapter. Store the spare cylinder outside, upright, away from the heater and any ignition sources. If you live somewhere with sustained summer temperatures above 120°F (49°C), do not store a full cylinder in a black-painted cabinet in direct sun for extended periods: LP pressure rises with temperature.
Step-by-step assembly
Work through these steps in order. Do not connect the propane cylinder until Step 9. The steps below correspond to the numbered assembly sequence in the MS44-305-004-01 manual, expanded here with the detail the quick-start card omits. If you have the manual PDF open alongside this guide, use the exploded diagram on the parts page as your visual reference. For an illustrated companion, see pyramid patio heater assembly instructions. For an alternate step-by-step walkthrough, see pamapic patio heater assembly instructions.
Assembling the base, poles, and burner head
- Step 1 — Prepare the base: Set the base frame on your chosen surface with the double-door cabinet facing the direction you want access from. Confirm the base is level in both directions using a spirit level. The four base legs should all contact the ground; if one lifts, shim the low leg with a non-combustible pad before continuing.
- Step 2 — Attach the lower pole to the base: Slide the lower pole section into the base pole receiver. Align the bolt holes. Insert the provided M8 bolts with flat washers, add lock washers, and thread on the hex nuts finger-tight first. Once all bolts are engaged, tighten evenly in a cross pattern to approximately 15-18 ft-lb (snug plus a quarter-turn beyond hand-tight). Do not over-torque aluminum-threaded receivers.
- Step 3 — Route the thermocouple and igniter wires: Before attaching the upper pole, feed the thermocouple wire and Piezo igniter wire down through the lower pole interior. The wires need to reach the control valve area at the bottom. Leave enough slack at the top end to connect to the burner head later. This step is easier before the upper pole is installed.
- Step 4 — Attach the upper pole to the lower pole: Slide the upper pole onto the lower pole's collar or coupler fitting. Align bolt holes as in Step 2 and tighten with the same M8 hardware and torque approach. Give the joined pole assembly a firm lateral push to confirm it does not rock before proceeding.
- Step 5 — Install the control valve and knob assembly: If your unit shipped with the valve assembly separate (some do, some arrive pre-installed), thread it into the upper pole housing. The valve outlet faces upward toward the burner. Connect the thermocouple and igniter wires to their respective terminals at the valve body. Thermocouple wire uses a push-in or compression fitting; the igniter wire uses a spade clip. Refer to the wiring diagram in the manual if uncertain.
- Step 6 — Attach the burner head assembly: Lift the burner head onto the top of the upper pole. There are typically two to four bolts or a threaded collar that locks the burner head in place. Tighten per the manual diagram. At this point connect the pilot housing (58-23-224) to the burner if it was shipped separately.
- Step 7 — Install the burner and lava rock: Place the burner ring (58-23-223) into the burner head housing. Add the lava rock (58-23-220) evenly around the burner ring according to the manual diagram. Do not pack lava rock tightly; airflow through the rock is part of the combustion design.
- Step 8 — Attach the emitter screen and reflector: Slide the emitter screen over the burner head assembly and secure with the provided fasteners. Then attach the reflector/top cap: align the three or four mounting tabs, insert bolts, and tighten. The reflector edge is stamped metal and can be sharp — keep your gloves on. A correctly fitted reflector should not wobble or rotate once tightened.
Installing the propane cylinder and connecting the regulator
- Step 9 — Place the cylinder in the cabinet: Open the double doors on the base. Lift a filled 20-lb cylinder (full weight is approximately 37-40 lb) and set it upright inside the cabinet. The valve should point upward and be accessible. Close the cabinet doors; they are designed to latch around the cylinder.
- Step 10 — Connect the regulator hose assembly (58-23-226): The regulator uses an Acme Type 1 (QCC) hand-tight nut. Thread the nut onto the cylinder valve clockwise (this is a standard right-hand thread, unlike older POL valves). Hand-tighten firmly — no wrench needed on the ACME nut itself, as over-tightening damages the rubber seat inside. Route the regulator hose through the base cabinet opening toward the pole. The hose connects to the gas inlet at the bottom of the lower pole or valve assembly; this end typically uses a threaded male fitting that goes into a female brass fitting on the heater. Use a wrench (10 mm or adjustable) to snug this connection — no thread tape on this joint if the factory fitting has a factory-applied sealant or O-ring seat, but confirm by checking the manual diagram for your specific unit.
- Step 11 — Check hose routing: The regulator hose must not be kinked, pinched in the cabinet door, or routed across any hot surface. The minimum bend radius for LP hose is roughly 3 inches. If the hose is too short to route cleanly, do not stretch it: contact Blue Rhino for a replacement hose assembly before operating the heater.
Gas connection and leak test: do this every time you connect a new cylinder
The MS44-305-004-01 manual instructs you to perform a leak test before each use and especially after any gas connection is made. This is not optional. Here is the full procedure, matching the manual's instructions and consistent with Propane Education and Research Council (PERC) guidance.
- Mix a solution of dish soap and water (roughly 1 part soap to 4 parts water) in a small bowl or spray bottle. A thick, bubbly solution works better than thin water.
- Confirm the heater control knob is in the OFF position before you open the cylinder valve.
- Open the cylinder valve slowly — no more than one full turn counterclockwise. Do not open it all the way immediately.
- Apply the soapy solution generously to: the regulator-to-cylinder connection (ACME nut), the regulator hose along its full length (especially near the ends), and the hose-to-heater fitting at the base.
- Watch each application point for 30 seconds. Growing bubbles indicate a leak. Static foam that does not grow is just soap residue.
- If you see bubbles: close the cylinder valve immediately, disconnect the regulator, inspect the connection for cross-threading, debris in the valve seat, or a damaged O-ring, then reconnect and retest. If bubbles persist after a second attempt, take the cylinder to your LP supplier for valve inspection. Do not use the heater.
- If no bubbles appear at any connection after 60 seconds with the valve open, the connections are tight. You can proceed to the first lighting.
- NEVER use an open flame — match, lighter, or torch — to test for a gas leak. This is a fire and explosion hazard.
Note on pressure: the regulator on this heater is a factory-set low-pressure unit delivering approximately 11 inches of water column (about 0.4 psi) at its outlet, the standard for portable LP appliances like grills and patio heaters. You do not need to adjust or verify outlet pressure as part of normal assembly; the regulator is not field-adjustable. If you suspect the regulator is delivering incorrect pressure (pilot flames too large or too small with a confirmed full cylinder), replace the regulator/hose assembly (part 58-23-226) rather than attempting to modify it.
First-time lighting: the correct sequence
The ignition procedure for the MS44-305-004-01 is specific about timing, and skipping the 20-second hold is the single most common reason people report the heater 'not staying lit' on the first try. Here is exactly what the manual says to do.
- Open the cylinder valve fully (counterclockwise until it stops).
- Push the control knob in and rotate it counterclockwise to the ignition/pilot symbol position. Keep the knob pushed in — this holds the gas valve open manually and bypasses the thermocouple safety circuit.
- Press the Piezo igniter button repeatedly (one press per second) until the pilot flame lights. You should see a small blue flame at the pilot tip.
- Once the pilot is lit, continue holding the control knob pushed IN for a full 20 seconds. This is not a suggestion: the thermocouple needs 15-20 seconds of direct pilot flame contact to generate enough millivolt output to hold the gas valve open on its own.
- After 20 seconds, slowly release the control knob. If the pilot stays lit, rotate the knob further counterclockwise to your desired heat setting. The main burner should ignite from the pilot flame.
- If the pilot goes out when you release the knob, turn the knob to OFF, wait 5 minutes for any residual gas to dissipate, then repeat from step 1. Do not attempt to re-light immediately after a failed attempt.
- To shut down: rotate the control knob to OFF, then close the cylinder valve. Closing the cylinder valve after the knob is off is good practice; it ensures no gas remains in the hose under pressure when the heater is not in use.
Troubleshooting common problems
Most failures on this heater fall into three categories: it will not ignite at all, it lights but goes out when you release the knob, or it trips and shuts off during normal use. Here is how to diagnose and fix each one.
Heater will not ignite (no click, no pilot flame)
Start with the obvious: is the cylinder valve open? Is there gas in the cylinder (lift it, a full 20-lb cylinder weighs about 37-40 lb; an empty one is about 17 lb)? If gas supply is confirmed, check the Piezo igniter. Press the igniter button and look for a spark at the pilot tip. If there is no spark, inspect the igniter electrode wire for damage, corrosion at the tip, or a disconnected spade terminal at the valve body. A gap of roughly 3-4 mm between the electrode tip and the pilot hood is normal; wider than 5 mm and the spark will not reliably jump. Bend the electrode carefully to correct the gap. If the spark is present but the pilot does not light, the pilot orifice may be clogged: remove the pilot housing and clear the orifice with a fine wire or compressed air (never enlarge the orifice with a drill bit).
Pilot lights but goes out when you release the knob
This is almost always the thermocouple. When the thermocouple is working correctly, the pilot flame heats its tip and generates 20-30 mV DC, which signals the gas valve to stay open. If the thermocouple is faulty, oxidized at the tip, or positioned so the pilot flame misses it, it will not produce enough voltage and the valve closes when you release the knob.
To test it: close the gas supply, disconnect the thermocouple wire from the valve body, set a multimeter to DC millivolts, and clamp the leads to the thermocouple terminals. Reopen gas, light the pilot manually (using a long lighter at the pilot tip), hold the control knob in, and read the multimeter. A healthy thermocouple should read 20 mV or higher after 30 seconds of flame contact. Below 10-15 mV consistently indicates a failing thermocouple that should be replaced. Replacement thermocouples compatible with M8-threaded pilot assemblies (a common format for tower patio heaters) are available from Walmart and third-party vendors; use the part number from the manual (or Blue Rhino's parts site) for an exact fit.
Heater shuts off during operation (tilt switch issues)
The anti-tilt (dump) switch is a mechanical safety that interrupts the thermocouple circuit if the heater leans past its safe angle. It is a feature, not a bug, but it can nuisance-trip on uneven surfaces or if the switch itself has failed. First, check that the heater is sitting on a level surface; even a 3-5 degree lean on a sloped patio is enough to trip some switches. If the surface is level and the heater still shuts off, the tilt switch may have failed in the open position (always tripped). Aftermarket replacements are sold as FD4-style or T125-style tilt switches and are widely available. Testing continuity through the switch with a multimeter (resistance should be near zero when the heater is level, open circuit when tilted) confirms whether the switch is at fault before you order a part.
Flame is too low or too yellow
A pale yellow or orange flame instead of a mostly blue flame usually indicates incomplete combustion from a clogged or partially obstructed burner. Remove the lava rock and inspect the burner ring orifice for spider webs (a very common issue if the heater has been stored) or debris. Clear with compressed air. Check that the lava rock is distributed evenly, packed lava rock restricts airflow and causes yellowing. A consistently low flame with a full cylinder and confirmed regulator connection usually points to a regulator that has gone into 'bypass mode,' a safety lockout that some regulators trigger if gas flow is too rapid on initial opening. Close everything, wait two minutes, and reopen the cylinder valve slowly (one-quarter turn, then gradually open fully). This often resets the regulator.
Symptom and fix reference
| Symptom | Most Likely Cause | DIY Fix |
|---|---|---|
| No spark from igniter | Electrode gap too wide or wire disconnected | Adjust gap to ~3-4 mm; reconnect spade terminal |
| Spark present, no pilot flame | Clogged pilot orifice or no gas supply | Clear orifice with fine wire; confirm cylinder open and filled |
| Pilot lights, goes out on release | Thermocouple weak or mis-positioned | Test with multimeter (target 20+ mV); replace if below threshold |
| Heater shuts off during use | Tilt switch tripping or failed open | Level the surface; test switch continuity; replace FD4-style switch if open on level surface |
| Low or yellow flame | Clogged burner orifice or regulator bypass mode | Clear burner; slow-open cylinder valve to reset regulator |
| Smell of gas, no visible leak at connections | Damaged regulator hose | Inspect full hose length; replace hose assembly (58-23-226) |
| Main burner won't light from pilot | Pilot flame too small to reach main orifice | Check gas supply; clean pilot orifice; verify lava rock placement |
Routine maintenance to keep it running year after year
This heater does not need much maintenance, but what it does need is specific. At the start of each season, before you light it for the first time, run through this checklist.
- Inspect the regulator hose for cracks, brittleness, or surface damage along the full length. LP hose degrades in UV over several years; replace if you see cracking in the outer jacket.
- Check all pole bolts and reflector fasteners for looseness. Vibration and thermal cycling loosen hardware over a season.
- Clear the burner orifice and pilot orifice with compressed air. Spiders build webs in burner orifices over winter storage and are a leading cause of no-ignition failures in spring.
- Inspect the lava rock: replace any pieces that have cracked into fine dust, as dust restricts airflow. Blue Rhino replacement lava rock (part 58-23-220) is available through parts.BlueRhino.com.
- Wipe the emitter screen and reflector with a damp cloth to remove grease and carbon buildup.
- Test the tilt switch by gently tipping the heater slightly with gas off and confirming the switch clicks; return to level and confirm continuity is restored.
- Confirm the cylinder valve O-ring is intact before reconnecting at the start of the season.
Where to get replacement parts
The MS44-305-004-01 manual specifically directs you to parts.BlueRhino.com for replacement parts, or to call Blue Rhino customer service. Using the internal part numbers from the manual (like 58-23-226 for the regulator/hose or 58-23-223 for the burner) makes ordering fast and eliminates guesswork about compatibility. Walmart also carries some patio heater replacement parts, including thermocouple and tilt-switch combination kits that are compatible with tower heaters. For the tilt switch specifically, aftermarket FD4-style or T125-style tilt switches are widely available from hardware retailers and online vendors and generally fit this class of heater, but confirm the mounting thread and wire-connector type match your unit before ordering.
Warranty and when to call a professional
Mainstays patio heaters sold at Walmart typically carry a limited manufacturer warranty; check your receipt and the manual for the exact duration and terms, as these vary by model year. DIY repair of consumable parts (thermocouple, tilt switch, lava rock, igniter electrode) generally does not void the warranty on a gas appliance the way it might on electronics, but modifying the regulator, drilling out orifices, or replacing the gas valve with a non-approved part does. If you are ever unsure, contact Blue Rhino before disassembling anything.
There are a few situations where you should stop and call a certified LP-gas technician rather than proceeding with DIY repair: a gas leak that persists after re-seating all connections, any visible damage to the brass gas valve body, a regulator that cannot be reset from bypass mode after multiple attempts, or a burner head that shows signs of overheating damage (warped metal, discolored brass fittings). These are not common failures, but they are the ones where the cost of a service call is worth every dollar.
How this heater compares to similar assembly-required models
If you have previously assembled a Hampton Bay, East Oak, or Foowin patio heater, you will find the Mainstays MS44-305-004-01 follows a very similar pole-and-base construction sequence. The main differences are in the reflector attachment method and the regulator fitting style. The East Oak and Foowin models, for example, use slightly different emitter screen designs that affect how the lava rock is distributed. For brand-specific steps, see the Foowin patio heater assembly instructions for the correct reflector and emitter-screen attachment details. If you are working through assembly instructions for any of these brands alongside this guide, the safety and gas-connection principles are identical: outdoor only, ten-foot clearances, LP gas only, soapy-water leak test every time. The troubleshooting logic for pilot and thermocouple failures applies across virtually all standing-pilot tower heaters regardless of brand.
FAQ
What official product and manual sources should I cite to ensure accuracy for the Mainstays 7‑ft (48,000 BTU) propane patio heater article?
Use the retailer product page (Walmart SKU 3233451676) for retail specs and images, and the official owner’s/assembly manual for Mainstays model MS44‑305‑004‑01 (GAD1450W) for safety warnings, assembly steps, exploded parts list and manufacturer procedures. Cite the manual for all quoted safety clearances, lighting sequences, leak‑test steps, parts IDs, regulator/hose descriptions and warranty/parts contact instructions.
Which safety standards and codes must the article reference and follow?
Reference the codes named in the Mainstays manual: NFPA 54 / ANSI Z223.1 (National Fuel Gas Code) and CSA B149.1/B149.2 where applicable. Also cite NFPA 58 (LP‑Gas Code) for cylinder handling. For consumer guidance about leak testing and propane safety, cite the Propane Education & Research Council (PERC). Use these standards for clearance, ventilation, cylinder handling and mandatory outdoor‑use warnings.
What specific technical details and performance specs should be included and verified?
Include the rated output (48,000 BTU), assembled dimensions (~31.5"L x 31.5"W x 86.6"H), approximate weight (~32.67 lb), CSA approval and listed safety features (Piezo ignition, thermocouple, anti‑tilt/tilt switch, double‑door 20‑lb tank access). Verify regulator type (Type‑1/ACME 20‑lb tank connection) and typical regulator outlet pressure (≈11" W.C.) from the manual and regulator spec sheets.
What parts inventory and part numbers must be verified and shown to support DIY repair and replacement?
Use the exploded parts list inside MS44‑305‑004‑01 to present a verified parts inventory and part IDs (examples from the manual: Lava Rock 58‑23‑220; Burner 58‑23‑223; Pilot Housing 58‑23‑224; Regulator/Hose Assembly 58‑23‑226). Cross‑reference the manual’s replacement‑parts instructions (parts.BlueRhino.com or Blue Rhino customer service) and list common replacement assemblies: thermocouple, pilot assembly, regulator/pigtail, tilt/dump switch, burner, lava rock/guard.
What diagnostic/measurement specifications are needed for thermocouple and pilot testing?
State the proper thermocouple test procedure: isolate gas, light pilot, heat the thermocouple with the pilot flame, measure DC millivolts with a multimeter on the thermocouple leads. Cite typical acceptable ranges used in appliance guidance (roughly 20–30 mV as a diagnostic benchmark) but note the exact manufacturer threshold isn’t published in the manual — recommend replacing if below typical millivolt ranges or if flame does not reliably hold when knob released. Link to a general thermocouple test guide for measurement steps.
Which leak‑test procedure must be shown and how should it be described?
Follow the MS44‑305‑004‑01 and PERC guidance: perform a bubble test before each use by applying leak‑detection fluid or a mixture of thick soapy water to the regulator, hose, tank valve and connections; slowly open the cylinder valve and watch for steady bubbles; do not use an open flame. If bubbles appear, tighten connections and retest; if you cannot stop the leak, close the cylinder valve, disconnect and call qualified service. Explicitly prohibit flame checks.