Most patio heater problems fall into three categories: it won't ignite at all, it lights but goes out the moment you release the control knob, or it runs for a bit then shuts off. For example, the Revoace owner’s manual troubleshooting table notes ignition no-start causes such as an LP gas tank that is low or empty and ignition problems like a bad igniter, cracked or broken electrode, wet electrodes or burners, and wiring or connection issues blank" rel="noopener noreferrer">it won't ignite at all. If you’ve already confirmed the ignition side is working, jump to the lights then won't stay lit section for the common causes of a patio heater will not stay lit patio heater problems. Each of those symptoms points to a different part, and once you know which one you're dealing with, the fix is usually straightforward with basic tools. If you keep running into patio heater problems, the fastest way to narrow it down is to identify which category you see first, because each one points to a different component. This guide walks you through each repair path so you can get your heater running today instead of ordering a replacement.
Patio Heater Fix: Troubleshoot and Repair Common Faults

Quick safety steps before you touch anything
Before you loosen a single fitting or remove a panel, do these things in order. Skip them and you're troubleshooting with live gas, which is how accidents happen.
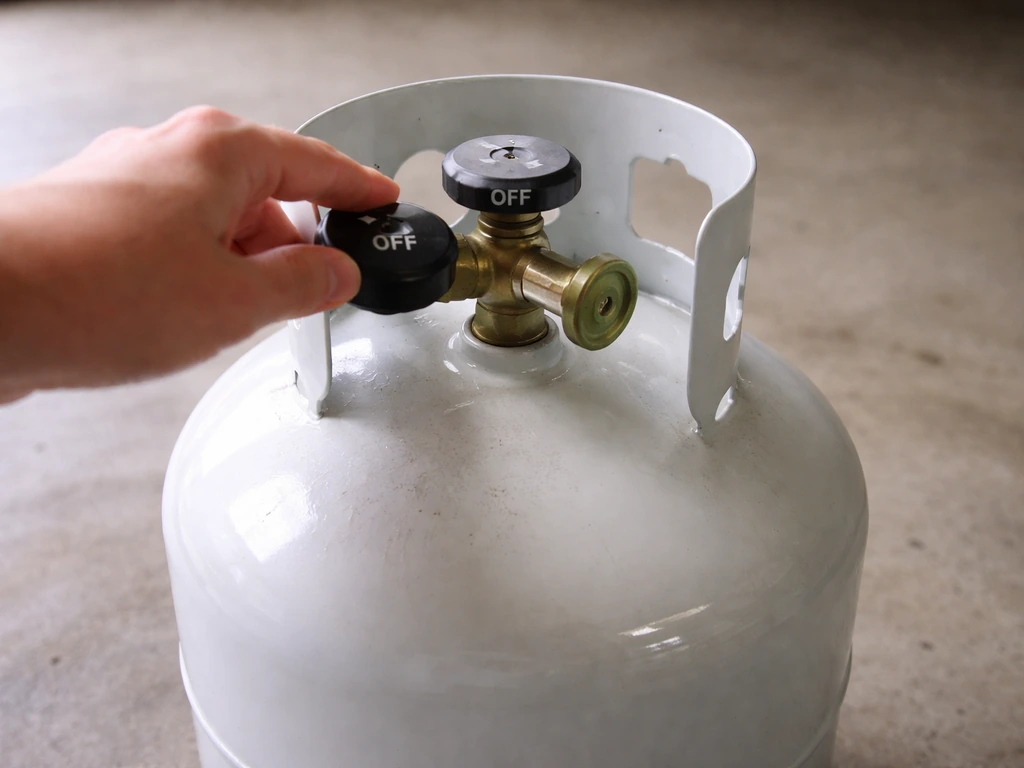
- Turn the control knob to the OFF position.
- Close the cylinder valve (or the main gas supply valve if you're on natural gas) all the way clockwise.
- Move the heater to a well-ventilated area away from ignition sources, including other appliances with pilot lights.
- Wait at least five minutes before opening any gas connections so residual pressure can clear.
- Never use an open flame to check for gas leaks. Mix a few drops of dish detergent with water, brush it onto every connection you've touched, and watch for bubbles. Bubbles mean a leak. Tighten the fitting, recheck, and don't proceed until the bubbling stops.
- Never bypass or jumper a safety component just to get the heater running. The tilt switch and thermocouple exist because gas is involved.
If you smell gas strongly and it doesn't clear after shutting off the supply and ventilating, stop. Leave the area, don't operate any switches, and call your gas company. That situation is past DIY territory.
Figure out what type of heater you have and what it's actually doing
Almost every residential patio heater is either a propane (LP) mushroom-style tower, a tabletop propane unit, or a natural gas unit hardwired to a fixed supply line. The internal components are largely the same across all three: a gas control valve, a thermocouple or thermopile, a piezo or electronic igniter, and one or more safety cutoffs. Knowing your type matters when you order replacement parts, but the diagnostic steps below apply broadly.
Before diving into repairs, pin down the exact symptom. This is your decision tree for the rest of the guide.
| What you're seeing | Most likely cause | Jump to section |
|---|---|---|
| Clicks but no flame at all | Igniter gap, dirty electrode, empty tank, or clogged pilot tube | Ignition problems |
| Lights, then goes out when you release knob | Thermocouple not heating fast enough, or flame not reaching it | Thermocouple section |
| Lights, holds for a few seconds, then cuts out | Tilt switch triggered, or thermocouple failing under load | Tilt switch and thermocouple sections |
| No click, no flame, nothing | Dead piezo igniter or electronic ignition module | Ignition problems |
| Flame is very low or yellow/orange instead of blue | Low gas pressure, clogged orifice, or regulator issue | Ignition and gas flow section |
Ignition problems: the igniter, electrodes, and gas flow
If your heater clicks but nothing ignites, or if there's no click at all, work through these checks in order. This is the most common repair path and usually doesn't require any new parts.
Check the basics first
- Is the propane tank actually open? It sounds obvious, but the valve gets turned off and forgotten. Open it fully counterclockwise.
- Is there fuel in the tank? Shake it or use a gauge. A nearly empty tank may produce just enough pressure for a weak flame that immediately dies.
- Is the regulator seated properly? Disconnect and reconnect it. Some regulators go into a lock-out mode if the valve was opened too fast. Close the tank valve, disconnect the regulator, wait 30 seconds, reconnect, then slowly open the tank valve.
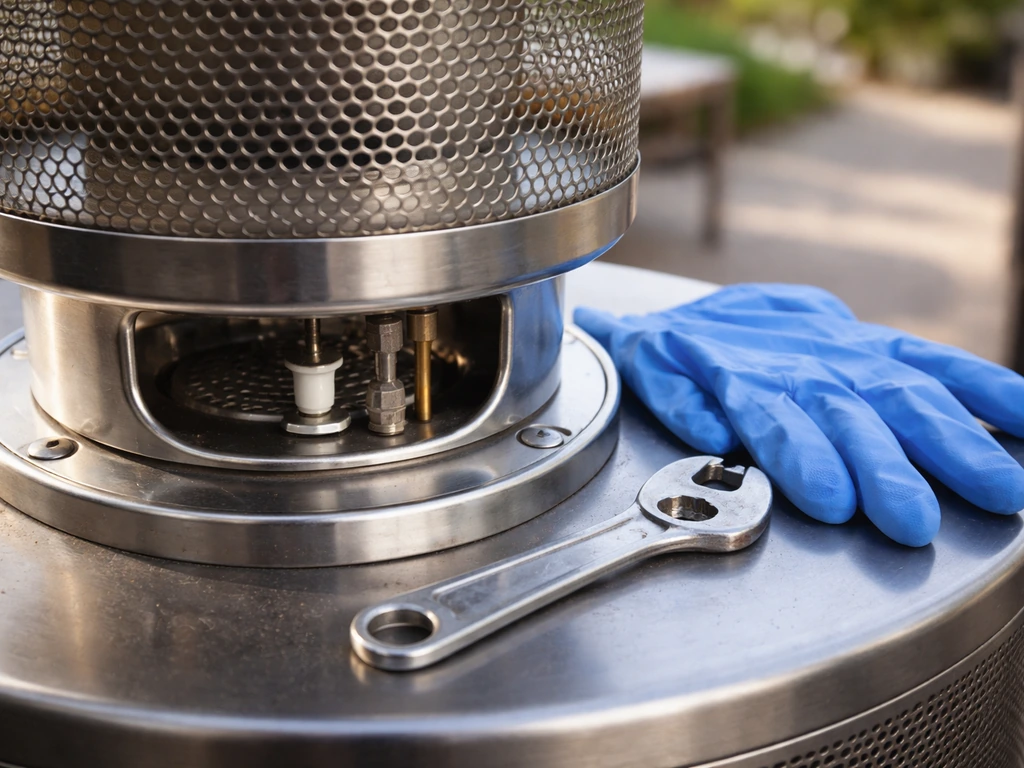
Inspect and clean the electrode and igniter

Remove the emitter screen (usually three screws at the top of the heater head) to access the burner area. Look at the igniter electrode tip. It should be clean, dry, and positioned near the pilot tube opening. A correct electrode gap is between 3/32 inch and 1/8 inch (roughly 2.5 to 3 mm) from the ceramic surface or pilot tube. If there's carbon buildup on the tip, clean it gently with fine sandpaper or a dry toothbrush. Do not use water or a damp cloth on the electrode assembly as moisture can cause shorts and prevent sparking.
If the gap is off, carefully bend the electrode bracket until the tip sits within spec. Too close and it won't spark cleanly; too far and the spark won't jump to the gas stream. After adjusting, press the igniter button and check for a visible blue spark. No spark at all means the piezo igniter itself is dead. Replacement piezo igniters are inexpensive (usually under $15) and available by heater model. If you have an electronic ignition model, check that the ignition module wiring is intact and that the module is getting power.
Check for blockages in the pilot tube and orifice
Spider webs and debris in the pilot tube or main orifice are surprisingly common causes of no-ignition, especially after a heater has been sitting unused. With the gas fully shut off, use a can of compressed air to blow through the pilot tube opening. A thin wire or pilot needle (never a drill bit that could enlarge the orifice) can clear stubborn blockages. If the orifice is visibly corroded or deformed, it needs replacement rather than cleaning.
Lights then won't stay lit: tilt switch and gas control checks
This is the scenario where the heater fires up fine, you hold the control knob down for the required time (usually 15 to 30 seconds), release it, and the flame immediately dies. If your patio heater keeps going out after you release the knob, this is the section to follow for common causes and checks. Or it stays lit for a few seconds and then shuts down. These two slightly different behaviors point to different parts, but both are worth checking before you assume the thermocouple is bad.
The tilt switch: more likely to fail than you'd think
Most freestanding patio heaters have an automatic tilt safety switch that cuts gas if the unit tips more than about 15 degrees in any direction. This switch can fail in the open (off) position, meaning it permanently tells the gas valve to shut down even when the heater is perfectly upright. The tilt switch is actually the more common failure point of the two main safety components, more so than the thermocouple, so check it first.
The tilt switch is usually located near the base of the heater, inside the housing, connected to the gas control valve via two small wires. To test it: with the gas fully shut off, disconnect the two wires from the switch and briefly touch them together (bridging the switch). Then try to light the heater normally. If it now stays lit, the tilt switch is your problem. Replace it with a matching OEM part and don't leave those wires bridged permanently. That bridge removes a critical safety cutoff.
If the heater is on an uneven surface, also check the obvious: a slightly tilted position on a sloped deck can trip the switch without it being defective. Level the heater and try again before assuming the switch is bad.
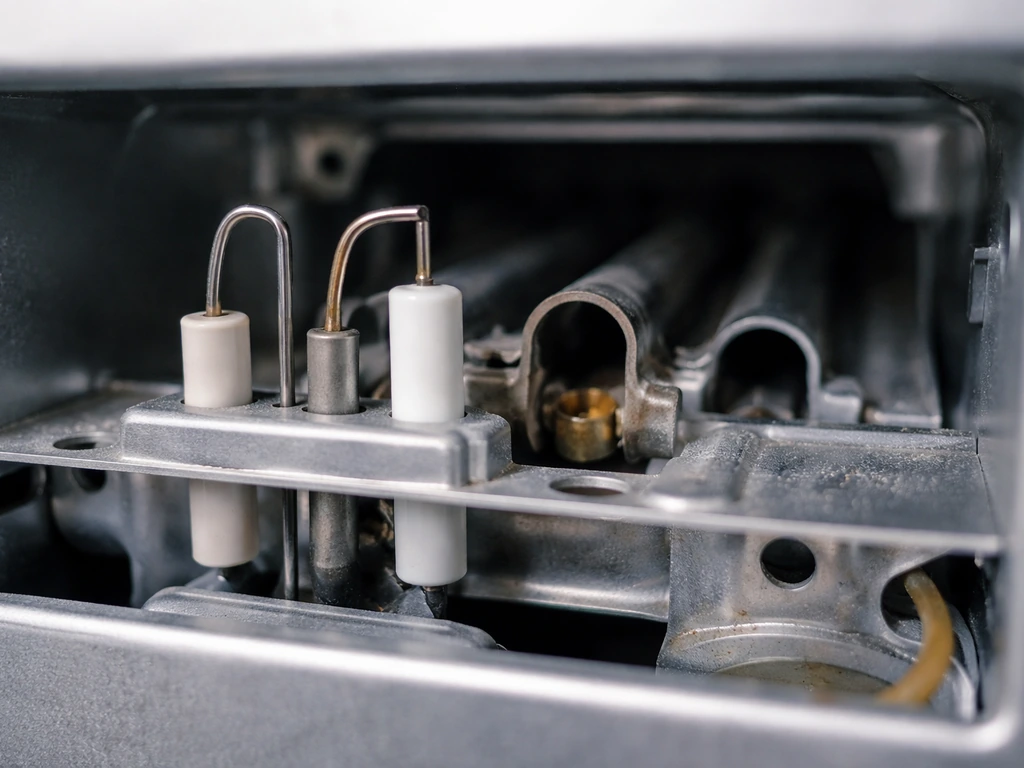
Pilot flame position matters more than you'd expect
If the tilt switch tests fine, look at where the pilot flame is sitting relative to the thermocouple tip. The thermocouple is the small metal probe positioned right next to the pilot flame. If the flame is too small or angled away from the thermocouple, the thermocouple won't heat up enough to signal the gas valve to stay open, and the heater shuts down. A pilot flame that barely grazes the thermocouple tip rather than fully enveloping it is enough to cause this. Adjusting the pilot tube slightly toward the thermocouple tip, or clearing any partial blockage that's reducing flame size, can solve this without replacing any parts.
Thermocouple failure: how to test it and when to replace it
The thermocouple is a simple device: it generates a small DC millivoltage when heated by the pilot flame, and that voltage is what holds the gas valve open. If the thermocouple is worn out or dirty, it doesn't generate enough voltage, and the valve closes. This is why you have to hold the knob down when lighting: you're manually holding the valve open while the thermocouple heats up. If releasing the knob kills the flame, the thermocouple isn't generating enough signal.
How to test a thermocouple with a multimeter
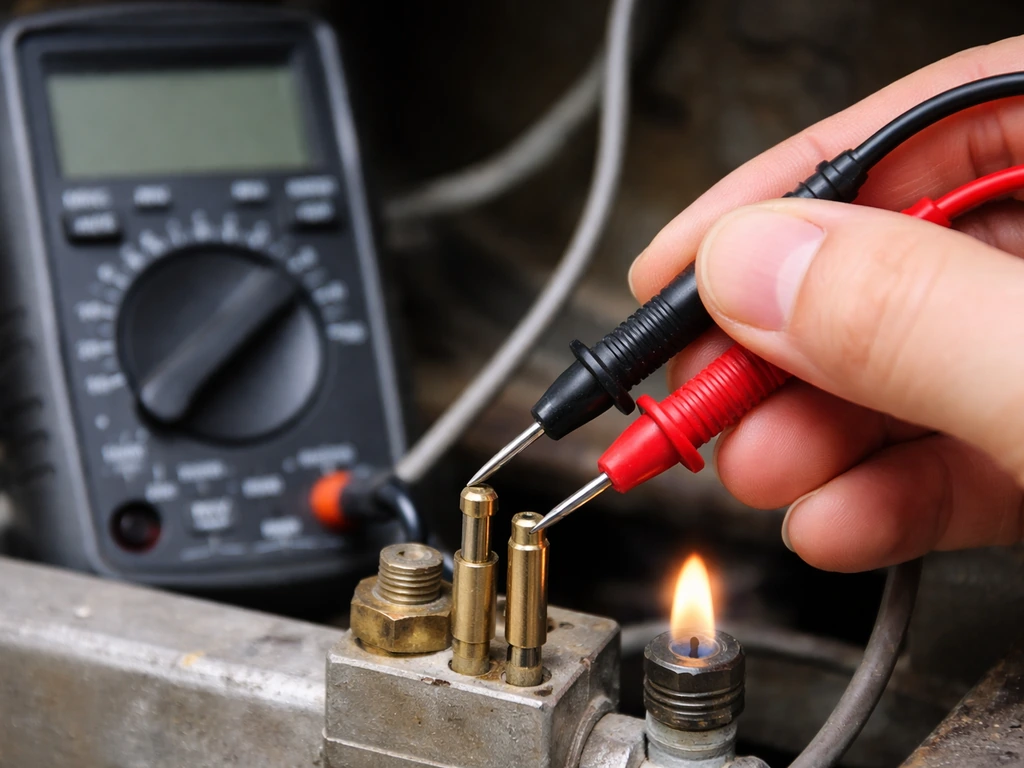
- Set your multimeter to DC millivolts (mV), on the lowest available range.
- Light the pilot and hold the control knob in the pilot position for at least 30 seconds to let the thermocouple heat fully.
- With the pilot flame burning, connect one multimeter probe to the thermocouple's copper rod and the other to the threaded connection end that plugs into the gas valve.
- Read the output. A healthy thermocouple generates between 25 and 30 mV at the open-circuit tip. Under load (connected to the valve), you'd expect 12 to 15 mV or more. A reading below 10 mV means the thermocouple is failing and needs replacement.
- If you get a zero reading with the pilot clearly burning, the thermocouple is either broken internally or the connection at the gas valve is corroded.
Before replacing, check the thermocouple connection at the gas valve. Unscrew the nut (hand-tight is usually enough; don't overtighten), clean any corrosion off the tip with fine sandpaper, and reconnect. Sometimes a poor connection mimics a dead thermocouple.
Replacing the thermocouple
Thermocouples are inexpensive (usually $10 to $20) and available in universal lengths or model-specific versions. Turn off all gas, disconnect the old thermocouple by unscrewing the nut at the gas valve and sliding it out of the pilot bracket, then install the new one in the same position, making sure the tip sits directly in the pilot flame path. Tighten the connection snugly. After replacing, perform a full leak check on the connection area before lighting, and repeat the multimeter test to confirm the new thermocouple is generating adequate voltage.
If the heater still won't stay lit after a confirmed good thermocouple and a working tilt switch, the gas control valve itself may be failing. At that point, the valve repair cost often approaches the price of a new heater, which is worth factoring into your decision.
Putting it back together, testing the repair, and keeping it running
Reassembly and pre-lighting checklist
- Confirm all panels and the emitter screen are reinstalled and all screws are snug.
- Reconnect the propane tank or gas supply and perform a soap-and-water leak test on every connection you touched. No bubbles before proceeding.
- Make sure the heater is on a level, stable surface so the tilt switch doesn't trigger.
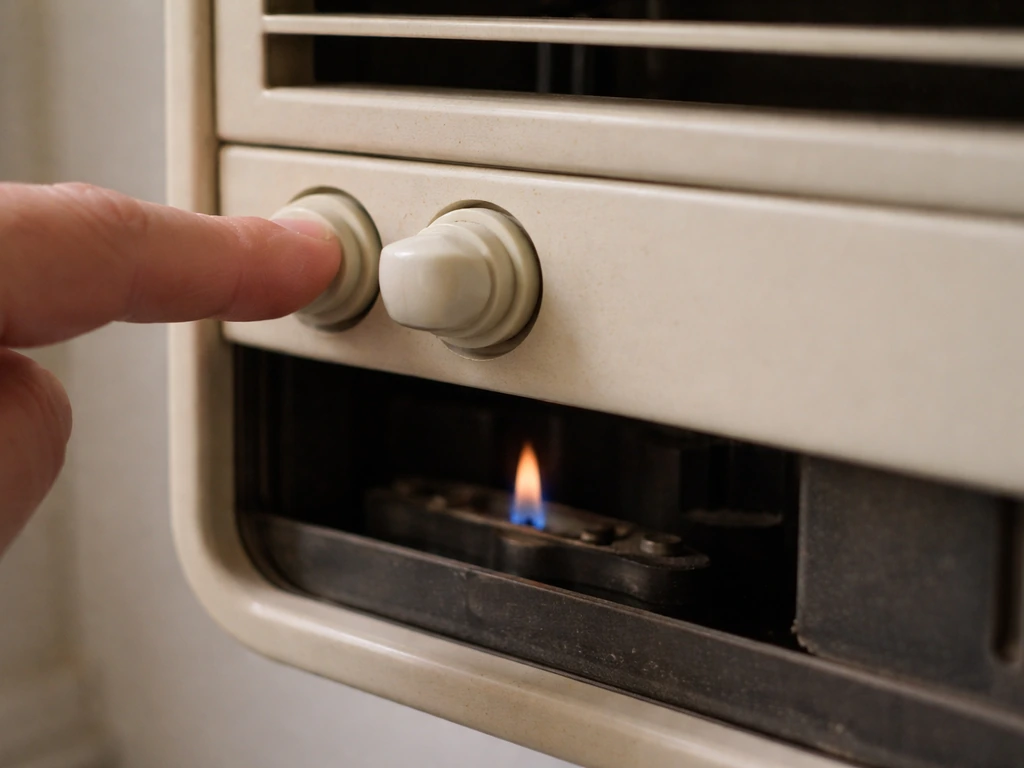
- Turn the control knob to pilot, press and hold it in while pressing the igniter. Hold for a full 30 seconds after the flame appears, then slowly release. The flame should stay.
- Let the heater run for at least five minutes and watch for any unexpected shutdowns or flame changes before leaving it unattended.
Maintenance habits that prevent most of these problems
Most patio heater failures are either corrosion or dirt-related, and both are preventable. At the start of each season, remove the emitter screen and blow out the pilot tube and burner area with compressed air. Clean the thermocouple tip and electrode with dry sandpaper. Check the electrode gap and reset it to spec if needed. Store the heater with the propane tank disconnected and use a cover to keep moisture and insects out of the burner area. If you're in a coastal area or somewhere with heavy humidity, inspect all connections for corrosion annually and replace the thermocouple proactively every two to three seasons since they do degrade with age even when not visibly damaged.
When to stop and call a pro (or replace the heater)
There are a few situations where it makes sense to stop the DIY path. If you run into firestorm patio heater problems that don't match these common patterns, treat it as a model-specific issue and verify compatibility before ordering parts. If you replaced the thermocouple and tilt switch and the heater still won't stay lit, the gas control valve is almost certainly the problem. If you replaced the thermocouple and tilt switch and the heater still won't stay lit, the gas control valve is almost certainly the problem. In that case, you may end up choosing a patio heater top replacement instead of continuing to troubleshoot. Valve replacement requires working directly on the gas supply path and is borderline for most DIYers without HVAC experience. If the regulator is damaged, hissing, or showing signs of corrosion, replace it rather than repair it. LP Gas Magazine discusses propane regulator lock-up behavior and notes operational conditions that can lead to a lockout state when the tank or valve is opened too quickly or in certain sequences. If there's any structural damage to the burner head, cracked ceramic emitter, or bent/corroded main gas tube, those are also replacement scenarios. And if you're dealing with a natural gas unit that's hardwired to a fixed line and you're not certain about the piping, get a licensed technician involved. The repair cost for a single service call is far less than a gas incident.
For deeper dives into specific failure modes, the guides on heaters that won't stay lit and common patio heater problems cover additional scenarios like thermocouple-to-flame alignment issues and model-specific quirks that don't always show up in general troubleshooting guides. If you suspect your broken patio heater fits one of those common failure modes, start by confirming the exact symptom before replacing any parts common patio heater problems.
FAQ
My patio heater clicks but won’t ignite, could it be power-related instead of an igniter problem?
Yes. If your unit has an electronic ignition module, a dead battery or weak power source (some models use batteries for ignition or control) can mimic a failed igniter. Check the manual for the power type and verify the module leads are seated and dry before replacing parts.
Can I use a lot of compressed air to clear the pilot tube and burner, or should I be careful?
No. Use compressed air in short bursts, and stop if you see moisture or thawed ice near the burner. Excessive air pressure can dislodge dirt into places that are harder to clean. After blowing out, let the unit sit a few minutes so any residual dampness clears before relighting.
The tilt switch test seems confusing, could surface level be the real cause?
Level matters. If the heater rocks, even slightly, on a deck or uneven patio, it can trip the tilt cutoff repeatedly and look like a failed tilt switch. Place the heater on a stable, level surface, or use an appropriate base pad, then retest before buying any parts.
Is it safe to leave the tilt switch wires bridged if the heater works that way?
Only do the bridging test described in the article briefly, and only with the gas fully shut off beforehand. If bridging keeps working, it indicates the tilt switch is open (not safety-safe). Replace the tilt switch and do not leave wires bridged for “just one night.”
What should I check if the electrode is clean and in spec, but there’s still no visible spark?
If the electrode looks clean but there is still no spark, the next most common causes are an ignition lead that has loosened or a cracked ceramic insulator that grounds out. Inspect the electrode wiring from the module to the electrode, and check the ceramic for chips before assuming the piezo is dead.
If the flame keeps going out, how do I tell whether it’s alignment versus a failing thermocouple?
A weak or misdirected flame is not always the thermocouple. First, confirm the pilot flame fully envelopes the thermocouple tip, then clear any partial blockage that could thin the pilot. If the flame and alignment are correct but the heater still drops immediately, then thermocouple performance is the more likely failure.
Can I keep bending the igniter electrode bracket until the gap is right?
For most units, you should not bend the bracket more than needed to hit the gap spec. If bending requires force, stop and inspect for a bent electrode assembly or worn parts, because geometry changes can create inconsistent sparking. If the electrode bracket is deformed, replacement may be safer than repeated bending.
After I reconnect the thermocouple, do I need to do another leak check, and where exactly?
Yes, after any gas-related opening, you should do a leak check around the connection you disturbed (for example, thermocouple nut at the gas valve). Use a non-flammable leak detection method and never check for leaks with an open flame. If you find bubbles, fix the connection before lighting again.
If I buy a universal thermocouple, will it always work as a patio heater fix?
Match matters. Universal thermocouples often work only if the length and tip orientation place the end in the pilot flame path. If the tip cannot sit where it used to, the replacement may still fail. Verify your model’s part or at least measure routing to ensure proper positioning.
How can I tell when the regulator is the issue rather than the thermocouple or tilt switch?
If the regulator is failing, symptoms can include erratic flame height, odors, or hissing near the propane tank area, not just ignition issues. If you suspect regulator problems, stop DIY troubleshooting and replace the regulator or have it serviced, since it affects gas delivery throughout the system.
Why would my patio heater run for a bit and then shut down, even though it ignites normally?
If your heater runs for a short time and then shuts off, confirm the pilot flame stays stable under operation, not just during the initial hold period. A partially blocked pilot, changing flame size as the unit warms, or a poor electrical connection can all cause timed shutdown. Recheck debris in the pilot path and the thermocouple connection cleanliness before replacing more parts.
I replaced the thermocouple and tilt switch, what’s the most likely next cause?
If you have replaced both the thermocouple and tilt switch and it still will not stay lit, the next step is verifying the gas control valve operation and the valve’s internal safety circuitry. At that point, DIY work becomes risky because it requires working directly on the gas control path. A licensed technician can also confirm proper pressures and flame stability.