You can replace a patio heater top yourself in about 30 to 60 minutes if you have the correct replacement part, a few basic hand tools, and a clear process for handling the gas connections safely. The key is matching the exact replacement to your model before you order anything, then working through the swap methodically so you don't damage the thermocouple wiring, burner seals, or reflector mounting points in the process.
Patio Heater Top Replacement DIY Guide and Safety Checks

Grant Mercer
28 Apr 2026
What exactly is the 'top' on a patio heater?
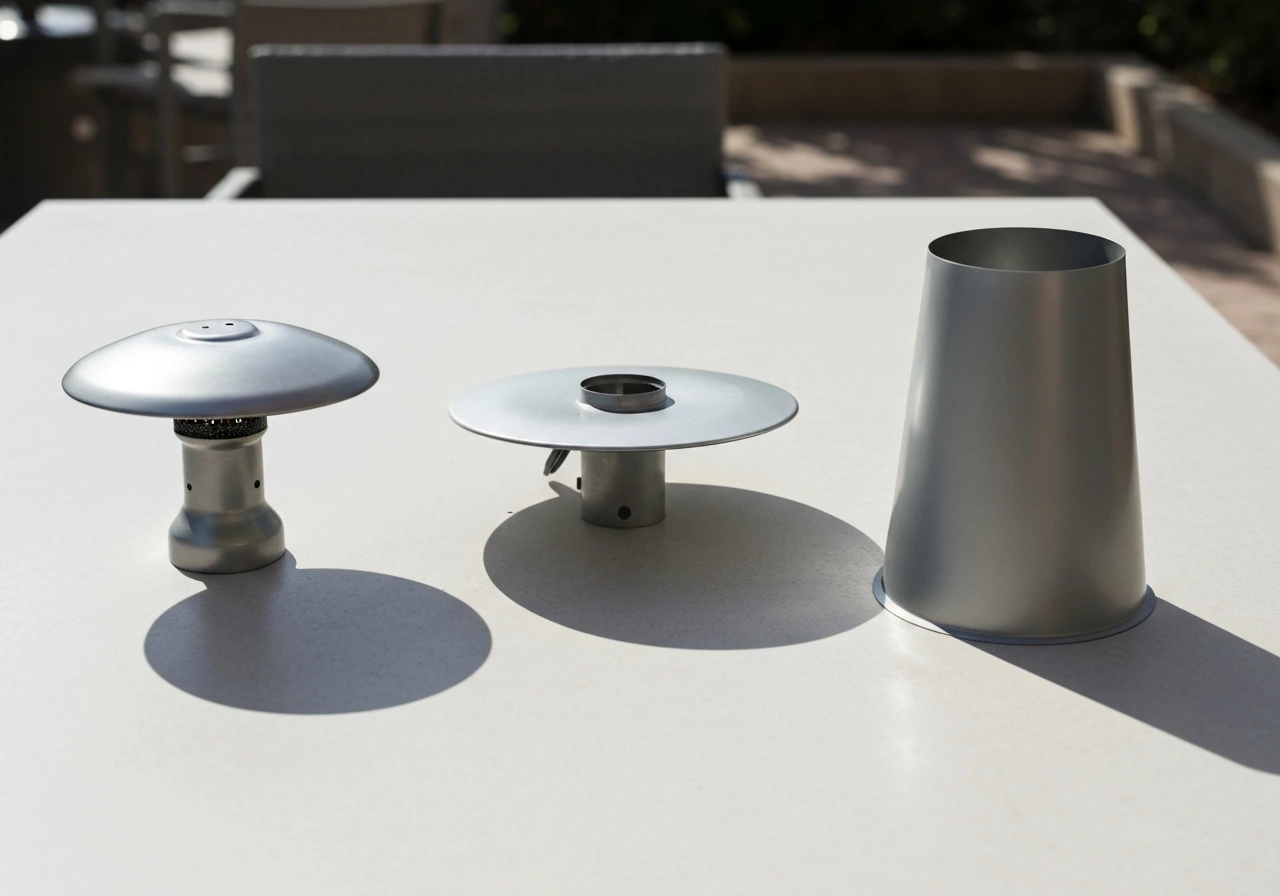
When people search for a patio heater top replacement, they usually mean one of a few different things depending on the heater style. On a standard freestanding mushroom-style propane heater, the 'top' is the head assembly: the dome-shaped reflector, the emitter screen beneath it, and the burner or pilot assembly that sits at the center. On a pyramid or flame-tower heater, the top usually refers to the upper housing and emitter cap. On infrared or electric patio heaters, it typically means the heating element enclosure. Before you order anything, you need to know exactly which component you're replacing, because a mushroom dome from one brand will not fit another even if they look identical in photos.
Identify your patio heater model and top type
Find the model number sticker before you do anything else. On most freestanding propane heaters it's on the lower pole, near the base, or on the underside of the burner housing. On tabletop heaters it's usually on the bottom of the unit. Write it down exactly as it appears, including any letter suffixes, because manufacturers like Desa Tech use model numbers like SPC-54PHW and SPC-21PHTSA that have different burner and mounting specs even though they look similar.
Once you have the model number, identify which specific top component needs replacing. Is it just the reflector dome (the shiny metal cone)? The full head assembly including the emitter screen and burner ring? Or are internal parts like the pilot assembly or ignitor electrode also damaged? The answer changes what you order and how involved the job is. If the emitter screen is crushed but the burner is fine, you may only need the screen. If the dome is cracked and the emitter is warped, you likely need the full top/head assembly.
- Mushroom-style freestanding heater: look for a 3-bolt or 4-bolt mounting pattern where the dome meets the burner head; photograph it before disassembly
- Pyramid/flame-tower heater: the top cap is often secured by 2 to 4 screws around the perimeter; burner assembly sits below
- Tabletop propane heater: the entire emitter/head is usually one assembly held by a center bolt or collar nut
- Electric/infrared patio heater: the top enclosure is typically held by clips or screws; the heating element is a separate replaceable component inside
Take clear photos of the mounting points, the bolt pattern, and any wiring or thermocouple connections before you touch anything. This is your roadmap back if something isn't obvious during reassembly.
Tools, parts, and where to find the correct replacement top
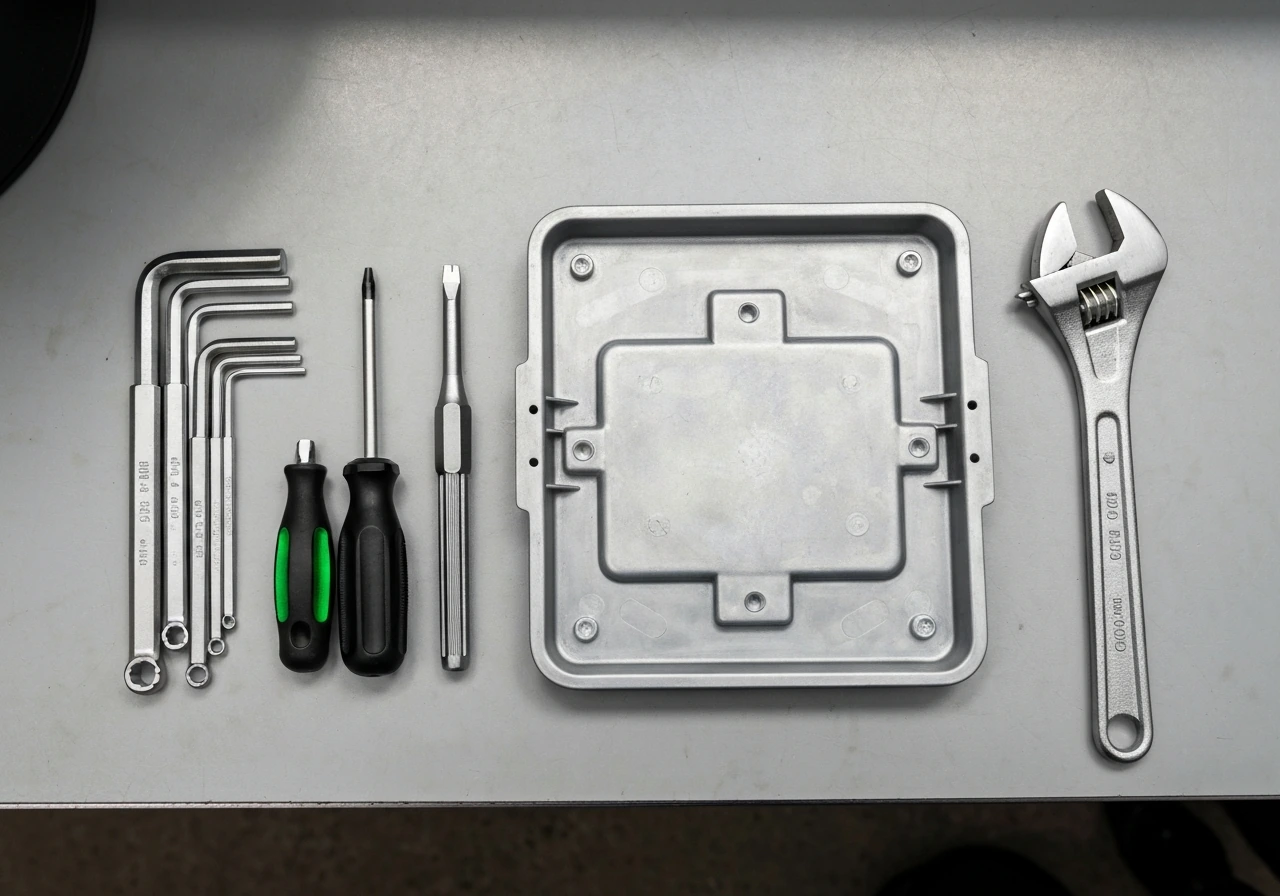
For most top replacements you only need basic hand tools. A set of metric and standard hex keys (Allen wrenches), a Phillips and flathead screwdriver, and an adjustable wrench cover about 90% of jobs. Have a small container of dish soap and water mixed to a thick, bubbly consistency ready for the leak check at the end.
For parts, always try to source OEM or OEM-equivalent first. Sites like PartSelect carry genuine OEM patio heater parts including thermocouples, igniters, and emitter assemblies with guaranteed fitment by model number. Wano Co specializes in patio heater replacement parts and sells OEM-sourced assemblies including full burner/emitter head kits and a useful all-in-one hardware kit that covers mounting bolts and fasteners when your old hardware is corroded or missing. Amazon and eBay have compatible options, but verify the bolt pattern and dome diameter against your model specs before clicking buy, because 'universal' rarely means universal in practice.
| Part source | Best for | Notes |
|---|---|---|
| PartSelect | Verified OEM fit by model number | Search by model number; genuine parts guaranteed |
| Wano Co | OEM-sourced assemblies and hardware kits | Good for pyramid heaters and burner head assemblies; sells hardware kits separately |
| Manufacturer direct | Brand-specific parts (SunStar, Sunpak, Desa) | Often the safest fitment guarantee; may take longer to ship |
| Amazon/eBay | Budget-compatible parts when OEM is unavailable | Verify bolt pattern and dome diameter carefully before ordering |
If your heater's manual is missing, search the model number plus 'manual PDF' or check ManualsLib. The manual will confirm the correct part numbers and show diagrams of the head assembly so you know exactly what you're dealing with.
Step-by-step replacement process
Step 1: Cut off fuel and power
For propane heaters, turn the valve on the propane tank all the way to the closed position first. Then disconnect the regulator from the tank. Do not skip this step or just leave the tank valve closed without disconnecting the regulator. You want no live gas pressure anywhere in the hose while you're working on the head assembly. For electric patio heaters, unplug the unit from the power source completely.
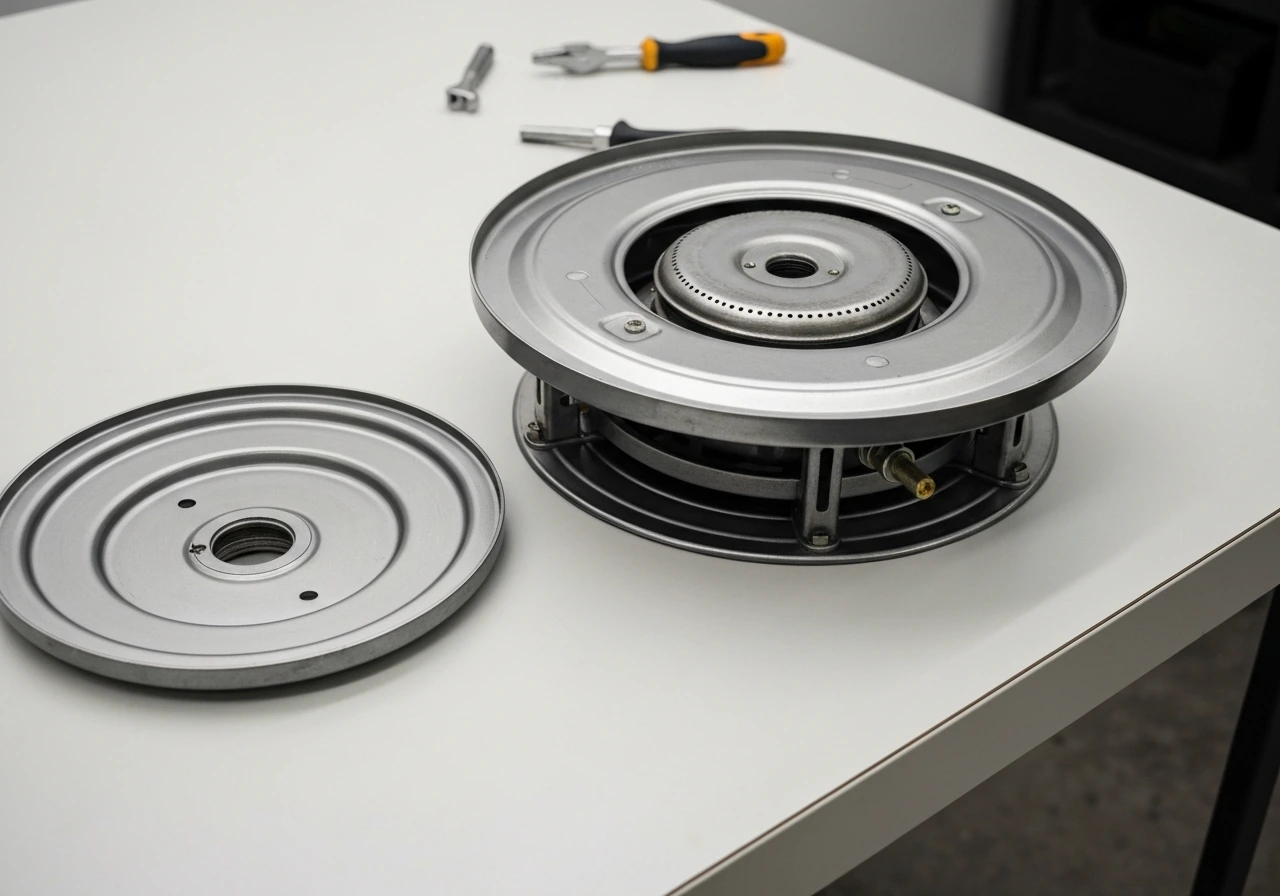
Step 2: Remove the dome/reflector
On most mushroom-style heaters, the reflector dome sits over the burner head and is held by 3 or 4 bolts around the underside rim. Loosen these bolts and lift the dome straight up. Set it aside. You'll now see the emitter screen and burner head below. On pyramid heaters, the top cap typically screws or clips into a collar; unscrew or unclip it carefully and set it on a clean surface.
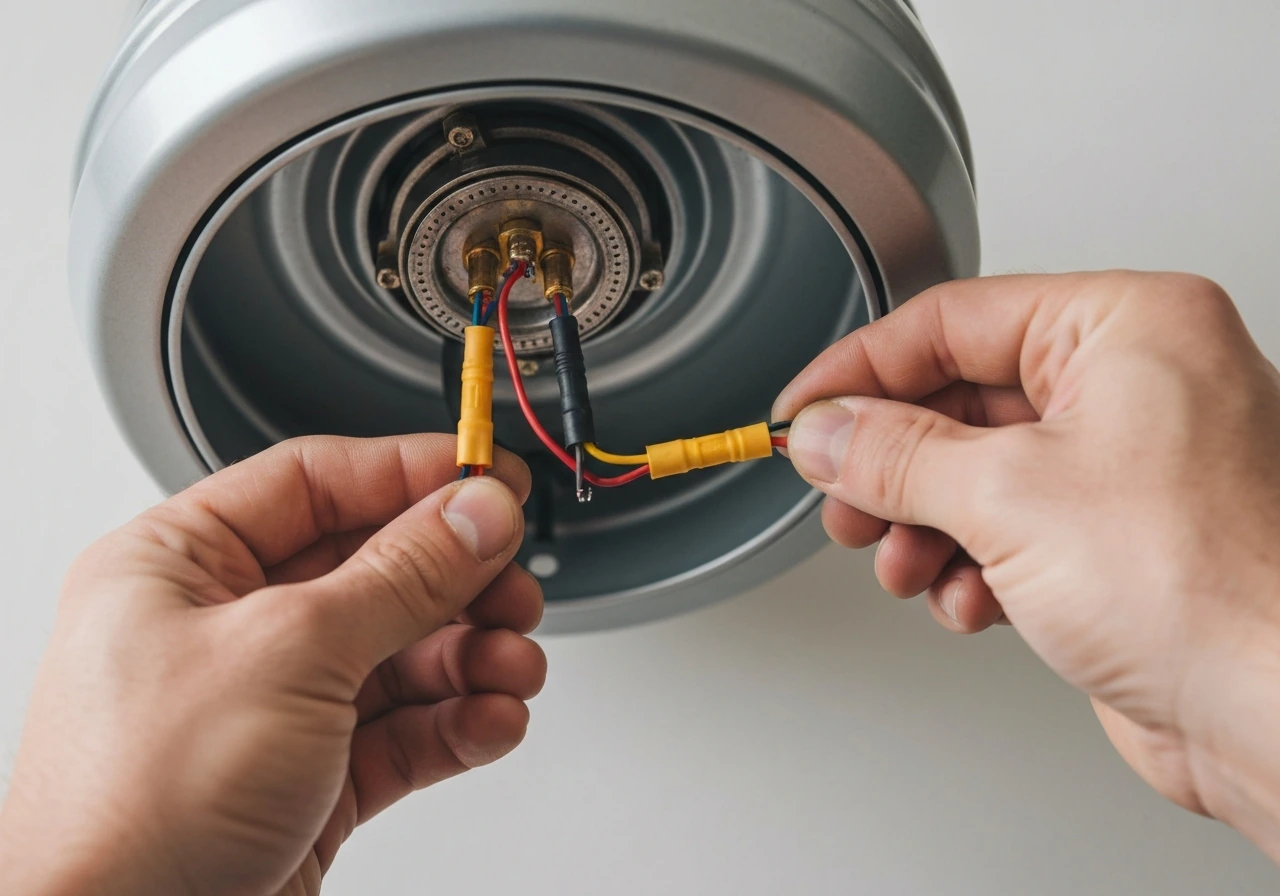
Step 3: Disconnect the ignitor and thermocouple wiring
This is the step where most people cause accidental damage. The ignitor electrode and thermocouple (the copper rod that sits right next to the pilot tube, beside the igniter) are connected by thin wires or push-fit connectors. Note how they're routed before you disconnect them. The thermocouple wire in particular is delicate; don't yank it or kink it. Gently push or unscrew the connectors, depending on your model. If the thermocouple is running through the burner head, feed it back carefully so it comes free with the assembly.
Step 4: Remove the emitter screen and burner head
The emitter screen usually lifts off once the dome is gone. The burner head or full top assembly is typically secured by a center bolt or collar nut. Unscrew it, noting any washers or seals, and lift the assembly free. If the burner ring is part of what you're replacing, you may also need to disconnect the gas orifice fitting at the base of the head. Use your adjustable wrench here and turn counterclockwise. Have a rag ready in case any residual gas odor is present in the line.
Step 5: Install the new top assembly
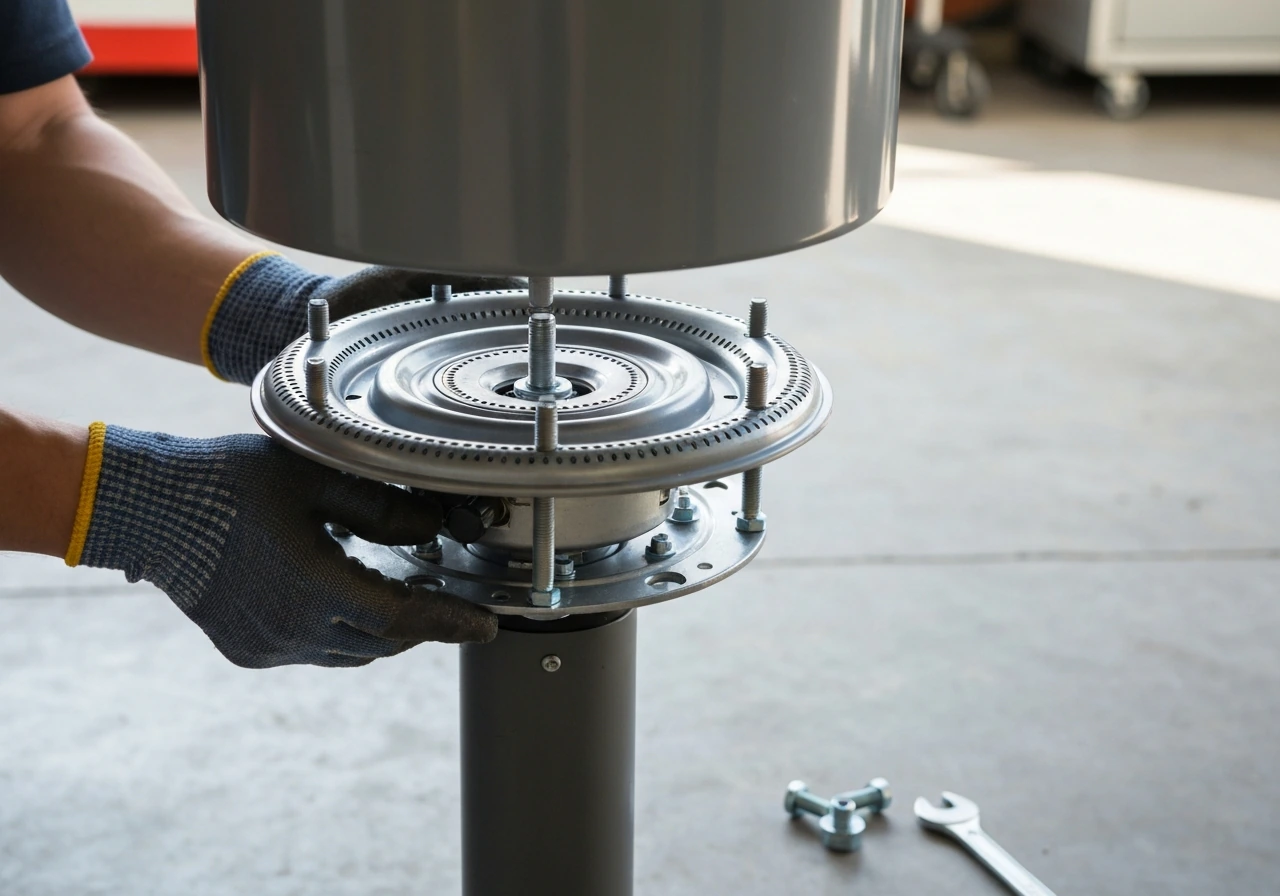
Set the new top assembly in place, aligning the mounting holes or bolt pattern with the heater pole or base bracket. If the assembly includes a new burner head, thread the gas orifice fitting in by hand first to avoid cross-threading, then snug it with the wrench. Do not overtighten fittings; snug plus a quarter turn is usually enough on brass fittings. Reconnect the thermocouple wire and ignitor lead in the same positions you noted earlier. Route the thermocouple so the sensor tip sits right next to the pilot tube, just as it was. Seat the emitter screen, then lower the dome back down and tighten the mounting bolts evenly.
Step 6: Reconnect gas and prepare for leak check
Reconnect the regulator to the propane tank. Hand-tighten the connection first, then snug with a wrench. Don't open the tank valve yet. You'll do that during the leak check below.
Gas leak and ignition verification
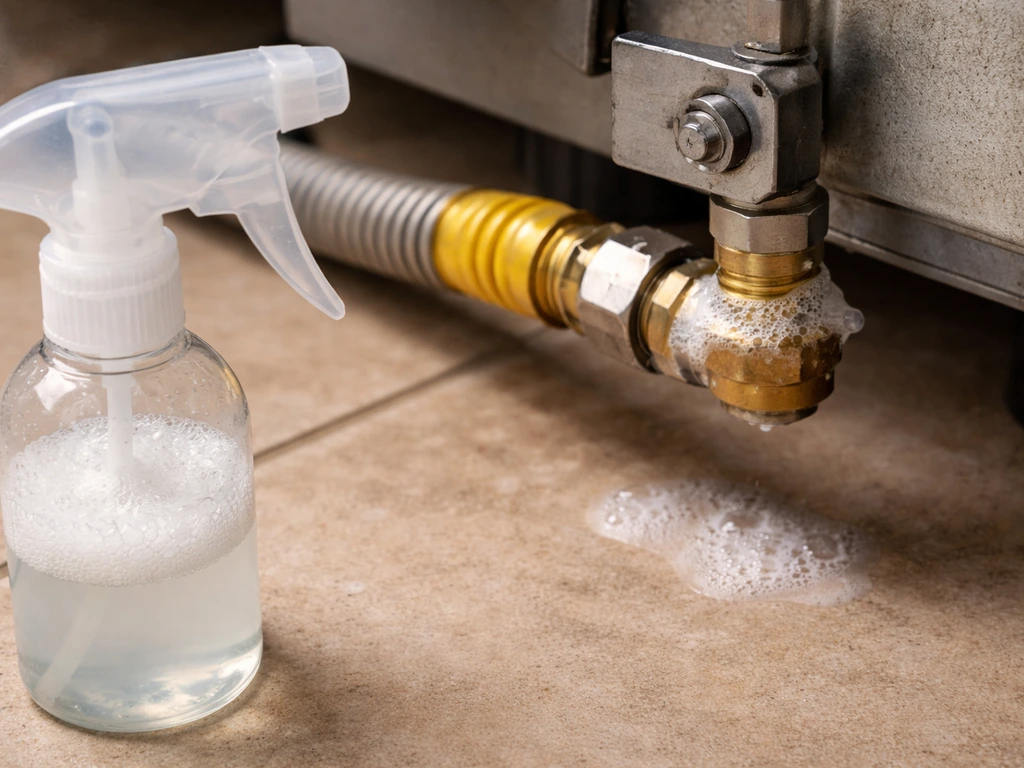
This step is not optional. Every time you disconnect and reconnect gas fittings, you check for leaks before you use the heater. Mix one part dish soap with one part water into a thick, bubbly solution. Slowly open the propane tank valve.
Apply the soapy solution generously to the regulator connection, the hose, and every fitting on the burner assembly you touched during the replacement. Watch for any bubbles forming, which indicate a gas leak. Do not use an open flame to check for leaks, ever. If bubbles appear at a fitting, close the tank valve, tighten the fitting, reopen, and check again.
If leaking continues after tightening, the fitting or hose needs to be replaced before the heater is used.
Once the leak check is clean, test ignition. Turn the gas control knob to the pilot or start position, blank" rel="noopener noreferrer">depress and hold the knob, and press the igniter button. The pilot should light within a few attempts. Hold the knob depressed for 30 seconds after the pilot lights to let the thermocouple heat up. Then slowly release the knob. The pilot should stay lit. If it goes out immediately when you release the knob, the thermocouple isn't seated correctly or wasn't reconnected properly. After the pilot is stable, turn the knob to the heat setting and verify the main burner lights cleanly. Check that the flame is even across the burner ring with no gaps or dead spots.
Per SunStar's commissioning guidance, after any component replacement the heater should be fully re-commissioned: check that the flame sensor and spark electrode are free of deposits and that the flame pattern looks normal before calling the job done.
Common problems after a top replacement
Heater won't light at all
If there's no spark, check that the ignitor lead is fully connected to the electrode on the new assembly. The electrode tip should sit close to (but not touching) the pilot tube. If the spark is visible but the pilot won't catch, confirm the gas is reaching the head by listening for a faint hiss when you depress the valve knob. No hiss usually means the orifice fitting isn't fully seated or there's a blockage.
Heater won't stay lit after replacement
This is almost always a thermocouple issue. Either the thermocouple tip isn't positioned correctly in the pilot flame (it needs to be sitting in the flame, not beside it), the connection at the gas valve end is loose, or the thermocouple was kinked or damaged during the swap. If a 'won't stay lit' problem appears after a top replacement that was working before, that's the first thing to revisit.
Issues like a heater that won't stay lit are often tied to thermocouple placement or a tilt switch fault, both of which are worth checking as part of the post-replacement process. In a related r/propane thread about a Desa heater, users report that pressing and holding the pilot knob for 30+ seconds before ignition can help keep the pilot lit Issues like a heater that won't stay lit are often tied to thermocouple placement.
Gaps in the flame or uneven burner performance
If the main burner lights but you see gaps or dead spots in the flame ring, the burner head may not be fully seated, or some of the gas ports are blocked. Remove the emitter screen and use a pipe cleaner to clear individual gas ports on the burner ring. Do not use a drill bit or anything that would enlarge the ports; that changes the gas-air mixture and creates a safety problem. Reseat the emitter screen and dome and test again.
Dome doesn't sit flush or gaps appear around the reflector
A poorly seated reflector isn't just cosmetic. The dome helps direct heat and provides wind protection for the burner. If there's a gap, check that the bolt pattern on the replacement matches your original. If the dome sits at an angle, one of the mounting bolts may be cross-threaded or the emitter screen isn't fully seated below it. Loosen all dome bolts, re-level the dome, and retighten evenly in a cross-pattern.
Airflow or spider web blockages
A new top on an otherwise dirty heater can still perform poorly. Spider webs and debris in the burner openings are a surprisingly common cause of ignition and flame problems, even right after a repair. While the head assembly is open during replacement, check all openings and clear any webs or debris with a dry brush. Don't use water around the pilot or burner components as moisture can cause lasting damage.
Maintenance tips to protect your new top
Most patio heater tops fail from weather exposure, physical damage, or neglect rather than normal wear. A few simple habits will significantly extend the life of your new top.
- Cover the heater when not in use: a fitted cover keeps moisture, bird droppings, and debris off the dome and emitter screen, which are the most common causes of corrosion and blockage
- Clean the reflector dome and emitter screen at the start and end of each season: wipe the dome with a damp cloth (never spray water into the burner area), remove the emitter screen, and use a dry brush or pipe cleaner to clear any blocked gas ports
- Check for spider webs in burner openings before the first use of each season: this is one of the most overlooked maintenance steps and one of the most common causes of ignition failure
- Inspect the dome mounting bolts annually: heat cycling loosens hardware over time; check that all bolts are snug and that the dome sits flush
- Keep the reflector surface clean: carbon buildup on the inside of the dome reduces heat reflection efficiency; wipe it with a dry cloth seasonally
- Store the propane tank properly: always disconnect the regulator when storing the heater, and store in a cool, dry place to prevent hose degradation that can cause leaks at the head fitting
Annual maintenance should also include checking the gas hose for cracks or stiffness, which are signs it needs replacing. A damaged hose is a safety issue that a new top won't fix.
When the replacement doesn't fix the problem
If you've installed the new top, passed the leak check, and the heater still won't light or stay lit, work through the following before calling a technician. If you’re still dealing with a patio heater fix after replacing the top, the issue may be in the thermocouple or gas control system new top.
If you still have firestorm patio heater problems after replacing the top, the issue is often tied to the thermocouple or gas control system patio heater fix after replacing the top. If you’re still running into patio heater problems after the top replacement, the fault is often in the thermocouple or gas control system. If you suspect a broken patio heater, start by rechecking the thermocouple placement and your ignitor connection after the top replacement.
First, confirm the thermocouple is fully seated in the pilot flame and that its connection at the gas valve is tight. Second, rule out the tilt switch by checking that the heater is perfectly level; a heater that's even slightly off-level can trip the safety shutoff. Third, verify the regulator is functioning by trying a known-good propane tank.
If all three check out and the heater is still not working correctly, the issue is likely inside the gas valve itself or there's an internal component problem that goes beyond what a top replacement addresses.
At that point, stop and get it serviced rather than continuing to troubleshoot blind. A faulty gas valve is not a DIY fix, and a heater that won't stay lit or ignites with a delay is a safety risk. For deeper diagnostic guidance on individual components like the thermocouple, tilt switch, or ignition failure, those are separate problems worth working through in detail, but they belong in a different diagnostic conversation from a top replacement.
FAQ
What’s the fastest way to confirm I’m buying the exact “patio heater top replacement” for my unit?
Use the full model number exactly as printed (including any letter suffix), then match it to the specific head assembly part list, not just a dome or screen photo. If you cannot find a diagram, compare the bolt count and spacing on the underside rim, and confirm the dome diameter, these two details catch most “looks the same” mismatches.
Can I replace only the reflector dome if mine is cracked but the burner looks fine?
Sometimes, but not when the damage warped the emitter alignment. If the dome bolts pull unevenly, the emitter screen sits crooked, or the flame pattern already looked abnormal, the reflector-only swap may not fix the underlying seating or gas distribution, and you should replace the full head assembly instead.
Do I need to replace seals or washers when installing a new top assembly?
Yes, if your kit includes them or if the old ones look flattened, brittle, or oil-soaked. Even if fittings thread on, a compromised burner seal can create slow leaks that may not show up until the heater warms up, so keep the original parts only if they appear intact.
Is it normal for a new top to make the first ignition smell different?
A mild odor can happen from dust or residue burning off, but any strong gas smell, persistent hissing, or a leak-check bubble means you must stop. After odor-burning-off, the flame should stabilize quickly and look even, if it repeatedly “strikes” then fails, treat it as a gas path or thermocouple seating problem.
How do I know the thermocouple is positioned correctly after the top replacement?
The sensor tip should be in the pilot flame envelope, not merely close to it. A practical check is to remove the dome once more and verify the tip geometry relative to the pilot tube, then route the wire without tight bends so the tip does not shift during reassembly.
What if my heater sparks but the pilot only lights after many attempts?
First, confirm the gas reaches the head by listening for a consistent hiss when the valve knob is held, then check that the orifice fitting is seated and threaded without cross-threading. If the hiss is weak or absent, you likely have an installation issue at the gas connection, a blockage, or a regulator problem, not an igniter problem.
Can I use a different brand “universal” top assembly if the threads seem to fit?
No, fitting the threads does not guarantee correct gas port alignment or correct thermocouple and ignitor geometry. Universal options often mismatch dome diameter, bolt patterns, and burner ring port spacing, which can cause dead spots, delayed ignition, or flame that doesn’t thermally heat the thermocouple.
Should I retighten gas fittings after the leak check passes?
Do not keep tightening after a clean test unless you see a bubble. Reopening fittings increases the chance of damaging threads or compressing seals inconsistently. If you get any bubble, close the valve, tighten slightly, and recheck, then stop when you achieve a steady no-bubble result.
Why do I still get a leak test bubble even after tightening the fitting?
Most often, the issue is a damaged hose end, a cracked fitting, a missing or deformed washer or gasket, or debris on the mating surface. If bubbles persist after reasonable snugging, replace the affected hose or assembly part rather than continuing to force the connection.
What should the flame look like after a correct patio heater top replacement?
You should see a fairly even flame ring around the burner, with no large gaps and no “lazy” sections that look extinguished. If you only fix the dome and ignore emitter seating, flame gaps often return, so re-level the dome evenly and ensure the emitter screen sits flat.
Is it safe to clear burner ports with something else if a pipe cleaner doesn’t work?
Avoid anything that enlarges or reshapes the ports. If a pipe cleaner cannot clear the obstruction, the safest move is to remove the burner head and use only soft, non-abrasive cleaning tools appropriate for the port size, or replace the burner/orifice assembly if the blockage is stubborn or corrosion is present.
Can I reuse my old regulator and hose with a new top assembly?
Usually yes, but only if the hose passes inspection. If you see cracks, stiffness, flattened spots, or any sign of age hardening near the connections, replace the hose/regulator set. A new top cannot compensate for a degraded hose, and leaks can originate at the hose even if the burner fittings are perfect.
What if the heater trips off because of a tilt switch after the repair?
After reassembly, confirm the heater is perfectly level on a stable surface. Even small lean angles can trigger safety shutoff, especially on uneven flooring, and the new head assembly height can make slight base shifts more noticeable. Test on level ground before resuming normal placement.
When should I stop DIY troubleshooting and call service for a patio heater top replacement issue?
Stop if you cannot get a stable pilot after confirming thermocouple placement, if leaks appear repeatedly during leak checks, or if the ignition requires extreme delay or fails unpredictably. A faulty gas control valve, damaged thermocouple, or internal regulator problem can be hard to verify safely, and those cases are not worth extended guessing.