
Setting up a patio heater correctly the first time saves you from cold nights, wasted fuel, and repair headaches down the road. Whether you're assembling a 40,000 BTU freestanding propane tower, running a natural gas line to a wall-mounted unit, or mounting an electric infrared heater above your pergola, the process breaks down the same way: check your site, size the heater for the space, assemble or mount it according to the manual, hook up the fuel or power safely, test everything before you fire it up, and know what to do when something doesn't work. This guide walks through every step for every heater type. If you need a definition first, see our patio heater meaning explainer for a quick overview.
Patio Heater Setup: Complete DIY Guide for Installation & Care

Grant Mercer
12 Jul 2026
Quick pre-setup checklist
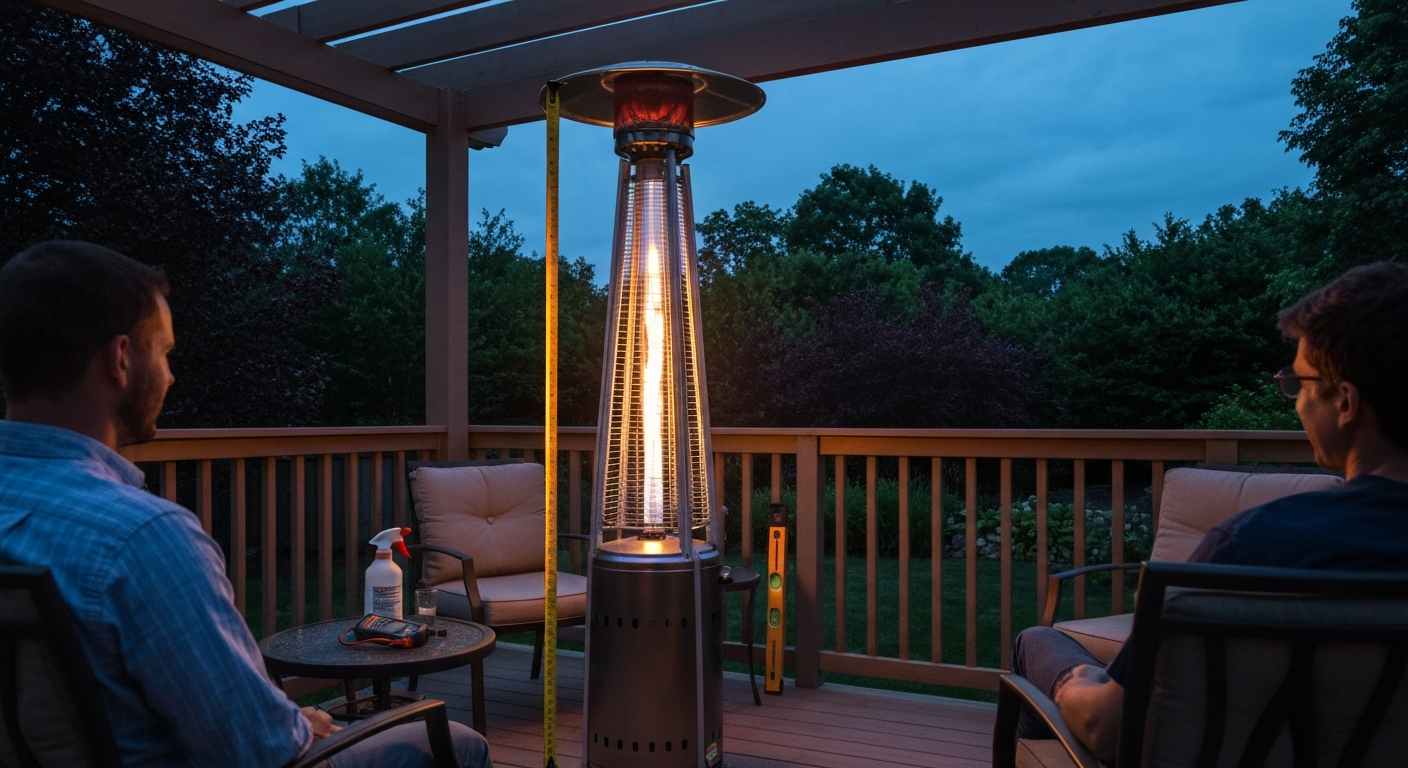
Before you unbox anything, run through this checklist. Skipping these steps is the most common reason heaters fail inspection, trip a breaker on first use, or create a genuine safety hazard.
- Site clearances: identify overhead obstructions (pergola beams, umbrellas, awnings) and measure vertical clearance. Gas freestanding heaters typically need 24 inches above the emitter head; wall and ceiling-mounted models follow manufacturer-specific minimums (Infratech W-Series, for example, lists 36 inches in front of the emitter to combustibles).
- Surface stability: freestanding heaters need a firm, level surface. Decking that flexes or tilts can trigger the built-in tilt-switch safety and shut the heater off mid-use.
- Permits: most jurisdictions don't require a permit for a portable propane heater, but a permanent natural gas line connection and hardwired electric heaters almost always do. Call your local building department before you start trenching or wiring.
- Fuel availability: for propane, confirm your cylinder is full and the valve is in working condition. For natural gas, locate your shutoff valve and verify line pressure (typical residential manifold pressure is 3.5 to 7.0 in. WC). For electric, identify your panel capacity and available circuits.
- Safety items on hand: a spray bottle with soapy water (roughly 1 part dish soap to 2 parts water) for propane leak testing, a multimeter for electrical checks, a pipe wrench and PTFE tape for gas fittings, a non-contact voltage tester, and your heater's printed or downloaded manual.
- Ventilation: all gas heaters — propane and natural gas alike — must be used outdoors in adequately ventilated areas. Carbon monoxide accumulates in enclosed or semi-enclosed spaces. If your 'outdoor' space has three or more solid walls, reconsider placement or choose electric.
- Manual lookup: download your exact model's manual before assembly. Clearances, regulator pressures, and assembly sequences vary significantly between models. If yours is missing, check the manufacturer's support page or a resource that indexes patio heater manuals by brand.
Tools, consumables, and spare parts to have ready
You won't need anything exotic, but having the right items on hand before you start keeps the job moving and prevents improvised shortcuts that cause problems later.
| Item | Used for | Notes |
|---|---|---|
| Adjustable wrench or combination wrenches (3/8" to 1") | Tightening gas fittings, base bolts | Do not use on aluminum fittings — use the correct size open-end wrench |
| PTFE (Teflon) tape, gas-rated | Sealing threaded gas connections | Yellow gas-rated tape only; standard white plumbing tape is not suitable for gas |
| Soapy water in spray bottle | Propane and NG leak test | Mix ~1 part dish soap to 2 parts water; rinse fittings after testing |
| Torque-limiting screwdriver or hand screwdriver set | Assembly screws, panel covers | Over-torquing stripped mounting hardware is very common |
| Non-contact voltage tester | Confirming circuit is dead before wiring electric heater | Essential — never assume the breaker is off |
| Multimeter | Checking element resistance, voltage at outlet | Useful for diagnosing electric heater faults after install |
| Level (4" bubble or digital) | Freestanding base and wall-mount alignment | Tilt-switch sensitivity makes level placement critical for gas heaters |
| Stud finder | Wall and ceiling mounting | Required for lag-screw anchoring of heavy mounted heaters |
| Pipe wrench (12") | Natural gas fittings | For final tightening of black iron pipe connections only |
| Wire stripper/crimper | Electric heater hardwiring | Only if doing hardwired install yourself and permitted by local code |
| Spare thermocouple (model-matched) | On-hand for first ignition failures | The most common part failure on gas heaters; inexpensive to keep one |
| Spare igniter electrode | Propane ignition faults | Often the first thing to degrade on a stored or new heater |
| Thread sealant (pipe dope, gas-rated) | Alternative to PTFE tape on NG fittings | Some installers prefer this over tape for iron pipe joints |
Sizing and placement: BTUs, coverage, and height rules
The most common setup mistake is buying a single large heater and placing it in the corner of a space that needs two medium ones. Coverage from a radiant patio heater is directional, not omnidirectional like a room furnace. Understanding this shapes both how many heaters you buy and where you put them.
BTU output and area coverage
Standard freestanding propane patio heaters run 40,000 to 48,000 BTU/hr and can reasonably keep 6 to 8 people comfortable within about a 10-foot diameter circle in calm conditions. Tabletop models under 15,000 BTU/hr (the maximum allowed under ANSI/CSA Z83.26 for tabletop gas heaters) are meant for 2 to 4 people seated close together. Electric infrared heaters are rated in watts: a 2,000W unit covers roughly 10 to 12 square feet of seating area at a mounting height of 8 feet, though Heatstrip's published radiant footprint data shows clearly that every additional foot of mounting height reduces the effective heated area, and open-sided or windy conditions cut performance further. The practical rule: choose your heaters for calm-condition coverage, then add one extra unit if your space is exposed or regularly breezy.
How many heaters do you actually need?
| Patio size | Heater type | Recommended quantity | Notes |
|---|---|---|---|
| Up to 100 sq ft (e.g., small deck) | 40,000 BTU freestanding propane | 1 | Position centrally; cover radius ~8–10 ft |
| 100–200 sq ft | 40,000–48,000 BTU freestanding propane | 1–2 | Two units cover corners better than one central unit |
| 200–400 sq ft | Electric infrared ceiling/wall-mounted (2,000–3,000W each) | 2–4 | Mount at 8–10 ft for best coverage distribution |
| Long narrow spaces (pergola, covered walkway) | Wall-mounted electric infrared | 1 per 8–10 linear ft | Aim heaters at a 30–45° downward angle toward seating |
| Dining table (4–6 people) | Tabletop propane (≤15,000 BTU) or tabletop electric | 1 | Center on table; keep clear of candles, décor |
Height and clearance rules you can't ignore
Gas freestanding heaters typically specify a minimum of 24 inches of clearance above the emitter head (check your manual, some require more). Wall and ceiling-mounted electric infrared heaters have two separate clearance requirements: the gap behind or above the fixture to the structural surface, and the 'front clearance' to occupants and combustibles below. Infratech W-Series manuals, for example, specify a minimum 6 inches from ceiling, 18 inches behind the unit, and 36 inches in front (below) to combustibles. Bromic's Tungsten series lists its own minimum mounting heights by model. Always go with the larger of the manufacturer's stated clearance and the local fire code requirement.
Choosing the right heater type and mounting style
The decision between propane, natural gas, and electric isn't just about fuel cost, it's about your space, your installation budget, your local codes, and how much flexibility you want. Similarly, whether you go freestanding, tabletop, or mounted changes the complexity of installation significantly.
| Type | Upfront cost | Running cost | Installation complexity | Portability | Best for |
|---|---|---|---|---|---|
| Propane freestanding | Low–Medium ($80–$300) | Medium (propane per tank) | Low (no permanent hookup) | High | Renters, flexible layouts, no gas line access |
| Natural gas (fixed) | Medium ($200–$600+) | Low (gas line cost) | High (permits, licensed plumber) | None (permanent) | Permanent covered patios with existing gas service |
| Electric plug-in infrared | Low–Medium ($100–$400) | Medium–High (electricity) | Low (standard outlet) | Medium | Small spaces, covered pergolas, simplest setup |
| Electric hardwired infrared | Medium–High ($300–$900+) | Medium–High | High (electrician recommended) | None (permanent) | Large covered patios, commercial-grade output |
| Tabletop propane | Low ($50–$150) | Low–Medium | Very low (portable) | Very High | Small gatherings, table use, camping crossover |
For most DIYers setting up a first patio heater, a freestanding propane unit gives you the best combination of output, cost, and zero-permit simplicity. Natural gas and hardwired electric deliver better long-term economics but typically require a licensed tradesperson for the final hookup, especially if you're pulling a new line or circuit. If you're still deciding on the best fit for your specific space, a dedicated patio heater size guide can help you work through the numbers before you buy. For detailed calculators and coverage charts, see our patio heater size guide to work through the numbers before you buy. For practical setup and maintenance advice, see our patio heater tips. For detailed sizing and selection advice, see our patio heater guide.
Mounting styles compared
- Freestanding: the most common DIY setup. Assembles from a base, pole sections, and emitter head. No permanent attachment to structure. Requires a level, firm surface and a tilt-switch that works correctly.
- Tabletop: smallest footprint, lowest output (capped at 15,000 BTU/hr for gas per ANSI/CSA Z83.26). Useful for intimate seating areas. Stability on the table surface matters — these tip over in wind.
- Wall-mounted: requires lag screws into studs or masonry anchors. Angle and height are fixed at installation, so plan placement carefully. Most wall-mount heaters are electric infrared.
- Ceiling-mounted: highest placement flexibility, best heat distribution for covered patios. Requires structural attachment point rated for the heater's weight (plus dynamic loads from wind). Most high-output electric infrared heaters mount this way.
Transport, pickup, and handling tips
If you're picking up a patio heater today from a home center or buying one locally, a few things are worth knowing before you load it in the car. If you need to patio heater pick up today, check local retailers for in-store pickup or curbside options. Full-size freestanding propane heaters ship unassembled in flat-pack boxes that are awkward but manageable, typically 40 to 60 lbs for the heater itself, plus the weight of a 20 lb propane cylinder. Larger wall-mounted or commercial-grade heaters can exceed 80 lbs and need two people and proper lifting technique.
- Check box dimensions before you go: many full-size freestanding heaters come in boxes over 60 inches long, which won't fit in a standard car trunk. Bring a pickup truck, SUV with folding rear seats, or a roof rack with tie-downs.
- Never transport a propane cylinder inside a passenger vehicle, enclosed trunk, or van with the valve open. NFPA 58 requires cylinders to be transported valve-end up and secured so they can't tip or roll. Lay the cylinder in a truck bed or on a roof rack only if it's properly secured and the valve is capped.
- Check the box on pickup: look for visible damage to corners (where the emitter head and reflector bowl are usually packed) before you leave the store. Damaged reflectors and bent emitter heads are the most common in-store shipping damage.
- If you're buying online and having it delivered, inspect it before the driver leaves if possible. Dents to the regulator housing or bent burner tubes are worth rejecting.
- For heavy wall or ceiling-mounted electric heaters, use a furniture dolly from pickup to installation site. These units have glass quartz tubes or carbon elements that can crack if the box is dropped on end.
- Assemble on-site rather than carrying an assembled heater up stairs or through doorways — re-assembly takes 20 minutes and prevents stress damage to welded joints.
Propane patio heaters: assembly, hookup, leak test, and first startup
This section covers the full process for the most common heater type: a freestanding propane unit in the 40,000 to 48,000 BTU range. The steps apply broadly to brands like Hampton Bay, Dyna-Glo, and similar, but always cross-check against your specific model's manual because assembly sequences and valve positions vary. For exact startup and lighting procedures, consult the manufacturer's patio heater lighting instructions (reference 6fe7ff6d-391c-4197-ba14-988ba541c397). DYNA‑GLO, DGPH series Owner’s Manual / Example product manuals (installation & startup) list model input ratings, parts (reflector, burner assembly, regulator/hose for propane), and step‑by‑step assembly and initial lighting procedures blank" rel="noopener noreferrer">DYNA‑GLO — DGPH series Owner’s Manual / Example product manuals (installation & startup).
Assembly
- Lay all parts out and match them against the parts diagram in your manual. Common freestanding heater parts: base with wheel axle, lower pole, upper pole, emitter head assembly, reflector (bowl), anti-tilt weight ring, burner assembly, regulator/hose, igniter wire, and hardware bag.
- Assemble the base first. Attach wheels and insert the anti-tilt weight ring (if included) before standing the unit up. Some bases have a screw-in ballast weight at the bottom — install this now, not after.
- Thread the pole sections together in order (lower then upper) and secure with the locking pins or set screws specified in the manual. Do not cross-thread pole sections.
- Mount the emitter head and reflector to the top of the upper pole. Most models use a locking collar — tighten to hand-tight plus a quarter turn. The reflector bowl typically clips or screws to the underside of the emitter head.
- Route the gas hose/regulator down through the pole interior if your model uses this design (Hampton Bay and Dyna-Glo freestanding models typically do). Connect the hose to the burner valve fitting at the top — usually a right-hand thread. Hand-tighten, then snug with a wrench. Do not over-torque.
- Attach the igniter wire to the electrode at the burner. Most models use a push-on spade connector. Make sure it seats fully.
Cylinder hookup
A standard 20 lb propane cylinder is the correct size for most freestanding patio heaters, this is the maximum cylinder weight permitted for integral mounting under ANSI/CSA Z83.26. The regulator on the heater's hose connects to the cylinder's POL valve or QCC1 (Type 1) fitting depending on the regulator supplied. QCC1 is the modern standard: it's the hand-wheel fitting on most post-1995 cylinders. Thread the regulator fitting onto the cylinder valve clockwise (QCC1 fittings are right-hand thread). Tighten firmly by hand, these do not require a wrench on the hand-wheel portion. Place the connected cylinder in the base cylinder holder and ensure it sits level and upright.
Leak test, do not skip this
Before the first startup and after any regulator or hose reconnection, you must perform a leak test. NFPA 58, LP‑Gas Code (committee input and code material) governs storage, handling, transport, piping, regulators, leak testing, and quantity limits for portable and stationary LP‑Gas containers and requires documented leak testing and specific rules for cylinder storage and transportation blank" rel="noopener noreferrer">NFPA 58 — LP‑Gas Code (committee input and code material). Open the cylinder valve slowly (one full turn) without touching the heater control valve. Spray soapy water generously on every gas connection: the regulator-to-cylinder fitting, the hose-to-burner fitting, and anywhere along the hose that has a crimp or connector. Watch for bubbles. Even slow-growing bubbles indicate a leak. If you see any, close the cylinder valve immediately, relieve the line by momentarily cracking the burner valve (outside, away from ignition sources), and re-tighten or replace the leaking fitting. Never test for leaks with a flame. After a clean test, rinse off soapy residue from fittings, some soaps are mildly corrosive to brass over time.
First startup
- Stand the heater on a level, stable surface outdoors with no overhead obstructions within the manufacturer's specified clearance.
- Open the cylinder valve slowly — one full turn counterclockwise. Wait 10 seconds to allow gas pressure to stabilize.
- Press and hold the control knob in (depressing the gas flow interlock) while rotating it to the 'ignite' or 'pilot' position.
- While holding the knob pressed in, press the piezo igniter button once per second until the pilot lights. Most heaters light within 5 presses. If it doesn't light after 10 attempts, release the knob, wait 5 minutes to allow any accumulated gas to disperse, then try again.
- Once the pilot is lit, continue holding the knob in for 15 to 30 seconds. This lets the thermocouple heat up enough to hold the valve open on its own. Releasing too soon is the number one reason heaters won't stay lit.
- Rotate the knob to the desired heat setting (low/medium/high). The main burner should ignite from the pilot.
- On the first startup, a brief burning smell or slight smoke from the emitter head is normal — residual oils from manufacturing burn off in the first 5 to 10 minutes. Run on high for 10 minutes outdoors before use at a gathering.
Natural gas patio heaters: line hookup, pressure checks, and first startup
Natural gas installations are governed by ANSI Z223.1 / NFPA 54 (the National Fuel Gas Code) and almost always require a permit and inspection. I want to be direct here: if you don't have experience working with gas piping, the hookup to your home's gas system is where you hire a licensed plumber or gas fitter. What you can reasonably do yourself is the heater-side assembly, placement, and prep work. What follows covers the full process with that line drawn clearly.
What the DIYer can do
- Fully assemble the heater body, mount it per the manufacturer's instructions, and confirm all clearances before gas connection.
- Identify and mark the correct gas supply line location and valve position for the installer.
- Verify the heater's required inlet pressure (typically 3.5 to 7.0 in. WC for natural gas appliances; your model's manual will specify) and communicate this to your gas fitter.
- Install a manual shutoff valve at the heater location (this may already be part of a flex connector kit, but confirm with your installer).
- Connect the approved flexible gas connector from the shutoff valve to the heater's inlet — this final connection is within DIY scope in most jurisdictions if the shutoff valve is already in place and the line is turned off.
What requires a licensed pro
- Running any new gas branch line from your main supply to the patio.
- Installing or modifying shutoff valves on the main line.
- Any underground gas line work.
- Final pressure testing of the supply line per NFPA 54 requirements.
- Obtaining the permit and scheduling the inspection.
Isolation and pressure check before first startup
Once the gas fitter has signed off and the permit is closed, do a soap-water leak test on every connection from the shutoff valve to the heater inlet just as you would on a propane unit. Open the shutoff valve slowly. Check all fittings and the flex connector for bubbles. The heater's main control valve should be in the off position during this test. If everything is clean, proceed to startup. The ignition sequence for a natural gas patio heater is functionally identical to propane: hold the knob, ignite the pilot, hold for the thermocouple to heat (15 to 30 seconds), then turn to operating temperature.
Electric patio heaters: mounting, wiring, and first power-up
Electric infrared patio heaters split into two categories with very different installation requirements: plug-in models (typically under 1,500W in the US, using a standard 120V NEMA 5-15 outlet) and hardwired models (anything from 1,500W to 6,000W or more, requiring a dedicated 240V circuit in most cases). The line between them varies by manufacturer, Heatstrip explicitly states that higher-wattage models require hardwiring rather than plug-in installation. Check your model's spec sheet before assuming you can use an extension cord.
Circuit and outlet requirements
Outdoor electrical installations are subject to GFCI protection requirements under the NEC (NFPA 70). The 2020 and 2023 NEC editions expanded GFCI protection requirements for outdoor receptacles and certain outdoor equipment, your local adopted edition determines exactly what applies, but the practical guidance is this: if your outdoor outlet isn't already GFCI-protected, it needs to be before you plug in a patio heater. See the CPSC summary of NEC section 210.8(F) and outdoor GFCI changes for details on the 2020/2023 GFCI expansion. For hardwired heaters, the circuit must be dedicated (no other loads sharing it), sized correctly for the heater's amperage draw, and GFCI-protected per local code. A 2,000W, 240V heater draws approximately 8.3 amps; a 4,000W model draws about 16.7 amps. Always size the circuit for 125% of the continuous load.
Mounting a wall or ceiling electric heater
- Use a stud finder to locate framing members behind the mounting surface. Lag screws into studs are mandatory for heaters over 10 lbs — toggle bolts in drywall alone are not acceptable.
- Hold the mounting bracket in position and mark stud locations. Drill pilot holes slightly smaller than your lag screw diameter to prevent splitting.
- Mount the bracket and torque screws to the value specified in the manual (or firmly snug if not specified). Check that the bracket is level.
- Hang the heater body on the bracket per the manufacturer's method — most wall-mount heaters use a hook-and-lock system that allows angle adjustment after hanging.
- Set the downward tilt angle. For most overhead-mounted electric infrared heaters, a 30 to 45 degree downward angle toward the seating area gives the best coverage. Refer to your model's radiant footprint diagram to confirm.
- Route the power cable or conduit to the connection point. For hardwired installs, conduit protects the wire run and is required in most outdoor applications — use weatherproof conduit fittings.
- Make wire connections with the breaker locked off. Verify with a non-contact voltage tester before touching any wire. Follow the wiring diagram in the manual exactly.
First power-up checklist
- Confirm all mounting hardware is tight and the heater is secure before energizing.
- Verify the area below and in front of the heater is clear — no combustibles within the minimum clearance distance.
- Switch the breaker on and test the GFCI (press test/reset) before operating the heater.
- Power on at low setting first. Electric infrared heaters often glow orange-red within 30 to 60 seconds — this is normal and expected.
- On first startup, a brief odor from manufacturing residue is normal. Run at full power for 5 to 10 minutes outdoors before occupying the space.
- Test any controls, dimmers, or smart switches included with the heater. Verify the remote (if included) operates correctly.
- If the heater doesn't power on, check the GFCI outlet first, then the breaker, then the heater's internal reset button (present on many models). Consult the troubleshooting section of your manual if the problem persists.
Mounting specifics: freestanding, tabletop, wall-mounted, and ceiling-mounted
Freestanding: anchoring for stability
Freestanding heaters are the easiest to set up but the most vulnerable to tipping. The tilt-switch safety interlock will shut off a gas heater if it leans beyond a set angle (usually around 30 degrees), but the interlock can't prevent the physical hazard of a 50 lb unit falling. On permanent or semi-permanent installations, use the stake-down kit if your heater includes one, or run a single stainless steel cable anchor from the pole to a deck anchor point. On decks, avoid placing freestanding heaters near the edge or near furniture that could be knocked into them. Keep the base weight ring in place, it's not optional.
Tabletop: surface and stability requirements
Tabletop heaters need a flat, level, heat-resistant surface. Most produce radiant heat directly downward onto the table surface as well as outward, so glass tabletops are a poor choice, stick to concrete, stone, tile, or purpose-made patio table surfaces. The heater's base must contact the table surface across its full footprint, not balanced on a table edge or uneven surface. Keep the center of the table clear of candles, paper, tablecloths, or any combustible material within 18 inches of the unit.
Wall-mounted: bracket load ratings and anchor requirements
Wall-mount brackets must be rated for at least twice the heater's weight to accommodate dynamic loads. Masonry anchors (sleeve anchors or wedge anchors) into concrete or brick are preferred for heavy units; wood-screw lag bolts into studs for wood-frame walls. After mounting, physically push the heater sideways and pull it forward before energizing, any movement in the bracket indicates an inadequate anchor. Stucco and EIFS (synthetic stucco) exteriors require special anchoring, never rely on surface-only fasteners in these materials.
Ceiling-mounted: structural load and vibration
Ceiling mounting carries the highest structural risk if done wrong. You need to know what your ceiling structure is (wood joists, steel beam, concrete slab) and what the rated load capacity of your chosen anchor point is. For pergolas and patio covers, attach only to structural members, beams, not lattice or decorative trim. Use hardware rated for the heater's weight plus a 4:1 safety factor. Verify that the mounting bracket's bolt pattern matches an available structural member; if it doesn't, add a structural spreader plate to bridge between joists. Check all ceiling-mount hardware for tightness every season, as thermal expansion and contraction loosen fasteners over time.
Troubleshooting the most common setup failures
Most problems that appear during first startup are actually setup or assembly issues, not heater defects. Work through this flow before assuming you have a faulty unit.
| Symptom | Most likely cause | Fix |
|---|---|---|
| Pilot lights but goes out when you release the knob | Thermocouple not heated enough, or faulty thermocouple | Hold the knob in longer (30–45 seconds minimum). If it still goes out, replace the thermocouple — it's the most common consumable failure on gas patio heaters. |
| Piezo clicks but no ignition at all | Electrode gap too wide, electrode wire disconnected, or electrode tip cracked | Check the igniter wire connection at the burner. Inspect the electrode tip for cracks. Adjust electrode gap to manufacturer spec (typically 3–4mm). |
| Heater shuts off by itself within minutes | Tilt-switch triggered (unit not level), or thermocouple failing | Check surface level with a bubble level. Test tilt-switch continuity with a multimeter. If level and tilt-switch is fine, thermocouple is the next suspect. |
| Low flame, yellow/orange flame instead of blue | Low gas pressure, clogged burner orifice, or wrong regulator | Confirm cylinder is not empty. Check regulator for damage. Inspect and clean burner orifice with compressed air (not wire — it widens the orifice). |
| Electric heater won't power on | GFCI tripped, breaker tripped, or internal thermal cutout triggered | Reset GFCI outlet and breaker first. Let heater cool completely, then check for an internal reset button (usually on the back of the unit). |
| Electric heater powers on but no heat | Burnt element, loose element connection | Check element resistance with a multimeter (open circuit = failed element). Element replacement is a DIY repair on most models. |
| Soapy water shows bubbles at regulator fitting | Loose connection or damaged regulator O-ring | Close cylinder valve, relieve pressure, re-tighten fitting. If bubbles persist, replace the regulator — do not use a heater with a leaking regulator. |
Routine maintenance and safety checks
A properly maintained patio heater runs reliably for many seasons. These checks take about 20 minutes at the start of each season and another 5 minutes each month during active use.
Start-of-season checklist
- Inspect the hose and regulator on propane units for cracks, brittleness, or kinking. Replace any hose that shows visible cracking — hoses have a recommended replacement interval (often 5 years; check your manual or look for a date stamp on the hose itself).
- Clean the burner ports with compressed air. Spider webs and insect nests inside burner tubes are a leading cause of ignition failure and are extremely common after winter storage.
- Test the tilt-switch by gently tilting the heater 35 to 40 degrees — the gas valve should close. If it doesn't, the safety interlock is faulty and the heater should not be used until repaired.
- Check all pole and base hardware for rust and looseness. Tighten any loose fasteners and treat surface rust with a spray-on rust converter before it progresses.
- For electric heaters, inspect the power cord and any weatherproof connectors for cracking, corrosion, or moisture ingress. Clean quartz tube surfaces gently with a dry cloth — fingerprints and residue reduce output.
- Verify the reflector bowl or emitter guard is clean, undented, and properly aligned. A misaligned reflector reduces efficiency significantly.
- Perform a leak test on all propane gas connections even if the heater was stored connected.
Monthly in-season checks
- Visual inspection of the hose for abrasion against pole or base edges.
- Quick soap test on regulator and cylinder connection if the heater has been reconnected or moved.
- Check that the base is still level if the heater is on a surface that shifts (wooden decks, pavers).
- Wipe down the reflector bowl and emitter head to remove grease, pollen, and debris — buildup affects both output and longevity.
- For mounted electric heaters, check that bracket hardware hasn't loosened.
Finding your manual and OEM replacement parts
The most useful piece of troubleshooting advice I can give is this: get the correct manual for your exact model before you start diagnosing anything. Clearances, regulator pressures, electrode gaps, thermocouple part numbers, and assembly sequences are model-specific. A Hampton Bay NCZH-G-SS has different internals than a Dyna-Glo DGPH series, which is different again from a Bromic Tungsten, the symptoms can look identical but the fixes and part numbers differ.
- Check the manufacturer's website first. Most brands (Bromic, Infratech, Napoleon, Dyna-Glo, Mr. Heater) maintain a downloadable manual archive indexed by model number.
- Your model number is typically on a sticker on the base, the pole, or inside the door of the cylinder compartment. Write it down before you need it.
- For Home Depot house brands (Hampton Bay, Home Decorators), manuals are often available on the Home Depot product page under the 'Documents' or 'Manuals' tab.
- OEM replacement parts (thermocouples, igniter electrodes, regulators, hose assemblies) are best sourced directly from the manufacturer or an authorized parts distributor. Generic thermocouples often fit physically but may have different millivolt output specs that cause premature shutoff — match the OEM part number when possible.
- If the manufacturer no longer supports your model, an appliance parts site indexed by part number is your next resource. Patio heater manual and parts lookup resources can help cross-reference discontinued models.
A note on HS codes (relevant if you're importing)
For the vast majority of homeowners buying domestically, Harmonized System (HS) codes are irrelevant. They matter if you're importing heaters from overseas for a commercial project, buying directly from a manufacturer outside your country, or dealing with customs documentation for a business purchase. Gas-fired patio heaters typically fall under HS heading 7321 (stoves, ranges, grates, cookers and similar non-electric domestic appliances) or occasionally 8516 depending on the fuel type and configuration. Electric infrared heaters generally fall under 8516 (electric instantaneous or storage water heaters and immersion heaters; electric space heating apparatus). If you're navigating an import, confirm the exact code with a licensed customs broker, as misclassification has real tariff consequences.
FAQ
What authoritative standards and codes must I consult when creating a DIY patio heater setup guide?
Reference national standards and model codes first: ANSI/CSA Z83.26 for gas‑fired outdoor infrared patio heaters; NFPA 54 / ANSI Z223.1 (National Fuel Gas Code) for natural‑gas piping and appliances; NFPA 58 for LP‑Gas (propane) storage, transport and leak testing; and NEC/NFPA 70 (National Electrical Code) for electric heater wiring and GFCI requirements. Also check the local adopted building, fire (IFC), and electrical code editions and the specific manufacturer installation manuals for model‑level clearances, pressures, and wiring diagrams.
What pre‑setup checklist should a DIY homeowner complete before starting assembly or installation?
Checklist: verify heater type (propane, natural gas, electric) and model; read the OEM manual and parts list; confirm required clearances and mounting heights; check fuel supply (propane cylinder size/regulator ratings or natural‑gas service pressure); confirm available electrical supply (voltage, GFCI, circuit amperage); gather tools and PPE (soapy leak solution, adjustable wrench, pipe thread sealant where allowed, multimeter, drill, ladder); obtain permits if local code requires; plan transport/pickup with two people and secure packaging; and disconnect power/gas at source before work.
What specific measurements and data do I need for type‑specific assembly and hookup (propane, natural gas, electric)?
Propane: regulator outlet pressure specified by OEM (typ. ~11 in. WC for many table/freestanding models), correct hose/regulator assembly, cylinder weight limit (ANSI Z83.26 permits up to 20 lb integral mounting where allowed). Natural gas: inlet pressure and manifold pressure requirements (check OEM and NFPA 54), gas line sizing and shutoff valve location, need for licensed gas fitter. Electric: required voltage, current draw (amps), hard‑wire vs. plug‑in, conduit/wiring gauge per NEC, GFCI/protection requirements. For all types: minimum clearances, mounting height, and recommended mounting hardware.
What are concise assembly and hookup steps for propane freestanding or tabletop heaters?
1) Unpack on a flat surface and confirm all parts with OEM parts list. 2) Assemble reflector, burner, and base per manual; tighten fasteners to specified torque if given. 3) Install the regulator and hose supplied by manufacturer; use manufacturer‑supplied parts only. 4) Connect regulator to cylinder: hand‑tighten nut, then wrench‑snug only; do NOT use pipe dope on cylinder thread unless manual permits. 5) Perform a leak test with soapy water on all connections—never use flame. 6) Position heater on level, noncombustible surface with required clearances. 7) Follow OEM lighting/startup sequence.
What are concise assembly and hookup steps for natural‑gas wall, ceiling, or freestanding heaters?
1) Confirm appliance listing for natural‑gas and read OEM and NFPA/National Fuel Gas Code requirements. 2) Hire or consult a licensed gas installer for piping, pressure testing, and final connection. 3) Mount bracket/hardware at the specified height and clearances. 4) Install a manual shutoff valve and sediment trap/drip leg where required. 5) Connect to properly sized gas piping with approved fittings and thread sealant per code and OEM. 6) Pressure‑test the system per NFPA 54 and OEM instructions; address leaks before lighting. 7) Complete startup per manufacturer sequence.
What are concise assembly and hookup steps for electric heaters (wall/ceiling/freestanding)?
1) Verify voltage and amperage requirements and whether the unit is plug‑in or requires hard‑wiring. 2) If hard‑wired, have a licensed electrician install branch circuit, conduit, and GFCI protection per the adopted NEC. 3) Mount the heater using OEM brackets at recommended heights and clearances; secure to structural framing. 4) Connect wiring per manufacturer diagram, verify grounding, and install required disconnects. 5) Commission by energizing circuit and following the OEM startup/checklist.