
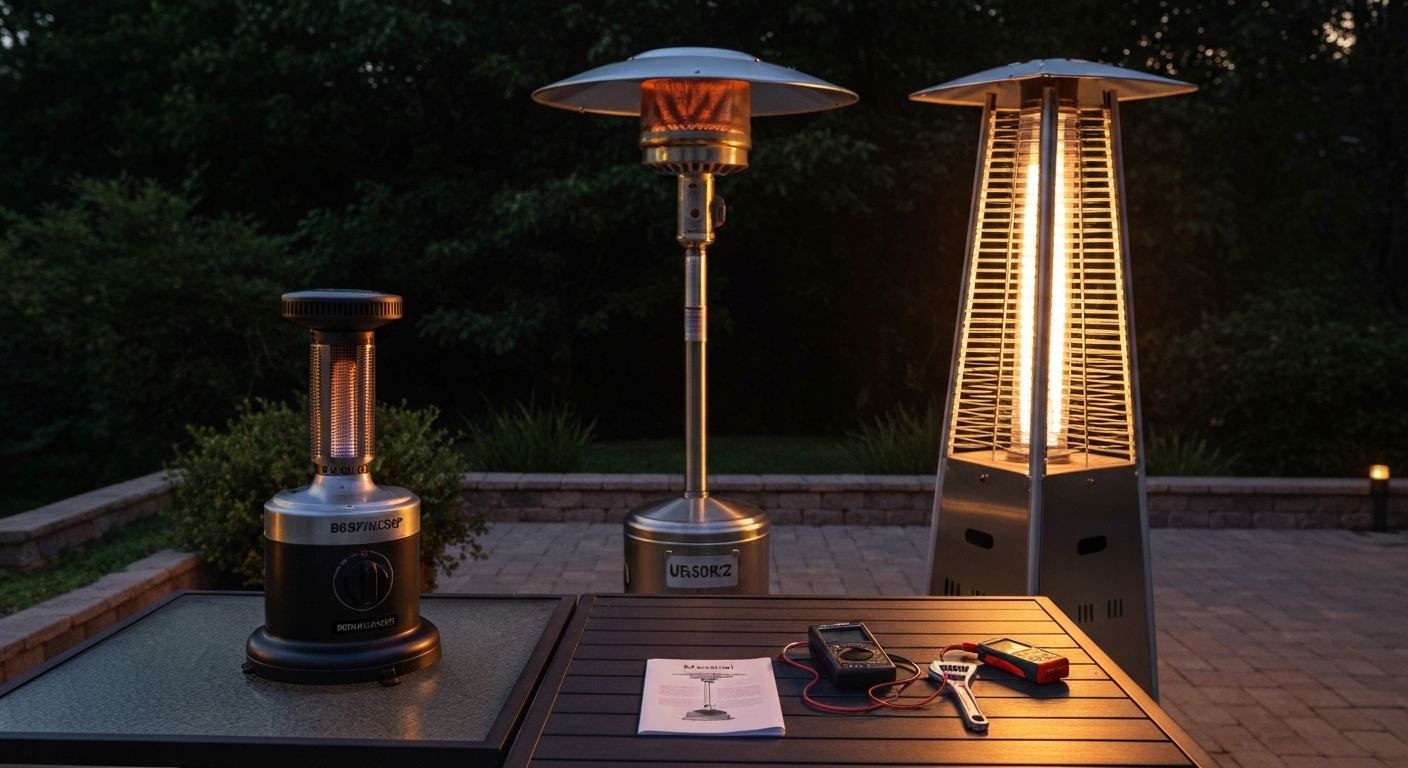
The Bali Outdoors portable patio heater manual covers assembly, ignition, and safety for both the tabletop model (B0897M2SQP) and the tall freestanding unit (UR50BK2). Both PDFs are freely downloadable from the Bali Outdoors website and from major third-party manual archives. If your heater won't ignite, won't stay lit, or keeps shutting off unexpectedly, the fix almost always comes down to one of four components: the thermocouple, the igniter, the tilt switch, or the regulator. This guide walks you through model identification, manual retrieval, assembly, leak testing, component diagnostics, and routine maintenance so you can handle all of it yourself without an expensive service call.
Bali Outdoors Portable Patio Heater Manual: DIY Guide - Assembly & Parts

Grant Mercer
25 Jul 2026
Safety first: what to check before you touch anything
Propane is heavier than air, which means a slow leak collects at floor level and stays there until something ignites it. Before you open a panel, swap a part, or even pull the heater out of storage, run through this checklist every single time. It takes about two minutes and it is not optional.
- Turn the control knob to OFF and close the tank valve fully before any inspection or disassembly.
- Work outdoors or in a space with active cross-ventilation. Never diagnose a propane appliance in an enclosed garage.
- Keep open flames, lit cigarettes, and electric sparks at least 10 feet away from the work area.
- Sniff at floor level before starting. If you detect a rotten-egg smell, move away and do not operate any electrical switches until the area is ventilated.
- Disconnect the regulator hose from the tank before removing any component from the gas train (burner, valve, thermocouple seat).
- Treat every regulator hose over 5 years old as suspect. Rubber degrades and micro-cracks become leak points.
- Never use an open flame to locate a gas leak. Use a soap-and-water solution or a dedicated combustible-gas detector.
- Keep a working fire extinguisher rated for Class B (flammable gas/liquid) fires within arm's reach.
- Read the relevant section of your manual before performing any step. Bali Outdoors manuals include clearance distances (typically 3 feet from any combustible surface overhead and 2 feet on each side) that vary slightly by model.
How to find your Bali Outdoors model and download the right manual
Bali Outdoors publishes their manuals in two places: the product listing page on their own website (balioutdoors.com) and on the Amazon product detail page for each unit. The most reliable approach is to search the model number directly, because the tabletop and freestanding manuals are not interchangeable.
The tabletop propane heater carries model number B0897M2SQP. Its manual covers the step-by-step ignition sequence, the 10-to-15-second thermocouple warm-up hold, outdoor-use-only safety warnings, and minimum clearance distances. The tall standing gas patio heater uses model UR50BK2 and its manual includes an exploded parts diagram, a spec sheet listing BTU output and gas pressure, tip-over shutoff descriptions, and a labeled parts list. If your unit does not match either of those model numbers exactly, search the model number on ManualsLib (manualslib.com) or Manuals+ (manuals.plus), both of which archive a wide range of Bali Outdoors PDFs. For OEM documentation that is not publicly posted, email Bali Outdoors directly at aftersales@balioutdoors. Bali Outdoors lists [email protected] as the official after‑sales contact for parts, warranty inquiries, and to request OEM manuals or exploded diagrams on its blank" rel="noopener noreferrer">Contact Us | Support for Outdoor Living Essentials page. com with your model number and purchase date. They can provide replacement manuals and exploded diagrams on request. If you need a specific file, request the tall Mocha Mainstays patio heater manual (UUID 14bfb05e-4d3d-41cd-b629-9160ce9c1940) when you contact them. For an alternative source you can also consult the Sunbeam Patio Master manual for similar procedures and parts guidance.
Tabletop vs freestanding vs quartz-glass-tube: which one do you have?
Getting the diagnosis right starts with knowing exactly which type of heater you are working on, because the gas train layout, igniter type, and thermocouple position differ between formats.
| Feature | Tabletop (B0897M2SQP) | Freestanding (UR50BK2) | Quartz-Glass-Tube Variants |
|---|---|---|---|
| BTU output | ~10,000–11,000 BTU | 36,000–40,000 BTU | Varies (typically 40,000–46,000 BTU) |
| Fuel source | 1 lb disposable or 20 lb via adapter | 20 lb standard tank | 20 lb standard tank |
| Igniter type | Piezo push-button | Piezo push-button or rotary | Electronic spark module (battery) |
| Thermocouple location | Inside burner dome, above pilot flame | Top of pole assembly, above pilot | Beside quartz tube, pilot-adjacent |
| Tilt switch | Mercury or ball-bearing type, base-mounted | Mercury or ball-bearing type, pole-mounted | Ball-bearing type, base or mid-pole |
| Regulator | Single-stage low-pressure, hose-and-coupler | Single-stage or two-stage, longer hose | Single-stage low-pressure |
| Manual source | B0897M2SQP PDF on balioutdoors.com / ManualsLib | UR50BK2 PDF on balioutdoors.com / ManualsLib | Check model sticker; search ManualsLib |
Quartz-glass-tube variants use an electronic battery-powered spark module rather than a piezo striker, which matters a lot when ordering a replacement igniter. Piezo and electronic igniters are not cross-compatible. If you are unsure, the sibling quartz glass tube patio heater instruction manual resource covers that specific format in more detail and is worth reading alongside this guide.
Reading the parts diagram: finding every component you might need to replace
The exploded diagram in the UR50BK2 manual numbers every part in the gas train. Here is how to orient yourself when you first open it, using the standard layout that applies to nearly all Bali Outdoors standing heaters.
- Regulator and hose assembly: always shown at the bottom of the diagram, connecting tank to the gas valve. Look for the POL fitting on one end and the threaded inlet on the valve body at the other.
- Control valve / gas valve: the component your knob attaches to. The diagram shows it as a central hub from which the pilot tube and main burner tube branch off.
- Pilot assembly and thermocouple: shown as a small sub-assembly just above the valve. The thermocouple tip must sit in the pilot flame path, typically within 3/8 inch of the flame.
- Piezo igniter: usually attached to the valve body with a single bracket screw and a push-rod that passes through to the exterior knob or button.
- Burner ring and emitter screen: the top of the assembly. On quartz-tube units, the quartz tube sits in a bracket above the burner ring.
- Tilt switch: on freestanding models it is mounted mid-pole or at the base; on tabletop units it is under the base pan. The diagram labels it as a 'tip-over safety device' or 'dump switch.'
- Reflector and dome: the top cap that focuses heat downward. It is typically held by three or four screws and has a center hole for the emitter.
When you identify a suspect part in the diagram, write down both the part name and the item number shown on the diagram before you call or email a supplier. Bali Outdoors support ([email protected]) can match a diagram item number to the current OEM part number and confirm availability.
Recording your model and serial number before ordering parts
This step sounds obvious but it prevents expensive mistakes. On the tabletop B0897M2SQP, the model and serial number label is on the underside of the base, near the gas inlet. On the freestanding UR50BK2, it is on a metal tag affixed to the pole approximately 6 inches above the base ring. Write down everything on that tag before you do anything else.
- Model number (example: UR50BK2 or B0897M2SQP)
- Serial number (unique to your unit, required for warranty claims)
- Manufacturing date or date code if shown
- Rated BTU output and gas type (LP/propane)
- Rated gas pressure (most Bali Outdoors manuals specify 11 inches water column inlet pressure at the appliance)
- Igniter type noted on the label or in the manual (piezo or electronic)
Take a photo of the label with your phone before the ink fades or the label is damaged by weather. Store it with your manual PDF. When you contact a parts supplier, having the full model number plus serial means the rep can cross-reference the correct revision of the parts diagram, which matters because Bali Outdoors has made mid-run changes to thermocouple thread size and igniter bracket style on some models.
Assembly and initial setup: from unboxing to first fire
Both the tabletop and freestanding manuals use a similar assembly sequence. The steps below are drawn from the UR50BK2 manual and the B0897M2SQP manual, with notes for each where the process differs.
Freestanding unit (UR50BK2) assembly
- Lay all parts on a clean, flat surface and compare them against the parts list in the manual before picking up any tools.
- Attach the base legs to the base ring using the provided bolts and lock washers. Torque to snug-plus-quarter-turn; over-tightening the cast-aluminum brackets can crack them.
- Slide the lower pole section into the base ring collar and secure the set screw finger-tight for now.
- Connect the middle and upper pole sections, aligning the wire-routing notch if your model routes the igniter wire internally. Thread the igniter wire through before locking each section.
- Mount the emitter head assembly onto the top pole section. The head typically locks with a split-ring clamp and two bolts.
- Route and connect the igniter wire to the piezo unit at the valve body. The connector is usually a push-on bullet connector; it only fits one way.
- Confirm the tilt switch wire harness connection at the mid-pole mount point. Two small spade connectors, typically red and black, plug onto the switch terminals.
- Attach the regulator hose to the valve body inlet (hand-tight plus one-quarter turn with a wrench; do not over-torque brass fittings).
- Do not connect to the propane tank yet. Complete the leak test in the next section first.
- Once leak-tested, set the heater on level ground, confirm the base legs are fully extended and locked, and proceed to the ignition sequence.
Tabletop unit (B0897M2SQP) assembly
The tabletop model ships nearly pre-assembled. The main assembly steps are attaching the emitter dome (two or three screws, hand-tight), placing the reflector disc over the burner tube, and connecting the regulator hose. The hose on the tabletop unit connects to either a 1-lb disposable cylinder directly or to a 20-lb tank via a separately purchased type-1 adapter hose. The manual specifies outdoor use only and a minimum 3-foot clearance from any overhead surface, which matters on a covered patio.
First ignition sequence (both models)
- Open the tank valve slowly, no more than one full turn.
- Turn the control knob to the pilot/ignite position (usually a 'flame' icon or marked PILOT).
- Press and hold the knob in (this opens the pilot gas supply and bypasses the thermocouple safety seat).
- While holding the knob in, press the piezo igniter button or push-rod repeatedly until the pilot lights. You should see a small blue flame at the thermocouple tip.
- Continue holding the knob in for 10 to 15 seconds. This is the thermocouple warm-up period specified in the Bali Outdoors manual. Do not release early — if you do, the gas valve will close and you have to restart.
- Release the knob slowly. If the pilot stays lit, rotate the knob from PILOT to your desired heat setting (LOW, MEDIUM, HIGH).
- If the pilot goes out when you release the knob, the thermocouple is not generating enough voltage to hold the safety valve open. See the thermocouple diagnosis section below.
- Allow 2 to 3 minutes for the emitter screen to reach full operating temperature before measuring heat output.
Leak testing and pre-start pressure checks
The Propane Education and Research Council (PERC) recommends performing a soap-and-water bubble test at every initial connection and at the start of each season. This is the minimum you should do. If you want to go further and test regulator output pressure, you need a water manometer or a low-pressure gauge, and PERC's guidance is clear that pressure testing of the regulator itself should be done by a trained technician, not a homeowner. Here is the practical boundary: you can do the bubble test yourself; leave manometer testing to a pro.
Soap-bubble leak test procedure
- Mix a solution of dish soap and water (roughly 1 part soap to 10 parts water) in a small cup. Dedicated leak-detection fluid works better and is inexpensive at hardware stores.
- Connect the regulator hose to the tank but leave the control knob at OFF.
- Open the tank valve slowly, one full turn.
- Apply the soap solution generously to every connection point: the tank-to-regulator coupling, the regulator body itself, the hose along its full length (look for cracks or abrasions), and the hose-to-valve connection at the appliance.
- Watch for bubbles for at least 30 seconds at each joint. Bubbles indicate a leak.
- If you find a leak at a threaded joint, close the tank valve, depressurize by opening the control knob briefly, then re-tighten the joint and retest.
- If the leak is at the hose body (a crack or blister), replace the hose. Do not use the heater with a compromised hose.
- If leaks persist after re-tightening, replace the regulator and hose assembly. They are sold as a unit for most Bali Outdoors models.
Standard low-pressure LP regulators, including those used on all Bali Outdoors portable heaters, are designed to deliver approximately 11 inches water column (11 in. w.c.) outlet pressure to the appliance. If your heater burns with a very weak or unusually low flame even with a full tank and good connections, a failing regulator that cannot maintain 11 in. w.c. is the likely cause. At that point, replacement is the correct action rather than adjustment, since the internal relief valve and diaphragm are not field-serviceable. For professional pressure verification, a technician uses a water manometer connected to the test port on the appliance valve body.
For leaks that are difficult to locate by eye, SENSIT Gold G2 and Bacharach Leakator series combustible-gas detectors are the professional-grade tools that service technicians use. They detect propane concentrations well below the lower explosive limit and are far more sensitive than the nose-only method. If you have a persistent leak you cannot isolate with the soap test, a technician with one of these detectors can find it in minutes.
Diagnosing the most common faults
Heater won't ignite at all
Start by confirming gas supply: tank is not empty, valve is open, and the regulator hose is fully connected. Then isolate the igniter itself. Press the piezo button with the heater disconnected from gas and hold a finger near the igniter tip. You should feel and hear a sharp snap and see a visible spark. If there is no spark, the piezo unit is dead. Replacement piezo igniters for Bali-style heaters are widely available on Amazon, eBay, and Walmart's online parts listings. The critical thing before ordering is to confirm whether your unit uses a piezo striker or a battery-powered electronic spark module: they are not interchangeable, and some quartz-tube variants use the electronic type.
If there is a spark but no ignition, the problem shifts to gas delivery. Check that the pilot orifice is not blocked. A partially clogged pilot orifice produces an intermittent or invisible pilot flame that cannot sustain combustion. Clear it with a can of compressed air rather than a wire probe, which can enlarge the orifice and change the gas-to-air ratio.
Pilot lights but won't stay lit (thermocouple diagnosis)
This is the single most common complaint on Bali Outdoors heaters. The BALI OUTDOORS 28-inch 50,000 BTU Propane Fire Pit Table Instruction Manual includes troubleshooting tables that identify thermocouple and igniter faults and recommend checks such as pilot positioning and battery replacement for electronic igniters. When you release the control knob after holding it 10 to 15 seconds and the pilot immediately goes out, the thermocouple is either not generating enough voltage or is not positioned correctly in the pilot flame.
First, check thermocouple position before replacing anything. The tip of the thermocouple probe must sit directly in the pilot flame, not above or beside it. The tip should be engulfed in the hottest part of the blue cone. On freestanding models the bracket that holds the thermocouple sometimes loosens over a season and lets the probe drift out of the flame path. Reseat it and test again.
If positioning does not fix it, test the thermocouple with a digital multimeter. Set the meter to the DC millivolt range (mV DC). Fluke recommends selecting the mV range, confirming the red probe is in the voltage input jack (not the amp jack), and using the correct polarity. Connect the red probe to the thermocouple's threaded terminal and the black probe to the body/sheath. Light the pilot and hold it for a full 60 seconds to allow the thermocouple to reach stable temperature. A properly functioning thermocouple produces 25 to 30 mV open-circuit. For a loaded (closed-circuit) reading, the working range drops to approximately 12 to 15 mV. If you read below 10 mV open-circuit, the thermocouple is failing and should be replaced. Thermocouples are inexpensive (typically under $15 for a universal replacement) and are among the most commonly stocked aftermarket parts for patio heaters of this type.
Heater shuts off on its own (tilt switch diagnosis)
The tilt switch (also called a tip-over switch or dump switch) is a normally-closed device: when the heater is upright, the switch is closed and allows the circuit to operate. When the heater tilts beyond a set angle, the switch opens and cuts power to the igniter circuit or directly interrupts the gas valve, shutting the heater off. If your heater shuts off randomly on a level surface, the tilt switch may have failed in the open position, or it may be responding to a slight lean from an uneven patio surface.
To test the switch, close the tank valve and disconnect the gas supply. Locate the tilt switch (base of freestanding models, underside of the tabletop base pan). Disconnect its two wires. Set your multimeter to continuity mode (the beep/diode symbol). With the heater perfectly upright, probe the two switch terminals. You should get continuity (beep). Tilt the heater about 30 degrees to either side: continuity should open (no beep). If you get no continuity at all in the upright position, the switch is stuck open and needs replacement. If you get continuity in all positions, the switch is stuck closed, which means the safety protection is defeated and replacement is still required. The FD4-series ball-bearing tilt switch is the most commonly cited aftermarket replacement that fits Bali-style heaters; confirm the terminal type (spade or wire-lead) before ordering.
Weak or uneven flame
A weak main flame with a full tank almost always points to one of three causes: a low-flow regulator, a partially blocked burner ring, or a clogged burner orifice. Start by inspecting the burner ports (the small holes around the burner ring) with the gas off. Spider webs, insect nests, and accumulated debris are common blockers, especially after storage. Clear them with compressed air. If the flame is yellow and sooty rather than clean blue-orange, the air shutter on the burner throat may need adjustment, though most Bali Outdoors consumer models have a fixed air shutter and this is not field-adjustable. A regulator that cannot maintain 11 in. w.c. will also produce a weak flame; replace the regulator if clearing the burner does not help.
Common replacement parts and where to get them
| Part | Notes | Sources |
|---|---|---|
| Thermocouple | Universal 24-inch or 36-inch millivolt type; confirm thread size (usually M8x1 or 3/8-in. SAE) | Amazon, Walmart parts, eBay, HVAC supply |
| Piezo igniter assembly | Confirm piezo vs electronic type before ordering; Bali bracket style varies by model year | Amazon, eBay, [email protected] |
| Electronic spark module (quartz-tube) | Battery-powered; incompatible with piezo units; verify voltage (1.5V AA typical) | Amazon, eBay |
| Tilt switch | FD4-series ball-bearing type fits most Bali freestanding models; confirm terminal style | Amazon, eBay, patio heater parts sellers |
| Regulator and hose assembly | Single-stage, type-1 POL fitting, rated for low-pressure LP; replace as a unit | Hardware stores, Amazon, Walmart |
| Burner ring | Model-specific diameter; measure existing ring before ordering | [email protected], Amazon |
| Quartz emitter tube | Fragile; handle with cloth to avoid oil contamination; model-specific length | Amazon, eBay, [email protected] |
| Reflector / dome | Usually model-specific; include model number when ordering | [email protected] |
Always verify your igniter type (piezo or electronic) before ordering. This is the single most common ordering mistake on Bali Outdoors heaters, and it is called out explicitly in Bali's own parts guidance: piezo and battery-powered electronic igniters are not interchangeable. When in doubt, email [email protected] with your model number and they can confirm the correct part.
Warranty and when to stop DIYing
Bali Outdoors heaters typically carry a limited manufacturer warranty. Performing DIY repairs during the warranty period may void coverage, so if your unit is new and developing a fault, contact [email protected] first. Out of warranty, DIY repair is entirely reasonable for the parts and procedures covered in this guide.
There are three situations where you should stop and call a qualified propane technician rather than continuing on your own. First, if you detect a gas smell that persists after closing the tank valve and allowing 10 minutes of ventilation, there may be an internal valve leak that requires professional equipment to locate and repair. Second, if the gas valve body itself is cracked, corroded through, or has a broken stem, do not attempt to repair it. Replace the entire valve assembly or retire the heater. Third, if you are uncertain about regulator outlet pressure and need a manometer-verified pressure test, a licensed technician with a calibrated gauge should perform it. Those three scenarios go beyond reasonable DIY scope regardless of skill level.
Routine maintenance, cleaning, and winterization
Cleaning the emitter screen and reflector
The stainless steel emitter screen and the aluminum reflector both accumulate oxidation, grease, and debris over a season. With the gas supply closed and the heater completely cool, remove the dome and reflector (usually three screws). Clean the reflector with a soft cloth and mild dish soap; avoid abrasive pads that scratch the polished surface and reduce heat reflection. The emitter screen can be brushed gently with a soft-bristle brush to dislodge debris. Do not use water on the emitter screen if the heater has a quartz tube: quartz glass is sensitive to oils and contamination. Handle quartz tubes with a clean cloth or gloves.
Inspecting and cleaning the burner and pilot assembly
At the start and end of each season, inspect the burner ring ports and the pilot orifice for spider webs or insect nests. These form quickly during storage and are a leading cause of failed ignition in spring. Use compressed air to clear the burner ports. Do not use wire to probe the pilot orifice. Wipe the thermocouple tip gently with fine steel wool to remove oxidation, which builds up after prolonged use and reduces heat transfer to the probe junction.
Winterization and storage
- Run the heater until the tank is near-empty or fully disconnect and remove the propane tank for storage (tanks should be stored vertically outdoors, not in enclosed spaces).
- Turn the control knob to OFF and leave it there for storage.
- Disconnect the regulator hose from the tank and cap or bag the regulator inlet fitting to prevent insect entry.
- Inspect the hose for cracks, kinks, or brittle sections. Replace any hose that shows surface cracking before the next season.
- Wipe all metal surfaces with a light coat of silicone-based protectant to prevent rust, particularly on the pole sections and base ring of freestanding models.
- Cover the heater with a fitted patio heater cover or store it indoors. If storing vertically outdoors under a cover, ensure the cover is vented to prevent moisture accumulation.
- Store the manual PDF somewhere you can find it in spring, whether that is a phone photo album, a cloud folder, or a labeled envelope with your patio heater accessories.
Spring startup checklist
- Inspect the regulator hose end-to-end before connecting to a tank.
- Clear burner ports and pilot orifice with compressed air.
- Wipe the thermocouple tip with fine steel wool.
- Perform a full soap-bubble leak test before the first ignition.
- Test the tilt switch with a multimeter before use after a long storage period.
- Confirm all pole and base hardware is tight (vibration from wind can work fasteners loose over a season).
How this compares to similar brand manuals
The Bali Outdoors manual structure and gas-train design closely mirrors several other consumer-grade standing and tabletop propane heaters on the market. The Thermo Tiki outdoor propane patio heater uses an almost identical thermocouple and tilt-switch arrangement, so the millivolt test procedure and tilt-switch continuity test described above transfer directly. For the Thermo Tiki specifically, see the Thermo Tiki outdoor propane patio heater manual for model-specific diagrams and replacement-part references. The Belleze patio heater uses the same FD4-style tilt switch that fits many Bali models. The Cuisinart tabletop patio heater uses a similar piezo ignition sequence with the same 10-to-15-second knob-hold requirement for thermocouple warm-up. See the Cuisinart tabletop patio heater manual for the manufacturer's specific ignition sequence and thermocouple warm-up guidance. And Infinity Glo units share the quartz-tube emitter format, making the quartz-tube handling precautions above equally relevant. For model-specific details, consult the Infinity Glo patio heater manual for quartz-tube models. The core diagnostic logic, namely thermocouple millivolt testing, tilt switch continuity testing, and soap-bubble leak checking, applies across all of these brands because they share the same fundamental propane appliance safety architecture.
FAQ
How do I identify my Bali Outdoors patio heater model so I can find the correct manual?
Locate the model/serial label on the heater: common locations are the base plate, regulator/hose area, or under the burner/reflector. Note the model number format (examples: B0897M2SQP for tabletop, UR50BK2 for tall standing). Photograph the label and appliance. Compare photos to product listings on the Bali Outdoors product pages or to PDF manuals (tabletop vs freestanding vs quartz‑tube). If the label is missing, match physical features (tabletop vs freestanding, quartz/glass tube vs open burner, BTU rating printed on product page) and contact Bali Outdoors aftersales with your photos and purchase info (use their support contact) to confirm model and request OEM manual/exploded diagram.
Where can I download the official Bali Outdoors owner’s manual and parts diagrams?
Search Bali Outdoors product pages and the support/contact page for downloadable manuals. Many model manuals (tabletop and tall standing units) are available as PDF downloads and include assembly drawings and exploded parts lists. If you can’t find a manual online, email Bali Outdoors aftersales (provide model/serial photos) to request the OEM manual or exploded diagram.
What are the key safety warnings and pre‑use checks in the Bali Outdoors manual I should follow?
Follow manufacturer safety: outdoor use only, maintain required clearances (top and sides), use only approved propane cylinders, ensure stable placement (flat, level), attach regulator and hose properly, perform a leak test before first use, confirm tip‑over safety device and thermocouple are functioning, never move while lit, keep combustibles away, and follow the manual’s lighting and shut‑off procedures (typically hold control knob 10–15 seconds after ignition for thermocouple warm‑up).
Step‑by‑step: how do I assemble and set up a Bali Outdoors freestanding patio heater?
1) Unbox and lay out parts, verify parts against parts list/exploded view. 2) Assemble base, pole, burner head and reflector per manual, hand‑tighten fasteners then torque per manual. 3) Install and tighten the regulator/hose assembly to the tank—do not cross‑thread. 4) Position heater on level ground away from overhangs. 5) Install propane cylinder and open valve slowly. 6) Perform leak test (soap‑and‑water) at connections. 7) Light per manual: turn control knob to pilot, depress and ignite (piezo or battery spark), hold knob 10–15 seconds to warm thermocouple, then release and turn to high. 8) Check flame pattern and stability before use.
Step‑by‑step: how do I assemble and set up a Bali Outdoors tabletop (portable) patio heater?
1) Verify you have the tabletop burner head, base/stand and fuel source (small disposable cylinder or hose/regulator per model). 2) Attach base/stand to burner head and secure fasteners. 3) Install small cylinder or attach hose/regulator; for cartridge models ensure proper seating. 4) Leak‑test connections. 5) Light per manual (same ignition hold time for thermocouple warm‑up). 6) Confirm stable mounting and flame behavior. Tabletop units are smaller and use lower BTU regulators—follow model‑specific mounting and clearance notes in the manual.
How do quartz‑glass‑tube variants differ in assembly, hazards, and maintenance?
Quartz‑glass‑tube heaters have an enclosed tube around the flame; assembly often includes careful placement of the tube and ceramic end caps. Hazards: the tube can become extremely hot and is fragile—avoid impact, thermal shock, and touching while hot. Maintenance: inspect tube for cracks, clean soot deposits with soft cloth after cooling, and replace broken tubes using the exact part number. Ignition and safety devices (tilt switch, thermocouple) operate similarly to open‑burner units, but the tube changes heat pattern and may require different burner cleaning procedures.