
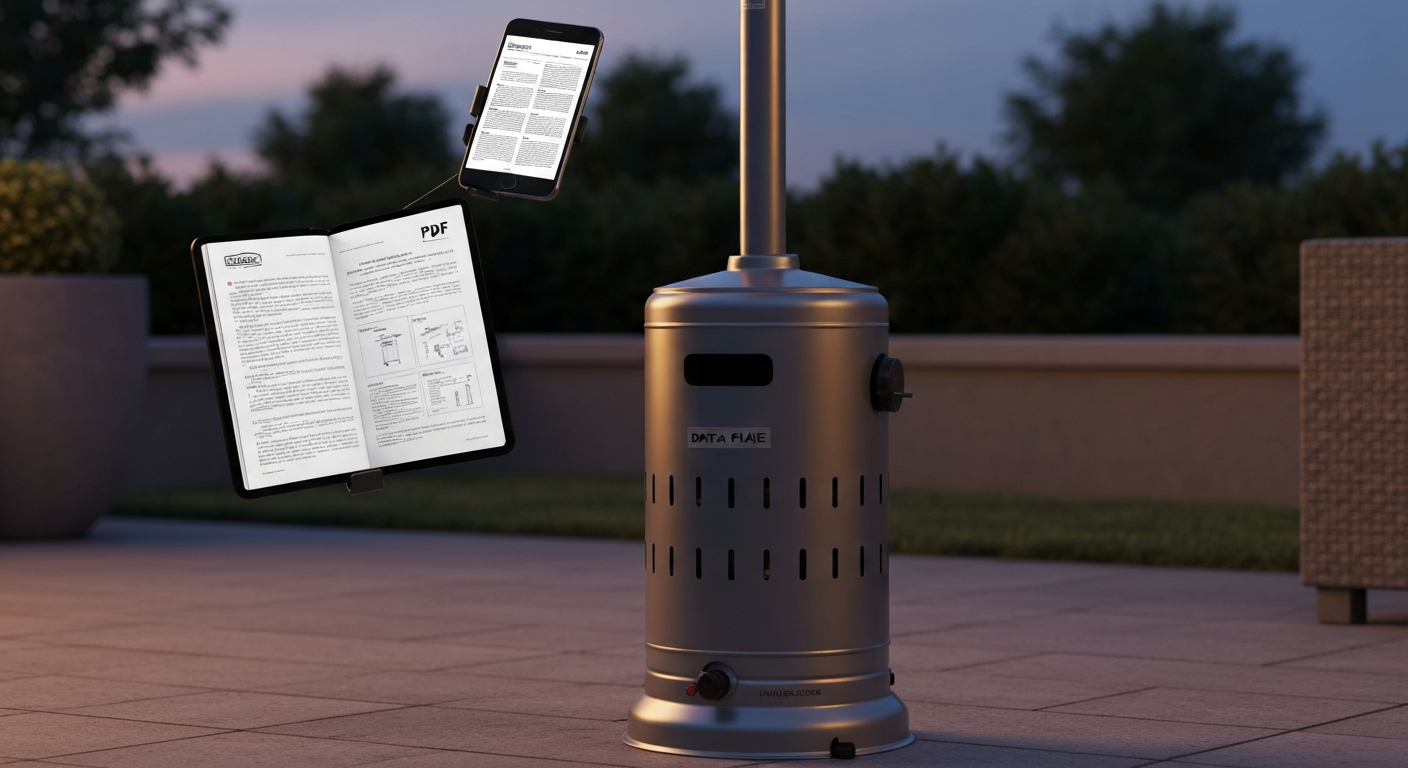
The Bond propane patio heater manual is a free PDF you can download directly from Bond Manufacturing's website or from the retailer page where the unit was sold (Home Depot and Lowe's both host model-specific PDFs). If you've lost the paper copy, go to bondmfg.com, navigate to the support or manuals section, and search by model number. You can also call Bond's customer support line at 1-866-771-2663 or email [email protected] to request a replacement copy. Before you do anything else with the heater, whether that's assembling it, lighting it for the first time, or diagnosing a problem, the manual is your authoritative reference for that exact unit.
Bond Propane Patio Heater Manual: Safe DIY Setup & Repairs

Grant Mercer
6 Aug 2026
Safety first: what to do before you touch anything
Working on a propane appliance carries real risk, and I want to be direct about that. Propane is heavier than air, so leaks pool at ground level and can ignite from a spark several feet away. Before you open a box, diagnose a problem, or swap a part, run through this safety setup every single time.
- Turn the tank valve fully off and disconnect the propane cylinder before any inspection, repair, or parts swap.
- Work outdoors or in a well-ventilated area only. Never perform leak tests or ignition diagnostics in an enclosed space like a garage.
- Wait at least 5 minutes after any failed lighting attempt before retrying, so accumulated gas can dissipate.
- Keep all ignition sources (open flame, cigarettes, electrical switches) well away during any gas-related procedure.
- Check the CPSC recall database (cpsc.gov) for your specific model and regulator before doing any DIY work. Recalled components must be handled through the manufacturer's remedy process, not repaired at home.
- PPE to have on hand: nitrile or latex gloves (protect against cleaning solvents and burner deposits), safety glasses (required during leak tests and burner cleaning), and closed-toe shoes. A gas detector (combustible gas detector, roughly $20–$50) is a worthwhile addition to any tool kit if you plan to work on gas appliances regularly.
One more thing on PPE: the soap-and-water leak test you'll do after every gas connection is safe for DIY use, but a handheld combustible gas detector gives you a second layer of confirmation and can detect leaks at connections you might not be able to reach visually with soapy water. It's not a replacement for the soap test, it's an additional check.
How to find and download the right Bond manual
Bond Manufacturing sells heaters under several product lines, including Canyon Ridge and firebowl-style units, and the manuals differ between models. Getting the wrong PDF and following its assembly or gas-pressure specs can create a real problem, so model matching matters.
- Find your model number first (see the identification section below before doing this step).
- Go to bondmfg.com and look for a Support, Manuals, or Product Resources section. Enter the model number in the search field.
- If the Bond site doesn't have it directly, go to the retailer where you bought the unit. Home Depot and Lowe's both host owner's manual PDFs on individual product pages. Search the product name plus 'manual PDF' on those retailer sites.
- ManualsLib (manualslib.com) indexes many Bond patio heater manuals and is a reliable third-party archive. Search 'Bond patio heater' plus your model number.
- If none of those work, email [email protected] with your model and serial number and request a PDF. Bond's support team has historically been responsive through that channel.
- Once you have the correct PDF, save it to both your phone and a printed copy. You'll want it accessible outdoors during assembly and initial lighting.
A word of caution about generic or third-party manual sites: some aggregate sites host outdated versions or mislabeled files. Always verify that the BTU rating, regulator type, and model number shown on the first page of the PDF match what's on your unit's data plate before you follow any instructions in it.
Equivalent brand manuals and when to cross-reference
Bond isn't the only brand that sells propane patio heaters through major U.S. retailers, and several other brands use mechanically similar burner assemblies, regulator configurations, and ignition systems. If your Bond manual is genuinely unavailable for your exact model, these equivalent-brand manuals can fill gaps in assembly and troubleshooting, though parts numbers are not interchangeable. If you need the Paramount Venturi Spiral Flame propane patio heater manual, download the model-specific PDF from the manufacturer's support or manuals page.
| Brand | Where to Find Manual | Best Used For | Key Difference from Bond |
|---|---|---|---|
| Member's Mark | Sam's Club product pages; ManualsLib | 47,000 BTU standing-pilot lighting sequence; exploded-view parts diagrams | Pilot hold time is 30–60 seconds vs. Bond's 15-second igniter hold; LED table models have separate wiring diagrams |
| Master Forge | Lowe's product pages; ManualsLib | Manifold pressure specs (11 in. w.c.); safety clearance tables; code references (ANSI Z223.1/NFPA 54, NFPA 58, CSA B149.1) | Explicitly requires qualified service person for installation/repair; slightly more conservative on DIY scope |
| Flame Pro / FlamePro 81 H | Costco and Lowe's product pages | Lighting sequences; pilot and burner passage cleaning notes; insect-web obstruction warnings | Sold primarily through Costco; may have slightly different regulator hose length |
| Paramount Venturi Spiral Flame | Retailer PDFs; ManualsLib | Venturi burner cleaning; spiral flame port maintenance | Unique venturi burner design; cleaning procedure differs from standard emitter-head burners |
| Bond (your primary) | bondmfg.com; Home Depot/Lowe's PDFs | Assembly, leak test, lighting sequence, warranty terms, OEM parts ordering | Bond requires OEM parts and states warranty is voided by non-approved replacements |
Use cross-reference manuals only for diagnostic logic and procedural guidance, never for part numbers or gas-pressure specifications. The Flame Pro pellet patio heater manual and the FlamePro 81 H steel patio pellet heater manual, for example, cover a completely different fuel system. If you discover your unit is pellet-fueled, those manuals are directly relevant, but applying their procedures to a propane unit would be dangerous. blank" rel="noopener noreferrer">The Master Forge patio heater manual is a useful cross-reference for code compliance language and pressure specs on propane systems similar to Bond's lineup.
Reading your model number, serial number, and safety labels
Before you do anything else, photograph every label on your heater. I mean this literally: walk around the unit and take clear photos of every metal plate, sticker, and stamped marking you can find. You'll need this information for manual lookup, parts ordering, and warranty claims, and these labels fade or peel over time.
- Data plate / rating label: usually located on the base housing or lower pole section. It shows model number, serial number, BTU input rating, gas type (LP/propane), and manifold pressure specification. Photograph this first.
- Regulator label: the regulator itself (the round device that connects the hose to the tank) often has a separate pressure rating stamp or label. Note this number.
- Safety warning labels: located on the pole, base, and near the burner head. These reference clearance distances, fuel type restrictions, and emergency shutoff instructions. Photograph all of them.
- Manufacturing date: sometimes encoded in the serial number (first two digits may be the manufacturing year), sometimes listed separately. Bond's customer service can decode the serial number if the date isn't obvious.
- CSA or UL certification mark: confirms the unit has been tested to North American gas appliance standards (ANSI/CSA Z83.26 / CSA 2.37 for outdoor infrared patio heaters). Its presence matters if you're making an insurance claim after an incident.
Record the model number and serial number in two places: a note in your phone and a written label on the inside of whatever cabinet or storage container you keep maintenance supplies in. When you're standing in a hardware store aisle trying to match a thermocouple, having the model number in your pocket saves a wasted trip.
Confirm your fuel type before going further
This sounds obvious, but it's a genuine source of errors. Bond sells propane patio heaters, but the broader patio heater market includes natural gas, pellet-fueled, and electric infrared models. The procedures, parts, and safety precautions are completely different between fuel types, and following the wrong set of instructions can cause a gas leak or fire. For North American construction and test requirements for gas‑fired outdoor infrared patio heaters, see CSA/ANSI Z83.26-20 (R2025) / CSA 2.37-20, Gas‑fired outdoor infrared patio heaters (ANSI webstore listing) CSA/ANSI Z83.26-20 (R2025) / CSA 2.37-20 — Gas‑fired outdoor infrared patio heaters (ANSI webstore listing).
| Fuel Type | How to Identify | Regulator Present? | Manual/Parts Notes |
|---|---|---|---|
| Propane (LP) | Connects to a portable 20 lb cylinder; regulator on hose assembly; data plate says 'LP' or 'Propane' | Yes, pressure-reducing regulator required | This article applies. Bond, Member's Mark, Master Forge, Paramount venturi models are all propane. |
| Natural Gas | Connected to a fixed gas line; no portable cylinder; data plate says 'NG' or 'Natural Gas' | No portable regulator; fixed line supply | Different orifice size; never use propane regulator or procedures on an NG unit |
| Pellet / Wood Pellet | Has a hopper/fuel chamber; no gas connections; electrical ignition element | No gas regulator | See Flame Pro pellet and FlamePro 81 H manuals; entirely different maintenance and assembly procedures |
| Electric Infrared | Power cord present; no fuel storage; no gas connections | No regulator | No gas procedures apply; electrical safety rules govern instead |
If your data plate says 'LP' and you're connecting to a standard 20 lb propane cylinder with the regulator hose that came in the box, you're in the right place. If there's any doubt, stop and contact Bond's support line before proceeding.
Tools and parts to have ready
Most Bond patio heater assembly and common repairs require only basic hand tools, but having everything laid out before you start prevents mid-job trips to the hardware store with a half-assembled heater sitting outside.
Tools
- Adjustable wrench or set of open-end wrenches (for regulator fitting and burner head hardware)
- Phillips and flathead screwdrivers (assembly hardware varies by model)
- Needle-nose pliers (electrode wire reconnection, small clip removal)
- Digital multimeter (for thermocouple and thermopile voltage testing; a basic $15–$20 unit works fine)
- Small wire brush or pipe cleaner (burner port cleaning)
- Paperclip or thin wire (clearing clogged burner ports per Bond's own troubleshooting instructions)
- Spray bottle with dish soap and water mixture, roughly 1 part soap to 10 parts water (leak testing)
- Combustible gas detector (optional but recommended for thorough leak checks)
- Torque wrench or torque screwdriver (optional; useful for tilt-switch hardware if over-tightening is a concern)
- Camera or smartphone (to photograph labels and document repairs)
Replacement parts to keep on hand
- Correct battery for your igniter (AA, AAA, or button cell per your model's manual — verify before buying)
- Thermocouple or thermopile matched to your model (order OEM from Bond at 1-866-771-2663; Bond's manual explicitly states replacement parts must come from Bond Manufacturing to preserve warranty)
- Regulator and hose assembly (again, Bond-specified OEM only per warranty terms)
- Replacement electrode/igniter tip (if electrode is cracked or visibly damaged)
- Lava rocks or fire glass if your model uses them (ensure they are cleared from burner ports)
On the parts question: Bond's manual is explicit that using non-approved replacement parts voids the warranty. If your unit is still under warranty, contact Bond before ordering any part from a third-party supplier. If the warranty has expired, OEM parts are still your safest option, but compatible universal parts (thermocouples, for example) are available from HVAC suppliers if the OEM is discontinued.
Step-by-step assembly checklist
Work through this checklist in order. Do not skip the leak test step or move the heater indoors at any point during or after assembly. Bond's manual includes an exploded-view diagram showing how each component fits together, have it open on your phone or printed beside you as you work.
- Unboxing: Remove all packaging and lay all components on a clean, flat surface. Check the parts list in your manual against what's in the box before starting assembly. Missing hardware is easier to resolve before you start than midway through.
- Base assembly: Attach the base legs or base frame according to the exploded diagram. Most Bond models use bolt-and-nut hardware through the base casting. Tighten firmly but do not overtighten cast metal fittings — hand-tight plus a half turn is typically correct unless the manual specifies a torque value.
- Pole assembly: Thread or insert the lower pole section into the base housing, then attach upper pole sections in sequence. Most Bond models use a set screw or locking collar at each joint. Ensure each joint is fully seated before adding weight above it.
- Burner head installation: Attach the burner head assembly to the top of the upper pole. Route the gas supply tube (the thin metal tube running down the inside of the pole) carefully so it doesn't kink. This tube connects the valve at the base to the burner at the top.
- Reflector/emitter screen: Install the heat reflector/dome above the burner head per the diagram. Most models clip or bolt in place. The reflector directs heat downward, and incorrect installation reduces heating efficiency noticeably.
- Regulator and hose hookup: Connect the regulator hose to the gas valve fitting on the base. Bond specifies hand-tight for this connection, not wrench-tight, to avoid damaging the threads. Do not use Teflon tape on flare-type fittings (which most propane heater regulators use) — it can cause leaks rather than prevent them.
- Install propane cylinder: Place the tank in the base housing, thread the regulator onto the cylinder valve hand-tight. Secure the tank with the retention hardware (bolt or strap) that holds it in the base. The cylinder must be upright at all times.
- Install igniter battery: If your model uses a battery-powered electronic igniter, install the correct battery now per the manual's polarity diagram. A missing or dead battery is the single most common reason a 'new' heater won't ignite.
- Lava rock / media placement: If your model uses lava rocks or fire glass, pour them into the firebowl or media area. Critically, keep the material clear of the burner ports. Blocked ports are a leading cause of uneven or failed lighting.
- Tilt-switch hardware check: The tilt switch is a safety device that cuts gas flow if the heater tips over. It's typically located at the base or lower pole and connected by a small bracket and spring. Verify it moves freely and is not kinked or bent from shipping. Do not over-torque the mounting hardware; the switch mechanism relies on gravity and needs to pivot freely.
- Visual pre-light inspection: Confirm the control knob is in the OFF position. Visually inspect all connections for obvious gaps, crossed threads, or missing hardware. Check that the gas tube inside the pole is not kinked.
First-light safety checks and leak testing
Do not light the heater until you have completed the leak test. This is not optional, and it's not a formality. A leak at any fitting can create a flash fire. The test takes about three minutes and uses materials you already have.
Soap-solution leak test procedure
- Mix your soap solution: roughly 1 tablespoon of dish soap per cup of water in a spray bottle. It should be sudsy but still liquid enough to spray.
- Open the propane tank valve slowly (one full turn counterclockwise). Do not light anything yet.
- Spray or brush the soap solution generously onto every gas connection: the regulator-to-tank connection, the regulator-to-hose fitting, the hose-to-valve fitting at the base, and the gas tube connections inside the pole if accessible.
- Wait 30 seconds and inspect each connection carefully. Bubbles that grow or continuously form indicate a gas leak at that point. Small bubbles that form and don't grow may just be from the spray action; keep watching for 30 full seconds.
- If you see active bubbles at any connection: close the tank valve immediately, disconnect the tank, and tighten or reseat that fitting. Then repeat the test from step 2. Never attempt to light the heater if you've identified a leak.
- If no bubbles appear at any connection after 30 seconds: the system is leak-free and you can proceed to lighting.
- Close the tank valve after the test if you are not immediately proceeding to the lighting step.
Gas detector alternative
A combustible gas detector held within an inch of each fitting will audibly alarm if propane is present, even in amounts too small to see with soap solution. This method is faster and works on fittings that are awkward to spray. However, detectors have sensor drift over time and should be tested against a known source (the propane smell near a tank valve, for example) before you trust them on a new installation. Use the gas detector in addition to the soap test, not instead of it, especially on your first assembly.
Initial lighting sequence and flame observation
- Work outdoors only. Ensure there are no ignition sources nearby other than the heater's own igniter.
- Open the tank valve fully (counterclockwise until it stops).
- Turn the control knob to the PILOT or ignition position per your manual's diagram.
- Push the control knob in (this opens the pilot gas valve) and simultaneously press the igniter button. Bond's manual specifies holding the knob depressed for 15 seconds after the pilot lights to heat the thermocouple sufficiently.
- If the pilot lights but goes out when you release the knob: the thermocouple hasn't reached operating temperature. Push and hold the knob again for a full 15 seconds before releasing slowly.
- If no ignition occurs after two attempts: close the tank valve and wait 5 minutes for any accumulated gas to clear before trying again. Do not repeatedly click the igniter with the tank open — you are building up unignited propane.
- Once the pilot is stable: turn the control knob to LOW, then gradually to the desired heat setting. Observe the flame color. A blue flame with small yellow tips at the outer edges is normal. A predominantly yellow or orange flame indicates an air-fuel mixture issue, often caused by blocked burner ports.
- Ventilation check: ensure the heater has at least the minimum clearance specified in your manual (typically 24–36 inches from overhead structures and 18–24 inches from side surfaces). These are minimums, not targets.
Diagnosing and fixing ignition failures
Ignition problems break down into a handful of distinct categories, and the symptom tells you exactly where to start. Work through the diagnostic steps in order rather than jumping straight to part replacement.
No spark at all when you press the igniter
- Check the battery first. Replace it with a fresh one of the correct type, verifying polarity against the diagram in your manual. A dead or reversed battery is the most common cause of zero spark.
- Inspect the electrode tip. Look for cracks in the ceramic insulator, carbon deposits, or physical damage. A cracked ceramic insulator causes the spark to ground out before reaching the burner. If the tip is cracked, it needs replacement.
- Check the high-voltage wire connection from the igniter module to the electrode. It should click firmly onto the electrode terminal. A loose connection produces no spark or a weak one.
- For piezo igniters (no battery, mechanical click): if pressing the button produces a click but no visible spark, the piezo crystal may be worn out. Replacement piezo modules are available from Bond or HVAC suppliers. Piezo igniters generate roughly 15,000–20,000 volts to jump the electrode gap; if the gap has widened, the spark won't jump even with a good crystal. The electrode gap on most patio heater igniters should be approximately 3–4 mm.
Spark present but no ignition
- Check that gas is actually reaching the burner. Open the tank valve and confirm the regulator hose is not kinked. A kinked hose restricts flow severely.
- Check for excess-flow valve activation. If the tank valve was opened very quickly, the cylinder's excess-flow safety valve may have tripped, restricting gas flow. To reset it: close the tank valve, wait 30 seconds, then reopen slowly (less than one full turn per second). Bond's troubleshooting table specifically calls this out.
- Check for a wet or contaminated electrode. Moisture on the electrode tip causes the spark to arc to the nearest ground rather than across the gap to ignite gas. Dry the electrode with a cloth or let it air dry.
- Check pilot orifice for blockage. Insects, particularly spiders, frequently build webs in pilot passages during storage. This is noted in multiple brand manuals including FlamePro. Use a can of compressed air to clear the passage, not a metal tool that could damage the orifice.
Pilot lights but won't stay lit when you release the knob
This is almost always a thermocouple or thermopile problem. The thermocouple is a safety device: it generates a small electrical voltage (typically 20–30 millivolts DC when heated by the pilot flame) that signals the gas valve to stay open. If the thermocouple is failing, cold, or not seated in the pilot flame correctly, the voltage drops below the valve's threshold and the valve closes, killing the flame.
- Confirm the thermocouple tip is actually in the pilot flame. If the pilot flame is very small or deflected, the thermocouple may not be reaching operating temperature. Check for partially blocked pilot orifice as a first step.
- Test thermocouple output with a multimeter: light the pilot and hold the knob in for 60 seconds to fully heat the thermocouple. Set your multimeter to DC millivolts. Connect leads to the thermocouple terminals at the gas valve. A healthy thermocouple reads 20–30 mV. A reading below 15 mV indicates a failing thermocouple that needs replacement.
- Thermopile systems (used in some millivolt-valve models) produce much higher voltages, up to 750 mV open-circuit. Check your manual or the parts diagram to confirm which system your model uses before testing, because the acceptable voltage range differs significantly.
- If voltage is within range but the pilot still drops out: the gas valve's electromagnet coil may be faulty. This is a gas valve replacement, which is at the edge of DIY scope. If the valve is under warranty, contact Bond. If not, a qualified technician should replace it.
- Thermocouple replacement is a straightforward DIY repair: the thermocouple threads into the gas valve and clips near the pilot flame. Order the Bond OEM part with your model number. Replacement takes about 15 minutes with a wrench.
Flame lights but is uneven, yellow, or goes out under load
- Clogged burner ports: clear each port with a paperclip (Bond's manual specifies this explicitly). Do this with the gas off and tank disconnected.
- Lava rocks or media blocking the burner: redistribute or remove rocks as needed, keeping them at least 1 inch clear of the burner head.
- Low gas pressure: a nearly empty cylinder or a faulty regulator can cause low flame output. Try a fresh cylinder first before replacing the regulator.
- Regulator failure: if the flame is consistently low even with a full tank and clear ports, the regulator may be under-pressuring the system. Regulators are not adjustable by the user and should be replaced with a Bond OEM unit.
Tilt-switch problems
The tilt switch cuts gas flow if the heater tips over, which is a critical safety feature. It's also one of the more frustrating failure modes because a malfunctioning tilt switch can shut off the heater on a level surface, and the symptom (flame goes out randomly) looks identical to a thermocouple problem.
- Confirm the heater is on a genuinely level surface. Even a 3–4 degree lean can activate a sensitive tilt switch. Use a level on the base if you have doubts.
- Inspect the tilt-switch bracket for bends, kinks, or contact with the pole that would hold it in the tripped position. Shipping damage occasionally causes this.
- Check that the switch moves freely by hand (with the tank disconnected and heater off). It should pivot easily and return to the upright position under its own weight.
- If the switch is physically undamaged but the heater shuts off on a level surface: test continuity across the switch terminals with your multimeter in continuity mode. When upright, the switch should show continuity (circuit closed). When tilted, it should break continuity. A switch that shows no continuity when upright needs replacement.
- Tilt-switch replacement is a DIY-appropriate repair on most Bond models. The switch clips or screws into a bracket on the pole. Order the OEM part from Bond with your model number.
Regulator and hose checks
The regulator reduces cylinder pressure (around 250 psi in a full LP tank) down to the appliance operating pressure, typically around 11 inches of water column for most patio heaters. A failing regulator typically presents as very low flame output that doesn't improve when you turn the knob up. Do not attempt to adjust or disassemble the regulator body itself. That is not a DIY repair.
- Check for physical damage to the hose: cracks, cuts, or abrasion marks mean the hose must be replaced immediately. Never use a damaged gas hose.
- Check for kinks: even a slight kink in the hose restricts flow enough to cause low-flame symptoms.
- Verify the regulator was not cross-threaded when installed: a leaking regulator-to-tank connection that you can't stop with hand-tightening usually indicates cross-threading. Back it off completely, inspect the threads, and reseat carefully.
- If you suspect regulator failure (consistent low pressure with a full tank, no kinks, no leaks): replace the entire regulator/hose assembly as a unit. Bond specifies using only the supplied or Bond-approved replacement assembly.
- Do not use a natural gas regulator on a propane heater or vice versa. They are calibrated for different pressures and the labels on the regulator body specify fuel type.
Routine maintenance and cleaning schedule
Most Bond patio heater problems I've seen come from skipped maintenance rather than failed parts. A heater that gets cleaned and inspected once a season will outlast one that's ignored by years.
| Task | Frequency | Tools Needed | Notes |
|---|---|---|---|
| Clean burner ports | Start of each season | Paperclip, compressed air | Do with gas off and tank disconnected |
| Inspect pilot orifice for insect webs | Start of each season / after storage | Compressed air | Spiders are especially common; do not use metal tools on orifice |
| Check and clean electrode tip | Start of each season | Dry cloth, fine sandpaper | Light carbon deposits are normal; heavy buildup or cracks mean replacement |
| Inspect regulator hose | Every use / start of season | Visual inspection | Replace immediately if cracked, kinked, or abraded |
| Soap-test all connections | After any reconnection and start of season | Soap/water spray bottle | Standard safety practice per Bond, Member's Mark, and Master Forge manuals |
| Replace igniter battery | Annually or when spark weakens | Correct battery per manual | Don't wait for complete failure; replace proactively each spring |
| Wipe down reflector/dome | Monthly during use season | Damp cloth | Grease and debris accumulation reduces radiant efficiency |
| Inspect and tighten hardware | Start of season | Screwdriver, wrench | Vibration and thermal cycling loosen fasteners over time |
| Full winterization | Before storage season | See below | Critical for longevity in freeze-thaw climates |
Winterizing your Bond propane patio heater
- Turn the heater off and allow it to cool completely (at least 30 minutes).
- Close the tank valve and allow the remaining gas in the hose to burn off by running the heater for 30 seconds after closing the valve, then turning the control knob to OFF.
- Disconnect the propane cylinder and store it outdoors in a well-ventilated area, away from heat sources. Never store a propane cylinder indoors.
- Clean the burner head, burner ports, and reflector as described above.
- Cap the regulator inlet with the plastic dust cap that came with the unit, or wrap with a clean cloth secured with a rubber band, to prevent insects from nesting in the orifice during storage.
- If storing outdoors: use a fitted patio heater cover to protect against moisture intrusion, UV degradation, and debris. Moisture in the burner assembly accelerates corrosion of the electrode and thermocouple.
- If storing in a shed or garage: the heater itself (without the propane cylinder) can be stored indoors. Never store a propane cylinder in an enclosed structure.
Sourcing compatible parts
Bond Manufacturing is your first call for parts: 1-866-771-2663 or [email protected]. Have your model number and serial number ready. Bond's own manual states that replacement parts must be supplied directly by Bond Manufacturing, and using non-approved parts voids the warranty.
If your unit is out of warranty and a Bond OEM part is discontinued, compatible universal parts are available from HVAC suppliers for thermocouples (match the length and thread type from the old part), piezo igniter modules (match the kV rating and mounting style), and regulator/hose assemblies (match the BTU rating, connector type, and hose length). For regulators in particular, verify the output pressure specification matches your original, because under-pressure and over-pressure both cause problems. The Member's Mark and Master Forge manuals are useful reference points for understanding pressure specs and parts compatibility on propane systems similar to Bond's.
For pellet heater owners who landed here by mistake: the Flame Pro pellet patio heater and the FlamePro 81 H steel patio pellet heater use entirely different fuel delivery and ignition systems. For the FlamePro 81 H steel patio pellet heater, consult the official FlamePro 81 H steel patio pellet heater manual for pellet-specific maintenance, ignition, and safety procedures. None of the propane parts or procedures in this article apply to those units, and their manuals cover a completely separate set of maintenance tasks.
When to stop DIYing and call a professional
I'm a strong advocate for DIY repair, but there are specific situations where the right move is to stop and call a certified gas technician or contact Bond's support line directly. Working past these boundaries doesn't save money; it creates risk. Check the CPSC recall database before advising DIY repairs to confirm model‑specific safety advisories and remedies (examples include the CPSC, Enerco/DEWALT 70,000 BTU Heater Recall (example listing)) CPSC — Enerco/DEWALT 70,000 BTU Heater Recall (example listing).
- You smell gas and cannot identify the source after a thorough soap test. Close the tank valve, move away from the unit, and call your propane supplier.
- The gas valve body itself is leaking, damaged, or needs internal repair. Gas valves are not user-serviceable.
- Your unit or regulator appears on a CPSC recall notice. Follow the recall remedy instructions; do not attempt to repair a recalled component.
- You've replaced the thermocouple and the pilot still won't hold, and multimeter testing confirms normal thermocouple voltage. A faulty gas valve electromagnet is the likely cause, and valve replacement should be done by a qualified technician.
- There is visible damage to the burner head, gas orifice, or main gas supply tube inside the pole. Damaged gas-carrying components are not field-repairable.
- Your unit is still within the warranty period. Unauthorized repairs will void coverage. Contact Bond Manufacturing first.
- You are not confident in any step of the process. Gas appliance work requires calm, careful execution. If something feels wrong, it probably is.
Warranty and support basics
Bond Manufacturing's warranty terms are included in every owner's manual. The key points that affect DIY repair decisions: the warranty covers manufacturing defects (not damage from misuse or non-approved modifications), replacement parts must come from Bond to keep the warranty intact, and the warranty is voided by use of non-approved parts or unauthorized modifications. Bond's support contact is 1-866-771-2663 and [email protected]. Keep your original purchase receipt, because warranty claims require proof of purchase date. Similar warranty language appears in the Member's Mark and Master Forge manuals, so if you're cross-referencing those brands, expect the same limitations to apply to their units as well. You can also consult the Master Forge patio heater manual for similar warranty and service information.
FAQ
Where can I download the official Bond propane patio heater manual (PDF) and equivalent-brand manuals (Member’s Mark, Master Forge, FlamePro)?
Download directly from retailer or manufacturer pages for the most authoritative versions. Examples: Bond Manufacturing owner’s manual (Canyon Ridge/Firebowl/patio heater) PDF is available from Home Depot/Lowe’s product pages; Member’s Mark patio‑heater manuals are on ManualsLib/manuals.plus or the retailer page; Master Forge and Flame/FlamePro manuals are on Lowe’s/retailer PDF pages. Always prefer the manual that matches your model number. If the retailer page is gone, search the model number plus “owner manual PDF” or contact the manufacturer customer service (Bond [email protected]; Bond phone commonly listed on manuals). Keep a local copy (PDF) and print one page with the model/serial/parts diagram for field reference.
How do I identify my heater model and where do I find the serial/model information and safety labels?
Locate the data plate or decal on the heater — common locations: inside the base/tank housing behind the cylinder access door, on the regulator housing, or on the control-valve bracket under the burner. The plate contains model number, serial number, input BTU, and regulator/hose part numbers. Photograph the plate (close-up) and the overall unit. Cross‑check that label info with the exploded parts diagram in the owner’s manual before ordering parts or performing work. If the plate is missing or unreadable, take photos of distinctive features (burner shape, reflector, control valve, base pattern) and compare to manuals or retailer product images to find the matching model.
What authoritative standards, codes, and safety references should a DIY article cite for propane patio heater work?
Cite CSA/ANSI Z83.26 (CSA 2.37) for gas‑fired outdoor infrared patio heaters, NFPA 58 (Liquefied Petroleum Gas Code) and NFPA/ANSI Z223.1 (NFPA 54) for LP‑gas handling and appliance piping, and PERC safety guidance for portable propane heater operation. Also advise checking the U.S. CPSC recall database for model recalls before repairs. State/local codes may apply — recommend following the stricter of the code or the manufacturer manual.
What is the complete assembly and first‑light checklist I should follow (safety‑first)?
Assembly/first‑light checklist: 1) Read the specific model manual fully. 2) Work in a well‑ventilated, outdoor area. 3) Verify all parts from the parts list and exploded view. 4) Keep control knob at OFF. 5) Install LPG cylinder correctly and secure in housing (no leaks). 6) Use only the supplied regulator/hose assembly (or manufacturer‑approved replacement). 7) Hand‑tighten regulator nut; do not use tools to overtighten. 8) Install igniter battery if required (observe polarity). 9) Remove packing from burner/burner ports; clear lava rock/grate away from ports. 10) Perform soap‑and‑water leak test on all fittings (no flame). 11) Follow the manual lighting sequence (commonly: turn to PILOT, push/hold knob 15–60 sec while igniting, continue holding for 10–30 sec to heat thermocouple). 12) If unsuccessful, turn OFF, wait 5 minutes for gas to clear, re‑test. 13) Verify stable flame and check for unusual odors or soot.
How do I perform a safe gas‑leak test and check the regulator/hose?
Leak test procedure: 1) Ensure tank valve is closed and connections are snug. 2) Prepare a soap solution (dish soap + water) or commercial leak‑test spray. 3) Open the cylinder valve slowly and apply solution to the regulator inlet, hose fittings, and valve connections. 4) Look for steady bubbles indicating a leak. 5) If bubbles appear, close the cylinder, relieve pressure, tighten fittings hand‑tight only, and retest. 6) Replace regulator/hose assembly if leak persists or if hose is cracked/kinked/softened. Only use the regulator/hose specified by the manufacturer; Bond manuals state use only the supplied regulator/hose and that unauthorized parts may void warranty. Never test leaks with a flame.
What are the common ignition/firing failure modes and stepwise diagnostics for ignition systems (piezo, battery/electronic, standing pilot)?
Common failure modes and diagnostics: Piezo igniter (mechanical): Failure signs — no spark, weak spark. Steps: inspect electrode tip for fouling; dry or clean carbon/debris; check high‑voltage lead for breaks; if worn, replace piezo assembly. Battery/electronic push button: Signs — no spark or intermittent. Steps: replace battery with specified type and polarity; inspect wiring and switch contacts; check for corrosion at spark electrode; if electronic module faulty, replace with OEM part. Standing‑pilot/pilot assembly: Signs — pilot won’t light, won’t stay lit. Steps: 1) Confirm gas at pilot with leak test that supply is pressurized. 2) Clean pilot orifice/passage of dirt/insects using compressed air or fine wire (follow manual warnings). 3) Ensure electrode gap and position per manual (~1–3 mm typical); realign if bent. 4) Verify thermocouple output (see thermocouple checks). 5) If pilot lights but flame is too small, check regulator pressure and clean burner ports. Always follow the model’s specific lighting sequence and hold times (manuals commonly require holding control knob 15–60 seconds after lighting to heat thermocouple).