
The Char-Broil Patio Bistro 240 electric grill manual is available as a free PDF download directly from Char-Broil's support site at charbroil.com/support/manuals. Search for your model number (commonly listed as the Patio Bistro 240 or TRU-Infrared Electric Patio Bistro 240), select your unit from the results, and download the owner's manual and assembly guide. That one document covers assembly, specs, basic troubleshooting, and parts diagrams. This guide expands on everything in it with hands-on assembly callouts, electrical safety steps, targeted troubleshooting, and parts sourcing so you can keep this grill running without an unnecessary service call.
Char-Broil Patio Bistro 240 Electric Grill Manual & Guide

Grant Mercer
22 Jul 2026
What this guide covers (and what it doesn't)
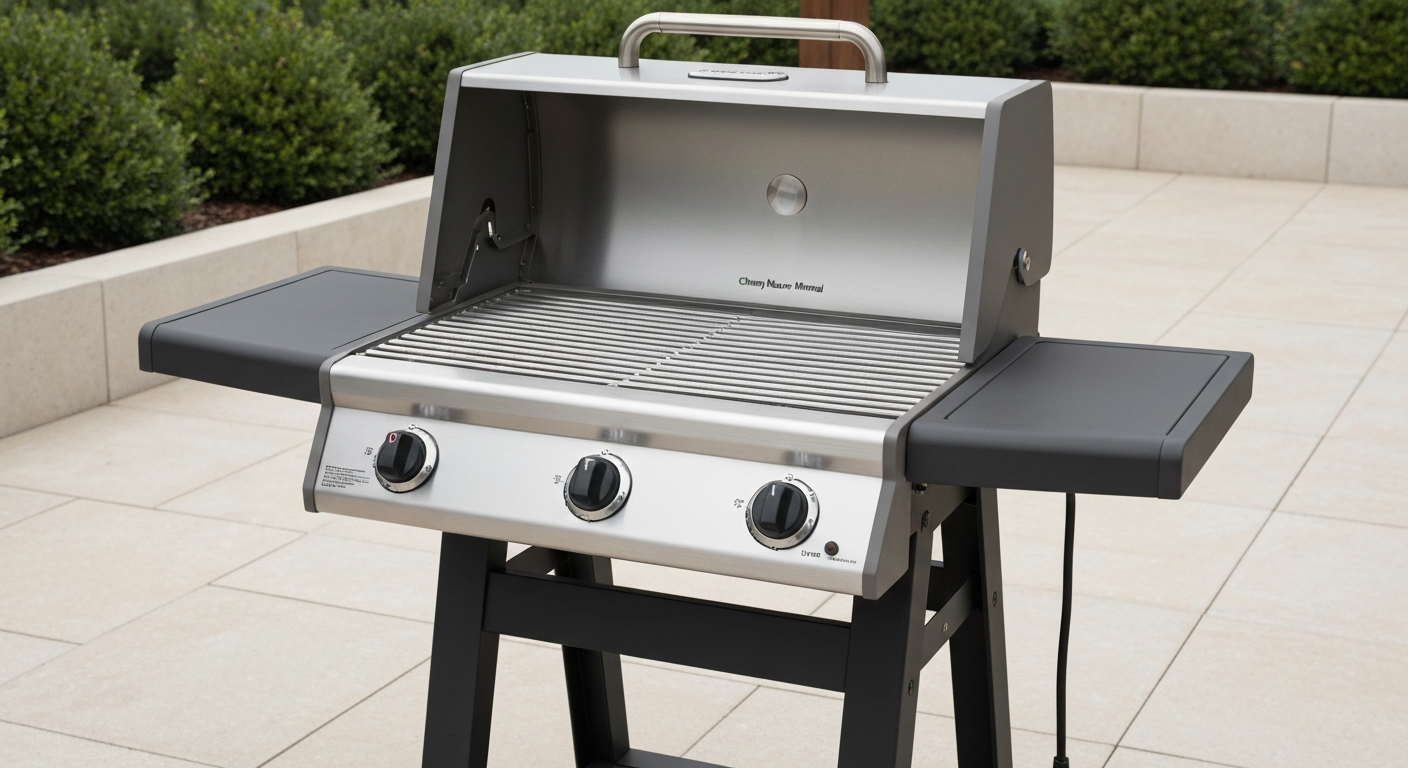
This is a practical DIY reference for the Char-Broil Patio Bistro 240 electric grill, which appears under several variant spellings across retailer listings and support pages: 'char broil patio bistro 240 electric grill manual,' 'char broil patio bistro 240 manual,' 'CharBroil Patio Bistro 240,' and occasionally just 'Patio Bistro TRU-Infrared Electric.' All of those names point to the same product family. This guide covers manual retrieval, model identification, spec verification, annotated parts, full assembly with tricky-step callouts, electrical and operation safety, troubleshooting for the most common failure modes, routine maintenance, and replacement parts sourcing. It does not cover gas variants of the Patio Bistro (those use a completely different ignition and burner system) or any mains-level electrical rewiring, which must be handled by a licensed electrician. If you have the gas version or a related model like the Patio Caddie, the parts diagrams and assembly workflow are different enough that you'll want a separate reference.
How to get the official manual
Char-Broil hosts all current and legacy owner's manuals on its support page, and getting the right PDF takes less than two minutes if you have your model number ready. Here's exactly how to retrieve it. If you need a step-by-step PDF, search for char broil electric patio bistro 240 assembly instructions to find the official assembly guide and related walkthroughs.
- Go to charbroil.com and click 'Support' in the top navigation, then select 'Manuals & Guides' (or navigate directly to charbroil.com/support/manuals).
- Type your model number or 'Patio Bistro 240' into the search bar on the manuals page. If you don't have your model number yet, use 'Patio Bistro Electric' to pull up the product family.
- Identify your exact unit from the list of results. Char-Broil will show both the owner's manual and a separate assembly guide as downloadable links.
- Click the PDF icon next to each document to download. Save both: the owner's manual contains specs, safety instructions, and troubleshooting; the assembly guide has the exploded parts diagram with OEM part numbers.
- If your model doesn't appear in search results, call Char-Broil's consumer support line (1-800-352-4111) and provide the model/serial number from your unit's label. They can email the PDF directly.
If the Char-Broil site is down or your exact variant isn't listed, trusted secondary sources include eReplacementParts.com and ManualsLib. Both host Char-Broil assembly documents that users have uploaded, and they're generally accurate for the Patio Bistro 240 family. That said, always cross-check any third-party PDF against the part numbers and specs on your actual unit before trusting it for a repair. Retailer pages at Home Depot and Lowe's also link to manufacturer manuals in the product documents tab, which is a quick alternate path.
Finding your exact model on the grill itself
Before you download anything, confirm which specific variant you have. Char-Broil has produced several iterations of the Patio Bistro 240, and the OEM part numbers for the heating element, thermostat, and cord assembly can differ between them. Getting the wrong part because you assumed your model is the same as someone else's is a frustrating and avoidable mistake.
The model and serial number label is located on the lower rear section of the grill body, typically on the back panel near where the power cord exits. On some units it's on the underside of the firebox. Look for a silver or white adhesive label with 'MODEL NO.' and 'SERIAL NO.' printed on it. The model number format typically looks like '20602109' or similar (a string of digits, sometimes with a letter prefix). Write both numbers down before searching Char-Broil's site, because the serial number encodes the manufacture date, which matters if you're checking warranty status.
Confirm your variant details by matching the model number against the spec sheet on Char-Broil's product page. The Patio Bistro 240 is described as a TRU-Infrared electric grill with approximately 240 square inches of cooking space. If your label shows a different cooking area or voltage rating, you may have the Patio Bistro 180 or a gas variant, and you'll need a different manual entirely.
Specifications you need to know
Always pull specs from the downloaded OEM manual or the official Char-Broil product page rather than relying on retailer listings, which occasionally contain errors. The table below reflects the specifications consistently listed for the Patio Bistro 240 electric across Char-Broil's product pages and major retailer documents. Verify each figure against your specific model's PDF before purchasing replacement parts or planning your outlet setup.
| Specification | Value | Why it matters |
|---|---|---|
| Cooking area | 240 sq. in. | Confirms you have the 240 variant, not the 180 |
| Voltage | 120V AC | Must match your household outlet; do not use on 240V circuits |
| Wattage | 1,750W | Determines amperage draw (~14.6A); needs a dedicated 15A or 20A circuit |
| Plug type | Standard 3-prong (NEMA 5-15P) | Requires grounded outlet; do not use with 2-prong adapter |
| Grill dimensions (approx.) | 18.5"W x 16"D x 36"H | Clearance planning and storage |
| Weight (assembled) | Approx. 33 lbs. | Portability and surface load planning |
| Heating technology | TRU-Infrared electric element | Affects cleaning method and element replacement procedure |
| Safety listing | ETL listed | Confirms third-party safety certification for portable electric appliances |
The 1,750-watt draw at 120V works out to roughly 14.6 amps. That's close to the limit of a standard 15-amp circuit, so Char-Broil recommends using a dedicated outlet rather than sharing a circuit with other high-draw appliances. If you're running the grill from an outdoor outlet, that outlet must be GFCI-protected under NEC requirements for outdoor receptacles, and it must be properly grounded. Never use a 3-to-2 prong adapter with this grill.
Annotated parts diagram: what everything is called
The exploded parts diagram in the official assembly PDF assigns an OEM part number to every component. When you're ordering replacements or describing a problem to Char-Broil support, using the correct part name prevents confusion. Below is a plain-language guide to the key components and how to identify them on your grill.
| Part name | Where it is | What it does |
|---|---|---|
| Lid / hood | Top of the grill body | Retains heat; hinged at the rear; inspect hinge pins for wear |
| Cooking grates | Inside the firebox, above the element | Food contact surface; porcelain-coated cast iron on most variants |
| TRU-Infrared heating element | Below the cooking grates, inside the firebox | The electric heat source; most common replacement part |
| Drip tray / grease tray | Slides out from the front or bottom of the firebox | Collects grease; must be cleaned regularly to prevent flare-ups |
| Control knob / thermostat | Front panel of the grill body | Sets heat level; connects to the thermostat inside the control housing |
| Control panel housing | Front lower section of the grill body | Encloses the thermostat and wiring connections |
| Power cord assembly | Exits from the rear or base of the control housing | 1,750W rated cord with molded 3-prong plug; inspect for damage before each use |
| Firebox / body | The main cooking chamber | Houses the element, grates, and lid; connects to the stand |
| Stand / legs | Below the firebox | Supports the unit; bolted assembly; check fasteners for tightness periodically |
| Leg cross-braces | Between the stand legs | Lateral stability; often the first assembly step |
| Fastener hardware pack | Included in box | Bolts, washers, and nuts for stand assembly; sizes listed in assembly manual |
When reading the official exploded diagram, each callout number corresponds to a part number in the adjacent parts list table. Write down the part number exactly as shown, including any dash suffixes (for example, a heating element might be listed as '80011336' or '80011336-A'). The suffix can indicate a revision, and ordering the wrong revision is a common parts-sourcing mistake.
Tools and hardware you'll need for assembly
Char-Broil's assembly hardware pack is included in the box and contains all the fasteners you need. Don't throw the small parts bag away before inventory. Before you start, lay out the hardware on a light-colored surface and group bolts, washers, and nuts by size so you can match them to the assembly steps without hunting.
- Phillips-head screwdriver (medium, #2) for any panel screws
- Adjustable wrench or 10mm/13mm combination wrench for leg bolt hardware (check your hardware pack sizes)
- Needle-nose pliers for seating cotter pins or tightening small fasteners in tight spaces
- Rubber mallet (optional) for seating leg sockets that fit snugly
- Stable work surface or a cleared section of the patio (grass is fine but a concrete or wood surface keeps parts from getting lost)
- A second person for the step where you lift and mount the firebox onto the assembled stand
- Cardboard from the shipping box (use it as a padded work surface to protect the lid finish)
The hardware pack typically includes M8 or 5/16-inch bolts with matching hex nuts and flat washers for the leg and cross-brace connections, plus shorter screws for any panel attachments. Char-Broil includes a small combination wrench in some packaging. Count and verify your hardware against the parts list in the manual before starting. If anything is missing, contact Char-Broil support before assembly rather than substituting hardware from a hardware store, since thread pitch matters on the leg mounting points.
Step-by-step assembly instructions
Set aside about 30 to 45 minutes for assembly. Read through all the steps once before picking up a tool. The sequence below follows the standard Char-Broil Patio Bistro 240 assembly workflow. Where a photo or diagram would help, I've noted it in brackets so you can cross-reference the corresponding image in the official assembly PDF.
- Unpack all components from the box and lay them out on the cardboard. Identify the firebox/body, lid (may be pre-attached on some variants), stand legs (2 pieces), cross-brace(s), drip tray, cooking grates, control knob, and hardware pack. [Photo reference: unboxed components laid flat]
- Attach the cross-brace(s) to the two stand legs. Insert the brace ends into the leg sockets and finger-tighten the bolts. Do not fully tighten yet. [Diagram reference: leg-and-brace exploded view]
- Stand the leg assembly upright. Check that it sits level on your work surface and that both legs are oriented the same direction (the mounting brackets for the firebox face upward and inward on both legs).
- With a helper, lift the firebox and align the mounting holes on the firebox base with the bracket holes on the top of the stand legs. Insert the mounting bolts through the firebox base and into the leg brackets. Finger-tighten. [Photo reference: firebox lowered onto stand]
- Install the drip tray by sliding it into the channel below the firebox opening. It should slide in smoothly and sit flush. If it doesn't seat fully, check that no hardware is blocking the channel.
- If the lid is not pre-attached: align the lid hinge brackets with the hinge holes at the rear of the firebox. Insert the hinge pins and secure with the included cotter pins or bolts. Open and close the lid twice to confirm it moves freely and doesn't bind. [Photo reference: lid hinge pin installation]
- Install the cooking grates inside the firebox. The grates sit on the cast support ledges inside the firebox walls. They should lie flat with no rocking. If they rock, flip them over — there's a correct side up, usually with a raised ridge pattern facing up.
- Attach the control knob to the thermostat shaft on the front panel. The knob has a D-shaped or flat-sided bore that mates with the thermostat shaft. Press it on firmly until it seats flush. [Photo reference: knob seated on thermostat shaft]
- Go back and fully tighten all bolts in the correct sequence: cross-brace bolts first, then leg-to-firebox bolts. Use your wrench and tighten to snug (firm resistance) without over-torquing, which can crack the leg socket casting.
- Place the assembled grill on its intended surface. Confirm all four leg feet contact the surface evenly. If the grill rocks, check that all bolts are fully seated and that the surface itself is level.
- Route the power cord so it hangs away from the grill body and won't contact hot surfaces during operation. Do not plug in yet. Perform a visual check of the cord for any damage from shipping.
- Your grill is assembled. Before the first cook, run a 15-minute burn-off at high heat (without food) to burn off any manufacturing oils from the heating element and cooking grates. This is normal — some light smoke is expected.
Tricky steps and common assembly mistakes
Most assembly problems with the Patio Bistro 240 fall into four categories: wiring pinch points, heating element orientation, fastener tightening sequence, and leveling. Here's where people go wrong and how to avoid it.
Wiring pinch points
When you lower the firebox onto the stand, the internal wiring harness (which runs from the control panel down through the stand on some configurations) can get pinched between the firebox base and the leg bracket. Before fully lowering the firebox, visually check that no wires are crossing the mounting bracket channel. If you hear or feel resistance when seating the firebox, stop and look before continuing. A pinched wire won't be visible externally but will cause intermittent power failures or, in a worst-case scenario, a short. This is the single most common assembly damage point on this unit.
Heating element orientation
On units where the heating element ships separately or can be removed, it has a correct orientation. The element's terminal ends (the two connection points) must face toward the control panel side of the firebox, not toward the rear. If the element is installed backward, the wiring harness won't reach the terminals without straining the connections, and the element may not sit flat against its support brackets. Check the assembly diagram in your PDF carefully before seating the element.
Tightening sequence and torque
Always tighten cross-braces before firebox-to-leg bolts. If you tighten the firebox bolts first, the cross-brace will flex when you tighten it and the whole stand can rack slightly out of square. Once racked, the grill will never sit completely flat. Tighten in a cross pattern on the firebox mounting bolts (like lug nuts on a wheel) rather than fully torquing one bolt before moving to the next. Snug is enough, the Char-Broil casting is not designed for high-torque fastening, and cracking a leg socket means replacing the whole stand assembly.
Leveling and stability
The Patio Bistro 240 is a top-heavy unit when the lid is open. If assembled on an uneven surface, it can tip. Confirm that all four feet contact your patio surface solidly. On slightly uneven concrete, a thin rubber furniture pad under the short leg will do the job. Never place the assembled grill on soft ground (grass or gravel) without a stable platform underneath it. The drip tray also needs to sit level, otherwise grease pools to one side and can overflow during cooking. If the drip tray isn't sitting flat after assembly, re-check that the firebox itself is level.
Electrical and operation safety
Electric grills are genuinely safer than gas in terms of open-flame risk, but they introduce their own hazards around electrical faults, moisture, and circuit overloading. Don't skip these checks.
- Always plug into a grounded (3-prong) outlet. Never use a 3-to-2 prong adapter. The grounding pin is your protection against electric shock if the element or internal wiring develops a fault.
- Outdoor outlets must be GFCI-protected under NEC Article 210.8. If your outdoor outlet doesn't have a GFCI (the test/reset button), have one installed by an electrician before using this grill.
- Use a dedicated 15A or 20A circuit. At 1,750 watts, the grill draws nearly 15 amps. Running it on a shared circuit with other appliances risks a tripped breaker or, worse, an overloaded wiring path.
- Never use an extension cord unless it is rated for outdoor use and is at minimum 14 AWG for runs up to 25 feet, or 12 AWG for longer runs. A lightweight indoor extension cord will overheat under the grill's load.
- Inspect the power cord before every use. Look for cracked insulation, fraying near the plug or the grill body entry point, or any discoloration from heat. If you see any of these, stop using the grill and replace the cord before the next session.
- Unplug the grill before cleaning, before moving it, and before performing any inspection of the element, drip tray, or internal components. This is not optional.
- Keep the grill at least 3 feet from combustible surfaces (wood fences, vinyl siding, patio furniture). The lid and body get hot during operation.
- Never use this grill indoors, in a garage, or under a covered porch with limited ventilation. The ETL listing is for outdoor use only.
- Let the grill cool completely before covering it or storing it. Trapping residual heat under a cover can damage the cover and the grill finish.
Troubleshooting: when the grill won't work right
The Patio Bistro 240 is a mechanically simple appliance. There are only a handful of things that can actually fail: the outlet or circuit, the power cord, the thermostat/control knob, and the heating element. Start at the outlet and work inward. For safe, step‑by‑step electrical checks (measuring outlet voltage and non‑live continuity/resistance of heating elements and thermostats), see RepairClinic, How‑To and electrical testing guides RepairClinic — How-To and electrical testing guides. Most 'it doesn't work' calls to Char-Broil support turn out to be a tripped GFCI or a faulty outlet, not a dead grill.
Won't power on at all
- Confirm the outlet is live. Plug in a lamp or phone charger and verify it works. This rules out a tripped breaker or tripped GFCI before you go any further.
- If the outlet has a GFCI, press the 'Reset' button firmly until you feel it click. GFCI outlets can trip from moisture, a brief overload, or even a power flicker. Resetting them is the most common fix for an outdoor grill that suddenly 'dies.'
- Inspect the plug end of the grill's power cord. Look for bent prongs, discoloration, or corrosion on the prong surfaces. Light oxidation on the prongs can be cleaned with fine sandpaper. Bent prongs are a replacement-cord situation.
- Check the cord along its full length for visible damage. Pay extra attention to the point where the cord enters the grill body and the point near the plug, as those are the highest-flex stress areas.
- If the outlet and cord check out but the grill still shows no sign of life (no warming at all after 5 minutes on the highest setting), the thermostat or internal wiring connection is the next suspect. Proceed to the thermostat check below.
Powers on but no heat (or very weak heat)
- Unplug the grill. Allow it to cool completely if it was recently used.
- Remove the cooking grates and visually inspect the heating element for visible cracks, breaks in the element coil, or burn marks at the terminal ends. A broken element is usually visually obvious.
- Check the thermostat knob. Turn it to the maximum setting and listen for any faint click from the thermostat. No click at maximum can indicate a failed thermostat, though some units don't produce an audible click.
- If you own a multimeter, set it to the resistance (ohms) setting. With the grill unplugged and fully cool, disconnect the element's terminal wires (note which wire goes to which terminal before disconnecting). Touch the multimeter probes to the two element terminals. A working Patio Bistro 240 element should show a resistance reading in the range of roughly 8 to 10 ohms. An open circuit (OL or infinite resistance) means the element is broken and needs replacement. Never perform this test with the grill plugged in.
- If the element tests good, test the thermostat for continuity in the same unplugged, cool state. A thermostat stuck in the open position will prevent power from reaching the element even if the element itself is fine.
Uneven heating
If food cooks unevenly (hot spots on one side, cool on the other), first check that the cooking grates are sitting completely flat on their support ledges and not rocking. A slightly tilted grate changes the food-to-element distance enough to cause noticeable hot spots. If the grates are flat and the problem persists, the TRU-Infrared element itself may have a partial break or a localized burnout zone. Inspect the element surface carefully with the grill cold and unplugged. Discoloration along one section of the coil, or a visible break at one end, confirms the element needs replacement. Partial element failures are less common than full breaks but do happen, especially after several seasons of use.
Thermostat or control knob problems
A knob that spins freely without engaging the thermostat shaft usually means the knob's bore has worn out or the D-flat on the thermostat shaft has rounded off. Pull the knob straight off and inspect the inside bore for wear. If the bore looks intact, the thermostat shaft itself may be worn. Replacement thermostats with new shafts are available through eReplacementParts and RepairClinic using the OEM part number from your assembly PDF. A thermostat that clicks but produces no heat change regardless of setting almost certainly needs replacement. This is an operator-serviceable repair: unplug the grill, access the control panel housing (usually two to four screws), photograph the wiring before disconnecting anything, swap the thermostat, reconnect wires to matching terminals, and reassemble.
Damaged cord or connectors
A damaged power cord is a replace-don't-repair situation. Do not attempt to splice or tape a damaged section of the cord. The OEM replacement cord assembly for the Patio Bistro 240 is available through Char-Broil parts or through eReplacementParts and RepairClinic by searching your model number. The replacement cord is a straight swap: unplug, access the internal connector (or terminal block where the cord terminates inside the grill body), photograph the connections, disconnect the old cord, connect the new cord to the same terminals, secure any strain-relief clamps, and close the housing. If the internal wiring shows any melting, discoloration at connection points, or signs of arcing, do not attempt to repair it yourself. That's a situation for a qualified appliance repair technician.
Symptom-to-likely-cause quick reference
| Symptom | Most likely cause | First step |
|---|---|---|
| No power at all | Tripped GFCI or breaker | Reset GFCI; check breaker panel |
| No power, GFCI is fine | Damaged cord or plug | Inspect cord; test outlet with another device |
| Powers on, no heat | Failed heating element or thermostat | Visual element inspection; continuity test |
| Weak or slow heat | Partial element failure or low voltage | Check element resistance; verify outlet voltage |
| Uneven heating | Warped grates or localized element burnout | Level grates; inspect element surface |
| Knob spins without effect | Worn knob bore or rounded thermostat shaft | Inspect knob bore; replace knob or thermostat |
| Burning smell (non-food) | Grease in drip tray, or cord/wiring fault | Clean drip tray; unplug and inspect cord/wiring |
| GFCI trips repeatedly | Element or cord grounding fault | Disconnect cord and test element isolation; consult electrician if unclear |
Routine maintenance and cleaning
The Patio Bistro 240 is a low-maintenance unit, but grease management is the one thing you can't skip. A full drip tray is the most common cause of flare-ups and burning smells on this grill, and it takes about two minutes to address.
After every cook
- Turn the thermostat to high for the last 5 minutes of cooking to burn off surface residue from the grates.
- After the grill cools completely, remove and empty the drip tray. Wipe it clean with a paper towel, then wash with warm soapy water if there's heavy buildup.
- Brush the cooking grates with a grill brush to remove food debris. The porcelain-coated cast iron grates should not be soaked in water.
Monthly or seasonal cleaning
- Unplug the grill before doing any deep cleaning.
- Remove the cooking grates and wash them with warm soapy water. Dry thoroughly before reinstalling. Do not put them in the dishwasher.
- Wipe the inside of the firebox with a damp cloth to remove grease splatter. Do not use a pressure washer or soak the interior, and never direct water toward the heating element or control panel.
- Visually inspect the heating element surface for carbon buildup, cracking, or discoloration. Light gray carbon dust is normal. Cracks or breaks are not.
- Inspect the power cord along its full length. Look for any new cracking or stiffening of the insulation.
- Check all leg and firebox bolts for tightness. Thermal cycling loosens fasteners over time.
- If storing for winter, clean the grill thoroughly, dry it completely, and use a weatherproof grill cover. Never store with grease in the drip tray.
Ordering replacement parts
Char-Broil sells replacement parts directly through its website at charbroil.com/parts. Enter your model number in the parts search and you'll see available OEM parts with pricing. The heating element and thermostat are the two highest-demand replacement items for the Patio Bistro 240 family, and they're usually in stock.
Third-party parts marketplaces give you more options and sometimes better pricing. eReplacementParts.com and RepairClinic both carry Char-Broil parts indexed by model number, and they include photos and diagrams to confirm you're ordering the right part before you buy. Partstree is another solid option. On all of these sites, search by your full model number first, then cross-reference the OEM part number from your assembly PDF against what's listed. If the part numbers match, you're getting the right part. If a listing says 'compatible with' but doesn't list an OEM part number, treat that with caution and verify against your manual.
For the heating element specifically, confirm the wattage (1,750W) and the terminal configuration match your unit before ordering. An element with the correct wattage but different terminal spacing won't connect to your existing wiring without modification, which isn't a project to take on.
Warranty and Char-Broil support
Char-Broil's standard warranty for the Patio Bistro 240 covers the unit against defects in materials and workmanship. Coverage periods vary by component: the overall grill typically carries a 1-year warranty, with some components (like the firebox) covered for longer on newer models. The exact coverage for your specific unit is printed in your owner's manual and on Char-Broil's warranty page at charbroil.com/warranty.
To make a warranty claim, you'll need your model number, serial number, and proof of purchase. Contact Char-Broil at 1-800-352-4111 or through the support form on their website. The serial number encodes the manufacture date, so Char-Broil can verify warranty eligibility even if you've lost your receipt. Before calling, check the CPSC recall database at cpsc.gov/recalls and SaferProducts.gov for any safety notices affecting the Patio Bistro series. As of this writing, no active recalls specific to the Patio Bistro 240 electric are listed, but it's worth verifying this yourself since recall databases are updated continuously.
Related manuals and next steps
If you have a different Patio Bistro variant (the 180 or a gas version), the assembly steps, parts, and electrical specs are different enough that you'll want dedicated guides for those units. The gas Patio Bistro involves a regulator, burner, and ignition system with its own set of failure modes. If you're troubleshooting a unit that won't work at all and you've already ruled out the outlet, cord, thermostat, and element, the broader Char-Broil Patio Bistro not working troubleshooting guide covers additional diagnostic paths for stubborn cases. For those who are still in the assembly stage or just pulled the box out of the garage, the char-broil patio bistro 240 assembly instructions and how to assemble char broil patio bistro 240 guides provide photo-referenced assembly walkthroughs that pair directly with the steps above. And if you also own or are researching a gas cart-style unit, the Patio Caddie gas grill manual covers a completely separate product with its own regulator and ignition system, but the general approach of downloading the OEM manual first and working through diagnostics methodically applies to any grill you're trying to repair. For those specifics, download the Patio Caddie gas grill manual to get the OEM regulator and ignition diagrams and step-by-step service instructions.
FAQ
What primary authoritative documents should I obtain before writing a DIY guide for the Char‑Broil Patio Bistro 240 electric grill?
Get the OEM owner’s manual and assembly instructions (PDF) from Char‑Broil’s official support/manuals pages — these are the definitive sources for model identification, electrical specs, safety warnings, exploded parts views and OEM part numbers. Also check Char‑Broil product pages for model photos and SKUs, and search retailer product pages (Home Depot, Lowe’s, Amazon) to cross‑verify specs and plug/outlet info.
Where do I download the official Char‑Broil Patio Bistro 240 manual and how do I verify it’s the correct model?
Download the manual from Char‑Broil’s support/manuals page (https://www.charbroil.com/support/manuals). Verify model by matching the model name/number and product photos against the grill’s label (usually on the base or underneath) and retailer listing SKUs. If multiple variants exist, confirm electrical specs (voltage/wattage/plug type) and part numbers in the PDF against the physical unit label before relying on any instruction.
Which documents contain the authoritative electrical specifications I must quote for safety guidance?
The model’s OEM owner’s manual and spec sheet on Char‑Broil’s site contain voltage, wattage and recommended outlet/plug type. Use those exact figures from the Patio Bistro 240 PDF for grounding, circuit load and GFCI guidance. If the manual is silent on a detail, cite CPSC, NEC (NFPA 70) and UL/ETL guidance for general electrical-safety rules.
What sources should I use to build an annotated parts diagram and list accurate replacement part numbers?
Use the exploded views and parts lists in the Patio Bistro 240 owner’s manual (OEM part numbers). Cross‑reference those numbers with authorized parts dealers and OEM‑parts marketplaces such as eReplacementParts, RepairClinic and Partstree to confirm availability, pricing and pictures of heating elements, thermostats, knobs and cord assemblies.
Where do I find clear, OEM-backed step‑by‑step assembly instructions and video demonstrations?
The OEM assembly instructions PDF included with the manual are primary. Also check Char‑Broil product pages and official videos on the manufacturer’s YouTube channel for visual guidance. For supplemental perspectives on common tricky steps, use reputable retailer assembly videos or established repair channels — but always prioritize OEM steps for safety-critical actions.
What electrical and operational safety checklist should I include, and which authorities back those items?
Include: verify correct outlet voltage and dedicated circuit per OEM spec; use properly grounded receptacle; recommend GFCI-protected outdoor outlet per NEC/CPSC when outdoors; inspect cord and plug for damage before use; never use extension cords unless OEM allows and then match ampacity; always unplug before servicing; do not disassemble live components. Back these items with the Patio Bistro 240 manual for model‑specific statements and cite CPSC, NEC (NFPA 70) and UL/ETL standards for general electrical-safety requirements.