To correctly use your Hampton Bay outdoor or tabletop gas patio heater: identify your exact model first (tabletop vs. If you own a Hampton Bay 48,000 BTU stainless steel patio heater, keep the specific manual handy for model-specific setup and troubleshooting steps Hampton Bay outdoor or tabletop gas patio heater. standard tower), assemble it in sequence using the included hardware, connect your LP tank with the supplied regulator and hose, run a soap-bubble leak test before every first use, then follow the ignition sequence: tank valve on, control knob to HI, press and hold the knob for 20 seconds while clicking the igniter until the burner lights, then hold for another 10 seconds before releasing. If it won't stay lit, the thermocouple or tilt switch is almost always the culprit, and there are specific reset steps you can try before calling for service.
Hampton Bay Outdoor and Tabletop Gas Patio Heater Instructions

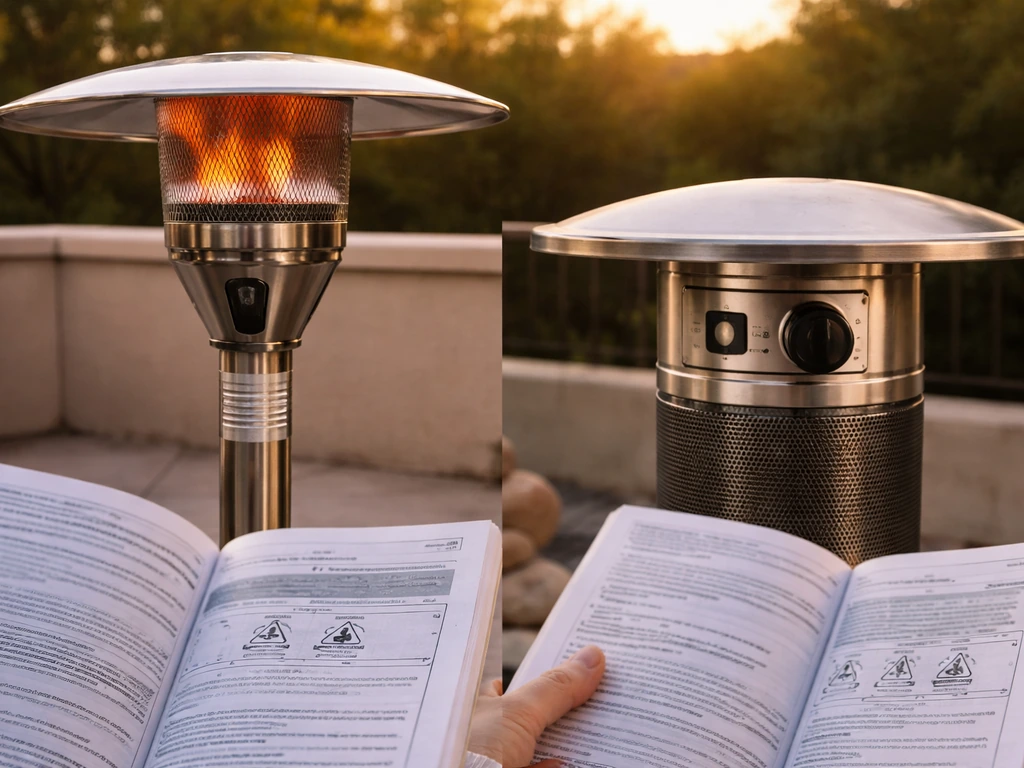
Identify Your Hampton Bay Model and Read the Safety Info First
Hampton Bay sells several distinct gas patio heater models, and the instructions are not interchangeable. The two main categories you'll encounter are the standard freestanding tower heater (typically 40,000 to 48,000 BTU, running on a 20 lb. propane tank in the base) and the tabletop heater (smaller, designed to sit on a table, with a 1 lb. disposable cylinder or an optional 4.
5 ft. conversion hose to a 20 lb. tank). If you have the 48,000 BTU stainless steel model, the assembly sequence and parts list differ slightly from the base models.
Check the model number on the box, the rating plate on the heater body, or the assembly manual included in the box. Common model numbers are printed near the burner head or on the back of the base panel.
Before you do anything else, read through these non-negotiable safety points. Every Hampton Bay gas patio heater is approved and designed for outdoor use only, full stop. Never operate it in a garage, screened porch, tent, or any enclosed or semi-enclosed space. Keep at least 3 feet of clearance on all sides and from overhead obstructions.
Your LP cylinder must meet U. S. DOT specifications, must include an overfilling prevention device (OPD), and must never be filled beyond 80% capacity. Do not store a spare propane cylinder under or near the heater while it is running.
If the flame ever goes out unexpectedly, turn the control knob to OFF immediately and wait at least 5 full minutes before attempting to relight, to allow any accumulated gas to fully dissipate and avoid a flash ignition.
Unboxing: Parts, Tools, and Workspace Setup
Open the box on a flat, clean surface outdoors or in a well-ventilated area. Lay out every part and cross-reference against the parts list in your included manual before you start assembling anything. Missing hardware is common and much easier to sort out before assembly than after. For a standard tower heater, you should find the base, pole sections (usually two or three), the burner head assembly, the emitter screen, the reflector, the reflector cap or finial, the regulator and hose assembly, and a hardware bag containing bolts, washers, and nuts. For a tabletop heater, the parts list is shorter: the body/burner unit, the reflector, the reflector cap secured by a bolt and finial, and the regulator hose.
Tools you'll need are minimal: a Phillips head screwdriver, an adjustable wrench or a set of open-end wrenches, and optionally needle-nose pliers for tightening small nuts in tight spaces. You do not need any power tools. Set up your workspace away from any gas sources, open flames, or ignition sources. Have a small bowl, some dish soap, and water nearby for the leak test you'll run after connecting the gas.
Assembly Instructions: Standard Tower vs. Tabletop
Standard Freestanding Tower Heater
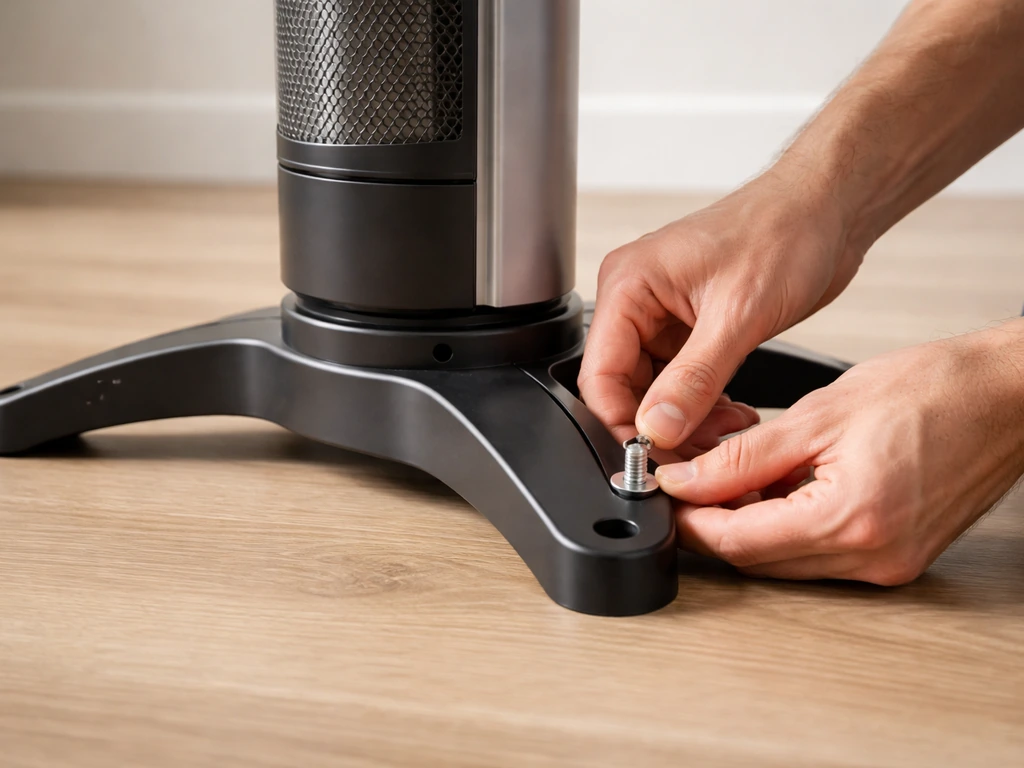
- Attach the base legs or base panel first, securing them firmly with the provided bolts and washers. The base needs to be solid before anything goes on top of it.
- Thread the lower pole section through the base opening and secure it. On most models, the gas hose routes up through the center of the pole, so feed it through before tightening.
- Connect the middle pole section to the lower section, aligning any orientation marks if present, and secure with the bolt.
- Attach the burner head assembly to the top pole. Hand-tighten the connection first, then snug it with a wrench. Do not overtighten or you risk cracking the fitting.
- Install the emitter screen around the burner head, then position the reflector above it. Attach the reflector using the nuts and washers provided, and secure the reflector cap with the finial bolt.
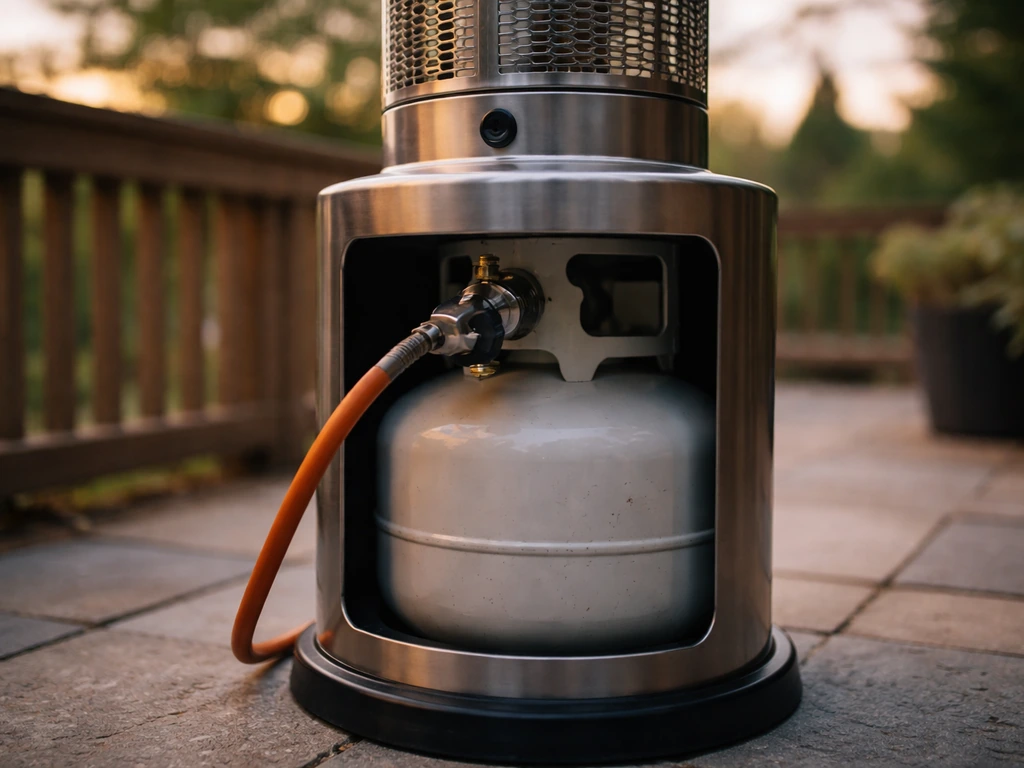
- Route and connect the regulator hose from the burner head assembly down to where the LP tank will sit in the base. Leave the tank end disconnected until the leak test.
Tabletop Heater
Tabletop assembly is simpler but has a few model-specific steps worth knowing. [Attach the reflector to the burner assembly using the nuts and washers specified in your manual, then secure the reflector cap with the bolt and finial. ](https://images. thdstatic.
com/catalog/pdfImages/e4/e4703fb1-e049-4389-b430-7a97ba7162fc. pdf) The reflector needs to sit level and centered over the burner head. If it's tilted, the heat output will be uneven and you may trigger the tilt-safety shutoff unnecessarily. Most tabletop Hampton Bay heaters run on a standard 1 lb.
disposable propane cylinder that threads directly into the base. However, some models support an Option 2 connection: a 4. 5 ft. conversion hose that lets you connect to a larger 20 lb.
propane tank for longer run time. If you plan to use the conversion hose, thread it into the heater's inlet connection hand-tight, then snug with a wrench, and connect the other end to the 20 lb. tank's regulator fitting.
Gas Hookup and Pre-Ignition Checks
Always use the pressure regulator and hose assembly that came with your Hampton Bay heater. If that assembly is damaged or worn, replace it only with a manufacturer-specified replacement. A generic hose may not be rated for the correct pressure, which creates a real safety risk. Before connecting anything, visually inspect the hose for cuts, abrasions, cracks, or any sign of wear. If you see any, do not use it. Also check that there is no debris, dirt, or spider webs in the LP cylinder valve head or in the burner ports. Both are surprisingly common and will cause ignition or flame problems.
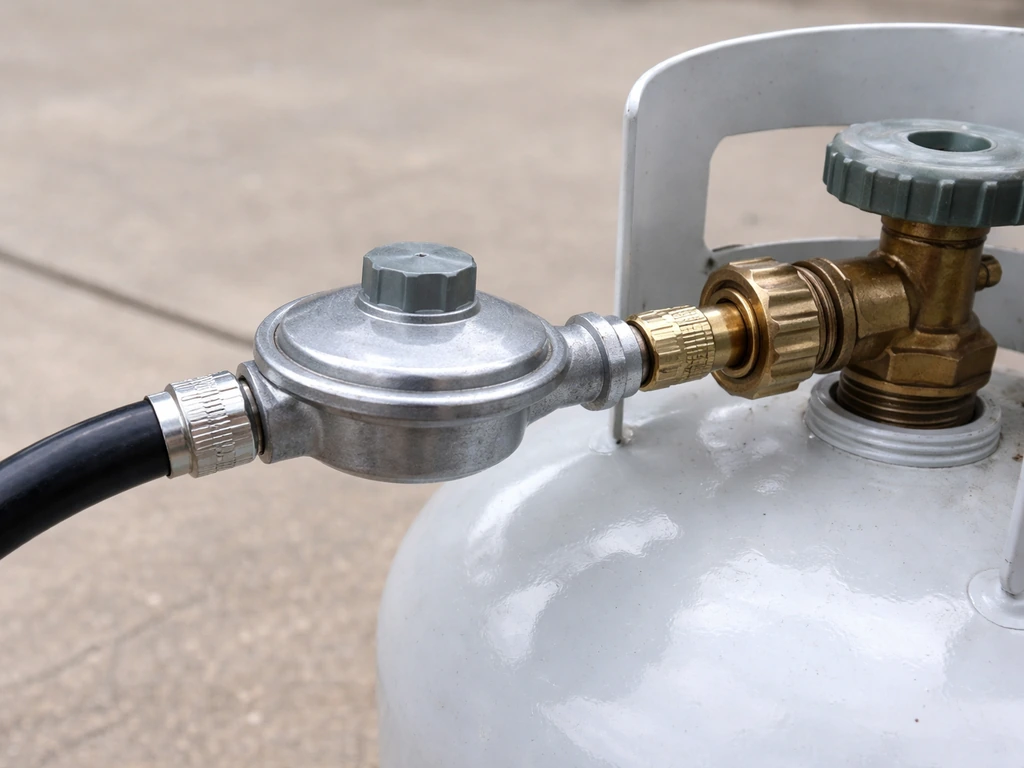
Once the hose looks good, connect the regulator to the LP tank valve. Most Hampton Bay regulators use a standard POL or Type 1 (QCC1) fitting that threads onto the tank counterclockwise to tighten (left-handed thread). Tighten firmly by hand, then give it a quarter-turn snug with a wrench. Do not crank it. Now, run a leak test before you ever attempt to light the heater.
Leak Test (Do Not Skip This)
Mix a solution of one part liquid dish detergent and one part water in a small bowl or cup. Open the LP tank valve slowly (one full turn is enough). Using a brush or a cloth, apply the soapy solution to every connection: the tank valve fitting, the regulator connection, and both ends of the hose. Watch each spot for 30 seconds.
Soap bubbles forming at any point means you have a leak. Close the tank valve immediately. [Loosen the leaking connection and re-tighten it, then test again. ](https://pdf.
lowes. com/productdocuments/44efaf25-5637-41f5-8fde-9359ba6a0738/08108931. pdf) If a connection still bubbles after re-tightening, do not use the heater. Call Hampton Bay customer service or replace the fitting.
A bubbling connection that you ignore is a fire and explosion hazard.
Lighting Your Hampton Bay Heater: The Correct Ignition Sequence
If you just connected a brand-new propane tank, there will be air in the gas line. Allow at least one full minute after opening the tank valve before attempting to light. This lets air purge out of the line so propane can reach the burner. Skipping this step is one of the most common reasons a heater fails to ignite on first use.
- Turn the LP tank valve to the fully open position.
- Make sure the control knob on the heater is in the OFF position. If the heater was recently on or recently had a flame go out, wait the full 5 minutes before proceeding.
- Press in and rotate the control knob to the HI (high) position.
- Press the control knob down firmly and hold it in. Keep holding it for the full 20 seconds.
- While holding the knob in, press the igniter button repeatedly (several clicks) until you see or hear the burner ignite. You can check whether the burner has lit by looking through the peephole located at the base of the burner head.
- Once the burner is lit, continue holding the control knob in for another 10 seconds before releasing it. This lets the thermocouple heat up enough to signal the gas valve to stay open.
- Release the knob slowly. The flame should remain on. If it goes out, wait 5 minutes and repeat from step 2.
- To adjust heat, rotate the control knob between LOW and HI. On LOW, you should see a noticeably smaller, quieter flame than on HI.
A healthy flame on a Hampton Bay gas patio heater should be blue with slight yellow tips. Pure yellow or orange flame usually means incomplete combustion, which can point to a blocked burner port or improper air-to-gas mixture. A very small, weak blue flame that won't grow on HI can point to a low tank or a regulator issue. After ignition, let the heater run for a couple of minutes on HI before adjusting to your preferred heat level.
Troubleshooting: Heater Won't Ignite
Failed ignition right after assembly or after sitting through winter is incredibly common, and most of the time the fix is straightforward. Work through the following checks in order before assuming anything is broken.
| Symptom | Most Likely Cause | What to Do |
|---|---|---|
| Igniter clicks but no flame | Air in the gas line (new tank) | Wait 60+ seconds after opening tank valve, then retry |
| Igniter clicks but no flame | Empty or very low propane tank | Check tank weight; swap for a full tank and retest |
| Igniter clicks but no flame | Debris in burner ports | Turn off gas, remove emitter screen, clear ports with a soft brush or compressed air |
| No click from igniter at all | Dead igniter battery or corroded electrode | Replace battery; clean electrode tip with fine steel wool or sandpaper |
| Igniter sparks but no gas smell at all | Regulator not fully connected or regulator lockout | Close tank valve, disconnect and reconnect regulator firmly; open tank valve slowly |
| Gas smell but won't light | Safety delay from previous flame-out | Turn to OFF, wait full 5 minutes, purge line, restart sequence from the beginning |
One often-overlooked cause is regulator lockout. This happens when the tank valve is opened too quickly, triggering the regulator's internal safety mechanism. Close the tank valve, press the control knob to OFF, wait 30 seconds, then open the tank valve very slowly (crack it open over 3 to 5 seconds) before trying the ignition sequence again. This clears the lockout in most cases.
Troubleshooting: Heater Lights But Won't Stay Lit
If your Hampton Bay heater lights but the flame dies within a few seconds of releasing the control knob, the thermocouple is almost always the reason. For Uline tabletop patio heater instructions, confirm your exact model number and follow the same safety, hose, leak test, and ignition steps described for Hampton Bay tabletop units. The thermocouple is a small safety sensor that sits in the flame path near the burner. It generates a tiny electrical signal when heated, which tells the gas valve to stay open. If it's cold, dirty, out of position, or failing, the valve closes and the flame dies. This is a safety feature, not a malfunction, but a worn thermocouple mimics a malfunction.
Thermocouple Reset and Check Steps
- Turn the heater fully off and let it cool for 10 minutes.
- Relight the heater following the full ignition sequence. This time, hold the control knob in for a full 30 seconds after ignition before releasing. A cold or slightly dirty thermocouple sometimes just needs more time to heat up.
- If it still goes out: turn everything off, let it cool, and visually inspect the thermocouple tip. It should be positioned so the flame tip contacts it directly. If it's bent away from the flame, gently bend it back into position.
- Clean the thermocouple tip with fine steel wool or very fine sandpaper to remove any oxidation or carbon buildup, then retry.
- If none of the above works after two or three attempts, the thermocouple likely needs replacement. This is a DIY-doable repair on most Hampton Bay models.
Tilt Switch and Auto-Shutoff Issues
All Hampton Bay gas patio heaters include a tilt-activated automatic shutoff. If the heater tips beyond a set angle (typically around 15 degrees), the shutoff kills the flame. This is a life-saving feature, but it also trips on uneven surfaces, soft ground, or if the base legs aren't fully deployed and locked. If your heater keeps shutting off unexpectedly, check that it is sitting on a firm, level surface and that the base is stable.
For tabletop models, make sure the surface itself is not rocking. If the heater is plumb and level but still shutting off, the tilt switch may be out of calibration or stuck. On some models you can access the switch by removing the base panel. A switch that is stuck in the tripped position will keep the heater from staying lit even on a flat surface.
If cleaning around the switch and ensuring it moves freely doesn't solve it, the switch needs replacement.
When to Stop and Call for Service
Stop troubleshooting and contact Hampton Bay customer service or a qualified gas appliance technician if: you smell gas and cannot identify a specific leaking connection, the hose or regulator shows any damage, the control knob feels sticky or doesn't turn correctly, or the heater has been knocked over and the gas line was under stress. Do not attempt to repair the gas valve, regulator internals, or burner orifice yourself. These are pressurized components that require calibrated tools and training.
Maintenance and Safety After Each Use
After using your Hampton Bay patio heater, turn the control knob to OFF and close the LP tank valve completely. Do not leave the tank valve open when the heater is not in active use. Let the heater cool fully before moving it or covering it. Use a weather cover when the heater is stored outdoors between uses to keep insects and moisture out of the burner ports, which is the primary cause of clogged ports and failed ignition the next season.
- Before each season: inspect the hose and regulator for cracks, kinks, or abrasion. Replace if any damage is visible.
- Clean the burner ports with a soft brush at the start and end of each season. Spiders love to nest in them over winter.
- Check that the emitter screen and reflector are not dented or bent. A damaged reflector reduces efficiency and can create uneven heat that scorches the burner head.
- Wipe down the exterior with a damp cloth. Do not use abrasive cleaners on the reflector or stainless surfaces.
- If you're storing the heater for winter, disconnect the propane tank and store the tank upright outdoors in a well-ventilated area, never inside the garage or a shed.
- Run the leak test at the start of every new season, not just at initial setup.
- If the heater has been knocked over or stored improperly, inspect all connections and run the full leak test before relighting.
Hampton Bay patio heaters are genuinely repairable appliances. The thermocouple, igniter, tilt switch, and hose assembly are all replaceable parts that you can source and swap yourself with basic tools. The goal is to know your specific model well enough that when something acts up, you can pinpoint it quickly. Whether you have the standard 48,000 BTU tower or a compact tabletop unit, the gas principles and safety rules are the same.
Follow the sequence, respect the 5-minute rule after any flame-out, and run a soap test any time you reconnect the tank, and you'll get years of reliable use out of your Hampton Bay heater. If you have a Hampton Bay 31 in outdoor gas patio heater, follow the exact manual for the correct parts, regulator setup, and ignition sequence hampton bay 31 in outdoor gas patio heater manual.
If you are working with a Havana Bronze commercial model, follow its specific instructions for startup, gas hookup, and troubleshooting Havana Bronze commercial patio heater instructions. If you want, you can also review Hampton Bay patio heater models and troubleshooting tips to help you diagnose issues faster.
FAQ
What should I check if my Hampton Bay patio heater won’t ignite after I assembled it correctly?
If the knob will not stay in the ON position, or the igniter clicks but the burner never catches, first confirm the heater is fully assembled and the control knob is aligned with the valve stem. Then inspect the thermocouple connection and positioning (it must sit in the correct spot in the flame path) and make sure the cylinder is not low, since a low-tank/low-pressure situation can prevent the safety circuit from holding.
Can I use a generic propane hose or regulator with my Hampton Bay heater?
Use only the included regulator and hose assembly that matches your model, even if the tank fitting looks compatible. If you need to replace it, get the manufacturer specified replacement for your heater model, because hose pressure rating and length (especially for tabletop conversion hose setups) affect safe operation and ignition behavior.
How tight should the regulator connection be, and can I use thread sealant?
For a standard tower, connect the regulator to the LP cylinder valve using the model’s specified fitting type, then tighten hand tight and add only a small snug with a wrench. Do not overtighten, and do not use thread sealant on propane connections unless the manual explicitly allows it (most do not), since sealant can degrade fittings or block flow.
What if my soap-bubble leak test shows a leak even after I re-tighten the connection?
If you are seeing bubbles during the leak test, stop immediately, close the tank valve, and re-tighten only the leaking connection. If bubbles continue after a careful re-tighten, do not attempt to light, do not swap parts casually, and contact customer service or replace the suspect fitting, because persistent bubbling usually indicates a damaged O-ring, cracked fitting, or mis-seated regulator.
Why does my heater flame look mostly yellow or orange, and what should I do?
A burner that produces mostly yellow or orange flame can also be caused by a partially blocked burner port from insects or spider webs. Let the heater cool, then inspect and clean the burner ports and surrounding area, and verify the reflector components are installed and centered. If the flame pattern remains abnormal after cleaning, stop using it and arrange service.
What should I do if it lights briefly, then shuts off again immediately?
After any flame-out, wait the required minutes before relighting. If it has not lit within a couple of attempts, stop and check for debris in the burner ports, confirm the hose is not kinked or under strain, and make sure the heater is on a stable level surface so the tilt shutoff is not repeatedly cutting the burner.
During ignition, I release the knob quickly, could that be why it won’t stay lit?
Even though the common reason is thermocouple or tilt safety, you should also check that the control knob is fully pressed and held for the specified time during ignition. Releasing too early can cause the burner to extinguish once the gas valve stops receiving the safety signal.
How can I tell if my shutdown is caused by the tilt safety shutoff versus another problem?
The tilt switch can trip on uneven or soft ground. Place the heater on a firm level base, ensure the legs are fully deployed and locked, and avoid placing it on decks or surfaces that can rock or flex. For tabletop models, verify the tabletop itself is not wobbling, because even slight movement can trigger shutoff.
When exactly should I perform a leak test, and what should I inspect beforehand?
You can run the leak test any time you reconnect the tank or after servicing any connection, regulator, or hose end. Also do a quick visual inspection before testing, looking for cracks, abrasions, or hardened spots on the hose, because damaged hose sections can leak under pressure even if fittings look fine.
If I switch from a 1 lb tabletop cylinder to the 4.5 ft conversion hose, do I need to leak test again?
Yes. When switching between a disposable 1 lb cylinder and a conversion hose option, follow the model’s correct connection method and ensure the conversion hose is firmly seated at both ends. Then perform a full leak test again before any ignition, since changing the gas path introduces new connection points.
How should I prepare my Hampton Bay heater after winter storage outdoors?
If the heater was stored outdoors, cover it after it has fully cooled to prevent insects and moisture from collecting in the burner area. In spring, remove the cover and inspect the burner ports for debris before the first lighting, since blocked ports can cause mis-ignition and uneven heat output.
What’s the safest response if I smell gas and I cannot find the source?
If you smell gas and cannot quickly identify the exact leaking connection, do not troubleshoot further with ignition attempts. Keep people away, close the tank valve if you can do so safely, ventilate the area, and contact customer service or a qualified technician. Never try to repair gas valve internals, because pressurized components require proper tools and calibration.