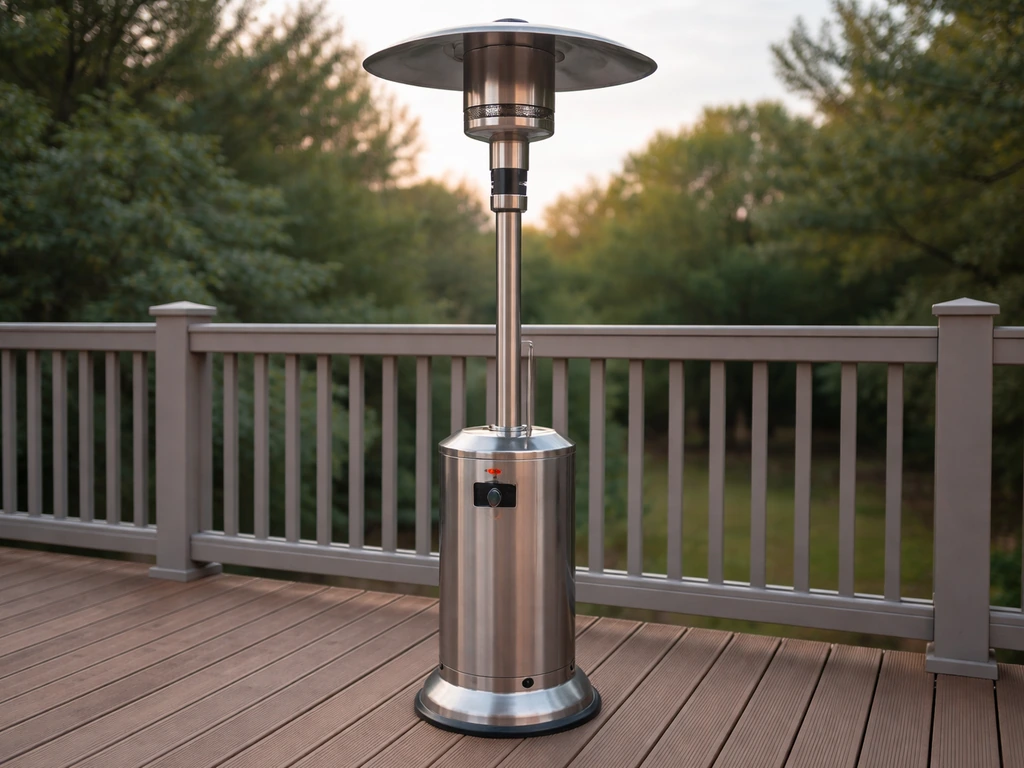
Setting up a patio heater takes about 30 to 45 minutes for most standing propane models, a bit less for tabletop or electric units. If you want the fastest way to warm up your outdoor patio, follow the setup steps carefully and focus on safe clearance and proper fuel or power connection How to warm up outdoor patio. You need to pick a stable, clear spot with at least 24 to 36 inches of clearance on all sides and roughly 3.5 feet above the head, assemble the base and pole before attaching the burner head, connect and leak-test your gas line (or plug in your electric unit), then hold the ignition knob in for a full 30 seconds on the first light so the thermocouple heats up and keeps the flame going. That last step is the one most people skip, and it's almost always why the heater lights and then dies two seconds later.
How to Set Up a Patio Heater Step-by-Step for Safe Startup

First, know what type of heater you have and what you'll need

Before you touch anything, figure out exactly what you're working with. Most residential patio heaters fall into one of three categories: freestanding propane (the classic mushroom-top tower), tabletop propane (smaller, sits on a table or deck rail), and electric infrared (wall-mount, ceiling-mount, or pole-mount, plugs into an outlet or hardwires). Most residential patio heaters fall into one of three categories: freestanding propane (the classic mushroom-top tower), tabletop propane (smaller, sits on a table or deck rail), and electric infrared (wall-mount, ceiling-mount, or pole-mount, plugs into an outlet or hardwires) how to buy a patio heater. Each has a slightly different setup workflow, and a few things you'll need are type-specific.
Check the box contents against the parts list in your manual before you start assembly. This sounds obvious but it saves a lot of frustration. For propane models, the parts list typically includes a base/weight block, one or more pole sections, a burner head with reflector dome and emitter screen, a control knob assembly, and hardware. What's often NOT in the box is the gas hose and regulator, the Qlima PGF 1211 manual explicitly lists the gas hose as 'not included,' and the OuterMust PH02-WY manual notes the hose and regulator may be sold separately depending on the package. If yours didn't come with one, you need to buy the correct kit for your model before doing anything else. Don't use a generic replacement hose unless your manual specifically says it's compatible. For electric infrared models like the Paramount LIP-15-TGG-SP, you're mostly dealing with a pole, a mounting bracket, a heater head, and a power connection, no fuel lines, but you still need to confirm your circuit can handle the load.
- Your owner's manual (look up your model online if it's missing — this site has a manual lookup)
- Adjustable wrench and pliers
- Dish soap and water in a spray bottle (for leak testing on gas models)
- A 20 lb propane tank that's been filled recently, or the correct power source for electric
- A level surface to work on
- A second set of hands for lifting the burner head onto a tall pole
Pick the right spot before you assemble anything
Location matters more than most people realize, and you want to commit to a spot before you start building the heater there. Moving a fully assembled freestanding propane heater across a patio is awkward and risky. Get the placement right first.
The core rule is clearance to combustibles. The exact numbers vary by model, but here's what the manuals consistently require: the Patio Comfort PC02 calls for at least 24 inches from combustible walls or materials on the sides and at least 24 inches above the top of the reflector. The DesaTech SPC-54PHW needs roughly 3.6 feet (1,100 mm) of clearance above the head and 2 feet on the sides. The Qlima PGF 1211 specifies 120 cm (about 47 inches) from combustibles. If your heater is going under a covered patio or pergola, check your manual specifically, the blank" rel="noopener noreferrer">Patio-Pal PH28/31/34 manual notes that if the heater is mounted beneath a non-combustible surface, you still need a minimum 8 inches of top clearance to prevent overheating the controls. Always use the clearance number from your specific manual, but if you've lost it, 24 inches on the sides and at least 36 inches above the head is a reasonable baseline.
Wind is the other factor people underestimate. The Qlima manual has an explicit warning about tilting in violent wind conditions, and that warning is there for a reason. Most freestanding heaters have a tilt safety shutoff that cuts the gas if the heater tips, which is a great safety feature, but it means a gusty evening will keep killing your heater if it's in a bad spot. Pick a location that has some natural wind protection, like a wall or fence on the windward side, but that still has adequate ventilation. Never use a propane patio heater in an enclosed space.
The surface needs to be flat, firm, and stable. Flagstone, concrete, composite decking, and pavers all work well. Soft ground, gravel, or uneven surfaces are problems, the heater can shift or sink. If you're on a wood deck, check that the deck boards are solid and even. Most freestanding heaters have a base you can fill with sand or water for added stability, and on a windy site, I'd strongly recommend doing that.
Assemble the heater correctly, base first, head last
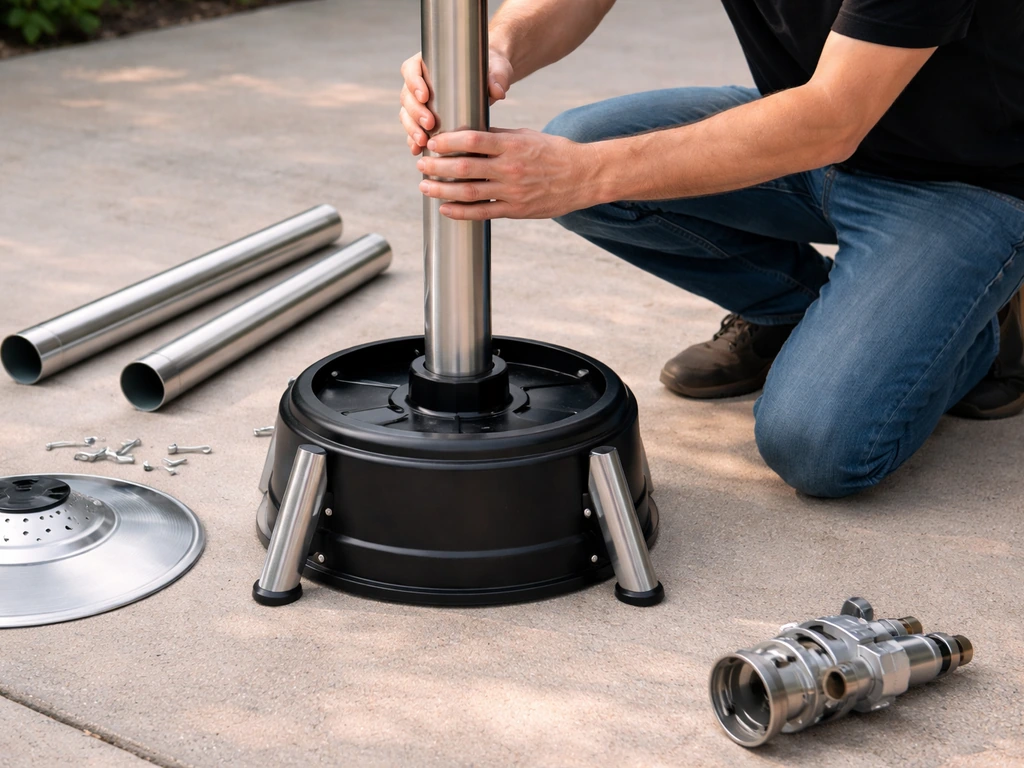
The assembly order matters. Always build from the bottom up: base and legs first, then the pole sections, then the burner head and reflector. Attaching the head before the base is secured is how heaters get dropped and damaged, and it's also how people get hurt.
- Lay out all parts and hardware and verify against the parts list. Don't start until everything is accounted for.
- Attach the base legs or assemble the weight base according to your manual. Hand-tighten first, then snug everything down with a wrench. If the base has a fill port for sand or water ballast, leave it open for now — fill it after the heater is fully assembled.
- Stand the lower pole section up in the base collar and secure it. Many models have a set screw or locking collar — use it.
- If there's a middle pole section, connect it to the lower section. The control knob housing or gas valve assembly often mounts at this stage on propane models. Thread the gas line up through the pole if your design requires it.
- Attach the upper pole section if there is one.
- With a helper, lift and set the burner head assembly onto the top of the pole. Align the tabs or mounting points, then secure with the provided hardware. On models like the HeatMaxx SRPT03, this is where you also attach the reflector dome and emitter screen.
- Install batteries in the igniter if your model uses a battery-powered piezo igniter (usually one or two AA batteries in a compartment on the control panel).
- Fill the base with sand or water now if you're adding ballast.
- Step back and check that the heater stands straight and doesn't rock. If it wobbles even slightly, adjust the legs before proceeding.
For electric infrared pole-mount heaters, the assembly is similar but you're routing a power cable instead of a gas line. Follow the pole assembly steps, secure the heater head, and make sure the cable is routed so it won't be pinched or abraded. Don't connect power until the unit is fully assembled and positioned.
Connect your fuel or power source safely
Propane models
Before you connect anything, make sure the heater's control knob is in the OFF position. The Patio Comfort PC02 manual is explicit about this: control knob goes to OFF before you touch the tank valve. This is non-negotiable.
Inspect your hose and regulator before every connection. Look for cracks, abrasions, kinking, or any sign of physical damage. The SPC-21PHTSA manual requires this inspection before each use, and it's good practice across every propane patio heater. If the hose looks damaged, replace it with a model-compatible hose, don't improvise.
Connect the regulator to the propane tank. The fitting is typically a left-hand thread (turns counter-clockwise to tighten), so it's the opposite of a standard bolt. Hand-tighten first, then snug it with a wrench, firm, not gorilla-tight. Connect the other end of the hose to the heater's inlet if it's a two-piece hose system.
Now do your leak test before you do anything else. Mix dish soap with water at roughly a 50/50 ratio and brush or spray it over every connection point: where the regulator meets the tank, along the hose, and where the hose connects to the heater. Mix dish soap with water at roughly a 50/50 ratio and brush or spray it over every connection point, since Blackstone recommends the blank" rel="noopener noreferrer">soapy water leak test over the entire regulator hose and growing bubbles indicate a leak at that connection or hose section. Slowly open the propane tank valve with the heater control knob still on OFF. Watch every connection for growing bubbles. A bubble that sits there is just soap foam. A bubble that grows and expands means gas is escaping at that point. If you see growing bubbles anywhere: close the tank valve immediately, disconnect the tank, and fix the leaking connection before proceeding. The DesaTech VPHGRP manual also recommends disconnecting the gas supply after each use and not storing the heater attached to the propane cylinder, good habits to start from day one.
Electric models
For electric infrared heaters, confirm the unit's wattage and voltage rating against your outlet or circuit. A 1,500W 120V unit will work on a standard 15-amp outlet. Larger or hardwired units need a dedicated circuit, check your manual. Make sure the power cord or cable won't be a trip hazard or exposed to water. Plug in (or connect hardwired leads) only after the heater is fully assembled and positioned.
The first-light startup procedure

This is where most setup problems happen, and almost all of them come down to rushing the thermocouple hold. Here's the correct sequence for a typical freestanding propane heater, adjust for your specific model, but this workflow applies to the vast majority of residential units.
- Make sure you're outdoors in a ventilated area. Confirm no ignition sources (open flames, smoking) are nearby.
- Open the propane tank valve fully (turn counter-clockwise until it stops, then back a quarter turn).
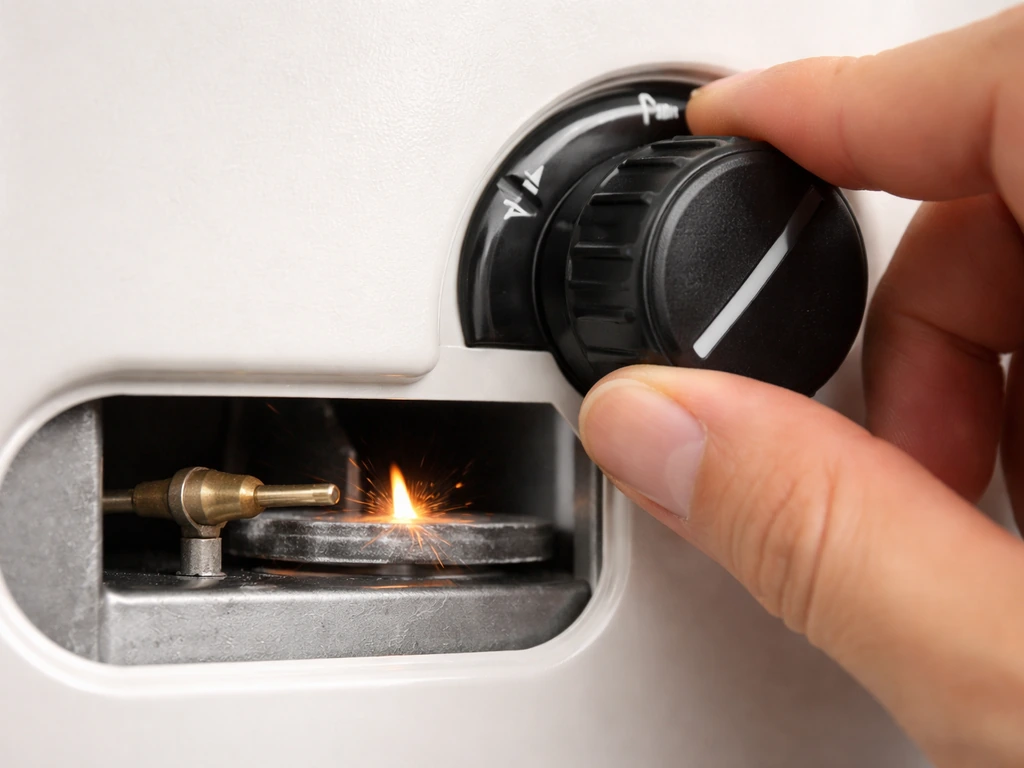
- Turn the heater control knob to the PILOT position.
- Press the control knob inward (you're opening the pilot gas valve) and while holding it in, press the igniter button. You should hear a click and see a small pilot flame.
- Keep the control knob pressed in continuously for 30 full seconds after the pilot lights. This is heating the thermocouple. If you release it before 30 seconds, the flame will go out. Use a watch or count slowly — 30 seconds feels like forever when you're holding a knob.
- After 30 seconds, slowly release the control knob. The pilot flame should stay lit.
- Turn the control knob from PILOT to your desired heat setting (LOW, MEDIUM, HIGH). The main burner should ignite with a soft whomp.
- Check the flame. It should be mostly blue with minimal yellow tipping. Yellow or orange flame can indicate incomplete combustion — make sure the heater is level and there's adequate air flow around it.
- Check that the heater is standing level and stable. Many units have a tilt safety shutoff that will kill the flame if the heater leans even a few degrees off-level.
For electric infrared heaters, the startup is much simpler: power on, set the thermostat or heat setting, and you should have heat within a minute or two. Verify the heating element glows uniformly and the unit doesn't trip the breaker.
If it won't light or won't stay lit: setup troubleshooting
A heater that lights and immediately dies, or that won't ignite at all, is almost always one of a handful of fixable problems. Work through these before assuming anything is seriously wrong.
Lights and immediately goes out
This is almost always a thermocouple problem, specifically, you didn't hold the knob in long enough on the first light. The thermocouple is a small metal probe that sits in the pilot flame. It needs heat to generate the small voltage that tells the gas valve it's safe to stay open. If it's cold (new heater, first use) or slightly misaligned, it needs the full 30 seconds to reach working temperature. Try the full lighting procedure again, this time counting out a genuine 30 seconds with the knob held firmly in. On some models, particularly in cold weather, it can take slightly longer.
If you've done that multiple times and the heater still won't stay lit, check whether the thermocouple tip is actually sitting in the pilot flame. It's a small metallic probe near the burner assembly. If it's been bent away from the flame during shipping or assembly, the flame won't heat it. You can carefully and gently bend it back toward the pilot flame using needle-nose pliers. On many heaters, the tilt switch and thermocouple are wired in series, if either one fails, the burner won't stay lit. So if the thermocouple checks out, a faulty or tripped tilt switch is the next thing to investigate.
Won't ignite at all
First, confirm the propane tank isn't empty and the valve is fully open. Then check the igniter. If it's battery-powered, replace the batteries even if they seem fine, weak batteries cause weak or absent spark. You should hear a sharp, clear click when you press the igniter button and see a visible spark at the burner. If you hear a weak click or no spark, the igniter module or electrode gap is the issue. If there's spark but no ignition, the problem is gas flow: check that the regulator is properly connected, the control knob is in the correct PILOT or IGNITE position, and that you're pressing the knob fully in while pressing the igniter.
On models with electronic ignition systems, like the Patio-Pal PH28/31/34, the control board will attempt ignition for about 15 seconds, retry twice, and then enter lockout mode if it doesn't establish a flame. If you've hit lockout, the fix is to turn the heater completely off, wait at least 5 minutes, and start the full lighting sequence from scratch. The DesaTech SPC-54PHW manual also notes a 5-second wait rule after adjusting the tank valve before attempting a relight, don't skip the waiting periods.
Tilt switch trips during normal use
If the heater keeps shutting off but it looks straight to your eye, use an actual bubble level to check it. Some tilt switches are sensitive to just a few degrees of lean. Adjust the legs or the surface under the base until it's perfectly level. If the tilt switch trips repeatedly even when the heater is level, the switch itself may be faulty, that's a repair topic in its own right, but it's a common and fixable problem, not a reason to replace the whole heater.
Quick setup troubleshooting checklist
| Symptom | Most Likely Cause | Quick Fix |
|---|---|---|
| Lights then dies in under 5 seconds | Thermocouple not heated / released too soon | Hold knob in for full 30 seconds after pilot lights |
| No spark when pressing igniter | Dead igniter batteries or loose electrode wire | Replace batteries; check electrode connection |
| Spark present but no ignition | Gas not flowing: knob position or regulator issue | Confirm knob on PILOT, tank valve open, regulator seated |
| Heater shuts off shortly after lighting | Tilt switch tripped or thermocouple misaligned | Level the heater; check thermocouple tip position in flame |
| Ignition lockout (won't even try to light) | Too many failed attempts triggered lockout mode | Turn off completely, wait 5+ minutes, restart from beginning |
| Weak or yellow flame | Low gas pressure or heater not level | Check tank level, regulator connection, and heater levelness |
Safety habits and maintenance after setup
Getting the heater running is only half the job. A few habits will keep it running safely and extend its life significantly. If you want the step-by-step process for building your own, start with how to build a patio heater and work through the assembly and safety checks in order.
- Run the leak test every time you swap the propane tank, not just on first setup. It takes two minutes and can prevent a serious incident.
- Inspect the hose and regulator before every use during the season. Look for cracks, kinking, or abrasion. The hose is the most wear-prone part of a propane heater.
- Close the tank valve when the heater is not in use. The DesaTech VPHGRP manual specifically advises disconnecting the gas supply after each use and not storing the heater while attached to the tank.
- Store the heater without the propane tank attached, and store it upright in a covered area protected from rain and UV. A weatherproof cover will significantly extend the life of the reflector, emitter screen, and control components.
- Never clean any patio heater — gas or electric — with combustible or corrosive cleaners. Use a damp cloth on exterior surfaces.
- Check the emitter screen for debris, insect nests, or corrosion at the start of each season. A blocked emitter causes incomplete combustion and can damage the burner.
- If you notice the flame color change from blue to mostly yellow or orange over repeated uses, that's a sign of a partial blockage or combustion issue — investigate before continuing to use it.
- For electric models, inspect the power cord and any exposed wiring at the start of each season for cracking, fraying, or damage from pests.
One thing worth knowing going in: patio heaters are repairable appliances. The parts that most commonly fail, thermocouples, tilt switches, igniter modules, hoses, and regulators, are all serviceable components. If your heater develops a problem down the line, there's a good chance you can fix it yourself without replacing the whole unit. The troubleshooting guides on this site cover all of those failure points in detail. But a proper setup done right from the start, with correct clearances, a leak-tested gas connection, and a patient first-light procedure, will save you a lot of that trouble.
FAQ
How can I tell if my patio heater needs a separate gas regulator or hose kit before setup?
Check your exact model number on the manual or rating label, then confirm whether a regulator and hose are listed as included. Many propane heaters ship without the hose/regulator combination, and using an incompatible generic hose can create incorrect gas pressure or connection fitment. If your box did not include the specified hose assembly, buy the model-compatible kit before you assemble or attempt any leak test.
What should I do if I lose my manual clearance measurements for my specific heater?
Use the conservative baseline of at least 24 inches to the sides from combustibles and at least 36 inches above the heater head, then add extra spacing if you have fabric furniture, umbrellas, or overhead decor that could move or sag. If the heater will sit under a cover, verify the top clearance requirement from the label if possible, because controls and reflector temperatures can exceed what you expect under pergolas.
Can I use a patio heater under a covered patio if it is not fully open to the air?
Only if your heater is specifically designed for that setup and your manual allows operation under a non-combustible overhang. Even then, keep the area ventilated and never treat a semi-enclosed space like an indoor setting. If the heater has a tilt shutoff, note that wind can still trigger frequent shutdowns, which increases annoyance and repeated ignition attempts.
How do I choose a stable spot if my patio surface is uneven or on pavers?
Place the base on firm, level ground so the feet do not rock. On uneven pavers or composite decking, shim only if it does not create a soft or unstable support, and avoid grassy or muddy areas where the base can shift. For freestanding propane units, filling the base as allowed by the manual helps prevent tipping, especially on gusty nights.
My propane heater lights but dies after a short time, what’s the best order to troubleshoot?
First repeat the initial lighting hold with a true 30-second count, keeping the knob fully depressed so the thermocouple reaches operating temperature. If it still shuts off, confirm the thermocouple tip is positioned in the pilot flame and not bent away. After that, check the tank valve is fully open and that you are in the correct control position (PILOT or IGNITE), then verify the igniter actually produces a strong spark.
Should I leak-test every time I set up the heater, or only after replacing parts?
Leak-test at every setup, not just after part changes. Hoses and connections can loosen slightly during transport or storage. Use soapy water on every connection, watch for bubbles that grow or expand, and if you find a leak, shut the tank valve immediately and fix the specific connection before relighting.
What are the most common mistakes when connecting a propane tank, especially regarding the fitting direction?
Don’t force the connection, and remember that many tank/regulator fittings use a left-hand thread, meaning the typical tightening direction is counter-clockwise. Hand-tighten first, then snug with a wrench firmly, without overtightening. Also confirm you have the correct hose type for your heater and regulator, then keep the heater control knob in OFF before touching the tank valve.
If my electric patio heater trips the breaker, what should I check before trying again?
Confirm the heater’s wattage and voltage match your outlet or circuit rating, then avoid using extension cords unless the manual explicitly allows them. Check that the thermostat or heat setting is not set higher than the circuit can handle when other loads are running. If it hard-trips repeatedly, stop and have the circuit checked rather than continuing resets.
Can I move a freestanding propane heater once it’s assembled or even while it’s warm?
Wait until it is fully cool and completely shut down before moving it. In practice, moving an assembled propane heater across a patio is risky because the base can shift, hoses can stress at connections, and the tilt mechanism can misbehave. Plan the location first, then assemble there, and only adjust placement after cooldown and shutdown.
After setup, what routine should I follow for storage and shutdown to prevent later problems?
For propane models, disconnect the gas supply after use if your manual recommends it, and do not store the heater attached to the propane cylinder. Inspect the hose and regulator for wear each time before connecting. For electric models, keep cords away from moisture, store the heater in a dry area, and avoid pinching or bending power cables during storage.