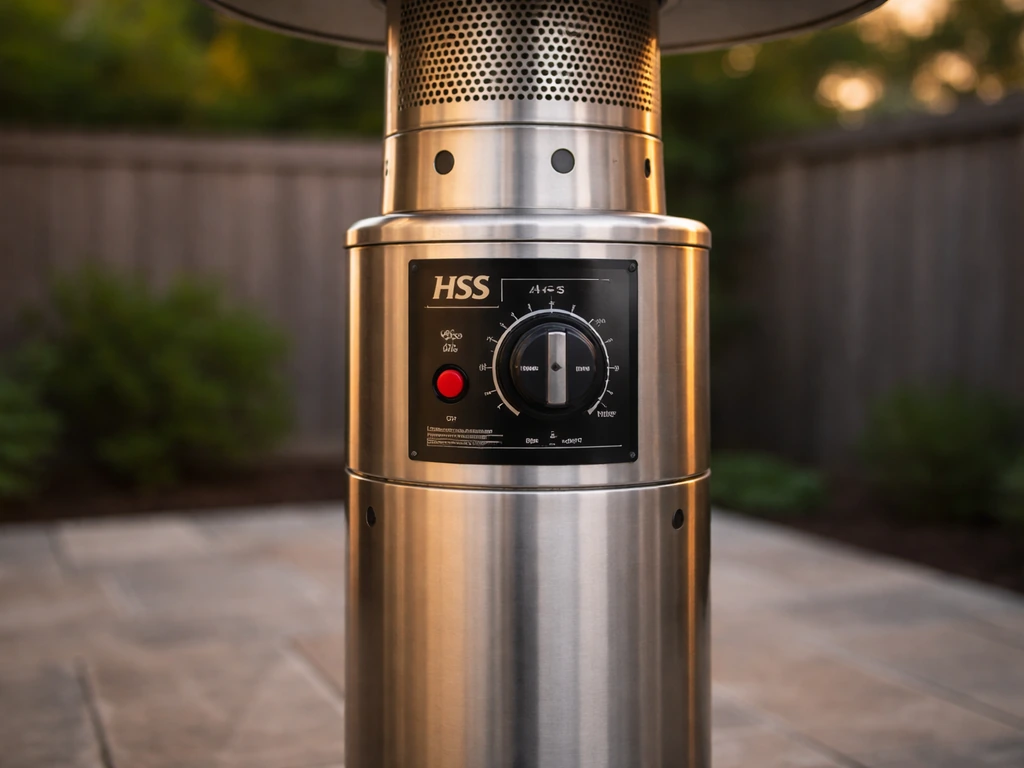
The search term 'hss a ss patio heater manual' almost certainly refers to the HSS-A-SS infrared patio heater, a Gardensun-branded propane tower heater sold widely through Home Depot and other retailers. The official owner's manual is labeled 'MODEL: HSS-A-SS' on its cover, and you can download it directly from gardensunservicecenter.com or find a PDF copy hosted by Home Depot. Before you grab any PDF, though, take 60 seconds to confirm that model string on your heater's label so you don't work through the wrong instructions.
HSS A-SS Patio Heater Manual Guide and Troubleshooting Steps

Grant Mercer
28 Jun 2026
Find your exact model number before anything else
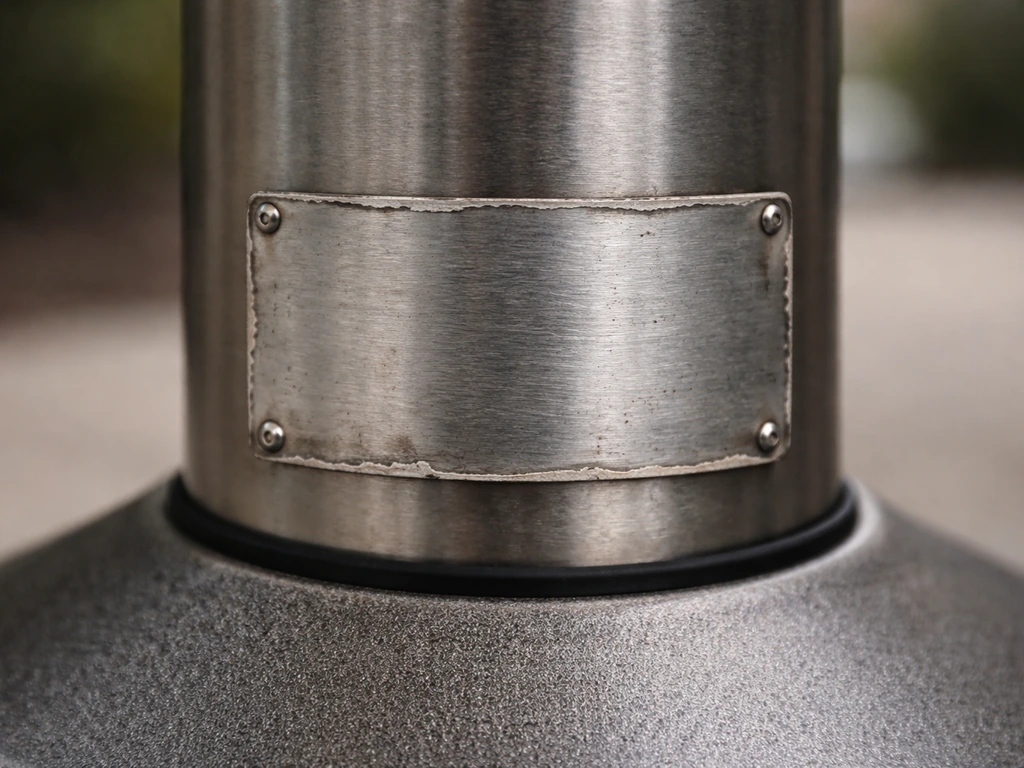
The model label on an HSS-A-SS heater is almost always on a metal plate or sticker attached to the lower pole section, near the base or just above the propane tank housing. Flip the heater so you can see the back of the lower pole and look for a silver or white label that reads something like 'MODEL: HSS-A-SS' along with a serial number and manufacturing date. Sometimes grime, UV fading, or a tight storage corner makes it hard to read. A quick wipe with a damp cloth usually reveals it.
Why does this matter? The HSS-A-SS is one of several closely related models in this Gardensun lineup. You may also see variants listed as HSS/A-SS or HSS-A in search results and on retailer sites, and sibling models like the BFC-A-SS share a similar form factor but have different part numbers for the thermocouple, regulator, and igniter. The Gardensun HSS-A-SS owner’s manual (cover shows blank" rel="noopener noreferrer">MODEL: HSS-A-SS and matching contents) confirms the model identifier and the manual’s scope align with the cover model string. If you have a BFC-A-SS patio heater instead of the HSS-A-SS, use the BFC-A-SS patio heater manual to confirm the exact parts and steps that match your model. Matching the label string exactly to the manual title means the parts diagram, torque specs, and ignition sequence are all correct for your unit.
What the HSS-A-SS manual actually covers
The manual is more useful than most people expect. It is not just an assembly booklet. The table of contents includes General Safety Information, Components and Hardware, Assembly Steps, Operation, Leak Check, Troubleshooting, Maintenance, Storage, and Service. That is the same sequence you should follow every time you work on the heater, and it is the same sequence this article uses below. For the exact sequence, diagrams, and safety checks for your model, use the pg188h patio heater manual you can download online.
- Parts diagram: labeled exploded view showing every component with part numbers, useful for ordering replacements
- Assembly steps: numbered sequence for first-time setup including pole sections, reflector, and burner head attachment
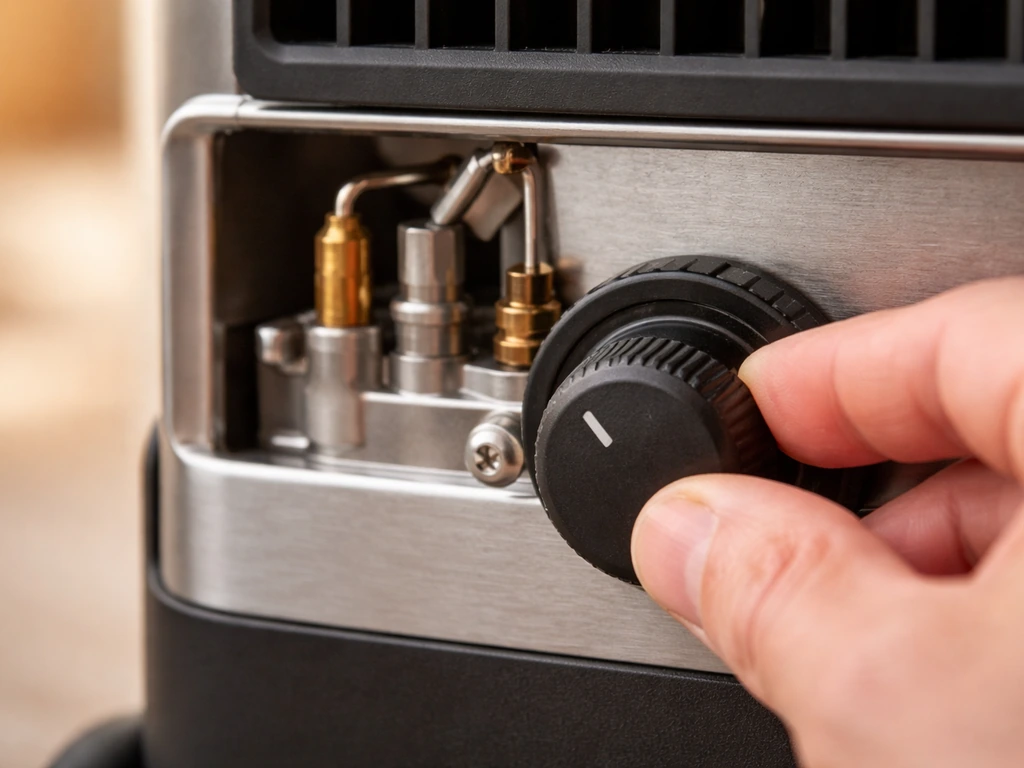
- Control descriptions: explains the piezo igniter button, gas valve knob positions (Off, Pilot, Low, High), and thermocouple location
- Lighting and ignition procedure: the exact push-and-hold sequence for the pilot, critical for first use and after the heater has sat unused
- Leak check guidance: soap-bubble test method and what to do if you find a leak
- Troubleshooting table: symptom-cause-remedy format covering most common failures
- Maintenance and storage: seasonal cleaning steps and safe propane disconnection
Safety rules before you touch anything
Propane is heavier than air, which means a small leak pools at ground level and creates a fire or explosion risk before you can smell it clearly. Treat every session working on this heater as a gas-handling task, not just a home repair task. The following precautions are non-negotiable.
- Close the propane tank valve completely before removing or reattaching any gas line component
- Work outdoors or in a space with open airflow — never in an enclosed garage or shed
- No open flames, lit cigarettes, or sparks within 10 feet while you are working on gas connections
- After reconnecting the tank, always run the soap-bubble leak test on every fitting before attempting to light the heater
- Do not operate the heater within 3 feet of walls, overhangs, or anything combustible
- Keep children and pets away from the work area
- If you smell gas strongly at any point, stop, move away, and call your gas utility or fire department — do not attempt to fix a suspected significant leak yourself
Step-by-step troubleshooting the way the manual walks you through it
The manual's troubleshooting section is structured as a symptom table, but working through it in the field is easier if you follow a linear sequence. Start with the simplest, most common cause and rule it out before moving to anything more involved. Here is how I approach it.
Heater won't ignite at all
- Check the propane tank first. Open the valve and listen for the faint hiss at the regulator. If the tank is empty or only has residual pressure, the piezo will click but nothing lights. Swap in a known-good tank before proceeding.
- Confirm the valve knob sequence. Push the knob in, turn to the Pilot position, then press and hold the igniter button several times. On a cold or recently moved heater, it can take 5 to 10 clicks before gas purges through the line and catches.
- Check the igniter electrode. The electrode tip should sit about 3 to 5 mm from the pilot burner tube. If the ceramic insulator is cracked, the spark shorts to the body instead of jumping to the burner. You will hear a dull thud click rather than a sharp snap. Replace the electrode assembly if the insulator is damaged.
- Check for a blocked pilot orifice. Spiders and insects love the pilot tube on patio heaters that sit in storage. A plugged orifice means gas cannot flow to where the spark lands. Remove the burner head cover and use a can of compressed air to clear the pilot tube — never use a metal wire, which can enlarge the orifice.
- Verify the tilt/tip-over switch is seated correctly (see the dedicated section below).
Heater lights but won't stay lit
- Hold the knob in longer. The thermocouple needs heat to generate the small voltage that keeps the gas valve open. On the HSS-A-SS, the manual specifies holding the pilot knob down for at least 30 seconds after the pilot flame appears before releasing. Many people let go at 10 to 15 seconds, which is not long enough.
- Check the thermocouple position. The thermocouple tip must sit directly in the pilot flame, not beside it. If the mounting bracket has shifted, the flame envelope doesn't fully envelop the tip and the millivolt signal is too weak. Gently bend the bracket so the tip is centered in the flame.
- Test thermocouple output. A multimeter set to millivolts connected to the thermocouple lead and the valve body should read 25 to 35 mV when the pilot is fully lit. Below 20 mV and the valve's safety seat will not hold open. If you're reading low, the thermocouple is failing and needs replacement.
- Inspect for wind interference. Even moderate wind can extinguish the pilot. If it goes out only on breezy days, the problem is environmental, not mechanical. Position the heater so the pilot is sheltered or add a windscreen.
Tilt switch or tip-over shutoff triggering unexpectedly
The HSS-A-SS has a tip-over (tilt) safety switch built into the base. If the heater senses it is off-level or has been bumped, the switch cuts gas flow and the flame dies. This is a safety feature, not a fault, but it can cause confusion when the heater sits on a slightly uneven deck or patio surface.
- Set the heater on a flat, level surface. Use a bubble level on the base ring. Even a 5-degree tilt can be enough to trigger the switch on some units.
- Inspect the switch wiring. The tilt switch is typically located in the base housing and connects to the gas valve via a short wire harness. If the connector is loose, corroded, or the wire has been pinched during assembly, the switch may trip even when the heater is level. Re-seat the connector and check for visible wire damage.
- Test the switch continuity. With the heater level and the tank valve closed, use a multimeter in continuity mode across the switch terminals. You should get a closed circuit (beep or near-zero resistance). If it reads open, the switch has failed and needs replacement — it is not adjustable.
- Do not bypass or disable the tilt switch. It is a primary safety device. A heater running without a functioning tilt switch is a fire hazard.
The components the manual points you toward for repairs
The HSS-A-SS manual's parts diagram highlights five components that account for the vast majority of field failures. Knowing what each one does makes the troubleshooting steps above much easier to follow. If you are looking for the DCS patio heater manual, the troubleshooting and parts sections can help you confirm you are using the correct model instructions before making any repairs.
| Component | What it does | Common failure symptom | DIY-replaceable? |
|---|---|---|---|
| Thermocouple | Generates millivolt signal to hold gas valve open when pilot is lit | Heater lights but goes out within 30 seconds of releasing knob | Yes — standard repair |
| Igniter/electrode | Creates spark to light the pilot burner | Click with no spark, or spark that won't reach burner | Yes — unplug and swap |
| Gas valve/regulator | Controls gas flow and houses the safety seat the thermocouple signal holds open | No gas flow despite open tank, or valve stuck open/closed | No — requires service |
| Tilt/tip-over switch | Cuts gas if heater tips or tilts beyond safe angle | Heater shuts off on level surface or won't stay lit when bumped | Yes — connector check first, then replace switch |
| Pilot orifice/burner jet | Meters gas flow to the pilot and main burner | Weak or no flame despite adequate tank pressure | Yes — clean or replace orifice |
Thermocouple replacement is the single most common fix on this class of heater. If you need the exact thermocouple steps and specifications, the Patioboss electric patio heater manual can help you match the right part and procedure. The part is inexpensive (typically under $15), universally available, and the swap takes about 20 minutes with a wrench and screwdriver. Match the length and tip diameter to the original or order directly from Gardensun's service center using the part number from your manual's diagram.
Routine maintenance that keeps the HSS-A-SS running season to season
Most HSS-A-SS problems that show up in spring are the result of neglect during storage. A 30-minute maintenance session at the start and end of every season prevents most of the issues described above.
Cleaning the burner, emitter screen, and reflector
Disconnect the propane tank and allow the heater to cool completely. Remove the reflector dome (usually three screws) and wipe the interior surface with a dry or slightly damp cloth. Do not use abrasive cleaners on the reflector; they scratch the finish and reduce heat output. The emitter screen or burner guard accumulates rust, grease, and debris over time. If it is heavily corroded, replace it rather than cleaning, since holes or gaps in the screen affect combustion airflow.
Burner jet and pilot orifice inspection
With the burner head disassembled, hold the main burner jet up to a light source. You should see a clean, round hole. Any debris, discoloration, or irregular shape indicates a partial clog. Use compressed air only to clear it. If the orifice looks damaged or corroded, replace the jet, they are listed in the parts diagram by number. A clogged main jet produces a low, yellow, lazy flame instead of the strong blue-tipped cone the heater is designed to produce.
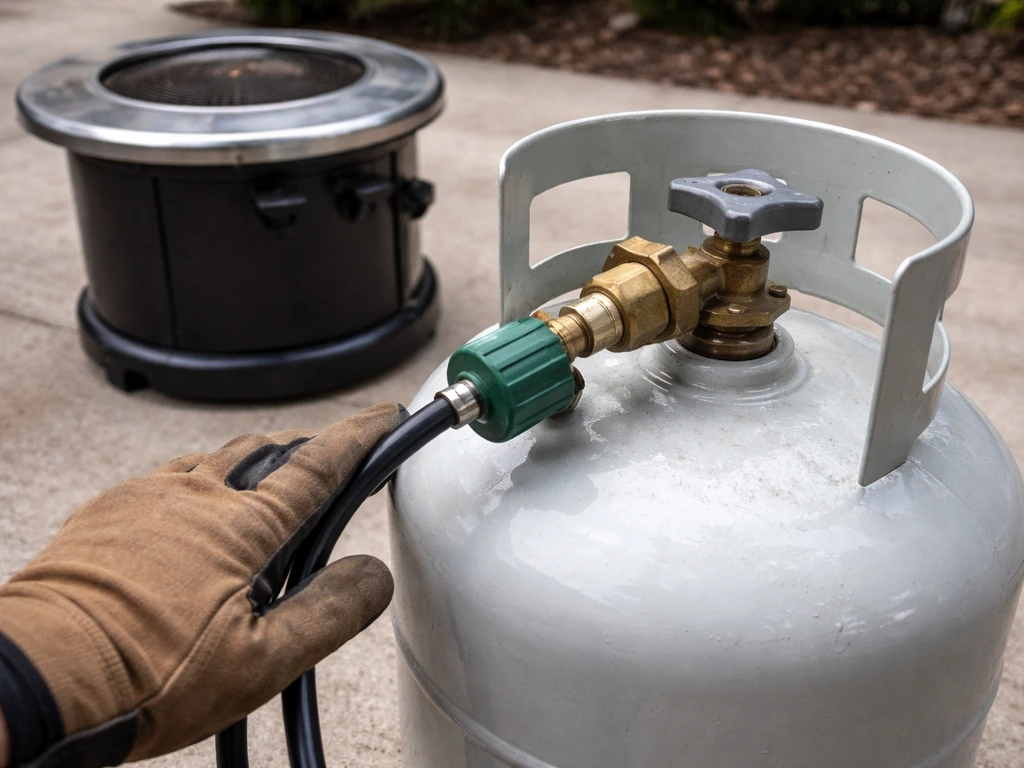
Leak check every time you reconnect the tank
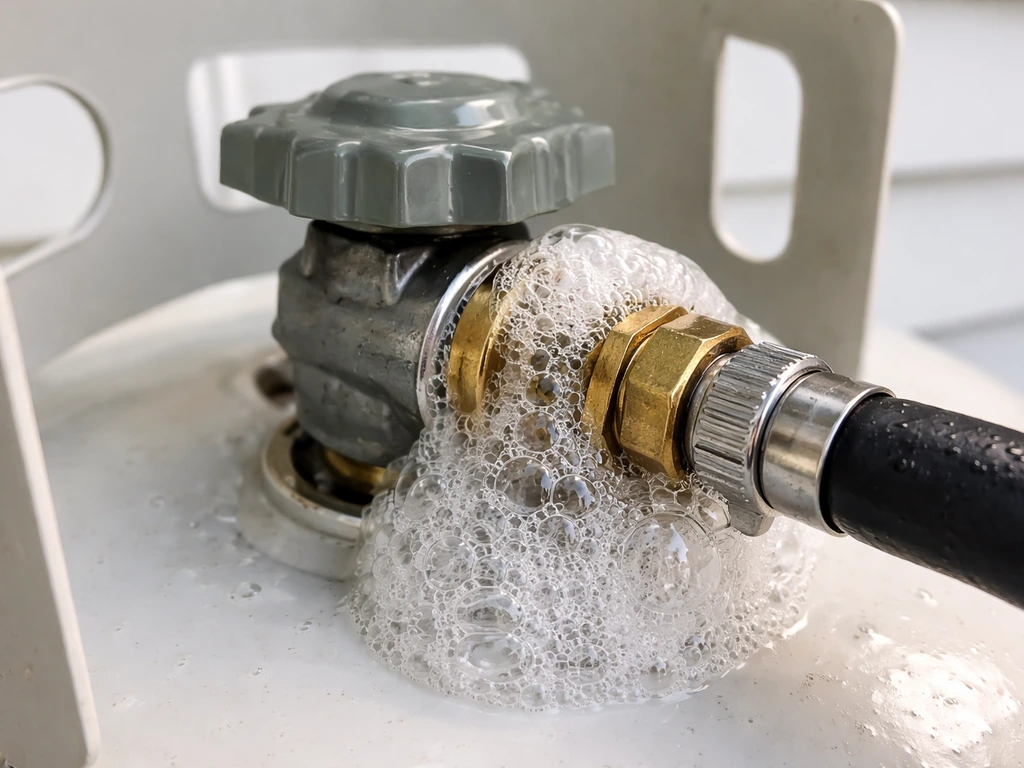
This is not optional and should happen every single time you attach a propane tank, not just at the start of the season. Mix dish soap and water to a thick, bubbly consistency. For the HSS-A-SS, the patio heater ph 2800 b manual also outlines a leak-test procedure you can follow each time you reconnect the tank. Open the tank valve slowly. Apply the soapy solution to the regulator connection at the tank, the hose, and the inlet to the gas valve. Watch for bubbles forming over 30 to 60 seconds. Any bubbles at all mean you have a leak at that fitting. Tighten the connection one quarter turn and retest. If bubbles persist after tightening, close the tank valve and do not use the heater until you have replaced the leaking component.
Airflow and ventilation check
The HSS-A-SS draws combustion air through vents in the lower pole housing. Make sure these vents are not blocked by debris, leaves, or stacked items. Restricted airflow causes incomplete combustion, which shows up as a yellow or sooty flame and can cause the heater to overheat and cycle the safety cutoff. Check the vents visually and use compressed air to clear any blockage.
End-of-season storage
- Close the tank valve, then run the heater briefly on High to burn off residual gas in the line before shutting off the knob
- Disconnect and remove the propane tank — never store the heater with a tank attached in an enclosed space
- Cover the burner head opening with a breathable cloth or the original cap to block insects and moisture
- Store the heater upright in a dry location; laying it on its side can allow moisture to pool in the burner assembly
- Coil and protect the regulator hose to prevent cracking from cold temperatures
Know when to stop DIYing and call a professional
Most HSS-A-SS issues are genuinely fixable at home, but there are clear stop points where the risk outweighs the savings. If you have done a thorough soap-bubble leak test and found persistent bubbling at any fitting that does not resolve after tightening and re-testing, do not use the heater. Replace the hose and regulator as an assembly and retest, or take the heater to a licensed gas appliance service shop.
If the gas valve itself is the suspected failure, whether that means gas flow that cannot be shut off, a valve that will not open even with a strong thermocouple signal, or a regulator that delivers inconsistent pressure, do not attempt to disassemble or repair the valve. These are precision components with internal springs, seats, and seals that must be set to exact tolerances. An incorrectly reassembled gas valve is a serious safety hazard. Order a replacement valve assembly using the part number from your manual, or have a technician do it.
Similarly, if you have replaced the thermocouple, verified correct placement in the flame, and the heater still will not stay lit, the problem may be inside the valve seat rather than the thermocouple circuit. That is a professional repair. The same applies if you ever detect a gas smell during normal operation that is not explained by a fitting connection, stop, ventilate the area, and call for service before using the heater again.
Other patio heater models in this category, including the BFC-A-SS, the Hiland series, and the PG188H, share many of the same repair logic and safety principles, so if you have a different model nearby, the diagnostic sequence transfers well. If you have a Hiland patio heater, the Hiland patio heater manual will help you verify the correct model number and follow the right troubleshooting steps. The gas valve and regulator rules, though, apply universally: those components are not DIY territory regardless of the brand.
FAQ
What should I do if I cannot clearly read the model number on my HSS-A-SS patio heater?
If the heater label is missing or illegible, do not rely on retailer screenshots alone. Take clear photos of the base plate, the regulator area, and any serial/date markings, then match what you see to the “MODEL:” string in the manual title before following troubleshooting or part numbers.
My HSS-A-SS flame goes out right away, could the tilt switch be tripping and what else should I check?
A tip-over switch trip can be caused by both level issues and movement. Check that the heater base is on a firm, non-sinking surface, verify no wobble exists, and make sure nothing is leaning against the tower. If it shuts off again immediately after relighting, stop and troubleshoot airflow or the gas/ignition circuit rather than repeatedly resetting it.
What does a low yellow or sooty flame usually mean on the HSS-A-SS?
For these heaters, a low yellow flame often points to gas delivery or an airflow restriction, including a partially clogged main jet or blocked lower vents. If you see yellow, sooty output, first clear debris from the vents and inspect the main burner jet hole for irregular shape, then repeat a controlled leak test after any gas connection work.
Can I use soapy water to diagnose any problem on my heater, or are there limits?
Avoid using soapy water on electrical components or control switches. For leak checks, apply the solution only to gas path fittings you can access safely (regulator connection, hose joints, valve inlet). If bubbles form at a fitting and tightening does not fix it, stop and replace the leaking part or have it serviced.
Is it okay to use compressed air on the main burner jet to clear clogs?
Yes, but only after you confirm the jet is cool and the gas is disconnected and the unit is fully vented. Use compressed air conservatively to clear loose debris, do not enlarge or scratch the orifice, and if the jet hole is corroded or damaged, replacement is safer than repeated blow-outs.
What are the stop conditions for leak testing if bubbles keep coming back?
If you already performed the leak test and you still have persistent bubbling after tightening, the issue is unlikely to be “just a loose connection.” Do not keep testing indefinitely, do not operate the heater, replace the affected gas component(s) as an assembly when recommended, or take it to a licensed gas appliance service shop.
My heater lights but shuts off after a few seconds, should I replace the thermocouple or suspect the gas valve?
If the heater ignites but will not stay lit, confirm the thermocouple is positioned correctly in the flame and not out of alignment. If placement is correct and it still will not hold, the fault may be in the valve seat or gas valve assembly, which is not a DIY disassembly job.
Why is repairing the gas valve or regulator internally not recommended even if parts seem accessible?
Do not replace only one internal piece of the gas valve. If symptoms point to a valve that cannot shut off properly or will not open reliably, order a complete replacement valve assembly using the part number from your manual, or have a technician install it.
What can I do if the heater keeps cycling the safety cutoff even after cleaning?
Make sure the base vents are unobstructed by stacked items, leaves, or debris, and that the reflector and emitter screen are not coated with residue. Then check that the heater is not installed too close to walls or overhead coverings, since restricted airflow can lead to incomplete combustion and cycling safety cutoff.
After a thermocouple replacement, what quick checks should I do before assuming the repair is complete?
After replacing the thermocouple, re-check the flame pattern immediately after relighting. If the flame is still irregular, investigate the burner jet and ventilation first, then re-run a leak test anytime you touched the gas connections.