
The most common Kirkland Signature patio heater sold at Costco is the PTH106A-SS, made by Nexgrill Industries. If you need the manual, the fastest route is searching 'PTH106A-SS owner's manual' on Manualzz.com or going directly to the Nexgrill service line at 1-800-913-8999. For parts, ApplianceFactoryParts and Clagrills both carry exploded diagrams and OEM part numbers for this exact model. Everything below is a hands-on guide for getting your heater assembled, running, and repaired without calling a technician.
kirkland signature patio heater manual: repair, troubleshooting & tips

Grant Mercer
12 Aug 2026
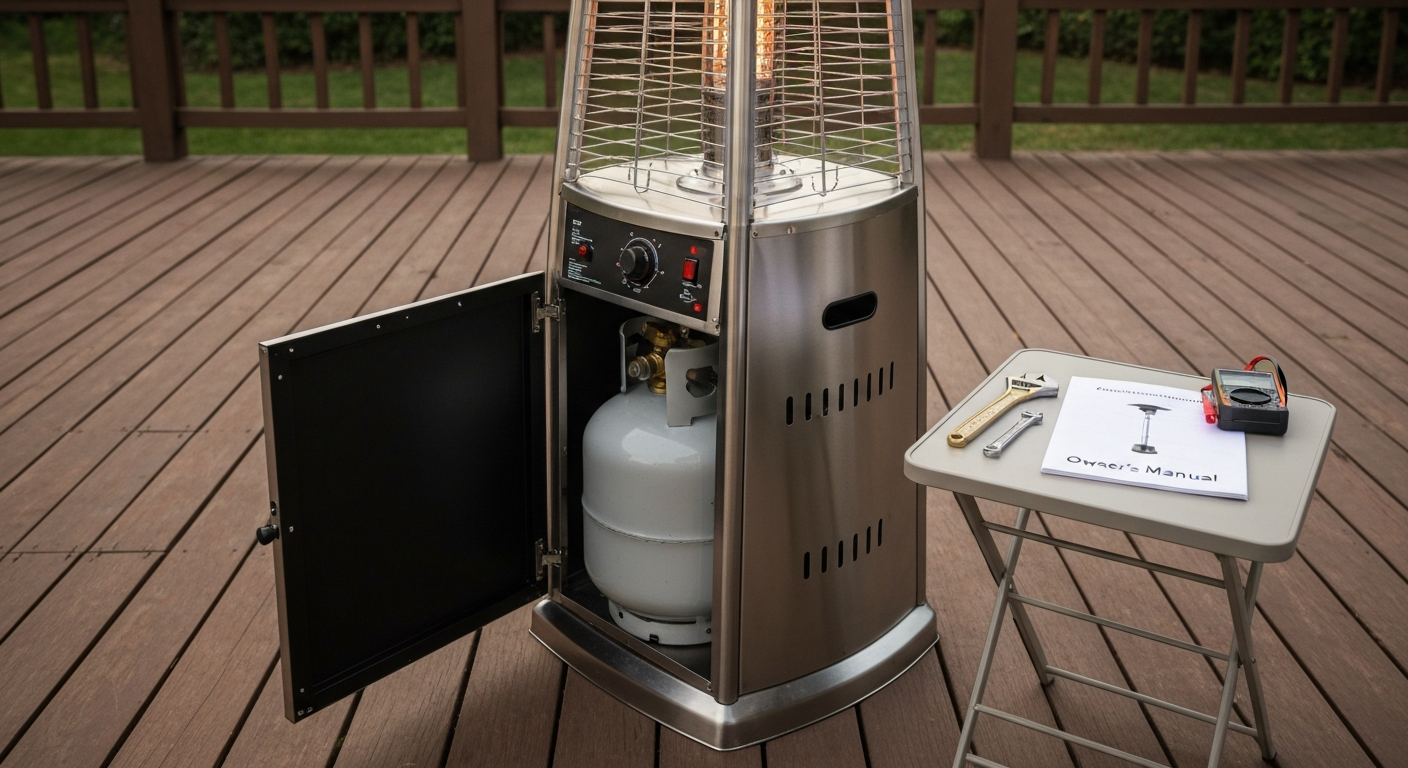
What this guide covers and who it's for
This guide is written for homeowners who bought a Kirkland Signature patio heater at Costco and need to assemble it, fix a common problem, or find a replacement part. You do not need HVAC certification to follow these steps, but you do need basic hand tools, patience, and a willingness to stop and read the safety warnings before touching anything. I've structured this to mirror the way most people actually use a heater manual: assembly first, then ignition, then troubleshooting when something goes wrong. If your heater won't light, won't stay lit, or just died mid-season, this is the guide for you.
Identify your Kirkland/Costco patio heater model
Before you download anything or order a single part, you need the exact model number. Kirkland Signature heaters are manufactured by Nexgrill, and the same physical heater can appear under slightly different SKUs depending on the Costco buying season. The primary model documented in Nexgrill's service records is the PTH106A-SS, a 46,000 BTU stainless steel propane tower heater, but there are stainless and hammered bronze variants with different suffixes.
The model and serial number label is almost always located on or near the valve housing, which is the metal box at the top of the pole where the gas knob and igniter button live. On many units it's on the rear face of that housing. A second label sometimes appears on the inside of the base enclosure door, near the propane tank compartment. Before you go searching online, take five minutes to do this:
- Look at the rear of the valve housing (the control head at the top of the pole). You're looking for a stamped or printed rating plate.
- Open the base cabinet door and check the interior panel and the underside of the tank shelf.
- Photograph every label you find, including the BTU rating, gas type (LP/propane), and any certification marks (CSA, UL).
- Write down: model number, serial number, BTU input, and gas pressure rating (usually shown as 11.0 in. W.C. outlet pressure).
- Note the certification standard on the plate. Kirkland/Nexgrill heaters are typically listed under CSA/ANSI Z83.26, which governs gas-fired outdoor infrared patio heaters.
- If the label is worn or missing, check your original Costco receipt or the cardboard box, which prints the model number on the outside.
Once you have the model number in hand, everything else in this guide becomes much easier. Parts vendors, manual archives, and Nexgrill's own support team all ask for it first.
Where to find and download the official manual and assembly diagrams
Costco does not maintain a permanent product manual library for discontinued seasonal items, so the official PDF sometimes disappears from their site after a model sells out. Here is a practical search sequence that reliably turns up the PTH106A-SS manual and assembly diagrams:
- Start at Manualzz.com. Type 'PTH106A-SS' in the search bar. The full Kirkland PTH106A-SS Owner's Manual is publicly hosted there and covers assembly, lighting, burner removal, troubleshooting, and a parts list.
- Try Costco's product support page at costco.com. Search your model number or the product name. For current-season models, Costco occasionally links the PDF from the product listing page.
- Go to the Nexgrill Industries support page (nexgrill.com) or call 1-800-913-8999 directly. Nexgrill is the OEM named in the Kirkland manual and can email or mail a replacement manual.
- Search ApplianceFactoryParts.com for 'PTH106A-SS parts'. Their parts pages include exploded-view diagrams with callout numbers that match the parts list in the manual.
- Try Clagrills.com. They carry Kirkland Signature parts with labeled exploded diagrams, which are useful even if you already have the manual PDF.
- As a backup, search Google for 'PTH106A-SS owner's manual filetype: pdf'. This often surfaces direct PDF links hosted by appliance-parts vendors or repair forums.
When you download the PDF, save it in two places (cloud and local) and note the revision date on the cover or back page. If you also need a manual for similar models, search for the Blue Rhino patio heater manual to compare regulator specs and parts diagrams. Nexgrill occasionally releases updated versions with corrected torque specs or revised clearance tables. If your manual's revision date is more than three years old and you're seeing an issue that isn't addressed in it, call Nexgrill and ask if there's a newer revision for your serial number range.
How to read the manual and assembly diagrams
The PTH106A-SS manual is organized the way most gas-appliance manuals are: safety warnings up front, assembly in the middle, operation and troubleshooting toward the back, and a parts list at the end. The parts list is where most homeowners get confused, so here's how to use it effectively.
The exploded-view diagram shows every component separated from the assembly with a circled reference number next to each part. That number corresponds to a row in the parts table, which lists the part description, OEM part number, and sometimes quantity. When ordering a replacement thermocouple or regulator, you want the OEM part number from that table, not just the description. Cross-referencing that number with ApplianceFactoryParts or Clagrills will confirm whether a direct OEM replacement or an acceptable substitute is available.
- Revision notes: look for a small box in a corner of the diagram (often labeled 'Rev' followed by a letter or date). If a part number changed between revisions, the newer number supersedes the older one.
- Dashed lines in exploded views indicate a sub-assembly, meaning those parts ship together as one unit.
- Asterisked part numbers in the parts list usually flag consumable or wear items (thermocouples, pilot orifices, o-rings) that the manufacturer expects homeowners to replace.
- Safety codes referenced in the manual (ANSI/NFPA 58 for LP-gas storage and ANSI Z223 / National Fuel Gas Code for installation) are not just legal boilerplate. If the manual says 'follow NFPA 58 for cylinder storage,' that means no storing spare tanks inside enclosed spaces.
Assembly checklist: step-by-step homeowner assembly and pre-start checks
Work on a flat, stable outdoor surface with enough room to lay all parts out in front of you. Have a second person available for lifting the pole assembly into the base, which is awkward alone. Keep the manual diagram open on your phone or a tablet while you work.
- Lay out all parts and confirm they match the parts list in the manual. Count fasteners now, not after you realize you're short two bolts.
- Attach the base legs to the base frame. Snug bolts finger-tight first, then tighten in a cross pattern to keep the frame square.
- Install the lower pole section into the base, inserting it through the center hole in the tank shelf. Secure with the provided collar hardware.
- Join the upper and lower pole sections. Align the gas tube running up the inside of the pole carefully. Do not kink or pinch the gas tube.
- Mount the emitter/burner housing at the top of the upper pole. This is where the reflector, burner, and control head attach.
- Connect the internal gas supply tube to the valve assembly at the top. Hand-tighten first, then use the specified wrench size from the manual.
- Attach the reflector dome to the emitter housing. Most models use three or four tab-and-bolt connections.
- Install the regulator and hose onto the propane tank valve. Hand-tighten the QCC1/Type-1 fitting (left-hand thread), then turn an additional quarter turn snug with a wrench.
- Route the regulator hose up the inside of the pole to the valve housing connection and attach it.
- Before introducing any gas, perform a full visual inspection: all bolts tight, no kinked hose, no bent or cracked gas tube, emitter housing seated firmly, reflector attached.
- Perform a soap-bubble leak test (see the propane safety section below) before your first light.
- Set the heater to the upright, level position and confirm the anti-tilt switch is engaged (more on that in troubleshooting below).
Tools, supplies, and estimated repair and assembly times
You don't need a specialty toolbox for most Kirkland heater work. Here's what I keep within reach for any assembly or repair job on this heater:
| Tool / Supply | Use Case | Essential or Optional |
|---|---|---|
| Adjustable wrench (8" or 10") | Regulator fittings, pole hardware | Essential |
| Phillips and flathead screwdrivers | Panel screws, emitter housing fasteners | Essential |
| Digital multimeter (mV setting) | Thermocouple testing, continuity checks | Essential for electrical diagnosis |
| Dish soap and water in a spray bottle | Leak testing all gas connections | Essential |
| Manometer (0–15 in. W.C.) | Verifying regulator outlet pressure | Strongly recommended |
| Flashlight or headlamp | Seeing inside the base cabinet and valve housing | Essential |
| Needle-nose pliers | Thermocouple nut removal, small fasteners | Essential |
| Wire brush (small, brass bristles) | Cleaning burner ports and pilot orifice area | Optional but useful |
| Compressed air (can or compressor) | Blowing out spider webs and debris from burner | Optional |
| Thread sealant tape (yellow gas-rated PTFE) | Resealing NPT threaded gas fittings if disturbed | Optional |
| Replacement thermocouple (universal 24"–30") | Direct swap for a failed thermocouple | Keep one on hand |
| Replacement piezo igniter module | Swap for a dead igniter | Keep one on hand |
Here are realistic time estimates for the most common jobs. These assume a DIYer with basic hand-tool comfort and a manual open for reference.
| Task | Estimated Time | Notes |
|---|---|---|
| First-time assembly from box | 45–75 minutes | Longer if done alone; 45 min with a helper |
| Full soap-bubble leak test after assembly | 10–15 minutes | Do not skip this step |
| Thermocouple replacement | 20–35 minutes | Mostly access time; the swap itself is 5 minutes |
| Piezo igniter module replacement | 15–25 minutes | Check electrode wire routing carefully |
| Tilt switch test and replacement | 20–30 minutes | Requires opening base cabinet |
| Pilot orifice cleaning | 15–20 minutes | Thin wire or compressed air; do not enlarge the orifice |
| Regulator and hose replacement | 15–20 minutes | Always leak-test the new connection |
| Burner port cleaning (seasonal maintenance) | 20–30 minutes | Remove emitter housing per manual instructions |
Safety first: required steps before any work
This is not the section to skim. Gas and propane are not forgiving of casual mistakes. I'm going to be explicit here because the consequences of skipping these steps range from a singed eyebrow to a serious fire. Follow all of these before you touch any fitting, wire, or burner component.
- Turn the propane tank valve fully clockwise (closed) before starting any work. Do this even if you think the heater is off.
- Disconnect the regulator from the propane tank completely for any job that involves opening or moving gas fittings.
- Work outdoors only. Propane is heavier than air and pools in low areas. Never bring the heater inside a garage or shed to work on it.
- Wait at least five minutes after closing the tank valve before opening any gas fitting. This allows residual pressure to bleed through the burner or vent out.
- Keep ignition sources away: no cigarettes, no open flames, no sparking tools near the work area.
- Wear safety glasses for any work near the burner assembly or when using compressed air.
- If you smell gas at any point during assembly or repair, stop immediately, move away from the heater, and do not re-approach until the area has fully ventilated (at least 10 minutes in open air).
- The Kirkland manual references ANSI/NFPA 58 for LP-gas handling and storage and ANSI Z223 (National Fuel Gas Code) for installation requirements. These are the same standards technicians follow. If you're unsure whether your setup meets them, call Nexgrill at 1-800-913-8999 before proceeding.
- Never bypass, bridge, or tape over any safety switch, including the tilt/anti-tilt switch or the thermocouple safety valve. The manual explicitly states that bypassing safety interlocks is unsafe and voids the warranty.
Propane handling and leak checks: step-by-step
A proper leak check is not optional after any assembly or any time you've disconnected and reconnected a gas fitting. The Kirkland PTH106A-SS manual specifies soap-bubble testing as the homeowner leak-check method, and I agree it's the right tool for this job. Here's the full procedure:
- Mix a solution of dish soap and water in a spray bottle (roughly 1 part soap to 4 parts water) or use a dedicated gas-leak detection spray.
- Reconnect the regulator to the propane tank valve. Hand-tighten, then snug with a wrench. Do not over-torque.
- Open the propane tank valve slowly, just one full turn. You do not need the valve fully open to perform the leak check.
- Spray or brush the soapy solution generously over every gas connection: the regulator-to-tank fitting, the hose-to-regulator connection, the hose-to-valve housing fitting, and any internal fittings you may have disturbed.
- Watch for bubbles forming or growing at any joint. Small slow bubbles indicate a minor leak; rapidly expanding bubbles indicate a serious leak.
- If you see any bubbling, close the tank valve immediately, disconnect the regulator, and tighten or reseat the leaking fitting. Repeat the test.
- If the leak persists after retightening, inspect the fitting threads and hose ends for damage. Replace any component that won't seal.
- Once the leak check passes with zero bubbles at all connections, you can proceed to lighting or further testing.
- For a more precise check, use a manometer (0–15 in. W.C. range) at the appliance inlet to verify the regulator is delivering approximately 11.0 in. W.C. outlet pressure. Connect the manometer per its instructions, open the tank valve, and take a static reading before lighting. A reading significantly below 11.0 in. W.C. (say, below 9 in. W.C.) suggests a failing regulator.
- Emergency shutoff procedure: if you smell gas while the heater is operating, turn the control knob to OFF immediately, close the propane tank valve, and move away from the area. Do not attempt to relight until you've identified and resolved the source of the smell.
Troubleshooting: symptoms, causes, and fixes
Most Kirkland heater failures fall into four categories: ignition problems, flame-extinction problems (won't stay lit), safety-switch trips, and gas-delivery issues. Use the table below to match your symptom to the most likely cause and the corresponding fix. Work down the 'Possible Causes' column in order before moving to the next symptom.
| Symptom | Possible Causes (check in order) | Fix |
|---|---|---|
| Heater clicks but no spark at electrode | Dead/discharged piezo module; electrode wire cracked or disconnected; electrode gap too wide | Inspect wire from button to electrode for damage. Confirm electrode gap (typically 3/16"). Replace piezo module if no spark visible with gas OFF. |
| Spark present but pilot won't light | Clogged pilot orifice; gas not reaching pilot (low tank, regulator issue); air in the line | Purge air by holding knob to pilot for 60 seconds. Clean pilot orifice with compressed air. Check regulator output. |
| Pilot lights but main burner won't come on | Thermocouple not heated enough; thermocouple output too low; valve seat issue | Hold knob at PILOT for 30–45 seconds before releasing. Test thermocouple mV (see below). Replace thermocouple if open-circuit reading is below 18 mV. |
| Pilot lights and releases, then goes out within seconds | Failing thermocouple; thermocouple not positioned in flame; dirty or blocked pilot orifice | Confirm pilot flame is engulfing the thermocouple tip. Clean orifice. Test thermocouple and replace if reading is below 18–20 mV open-circuit. |
| Heater shuts off unexpectedly on a windy day | Pilot flame blown out by wind; emitter housing not seated (allows draft) | Reposition heater away from direct wind. Check emitter housing and reflector for gaps. Relight per manual procedure. |
| Heater won't light at all (no click, no spark, no pilot) | Tilt/anti-tilt switch tripped or failed; dead igniter batteries (if electronic ignition); loose wire at valve | Level the heater and reset the tilt switch. Check and replace batteries. Trace all wires from igniter to valve for disconnection. |
| Low flame or yellow/orange flame instead of blue | Low tank pressure; regulator under-delivering; partially clogged burner ports | Check tank level. Test regulator with manometer (should read ~11.0 in. W.C.). Clean burner ports with wire brush. |
| Hissing from gas valve or regulator | Loose fitting; regulator diaphragm failure | Close tank valve immediately. Tighten all fittings and leak-test. If hiss persists from regulator body, replace the regulator. |
How to test the thermocouple with a multimeter
This is the most useful diagnostic test you can do on a patio heater that won't stay lit. You'll need a digital multimeter that reads DC millivolts (mV). Before starting, make sure the tank valve is closed and you've given the system five minutes to depressurize.
- Locate the thermocouple: it's the thin metal probe that sits in the pilot flame, with a narrow copper tube running down to a threaded nut on the gas valve body.
- Light the pilot and hold the knob at PILOT for 45 seconds to fully heat the thermocouple. Carefully set your multimeter leads on the thermocouple body (one lead) and the thermocouple nut connection at the valve (other lead). Set the meter to DC mV.
- Open-circuit reading: without disconnecting the thermocouple, read the mV with the pilot burning. A healthy thermocouple reads 25–30 mV. A reading of 20–24 mV is marginal. Anything below 18 mV means the thermocouple is failing and should be replaced.
- If you want a more definitive test, shut down the pilot, close the tank valve, and carefully unscrew the thermocouple nut from the gas valve (needle-nose pliers). Relight the pilot manually with a lighter to heat the probe alone, and measure open-circuit mV at the disconnected nut and body. This eliminates any valve-loading variable.
- Replacement thermocouples for the PTH106A-SS are available from ApplianceFactoryParts and Clagrills using the OEM part number from the manual's parts list. A 30-inch universal replacement (matching the thread type and tip style) is a reliable substitute if the OEM part is back-ordered.
How to test the tilt/anti-tilt switch
The tilt switch (often called an FD4 dump switch or anti-tilt safety switch) is a small device inside the base of the heater that kills the gas circuit if the heater tips past a safe angle. It's a common culprit when a heater simply won't light at all and the igniter seems dead, especially on older units where the switch has vibrated or corroded. Do not bypass this switch under any circumstances.
- Close the propane tank valve and disconnect the regulator.
- Open the base cabinet and locate the tilt switch. It's typically a small cylindrical or disc-shaped component mounted to the base frame, with two wires attached.
- Disconnect both wires from the switch.
- Set your multimeter to continuity (the beep/diode mode).
- With the heater perfectly upright and level, touch the multimeter probes to the two switch terminals. You should get continuity (a beep or near-zero ohms). This means the switch is closed and the safety circuit is complete.
- Gently tilt the heater more than 15 degrees to one side while holding the probes in place. Continuity should break (no beep, infinite resistance). If it doesn't break, the switch is stuck closed and should be replaced.
- If the switch shows no continuity even when upright, it's stuck open. That's why your heater won't light. Replace the switch.
- Reconnect the wires in the correct polarity (check the manual diagram), close up the base, reconnect the regulator, and retest the heater.
Routine maintenance to prevent problems
The Kirkland PTH106A-SS manual calls out a short list of homeowner maintenance steps, and I'll tell you from experience that ignoring them is how you end up troubleshooting in the middle of a dinner party. The Kirkland PTH106A-SS owner's manual (Manualzz) includes homeowner maintenance steps to inspect and clean the pilot orifice and burner ports, and instructs using a soap‑bubble leak test after assembly or whenever fittings are disturbed Kirkland PTH106A-SS Patio Heater Owner's Manual (Manualzz) — pilot cleaning & leak test instructions. Here's what to do at the start of each season and after any period of storage:
- Inspect the pilot orifice for spider webs, wasp nests, or debris. This is the number one cause of no-light failures after storage. Use compressed air to blow out the orifice. Do not enlarge the hole with a wire or drill.
- Check all burner ports on the emitter ring for blockage or rust. Brush lightly with a brass wire brush. Clogged ports cause uneven, yellow flames.
- Inspect the regulator hose for cracks, cuts, or brittleness. Replace the hose and regulator assembly if you see any surface cracking. Hoses degrade in UV and should be replaced every three to five years regardless of appearance.
- Wipe down the reflector dome interior with a damp cloth to remove soot and oxidation. A clean reflector improves heat output noticeably.
- Check all bolt connections on the pole sections and base legs. Vibration from wind loosens fasteners over a season.
- Perform a full soap-bubble leak test at the start of every season, even if you didn't change any fittings.
Finding replacement parts and compatible cross-brand components
Nexgrill is the OEM for Kirkland Signature heaters, so OEM parts are available through Nexgrill directly (1-800-913-8999, nexgrill.com) and through specialty parts vendors. Here are the most reliable sources, in rough order of completeness:
- ApplianceFactoryParts.com: search 'PTH106A-SS' for a full exploded-view parts page with OEM part numbers for the thermocouple, pilot assembly, regulator/hose, control knob, and valve.
- Clagrills.com: carries Kirkland Signature parts with labeled diagrams. Good for checking if a part is in stock before calling Nexgrill.
- Nexgrill Industries direct: 145 Brea Canyon Road, Walnut, CA; 1-800-913-8999. They can confirm part numbers and availability for your specific serial number.
- Amazon and Home Depot: useful for universal thermocouples, piezo igniter modules, and QCC1 regulator/hose assemblies that cross-fit the PTH106A-SS. Always match thread type and length to the OEM spec.
- eBay: sometimes the only source for discontinued emitter assemblies or specific valve bodies. Verify the seller's part number against the manual before ordering.
For thermocouples, the PTH106A-SS uses a standard 30-inch type with a 3/8-inch-27 left-hand thread connection at the valve. Honeywell Q390 series and equivalent universal thermocouples from most hardware stores will fit. For the regulator, confirm it outputs 11.0 in. W.C. (the standard for 20 lb propane tank-connected patio heaters) and uses a Type-1/QCC1 inlet fitting before ordering. Other brands in this product category use similar regulators: if you've worked through a Blue Rhino or Shinerich heater repair before, the regulator specs will look familiar.
Warranty and contacting manufacturer support
Kirkland Signature patio heaters typically carry a one-year limited warranty through Costco, covering defects in materials and workmanship. Because Nexgrill is the actual manufacturer, warranty claims for parts or service go to Nexgrill Industries, not Costco directly (though Costco's return policy may provide additional options). When you contact Nexgrill, have the following ready:
- Full model number (e.g., PTH106A-SS)
- Serial number from the rating plate
- Date of purchase and proof of purchase (Costco receipt or order confirmation)
- Description of the failure, including what you've already checked
- Photos of the failed component if visible
Nexgrill's phone support at 1-800-913-8999 has been responsive for parts inquiries in my experience. Email support tends to be slower. If your heater is out of warranty, Nexgrill can still quote you OEM replacement parts at standard retail prices, which is often cheaper than buying from a third-party parts site for specific valve or burner assemblies.
DIY vs. calling a professional: where to draw the line
Most common Kirkland heater repairs are genuinely DIY-appropriate: swapping a thermocouple, replacing a piezo igniter, cleaning a pilot orifice, testing and replacing a tilt switch. These are mechanical swaps and cleaning tasks that don't require special licensing. However, there are a few situations where you should stop and call a qualified gas appliance technician: Professional guidance recommends manometer pressure‑hold tests and documented outlet pressure readings as part of safe regulator and appliance service; see RV LP Gas System Service (A1 RV Repair), manometer and pressure‑hold testing guidance RV LP Gas System Service (A1 RV Repair) — manometer and pressure‑hold testing guidance.
- The gas valve body itself is leaking, damaged, or the valve seat is suspected of failing. Gas valve internals are not homeowner-serviceable.
- You smell gas but can't identify the source after a thorough leak test. Don't keep trying; get a professional.
- The burner assembly shows signs of physical damage (cracked ceramic, warped emitter ring) that could affect combustion integrity.
- Any repair requires cutting, splicing, or modifying the internal gas supply tube inside the pole.
- You've replaced the thermocouple and the heater still won't hold a pilot flame after two fresh thermocouples. This typically indicates a valve safety-circuit issue that needs a qualified tech.
A service call for a gas appliance typically runs $75–$150 for a diagnosis visit plus parts. For a heater that cost $150–$250 at Costco, that math sometimes pushes toward replacement. But if your heater is a higher-end stainless unit and the repair is something like a valve replacement at $40 in parts, a tech visit makes sense. Be honest with yourself about the cost-benefit before you dig in.
How the Kirkland heater compares to other brands you might own
Kirkland/Nexgrill heaters share a lot of design DNA with other major-brand consumer patio heaters, which is useful to know when sourcing parts or applying repair steps across units. If you're working on a Blue Rhino heater alongside a Kirkland, the valve housing layout and thermocouple connection are very similar. Shinerich and Trustech models tend to use the same CSA/ANSI Z83. See the Trustech patio heater manual for model-specific diagrams and parts cross-references. For model-specific instructions, consult the Shinerich patio heater manual. 26 certification standards and 11 in. W.C. regulator specs, so the diagnostic steps in this guide translate well. Briza infrared heaters use a different heating technology (electric infrared rather than gas), so the troubleshooting logic is different. For guidance on fan controls and mounting, see the Kichler basics patio fan. For model-specific details, consult the briza infrared patio heater manual. Zubri heaters are gas-fired tower heaters with nearly identical construction to the Nexgrill platform. For Zubri patio heaters instructions, consult the Zubri patio heaters instructions (UUID 92c4b607-1cc0-416b-86b9-7f5d29285447) for model-specific guidance.
The takeaway is that if you've mastered the repair workflow on your Kirkland PTH106A-SS, you're well equipped to work through most other propane tower heater brands using the same tools and diagnostic sequence. The specific part numbers change, but the failure modes and fix procedures are remarkably consistent across the category.
FAQ
What authoritative documents should I gather before writing a homeowner guide for the Kirkland Signature patio heater (PTH106A‑SS)?
Collect the official owner’s manual (assembly, safety, parts list), OEM exploded parts diagram and part numbers (Nexgrill/Kirkland), applicable codes/standards (CSA/ANSI Z83.26 • CSA 2.37 for gas‑fired infrared heaters; ANSI/NFPA 58 and ANSI Z223/NFPA National Fuel Gas Code for LP‑gas handling), regulator and hose specifications (outlet pressure ~11.0 in. W.C.), and any service bulletins from the OEM. Keep copies or links to these documents for exact specs and safety wording.
Where can I find and download the official Kirkland Signature (PTH106A‑SS) patio heater manual and parts diagram?
Search the model number PTH106A‑SS on manual repositories (Manualzz, ManualsDir), parts vendors (ApplianceFactoryParts, Clagrills), and Costco/Kirkland product pages. The Nexgrill/OEM parts pages and exploded diagrams are commonly hosted by appliance‑parts sites. Save PDFs locally and note the OEM contact (Nexgrill Industries) and any document revision/date.
How do I identify my Kirkland/Costco patio heater model and serial number for parts or support?
Locate the rating plate/label—commonly on or near the valve housing, rear of valve housing, inside the base/cylinder enclosure, or underside of the base. Photograph the label (clear closeups) including model, serial, and manufacturing date. If the label is missing, take clear overall photos and component closeups (valve, burner, regulator) and provide them when contacting parts or service.
Who is the OEM/service contact listed in the Kirkland manual and when should I contact them?
The PTH106A‑SS manual lists Nexgrill Industries (Nexgrill) as the service/parts contact. Contact them for OEM replacement parts, warranty inquiries, and unresolved safety or performance issues you cannot confidently repair. Keep your model/serial and purchase info available when calling.
What tools and test equipment are required for common homeowner diagnostics and repairs?
Basic tools: adjustable wrench set, hex/Allen keys, screwdrivers, needle‑nose pliers, wire cutters/strippers, small brush, compressed air or can. Safety PPE: gloves, safety glasses. Test equipment: digital multimeter with millivolt resolution (for thermocouple tests), manometer or LPG pressure gauge (for regulator/outlet tests), soapy leak‑test solution and spray bottle. Estimated repair times: 15–30 min for pilot/thermocouple swap; 30–90 min for burner or regulator replacement depending on disassembly.
What stepwise tests should homeowners perform to diagnose a failed ignition or no‑spark condition?
1) With gas OFF perform visual piezo check: press igniter and observe click and electrode for visible spark (outdoors). 2) Inspect electrode gap/alignment and replace cracked/insulated spark wire. 3) If battery/electronic spark, check/replace batteries and wiring. 4) If no spark from module but clicking heard, replace piezo/spark module. 5) After repairs, leak‑test fittings before lighting.