
If you own a Paramount patio heater and need the manual, go directly to JR Home Products (jrhome.com), the official manufacturer and distributor behind the Paramount brand. Their site hosts a downloadable PDF library under the /InstructionManuals section, a spare-parts store, and customer support at 1-800-561-5550 or [email protected]. If the exact PDF isn't there, check the product page on The Home Depot (models like PH100171 and PH-E-144 list manufacturer PDFs in the 'From the Manufacturer' section), or search ManualsLib and Manualzz using your full model number. This guide walks you through every step after that: verifying the right manual, assembling and starting your heater safely, diagnosing every common fault, ordering parts, and knowing when to stop and call a pro.
Paramount Patio Heater Manual: Download, Assemble & Troubleshoot

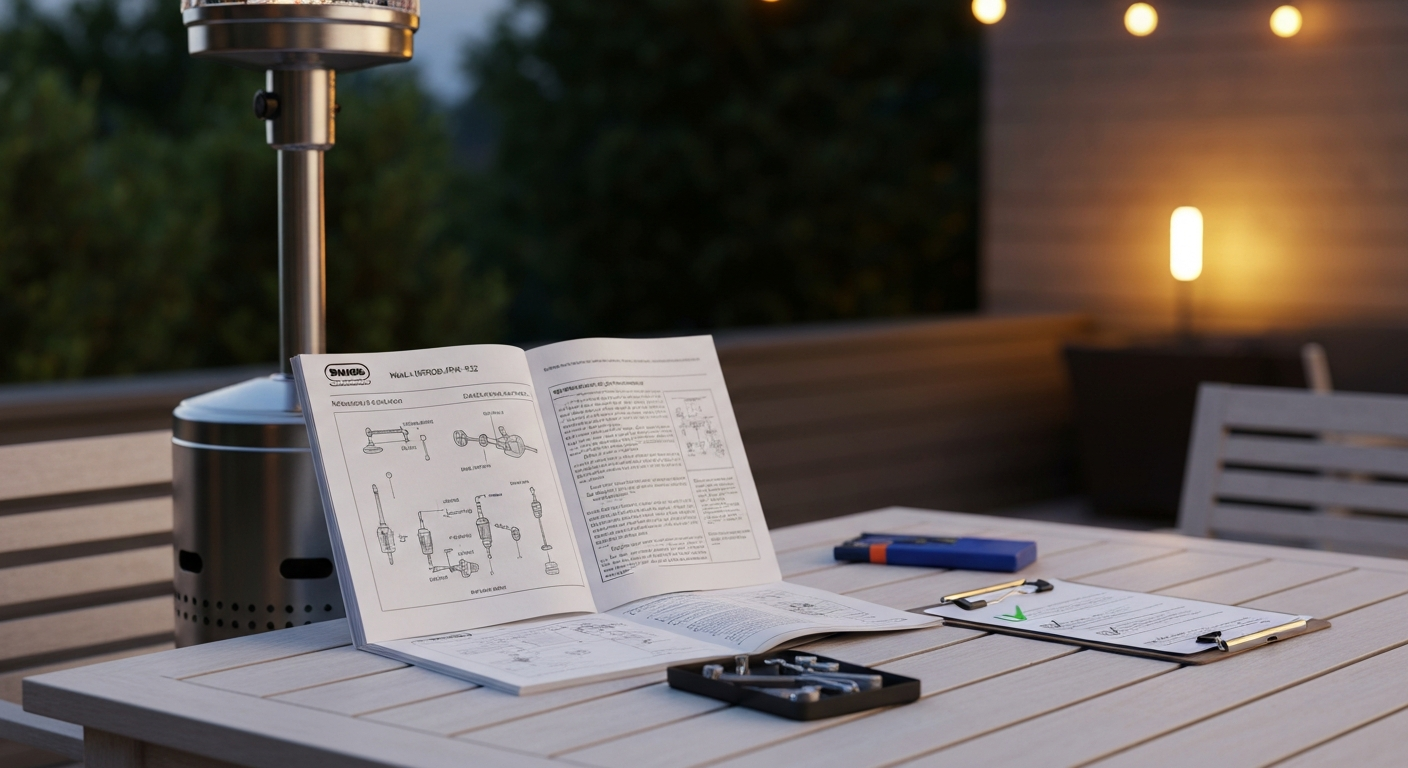
What this guide covers (and what to call the manual)
Paramount patio heaters are manufactured and distributed by JR Home Products (also referred to as J&R Home or JR Home). The same document gets called different things depending on where you find it: Paramount patio heater manual, Paramount owner's manual, Paramount user manual, Paramount instruction manual, Paramount manual download, or Paramount troubleshooting manual. They all refer to the same OEM PDF. The model-specific version is what matters, a manual for the KLD7003S/KLD7003SS (item PH-F122) covers assembly, leak testing, lighting, re-lighting, maintenance, troubleshooting, and a parts diagram specific to that unit. Using the wrong manual for your model is a real safety risk, especially for gas-connection torque specs and minimum clearance distances. This guide covers both propane gas models (the majority of the Paramount lineup) and electric models like the PH-E-144, with cross-references to Westinghouse-style 1500W freestanding electric heaters where relevant.
Where to find and download the official Paramount patio heater manual
Start with the manufacturer. JR Home's website is the authoritative source and the first place to look for any Paramount patio heater owner's manual, whether you want a first-time assembly guide or a troubleshooting manual to diagnose a fault.
- Go to jrhome.com and navigate to the Instruction Manuals section (URL path: /InstructionManuals). PDFs are organized by item/model number.
- If your model doesn't appear, call JR Home at 1-800-561-5550 (Mon–Fri, PST) or email [email protected] with your model number and they will send the correct PDF.
- For retail-purchased units, find the product on The Home Depot's website by searching your model number (e.g., PH100171 or PH-E-144). Scroll to 'Additional Resources' or 'From the Manufacturer' — this section often lists Assembly Instructions, Installation Guide, Use & Care Manual, and Warranty as separate downloadable PDFs.
- If neither source has your exact manual, search ManualsLib, Manualzz, or Manuals.plus using your full model number (e.g., 'Paramount KLD7003SS manual' or 'Paramount PH-S-112 manual'). These aggregator sites host legitimate OEM copies for models including the KLD7002SS/KLD7003 series, PH-S-112, and EF-WM411.
- When you download a PDF, check the document header or footer for the item/model number and revision date before you print or follow any steps. An outdated revision may have different torque specs or wiring diagrams.
A practical tip for PDF downloads: right-click and 'Save As' rather than opening in a browser tab. Browser-rendered PDFs sometimes cut off the last pages, which typically contain the troubleshooting table and parts diagram, the two sections you'll need most during a repair.
Making sure you have the right manual before you start
Paramount produces both propane/gas and electric heaters, and the manuals are not interchangeable. A gas manual for the KLD7003SS has no useful information about the wiring or element in a PH-E-144, and vice versa. Before following any procedure in a downloaded PDF, confirm three things: model number match, fuel type match, and revision match. The revision is usually printed in small text at the bottom of the cover page or in the footer (e.g., 'Rev. 2021-03'). If the manual PDF you found predates a known product update, it may reference a different regulator type or ignition sequence. When in doubt, request the current revision directly from JR Home.
| Check | Where to verify | Why it matters |
|---|---|---|
| Model number match | Cover page of manual vs. sticker on heater | Specs, clearances, and part numbers are model-specific |
| Fuel type (gas vs. electric) | Product description and manual title page | Completely different procedures and hazards |
| Manual revision/date | Footer or cover page of PDF | Updated revisions may reflect regulator or valve changes |
| Language/region edition | Title page — look for ANSI Z83.26/CSA 2.37 compliance note | Confirms the manual applies to North American market specs |
How to find the model and serial number on your Paramount heater
On most Paramount gas patio heaters (including the mushroom-style propane tower units), the model and serial number sticker is on the lower pole section, typically facing inward toward the base. On table-top and wall-mounted infrared models, check the underside of the mounting plate or the back panel of the emitter housing. The sticker is usually a silver or white foil label and can fade or peel in outdoor conditions, so check it before the heater's first season if you can.
- Tower/mushroom propane heaters: lower pole, facing inward, approximately 6–12 inches above the base ring
- Table-top propane heaters: underside of the base or back of the burner assembly
- Wall-mounted infrared models (e.g., EF-WM411): back panel of the emitter housing
- Electric models (e.g., PH-E-144): base plate or back of the reflector housing
The model number format for Paramount heaters follows a few patterns. 'KLD' prefix models (KLD7003S, KLD7003SS) are JR Home's internal model designations; the 'SS' suffix typically indicates stainless steel finish. 'PH-' prefix models (PH100171, PH-S-112, PH-E-144, PH-10000 SS) are item codes used on retail listings. You may see both on the same sticker: the item number (PH-F122) and the model number (KLD7003S) appear on the same label in the PH-F122 documentation. Write down both numbers when you contact JR Home or search for parts, because JR Home's parts system uses item codes while some retailers index by model codes.
Cross-compatibility: when one manual covers multiple variants
JR Home sometimes publishes a single instruction manual that covers multiple finish variants of the same mechanical design. The PH-F122 manual, for example, covers both the KLD7003S (black finish) and KLD7003SS (stainless steel) because the gas valve, regulator, burner, and assembly sequence are identical between them. If you have one finish variant and can only find the manual for the other, that document is safe to use for assembly and troubleshooting provided the burner type and BTU rating match. What you cannot cross-reference safely across different model families are gas orifice sizes, regulator pressure specs, and clearance distances, those are model-specific and must match your unit exactly.
Year-to-year revisions on the same model are usually minor (label updates, regulatory language changes, minor hardware revisions) but occasionally include a regulator change or valve substitution. If your unit has a different regulator style than shown in the manual diagram, contact JR Home to confirm which revision applies to your serial number range before ordering parts.
The same cross-reference logic applies to electric patio heaters. If you're working on a Paramount electric model, the procedures for checking wiring, testing elements, and tracing faults are broadly similar to those used for Westinghouse 1500W freestanding electric patio heater models, those guides can serve as a useful reference for test methodology even when exact wiring diagrams differ.
Quick printable assembly and first-start checklist
Print this checklist and keep it with your heater during assembly and first use. Check off each item as you complete it. Do not skip the leak test or the minimum-clearance check.
- Confirm model number on sticker matches your downloaded manual
- Inventory all hardware in the box against the parts list in the manual
- Assemble base and pole sections per manual sequence — do not cross-thread pole connections
- Attach emitter/burner head assembly — hand-tighten first, then torque per manual spec
- Connect gas hose and regulator — hand-tighten, then wrench-snug (do not overtighten brass fittings)
- Verify minimum clearances: 36 inches above emitter, 24 inches on all sides (check your specific manual — clearances vary by model)
- Perform soapy-water leak test on all gas connections with tank valve open before any ignition attempt
- Confirm no bubbles at any connection — if bubbles appear, close tank valve, tighten fitting, retest
- Open tank valve slowly (no more than one full turn)
- Purge air from gas line: press and hold control knob in pilot position for 30–60 seconds before attempting ignition
- Follow lighting sequence in your manual exactly
- Observe flame during first 10 minutes: note any unusual smell (minor manufacturing-oil burn-off is normal; strong gas smell is not)
- Confirm tilt safety switch is upright and functional before leaving heater unattended
- Record model number, serial number, and manual revision date on the back of this sheet
Step-by-step assembly for common Paramount patio heater models
The following assembly sequence applies to the standard tower-style propane heater (KLD7003S/KLD7003SS and similar PH-series models). Electric models like the PH-E-144 follow a simpler pole-and-reflector assembly without the gas-line steps, refer to your specific electric manual for that sequence.
Laying out parts and hardware
Before you pick up a wrench, lay all parts on a flat, clean surface and match them to the parts-list illustration in your manual. Paramount tower heaters typically include: base with wheel casters and weight tray, lower pole section, upper pole section, emitter/burner head assembly, reflector (mushroom), gas hose and regulator assembly, and a hardware bag with bolts, nuts, and a wrench. Missing a part before you start? Contact JR Home directly, the manual instructs customers to call or email for missing components, not to substitute hardware from the hardware store.
Base and pole assembly
Assemble the base first and confirm it sits flat without rocking. Attach the lower pole to the base collar using the provided bolts, thread all bolts by hand before applying any torque to ensure you don't cross-thread. On most Paramount models the pole sections thread together; turn clockwise until snug and then apply the supplied wrench for one additional quarter-turn. Do not over-torque aluminum pole couplings. If your model has a weight tray (a shelf inside the base frame), load it with a paver stone or sand bag before you raise the pole, this dramatically improves stability and is specifically recommended in the PH-F122 manual.
Emitter head and reflector
The emitter head is the heaviest single component. Have a helper hold it while you guide the burner tube into the top of the upper pole and thread the lock ring or collar. Do not let the head hang unsupported from the gas connection, the internal gas tube is not a structural member. Once the emitter is seated and the collar is hand-tight, install the reflector (mushroom dome) per the manual, most models use three retaining screws. Tighten in a star pattern to seat the reflector evenly.
Gas hose and regulator connection
Route the gas hose per the manual illustration, it should have no sharp bends and must not contact the pole surface in a way that allows chafing. Connect the regulator to the propane tank valve: this is a left-hand (reverse) thread on standard POL-type connectors and a right-hand thread on QCC1/Type-1 connectors. The PH-F122 uses a standard QCC1 regulator that threads clockwise onto the tank valve. Hand-tighten plus one snug quarter-turn with a wrench. Never use pipe dope or thread tape on regulator-to-tank connections, the seal is made by the integral O-ring.
Start-up and first-use safety checks
The leak test is not optional. Every Paramount gas-heater manual (including the PH-F122) requires a soapy-water leak test before the first ignition, and before the first use of each season. Mix dish soap and water in a spray bottle or use a dedicated gas-leak detector solution. Open the tank valve slowly. Spray or brush the solution on every gas connection: the regulator-to-tank joint, the hose-to-regulator joint, and the hose-to-burner connection at the top of the pole. Watch for 5 full seconds at each point. Steady bubbles mean a leak, close the tank valve immediately, tighten that connection, and retest. If a connection still leaks after re-tightening, replace the hose/regulator assembly. Do not attempt ignition with a leaking connection.
Minimum clearances matter more than most people realize. The PH-F122 manual specifies 36 inches of clearance above the emitter and 24 inches on all sides. Do not position the heater under a patio umbrella, pergola cover, or low overhang. Confirm the area is well ventilated, these are outdoor appliances and must not be used indoors or in enclosed spaces.
On first light, you may notice a faint burning smell for the first 5–10 minutes. This is normal: manufacturing oils on the emitter screen burn off during the initial heat-up. The smell should disappear within one use cycle. A persistent gas smell (rotten-egg odor from the odorant added to propane) is never normal, extinguish the heater, move away from the area, and investigate the gas connection before relighting.
Troubleshooting: heater won't ignite at all
Failed ignition is the most common complaint on Paramount propane heaters, and it's almost always one of four things: no gas reaching the burner, a dead piezo igniter, a fouled pilot orifice, or air trapped in the gas line. Work through these in order.
Gas supply checks first
- Confirm the tank valve is open — turn counterclockwise until it stops, then back one quarter-turn
- Confirm the tank has fuel — lift it; a full 20 lb tank weighs about 37 lbs total
- Check that the regulator excess-flow device hasn't tripped: close the tank valve, disconnect the regulator from the tank, wait 30 seconds, reconnect, and open the tank valve very slowly (this resets the excess-flow valve)
- Purge air from the gas line: with the control knob in the pilot/ignite position (pushed in and held), wait 45–60 seconds before clicking the igniter to allow gas to displace trapped air
Piezo igniter checks
Press the igniter button and listen and look for a click and a visible spark at the pilot tip. No click means the piezo striker is worn or broken, replacement piezo igniters for Paramount models are available through JR Home's parts store and RepairClinic. A click but no spark usually means the electrode wire has come loose from the igniter body or the electrode tip is fouled with carbon deposits. Clean the electrode tip with fine-grit sandpaper or a wire brush, check the wire connection, and retry. On models with a battery-powered electronic igniter (some PH-series units), replace the battery (typically one AA or AAA) before assuming the igniter is faulty.
Electric heater ignition faults (PH-E-144 and similar)
Electric Paramount models like the PH-E-144 don't have a pilot, they use a resistive heating element. If the unit powers on (indicator light comes on) but produces no heat, the element has likely failed. If nothing powers on at all, check the wall outlet with another device, check the GFCI outlet or breaker, and inspect the power cord for visible damage. The PH-E-144 uses a standard 120V/1500W circuit, it needs a dedicated 15-amp circuit and will trip a shared breaker. For deeper wiring and element tests on 1500W freestanding electric units, the guides covering Westinghouse 1500W freestanding electric patio heater models use the same test methodology (multimeter continuity check on the element) and are a useful reference. See the Westinghouse electric patio heater manual for element testing steps and wiring diagrams that closely match 1500W freestanding units.
Troubleshooting: heater lights but won't stay lit
This is the classic thermocouple symptom, but before you replace the thermocouple, rule out two quicker fixes: gas supply pressure and the pilot flame positioning.
Pilot and thermocouple basics
The thermocouple is a safety device, a thin metal probe that sits in the pilot flame. When the pilot flame heats it, it generates a small millivolt current that signals the gas valve to stay open. If the pilot flame is too small to fully engulf the thermocouple tip, or if the thermocouple itself is failing, the valve closes within 30–90 seconds and the flame dies. On a working system, after lighting the pilot and holding the control knob in for 30–45 seconds, you should be able to release the knob and the pilot stays lit.
- Check pilot flame size and color: it should be a steady blue flame, 1–1.5 inches long, with the tip touching or wrapping around the thermocouple probe. A weak, wavering, or yellowish pilot points to a partially blocked pilot orifice — clean it with a can of compressed air or a fine wire (never enlarge the orifice with a drill bit)
- Confirm the thermocouple probe is properly positioned in the pilot flame — it sometimes shifts during transport or cleaning. The probe tip should be in the hottest part of the flame
- Hold the control knob down for a full 45 seconds after the pilot lights before releasing — rushing this step is the most common cause of 'won't stay lit' calls
- If the pilot stays lit when you hold the knob but dies when you release it, the thermocouple is not generating enough voltage. Test it with a multimeter set to millivolts DC: a working thermocouple generates 18–30 mV with the pilot lit. Below 15 mV, replace the thermocouple
- If the pilot won't light at all, revisit the ignition troubleshooting steps above
Gas valve checks
If a new thermocouple is fitted correctly and the heater still won't stay lit, the gas valve itself may be faulty, specifically the electromagnet/coil inside the valve that holds it open in response to the thermocouple signal. Testing the valve coil requires a multimeter and the resistance spec from your manual. Gas valve replacement is a straightforward DIY task on Paramount models (the valve is a field-replaceable part available through JR Home) but requires turning off and disconnecting all gas supply first, and verifying no gas is present before any connection is disturbed.
Troubleshooting tilt switch and overheat switch issues
All Paramount tower propane heaters include a tilt safety switch, a mercury or ball-bearing switch in the base that cuts gas flow if the heater tips past a set angle (typically 30 degrees from vertical). This is a required safety feature under ANSI Z83.26. If your heater shuts off unexpectedly on a level surface, or won't stay lit even with a good thermocouple and strong pilot, the tilt switch is a prime suspect.
- Verify the heater is on a flat surface — even a slight tilt can trigger a sensitive switch. Use a small level on the base
- Locate the tilt switch (usually in the base housing, connected in series with the thermocouple wire — check your manual's wiring diagram)
- With the heater upright and the gas fully OFF, disconnect the two wires from the tilt switch and use a multimeter set to continuity mode. With the unit level, the switch should show continuity (closed circuit). Tilt it 30+ degrees — the switch should open (no continuity). If it fails either test, replace the switch
- Tilt switch replacement: disconnect power/gas, snip or disconnect the two leads, connect the replacement switch with matching wire connectors, confirm polarity is correct per the wiring diagram in your manual
- Some Paramount heaters also include a thermal overheat cutout (a bimetal disc or thermal fuse in the emitter head). If this trips, the unit cuts out even on a level surface. After the heater cools completely (15–20 minutes), the overheat cutout will typically reset automatically. If it trips repeatedly, check for blocked ventilation or a faulty thermostat
Thermocouple and pilot assembly: testing and replacement
The thermocouple is the single most commonly replaced part on any gas patio heater. On Paramount models it's a standard universal thermocouple (typically 24-inch length, M8x1 thread fitting at the gas valve end) available through JR Home's parts store or RepairClinic. Before ordering, confirm the thread size and length from your manual's parts diagram, some models use a 30-inch thermocouple.
Multimeter test procedure
- Set multimeter to DC millivolts (mV)
- Disconnect the thermocouple from the gas valve (unscrew the nut at the valve body — this is the small copper-tipped tube, not the main gas line)
- Probe the thermocouple tip (positive lead) and the body/nut (negative lead)
- Light the pilot and hold the flame directly on the thermocouple tip for 30 seconds
- Read the voltage: 18–30 mV is healthy; 15–17 mV is borderline; below 15 mV, replace the thermocouple
- Reconnect or replace as needed
Replacement procedure
Turn off the tank valve and wait 5 minutes before disconnecting anything. Unscrew the thermocouple nut at the gas valve (usually 9/16-inch wrench, hold the valve body steady so you don't twist the internal valve seat). Slide the old thermocouple out of its bracket at the pilot assembly. Thread the new thermocouple in, positioning the tip in the pilot flame path per the manual diagram. Reconnect the nut at the gas valve, hand-tight plus a quarter-turn snug, no more. Over-tightening strips the soft copper fitting. Perform the soapy-water leak test on the valve connection before lighting.
Gas flow and regulator checks
A low flame that can't be turned up, or a pilot that lights but won't build to a proper main-burner flame, usually points to a gas supply or regulator problem. Low propane in the tank is the obvious first check, partial tanks in cold weather (below 40°F/4°C) have reduced vapor pressure that mimics a regulator fault. Warm the tank in a bucket of warm (not hot) water for 10 minutes and retry before condemning the regulator.
Regulator types and checks
Paramount propane heaters ship with a preset low-pressure regulator (typically set to 11 inches water column / 0.4 PSI output). This is a fixed regulator, it is not adjustable and must be replaced as a unit if faulty. Signs of a failing regulator include: flame won't reach full height even with a full tank, pilot lights but main burner won't open fully, or yellow/orange flame color at full height (incomplete combustion from low gas pressure).
- Confirm the tank valve is fully open
- Reset the excess-flow valve: close tank, disconnect regulator, wait 30 seconds, reconnect, open tank valve very slowly over 5 seconds
- Inspect the regulator vent hole (a small hole on the side of the regulator body) — if it's blocked with debris or spider web, clear it gently with a toothpick. A blocked vent prevents the diaphragm from responding to downstream pressure changes
- Inspect the hose: look for kinks, cracks, or soft spots. A damaged hose must be replaced — do not use tape or hose clamps as a fix
- If all above checks pass and the flame is still low, replace the regulator/hose assembly as a unit. OEM assemblies are available through JR Home's parts store and RepairClinic
All gas hose and regulator work on Paramount heaters falls under NFPA 58 (the Liquefied Petroleum Gas Code) for LP-fueled units. You don't need to memorize the code, but it's worth knowing that using non-listed replacement hoses or regulators voids compliance with ANSI Z83.26/CSA 2.37 and may void your warranty. Stick to OEM or certified-equivalent parts.
Basic electric heater faults and fixes
Paramount's electric models (particularly the PH-E-144 Smart Electric Patio Heater) share the same basic fault pattern as other 1500W freestanding electric patio heaters. The procedures here also apply broadly to Westinghouse WES31-15110 and similar 1500W freestanding units, since the electrical architecture is nearly identical.
| Symptom | Most likely cause | First fix to try |
|---|---|---|
| No power, no indicator light | Tripped GFCI outlet or breaker | Reset GFCI, check circuit breaker |
| Power light on, no heat | Failed heating element | Multimeter continuity test on element — replace if open circuit |
| Heater trips breaker repeatedly | Shared circuit overloaded (1500W needs dedicated 15A circuit) | Move to dedicated circuit |
| Heat output reduced, one zone only | One element failed in dual-element model | Test each element independently |
| Burning smell (not first use) | Debris on element or failed wiring insulation | Inspect element and wiring — stop use if wiring is damaged |
| Remote/smart control not responding | Pairing issue or dead remote battery | Re-pair per manual, replace battery |
For wiring and element tests, set your multimeter to resistance (ohms). A 1500W/120V element should measure approximately 9.6 ohms (using the formula R = V²/P = 14400/1500). An open circuit (OL reading) means the element has burned out and needs replacement. A shorted element (reading near zero ohms) is a fire risk, stop use immediately and replace. If the cord, plug, or internal wiring shows any melting, discoloration, or cracking, do not attempt repair, replace the component or the unit.
Routine maintenance and seasonal safety inspection
JR Home's manuals explicitly recommend an annual inspection by qualified service personnel, but most of the inspection tasks are things a careful DIY owner can do before each season. Doing these checks in spring before the first use, and again in fall before storage, keeps the heater safe and extends its service life significantly.
Annual inspection checklist
- Burner and emitter screen: remove and inspect for carbon deposits, insect nesting, or physical damage. Clean with a soft brush — spider webs in the burner orifice are a very common cause of ignition failure after winter storage
- Pilot orifice: blow out with compressed air (can of air, not a compressor — too much pressure can damage the orifice seat)
- Gas hose and regulator: inspect the full length of the hose for cracking, stiffness, or abrasion marks. Replace any hose that is more than 5 years old or shows any surface damage
- All gas connections: perform the soapy-water leak test with a fresh tank before the first use of the season
- Thermocouple: visually inspect for corrosion at the probe tip and the connection nut. If the tip is gray/white with scale, clean gently with fine sandpaper
- Tilt switch: test continuity per the procedure in the troubleshooting section above
- Pole connections: check for looseness, corrosion, or wobble at each coupling
- Reflector/emitter: check for warping, cracking, or corrosion. A warped reflector reduces radiant efficiency and can focus heat unevenly
- Base and casters: confirm casters roll freely and the base is not cracked or corroded
- On electric models: inspect the power cord for any cracking, inspect the plug for discoloration or melting, and test the GFCI protection on the outlet
Storage tips
Store propane heaters with the tank disconnected and removed from the base. Never store a propane tank indoors or in an enclosed space. Store the heater under a breathable cover (not sealed plastic) to prevent moisture buildup on the burner assembly. If storing for more than 3 months, apply a thin coat of food-grade silicone spray to exposed metal parts to inhibit corrosion.
Reading diagrams and parts lists in your manual
Every Paramount OEM manual includes an exploded-view diagram and a numbered parts list, usually in the last 2–3 pages of the PDF. This is the most valuable section when you're ordering a replacement part or diagnosing a specific component. Here's how to use it efficiently.
- The exploded view shows every component separated from its neighbors, with a number that corresponds to a row in the parts list table
- The parts list table gives the part name, part number, and sometimes a quantity. The part number is what you give to JR Home or RepairClinic when ordering
- Common Paramount part names to recognize: thermocouple (the thin copper tube near the pilot), pilot assembly (the pilot tube/orifice/bracket assembly), gas control valve (the main gas valve body), regulator assembly (the pressure-reducing device at the tank), igniter electrode (the ceramic-tipped spark rod), emitter screen (the mesh screen inside the reflector), reflector (the dome/mushroom), and glass tube (on models with a glass cylinder around the burner)
- If your manual uses a generic name that doesn't match a search result, also try searching by the physical description plus the brand name (e.g., 'Paramount patio heater thermocouple M8 24-inch')
- If the manual's exploded view is unclear, JR Home's parts page shows photos of individual components next to their part numbers — this is often more useful than the diagram for identifying small hardware
Ordering replacement parts: OEM vs. aftermarket
For gas-side components (thermocouple, gas valve, regulator, igniter electrode), always start with OEM parts from JR Home's parts store. The OEM part is pre-verified to match the pressure rating and physical dimensions of your model. Aftermarket thermocouples and regulators from RepairClinic or similar are acceptable if they are listed as compatible with your specific model number, RepairClinic maintains a parametric parts catalog where you can filter by brand and model to confirm compatibility before buying.
For cosmetic and structural parts (reflector, emitter screen, glass tube, control knob, caster wheels), aftermarket equivalents are generally fine as long as the physical dimensions match. These parts don't affect gas safety. When ordering, have the following information ready:
- Full model number (e.g., KLD7003SS) AND item number (e.g., PH-F122) — provide both
- Serial number (found on the sticker — this helps JR Home identify the production run and correct revision)
- Part number from the manual's parts list
- Part name as it appears in the manual
- Photo of the failed part if the number is unreadable — JR Home customer care will identify it from a photo
JR Home ships directly from their parts store and is the fastest path to OEM parts. RepairClinic is a reliable alternative with faster shipping to some US locations. Both sources maintain return policies if the part doesn't match.
Cross-referencing manuals for similar brands
If you're having trouble finding the exact Paramount PDF for your model, it's worth knowing that several brands share hardware designs with Paramount, JR Home distributes multiple brands using similar or identical mechanical assemblies. The most directly relevant cross-reference for electric models is the Westinghouse 1500W freestanding electric patio heater family, including the Westinghouse WES31-15110. These units follow the same 1500W/120V element architecture as the Paramount PH-E-144, and the assembly sequence, element testing procedure, and basic wiring layout are closely analogous. If you're working on a Paramount electric heater and your specific manual isn't available yet, the Westinghouse 1500W freestanding patio heater manual and the Westinghouse WES31-15110 guide cover the same electrical fundamentals and are reliable procedural references.
For gas models, the cross-reference is less direct because regulator pressure specs and orifice sizes vary between brands even when the cabinet looks identical. Do not use a different brand's gas manual as a primary guide for any gas-side procedure, use it only to understand the general sequence, then verify every spec against your Paramount OEM document.
When to stop DIY and call a certified technician
Paramount's own manuals state it clearly: 'Installation and repair should be done by a qualified service person. According to the PH‑F122 instruction manual from Paramount/JR Home, 'installation and repair should be done by a qualified service person' and the manufacturer recommends annual inspections and that any work on gas passages or gas‑related repairs be performed by qualified technicians The PH‑F122 manual instructs that 'installation and repair should be done by a qualified service person' and recommends an annual inspection and that gas‑passage repairs be performed by qualified technicians.. ' That's not just legal boilerplate. There are specific situations where continuing a DIY repair creates a genuine safety risk. Know where that line is.
- You smell gas and cannot identify or stop the source: evacuate the area, close the tank valve if you can do so without entering the gas-smell zone, and call your gas supplier or fire department
- Any gas connection continues to leak after two retightening attempts: the fitting, hose, or valve body is damaged and must be replaced by someone with proper tools and leak-detection equipment
- The gas valve body itself is cracked, corroded, or physically damaged: gas valve bodies are not DIY repairs — the valve must be replaced by a qualified technician who can verify the replacement is properly seated and sealed
- You need to modify gas piping or change orifice sizing: this falls under NFPA 58 requirements and must be done by a licensed LP gas technician
- The unit is within its warranty period: unauthorized repairs void the warranty. Contact JR Home at 1-800-561-5550 first — they may cover parts or service
- On electric models: any repair involving internal wiring beyond replacing the cord or element (e.g., control board replacement, rewiring the heating circuit) should be done by a licensed electrician if you're not confident with wiring safety
- Annual inspection: even if you do your own maintenance checks, the manufacturer recommends an annual inspection by qualified service personnel for gas models — this is particularly important for heaters used commercially or in high-use settings
Quick-reference links to deeper repair guides
The sections above give you enough to diagnose and fix most Paramount patio heater problems. For deeper step-by-step repair guides on specific failure modes, the following internal guides on this site go into more detail with photos and component-specific instructions.
- Ignition troubleshooting guide: covers piezo vs. electronic ignition systems, electrode gap adjustment, and spark transformer testing
- Thermocouple replacement guide: full photo walkthrough for removing the old thermocouple, sizing the replacement, and reinstalling with correct torque
- Tilt-switch testing and replacement guide: continuity test procedure, switch types (mercury vs. ball-bearing), and wiring reconnection steps
- Gas regulator replacement guide: identifying regulator types, safe disconnection from the tank, and connecting a replacement assembly
- Electric element testing guide: multimeter resistance test, identifying element part numbers, and step-by-step replacement for 1500W freestanding units
Final safety reminders to keep with your manual
Print this list and tape it to the back of your manual or to the inside of the heater's base cover.
- Always perform a soapy-water leak test before first use of the season and after any gas-connection work
- Never use a Paramount propane heater indoors, in a garage, on a covered porch with less than the required clearances, or under any low overhead structure
- Maintain minimum clearances: 36 inches above the emitter, 24 inches on all sides (verify against your specific model manual — clearances vary)
- Keep children and pets at least 3 feet away from the heater during operation
- Never leave a lit propane heater unattended
- Turn off the tank valve (not just the control knob) when the heater is not in use
- Store propane cylinders outdoors, upright, and away from any heat source — never indoors
- Replace any gas hose that shows cracking, stiffness, or surface damage — do not repair with tape
- If you smell gas: do not operate any switches or electrical devices, do not use your phone nearby, leave the area, and call your gas supplier
- Paramount gas heaters comply with ANSI Z83.26-2014 / CSA 2.37-2014 — use only replacement parts that maintain this compliance rating
- JR Home customer support: 1-800-561-5550 or [email protected] (Mon–Fri, PST)
FAQ
Where can I download the official Paramount patio heater manual for my model?
Start with the manufacturer/distributor: JR Home (Paramount) maintains product pages and an instruction-manual library with OEM PDF manuals and spare-parts listings. If you can’t find your exact model there, check the retailer 'From the Manufacturer' section on product pages (The Home Depot often hosts OEM PDFs). If the OEM site or retailer copy is missing, use reputable manual archives (ManualsLib, Manuals.plus, Manualzz) — search by exact model string (example: PH-F122, KLD7003S, PH100171). Keep the PDF for printing and follow the model-specific instructions exactly.
How do I identify my Paramount patio heater model and serial number so I get the correct manual and parts?
Locate the rating/identification plate or sticker on the heater: common places are the underside of the reflector, inside the control-panel door, on the burner housing, or on the base. The plate lists model number (examples: KLD7003S, PH100171, PH‑E‑144) and a serial number. Record both exactly (including dashes). If the plate is missing or unreadable, check original packaging, purchase receipt, or retailer order history. Use the exact model string when searching manuals or ordering parts.
What safety checks should I do before assembling or lighting a gas Paramount heater?
Printable pre-assembly & first-start checklist: 1) Read the model’s OEM manual before anything. 2) Confirm site clearances and non-combustible mounting surface per manual. 3) Inspect all parts against the parts list. 4) Tighten fittings per instructions; do not overtighten. 5) Perform a soapy-water leak test at gas connections with gas on (no open flames) — bubbles indicate a leak; fix before lighting. 6) Ensure correct regulator and hose are installed and undamaged. 7) Purge air from the gas line if it’s the first use. 8) Keep a fire extinguisher nearby and keep children/pets away during testing.
What is a concise assembly & start-up checklist I can print and follow?
Paramount heater assembly & start-up printable checklist: 1) Verify model & manual. 2) Unpack and match parts to list. 3) Assemble reflector, emitter, burner, housing, and base per manual torque/spec notes. 4) Connect regulator and hose; ensure regulator type matches propane or natural gas. 5) Leak-test all gas joints with soapy water. 6) Place heater in final position with required clearances. 7) Open cylinder valve slowly; inspect for leaks again. 8) Follow OEM lighting procedure (press/push valve, ignite pilot/or main per model). 9) Observe for steady blue flame and no gas smell. 10) Shut down and re-check if any issues. Save checklist with manual.
What step-by-step troubleshooting should I follow if the heater fails to ignite?
Failed-ignition quick procedure: 1) Confirm fuel source: propane cylinder not empty or natural gas supply on. 2) Check regulator and hose for kinks, damage, or disconnection. 3) Verify control knob/pilot switch positions and battery in ignitor (if battery-powered). 4) Perform purge: turn off gas, open valve briefly to remove trapped air, then retry lighting per manual. 5) Inspect ignitor electrode for carbon/spray residue and correct gap; clean gently and realign. 6) If piezo/igniter dead, try manual lighting per manual (safety steps). 7) If still no ignition, consult manual troubleshooting table for orifice blockage and remove/clean per instructions. If unsure about disassembly of gas components, stop and contact a qualified service person.
What do I do if the heater lights but won’t stay lit or the flame goes out?
‘Won’t stay lit’ targeted checks: 1) Check tilt/overheat safety switch — ensure heater is level and the bracket is secure; manuals show switch location and reset steps. 2) Inspect thermocouple/pilot assembly: loose, dirty or misaligned thermocouple/pilot will fail to sense flame — tighten, clean with emery cloth, and ensure pilot flame envelops the thermocouple tip. 3) Verify regulator function and low gas pressure (replace regulator if suspect). 4) Check for wind drafts or ventilation issues that may extinguish flame. 5) Replace pilot or thermocouple only with OEM or specified replacement parts and follow manual removal/installation instructions. If frequent outages persist after these steps, call a qualified technician.