Most freestanding propane patio heaters need at least 36 inches (3 feet) of clearance above the burner head and at least 24 to 36 inches from the sides to any combustible material like siding, railings, curtains, or furniture. But that's the general rule, your specific model may call for more, and the exact numbers are printed right on the rating label or in the owner's manual. If you skip this step and just eyeball it, you're risking heat damage to your deck or pergola, and you're also setting yourself up for ignition failures and nuisance shutdowns that make the heater feel broken when the real problem is just poor placement.
Patio Heater Clearance Requirements: DIY Safe Distances

Grant Mercer
17 Jun 2026
Why clearance requirements actually matter
There are three separate reasons clearance matters, and most people only think about one of them. The obvious one is fire: the CPSC is direct about portable fuel-burning heaters causing fires when placed too close to drapes, furniture, or other combustibles. A patio heater running at full output generates serious radiant heat, and materials like wood latticework, canvas awnings, or synthetic rattan furniture don't need to be touching the heater to ignite or degrade.
The second reason is combustion air. Gas-fired patio heaters need a steady supply of fresh air to burn cleanly. Crowd the heater into a corner, wrap it too tightly with a windscreen, or park it under a low ceiling without enough airflow, and it will run rich, produce more carbon monoxide, and may not maintain a stable pilot flame.
For clearances, NFPA-style outdoor heater safety guidance emphasizes that you must not interfere with combustion air, and it also highlights properly maintaining ventilated draft hood or vent terminal clearance and accessibility adequately ventilated areas to support combustion and minimize CO accumulation. Regulations specifically call out that gas-fired heaters require adequately ventilated areas to support combustion and minimize CO accumulation, this is true even for outdoor-rated heaters.
The third reason hits closest to home for DIY troubleshooters: clearance problems cause operational failures. If your heater lights and then goes out, or won't stay lit, or the tilt switch keeps tripping, there's a real chance the placement is contributing to the problem. More on that in a dedicated section below.
Find the exact clearance numbers for your model first

Before you measure anything, find the source of truth for your specific heater. General guidelines are useful as a starting point, but manufacturers test their units and publish exact minimums, and those numbers can vary significantly between models. A wall-mounted infrared heater has totally different clearance geometry than a freestanding mushroom-style propane tower.
Here's where to look, in order of reliability:
- The rating label on the heater itself: Look on the base, the pole, or the burner shroud for a permanently attached label. It often lists BTU output, fuel type, and a clearance-to-combustibles summary.
- The owner's manual that shipped with the unit: If you no longer have it, search '[your brand] + [model number] + owner's manual PDF' — most manufacturers have them available for download, and sites that archive appliance manuals are also reliable sources.
- The manufacturer's website or customer support line: If the model number is hard to find, the serial number can usually get you to the right documentation.
- The installation manual (separate from the owner's manual for some brands): Wall-mount and ceiling-mount heaters like the Heatstar HSRP37 series have installation-specific documents that include clearance tables with exact distances for different mounting angles and surface types — non-combustible vs. combustible ceilings, for example.
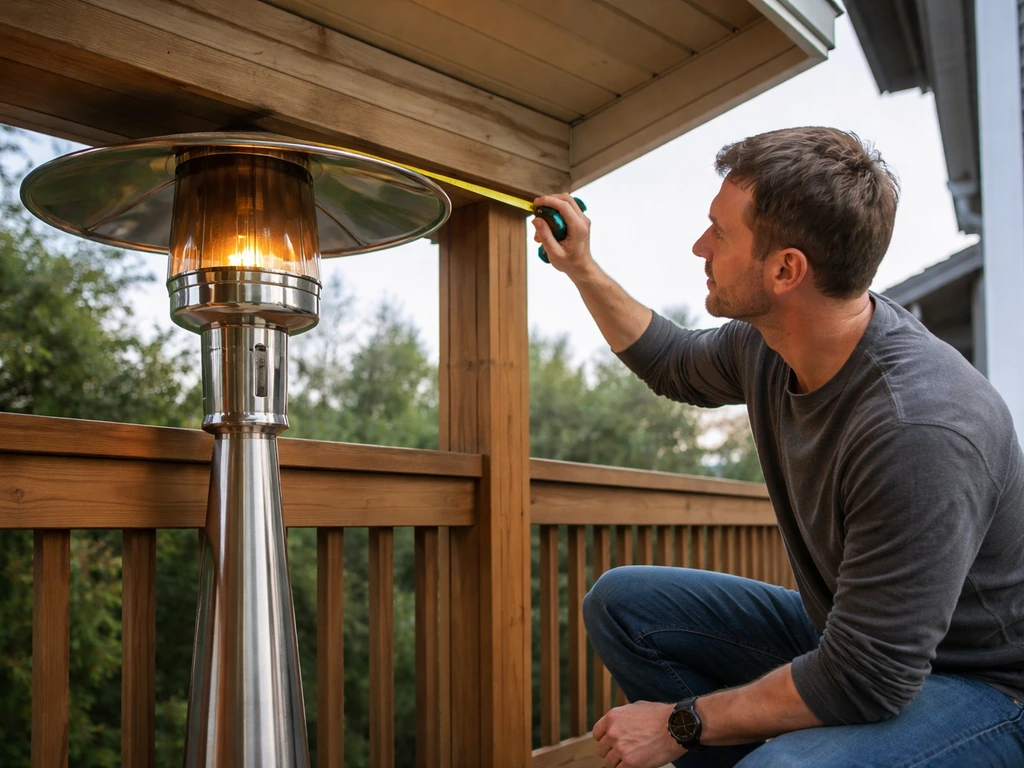
When you find your manual, look specifically for a section titled 'clearance to combustibles' or a clearance table. Pay attention to whether the measurement is taken from the heater body, from the reflector, or from the burner surface, manufacturers define this differently, and measuring from the wrong reference point can put you several inches short of safe.
General clearance distances to know before you dig into your manual
If you're waiting on a manual or just want a working framework, here's what shows up consistently across multiple manufacturers and safety standards. Treat these as minimum starting points, not as permission to stop there.
| Direction / Surface | Typical Minimum Clearance | Notes |
|---|---|---|
| Above the burner head (open sky) | 36 inches | Freestanding mushroom-style heaters; more if under a roof |
| Overhead (covered/non-combustible surface) | 8 inches minimum (some models) | Heatstar specifies 8 in under non-combustible surfaces to protect controls — verify yours |
| Overhead (covered/combustible surface) | Much greater — often 5+ feet | Covered patios with wood pergolas fall here; check your manual explicitly |
| Sides to combustibles | 24–36 inches | Fire Sense manuals cite 24 in from sides; CPSC recommends at least 3 ft from drapes/furniture |
| Front/radiant face to combustibles | 36 inches minimum | Applies to wall-mount infrared heaters aimed at seating areas |
| From LPG cylinders / regulators | Per NFPA 58 and your manual | Hose must also be protected from heat sources and physical damage |
| General separation (events/public spaces) | 5 feet minimum | NPS fire safety requirements for outdoor events — good conservative benchmark |
The 5-foot rule cited by the National Park Service for outdoor events is a useful conservative benchmark for any situation where you're uncertain. It gives you margin for wind, movement, and the fact that radiant heat doesn't stop at the edge of the heater.
Clearance by setup: decks, covered patios, pergolas, walls, and furniture
On an open deck
An open wood or composite deck is one of the more forgiving setups because you have overhead clearance, but the deck boards themselves become the hazard. Place the heater on a stable, level surface, uneven decking is a real tilt-switch trigger (more on that below). Keep the base away from deck railings, balusters, and any decorative trim. Wood rails at 24 inches from the heater body might feel far enough, but if the rail is in the radiant path of the burner, treat it as a combustible that needs the full 36-inch clearance.
Under a covered patio or roof
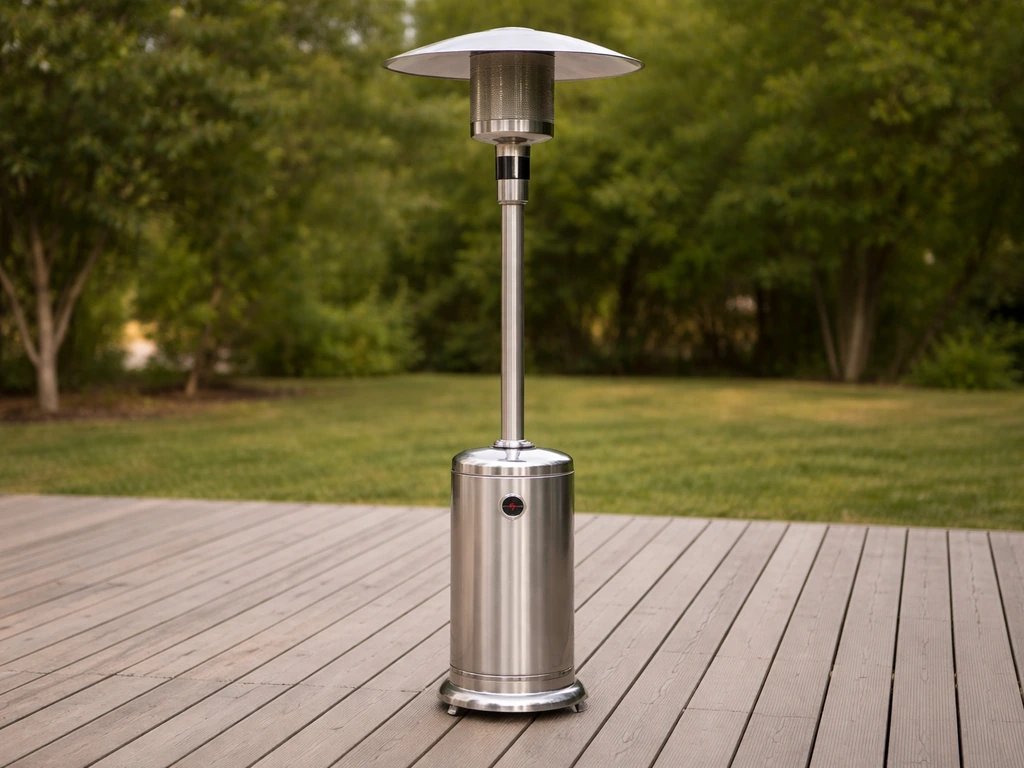
This is where most people make serious mistakes. A freestanding mushroom heater with a burner head sitting at 7 feet off the ground and a patio roof at 8 or 9 feet gives you almost nothing, often less than 24 inches of overhead clearance. Some heaters are specifically not rated for use under combustible roofs. This also applies when you calculate how much clearance does a patio heater need, because overhead height affects safe placement and combustion performance.
Others specify a minimum mounting or use height (Sunpak, for example, recommends no installation below 7 feet from the floor for safety, and that applies before you even factor in overhead clearance). If your patio cover is wood, painted wood, or fabric, check your manual for an explicit statement that the heater can be used under a combustible surface, and what the minimum clearance is.
When in doubt, a wall-mounted or ceiling-mounted infrared heater designed for covered patios is a much better fit than forcing a freestanding unit into a space it wasn't designed for.
Under a pergola
Pergolas create a patchwork overhead situation, open sky through the gaps, but wood beams directly above. Measure from your heater's burner to the lowest beam, not to the open sky above it. If that distance is less than what your manual specifies for clearance to combustible overhead surfaces, the heater shouldn't run in that spot. Attaching fabric shade covers or string lights to the pergola above the heater makes the situation worse, and fabric is one of the fastest-igniting materials in a close-proximity heat scenario.
Near walls and railings
Vinyl siding, painted wood siding, and wood or composite fence panels are all combustibles. Even if the heater isn't pointed directly at the wall, radiant heat reflects and accumulates in corners. Keep the heater's reflector or burner head at least 36 inches from any wall or railing surface, and add extra margin if the heater is in a corner where two surfaces face it. Stucco and brick are non-combustible, but they can still absorb and radiate heat back toward the heater, affecting combustion airflow.
Near furniture, umbrellas, and curtains
Outdoor curtains and market umbrellas are the most common clearance violations I see. To keep patio fire pit safety in check, make sure umbrellas, curtains, and any other fabric stay well outside the heater’s radiant zone so nothing can blow into it. They look fine at setup time, then a light breeze swings a curtain panel into the heater's radiant zone.
Apply the 36-inch minimum as a no-encroachment zone, nothing should be able to swing, fall, or get pushed into that radius. For propane towers specifically, the mushroom-shaped reflector throws heat in a downward cone, but the upper part of the pole and the burner area still get hot. Keep chair backs, umbrella poles, and planters outside that full 36-inch radius around the entire unit, not just the top.
Propane and gas placement checks: tank, regulator, hose, and burner airflow
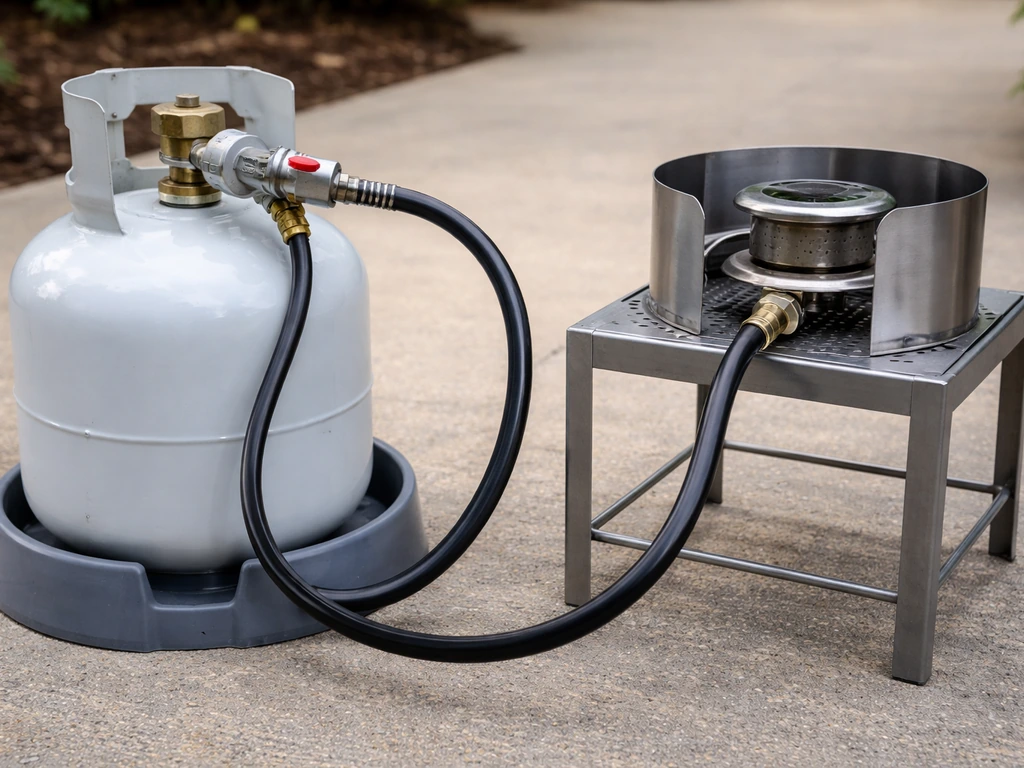
For propane-fueled heaters, clearance isn't just about what's around the burner, it's also about where and how the fuel system sits. These checks are separate from the combustible clearance checks and often get skipped entirely. After placement and clearance, patio heater safety also depends on keeping the heater’s fuel connections and airflow in good shape.
- Tank position: The propane cylinder sits inside the base of most freestanding heaters. It should never be placed near or below any external heat source. The base vents of the heater housing are designed to keep the cylinder ventilated — don't block them with decorative covers, pot plants, or storage. ANSI Z83.26 limits most self-contained propane patio heaters to a single 20 lb cylinder maximum.
- Regulator clearance: The regulator connects the cylinder valve to the hose. It needs to be positioned so it won't contact the base housing when you close the panel, and so liquid propane can't pool near it if the cylinder is accidentally overfilled.
- Hose inspection and routing: Hose must be protected against physical damage and heat — this is explicitly stated in NFPA 58. Route the hose so it doesn't kink, doesn't rest against hot surfaces, and can't be stepped on or caught on furniture legs. Inspect it for cracks or abrasion before each season.
- Burner and air intake clearance: The burner assembly on most mushroom heaters has air intake slots at the base of the burner head. These must not be blocked by anything — not a windscreen placed too close, not a cover that wasn't fully removed, not a bird nest or spider web from storage. Restricted airflow here will cause flame instability and can cause the thermocouple to drop out.
- Windscreens: If you use a windscreen, keep it at least 24 inches from the heater on all sides to allow adequate combustion air. A windscreen placed too close essentially walls off the fresh air supply.
How bad placement causes ignition failures and safety shutdowns
Here's where the troubleshooting and the safety placement guidance connect directly. If your heater lights and then shuts off after a few seconds or minutes, or if it won't light at all, check placement before you start replacing parts.
Tilt switch trips from uneven surfaces
Freestanding propane heaters include a tilt switch (tip-over safety device) that cuts gas flow if the heater leans beyond a safe angle. This is a legitimate and important safety feature. But it also means that placing the heater on an uneven deck board, a sloped patio surface, or soft ground that lets one leg sink will trigger a false shutdown. If your heater cuts out and the tilt switch is the culprit, the fix is to level the surface under the heater, not to disable the switch. Use a spirit level on the base before you light it.
Thermocouple failures from wind and airflow problems
The thermocouple (or thermopile) senses the pilot flame and keeps the gas valve open. If wind is hitting the pilot flame directly, because the heater is positioned in a wind channel, or facing the wrong direction relative to the breeze, the flame gets disturbed and the thermocouple cools. The gas valve closes. This shows up as the classic 'lights, holds for 30 seconds, then goes out' failure. Repositioning the heater relative to prevailing wind often fixes this entirely without any parts replacement. Similarly, a dirty or obstructed burner will produce a weak, unstable flame that can't keep the thermocouple heated, and insufficient combustion air from blocked intakes is a common cause.
Overheating from insufficient overhead clearance
Some heater control components are mounted in the upper housing near the burner. Heatstar's manual specifically calls out that the 8-inch minimum top clearance under a non-combustible surface exists partly to prevent overheating of controls. If you're running a heater too close to a ceiling or pergola beam, reflected heat can cause the control module to overheat and shut down, or degrade components over time. This kind of failure is intermittent and hard to diagnose if you don't know to look at placement first.
Quick safety troubleshooting flow
- Heater won't light at all: Check propane level, confirm hose and regulator are connected and the valve is open, verify the burner intake isn't blocked, and check that the unit is sitting level (tilt switch).
- Lights then shuts off within 30 seconds: Hold the ignition knob down longer to heat the thermocouple fully. If it still drops out, check for wind hitting the pilot, inspect thermocouple position and cleanliness, and verify combustion airflow is unobstructed.
- Shuts off after running for a few minutes: Suspect overheating from insufficient overhead clearance, or a tilt switch triggered by the heater rocking on an uneven surface. Level the base and measure overhead clearance.
- Flame is yellow/orange or sooty: Classic sign of incomplete combustion from restricted airflow. Clear the burner intake area and check for anything blocking ventilation around the heater body.
DIY placement checklist: do this before every first use or after moving the heater
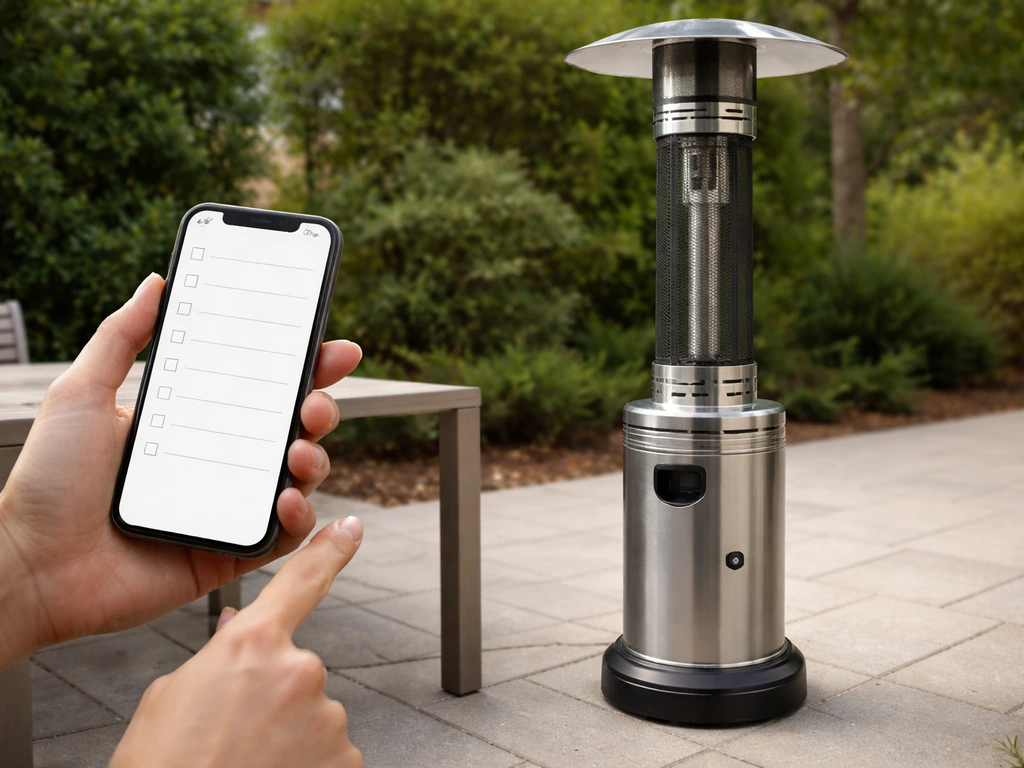
Print this out or run through it on your phone each time you set the heater up in a new spot. It takes about five minutes and it's the difference between a safe evening outside and a call to the fire department. Outdoor patio heater safety starts with placement, so this checklist helps you avoid unsafe clearance problems before you light the unit.
- Locate your manual and confirm the exact clearance-to-combustibles numbers for your specific model before placing the heater.
- Identify every combustible surface within 6 feet: wood deck boards, railings, siding, furniture, umbrellas, curtains, planters, and any overhead structure.
- Measure the actual distance from the burner head (or reflector, per your manual's reference point) to each combustible. If any measurement is under your manual's minimum, move the heater or remove the combustible.
- Measure overhead clearance from the top of the burner/reflector to any ceiling, roof, pergola beam, or awning. Compare against your manual's spec for combustible vs. non-combustible surfaces.
- Place the heater on a firm, level surface and confirm it doesn't rock. Set a spirit level on the base — if it's more than slightly off, adjust the surface or find a different location.
- For propane units: open the base panel and visually inspect the cylinder, regulator connection, and hose. Look for cracks, kinks, or contact with hot surfaces. Confirm the base vents are open and unobstructed.
- Confirm that windscreens, if used, are at least 24 inches away from the heater on all sides.
- Check the burner intake openings for spider webs, debris, or any leftover cover material from storage.
- Light the heater and observe the flame for 2 to 3 minutes. A steady blue flame with a small yellow tip is normal. A large yellow or flickering flame indicates airflow or fuel pressure issues.
- Walk a full circle around the heater and re-check that nothing has shifted into the clearance zone (chairs pulled closer, a curtain swinging in the breeze, etc.).
If you're dealing with a covered patio or pergola setup that makes the clearance numbers difficult to meet with a freestanding unit, it's worth looking into heaters specifically designed for overhead mounting, wall-mount or ceiling-mount infrared units that are tested and rated for exactly those installation geometries. The clearance conversation looks very different for a purpose-built overhead heater vs. a freestanding mushroom tower that's being squeezed under a 9-foot roof. Getting the right heater type for your setup from the start saves a lot of troubleshooting headaches down the road.
FAQ
Do I measure patio heater clearance from the burner head or the heater base/body?
Use your manual’s specified reference point. Some heaters define clearance from the burner surface, others from the reflector or the outer housing, and using the wrong reference can leave you short even when the “distance” looks correct from the ground. If the manual is unclear, measure from the hottest radiating parts you can identify (burner and reflector) and then add extra margin until you confirm the manufacturer’s definition.
What counts as “combustible” for patio heater clearance requirements?
Treat anything that can ignite or deform with heat as combustible, including painted or varnished wood, wood latticework, synthetic rattan or plastic planters, awning fabric, and umbrella/cushion materials. Even non-matching materials can be risky in corners because radiant heat reflects and accumulates. As a rule, if it’s not explicitly rated non-combustible by the manufacturer, assume it is combustible for placement.
Can I place a patio propane heater under a pergola or patio roof if there are gaps in the overhead structure?
Measure to the lowest overhead combustible component, such as the bottom of a beam or any shade panel, not to open sky. Gaps do not reduce the clearance you need if the beam or cover is still within the required overhead clearance. Also avoid adding fabric covers, string lights, or tarps above the heater, since moving fabric can drift into the radiant zone.
How do wind and direction affect clearance and safe operation?
Wind can pull the flame pattern and disturb the pilot, which can cause shutdowns that look like “bad clearance” or a failing thermocouple. To reduce this, set the heater so prevailing wind is not driving directly across the pilot area, keep vents and airflow unobstructed, and do not use improvised windshields that wrap the heater tightly. Clearances are still required even if you are only “shielding” from gusts.
My heater lights but shuts off after 30 to 60 seconds, what placement checks should I do first?
First verify the base is level (uneven decking or soft ground can trip the tilt switch), then check that the heater is not in a wind channel where the pilot flame is being blown off or cooled. Also inspect burner cleanliness and confirm the intake path is unobstructed so combustion air is adequate. Repositioning for airflow and leveling usually resolves many shutdowns without replacing parts.
Does the heater need extra clearance if it’s near a corner, even if it is not pointing at the wall?
Yes. Corners can increase heat exposure because radiant energy reflects between two facing surfaces. If the heater sits where two walls or railings form an angle, add extra margin beyond the minimum and treat both adjacent surfaces as in the radiant path, especially around the reflector and burner area.
What’s the safest way to keep patio curtains or umbrellas from violating clearance?
Apply the minimum clearance as a no-encroachment zone, meaning nothing should be able to swing, blow, or fall into that radius. Use a setup that prevents drift, such as securing curtains off the heater side and ensuring umbrellas can’t rotate toward the heater in a breeze. Also remember the entire unit, including the pole and umbrella pole, can get hot, so keep nearby objects outside the full hot-zone radius.
Do wall-mounted infrared patio heaters have the same clearance rules as propane mushroom heaters?
No. Purpose-built overhead or wall-mount infrared units have different geometry and often different required distances. Clearance requirements can vary based on whether the heater is designed for covered patios and how heat is directed, so you should follow the installation diagram for that specific model rather than applying the typical 36-inch/3-foot guideline from freestanding propane towers.
Can I use a windscreen or patio cover to protect the heater from the elements?
Be careful. Many heaters should not be wrapped with devices that restrict airflow or trap heat around the burner and controls. If you need weather protection, choose manufacturer-approved accessories and maintain all clearance-to-combustibles and clearance-to-heat-controls requirements. Improvised covers can increase CO risks by reducing combustion air.
What should I do if I don’t have the manual for my specific heater model?
Look for the rating label and any model-specific online documentation, then confirm the clearance-to-combustibles table and the reference point (burner surface, reflector, or housing). If you cannot verify the manufacturer’s numbers, use a conservative placement approach, increasing distances beyond the minimums and ensuring you never exceed the minimum overhead use height or mounting guidance mentioned for your heater type.
How can I check that my patio surface will not trigger the tilt switch?
Use a spirit level on the base area before lighting, and verify that none of the feet sit on uneven boards, wedges, or settling ground. Soft soil or uneven deck sections can let one leg sink slightly even if the heater “looks” stable, causing false cutoff. If you need a stable platform, create one that stays level and heat-safe.