For most freestanding propane or gas patio heaters, the minimum safety distance is 24 inches from combustible materials on the sides, 18 inches from the top, and at least 78 inches of clearance beneath the reflector head. Electric infrared models like the Infratech C-Series typically need 18 inches on all four sides and 36 inches directly in front of the element. But here is the thing: those numbers are baseline rules. How much clearance does a patio heater need?
Patio Heater Safety Distance Guide by Model and Clearances

Grant Mercer
4 Jun 2026
The answer depends on fuel type, mounting style, and your specific model. Your specific model may require more, and conditions like wind, uneven ground, and enclosed spaces can push that requirement up significantly. The only way to know for sure is to check your heater's manual or rating plate, then verify the setup in real conditions.
Find your heater's required clearance first
Your heater's manual is the authoritative source for clearance distances, not general rules you find online. Every heater has what the industry calls "clearance to combustibles" listed in the installation section, and manufacturers like Dyna-Glo, Infratech, Patio Pal, and ReverberRay all specify different numbers depending on output, burner design, and mounting style. Pull up your manual before you do anything else.
To find clearance specs, look for the installation or specifications section of the manual. It will typically list clearance in a table or bullet list broken out by direction: sides, top, front, and clearance beneath the head or reflector. The Dyna-Glo DGPH101BR-1, for example, specifies 24 inches from the sides, 18 inches from the top, and 78 inches beneath the reflectors. The Patio Pal PH-28/31/34 adds an important nuance: if you mount the heater beneath a non-combustible surface (like a metal ceiling), you still need a minimum 8 inches of top clearance to prevent overheating the heater's own controls. That is a repair-scope issue, not just a burn hazard.
One thing worth knowing: clearance numbers are not arbitrary. Infratech's manuals explain that the specified clearance distance corresponds to a surface temperature of 90°F (32°C) at that point. That means the clearance is defined as the distance at which nearby materials stay below ignition-risk temperatures. Go closer, and you are inside that safety margin.
What if your manual lists clearance differently than common rules?
Always follow the more conservative number. If the common rule says 24 inches but your manual says 30 inches, use 30. Manufacturer specs are based on actual testing of that unit's heat output and reflector design. Common rules are starting points, not replacements for model-specific data.
Safe minimum distances: people, furniture, walls, and doors
Beyond combustibles, you need to think about who and what is around the heater during use. Keeping patio heater safety in mind also means checking clearances around doors and other walk-through areas. Here is a practical breakdown of the distances that matter most in a real backyard or patio setup.
| What you're measuring from | Minimum safe distance | Notes |
|---|---|---|
| Combustible walls, siding, fencing | 24 in (61 cm) | Check your manual; some models require more |
| Overhead combustibles (awnings, wood pergolas) | 18 in minimum from top of heater | More if overhead material is combustible |
| Non-combustible overhead surface | 8 in minimum from heater top | Prevents control overheating per Patio Pal/ReverberRay specs |
| Beneath reflector head to floor/ground | 78 in (198 cm) | Based on Dyna-Glo DGPH101BR-1; verify your model |
| Doors and exit pathways | 5 ft (1.5 m) | Required by NFPA 58 for assembly occupancies |
| Seated or standing people (general) | 3 ft minimum, 6 ft preferred | Radiant heat intensity drops sharply with distance |
| Furniture, cushions, umbrellas | 24 in minimum | Fabric and foam ignite faster than wood |
| Landscape plants, dried mulch | 24–36 in | Dry plant material is a real ignition risk |
The exit-clearance rule from NFPA 58 is worth calling out separately. Patio heaters shall not be located within 5 feet of exits from an assembly occupancy. If you are using a heater near a sliding glass door, patio gate, or any door that people will walk through, that 5-foot rule applies. If you need a quick checklist, focus on patio heater clearance requirements for combustible materials, doors, and traffic areas to keep the installation code-compliant. This is especially relevant for restaurants, event spaces, and covered patios with a lot of foot traffic, but it is good practice for home setups too.
Clearance basics by heater type: gas, propane, and electric
The fuel type changes both the clearance requirements and the safety risks you need to manage. Here is how to think about each one.
Propane and natural gas patio heaters
Gas and propane heaters produce an open flame and combustion byproducts, so clearance issues here are about both ignition risk and ventilation. The ANSI/CSA Z83.26 standard covers gas-fired outdoor infrared patio heaters and sets the framework most manufacturers follow. Under NFPA and manufacturer guidance, gas-fired heaters should only be used in adequately ventilated areas, with ventilation provided per the manufacturer's installation instructions to minimize carbon monoxide buildup. If you are running a propane heater in a semi-enclosed space like a screened porch or under a solid roof, ventilation becomes a critical part of the safety distance equation, not just clearance from walls.
For propane models specifically, NFPA 1 and NFPA 58 set the framework for safe use of heaters with integral LP-gas containers. The Charlotte Fire Department's interpretation memo for portable outdoor propane heaters includes a 5-foot minimum clearance between the heater and any structure or exposed combustible material. That is more conservative than what some heater manuals say, but it reflects what fire authorities actually enforce.
Electric infrared patio heaters
Electric infrared heaters do not produce combustion gases, so ventilation is less of a concern, but radiant heat clearance is still very real. The Infratech C-Series manual requires 18 inches on all four sides and 36 inches directly in front of the element. For ceiling-mounted electric units, Infratech also specifies no installation less than 6 feet from the ceiling in certain labeled configurations. Electric heaters are often mounted overhead, which means the clearance below the unit (the heated zone) is where most of the risk lives. Do not assume electric means safe to put anywhere.
Mounted vs. freestanding: how installation type affects clearance
Freestanding heaters need clearance in all directions because they can tip. Wall-mounted and ceiling-mounted heaters have fixed clearance directions, but the mounting surface itself becomes part of the equation. ReverberRay's design guide specifies a minimum installation height of 6.5 feet above the finished floor for certain mounted configurations. Getting the mounting height right is directly tied to both clearance compliance and how the thermocouple and tilt-switch systems function. A heater mounted too low can also create scenarios where the tilt switch trips unexpectedly if bumped, which is a common cause of heaters that won't stay lit.
Wind, placement surfaces, and outdoor conditions that shift your safe distance
Clearance numbers in a manual assume a calm, controlled environment. Outdoors, that is rarely what you get. Wind is the biggest variable. A gust can push flame or radiant heat toward materials that would otherwise be safely outside the clearance zone. It can also push combustion gases (from propane or gas models) into enclosed areas faster than ventilation can clear them. If your setup is in a consistently windy spot, add extra distance on the downwind side of the heater and consider wind screens that do not restrict airflow to the burner.
Surface matters too. Patio heaters are designed to sit on flat, stable, non-combustible surfaces. Placing a freestanding heater on a wood deck, sloped surface, or uneven pavers increases tip risk, which is exactly what the tilt switch is designed to respond to. If the tilt switch engages and shuts off the gas, that is the safety system doing its job, but it is also a signal that your placement is unsafe. Repeated tilt-switch trips on an otherwise functioning heater are a placement problem, not a heater problem.
- Use a level to check the surface before placing the heater; even a slight slope creates tip risk
- On wood decks, place the heater on a non-combustible pad (like a cement board tile) to add fire separation
- In windy conditions, add 12–18 extra inches of clearance on the downwind side
- Avoid placing heaters where outdoor furniture, umbrellas, or planters can blow toward them
- In semi-enclosed spaces (screened rooms, gazebos), treat ventilation as part of safe distance planning
Heat hazards checklist: burns, radiant heat, and ignition risks
Patio heaters create three distinct hazard zones you need to account for, and they are not all in the same place. Always follow patio fire pit safety practices like checking clearances, accounting for wind, and keeping combustibles away before you light the unit three distinct hazard zones.
- Contact burn zone: The heater body, burner housing, and reflector are extremely hot during operation. Keep children and pets at least 3 feet from the heater body itself, not just the heat output zone.
- Radiant heat zone: The infrared or radiant heat output extends outward and downward from the reflector. This is where furniture, fabric cushions, umbrellas, and plants are most at risk. The clearance numbers in your manual define the outer edge of this zone.
- Ignition risk zone: Combustible materials within the clearance distance can reach ignition temperatures, especially if airflow is blocked or the heater is operating at full output for an extended period. Dry leaves, fabric, painted wood trim, and vinyl siding all have lower ignition thresholds than most people expect.
- CO accumulation zone (gas/propane only): In semi-enclosed or low-ventilation spaces, combustion gases accumulate in the space around and above the heater. This is not a clearance issue in the traditional sense but is directly affected by how close walls and ceilings are to the heater.
- Control overheating zone: If clearance above the heater is too tight, heat builds up around the gas valve, thermocouple, and ignition components. This causes ignition failures, thermocouple shutoffs, and premature component wear. This is one of the most overlooked clearance problems because it looks like a heater malfunction rather than a placement problem.
That last point is worth flagging for DIYers: if your heater has been failing to ignite, shutting off shortly after lighting, or showing signs of heat damage on the control housing, check overhead clearance before assuming the thermocouple has failed. Inadequate clearance above the heater is a known cause of control overheating, and fixing the placement often fixes the apparent ignition problem without any parts replacement. In the Patio Pal PH-28/PH-31/PH-34 manual, there is a safety note that when the heater is mounted beneath a non-combustible surface, you must maintain a minimum 8-inch top clearance from the top of the heater to prevent overheating the controls 8-inch minimum top clearance.
How to verify your setup is actually safe right now
Reading the numbers is one thing. Verifying them in your actual space is another. Here is a practical walk-through you can do today before you run your heater. When you’re planning an outdoor patio setup, make sure you follow outdoor patio heater safety guidance for clearances, ventilation, and proper placement.
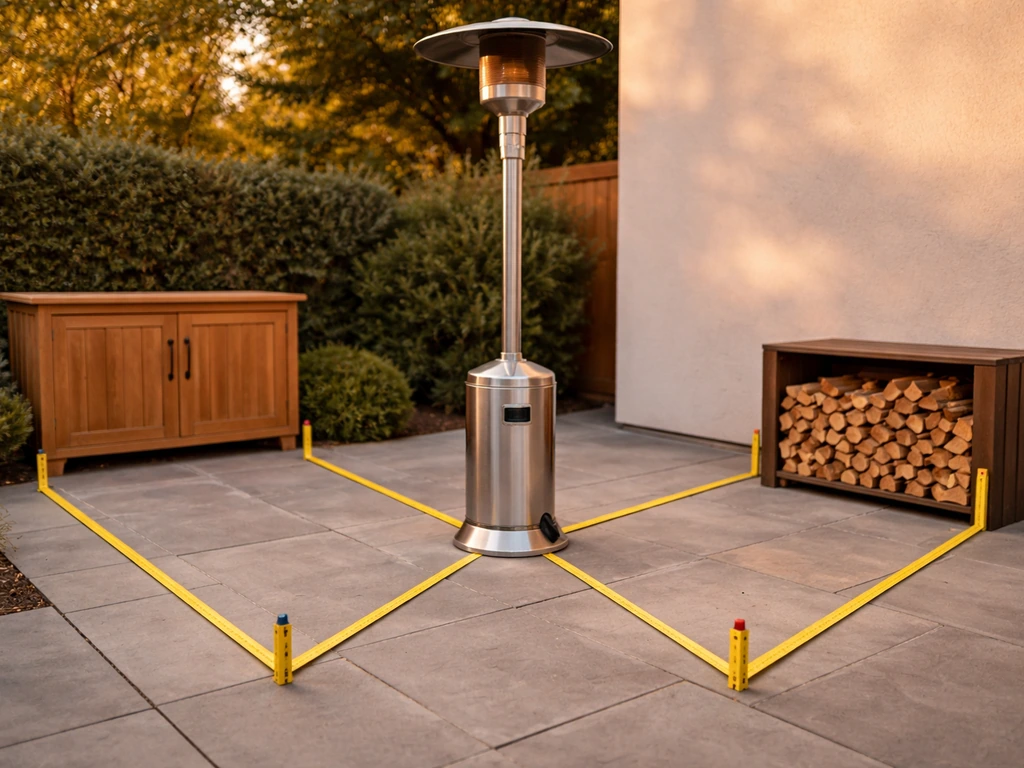
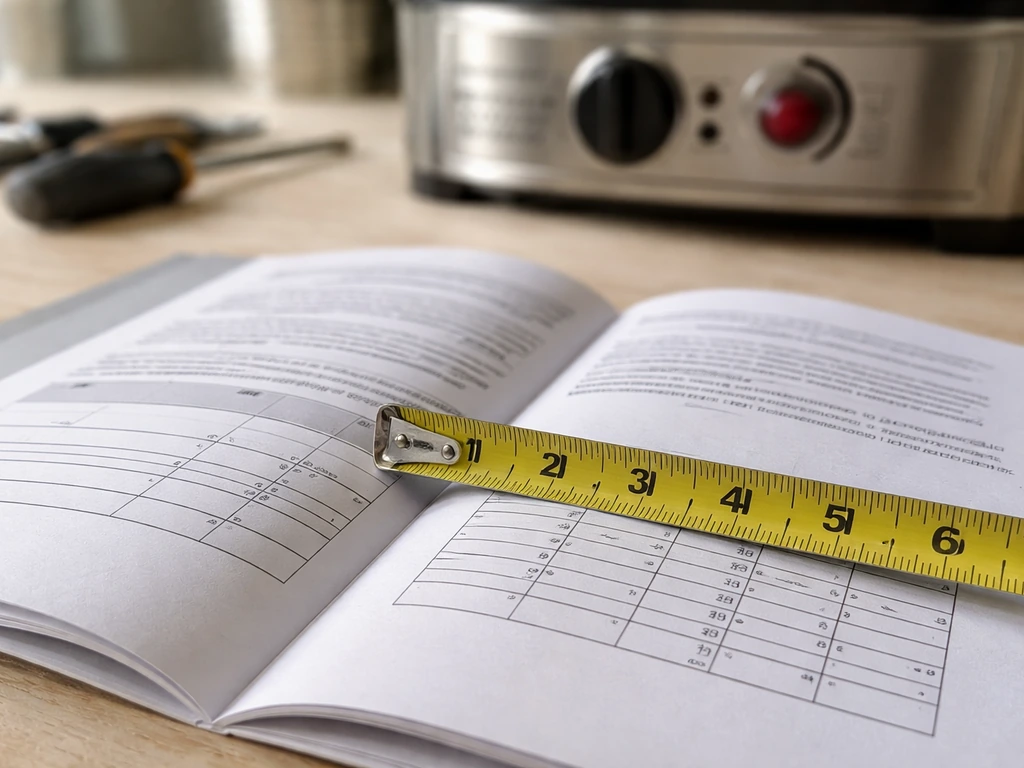
- Get a tape measure and your heater's manual. Pull the clearance table from the installation section and write down the numbers: side clearance, top clearance, front clearance (for mounted units), and floor clearance beneath the reflector.
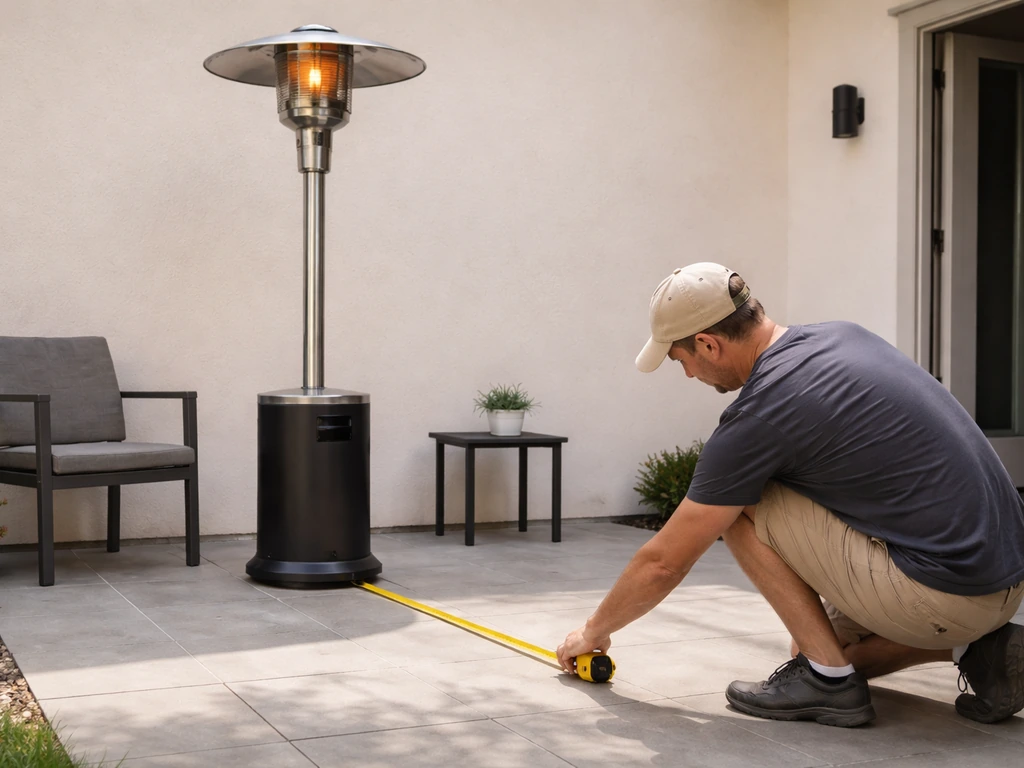
- Measure every direction from the heater body. Do not eyeball it. Measure from the actual heater surface, not from the base. Check for walls, fences, siding, railings, roof overhangs, pergola cross-members, umbrellas, and any furniture within the required distance.
- Look up, not just sideways. Overhead clearance is the most commonly missed measurement. If you are under an awning, pergola, or porch roof, measure from the top of the heater to the underside of that structure.
- Check the surface. Is it level? Is it non-combustible or do you need a pad? Tap the base to see if the heater rocks or shifts.
- Light the heater and stand at the specified clearance distance for 10–15 minutes. Check whether nearby surfaces feel warm to the touch. If they do, they are inside your effective heat zone and you need more distance.
- For propane and gas heaters in enclosed or semi-enclosed spaces: run the heater for 20 minutes and check for any smell of gas or unusual fatigue symptoms (headache, dizziness). If anything feels off, turn it off, ventilate the space, and reassess placement before using it again.
Common mistakes that put people in the danger zone
- Measuring from the base instead of from the heater body or reflector edge
- Forgetting about patio umbrellas, which are often moveable and end up inside the clearance zone
- Ignoring overhead clearance when placing a freestanding heater under a covered patio
- Placing the heater on a wood deck without a non-combustible pad underneath
- Not accounting for furniture being pushed closer to the heater when people gather around it
- Running a gas heater under a solid roof without checking that the space is adequately ventilated
- Assuming an electric heater has no meaningful clearance requirements because it has no flame
What to do if your manual is missing or you can't find clearance specs
If you do not have the manual, the first step is to find your heater's model number. It is on the rating plate, which is a permanently affixed metal or label tag on the unit. For most freestanding patio heaters, check the base, the pole, or the back of the control housing. For mounted heaters, the plate is often on the back panel or behind a mesh barrier or louver cover. Heat and Glo and Regency, for example, locate their rating plates behind a vignette surround or similar panel.
Once you have the model number, here is how to track down the clearance specs:
- Search for the model number plus the word 'manual' on the manufacturer's website. Most major brands post PDF manuals in a support or downloads section.
- Try manualzz.com or manualslib.com with the model number. Both sites index a large number of patio heater manuals, including older and discontinued models.
- If the manufacturer is no longer in business, search for the ANSI/CSA certification number on the rating plate. Heaters certified to ANSI/CSA Z83.26 were tested to a standard that specifies clearance testing, and the certification body may have archived documentation.
- If you cannot find model-specific data at all, use the most conservative commonly published baseline: 36 inches on all sides from combustibles, 36 inches from people, and 78 inches beneath the reflector for freestanding units. These are more conservative than many manuals require, but they give you a defensible safety margin while you keep searching.
- Contact the manufacturer's support line directly with the rating plate information. Even if the model is old, manufacturers often have clearance data on file and can confirm requirements over the phone or by email.
Do not guess at clearance distances and run the heater. The risk is not just fire damage, it is control overheating, thermocouple failure, and accelerated wear on components that are already expensive to replace. Getting the clearance right protects both your safety and the heater's operating life. If you are regularly troubleshooting ignition or stay-lit problems and your heater is in a tight space, clearance is the first variable to rule out before spending money on parts.
FAQ
If my patio heater is under a roof overhang, can I use the side and top clearance numbers from the manual without adjusting for the overhang depth?
You should still follow the manual’s clearance-to-combustibles for each direction, but also consider how far the burner and reflector sit from the overhang. A shallow overhang can effectively reduce the real clearance in front or downwind, while a deep overhang can create a semi-enclosed pocket that increases heat and, for gas or propane units, exhaust buildup. If the manual lists separate clearances for “front,” “sides,” and “top,” prioritize those over general room geometry, and increase distance if the heater is noticeably closer to the roof opening than to the surrounding walls.
Does wind change the required patio heater safety distance, and if so, how should I apply extra clearance?
Yes. Wind can push flame or radiant heat toward nearby surfaces and can move combustion byproducts into areas where they can accumulate. A practical approach is to treat the downwind side as higher risk than the upwind side and increase clearance on that side beyond the baseline spec. If you use a wind screen, choose one designed for heater use and confirm it does not redirect airflow across the burner in a way that changes temperatures near controls.
What’s the best way to verify clearance when my patio has furniture, planters, or a railing that wasn’t in mind when the manual was tested?
Use the manual clearances as the minimum for combustible materials, then measure to the nearest item from the heater’s “source area,” usually the burner or reflector head location, not just the outer casing. Also treat railings, planter boxes, and fabric cushions as combustibles, even if they feel non-flame resistant. If items can move, like collapsible chairs or hanging decor, ensure they stay within the safe distance during use and when people pass close by.
Should I count “clearance in front” to the reflector head, or to the control housing, when measuring patio heater safety distance?
Measure to the manufacturer-specified area, which is usually the reflector head or radiant element position. The manual tables typically differentiate “front” and “beneath the head,” and those correspond to where heat is most intense. If the heater has a curved reflector or adjustable head, measure from the stated reflector orientation you will operate with, since a different angle can change where radiant heat lands.
If my heater trips the tilt switch or shuts off when bumped, does that automatically mean the clearance is wrong?
Not necessarily, but it often points to placement or stability issues. Clearance problems can contribute, yet the tilt switch behavior usually means the heater is too close to obstacles that can be contacted, set on an unstable or sloped surface, or positioned where wind can move it. Re-check the base on flat, stable, non-combustible material, confirm it is level, and verify there is enough space around the perimeter to prevent accidental bumps.
Can I place a propane patio heater closer than the manual says if I’m using a non-combustible surface like metal or tile nearby?
Don’t reduce the distance based only on the surface being “non-combustible.” Clearance specs are tied to heat and surface temperature at a given distance, not just fire resistance. A metal surface can still overheat, deform, or transfer heat to adjacent materials, and controls may still be affected if the heater is too close to a roof or ceiling. If the manual mentions special allowances for certain non-combustible coverings, follow those exactly, otherwise keep the conservative minimum.
How do I apply the exit-clearance rule for patio heater safety if my patio door is very close to the heater but the heater is otherwise far from combustibles?
The exit clearance requirement is separate from clearance-to-combustibles. If the heater is near an exit path, a minimum distance from exits applies regardless of combustible clearance. Practice a “traffic test,” stand in the exit route and see whether the heater blocks a clear line of travel or causes people to step around the heater when opening doors or sliding panels. If in doubt, increase the setback so the heater does not intrude into the functional egress zone.
What should I do if I can’t find the manual, and there’s no clearance chart on the unit itself?
First confirm you have the exact model number from the rating plate, not just the product line name, since different burner outputs can have different clearance-to-combustibles. Then look for any labeling on the unit that lists installation clearances or minimum distances. If the unit still lacks documented clearances, contact the manufacturer for the specific manual for your model, and do not operate the heater until you have a clearance specification you can measure against.
Is 24 inches, 18 inches, and 36 inches ever safe to treat as “universal” patio heater safety distances?
No, those values are common baseline rules, but they are not universal across brands, burner designs, and mounting styles. Treat them as starting points only. If your heater’s manual specifies larger numbers for any direction, follow the larger ones. If your heater is mounted differently (wall or ceiling) or has a different reflector configuration, assume the baseline may not apply at all.
Do I need clearance beneath the reflector head for all patio heaters, including electric infrared models?
Many gas or propane models specify a large clearance beneath the head, but electric infrared units often focus on side and front clearances, and some configurations emphasize spacing from the heating element to people or surfaces. Do not assume “underneath” clearance is the same for electric versus gas. Check your unit’s manual table for the specific “beneath,” “front,” and directional requirements that match your mounting type (freestanding versus overhead).