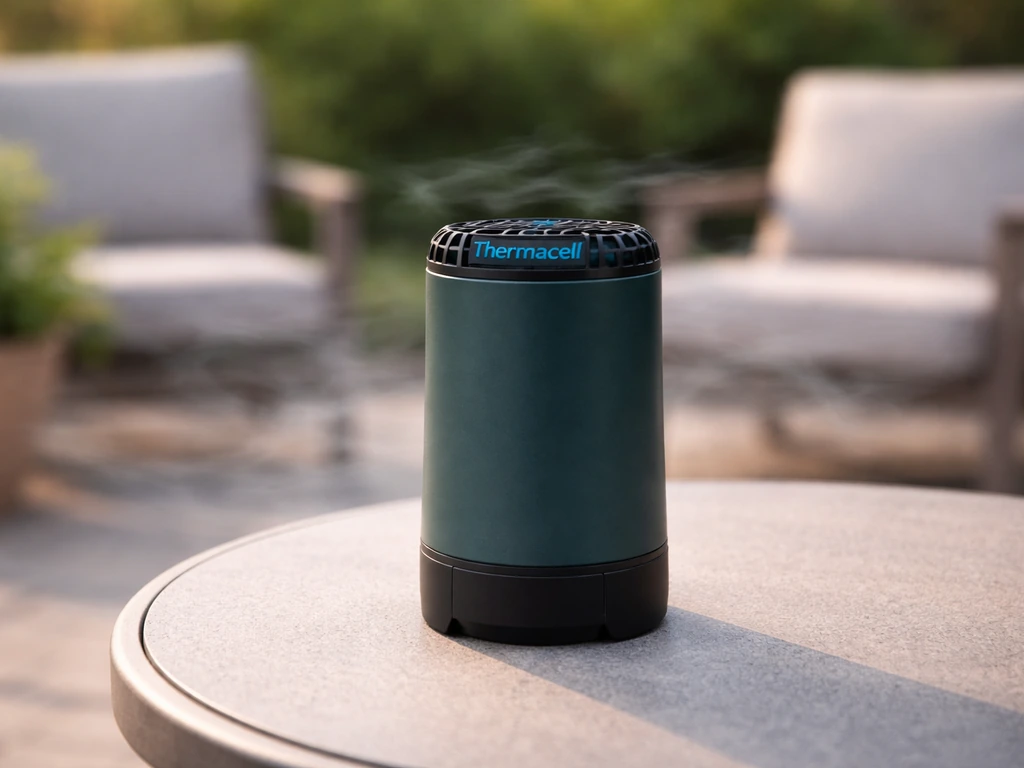
The Thermacell Patio Shield works by heating a butane-fueled element that warms a repellent mat, releasing allethrin into the air to create a mosquito-free zone up to 15 x 15 feet (225 square feet). To get it running: insert a repellent mat, screw in a butane cartridge until it stops, turn the collar or switch to ON, wait 5 to 10 seconds for gas to flow, then press or rotate to START and listen for a click. To keep your patio heater working safely, follow the gardenline patio heater instructions for setup, fuel use, and placement. You should see an orange glow through the small view window within a few seconds. If that glow never appears, the fix is almost always a loose cartridge, an empty cartridge, or a missed step in the start sequence.
Thermacell Patio Shield Instructions: Setup and Troubleshooting

Patio shield vs. lantern vs. torch: which one do you have?
If you searched for "patio shield," "patio lantern," "lantern XL," or "Thermacell torch," you are almost certainly looking at the same product family. All of these units run on the same Thermacell butane fuel cartridge and allethrin-soaked repellent mat system. The differences are mostly cosmetic: the Patio Shield looks like a compact outdoor lantern, the Lantern XL is a larger version of the same design, and the Torch is styled to look like a tiki-style outdoor torch you'd stake into the ground. The startup sequence, troubleshooting steps, and mat/cartridge system are functionally identical across all three. If you want the exact patio egg diffuser instructions for your setup, the start-up sequence and troubleshooting flow are the same, just follow the diffuser-specific steps startup sequence. Thermacell's own product guide hub groups them together and links to individual guides for each one. So whether your device looks like a lantern, a torch, or a shield-shaped repeller, the instructions below apply to you.
Unbox, assemble, and get it ready to run
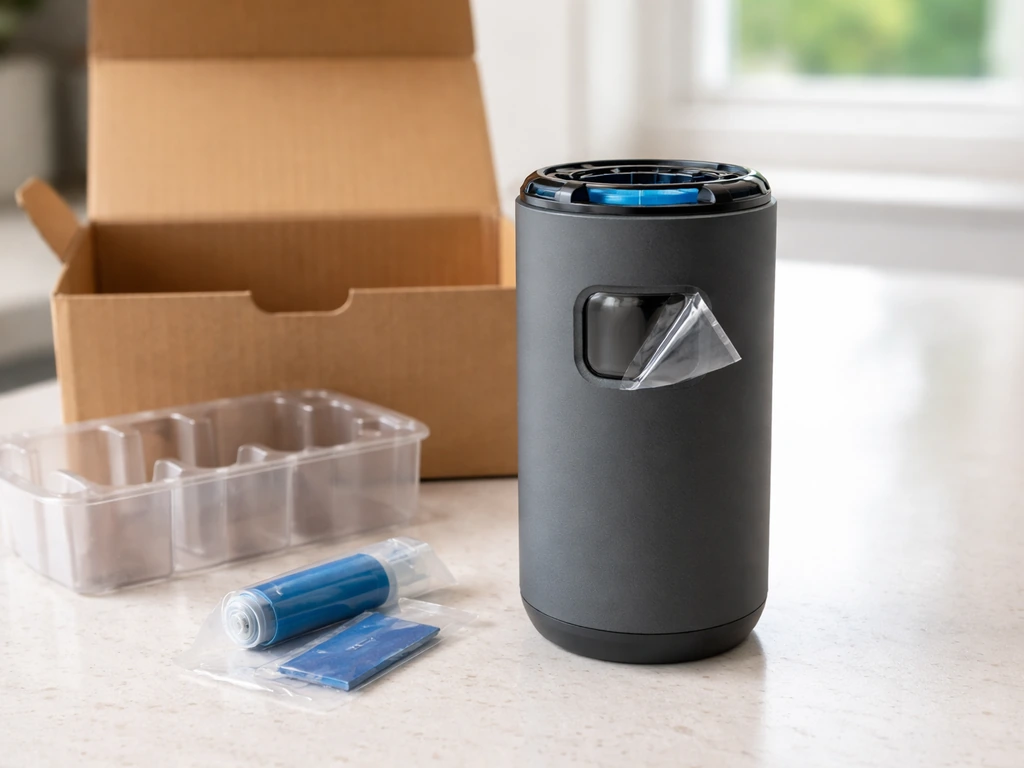
There's very little assembly required straight out of the box, but a few small steps trip people up. Here's how to go from unboxed to ready in under five minutes.
- Remove any packaging inserts or protective films from the device body and the view window.
- Open or remove the appliance cover (on lantern-style units, this is the decorative outer shell or grill section) to access the mat holder.
- Slide one Thermacell repellent mat into the mat holder underneath the grill or heating element. The mat is a small blue pad. It sits flat on the metal heating surface.
- Remove the cap from a fresh Thermacell butane fuel cartridge.
- Locate the fuel port at the bottom of the device. Screw the cartridge in clockwise by hand until it stops. Do not overtighten and do not use tools. Hand-tight is correct.
- Replace the appliance cover or grill section.
- Set the device on a stable, flat, non-flammable surface before you turn it on.
A quick note on cartridges: only use genuine Thermacell butane cartridges (the green ones, typically labeled "Fuel Cartridge" or "Fuel Cartridge 12-Hour"). Generic butane canisters with a different thread size will not seat correctly and the device will not light. This is one of the most common reasons a brand-new unit appears "broken" right out of the box.
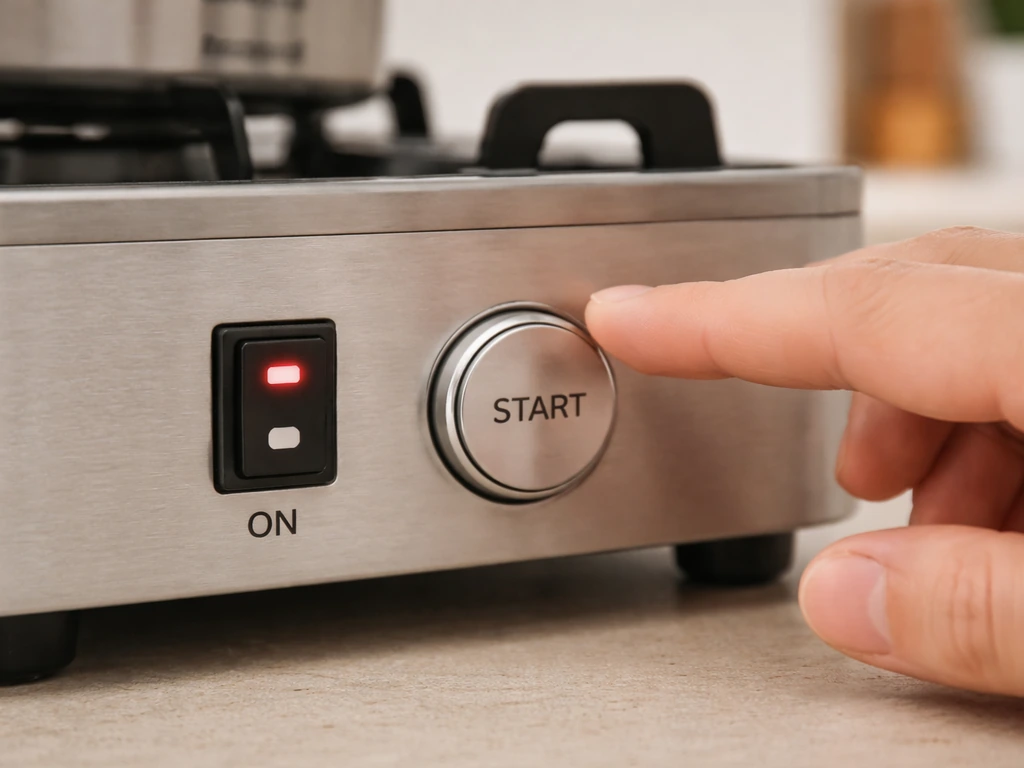
How to start it, where to put it, and how long it runs
The start-up sequence
- Rotate the collar or flip the switch to the ON position. On lantern-style units, this is a rotating collar near the top or middle of the body. On the Torch, it's a similar rotary control.
- Wait 5 to 10 seconds. You're letting gas flow from the cartridge into the heating element. Don't skip this wait.
- Rotate to START or press the ignition button. You should hear a distinct clicking noise. That's the piezoelectric igniter firing.
- Check the view window (a small oval or rectangular opening on the device body). You should see an orange glow. That glow means the element is lit and the mat is beginning to heat.
- Once lit, the collar will stay in the ON position on its own. Leave it there. The device is now running.
Don't expect instant results. Thermacell states it takes 10 to 15 minutes to reach maximum effectiveness, and their own manual notes that depending on the size of the area, you may want to allow up to 30 minutes before judging whether it's working. Turn it on before your guests arrive, not when the mosquitoes already are.
Where to place it

Placement matters more than most people realize. The Patio Shield works by letting the repellent vapor drift gently outward and settle around your seating area. That only works in calm air. Place the device upwind of where people are sitting so the vapor drifts toward them, not away. In practice, that means a few feet away from the seating area on the windward side, at ground level or on a low table. If it's breezy, move to a more sheltered spot. Thermacell’s Patio Shield manual also advises using it in outdoor areas with minimal air movement (like yards or outdoor campsites) and not in indoors or enclosed spaces, especially avoiding windy conditions. The device's stated protection zone is 225 square feet (roughly 15 x 15 feet), so for a large patio you may need two units. Never use it indoors or in any enclosed space, and don't leave it unattended. Rain exposure is also a problem: wet conditions can foul the igniter and mat holder.
Runtime expectations
| Component | Typical runtime | Replacement signal |
|---|---|---|
| Butane fuel cartridge (12-hour) | Up to 12 hours of use | Device won't stay lit or won't ignite at all |
| Repellent mat | Up to 4 hours per mat | Mat turns from blue to white or near-white |
| Repellent mat (Patio Shield Lantern XL) | Up to 4 hours per mat | Same: blue to white color change |
One cartridge will outlast several mats. A good habit is to swap the mat every session and track how many hours are on the cartridge. When you're unsure whether the cartridge is empty, tip the device gently: you can often hear or feel the liquid butane inside a partially full cartridge. An empty cartridge is noticeably lighter.
Setup mistakes that waste your evening
- Not waiting for gas to flow before hitting START: if you press START immediately after turning to ON, the igniter fires into a dry element with no gas and nothing happens. Wait the full 5 to 10 seconds.
- Using a non-Thermacell butane cartridge: third-party canisters don't fit the proprietary threading. The cartridge looks almost seated but gas won't flow.
- Forgetting the mat: the device will light and appear to work, but there's no repellent being released. Check that the mat is seated before startup.
- Running it in wind: even moderate breezes destroy the effectiveness zone. A Patio Shield working in a 10 mph breeze is basically decorative.
- Using it indoors or in a covered porch that's mostly enclosed: this is a carbon monoxide and ventilation hazard, not just an effectiveness issue. Outdoors only.
- Putting a used-up (white) mat back in: a fully white mat has zero repellent left. Always start with a fresh blue mat if you haven't been out in a while.
- Overtightening the cartridge: hand-tight only. Forcing it can damage the valve and cause a gas leak.
When it's not working: quick diagnostics
Before assuming the device is broken, run through this short checklist. Most Thermacell Patio Shield problems fall into one of four categories: no ignition, no glow after ignition, device lights then goes out, or repellent seems ineffective. Here's how to figure out which one you're dealing with.
| Symptom | Most likely cause | Quick check |
|---|---|---|
| Clicking but no orange glow | Gas not reaching igniter yet, or cartridge not fully seated | Re-seat cartridge, wait 10 seconds, retry START 2-3 times in rapid succession |
| No clicking sound at all | Igniter not engaging | Confirm the collar/switch reached the START position; listen for the mechanical click |
| Lights briefly then goes out | Near-empty or empty cartridge | Replace cartridge and restart from scratch |
| Orange glow present but still getting bitten | Mat is used up or placement is wrong | Check mat color (should be blue, not white); reposition upwind |
| Strong gas smell with no ignition | Gas flowing but igniter failing | Turn OFF immediately, let gas dissipate outdoors, retry or inspect igniter port |
Fixes and replacements
Cartridge and fuel issues
If you suspect the cartridge is empty or close to empty, replace it. Turn the device OFF first, let it cool for a couple of minutes, then unscrew the old cartridge counterclockwise. Even if the old cartridge isn't quite empty, replacing it is always the fastest fix when the device isn't lighting. Screw the new one in clockwise until it stops by hand. Then restart using the full sequence: ON, wait 5 to 10 seconds, then START.
There's also a purge trick worth knowing: if you are NOT replacing the cartridge but the device still won't light after a normal attempt, turn the collar to ON and let gas flow for a full 2 minutes before trying START again. This purges any air from the fuel line and often fixes stubborn startup failures on cartridges that have been sitting for a while.
Mat replacement
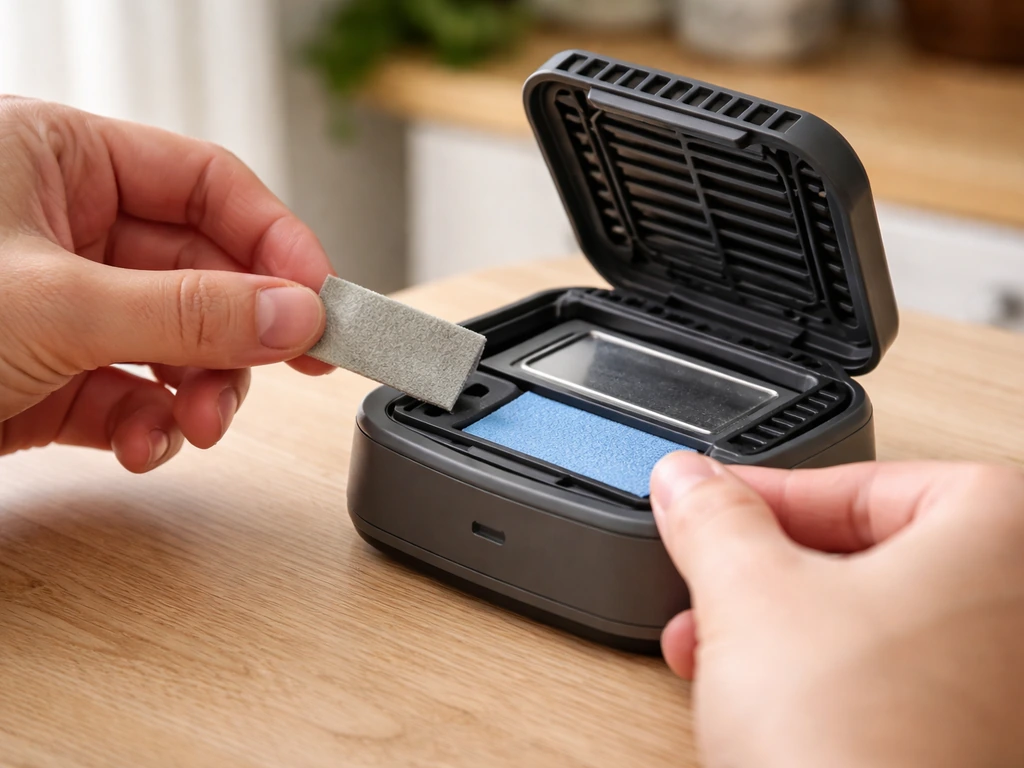
Replacing a mat is straightforward. Turn the device off and let it cool. Open the grill or cover, slide the old mat out, and drop a fresh blue mat in its place on the heating surface. That's it. If the device is mid-session and the mat has gone white, it's fine to swap mats while the cartridge is still in place. You don't need to replace both at once. Keep unused mats in their original packaging in a cool, dry location away from kids and pets.
Igniter and activation problems
If you're getting gas flow (you can hear or faintly smell butane when the collar is ON) but no clicking when you try to START, the piezoelectric igniter may be fouled or wet. Turn OFF immediately and let any residual gas dissipate in open air. After a few minutes, visually inspect the igniter tip in the view hole area if accessible. A damp cloth can be used to carefully clean moisture off the igniter area after the device is fully cooled and the cartridge is removed. If the igniter clicks but simply won't light across multiple fresh cartridges and retry attempts, that's a legitimate hardware failure and the device should be replaced rather than disassembled.
Cleaning the device
Routine cleaning is simple but has to be done cold. After the device has cooled completely and the cartridge has been removed, wipe down the exterior and the mat holder area with a damp cloth. Don't use solvents, cleaners, or compressed air near the fuel port or igniter area. That's genuinely all the maintenance it needs between uses. If the view window gets sooty or discolored on the inside, that's normal accumulation from the heating element and doesn't affect function.
Safety, storage, and finding the right manual
A few safety points worth keeping top of mind. This is a butane-fueled device and butane is flammable: never use it near an open flame, never leave it running unattended, and always store butane cartridges away from heat sources. When disposing of empty cartridges, do not puncture or incinerate them. Don't pour old repellent mats down any drain, indoor or outdoor. Store the device and cartridges in the original box in a cool, dry place between uses.
For storage between seasons, remove the butane cartridge from the device. Storing the cartridge attached creates a slow leak risk over time. Keep mats in their sealed original packaging. If you're storing for more than a few months, do a quick test run at the start of the next season before you actually need it: you'd rather discover a dead igniter on a Tuesday afternoon than when you're hosting a backyard party Friday night.
Finding the manual for your specific model
Thermacell's official product guide hub is the best place to find model-specific documentation. From that hub you can access the Patio Shield Product Guide, the Patio Shield Repeller Lantern guide, the Patio Shield Lantern XL guide, and the Torch guide, plus separate fuel cartridge install and refill guides. If you know whether you have a standard Patio Shield, a Lantern XL, or a Torch-style unit, navigate to the matching guide for any model-specific control layout differences. If you're not sure, the Patio Shield Series Product Guide PDF covers the full family and includes the same troubleshooting steps outlined in this article. The core startup and troubleshooting logic is consistent across all fuel-powered Thermacell devices, which makes it easy to cross-reference if your specific model page isn't loading.
If you've followed every step here and the device still won't run reliably, it's worth noting that Thermacell devices are relatively low-cost and the repair parts (igniter, housing) aren't sold separately for DIY replacement. A unit that won't light after a confirmed-fresh cartridge, a properly seated mat, and multiple retry attempts almost always has a failed igniter, and at that point replacement makes more practical sense than further disassembly.
FAQ
How long should I wait for the orange glow and when should I start troubleshooting?
Give it at least a few minutes after you complete ON, wait 5 to 10 seconds, then START. If you get no glow at all after a few minutes, stop treating it like a timing issue and focus on cartridge seating, cartridge emptiness, and whether you actually reached START (you should hear the click).
What should I do if I smell butane, the collar is on, but nothing happens when I press START?
Stop immediately, turn the device OFF, and let any residual gas clear in open air before trying again. Then check whether the igniter area is wet or fouled, and avoid repeated START attempts while it is still actively releasing gas.
Can I use the Patio Shield in light rain or after it just rained?
It is not intended for wet conditions. Rain can foul the igniter and mat holder, leading to no ignition or unreliable clicking, so move it to a sheltered dry spot and avoid operating it during steady rain.
Do I need to replace the repellent mat every time I change the cartridge?
You do not have to replace both at once. A practical approach is to swap the mat each session for consistent performance, while tracking cartridge hours and replacing the cartridge when it gets low or when lighting becomes unreliable.
Why does the repellent sometimes seem weak even though the device lights normally?
Most cases come from airflow and setup. Place the unit upwind of seating so vapor drifts toward people, and if it is breezy consider a more sheltered location. Also remember it takes up to 10 to 15 minutes to reach maximum effectiveness, sometimes longer for larger areas.
Will using the Patio Shield outdoors work if there is a strong breeze?
Not reliably. Strong wind can push the repellent vapor away from your seating zone. If you cannot reduce wind exposure by relocating, you may need additional units or a more sheltered placement area.
Can I run multiple Patio Shield units to cover a bigger yard, and how should I space them?
Yes, for areas larger than the stated 225 square feet you may need more than one unit. Keep each unit low and positioned upwind relative to the seating it is meant to protect, rather than placing them all on the same side regardless of where the wind is coming from.
Is it safe to use near people who are sensitive to scents or insect repellents?
If you or your guests are sensitive, treat the device like a localized repellent system. Use it only outdoors, start it before guests arrive so exposure is lower during initial startup, and consider stepping away if you notice irritation.
What is the purge trick, and when should I use it?
If gas flow is happening but the device does not start properly after a normal attempt, set the collar to ON and let it run for a full 2 minutes before trying START again. Use this instead of repeatedly pressing START, especially when the unit or cartridge has been stored for a while.
How do I tell whether a cartridge is close to empty without weighing it?
Gently tip the device and use your senses. You can often hear or feel the liquid butane in a partially full cartridge. An empty cartridge is noticeably lighter, and replacing a suspected-low cartridge is the fastest diagnostic when ignition fails.
Can I clean the igniter or mat holder with any household cleaner?
No solvents or harsh cleaners. Between uses, wipe the exterior and mat holder area with a damp cloth only after the device has cooled and the cartridge is removed, and avoid cleaning near the fuel port or igniter area with products that leave residues.
Should I store the Patio Shield with the cartridge still attached?
No. For storage between seasons, remove the butane cartridge to reduce slow leak risk over time, and keep the mats in their sealed original packaging in a cool, dry place away from kids and pets.
If my Patio Shield still will not run reliably after trying a fresh cartridge, what is the best next step?
If a confirmed-fresh, properly seated cartridge and a properly seated mat still do not produce consistent ignition or starting, it often points to a failed igniter or similar hardware issue. At that point, replacement is usually more practical than further disassembly since repair parts are not typically sold for DIY fixes.