
If you own a Belleze patio heater and need the manual, go directly to belleze.com, click 'Assembly Instructions,' and search by your model's SKU. The two most commonly searched PDFs are for the 014-HG-PH00 (48,000 BTU freestanding propane) and the 014-HG-PH42 (42,000 BTU square glass/quartz-tube model). Both are free to download, cover assembly, leak testing, operation, troubleshooting, and parts lists, and are the foundation for every repair and maintenance task covered in this guide.
belleze patio heater manual: Find, ID, Fix & Maintain Guide

Grant Mercer
4 Aug 2026
Who this guide is for
This article is written for homeowners who want to assemble, operate, troubleshoot, and maintain a Belleze patio heater themselves without paying for a service call. You need basic hand-tool experience, a willingness to read carefully, and respect for propane safety. You do not need HVAC certification or any specialized gas training to complete most tasks here. That said, I'll be upfront about the handful of jobs that genuinely require a licensed technician, because pushing through those yourself creates real risk.
Identify your Belleze model before you do anything else
Belleze sells several distinct patio heater types, and the manuals are not interchangeable. Downloading the wrong PDF means wrong hardware lists, wrong torque steps, and wrong troubleshooting charts. Spend two minutes confirming your model before you proceed.
The three main heater types
| Type | Typical BTU | Fuel/Heat Source | Key Visual Clue | Example SKU |
|---|---|---|---|---|
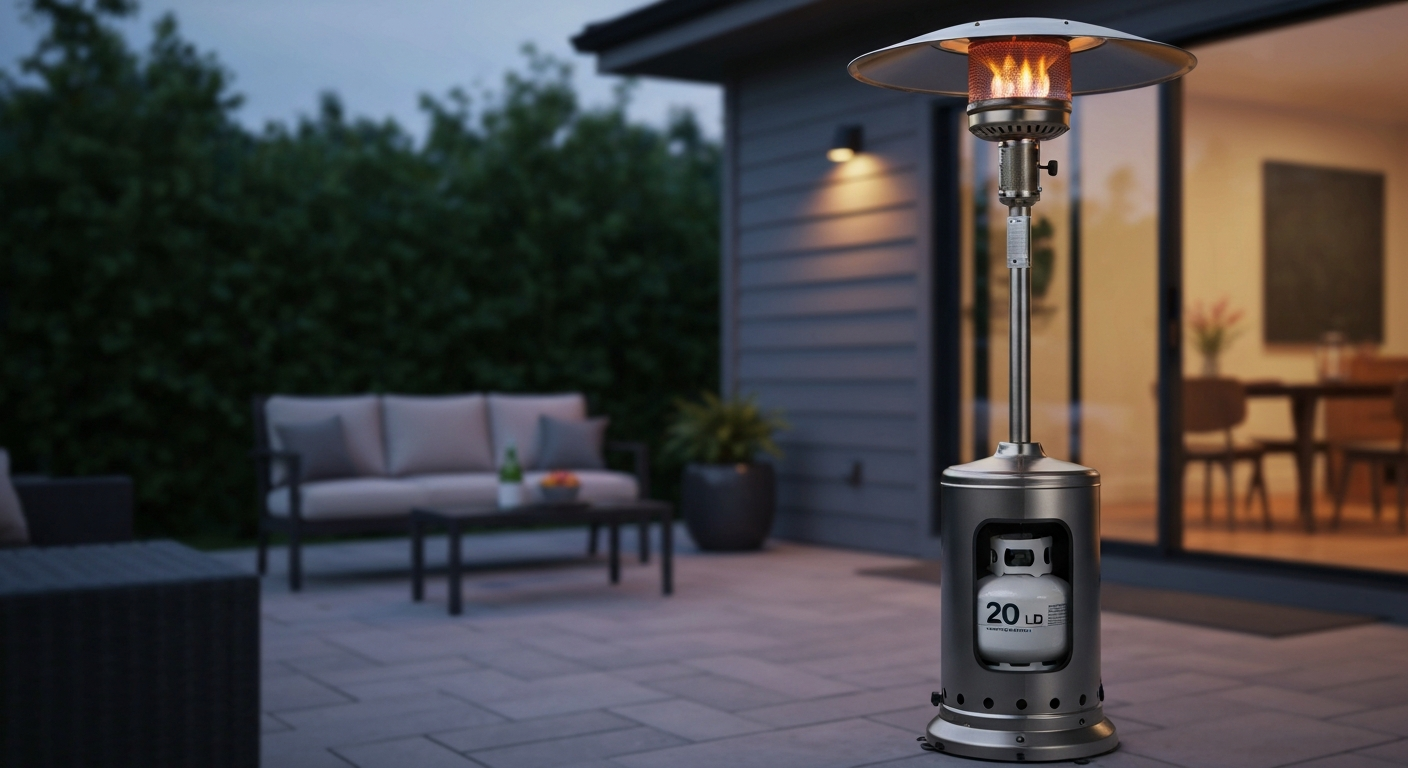
| Freestanding propane | 48,000 BTU | Propane / catalytic burner + reflector dome | Tall mushroom-dome shape, 20 lb tank inside base | 014-HG-PH00 |
| Quartz-tube / infrared | 42,000 BTU | Propane / quartz glass tube radiator | Square or rectangular housing, visible glass tube | 014-HG-PH42 |
| Tabletop propane | 10,000–11,000 BTU | Propane / small burner + mini dome | Compact, sits on a table, small 1 lb or 20 lb adapter hose | Various Belleze tabletop SKUs |
Where to find the SKU and serial number
Belleze directs users to check four places: the product page URL or listing title on the retailer site where you bought it, the original packaging label, the shipping label on the box, and your order confirmation email. On the heater itself, look for a metal data plate or sticker on the lower base section or back panel. The SKU is the number you type into the search bar at belleze.com/pages/assembly-instructions. Write it down now, because you will need it again when ordering replacement parts.
How to find and download the right Belleze manual PDF
Belleze's official support page (belleze.com) has an Assembly Instructions hub where you can search by product name or SKU. The PDFs there are the authoritative source, meaning they match the exact hardware revision shipped with your unit. For an alternate manual format and additional troubleshooting tips, see the Sunbeam Patio Master manual (internal ref: 9ec9563d-f86a-4da1-b41e-ab7c18ac8b42). Third-party hosting sites sometimes have older versions, so always cross-check by confirming the SKU on the PDF cover page matches yours.
- Go to belleze.com and navigate to the Assembly Instructions page.
- Type your SKU (e.g., 014-HG-PH00 or 014-HG-PH42) into the search field.
- Download the PDF and save it locally — heater repairs often happen when you have no internet.
- If your SKU returns no results, email [email protected] or call (800) 682-6376 during listed business hours. Have your SKU and order number ready.
- Retailer listings on Amazon and Walmart occasionally host the manual PDF under the product's 'Documents' tab — useful as a backup but verify the SKU match.
- If you cannot locate a PDF anywhere, Belleze support can email it directly or point you to a replacement parts request form.
Tools, materials, and safety precautions before you start
Propane is heavier than air, pools in low spots, and ignites with very little provocation. Treat every gas connection with the same respect you would give a live electrical circuit. The precautions below apply whether you are assembling a new heater or opening one up for a repair.
Required tools and materials
- Phillips-head screwdriver (medium and small sizes — Belleze assembly steps call both out explicitly)
- Adjustable wrench or pliers (for hose fittings, not required on push-fit connections)
- Digital multimeter (DMM) set to millivolts DC — essential for thermocouple testing
- Leak detection solution: 1 part dish detergent mixed with 3 parts water in a small spray bottle or bowl (per Belleze manual instructions — do not use petroleum-based products)
- Clean lint-free cloth
- Replacement parts as needed (see Parts section below)
Safety precautions, read before touching anything
- Work outdoors only. Belleze manuals carry an explicit OUTDOOR USE ONLY warning and carbon monoxide hazard statement. Propane combustion indoors is lethal.
- Close the propane cylinder valve fully before disconnecting or reconnecting any gas line. Confirm it is closed by turning it clockwise until it stops.
- Never work near open flames, cigarettes, or electrical sparks when the cylinder valve is open.
- Wear safety glasses when working around quartz glass tubes, which can shatter if handled roughly.
- Wear work gloves when handling the burner and reflector — edges are often sharp.
- After any gas-line work, perform the soap-bubble leak test described below before lighting the heater.
- If you smell gas and cannot identify the source immediately, close the cylinder valve, move away from the heater, and call Belleze support or a licensed propane technician.
- Disconnect the LP cylinder before storing the heater indoors. Store the cylinder outdoors, never in a garage or basement.
Soap-bubble leak test procedure
The Belleze manual specifies this exact procedure: mix one part dish detergent with three parts water. Apply the solution with a brush or cloth to the hose-to-regulator connection and the regulator-to-cylinder connection. Open the cylinder valve slowly and watch both connection points for at least 30 seconds. Any bubbles mean gas is escaping. Turn the cylinder off immediately, tighten the connection, and retest. If bubbles persist after tightening, the fitting or hose is defective and must be replaced before use. Do not attempt to light the heater with a known leak present.
Parts diagrams and parts lists by heater type
Each Belleze manual includes a numbered or lettered parts diagram. The descriptions below reflect what the published Belleze PDFs actually list, so you can cross-reference them against your own diagram when ordering replacements.
Freestanding propane (014-HG-PH00 and similar)
| Component | Function | Serviceable by DIY? |
|---|---|---|
| Reflector / dome | Directs heat downward | Yes — unscrew and swap |
| Burner head / emitter screen | Combustion surface | Yes — clean or replace |
| Control knob / gas valve assembly | Regulates gas flow and pilot | Yes with care — see valve section |
| Thermocouple / pilot assembly | Keeps pilot lit via mV signal | Yes — measure and replace |
| Gas hose and regulator | Delivers propane at ~11 in. W.C. | Yes — must use Belleze-supplied unit |
| Base / pole assembly | Structural support and tank housing | Yes — hardware replacement only |
| Wheel assembly | Mobility | Yes — bolt-on replacement |
| Bottom plate | Encloses base | Yes — screws only |
Quartz-tube / infrared (014-HG-PH42 and similar)
| Component | Function | Serviceable by DIY? |
|---|---|---|
| Quartz / glass tube | Radiates infrared heat | Yes — handle with gloves, replace carefully |
| Black silicone ring | Seals lower edge of glass tube | Yes — must be in place before use |
| Protective guard / frame | Prevents contact with hot tube | Yes — screws |
| Reflector panel | Directs radiant heat outward | Yes — screws |
| Control box assembly | Houses gas valve and igniter | Partial — clean and test; valve swap is advanced |
| Gas hose and regulator | Propane supply line | Yes — same leak-test requirement |
| Thermocouple / pilot assembly | Safety shutoff | Yes — same DMM test procedure |
| Wheel assembly | Mobility | Yes — bolt-on replacement |
Tabletop models
Belleze tabletop heaters share most of the same core components as the freestanding units (control knob, thermocouple, pilot assembly, reflector, burner screen, hose and regulator) but in a much more compact form. The base is typically weighted for stability but still tippable, so the tilt-switch safety device is especially important on these units. The parts list in your specific tabletop manual will call out the tilt switch separately, note its location and test it as part of any 'won't stay lit' diagnosis.
Step-by-step assembly and initial setup: tabletop models
Belleze estimates assembly at approximately 60 minutes for most models. Lay all hardware on a clean surface and verify the package contents against the manual's hardware list before you start. Missing a single small screw now is easier to sort out than mid-assembly.
- Unbox all parts and match them to the hardware list in your manual. Count every nut, bolt, and screw.
- Attach the base plate to the lower pole section using the provided bolts. Hand-tighten first, then snug with a screwdriver — do not overtighten plastic-thread inserts.
- Slide the pole sections together in the sequence shown in the diagram. Most tabletop Belleze units have two or three pole segments that lock with a bolt through the collar.
- Mount the burner head assembly to the top of the pole. Connect the gas supply tube running through the pole to the burner inlet — this is usually a push-and-twist fitting.
- Attach the reflector dome above the burner head using the screws provided. The dome must sit level; a tilted dome affects heat distribution and can block the thermocouple from seating in the pilot flame.
- Attach the emitter screen or burner guard beneath the dome.
- Connect the hose and regulator to the gas inlet port at the base. Hand-tighten the Type-1 (QCC-1/ACME) fitting clockwise — these are standard thread, not reverse. Do not use thread tape on these fittings.
- Connect the other end of the regulator to a standard 20 lb propane cylinder. Belleze manuals specify use of the supplied hose and regulator only — do not substitute a longer hose without confirming BTU capacity and pressure rating.
- Perform the soap-bubble leak test on both connections before lighting.
- On first startup, push and hold the control knob in for approximately 2 minutes to purge air from the gas line. This step is mandatory after a new cylinder connection and is documented in the Belleze operation instructions.
- After purging, turn the knob to the pilot position, press the igniter button, and continue holding the knob in for 30 seconds after the pilot lights before releasing. The thermocouple needs that time to heat up and generate enough millivolts to hold the valve open.
Step-by-step assembly and initial setup: freestanding propane heaters
The freestanding 014-HG-PH00 and similar 48,000 BTU models are the most popular Belleze heaters and have the most detailed published manual. The assembly sequence below follows that document's structure.
- Lay the base on a flat surface. Attach the wheel assembly to the base frame using the bolts provided — wheels go on the weighted end, not the open cylinder compartment side.
- Attach the bottom plate to the underside of the base using screws. Route the gas supply tube up through the center opening in the base plate before fully closing it.
- Insert the lower pole section into the base collar and secure with the through-bolt and nut. Leave a half-turn loose until the full pole is assembled and plumb.
- Stack the middle pole section onto the lower section and secure the collar bolt.
- Stack the upper pole section and secure. Now check that the assembled pole is plumb (vertical) by eye or with a level. Tighten all collar bolts in sequence from bottom to top.
- Route the gas supply tube up through all pole sections — it should emerge at the top pole opening near the burner mount.
- Mount the burner head and control valve assembly to the top of the pole. Connect the gas supply tube to the valve inlet per the diagram in your manual.
- Place the emitter / burner screen onto the burner head.
- Position the reflector dome over the burner assembly and secure with the provided screws or clips. The dome must be centered and level.
- Attach the finial (decorative cap) at the very top if included.
- Place a standard 20 lb propane cylinder into the base compartment. Connect the supplied regulator's QCC-1 fitting to the cylinder valve and hand-tighten. Connect the hose's other end to the heater's gas inlet at the base.
- Perform the soap-bubble leak test on both connection points.
- Purge the gas line by pressing and holding the control knob for 2 minutes before attempting to light.
- Light the pilot: turn the control knob to the pilot symbol, press and hold, press the igniter button, and hold the knob in for 30 seconds after ignition. Then turn to your desired heat setting.
Step-by-step assembly and initial setup: quartz-tube and infrared models
The 014-HG-PH42 and similar quartz-tube models have one assembly step that is absolutely critical and has no equivalent on dome-style heaters: the black silicone ring. The Belleze manual states clearly that the black silicone ring must be installed on the lower edge of the glass tube and must be in place before you operate the heater. Skipping this step can lead to tube cracking from thermal shock and uneven seating.
- Assemble the base, wheels, and pole sections using the same sequence as the freestanding model above, following the PH42-specific hardware list in your manual.
- Mount the reflector panel and frame housing to the top pole assembly first, before inserting the quartz tube — it is much harder to fit the tube around the frame than to build the frame around the tube mounting points.
- Before handling the quartz tube, put on safety glasses and work gloves. Quartz tubes are glass and will shatter if dropped or knocked against a hard edge.
- Slide the black silicone ring onto the lower edge of the quartz tube. Confirm it is seated evenly all the way around the circumference, not bunched or twisted.
- Insert the quartz tube into the burner housing from the top, aligning the lower end with the burner nozzle and the upper end with the upper retainer clip or bracket per your manual's diagram.
- Secure the upper retainer and any side clips. The tube must not rattle or shift — any movement means misalignment that will cause uneven heating and potential cracking.
- Attach the protective guard frame around the tube. This guard is a mandatory safety component and must be fully secured before operation.
- Connect the gas hose and regulator to the cylinder and heater inlet. Perform the soap-bubble leak test.
- Purge air from the line by holding the control knob for 2 minutes, then light the pilot following the same hold-in sequence described for freestanding models.
- On first light, inspect the quartz tube from a safe distance as it heats up. The tube should glow evenly across its length within a few minutes. A dark cold spot in the middle of the tube often indicates a partially blocked burner orifice or misaligned tube.
Diagnosing and fixing common faults
Belleze manuals include a troubleshooting table that pairs symptoms with causes and corrective actions. I have expanded those entries here with actual test steps and component checks so you can work through each fault systematically rather than guessing.
Pilot won't light
The Belleze manual lists five root causes for a pilot that refuses to ignite: closed cylinder valve, blocked pilot or orifice, air in the gas line, low gas pressure, and igniter failure. Work through them in this order because earlier checks are faster and fix the problem more often.
- Confirm the cylinder valve is open. Turn it counterclockwise until it stops. This is the most common cause and takes five seconds to check.
- Check that you performed the 2-minute air purge. If the cylinder is new or was recently swapped, you must hold the control knob in for approximately 2 minutes before the pilot can light. The Belleze operation instructions are explicit on this point.
- Check gas pressure. If the cylinder feels empty when you shake it or was stored in cold temperatures (below freezing lowers LP vapor pressure significantly), swap it for a known-full cylinder and retest.
- Test the igniter. Press the igniter button with the gas off and listen/look for a spark at the pilot tip. No spark means the igniter electrode is fouled, the electrode wire is disconnected, or the igniter module has failed. Clean the electrode tip with a dry cloth, reconnect any loose wire, and retest.
- Inspect the pilot orifice. With the cylinder valve closed and the regulator disconnected, use a can of compressed air or a soft brush to clear visible debris from the pilot tip. Do not use metal tools on the orifice — you will enlarge it and change the gas flow rate.
Pilot lights but won't stay lit
This is the most frustrating fault on any propane heater and almost always comes down to one of three causes: a dirty pilot, a loose gas valve or pilot connection, or a failing thermocouple. The Belleze troubleshooting table lists all three explicitly.
- Check that you are holding the control knob in long enough after ignition. Hold it for a full 30 seconds after the pilot lights before releasing. Releasing too early is the single most common cause of this complaint on brand-new units.
- Inspect the pilot flame. It should be steady and blue with a small orange tip, and it must be fully enveloping the thermocouple tip. A weak, flickering, or yellow pilot usually means a dirty or partially blocked pilot orifice. Clean as described above.
- Check the thermocouple seating. The thermocouple tip must sit in the pilot flame, not beside it. If it has shifted, loosen the bracket nut, reposition the tip into the center of the flame, and retighten.
- Test the thermocouple output with a DMM. Close the cylinder valve, remove the thermocouple lead from the gas valve (usually a push-on spade or threaded nut), set your DMM to millivolts DC, connect the probes to the thermocouple lead and ground, then relight the pilot manually with a long lighter. A healthy thermocouple will generate measurable millivolts when hot. If you read near zero millivolts after 60 seconds in the flame, the thermocouple is dead and needs replacement. Target ranges vary by valve design — single thermocouples typically produce 8 to 35 mV depending on the specific appliance valve.
- Check for loose connections between the pilot assembly and the gas valve. A loose compression fitting here causes intermittent gas flow to the pilot, which makes the flame drop below the thermocouple and starves it of heat. Hand-tighten and retest.
- If all of the above pass and the pilot still drops out, the gas valve itself may be faulty. Gas valve replacement is at the edge of DIY territory — see the 'When to call a pro' section below.
Tilt switch problems
Belleze heaters include a tilt switch that shuts off gas flow if the heater tips past a safe angle. This is a valuable safety feature but it can cause a 'won't stay lit' symptom when it malfunctions or when the heater is sitting on an uneven surface. To test it: ensure the heater is on a level surface (use a small bubble level on the base), light the pilot and hold the knob for 30 seconds, and see if it holds. If it does on a level surface but not on your deck, the deck surface is the problem, not the switch. If it fails even on a flat surface, the tilt switch ball or contact may be dirty or stuck. On most Belleze models the tilt switch is accessible after removing the base cover. With the cylinder valve closed, gently tap the base to dislodge any debris from the ball switch. If the switch tests as open with a multimeter even when the heater is level, replace it, it is a simple two-wire component and an exact-model replacement from Belleze support is the safest choice.
Regulator and hose leaks
Gas hoses degrade with UV exposure and physical contact with the ground. Regulators can fail internally without obvious external signs. If the soap-bubble test reveals a leak at the regulator body itself (not a connection point), replace the entire regulator and hose assembly. The Belleze manual is direct about this: the pressure regulator and hose supplied with the unit must be used, and any damaged component must be replaced before use. Do not patch a gas hose with tape or sealant. A replacement Belleze hose and regulator assembly is listed in the PH42 parts list by name and is available through Belleze support. Standard 20 lb grill cylinders use a Type-1 (QCC-1/ACME) hand-tighten connection, make sure any replacement regulator matches this thread type before purchasing. Older or oversized cylinders may use a POL fitting, which requires an adapter; confirm what your tank has before ordering parts.
Burner lights but output seems low
Low heat output on a propane heater usually points to low cylinder pressure, a partially blocked burner orifice, or a regulator that has tripped its internal over-flow protection. Industry guidance notes residential propane appliances are typically designed for about 11 inches water column (≈0.4 psi / ≈27 mbar) manifold pressure and regulators are set to deliver this Open Textbook (plumbing/LP systems) guidance on LP appliance pressures. To reset a tripped regulator: close the cylinder valve, turn the control knob to off, wait 30 seconds, then open the cylinder valve very slowly (about a quarter turn per second). A fast-opening cylinder valve can trip the regulator's flow limiter and starve the burner. If output is still low after a slow reset, check the cylinder level and try a different cylinder before suspecting the regulator.
Replacing the thermocouple: step-by-step
A thermocouple is one of the most cost-effective repairs on any propane heater. The part typically costs under $15 and the swap takes about 20 minutes once you have confirmed the diagnosis with the DMM test above.
- Close the cylinder valve and disconnect the hose from the cylinder. Let the heater cool completely — at least 30 minutes after last use.
- Remove the reflector dome (typically 3 to 4 screws) to access the burner head and pilot assembly.
- Disconnect the thermocouple lead from the gas valve. On most Belleze models this is a threaded nut you turn counterclockwise with a small wrench or pliers.
- Unclip or unbolt the thermocouple bracket from the pilot assembly mount. Note the exact position of the thermocouple tip relative to the pilot flame path before removing — you will need to recreate this position.
- Thread the new thermocouple lead into the gas valve fitting and hand-tighten, then snug it a quarter turn with pliers. Do not over-tighten copper fittings.
- Position the new thermocouple tip so it sits directly in the center of where the pilot flame will be. Secure the bracket.
- Reconnect the hose to the cylinder. Perform the soap-bubble leak test.
- Light the pilot using the hold-in procedure, confirm it holds for 60 seconds after releasing the knob, and then test at full burner output.
Routine maintenance and seasonal storage
Monthly and end-of-season maintenance
- Wipe the reflector dome and pole with a damp cloth to remove dust, debris, and spider webs — blocked airflow around the burner affects combustion quality.
- Inspect the gas hose for cracks, cuts, abrasion marks, or discoloration. Replace immediately if any are found.
- Clean the burner emitter screen by brushing away debris with a soft bristle brush. Do not use water directly on the burner head.
- On quartz-tube models, inspect the glass tube visually for cracks or chips after every use. A cracked tube must be replaced before the next use — see the parts section for ordering.
- Check and re-seat the black silicone ring on quartz-tube models each season.
- Perform a fresh soap-bubble leak test at the start of each season and after any cylinder swap.
- Inspect the tilt switch mechanism for debris or corrosion annually.
Seasonal storage
Belleze manuals include explicit winter storage instructions. Belleze's manual states OUTDOOR USE ONLY, warns of carbon monoxide hazards, and instructs users to disconnect the LP cylinder before indoor storage and to store cylinders outdoors Belleze's manual states OUTDOOR USE ONLY, warns of carbon monoxide hazards, and instructs users to disconnect the LP cylinder before indoor storage and to store cylinders outdoors.. Disconnect the LP cylinder from the heater before bringing it indoors for storage. Store the propane cylinder outdoors in a ventilated area, never in a garage, basement, or enclosed shed. Cover the heater with a weather-resistant cover to protect the reflector and burner from moisture and insect nesting. If you live in a climate with hard freezes, bring the hose and regulator indoors separately; rubber hose compounds become brittle when stored in extreme cold for extended periods.
Ordering replacement parts
The parts list in the Belleze manual (notably the PH42 replacement parts list) uses component names and letter designations rather than unique part-number SKUs. When ordering, use your full heater SKU and the component name exactly as listed in your manual's parts section. Contact Belleze directly through the Assembly Instructions hub at belleze.com, by email at [email protected], or by phone at (800) 682-6376. Having your order number speeds up the process significantly because Belleze can confirm the hardware revision that shipped with your unit. For components not available directly from Belleze (such as universal thermocouples), confirm the thread size and overall length match your original before purchasing a third-party part.
When to call a professional
Most Belleze patio heater repairs are genuinely DIY-friendly, but a few situations call for a licensed propane technician. If you smell gas and cannot identify the source after the leak test, evacuate the area and call your propane supplier. If the gas valve body itself is leaking or damaged, do not attempt to repair it, gas valves are not serviceable components and a faulty valve can fail open. If the burner produces soot or a consistently orange flame that does not respond to orifice cleaning, a technician can check the air-to-gas mixture and inspect the orifice sizing. And if you ever see scorch marks on the pole near the gas connections or notice heat where it should not be, stop using the heater and have it inspected before relighting.
How Belleze compares to similar brands
If you are researching Belleze alongside other brands, the assembly and troubleshooting logic transfers well across most propane patio heaters. The core components, thermocouple, regulator, tilt switch, and control valve, are near-universal across freestanding and tabletop designs. Tabletop-specific owners dealing with compact gas connections may find the Cuisinart tabletop patio heater manual a useful cross-reference for assembly quirks on small-format units. For portable single-pole designs, the Bali Outdoors portable patio heater manual covers a similar format to the Belleze PH00. For comparable assembly and troubleshooting steps, see the Bali Outdoors portable patio heater manual (reference 85a3afea-399f-43b6-95cf-033bc10532c1). If your heater uses a quartz or glass tube element rather than a dome reflector, the quartz glass tube patio heater instruction manual goes deep on tube handling, alignment, and replacement. See the quartz glass tube patio heater instruction manual on Belleze's Assembly Instructions hub by searching your model SKU. For Infinity Glo models, consult the Infinity Glo patio heater manual for tube handling, alignment, and replacement. Owners of other big-box-store heaters may also find the tall Mocha Mainstays patio heater manual or the Thermo Tiki outdoor propane patio heater manual relevant for side-by-side comparison of troubleshooting tables and parts diagrams. See the Thermo Tiki outdoor propane patio heater manual for a side-by-side comparison of troubleshooting tables and parts diagrams. For direct instructions and diagrams for that model, consult the tall Mocha Mainstays patio heater manual for model-specific assembly and parts information.
FAQ
Where can I find and download the correct Belleze patio heater manual (PDF) for my model?
Search Belleze’s Assembly Instructions hub (https://belleze.com/tools/assembly-instructions) using the product name or SKU; Belleze places SKU on product page, packaging, shipping label or order confirmation. Popular public PDFs include BELLEZE 014-HG-PH00 (48,000 BTU stand) and 014-HG-PH42 (42,000 BTU glass/quartz tube). If you can’t find it, contact Belleze support ([email protected] or their phone number listed on the site) and provide the SKU, product name, or photos of the heater label.
How do I identify which Belleze heater type I have (tabletop, freestanding, quartz/glass tube)?
Look for these distinguishing features: tabletop — small base and short stem sized to sit on a table; freestanding/stand — large base or weighted base with tall post and domed reflector; quartz/glass-tube — visible long quartz or glass heating tube (rectangular or round) and protective guard around the tube. Also check the model label on the base or control box for SKU; cross-check with Belleze manual images to confirm.
What parts diagrams and lists should I look for in the Belleze manual to understand my heater?
Open the manual’s ‘Replacement Parts List’ or exploded diagram. Typical labeled items: reflector, burner head/flame screen, glass/quartz tube (if applicable), black silicone tube ring (quartz models), control box assembly, pilot/thermocouple assembly, gas hose & regulator, pressure regulator, base/bottom plate, wheel assembly, hardware (bolts, screws). Manuals often show lettered diagrams with matching part names (not always SKUs). Save or print the diagram before disassembly.
What basic tools and safety items do I need before assembling or servicing a Belleze heater?
Basic hand tools: Phillips screwdriver, adjustable wrench, pliers, hex keys (if supplied), socket set (if required). Service tools: leak-test solution (soap + water), multimeter (mV scale) for thermocouple checks, needle picks/brush for pilot cleaning, replacement gaskets/heat-resistant silicone for tube seals, replacement parts. Safety gear: work gloves, eye protection, leak-test soap, well-ventilated outdoor workspace, fire extinguisher rated for flammable gas. Always work outdoors and with cylinder valve closed and disconnected when servicing fuel system components.
What are the step-by-step assembly highlights for freestanding Belleze heaters?
1) Unpack and match parts to the manual’s parts list. 2) Assemble the base and weighted plate per diagram; mount the pole/post and secure fasteners. 3) Attach the control box assembly and burner head to the post. 4) Install reflector and any heat shields. 5) Fit wheels if provided. 6) Install regulator and hose per manual (use supplied regulator). 7) Perform leak check (soap solution) on all regulator/hose/tank connections before first use. Manuals typically list required screw sizes and estimated time (~60 minutes). Tighten hardware hand-tight then torque per manual if specified.
What special assembly steps apply to quartz/glass-tube models?
Follow manual warnings exactly: install the black silicone ring on the lower edge of the quartz/glass tube (mandatory). Slide tube into lower and upper supports per diagram, align protective guard and reflector, and secure glass with clamps or screws supplied. Avoid overtightening clamp hardware which may crack the glass. Confirm the black silicone ring is seated before operating. Wear cut-resistant gloves when handling glass.