To assemble the Char-Broil Patio Bistro 240 safely, you build from the bottom up: base frame first, then the firebox body, cooking components, door and control panel hardware, and finally the gas hose and regulator connection. Before you fire it up for the first time, you must do a full soapy-water leak test on every gas connection. Skip that step and you're taking a real risk. This guide walks you through every stage in the right order, flags the fitment mistakes that trip people up, and tells you exactly what to check on your first ignition.
Char-Broil Patio Bistro 240 Assembly Instructions and Safety Guide

Grant Mercer
2 Jun 2026
What you need before you start
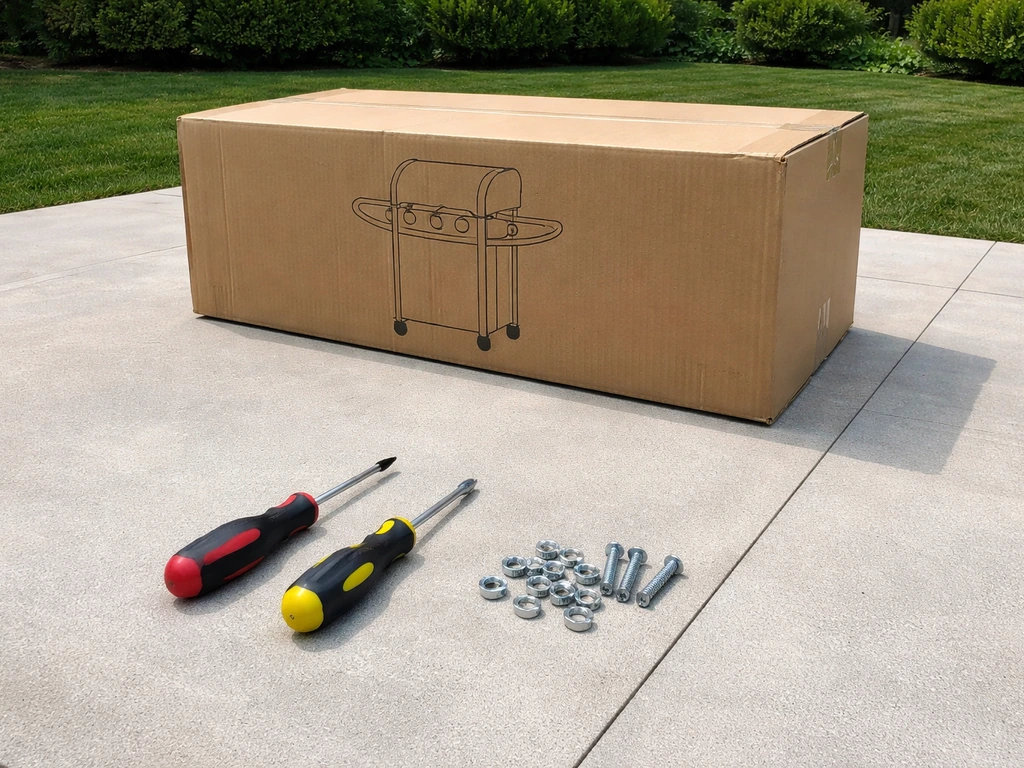
Clear a flat, hard surface outside with at least four feet of open space on each side. The Patio Bistro 240 box is bulky, and you'll need room to lay parts out and move around the unit. Do not assemble this grill indoors, in a garage, or anywhere near an open flame. Propane connections will be made during assembly, and you want ventilation.
For tools, you'll mostly need a Phillips head screwdriver, a flathead screwdriver, and a pair of needle-nose pliers for any snap clips. A permanent marker helps you stage parts before you start. You'll also need a small bowl of dish soap mixed with water for the leak test later. Do not skip preparing that now because you'll use it immediately after making the gas connection.
- Phillips head screwdriver (medium)
- Flathead screwdriver
- Needle-nose pliers
- Dish soap and water in a bowl (for leak testing)
- Small brush or sponge (to apply soapy solution)
- Permanent marker (to label hardware bags)
- A second person to hold panels during alignment (strongly recommended)
- The hardware pack (labeled 'Hardware Pack, Gas Bistro, 11' in the parts list)
One more thing before you open a single bag: check whether your model number is 11601558, 11601558-A1, 12601558, or 12601558-A2. Char-Broil’s official recall information page for the Patio Bistro 240 lists these U.S. model numbers as part of the recall: 11601558, 11601558-A1, 12601558, and 12601558-A2 model number is 11601558, 11601558-A1, 12601558, or 12601558-A2. Those specific U.S. models were subject to a CPSC recall issued on August 15, 2013 because the electronic ignition could fire unexpectedly and create a burn hazard. Char-Broil issued an official 'Gas Patio Bistro 240 Recall Kit' with its own installation instructions. If your grill has one of those model numbers and you haven't already applied the recall kit, contact Char-Broil before you proceed. The model covered by this guide is 14601900, which carries a revised manual dated 11/14/13.
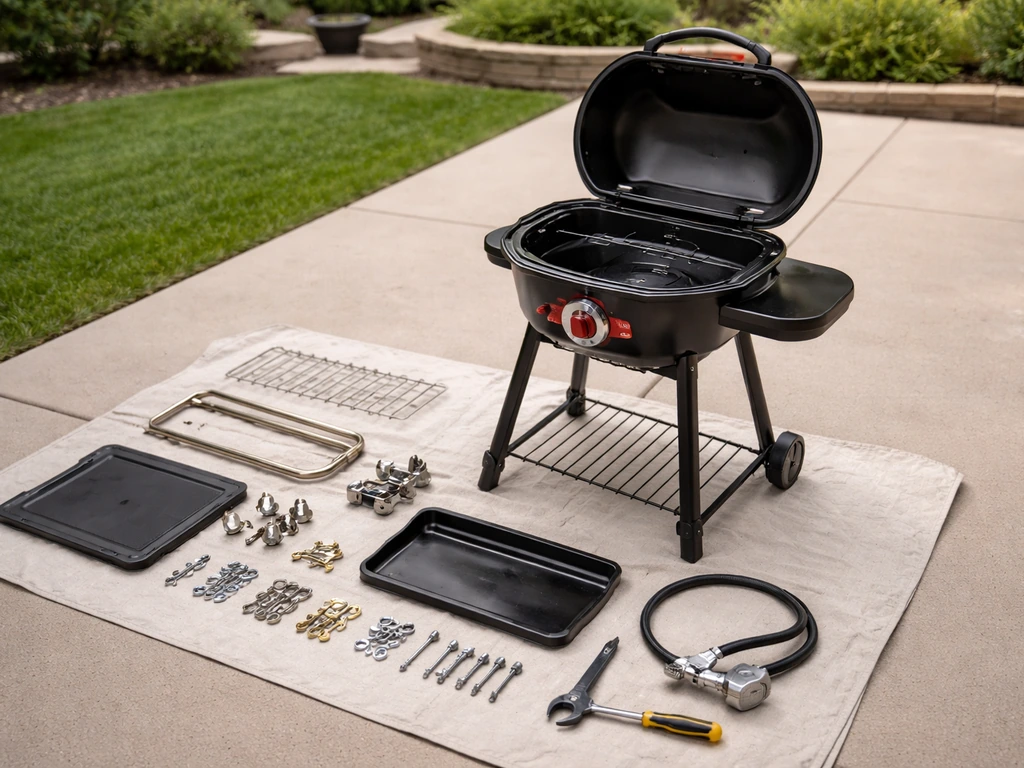
Unboxing and parts identification
Lay all the parts out on a clean surface before you start building anything. This saves real time because misidentifying a panel early means backtracking later. Char-Broil's parts list for the 14601900 gives everything a specific name, and using those names here will help you match what's in your box to the manual.
| Part Name | Description / What to Look For |
|---|---|
| Base, Gas Bistro, 240, Painted Silver Pa | The lower frame/leg assembly, usually the largest piece in the box. Silver painted finish. |
| Firebox / Cooking Chamber | The main body of the grill that sits on the base. Pre-assembled to some degree. |
| Door / Front Panel | The hinged access door for the propane tank compartment. |
| Temperature Gauge Bezel (Tru-Infrared) | The ring/frame that holds the temperature gauge on the lid. |
| Hose, Valve & Regulator Assembly | The gas hose with regulator attached. This connects the LP tank to the burner valve. |
| Hand Knob, Tank Retainer | A hand-tightened knob that secures the LP cylinder inside the cabinet. |
| Hardware Pack, Gas Bistro, 11 | Fasteners: screws, bolts, washers, nuts. Count and sort before assembly. |
| Cooking grates / Infrared emitter plates | The actual cooking surface components, usually wrapped separately. |
| Lid / Hood | The top cover of the cooking chamber, may already be attached. |
Open the hardware pack and sort the fasteners by size on a paper plate or in small cups. This one step eliminates most of the mid-assembly frustration. If a bag is missing or a bolt count is short, call Char-Broil customer support before starting rather than improvising with hardware store substitutes on a gas appliance.
Step-by-step assembly sequence
Follow this order closely. The Patio Bistro 240 is designed so that certain panels and brackets have to go on before others become accessible. Jumping ahead is the single most common reason people end up with leftover hardware or panels that don't align.
Step 1: Build the base frame

Start with the painted silver base assembly. Attach the legs or base supports to the lower frame using the bolts from the hardware pack. Finger-tighten everything first and do not fully torque any bolts until all four corners are aligned. The base needs to sit completely flat before you put weight on it. If it rocks on your work surface, adjust the leg connections before moving on.
Step 2: Mount the firebox body onto the base
With the base stable, set the main cooking chamber body onto it. This is where a second person helps significantly because the firebox is heavy and awkward to align solo. Line up the mounting holes in the bottom of the firebox with the corresponding slots in the top of the base frame. Insert the bolts and again, finger-tighten first. Check that the firebox sits level and square before you tighten down fully. A twisted firebox at this stage causes the door and panels to bind later.
Step 3: Attach side panels and the cabinet door
The lower cabinet door (which covers the propane tank compartment) mounts to the front of the base assembly. Hinge pins typically slide into position from the top. Hold the door up against the hinge points and confirm the gap is even on both sides before locking the hinges. If the door gaps unevenly, the hinge pin is not fully seated or the base is slightly out of square. Do not force it closed.
Step 4: Install cooking components inside the chamber
Drop in the infrared emitter plates (if separate from the cooking grates) first, then lay the cooking grates on top. The Patio Bistro 240 uses a Tru-Infrared cooking system, so the emitter plates sit directly above the burner and below the grates. Make sure the emitter plates sit flat and are not bridging any support rails, which would leave them rattling during use.
Step 5: Mount the temperature gauge bezel
The Tru-Infrared temperature gauge bezel fits into the pre-cut hole in the lid. Press it in from the front and secure with the retaining hardware from the parts pack. If the bezel feels loose after installation, the retaining clip is not fully snapped in place. This is a common missed step because the clip is small and the feedback is subtle.
Step 6: Route and connect the hose, valve, and regulator assembly
Thread the gas hose through the internal routing channel (usually a notch or grommet at the base of the cooking chamber). The regulator end will hang down into the LP tank compartment. Do not connect the regulator to the LP cylinder yet. That step comes after the full assembly is complete and you're ready to do the leak test. Secure any hose clips or routing brackets that keep the hose away from hot surfaces.
Step 7: Install the tank retainer hand knob
Thread the hand knob into the tank retainer bracket inside the LP compartment. This holds the propane cylinder in place during use and prevents it from tipping. Place your LP cylinder into the compartment and hand-tighten the knob against it to confirm the fit before the gas connection step.
Step 8: Final tighten all structural fasteners
Go around the entire grill with your Phillips screwdriver and tighten every fastener you left at finger-tight. Work from the bottom up. Do not overtighten sheet-metal screws as they strip easily. Check that the lid opens and closes smoothly, the door swings without binding, and the cooking grates sit level. The grill should feel solid, with no rocking or flexing panels.
Gas connection checks and leak-safety basics
This section is not optional reading. The manual is explicit: do not use this grill until it has been leak-tested. Every single time. Not just on first assembly, but any time you disconnect and reconnect the propane cylinder.
Connecting the regulator to the LP cylinder
Before connecting anything, make sure all control knobs on the grill are turned fully to OFF. Then follow this sequence from the manual exactly:
- Hold the regulator straight and insert the nipple into the LP cylinder valve opening. Keeping it straight is critical because the coupling nut cross-threads easily if you come at it at an angle.
- Hand-tighten the coupling nut clockwise. Do not use a wrench or pliers. Char-Broil specifically instructs hand-tightening only for this connection.
- After the nut reaches a stop, continue turning an additional one-half to three-quarters of a turn. The regulator has a back-check safety feature that creates some resistance just before full seal. You have to push past that resistance with that final partial turn or the connection is not complete.
- Check that the hose is not kinked or pinched after the connection is made.
- Important: do not use a POL transport plug (the plastic piece with external threads) anywhere in this connection. The manual specifically warns that it defeats the safety feature of the valve.
How to do the leak test

With the regulator connected and all control knobs at OFF, slowly open the LP cylinder valve fully by turning it counterclockwise. Listen immediately. If you hear a rushing sound of gas escaping, turn the cylinder valve off right away. That sound means a major leak at the connection, not a minor seep. Do not continue until you've identified and corrected it.
Assuming no rushing sound, take your bowl of soapy water and a brush or sponge and coat all of the connection points: the regulator-to-cylinder coupling, the hose fittings at both ends, and the valve manifold connections inside the grill. Watch for bubbles that grow and expand. Soap foam that sits still is just soap. Bubbles that visibly grow and stretch mean gas is escaping from that spot.
If you see growing bubbles, close the LP cylinder valve immediately and retighten that connection. Reopen the valve and retest. If you cannot stop the leak by retightening, do not try to repair the fitting yourself. The manual says to call for replacement parts. If a leak cannot be stopped by closing the LP cylinder valve entirely, leave the area and call the fire department. That is not an exaggeration.
Ignition and first-fire setup
Once the leak test passes with zero bubbles, you're clear to light the grill. The Patio Bistro 240 uses electronic ignition, so there's no match required. Here's how to do a proper first-fire test:
- Make sure the grill is on a level, stable surface and clear of any combustible materials (fences, walls, overhangs, patio furniture) by at least the clearance distances in your manual.
- Open the lid before lighting. Always. Lighting with the lid closed allows gas to pool inside the cooking chamber.
- Turn the main burner control knob to the HIGH or START/LIGHT position.
- Press the electronic ignition button. You should hear a clicking sound and see a flame establish at the burner within a few seconds.
- If it doesn't light after three clicks, turn the knob back to OFF, wait five minutes for any gas to disperse, then try again.
- Once lit, close the lid and let the grill preheat for about 10 to 15 minutes. Watch the temperature gauge and confirm the needle climbs. This tells you the burner is running, the Tru-Infrared emitter is heating, and the temperature gauge bezel you installed is reading correctly.
- Check for any unusual smells (beyond the normal new-grill burn-off of protective coatings), any flames visible outside the cooking chamber, or any smoke from the base cabinet area. None of those should be happening.
Electrode gap: if ignition is weak or inconsistent
The Patio Bistro 240 manual gives specific electrode spacing for reliable ignition. The main burner electrode tip should point toward the gas port opening with a gap of 1/8 inch to 1/4 inch. If sparking is present but weak, or if you hear the igniter clicking but see no flame, check that the electrode hasn't shifted during assembly and that the tip is within that range. Adjust it carefully by bending the electrode bracket very slightly. If you see sparks but they're not landing at the gas port, the electrode is misaligned, not failed.
Troubleshooting common assembly and fitment mistakes
These are the problems that come up most often, either during assembly or on that first ignition attempt.
Burner won't light at all
The manual lists several causes worth checking in order. If your burner won’t light, troubleshooting includes checking that you are trying to light the correct burner, that the burner is properly engaged with the control valve, and that there is no obstruction preventing gas flow. First, confirm you're turning the correct burner knob for the burner you're trying to light. On a multi-burner setup it's easy to turn the wrong one. Second, check that the burner tube is fully seated over the control valve outlet. During assembly, burner tubes sometimes sit slightly off the valve spud, which means gas isn't entering the tube at all. Lift the cooking grates and emitter plates and press the burner tube firmly onto the valve.
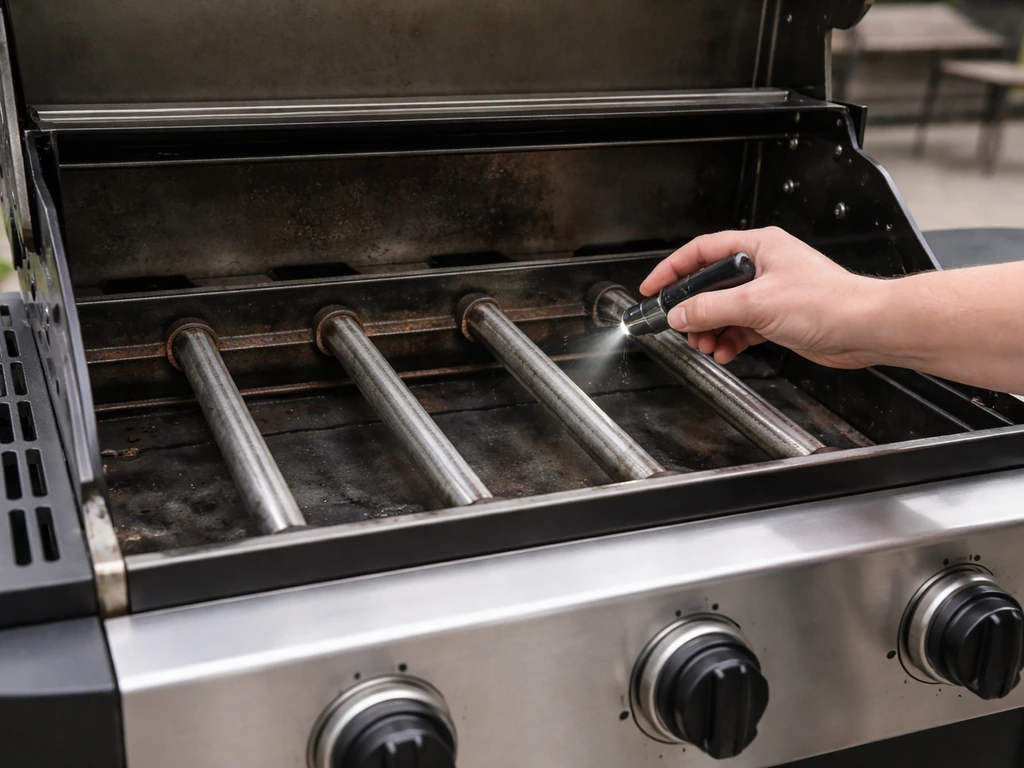
Third, look inside the burner tubes for spider webs or debris. This is a known issue even on brand new units that sat in a warehouse. A single spider web in the burner tube is enough to cause a partial or complete blockage that prevents ignition or causes the flame to blow back through the control panel (which shows up as fire coming through the control panel face). If you see that symptom, turn off the gas immediately, disconnect the cylinder, and clear the obstruction before relighting.
Vapor lock or coupling nut issue
If you have gas to the grill but still can't get a flame and everything else checks out, vapor lock at the coupling nut is a likely culprit. Disconnect the regulator from the LP cylinder, wait a minute, and reconnect it using the hand-tighten plus half-to-three-quarter-turn method described earlier. This resets the internal valve and usually resolves the no-gas symptom.
Panels that don't line up or gaps that are too wide
This almost always traces back to the firebox-to-base mounting being slightly off square. If you fully torqued the base-to-firebox bolts before checking alignment, you'll need to loosen them, square everything up, and retighten. It's tedious but necessary. Forcing panels to close over a misaligned body stresses the hinge hardware and usually results in a door that won't latch or a lid that doesn't seal evenly.
Missing hardware
If your hardware pack is short on specific fasteners, contact Char-Broil directly with your model number (14601900) and describe which hardware is missing. Do not substitute bolts or screws from a hardware store on a gas appliance, especially anything near the burner, valve, or heat shield. Use Char-Broil OEM replacement parts only.
Electronic ignition symptoms and what they mean
| Symptom | Likely Cause | What to Check |
|---|---|---|
| No spark, no clicking sound | Dead battery or disconnected igniter wire | Replace igniter battery; check wire connection at igniter module |
| Clicking sound but no spark visible | Electrode tip out of position or wire loose at electrode | Check electrode gap (1/8"–1/4" for main burner); reseat wire |
| Sparks present but no flame | Gas not reaching burner; vapor lock; burner tube off valve | Reconnect regulator; confirm burner tube is seated on valve spud |
| Sparks visible but not at gas port | Electrode misaligned during assembly | Adjust electrode so tip points directly at gas port opening |
Safety, maintenance, and when to stop and get help
A few ongoing safety practices that matter well beyond the first assembly day:
- Always perform a soapy-water leak test any time you disconnect and reconnect the LP cylinder, not just on initial assembly.
- If you see grease or other hot material dripping from the cooking area onto the hose, regulator, or valve, turn off the gas at the cylinder immediately. Identify the cause, clean and inspect the hose and regulator, and do a full leak test before relighting.
- Keep the burner tubes clear. Check for spider webs and debris at the start of every grilling season and any time the grill has sat unused for more than a few weeks.
- Never store or use the grill indoors or in any enclosed space, including a covered patio with limited airflow.
- The grill must sit on a level, stable surface away from combustible materials every time it's used, not just the first time.
- Do not operate the grill if the hose shows any cracking, stiffness, or visible damage. Replace the hose and regulator assembly before using.
When to stop and call for help
There are a few situations where the right call is to stop entirely and not continue DIY troubleshooting. If a gas leak won't stop after closing the LP cylinder valve, leave the area and call the fire department. If you see fire coming through the control panel face during or after assembly (not just at the burner), shut off the gas, let everything cool completely, and identify the burner tube obstruction before relighting. If your unit has one of the recalled model numbers (11601558, 11601558-A1, 12601558, or 12601558-A2) and you haven't applied the recall kit, contact Char-Broil before any further use. And if the hose and regulator assembly shows any physical damage that appeared during unboxing, request a replacement part before you connect anything.
For ongoing operation questions beyond assembly, including how to use the Tru-Infrared system day to day or what the full manual covers for settings and features, the detailed instructions content for the Patio Bistro 240 goes deeper into those topics. If you are using the Masterbuilt MPS 20B patio 2-portable propane smoker, consult its manual for the exact setup and safety steps before your first cook masterbuilt mps 20b patio 2-portable propane smoker manual. For the step-by-step details on the Char-Broil electric patio caddie, consult the corresponding manual for your model Char-Broil electric patio caddie manual. For complete char-broil patio bistro 240 instructions, follow the manual’s setup, ignition, and maintenance steps after assembly. Assembly is just the starting point. For more on using the Patio Bistro after assembly, see our guide on how to use Char-Broil patio bistro. Getting it right here means everything downstream is safer and simpler.
FAQ
Do I need to leak-test again every time I change the propane cylinder?
Yes, but only after the previous leak test. If you disconnect the LP cylinder for any reason, turn all control knobs to OFF first, connect the regulator, then repeat the soapy-water bubble check on every connection point before lighting.
Can I assemble or first-test the Patio Bistro 240 on a covered patio or near my house?
Do not use the grill outdoors near a doorway, vent, or any location where fumes can be pulled inside. Keep it fully in the open with cross-breeze, and do not assemble under a covered patio roof that traps gas near the floor or walls.
What should I check first if the igniter clicks but the burner still will not light?
Before first ignition, confirm the emitter plates are seated flat and fully centered over the burners, then verify the burner tube is pressed completely onto the valve outlet. If ignition still fails, do not keep clicking the igniter with the lid closed, instead follow the blockage checks (spider webs or debris) and clear the burner tube first.
What should I do if I smell gas during or after assembly, but I do not see bubbles?
If you smell gas, treat it as a serious leak even if the leak test previously passed. Turn the cylinder valve OFF immediately, step away, and ventilate the area. Only reconnect and retest after the source is identified and fixed.
How do I tell the difference between harmless soap bubbles and a real leak?
Some bubbles can form from residual soap or from disturbed surfaces, so watch for bubbles that actively grow and expand over time. If you are unsure, close the cylinder valve, wipe the area dry, then apply fresh soapy solution and recheck.
My grill seems slightly uneven and the door does not align, what should I fix before continuing?
If the grill rocks or the lid alignment looks off, stop tightening and correct the base first. Re-check leg/base support connections and confirm the firebox is square on the frame before you fully torque, because forcing later assembly can cause hinge binding and door latch issues.
Can I substitute fasteners if the hardware pack is short?
Use only the hardware intended for the heat and gas areas, especially anything near the burner, valve manifold, or heat shields. If a fastener is missing, request OEM replacements using your model number rather than substituting bolts or screws from a general hardware store.
If the electrode gap seems off, can I adjust anything else or only the electrode?
No. The safest approach is to follow the manual’s electrode gap and alignment guidance and adjust the electrode bracket only if sparking is weak or not reaching the port opening. Do not bend other components or reposition the burner tube unless you have already verified the tube seating over the valve outlet.
What do I do if the hose or regulator area gets scraped or shows heat damage during assembly?
After an initial successful leak test, but before lighting, verify all knobs are fully OFF and that the regulator routing keeps the hose away from hot surfaces. If you later notice melted or scraped hose insulation, stop use and replace the hose-regulator assembly rather than patching it.
Fire appeared at the control panel after lighting, is it safe to try again?
If you see fire coming through the control panel face, shut off gas, let the grill cool fully, and clear the burner tube obstruction (for example, debris or spider webs) before any attempt to relight. Do not relight to “check again” since backflow indicates a blocked or mis-seated combustion path.
What is the cutoff point where I should stop troubleshooting and call for replacement parts?
If you cannot stop a leak by turning the cylinder valve OFF and retightening, do not keep attempting multiple re-connections. Follow the stop-and-call guidance, request replacement parts, and keep people away from the area until the issue is resolved.