If your Fire Sense patio heater igniter isn't working, the most likely culprits are a dead AAA battery inside the igniter button, a loose wire connection, or a gas flow problem that has nothing to do with the igniter itself. Before you assume the igniter is broken, you need to figure out whether it's failing to spark at all or sparking fine but failing to light the burner. Those are two completely different problems with different fixes, and mixing them up wastes a lot of time.
Fire Sense Patio Heater Igniter Not Working: DIY Fix Steps

Grant Mercer
17 May 2026
Start here: safety checks before you touch anything
Any time you're troubleshooting a propane patio heater, you do the safety checks first. No exceptions. Turn the control knob fully to OFF and close the propane tank valve before you start poking around. If you smell gas strongly at any point during this process, do not press the igniter, do not flip any switches, and do not use your phone near the heater. Close the tank valve, step away, and let the area ventilate for several minutes before continuing.
- Is the propane tank valve open? It sounds obvious, but it's the most commonly missed step.
- Is the tank empty or nearly empty? Shake it or use a gauge. A nearly empty tank can still feel like it has fuel but won't supply enough pressure.
- Is the regulator connection hand-tight at both ends? A loose fitting at the tank or hose joint is enough to starve the burner of gas.
- Is anything visibly blocking the burner head or pilot area? Spiders, wasp nests, and debris are extremely common in outdoor heaters that sit unused for a season.
- Are you trying to light the heater in high wind? Wind alone can prevent ignition even when the spark is perfect.
- If your model uses a battery-powered igniter, when did you last replace the battery?
Fire Sense manuals specifically recommend a soap-and-water leak test on the regulator-to-hose and hose-to-heater connections: mix a few drops of dish soap with water, brush it onto the joints, open the tank valve slowly, and watch for bubbles. If you see bubbles, close the tank valve immediately, tighten the connection, and test again. Never try to light the heater if you're seeing a leak.
Figure out exactly what 'not working' means on your heater
This step saves you from chasing the wrong fix. There are two distinct failure modes that both get described as 'the igniter isn't working,' and they need completely different solutions.
No click, no spark
If you press the igniter button and hear absolutely nothing, no click and no visible spark at the burner tip, then the igniter itself is the problem. On most Fire Sense models, the igniter button contains a AAA battery that powers a piezo or electronic spark module. A dead battery is the single most common reason for total igniter silence. The other common causes are a loose wire between the button and the electrode, a corroded or broken electrode tip, or a failed ignition module.
Clicking and sparking, but no flame
If you can hear the igniter clicking and can see or hear sparking at the burner or pilot area, but nothing lights, then your igniter is actually doing its job. The problem is with gas delivery: empty tank, closed valve, blocked orifice, regulator reset needed, air in the supply line, or a safety system (thermocouple or tilt switch) that's preventing gas from flowing.
If you’re dealing with a Hampton Bay patio heater igniter not working, you can use the same basic diagnostic split to decide whether you have a spark problem or a gas-delivery problem gas delivery. If your outdoor propane patio heater is not working, focus first on gas delivery problems before assuming the igniter is bad outdoor propane patio heater not working.
Fire Sense's own troubleshooting guide makes this exact distinction and tells you to confirm gas is reaching the burner before pressing the igniter repeatedly.
Check the igniter's power source and controls
Most Fire Sense patio heaters use a battery-powered electronic igniter with a AAA battery located inside or directly behind the igniter button housing. Fire Sense's own troubleshooting chart lists 'AAA battery behind igniter button is dead' as one of the first things to check, and the fix is simply to unscrew the igniter button cap, swap in a fresh AAA battery, and reinstall. This takes about 60 seconds and fixes a surprising number of 'broken igniter' complaints.
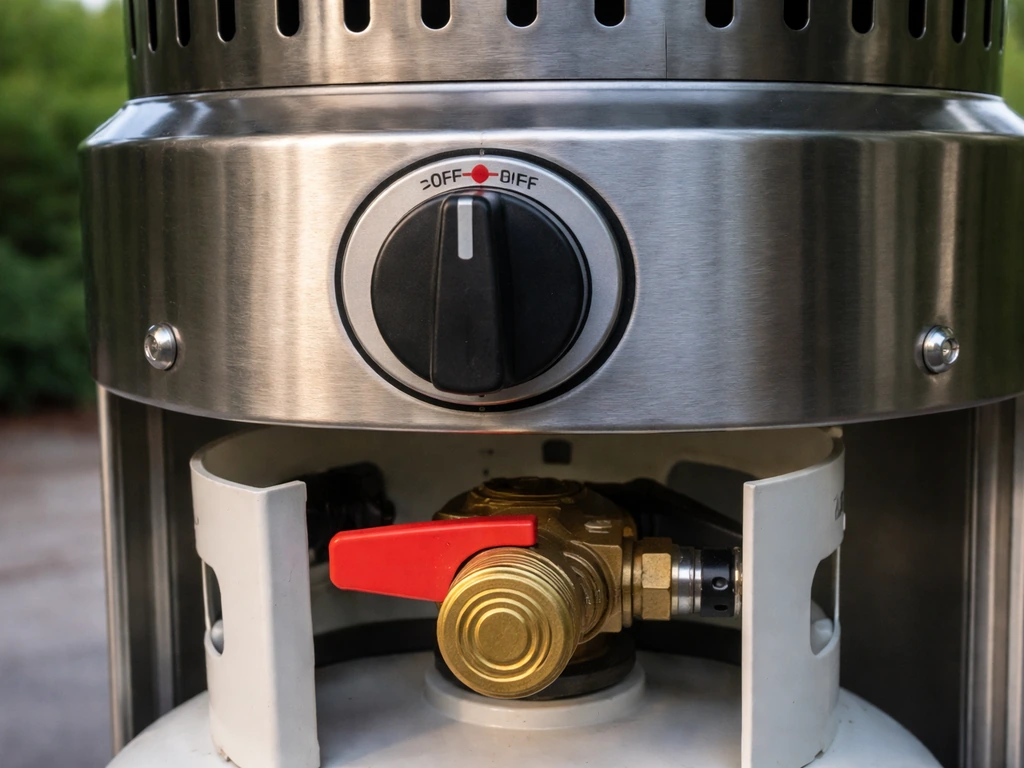
- Turn the control knob to OFF and close the tank valve.
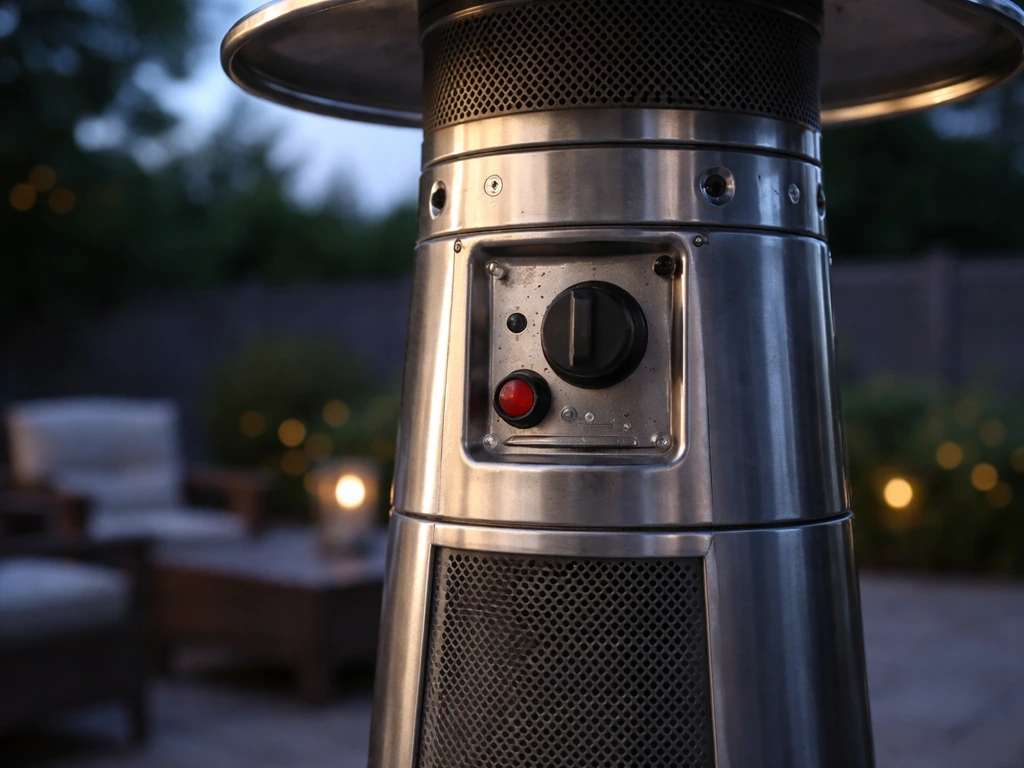
- Locate the igniter button on the control panel. On most Fire Sense models it's a red push button near the main control knob.
- Unscrew or pop off the igniter button cap. The battery compartment is usually right behind it.
- Remove the old AAA battery and install a fresh one, noting the correct polarity.
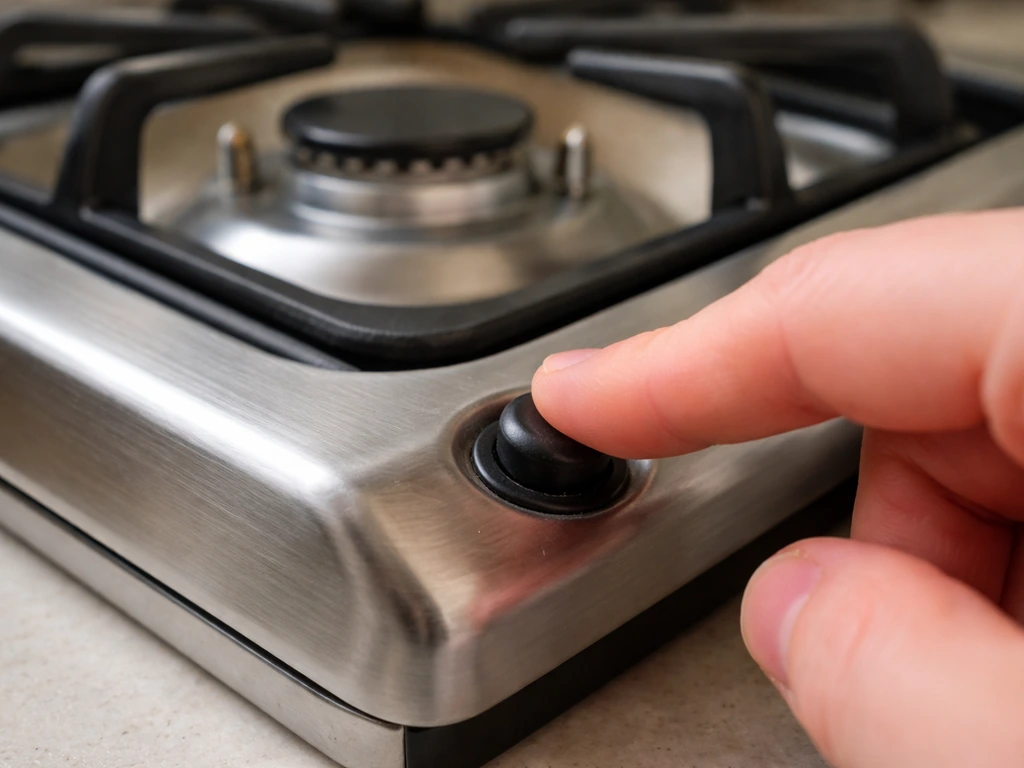
- Reassemble the button and test: press it once with the knob still at OFF and in open air. You should hear a clear, crisp click.
- If the click is now audible and sharp, the battery was your problem. If there's still nothing, move on to the electrode and wiring.
While you have the button area open, look at the ignition switch itself. Press the button a few times and watch whether the click sounds mechanical and consistent. A weak, mushy, or intermittent click can indicate a worn ignition switch that needs replacing. Also check whether the wires connected to the igniter button are firmly seated, not corroded green or white, and not cracked or pinched.
Inspect the electrode, wiring, grounding, and moisture damage
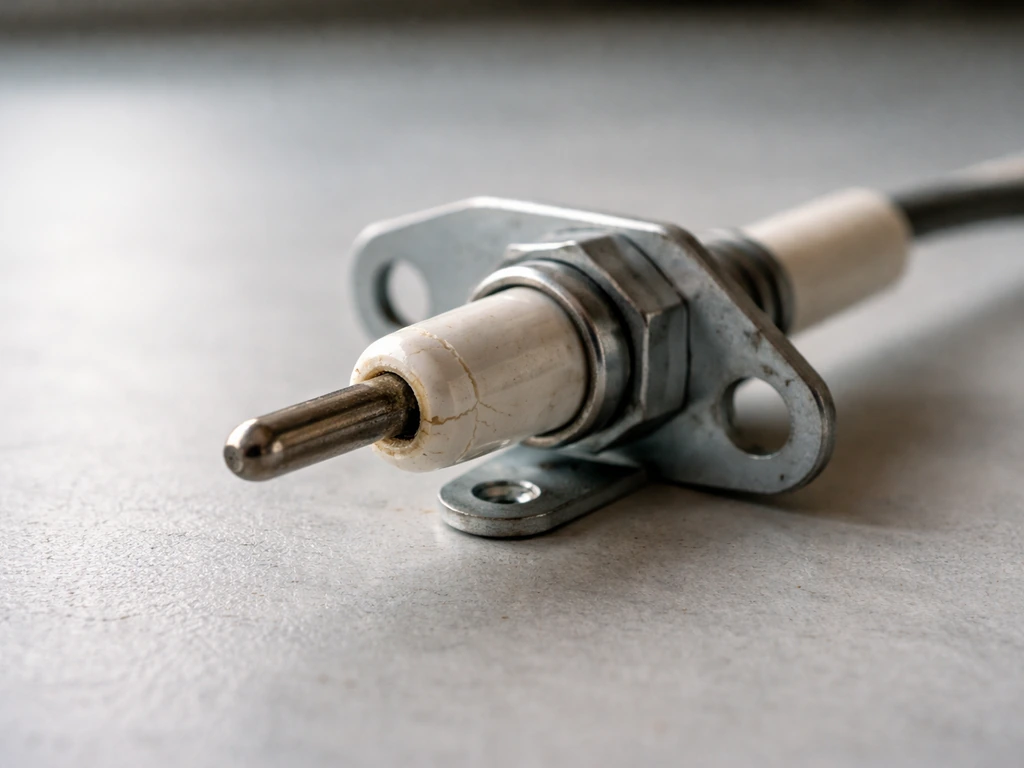
Even with a fresh battery and a working button, a bad electrode or wiring problem will prevent any spark. The electrode is the small ceramic-tipped probe positioned near the pilot or burner head. It generates the actual spark that lights the gas.
What to look for at the electrode
- Cracked ceramic insulator: if the white ceramic body around the electrode wire shows any crack, the spark is grounding out through the crack instead of jumping to the burner. Replace the electrode.
- Carbon buildup or corrosion at the tip: a dirty tip increases resistance and weakens the spark. Clean gently with a fine wire brush or light sandpaper, then wipe dry.
- Electrode tip position: the tip needs to be close enough to the burner or ground point to arc across, usually about 3 to 5 mm. If it's been bent away, it won't spark. Carefully bend it back into position.
- Moisture in the electrode area: if the heater sat outside in rain or heavy humidity, moisture on the ceramic can cause the spark to dissipate. Let the heater dry completely in a warm, ventilated area before testing again.
- Debris blocking the gap: spider webs, dirt, and grease can bridge the gap and prevent a clean arc. Clear the area around the electrode tip.
Wiring and grounding checks
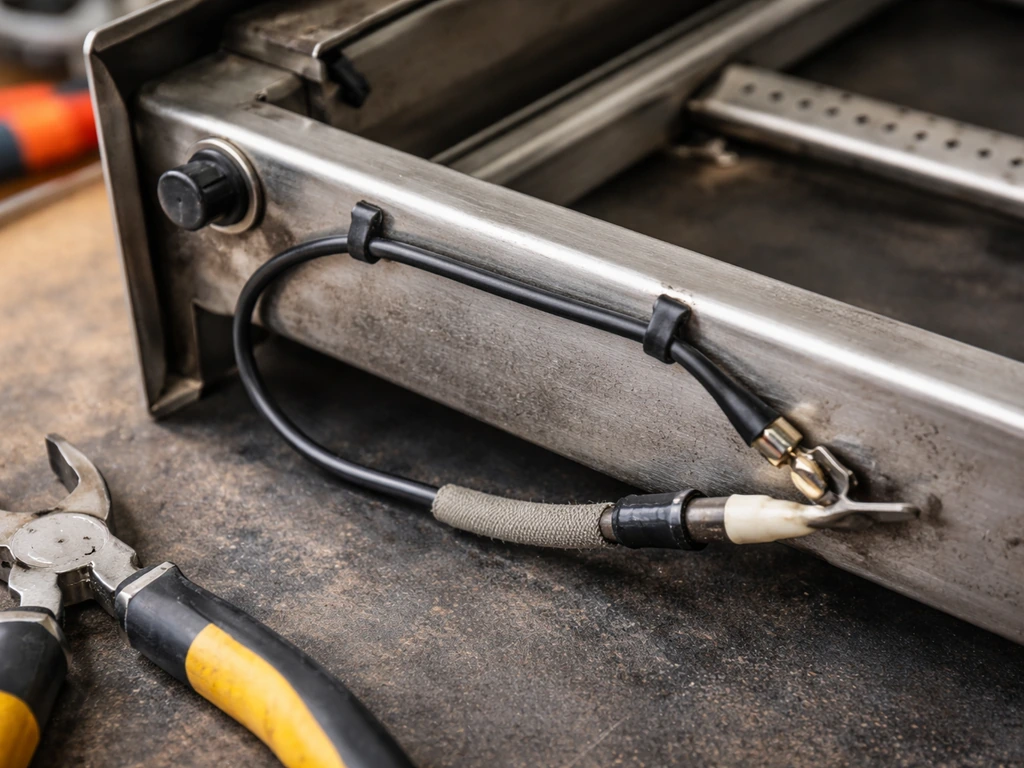
Trace the wire from the igniter button down to the electrode. Fire Sense troubleshooting charts specifically list 'loose connection' as a cause of ignition failure, and that wire is the most likely place for it to occur. Push each connector firmly seated, look for corrosion (green or white powdery buildup), and check that the wire jacket isn't cracked or melted from heat exposure.
A loose or corroded ground connection is just as important: the spark needs a solid ground path through the heater frame to arc across to the electrode tip. If the heater body has surface rust or paint buildup around the electrode mounting point, that can interrupt grounding. Clean the mounting area and ensure the electrode bracket is making solid metal-to-metal contact with the heater frame.
Cross-check the safety systems before blaming the igniter
Fire Sense heaters include safety devices that cut off gas if they sense something wrong. These systems can produce symptoms that look exactly like an igniter failure, especially when the igniter sparks but the burner won't stay lit or gas doesn't seem to flow.
Thermocouple or flame sensor
The thermocouple is a small probe near the pilot flame that generates a tiny voltage when it's heated. That voltage tells the gas valve it's safe to stay open. If the thermocouple is faulty, worn out, or not positioned correctly in the pilot flame, the gas valve closes within seconds of ignition, and the flame goes out. Fire Sense manuals list 'thermocouple bad: replace thermocouple' as a specific corrective action.
If your heater lights briefly and then goes out 5 to 30 seconds later every single time, a failed thermocouple is almost certainly the cause, not the igniter. You can test a thermocouple with a multimeter on millivolt mode: a working thermocouple should produce roughly 25 to 30 millivolts when its tip is held in a flame.
Tilt switch
Most mushroom-style patio heaters include a tilt switch (sometimes called an anti-tip switch) that cuts gas flow if the heater tilts beyond a safe angle. If this switch is faulty, stuck, or has a broken wire, it can prevent the heater from lighting even when the heater is perfectly upright. Check that the heater is on a flat, level surface. If you suspect the tilt switch, gently tap the heater body while attempting ignition. If it suddenly lights, the switch contacts are probably intermittent and the switch should be replaced.
OPD valve reset (propane models)
Propane tanks made after 1998 have an OPD (Overfill Prevention Device) valve that can trip and restrict gas flow if the tank valve is opened too fast. If you opened the tank valve quickly and now get very weak gas flow or none at all, close the tank valve completely, then disconnect the regulator, wait 30 seconds, reconnect the regulator, and slowly open the tank valve. This resets the OPD and often restores full gas pressure immediately.
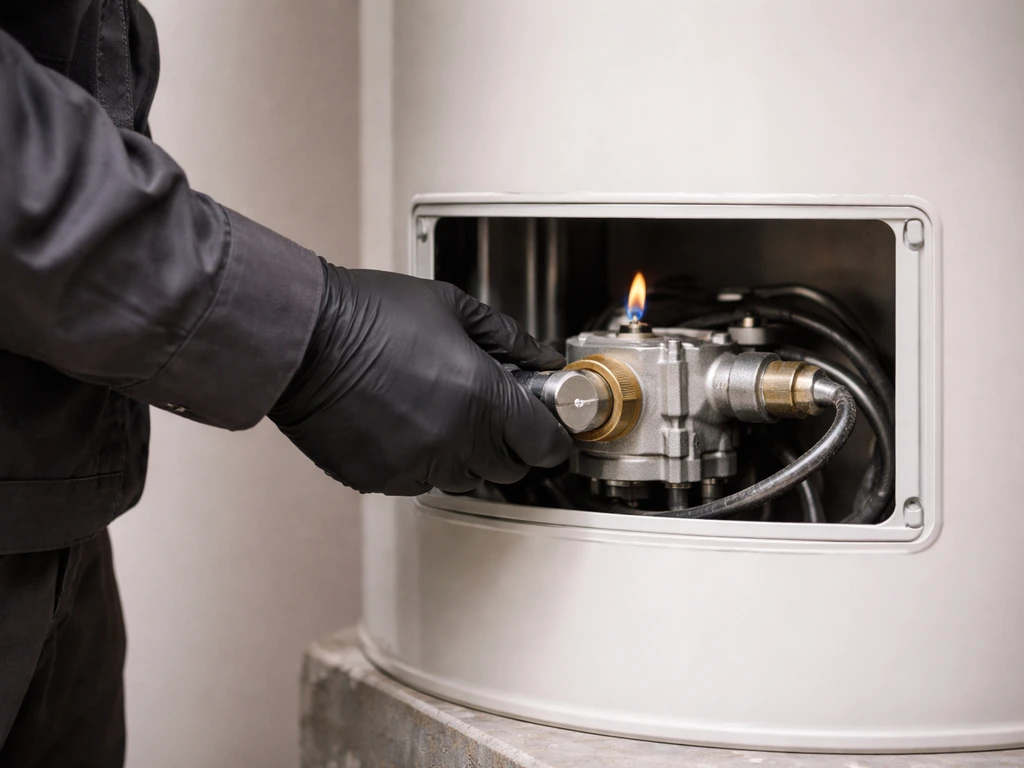
Test the gas path and try a safe manual light
Once you've confirmed the igniter is generating a spark (you can hear and/or see it), the next thing to verify is whether gas is actually reaching the burner when you attempt ignition. If your patio heater not working because the igniter sparks but gas is not reaching the burner, use this gas-path test before assuming any ignition part is bad. This is the diagnostic split Fire Sense's own guide points you toward: gas flow confirmation before repeated igniter pressing.
- Open the tank valve slowly (one full turn). Confirm the regulator connection is secure.
- Follow your model's lighting sequence: press and hold the control knob inward (or turn it to PILOT), then press the igniter button. Hold the knob for at least 30 seconds after the pilot lights to allow the thermocouple to heat up.
- Listen and sniff carefully near the burner area (not your face directly over it). A very faint hiss of gas is normal when you're in the ignition position. No sound at all suggests a blocked orifice, faulty regulator, or closed valve somewhere in the path.
- If you're confident gas is flowing and the igniter is sparking but nothing lights, try a manual light with a long-reach lighter or a fireplace match. Hold the flame near the pilot area, then slowly turn the control knob to PILOT while holding the knob. If it lights manually, your igniter electrode isn't positioned correctly or the spark isn't reaching the pilot. If it doesn't light manually either, the gas path is blocked.
- If the heater lights manually but won't light by igniter, the fix is in the igniter system: electrode position, wiring, or the ignition module.
- If the heater won't light manually either, focus on the gas path: check for a blocked pilot orifice, test the regulator with a known-good one, or look for a kinked hose.
To check for a blocked pilot orifice, close the tank valve, disconnect the gas supply, and locate the tiny brass orifice fitting at the pilot assembly. Use a can of compressed air to blow through it gently. Never use a metal wire or pin to poke the orifice open; that can damage the precisely sized hole and ruin gas flow permanently.
Repairs and replacements: what to do and when to stop
Here's a practical summary of the fixes in order of complexity and how far a typical DIYer should go.
| Problem | Fix | DIY Level |
|---|---|---|
| Dead AAA battery in igniter button | Unscrew igniter cap, replace battery | Easy |
| Loose wire at igniter button or electrode | Reseat connector, check for corrosion, clean and reconnect | Easy |
| Corroded or dirty electrode tip | Clean with wire brush, dry thoroughly, retest | Easy |
| Electrode tip out of position | Carefully bend tip to 3-5 mm gap from ground point | Easy |
| Cracked electrode ceramic | Replace electrode assembly (available from Fire Sense parts suppliers) | Moderate |
| Faulty ignition module | Replace ignition module; match part number from your model's manual | Moderate |
| OPD valve tripped on tank | Close valve, disconnect regulator, wait 30 sec, reconnect, open slowly | Easy |
| Blocked pilot orifice | Blow clear with compressed air after disconnecting gas supply | Moderate |
| Failed thermocouple | Replace thermocouple; Fire Sense manuals list this as a standard corrective action | Moderate |
| Faulty tilt switch | Replace tilt switch; test continuity with a multimeter first | Moderate |
| Gas leak at regulator or hose fitting | Tighten connection, retest with soap solution; replace hose or regulator if leak persists | Moderate |
| Faulty gas valve or regulator | Replace regulator first (common); if still no flow, stop and call a pro | Stop/Pro |
Replacing the ignition module
If a fresh battery and clean connections don't restore a spark, the ignition module itself may have failed. This is the small electronic box or piezo unit that generates the high-voltage pulse when the button is pressed. To replace it, find your Fire Sense model number (printed on the label on the base or emitter body), look up the parts diagram in your manual or on the Fire Sense/Balkene website, and order the matching ignition module. Replacement is usually straightforward: disconnect the two or three wires, swap the module, reconnect, and test. Always do this with the tank valve closed.
When to stop and call a professional
There are a few situations where the right answer is to stop and get a qualified gas appliance technician involved. If you detect a gas leak that doesn't stop after tightening connections and replacing the hose or regulator, that's a pro call. If the internal gas valve is suspected faulty (gas doesn't flow even with a known-good regulator, open tank, and clear orifice), replacing a gas valve on a patio heater is generally not a DIY repair on most consumer models, and often the cost of labor and parts approaches the cost of a new heater. Similarly, if the heater is more than 8 to 10 years old and multiple components are failing at once, replacement is likely the more practical and safer path.
How Fire Sense igniter problems compare to other patio heater brands
The same root causes that affect Fire Sense igniters (dead battery, loose wire, electrode position, thermocouple failure, blocked orifice) show up across virtually every propane patio heater brand. If you've worked through this guide and want to cross-reference similar symptoms on other brands, the same diagnostic sequence applies broadly to Hampton Bay, AZ Patio Heaters, and generic outdoor propane models. The main difference with Fire Sense is the confirmed use of a AAA battery inside the igniter button housing, which makes the battery check the most important first step and the one most often skipped. On some brands, piezo igniters are entirely mechanical and need no battery, so confirming your Fire Sense model's ignition type from the manual before troubleshooting saves time.
Quick decision guide: where to start based on your symptom
| What you observe | Most likely cause | First fix to try |
|---|---|---|
| No click, no spark at all | Dead AAA battery | Replace battery in igniter button |
| Weak or intermittent click | Worn ignition switch or low battery | Replace battery; replace switch if still weak |
| Click but no visible/audible spark | Bad electrode, cracked ceramic, or broken wire | Inspect electrode and wiring; clean or replace |
| Spark present but pilot won't light | No gas flow, blocked orifice, or OPD tripped | Check tank valve, reset OPD, check orifice |
| Pilot lights then goes out in seconds | Thermocouple not heated or faulty | Reposition thermocouple; replace if needed |
| Heater won't light in wind | Environmental, spark not reaching pilot | Shield heater from wind; check electrode gap |
| Heater lights manually but not by igniter | Electrode position or weak spark | Re-gap electrode; replace module or electrode |
Working through this sequence systematically instead of jumping straight to parts replacement will solve the majority of Fire Sense igniter problems in under 30 minutes. The battery and loose-wire checks alone fix a large portion of reported igniter failures on these heaters, and they cost nothing if you already have a AAA battery on hand. Start simple, confirm what you're seeing before each next step, and only move to parts replacement once you've ruled out the easy stuff.
FAQ
If I keep pressing the Fire Sense igniter button repeatedly, is that safe if it still won’t light?
Not after you confirm a lack of ignition. If you do not see any spark or you suspect gas might not be reaching the burner, stop pressing, keep the control knob OFF, and recheck tank valve position and the soap-and-water leak check. Repeated attempts can flood the burner area and make the next attempt harder or more hazardous.
My Fire Sense igniter clicks but the spark looks weak. Could the battery still be the issue?
Yes. A weak click and weak or inconsistent sparking can still come from a tired AAA battery or a poor battery contact. Swap in a fresh AAA and inspect the battery contacts for grime or looseness before assuming the module or electrode is failing.
What if I can see sparking at the electrode but the burner lights for a second and then goes out?
That pattern usually points to a safety shutoff, most commonly a thermocouple. If it reliably shuts down 5 to 30 seconds after ignition, test the thermocouple output with a multimeter on millivolts (about 25 to 30 mV in flame is typical for a healthy sensor) and ensure the tip sits in the pilot flame.
How do I tell whether the problem is gas delivery versus the igniter when I hear clicking?
Use the spark observation first, then focus on gas path. Confirm the tank valve is fully open, verify gas flow at the burner/pilot area, and check the regulator and orifice for blockage. If gas is not reaching the burner, keep troubleshooting the gas side rather than replacing igniter parts.
Could the regulator have triggered or be causing low gas flow even if the igniter sparks normally?
Yes. If you opened the tank valve quickly and now you have little or no flame, the OPD valve may be restricting flow. Close the tank, disconnect the regulator, wait about 30 seconds, reconnect, and slowly reopen the tank valve to reset the restriction.
If the electrode area looks clean, how can I tell whether the electrode is positioned correctly?
Visually confirm the electrode tip is aimed at the pilot or burner ignition area and that the ceramic tip is intact. If the electrode is loose or shifted after transport, the spark can jump to the wrong spot. Reseat the electrode bracket so it makes solid metal-to-metal contact and retest.
What does “loose ground connection” look like in real troubleshooting, and how do I fix it?
You may see rust, paint, or corrosion around the electrode mounting point, or the electrode bracket may not be tightly attached to bare metal on the heater frame. Clean the contact surfaces down to clean metal where appropriate, tighten the mounting hardware, and recheck that the spark consistently arcs to the electrode tip.
How can I recognize a failing ignition switch without damaging anything?
If the click is mushy, intermittent, or changes noticeably when you press the button, that suggests a worn ignition switch. Avoid yanking wires, and check that the connectors behind the button are secure before ordering any part.
My heater won’t light and keeps shutting off. Could the tilt (anti-tip) switch be the cause even if the heater seems upright?
Yes. If the heater is on an uneven surface or the tilt switch contacts are intermittent, gas can be cut even while it appears level. Place it on a flat surface and gently tap the heater body during ignition attempts. If it lights after tapping, the tilt switch circuit likely needs replacement.
What should I do if I find bubbles during the soap-and-water leak test?
Do not try to ignite. Close the tank valve, tighten the affected connection(s), and repeat the leak test. If bubbles persist after tightening and you can’t correct the leak at the connection points, stop and contact a technician rather than continuing DIY ignition troubleshooting.
If I open the control valve and there is no gas sound at all, what’s the next check before touching the igniter?
Confirm gas path basics first: tank valve fully open, regulator properly connected, and no blocked supply flow. Also verify the orifice at the pilot assembly is not obstructed and avoid using metal tools to clear it, since damaging the hole can permanently alter gas delivery.
When is it time to stop and replace the ignition module instead of troubleshooting wires and electrode first?
If you have a fresh AAA battery, a consistent clicking sound, clean and tight connections, and proper spark generation at the electrode, but the module still fails to produce the correct spark behavior, the ignition module may be bad. Use the model number to order the exact matching module, and replace it with the tank valve closed.
How old is too old for DIY fixes if the igniter problems keep changing?
If the heater is roughly 8 to 10 years old and multiple components show failure at once, replacing the heater is often safer and more cost-effective than continued part swaps. A technician can help decide if the issue is isolated to the ignition circuit or broader gas-safety components.