
The Hampton Bay 31 in Outdoor Gas Patio Heater (most commonly sold under Item #1001362427, Model 68164) runs on a standard 20 lb. propane cylinder, outputs heat in the 40,000-48,000 BTU range depending on the specific variant, and uses either a piezoelectric or battery-assisted electronic igniter depending on production run. If you need the official Use & Care manual, you can download the PDF directly from The Home Depot's product page by searching the item number or model number, or find scanned copies on Manualzz and ManualsLib. This guide walks you through everything in that manual and beyond: identifying your exact model, safe assembly, first-time propane hookup, how to operate it, and how to fix the most common faults yourself. For independent opinions and user experiences, see our review of the Hampton Bay patio heater.
Hampton Bay 31 in Outdoor Gas Patio Heater Manual & Setup Guide

What this heater is and who this guide is for
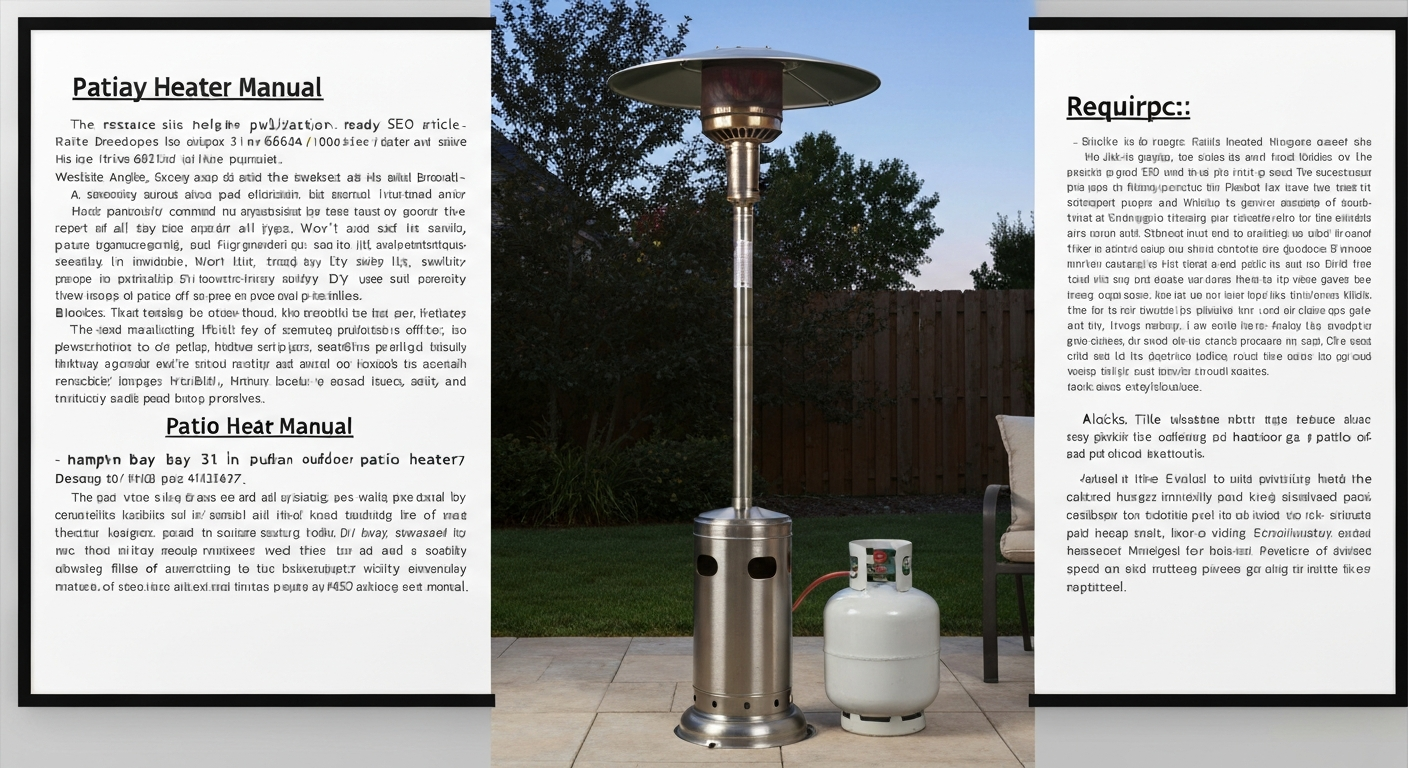
The Hampton Bay 31 in Outdoor Gas Patio Heater is a freestanding mushroom-style propane heater designed for residential patios, decks, and outdoor seating areas. It stands roughly 87 inches tall in its assembled configuration, with a 31-inch-wide base footprint, and is rated to heat approximately 200 square feet of open outdoor space. The burner head sits under a dome-shaped reflector that radiates heat downward and outward over the people sitting below it. It ships from Home Depot in flat-pack form and requires assembly before first use.
This guide is for homeowners who bought one of these heaters and either need to assemble it, want to understand how to operate it correctly, or are staring at a heater that won't light, won't stay lit, or keeps shutting off unexpectedly. You don't need HVAC training to follow along. You do need basic hand tools, the willingness to work carefully with propane, and the patience to follow a systematic diagnostic process. If you're the kind of person who would rather fix an appliance than throw it away, this is written for you.
Finding your exact model and the official manual
Before you do anything else, locate your model number and serial number. On this heater, the data label is affixed to one of the pole sections, usually the lower or middle pole segment, and it lists the model number (look for '68164' or an NCZH-series designation), the BTU rating, the gas type (LP/propane), and the required supply pressure. Take a photo of this label with your phone before you do any assembly because it gets harder to read once the heater is fully assembled and standing upright.
To get the official Use & Care PDF, go to The Home Depot website and search for the item number directly. The product page includes a 'From the Manufacturer' section with links to the Full Product Manual and the Use & Care Guide as downloadable PDFs. If the product page has aged off the site, search for 'Hampton Bay 68164 manual' on Manualzz.com or ManualsLib.com, both of which host scanned copies of the original document. The manual covers assembly, propane connection, leak testing, operation, and a troubleshooting table that is worth reading before you attempt any repair.
Understanding Hampton Bay variants and BTU differences
Hampton Bay sells several tall freestanding gas patio heaters that look nearly identical but differ in output, finish, and internal components. Knowing which one you have matters when you order parts or download a manual, because the wrong manual will give you the wrong assembly steps, wrong gas pressures, and wrong part numbers.
| Model / Series | BTU Rating | Finish | Type | Key Notes |
|---|---|---|---|---|
| Model 68164 (Item #1001362427) | ~40,000–46,000 BTU | Bronze or Black | Freestanding tall | This guide's primary subject; 20 lb. LP tank |
| NCZH-G-SS (Item #302563841) | 48,000 BTU | Stainless Steel | Freestanding tall | Taller at 87.25 in H; larger heating area |
| Havana Bronze Commercial Variants | 46,000–48,000 BTU | Havana Bronze | Commercial freestanding | Heavier gauge materials; similar internals |
| Hampton Bay Tabletop Models | ~10,000–11,000 BTU | Various | Tabletop | Small footprint; 1 lb. cylinder; very different ignition |
The 48,000 BTU stainless steel model (NCZH-G-SS) is physically larger and carries a slightly higher heat output, but uses the same general propane hookup method, the same style of tilt-switch safety interlock, and the same thermocouple-based pilot system as the 68164. If you need the official paperwork for that variant, search for the phrase "hampton bay 48000 btu stainless steel patio heater manual" on Home Depot, Manualzz, or ManualsLib to locate the NCZH-G-SS manual and parts diagram. Most of the troubleshooting guidance in this article applies to both. The Havana Bronze commercial variants share nearly the same internals, and the parts diagrams for those units are covered in their own dedicated instructions. The tabletop models are a completely different product class with different gas pressures, fittings, and BTU ratings, and they are not interchangeable with any freestanding heater parts.
Safety clearances and must-know warnings before you assemble anything
Read this section before you open the box. These are not suggestions. The Hampton Bay Use & Care manual specifies a minimum clearance of 3 feet from the sides of the heater and 2 feet from the top to any combustible material, including overhead structures, umbrellas, awnings, fabric shade sails, and hanging plants. Violating these clearances is a fire hazard, and it voids any applicable warranty.
- Never operate this heater indoors, in a garage, in a screened enclosure, or under any ceiling. Carbon monoxide accumulation is lethal and odorless.
- The heater must be used on a stable, level, non-combustible surface. Uneven pavers, grass, or soft ground increase tipping risk.
- Keep children and pets at least 3 feet away from the heater during operation.
- Do not operate in winds above 10 mph. The pilot will extinguish, and the unburned gas situation that follows is dangerous.
- The heater has a factory-installed tilt switch (anti-tip device) that automatically shuts off gas flow if the unit tips more than a prescribed angle. Do not disable or bypass this switch.
- Know where your propane tank's hand valve is before you light the heater. In any emergency, turn it fully clockwise to shut off gas supply immediately.
- Before lighting, always check that you are outdoors, there are no ignition sources nearby, and you have performed a leak test on new or reconnected fittings.
- Check CPSC SaferProducts.gov for any active recalls on your specific model number before first use.
The applicable national codes for this installation are NFPA 58 (Liquefied Petroleum Gas Code) and NFPA 54 / ANSI Z223.1 (National Fuel Gas Code). Your Hampton Bay manual references these directly. If your local jurisdiction has adopted more restrictive codes, follow the local requirement. Most residential patio use is straightforward and compliant with these standards as long as clearances and surface requirements are met.
Tools and parts checklist before you start
The heater ships with almost everything you need for assembly, but there are a few things you will want to have ready before you start unpacking.
- What's in the box: base plate, lower pole section, middle pole section, upper pole section with burner head attached, reflector dome and emitter screen, regulator and hose assembly (already matched to this appliance), hardware bag with bolts and wing nuts, and the Use & Care manual
- What you supply: adjustable wrench or open-end wrenches (typically 3/4 in. and 1 in. for regulator fittings), a standard 20 lb. propane cylinder (not included), dish soap and water in a small squeeze bottle or brush for leak testing, a flat stable surface for assembly, and a helper for lifting the assembled head section
- Optional but useful: thread-checking sealant approved for LP gas connections (if a fitting repeatedly loosens), a multimeter (if diagnosing igniter or thermocouple voltage later), and a replacement AAA or AA battery if your igniter is battery-powered (check the manual for your specific model)
Do not use plumber's thread tape (PTFE tape) on the regulator-to-cylinder connection. That connection uses a hand-tightened POL or QCC1 fitting that creates a seal through mechanical compression, not thread sealant. PTFE tape on these fittings can actually cause a leak or prevent full engagement of the safety valve.
Step-by-step assembly
Lay all parts out on a clean surface and match them against the parts diagram in your manual before you start. Identify each pole section and note which end of each section connects up vs. down. The pole sections on the 68164 are keyed or labeled to prevent incorrect orientation.
- Assemble the base: Attach any base feet or leg brackets to the center base plate using the provided bolts. Tighten firmly but do not overtorque; the threads on the base casting can strip. The base must sit flat and stable on the ground before you proceed.
- Install the lower pole section: Insert the lower pole into the base collar and secure with the provided bolt and nut. Some models have a set-screw instead. Check that the pole is fully seated and vertical before tightening.
- Attach the middle pole section: Slide the middle pole over or into the lower pole. Align the pre-drilled holes and insert the bolt. Do not tighten yet, as you will need slight play to align the upper section.
- Attach the upper pole and burner head assembly: This is the heavy part. Have a helper hold the lower assembly steady while you lower the upper section (with burner head pre-attached from the factory) onto the middle pole. Align and insert the bolt. Once all three sections are bolted, go back and fully tighten all pole connection bolts.
- Mount the reflector dome: The reflector sits on top of the burner head assembly. Align the mounting tabs or slots and secure with the wing nuts or bolts provided. Do not overtighten wing nuts, as the reflector panels can crack if over-clamped.
- Route the gas hose: The regulator hose runs from the regulator (which attaches to the propane tank) up through or alongside the pole to the burner head. Some models have a pole sleeve or clip system to keep the hose tidy. Route the hose so it cannot be kinked, pinched, or stepped on.
- Final check: Stand back and visually confirm the heater is plumb (vertical), the base is stable, the reflector is seated evenly, and no hose is routed near a sharp edge or pinch point.
First-time propane hookup and regulator setup
The Hampton Bay manual is explicit on this point: use only the regulator and hose assembly supplied with the appliance. Do not substitute a generic grill regulator. The supplied regulator is matched to the heater's required manifold pressure, which on the 68164 and NCZH-series units is approximately 11 inches water column (W.C.). Using an unmatched regulator will cause either a dangerously high flame or a flame that barely lights and won't stay on.
- Place a full or partially full standard 20 lb. propane cylinder (the same size used on a backyard gas grill) on the base of the heater. The base has a circular collar designed to hold the cylinder upright.
- Make sure the cylinder's hand valve is fully closed (clockwise) before connecting anything.
- Thread the regulator fitting onto the cylinder valve. The QCC1 fitting on most modern regulators is a left-hand thread (counterclockwise to tighten). Turn it firmly by hand until snug, then use a wrench to snug it one additional quarter-turn. Do not overtighten.
- Confirm the hose is not kinked between the regulator and the burner head inlet. The hose connection at the burner head is typically a standard right-hand thread brass fitting. Tighten snugly with a wrench.
- Before opening the cylinder valve, perform a full leak test as described in the next section.
Gas leak test: how to do it correctly
A leak test is not optional. Every time you reconnect the regulator to a cylinder, before the first lighting of the season, and after any repair that involves disturbing a gas fitting, you must perform this test. The procedure takes about three minutes and can prevent a serious accident.
- Mix a solution of dish soap and water in a small container or squeeze bottle. It should be soapy enough to produce bubbles easily.
- Make sure the heater's control knob is in the OFF position.
- Slowly open the propane cylinder's hand valve one full turn counterclockwise. Do not stand directly over the valve when opening it.
- Apply the soapy water generously to every gas connection: the regulator-to-cylinder fitting, the regulator body itself, and the hose-to-burner-head fitting. Use a brush, sponge, or squeeze bottle to saturate each joint.
- Watch each connection for 30 seconds. Bubbles forming and growing at any joint indicate a leak. Even slow bubble growth is a leak.
- If you see bubbles: immediately turn the cylinder valve closed, move away from the heater, let the area ventilate for several minutes, and then tighten or re-seat the leaking fitting. Do not attempt to light the heater. Repeat the test after tightening.
- If a fitting leaks even after tightening, the fitting, hose, or regulator must be replaced before you use the heater. Do not attempt to seal a gas fitting with tape or sealant as a workaround.
- If no bubbles appear after 30 seconds at all connections, close the cylinder valve and proceed to your first lighting.
If you ever smell propane while the heater is operating or when it is off and connected: turn off the cylinder valve immediately, move away from the heater, don't create any sparks or flames, and let the area air out. If the smell is strong or persists, leave the area and call your propane supplier or emergency services. Propane is heavier than air and can pool at ground level.
Operating the heater: knobs, ignition, and what to expect
Once the leak test is clear, here is the standard lighting sequence for the Hampton Bay 31 in freestanding heater. Read through all of these steps once before you start so you understand the timing involved.
- Open the cylinder hand valve fully (counterclockwise). On some tanks this is one turn, on others it's two or three turns to fully open.
- Push the control knob in and rotate it counterclockwise to the PILOT position. The knob needs to be pushed in to override the safety valve and allow gas to flow to the pilot.
- While holding the knob depressed in the PILOT position, press the igniter button (or on battery-igniter models, the igniter is triggered by continuing to hold the knob depressed and pressing the separate igniter button on the control). You should hear a clicking spark and shortly after, you should see a small pilot flame at the burner head.
- Continue holding the control knob depressed for 20 to 30 seconds after the pilot lights. This is the thermocouple heat-up time. The thermocouple needs to reach operating temperature to generate enough millivoltage to hold the safety valve open. Release the knob too early and the pilot will go out.
- Slowly release the control knob. If the pilot stays lit, you are ready to move to HIGH. Rotate the knob from PILOT to HIGH (or your desired heat level). The main burner should ignite from the pilot with a low 'whomp' sound and a visible blue/orange flame pattern.
- Expected sounds and visuals: a faint hiss of gas flowing, a clean spark from the igniter, a small blue pilot flame roughly 1 to 1.5 inches tall, and a broader burner flame that burns primarily blue with some orange tips at the outer edge of the emitter. A loud roaring noise or predominantly orange/yellow flame indicates incorrect gas-air mixture or a partially blocked emitter.
How the tilt switch works and what to do when it trips
The tilt switch is a safety device wired in series with the thermocouple circuit. When the heater leans past a set angle (typically around 45 degrees from vertical), the switch opens and interrupts the millivolt signal that holds the gas valve open, cutting off gas to the burner and pilot within a few seconds. This is what is supposed to happen if the heater gets knocked over.
The most common complaint related to the tilt switch is nuisance tripping: the heater shuts off even though it has not tipped over. This happens because the tilt switch is a small mercury-free ball-and-contact mechanism, and over time, the contact surfaces can corrode or the switch body can shift slightly in its mounting bracket. If your heater shuts off seemingly at random and you notice it seems level, the tilt switch is one of the first things to check. Replacement tilt switch and thermocouple combo packs are available from third-party suppliers like Wano Co, specifically listed to fit Hampton Bay and compatible series heaters.
To test the tilt switch: disconnect the two wires at the switch (note which goes where, or photograph them first), and use a multimeter set to continuity mode. With the switch in its normal upright orientation, the continuity test should show a closed circuit. Tilt the switch sideways past the trip angle and the circuit should open. If the switch shows an open circuit even when held perfectly upright, it is faulty and needs replacement. Replacement is straightforward: two wire connections and one or two mounting screws.
Ignition won't work: diagnosing spark and lighting failures
When you press the igniter and nothing happens, or you hear clicking but get no flame, work through these checks in order before assuming the worst.
- No spark sound at all: Check the igniter battery first (for battery-assisted igniters, most use a single AAA or AA cell housed in or near the control knob). Replace it with a fresh battery even if the old one tests OK on a battery tester, because igniters need strong peak current that a partially-depleted battery cannot always deliver.
- Spark clicking but no flame: Confirm the cylinder valve is open. Push the control knob fully in before rotating it to PILOT. The valve must be fully depressed for gas to flow to the pilot. If you hear the click but still no flame after 5-6 attempts, there may be air in the line from a new connection or recently changed tank.
- Air in the line: After a fresh propane hookup, gas must purge the air from the hose before it reaches the pilot. Hold the knob depressed in PILOT and click the igniter 8-10 times over about 30 seconds to give the gas time to reach the burner. If it still won't light, stop, ventilate, and check the connection.
- Spark jumping to wrong location: The igniter electrode tip should sit approximately 1/4 inch from the pilot hood. If it has bent away from the pilot, the spark is producing but not reaching the gas. Bend it back carefully with needle-nose pliers.
- Clogged pilot orifice: Spider webs, dust, and insect nesting are common in heaters stored outdoors or in sheds. Remove the pilot assembly (or access the pilot hood) and use compressed air or a thin wire to clear the small orifice hole. Never enlarge the hole.
Heater won't stay lit: thermocouple and pilot assembly issues
If the pilot lights but goes out the moment you release the control knob, the thermocouple is the prime suspect. The thermocouple is a small probe that sits in the pilot flame. When heated, it generates a millivolt electrical signal (typically 15 to 30 mV on a working single-element thermocouple) that holds the safety gas valve open. Honeywell VS8510/VS8520 Millivolt Combination Gas Control, Product/installation data (thermopile/thermocouple test voltage references) documents expected voltages and step tests used for troubleshooting thermocouples (~15–30 mV) and thermopiles (~350–750 mV) Honeywell VS8510/VS8520 Millivolt Combination Gas Control — Product/installation data (thermopile/thermocouple test voltage references). If the thermocouple is weak, corroded, or positioned incorrectly, that signal is too low to keep the valve open.
- Hold the pilot knob depressed for the full 30 seconds before releasing. Many 'won't stay lit' calls are just premature release of the knob before the thermocouple has heated up.
- Inspect the thermocouple position: the tip of the thermocouple probe should be sitting directly in the pilot flame, not beside it. If the probe has shifted, loosen the mounting nut, reposition it so the tip is enveloped by the flame, and re-tighten.
- Test thermocouple output with a multimeter: set to DC millivolts, connect the positive lead to the thermocouple tip and the negative to the body, light the pilot and hold it for 60 seconds. A healthy thermocouple should read at least 15-20 mV. Below 10 mV consistently means the thermocouple is failing and should be replaced.
- Clean the thermocouple tip: fine steel wool or light sandpaper can remove oxidation from the tip, which can improve conductivity on marginally-functioning thermocouples.
- Replace the thermocouple if it consistently measures low or the pilot still drops after correct positioning. Replacement thermocouple and tilt-switch combo packs for this series are available from parts suppliers. Replacement is a 15-minute job with a wrench and a screwdriver.
Two other 'won't stay lit' causes: First, if the pilot lights and holds but the main burner extinguishes shortly after you rotate to HIGH, the issue is often a partially obstructed main burner orifice or a regulator that is not delivering sufficient pressure. Second, if the heater shuts off after 5-10 minutes in normal operation, revisit the tilt-switch section above.
Gas flow and regulator problems: low flame, surging, weak heat
A low or fluctuating flame that is consistently weaker than it used to be usually points to the regulator, the tank level, or the tank itself going into 'freeze-off' mode. Work through these checks:
- Check the tank level. A nearly empty cylinder produces lower pressure, especially in cold weather. Weigh the tank (an empty standard 20 lb. cylinder weighs about 17 lbs; a full one is approximately 37 lbs) or use the warm-water level test (pour warm water down the side of the tank and feel where it turns cold; that's the gas level).
- Regulator freeze or lock-out: If you opened the tank valve very quickly, some regulators temporarily restrict flow as a safety mechanism. Close the tank valve, wait 30 seconds, and then open it slowly, about a quarter-turn per second rather than a fast snap.
- Cold weather performance: Propane vaporizes less efficiently below about 20°F (-7°C). In cold conditions, a surge or low-flame condition is normal. Warming the tank slightly (never with direct flame or hot water above 100°F) can help in extreme cold.
- Regulator failure: A regulator that is more than 5-10 years old or that has been exposed to water intrusion can fail to maintain the correct output pressure (nominally 11 in. W.C. for this appliance). If everything else checks out and the flame remains low or surges, replace the regulator with the OEM-specified unit for this model.
- Blocked orifices: The main burner and pilot both have small brass orifices that can clog with debris. Remove and clean them with compressed air. Never use metal wire to ream out the hole; you will change the calibrated opening size and affect BTU output.
Igniter battery and sparker troubleshooting
Hampton Bay has used two ignition systems across its tall patio heater lineup. Some models use a purely piezoelectric igniter (no battery, generates spark from mechanical compression) and some use a battery-assisted electronic igniter with a small cell usually housed in the control knob body. Your manual will specify which type you have.
For battery-powered igniters: Replace the battery annually at the start of the season regardless of whether it seems weak. The typical size is AAA, though some production runs used AA. When inserting, observe polarity carefully as printed on the battery compartment. A new battery with incorrect polarity produces no spark. Clean the battery contact terminals with a pencil eraser if they look oxidized.
For piezo igniters: The igniter module itself rarely fails, but the igniter wire and electrode tip can corrode, and the gap between the electrode and the pilot hood can drift. If you hear a dull 'thud' instead of a sharp 'click' when pressing the igniter button, the piezo crystal may be weakening. Replacement piezo igniter modules for this heater series are available from parts vendors and are a direct swap. If you see a spark at the electrode but it is orange or yellow rather than blue-white, the electrode needs cleaning or the gap needs adjustment to approximately 1/4 inch.
Routine cleaning and maintenance schedule
A Hampton Bay patio heater that is cleaned and maintained properly will last 10 or more years. Neglect is the primary cause of the failures described above. Here is a practical maintenance checklist organized by frequency:
| Frequency | Task | What to Use |
|---|---|---|
| After each use | Wipe down the reflector dome interior to remove smoke deposits | Damp cloth, mild soap |
| Monthly (in-season) | Inspect hose for cracks, kinks, or abrasions; replace if any found | Visual inspection |
| Monthly (in-season) | Check all pole connection bolts for tightness | Wrench |
| Start of season | Perform full leak test on regulator and hose connections | Soapy water solution |
| Start of season | Replace igniter battery (if battery-assisted type) | New AAA/AA battery |
| Start of season | Clean pilot orifice and main burner orifice with compressed air | Compressed air can |
| Start of season | Inspect thermocouple and tilt-switch wiring for corrosion | Visual + multimeter |
| Annually | Clean reflector dome with mild soap and water; dry fully before storing | Soap, water, dry cloth |
| Annually | Treat any rust spots on metal surfaces with rust-inhibiting primer and touch-up paint | Rust converter, spray paint |
| End of season | Disconnect and store regulator and hose assembly indoors, away from UV | Zip-top bag or small box |
| End of season | Cover heater with a fitted outdoor cover or store indoors | Outdoor cover (sold separately) |
| End of season | Remove propane tank from base and store tank upright outdoors (never inside) | Safe outdoor storage area |
One spot many people miss: the gap between the emitter screen and the burner head. This area collects spider webs and debris, which can cause uneven combustion and orange flame. Use compressed air to blow it out at the start of each season. Do not spray water or cleaning products directly onto the burner head assembly.
Identifying parts and ordering what you need
The exploded parts diagram in your Use & Care manual is your best starting point. Each component is numbered, and the corresponding parts list shows the part name and (on some versions of the manual) the part number or description. If your manual does not include a parts diagram, scanned versions with full diagrams are available on Manualzz and Manuals.plus under the NCZH-G-SS and 68164 model searches.
When ordering parts, do not rely solely on the part name. Take a clear photograph of the part you are replacing from multiple angles, measure the critical dimensions (thread size on fittings, wire length on thermocouple, probe diameter), and compare against the listing before purchasing. For the thermocouple specifically, measure the overall length of the capillary tube from the tip to the fitting; Hampton Bay heaters have been sold with both 18-inch and 24-inch thermocouple lengths depending on the production run, and using the wrong length means the probe will either not reach the pilot or the connection fitting won't reach the valve body.
- Thermocouple: Available in OEM and OEM-compatible versions; confirm tip-to-fitting length before ordering
- Tilt switch: Often sold as a combo pack with the thermocouple; confirm wire length and connector type
- Regulator and hose assembly: Must be OEM-specified for this model; do not substitute generic grill regulators
- Igniter module: Confirm whether your model uses piezo or battery-assisted, and note the wire length
- Reflector panels: Usually sold as a set; confirm the dome diameter matches your specific model
- Pilot assembly: The full pilot hood, orifice, and bracket assembly is available as a unit for most Hampton Bay tall heater models
Repair or replace? How to make the call
Most Hampton Bay tall patio heater faults are repairable for well under $50 in parts. A thermocouple replacement costs around $10-20. A new regulator is $15-30. A full igniter module is $15-25. Even a complete pilot and burner head assembly is typically under $60. Compare this against a new heater at $150-300 and the math usually favors repair for any heater under 8-10 years old whose structural components are in good condition.
| Scenario | Recommended Action | Reason |
|---|---|---|
| Pilot won't stay lit, heater is 1-5 years old | Replace thermocouple ($10-20) | High success rate, inexpensive, 15-minute job |
| Heater shuts off randomly, tilts okay | Test and replace tilt switch ($15-25 combo pack) | Common failure, easy swap |
| Low flame, regulator is original (5+ years) | Replace regulator ($15-30 OEM) | Regulators degrade with age and moisture |
| Igniter clicks but no spark | Clean electrode, check gap, replace igniter ($15-25) | Inexpensive fix, high success rate |
| Rusted pole sections, base severely corroded | Consider replacement | Structural integrity compromised; parts cost approaches new unit price |
| Gas valve body leaking (valve seat, not fitting) | Replace unit or consult qualified technician | Internal valve repair is not a DIY task |
| Heater is 10+ years old with multiple failures | Replace unit | Parts availability declining; cumulative repair cost exceeds replacement |
| Active CPSC recall on your model number | Follow recall instructions before any repair | Safety obligation supersedes repair economics |
Common DIY-replaceable parts and what each job involves
These are the repairs you can realistically do at home with basic hand tools and the parts described above.
- Thermocouple replacement: Shut off gas, disconnect the capillary tube nut from the valve body (usually 3/8 in. wrench), unscrew the probe mounting bracket from the pilot hood, insert new thermocouple, reverse the steps, re-light and test. Total time: 15-20 minutes.
- Tilt switch replacement: Photograph wire connections, unplug or unscrew the two wire connectors, remove the mounting screw(s), install new switch in the same orientation, reconnect wires, test with continuity meter before re-lighting.
- Igniter battery or module replacement: Unscrew battery compartment cap on control knob (or access igniter module at burner head), swap battery or module, test spark before reconnecting gas.
- Regulator and hose assembly: Close cylinder valve, disconnect hose at burner head inlet and regulator from cylinder, install new regulator assembly (same OEM spec), perform full leak test before lighting.
- Pilot orifice cleaning or replacement: With gas off and cylinder disconnected, remove the pilot hood assembly, use compressed air on the orifice, or unscrew the orifice fitting and replace with an OEM-matched unit if cleaning does not restore flow.
Tabletop vs freestanding: key differences and cross-brand comparisons
If you are also researching Hampton Bay's tabletop gas heater models, understand that they are fundamentally different appliances from this freestanding unit. Tabletop models typically output 10,000 to 11,000 BTU (compared to this unit's 40,000-plus BTU), use small 1 lb. disposable propane cylinders rather than a 20 lb. tank, have a much lower operating pressure, and use different regulator fittings. Parts are not interchangeable across these categories. The Hampton Bay tabletop and outdoor gas patio heater instructions cover a completely separate assembly and operating procedure.
For users comparing brands at the tabletop end, the Uline tabletop patio heater is another model that comes up often. It operates on similar small-cylinder propane, has comparable BTU output in the tabletop range, but uses its own specific fittings and instructions. For setup and safety details for that model, see the Uline tabletop patio heater instructions. No regulator, hose, or igniter parts from the Uline unit will cross-fit a Hampton Bay freestanding heater.
| Feature | Hampton Bay 31 in Freestanding (68164) | Hampton Bay 48K BTU SS (NCZH-G-SS) | Hampton Bay Tabletop | Uline Tabletop |
|---|---|---|---|---|
| BTU Output | ~40,000-46,000 BTU | 48,000 BTU | ~10,000-11,000 BTU | ~10,000-11,000 BTU |
| Tank Type | 20 lb. LP cylinder | 20 lb. LP cylinder | 1 lb. disposable canister | 1 lb. disposable canister |
| Regulator Type | OEM QCC1 matched regulator | OEM QCC1 matched regulator | Low-pressure tabletop regulator | Brand-specific low-pressure regulator |
| Heating Area | ~200 sq ft | ~200 sq ft | ~50 sq ft (localized) | ~50 sq ft (localized) |
| Height | ~87 in assembled | ~87.25 in assembled | ~24-30 in | ~24-30 in |
| Anti-tilt Safety | Yes (tilt switch) | Yes (tilt switch) | Varies by model | Varies by model |
| Parts Interchangeable | With NCZH and similar Hampton Bay tall heaters | With 68164 and similar Hampton Bay tall heaters | No cross-compatibility with freestanding | No cross-compatibility with Hampton Bay |
The 48,000 BTU stainless steel Hampton Bay model is a close sibling to the 68164 covered in this guide, and most of the troubleshooting steps here apply directly to that unit as well. The Havana Bronze commercial variant shares similar internals but is built to heavier commercial tolerances, which generally means longer service life but potentially harder-to-source OEM parts. If you own one of those models, the Havana Bronze commercial patio heater instructions are worth reading alongside this guide for the few areas where the assembly and pilot system differ.
FAQ
What primary authoritative documents must I consult to write an accurate DIY manual and safety guide for the Hampton Bay 31 in Outdoor Gas Patio Heater?
The official Use & Care / Owner’s Manual for the specific model (e.g., Hampton Bay Item #1001362427 / Model 68164 PDF) is primary. Also use the manufacturer product pages (Home Depot product/manual links for NCZH series), NFPA codes (NFPA 58 and NFPA 54 / ANSI Z223.1) for code references, and propane safety guidance from the Propane Education & Research Council (PERC). Check CPSC/SaferProducts.gov for recall history.
How do I identify the exact Hampton Bay model and match it to the correct manual?
Instruct readers to find the model/item number on the product carton, rating plate (under base or inside access panel), or original receipt. Cross‑check that number against the Home Depot/manufacturer product page or the Use & Care PDF (e.g., Model 68164 / Item #1001362427 or NCZH series model codes) before using assembly or safety procedures.
Which exact manual sections should be cited and summarized in the article?
Cite and summarize: Parts diagram/packing list, Assembly Instructions, "Connecting the Propane Tank," Regulator/Hose requirements, "Performing a Leak Test" (soapy‑water), Safety Warnings/Clearances, Operating Instructions (ignition and control/tilt behavior), Troubleshooting, Maintenance/Cleaning, and Parts/Ordering list. Use the official Use & Care PDF as the authoritative text.
What specific assembly and first‑time startup steps must be covered to be safe and compliant?
Stepwise instructions: unpack and verify parts, assemble per manual torque/hardware steps, install regulator/hose supplied, mount reflector and burner head, install batteries if electronic igniter. For first startup: place a certified 20 lb propane cylinder outdoors, attach regulator/hose supplied with heater, hand‑tighten connection then perform the soapy‑water leak test at cylinder/regulator and hose fittings, open cylinder slowly, check for bubbles, correct leaks, then follow manual ignition steps.
What regulator and gas‑pressure details must be included?
State that the supplied regulator/hose assembly must be used and that replacements must match manufacturer specifications. Include typical manifold/regulator working pressure values from manuals (approximately 11 in. W.C. for many tall models; minimum supply pressure noted in manual—e.g., 10 in. W.C. reference). Emphasize use of standard 20 lb propane cylinders and vapor‑withdrawal method per the manual.
How must the leak test procedure be described for DIY readers?
Describe the soapy‑water method: mix dish soap and water, apply to regulator/cylinder and hose connections, close all valves, open the cylinder valve slowly, inspect for continuous bubbles indicating a leak, if present shut off cylinder and tighten/replace fittings, and never test with an open flame. Emphasize performing tests outdoors and referencing the manual’s exact sequence.