Most of the time, you do not need to bypass your patio heater's tilt switch at all. What you actually need is a reset, and that is a much safer fix. Place the heater on a firm, level surface, restore it to an upright position, turn the propane off for a minute, then follow the reset procedure for your model. In the majority of cases, that is enough to get the heater running again. True bypassing, where you physically disconnect or bridge the switch to eliminate it from the circuit, is a last resort that removes a critical safety function and should only be considered temporarily while you source a replacement switch.
How to Bypass Tilt Switch on Patio Heater Safely and Reset

Grant Mercer
2 Jun 2026
What the tilt switch actually does and why bypassing it is genuinely risky
The tilt switch is a small but serious piece of safety hardware. Its entire job is to cut gas flow the moment the heater tips past a critical angle, before it has actually fallen over far enough to start a fire. Standards like UL 1278 require this device to trigger before the heater reaches a dangerous tipping point, not after.
A UL-focused tip-over protection document for electric heaters describes the “tip-over” switch and its function, illustrating how the heater’s tilt condition is used to trigger protective action during testing tip-over protection is handled in standards testing for heaters.
On propane patio heaters, that means the switch is wired into the gas control valve circuit: when the switch opens, gas stops, and the flame goes out. No tilt switch, no automatic shutoff.
When you bypass the switch by disconnecting or bridging its wires, you are telling the heater to act as if it is always upright and stable, even if it falls over in a strong gust of wind. A knocked-over heater with an open flame and live gas flow is a real fire and explosion risk. That is not a hypothetical. It is exactly the scenario the switch exists to prevent. So before you touch any wiring, be honest with yourself about whether the switch is actually faulty or whether the heater just needs a reset and a flat surface to sit on.
How to identify your tilt switch type and where it connects
Tilt switches on patio heaters come in two main forms depending on whether you have a propane or electric model. Knowing which you have changes where you look and what you test.
Propane patio heaters
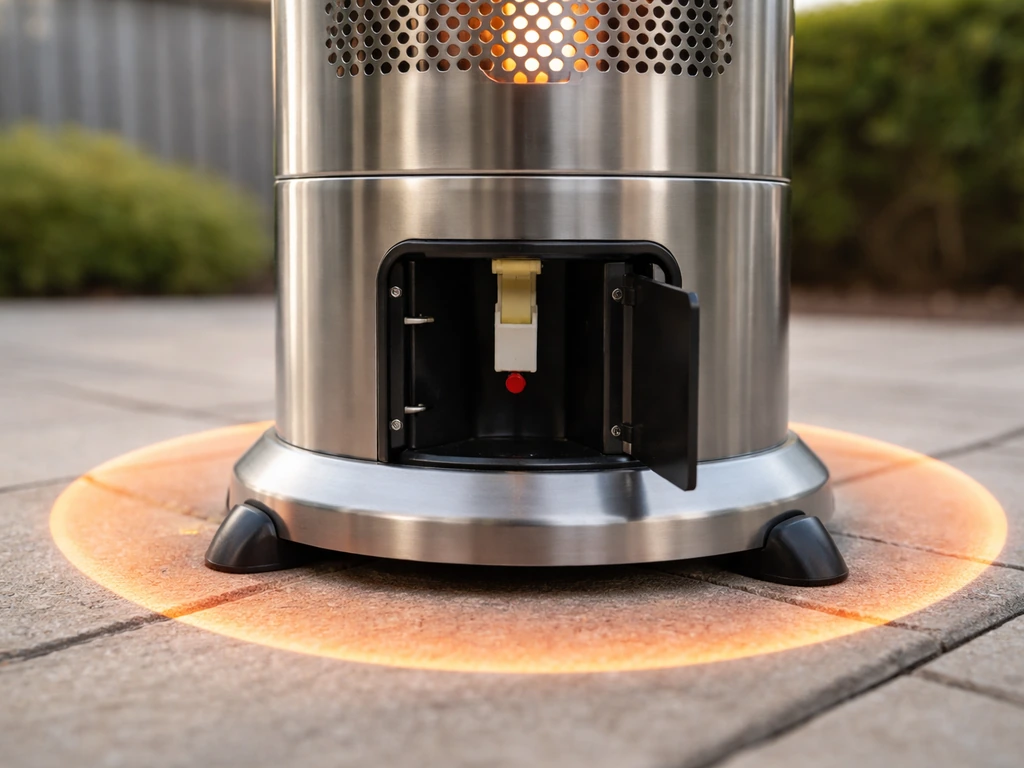
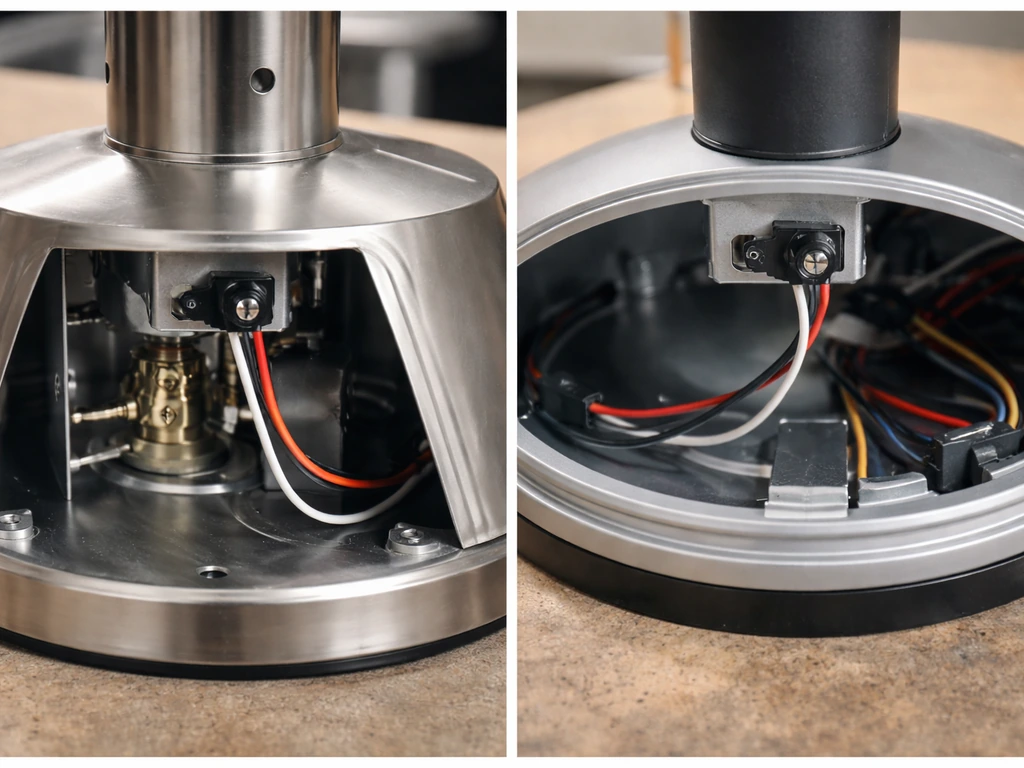
On a standard mushroom-style propane patio heater, the tilt switch is usually a small cylindrical or rectangular mercury-style or ball-bearing switch mounted inside the lower housing, near the base or just above the gas valve. It typically has two spade connectors or a two-wire harness that plugs directly into the gas control valve circuit. When the heater is upright, the internal ball or mercury contact closes the circuit and allows voltage to the valve. Tip it, and the contact opens.
To find it, look for a small component roughly 1 to 2 inches long with two wires leading toward the valve. On many common imported mushroom heaters, it sits in a bracket on the pole near the burner assembly or inside the base housing.
Electric patio heaters
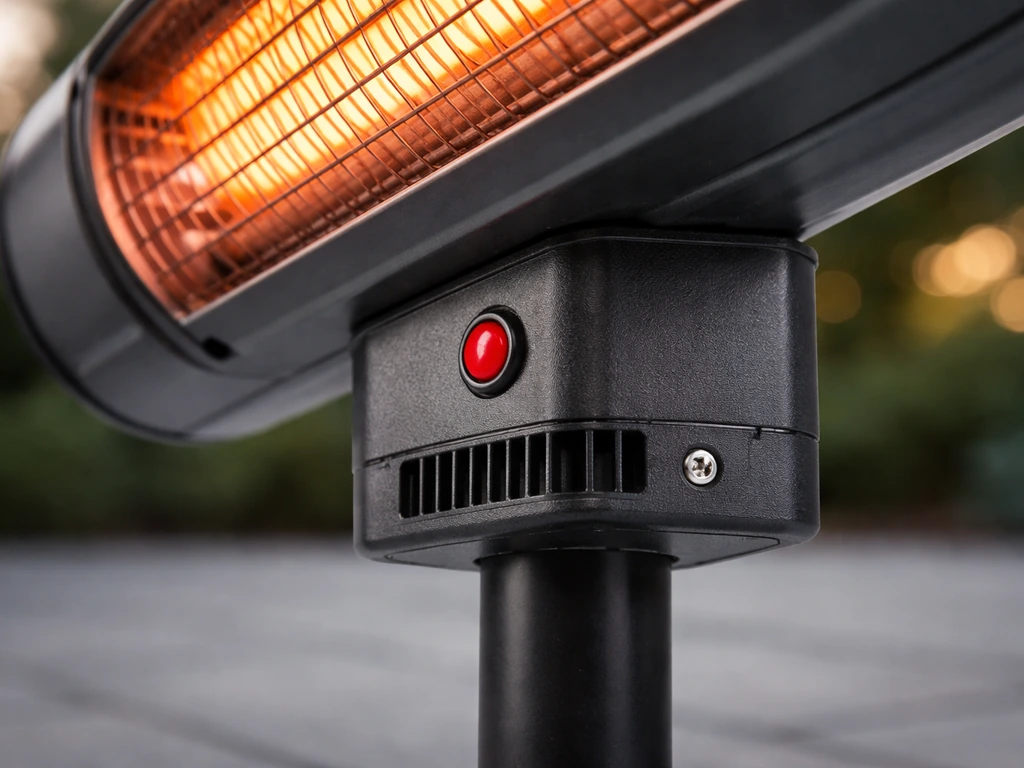
Electric infrared patio heaters handle tip-over protection differently. Many have a manual reset button, often accessed from the underside or rear of the unit, that you press with a non-conductive rod like a chopstick or pencil after the unit trips.
For example, an owner’s manual reset procedure for tip-over protection may instruct unplugging the unit and pressing a manual reset button using a non-conductive rod [a manual reset button, often accessed from the underside or rear of the unit, that you press with a non-conductive rod like a chopstick or pencil after the unit trips. ](https://manuals. harborfreight. com/manuals/62000-62999/62313-792363623131.
pdf). If you are dealing with a manual reset button, this is the step you will usually need to perform after the heater tips patio heater tilt switch reset. Some models, like certain Cascade-style electric heaters, reset by simply unplugging the unit and plugging it back in after placing it upright. Check your owner's manual for a small diagram showing the reset button location, since it varies significantly by brand.
| Heater Type | Switch Location | Connection Type | Reset Method |
|---|---|---|---|
| Propane mushroom (standard) | Lower housing or pole, near gas valve | Two-wire spade or harness to valve | Upright position + power cycle |
| Propane tabletop | Inside base near regulator | Two-wire inline harness | Upright position + power cycle |
| Electric infrared (wall/ceiling mount) | Rear or underside of unit | Inline wiring to heating element circuit | Non-conductive reset button press |
| Electric freestanding | Base housing | Inline wiring, sometimes with external reset | Unplug, upright, plug back in |
Do these checks before you touch any wiring
Before you open any panels or poke around inside the heater, work through this list. A large percentage of tilt switch problems are actually positioning problems, loose connections, or something else mimicking a tripped switch. Ruling these out first saves you time and keeps you from doing something you cannot undo.
- Turn off the propane tank valve completely. If it is an electric heater, unplug it from the wall. Do not skip this. Opening internal components with gas flow active is dangerous.
- Check that the heater is sitting on a genuinely flat, stable surface. Even a slight lean on uneven pavers or grass can keep a sensitive tilt switch in the open position. Use a small bubble level on the base.
- Look for visible damage to the heater body or base. A heater that actually fell over may have a bent frame that holds it at a slight angle even when you think it is upright.
- Inspect the wiring harness leading to the tilt switch for pinched, corroded, or disconnected wires. A loose spade connector can produce the exact same symptom as a tripped switch.
- Check the thermocouple and gas valve as separate failure points. A heater that will not stay lit or will not ignite can be caused by a failed thermocouple, a dirty pilot, or a stuck control knob, not just a tilt switch. These are worth ruling out before focusing on the switch.
- Look at the regulator connection. A loose or improperly seated regulator can cause the valve to behave as if it received a shutoff signal.
How to reset your patio heater's tilt switch: step by step

This is the fix that works in most cases. If your patio heater keeps shutting off, the reset steps and safety checks below can help you figure out why and fix it safely why does my patio heater keep shutting off. Run through each step in order and check the result before moving on.
- Turn the gas control knob to the OFF position and close the propane tank valve. If electric, unplug the unit.
- Move the heater to a flat, hard surface. Concrete, pavement, or a solid deck plank works well. Avoid soft ground where legs can sink unevenly.
- Confirm the heater is fully upright using a bubble level. If the legs are uneven, adjust or shim them until the base is level.
- Wait at least 60 seconds. This gives the switch time to settle into the closed (upright) position and allows any residual gas to clear.
- For electric models with a manual reset button: locate the small pinhole or recessed button on the underside or rear of the heater. Press it firmly with a non-conductive rod until you feel a click. Then plug the unit back in.
- For propane models: open the propane tank valve slowly. Depress the control knob to the pilot position and hold it down while pressing the igniter. Keep holding the knob for 30 to 45 seconds after the pilot lights to allow the thermocouple to heat up. Then slowly turn to your desired heat setting.
- If the pilot lights and holds, the tilt switch has successfully reset. Test the main burner at a low setting and watch for a full, even flame across the burner ring.
- If the pilot does not light or will not hold, move to the diagnostics section below.
If a reset does not fix it: what to test next
A reset that does not hold, or a heater that still will not ignite after a proper reset procedure, usually means one of three things: the tilt switch itself is faulty, something else in the control circuit has failed, or the heater is still sitting at an angle that keeps the switch open. Here is how to narrow it down.
Test the tilt switch with a multimeter
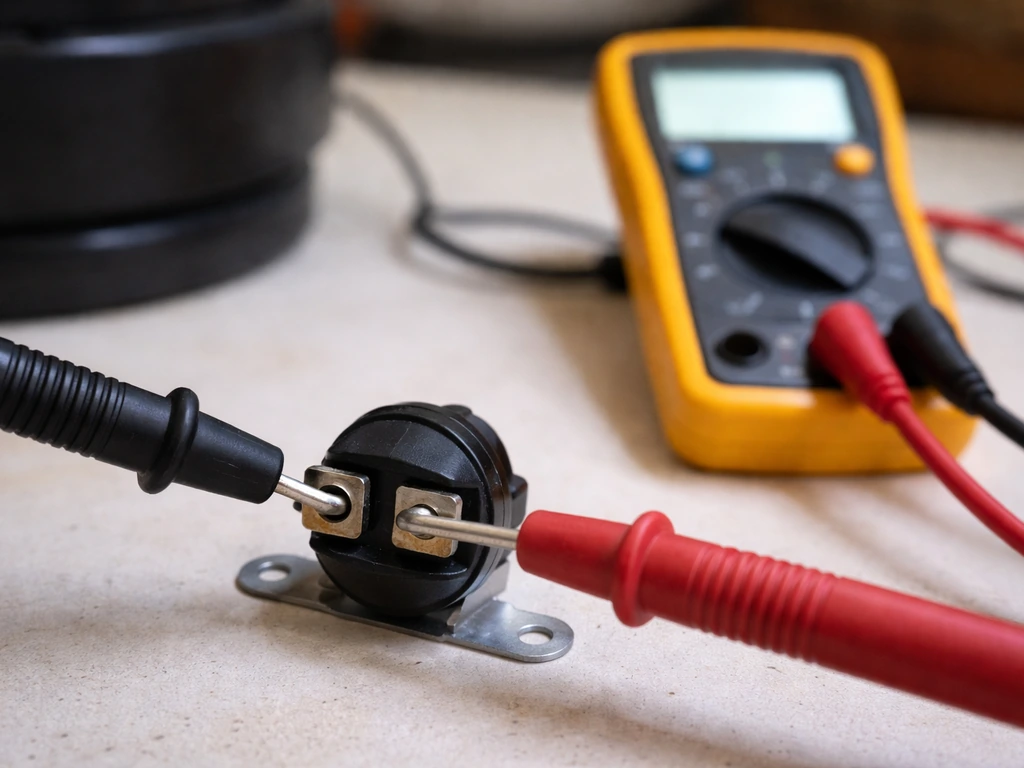
With the propane off and the heater unplugged (electric), disconnect the two wires from the tilt switch. Set a multimeter to continuity mode. Touch the probes to the two switch terminals while the heater is upright. You should hear a beep or see near-zero ohms, meaning the circuit is closed.
Now tilt the switch slightly (just the switch, not the whole heater) and watch for the continuity to break. If it shows open (no continuity) while the heater is fully upright, the switch is stuck open and needs to be replaced, not reset. A patio heater safety switch can be checked with a multimeter to confirm whether it is stuck open or working properly.
If it shows continuity in all positions, the switch is likely fine and the problem is elsewhere in the circuit.
Check the thermocouple separately
A bad thermocouple is one of the most common reasons a patio heater will not stay lit, and it is easy to confuse with a tilt switch problem because both produce the same symptom: the pilot goes out when you release the control knob. If your patio heater turns off when the knob is released, compare this symptom to what the thermocouple and gas valve are doing pilot goes out when you release the control knob. If the tilt switch tests fine, move your attention to the thermocouple. A thermocouple that no longer generates enough millivoltage to hold the gas valve open will cause the valve to close even with the tilt switch in perfect working order.
Look at the gas control valve and wiring
Check every spade connector and wire in the circuit between the tilt switch and the gas valve. Corrosion on outdoor heaters is common, especially on connectors near the base where water collects. A green or white residue on a spade terminal is enough to break the circuit. Clean terminals with fine sandpaper or electrical contact cleaner and reseat the connectors firmly.
If the heater keeps shutting off repeatedly, even after a reset and all the checks above pass, you may be dealing with a pattern worth investigating further. A heater that shuts off on its own can also point to gas pressure issues, a faulty ODS (oxygen depletion sensor), or a valve that is failing mechanically.
If you are still considering a bypass: what that actually looks like and when to stop
Let me be direct here. A full bypass, meaning you bridge the two tilt switch terminals with a wire or remove the switch entirely, eliminates the only automatic shutoff protecting you if the heater tips over. I am not going to tell you it is never done, because it is. But it should be a short-term diagnostic step to confirm the switch is the problem, not a permanent operating solution.
The only responsible temporary option
If you have confirmed with a multimeter that the tilt switch is stuck open while the heater is upright, and you are waiting for a replacement part to arrive, the least dangerous temporary approach is this: disconnect the switch wires, use a small jumper wire or a paperclip to bridge the two terminals, and use the heater only under direct supervision on a completely stable, level surface away from anything flammable. Never leave it unattended. Never use it in a wind-prone area. And remove the jumper the moment the replacement switch arrives. Most replacement tilt switches for common mushroom heaters cost between $5 and $20 and are available from parts suppliers or directly from the manufacturer.
Stop DIY and call a technician if any of these apply
- You smell gas at any point during this process and cannot identify the source immediately.
- The gas control valve shows physical damage or a sticky knob that will not turn smoothly.
- The wiring inside the heater shows signs of burning, melting, or severe corrosion.
- The heater is a permanently mounted or natural gas model. The stakes are higher and the work is not the same as a portable propane unit.
- You have bypassed the switch and the heater still does not work, meaning the tilt switch was not the actual problem and something else in the safety circuit has failed.
- The heater is more than 10 years old and has had multiple component failures. At that point, replacement is usually safer and cheaper than continued repair.
Putting it back together and making sure it stays fixed
If you replaced the tilt switch, reassembly is the reverse of how you got in. Reconnect the wires firmly to the correct terminals, making sure polarity matches the original if your switch is directional. Tuck the wires so they cannot rub against moving parts or hot surfaces. Reattach any brackets or covers with the original hardware.
Before lighting the heater, do a quick leak check on any gas connections you touched. Apply a small amount of soapy water to the regulator connection and any fittings near the valve. Open the tank valve slowly and watch for bubbles. If you see any, tighten the fitting and recheck before lighting.
Run the heater through a full test cycle: pilot, low flame, high flame. Watch the flame pattern for at least five minutes. A healthy burner should produce a steady, even ring of blue-orange flame without flickering or going out when you release the control knob.
Preventing repeat tilt switch trips
- Always place the heater on a hard, flat surface. A small rubber mat under the base can help on slightly uneven surfaces while still keeping it stable.
- If you use the heater on a deck, check that the boards are level and that legs are not sitting in cracks or gaps.
- In windy conditions, use the heater's built-in base weight bag (if it has one) filled with sand. Most mushroom heater bases have a compartment designed for this.
- Inspect the tilt switch wiring once a season, especially the spade connectors. A few seconds of contact cleaner spray each year prevents corrosion from building up.
- If you store the heater seasonally, store it upright in a covered location. Laying it on its side during storage can keep the switch in a tripped state and confuse you in the spring when it will not light.
- Check for signs of physical wear on the switch mounting bracket. A loose bracket lets the switch vibrate into an open state without the heater actually tipping.
A tilt switch problem is almost always fixable without bypassing anything. Work through the reset, check the surface, test the switch with a meter, and replace it if it is genuinely faulty. That gives you a heater that works correctly and still protects you if something goes wrong.
FAQ
Is it ever okay to bypass the tilt switch on a patio heater permanently?
Do not bypass it for comfort or convenience. If the heater keeps tripping after you set it upright on a level surface and complete the reset, treat bypassing as a short diagnostic only (and only if you confirm with a multimeter the switch is stuck open). A permanently bypassed tilt switch removes automatic shutoff, so the safer long-term fix is replacement.
What should I try first if my patio heater tipped and the tilt switch seems to have tripped?
If your heater uses a manual reset button (common on electric infrared models), try that reset first rather than touching wiring. For electric models, tripping is often resettable by pressing the button once the unit is upright, then verifying it stays on for several minutes under normal conditions.
How level does the surface need to be for the tilt switch to reset properly?
Roughly level means more than “not obviously leaning.” Use a small bubble level on the mounting base or stand, then confirm the heater cannot rock on uneven paving, stones, or grass. A tilt switch can stay open if the base is slightly angled, even when it looks mostly upright.
Where is the tilt switch located on a typical propane mushroom heater?
On propane mushroom-style heaters, expect the tilt switch to be a small component near the lower housing with two wires to the gas valve circuit. If you cannot locate two terminals going to a small switch near the base, stop and verify the heater model type before probing, because some units use different control modules or harness layouts.
How do I distinguish a faulty tilt switch from a loose connector?
Use continuity mode on a multimeter with the heater powered off (unplugged for electric, propane off for gas). A working tilt switch should show continuity when upright and open when you carefully tilt only the switch. If continuity changes only when you jiggle wires or terminals, suspect a loose connection or corrosion rather than the switch itself.
How can I tell whether the problem is tilt switch related or thermocouple related?
Yes. If the heater still shuts off, look for symptoms that point away from tilt protection. If it goes out specifically when you release the control knob, that pattern can indicate thermocouple or gas valve holding issues, even if the tilt switch tests normally.
If I do a temporary diagnostic jumper, what are the safety do’s and don’ts?
Do not bridge using thick wire you cannot remove quickly, and never route a jumper so it can touch hot surfaces or become pinched by covers. If you do a temporary jumper diagnostic, use a short removable jumper and remove it immediately once the replacement switch arrives.
What does it mean if bypassing only temporarily makes the heater work?
If the jumper diagnostic changes behavior (heater stays on when it previously shut off), it strongly suggests the tilt switch is open or wiring between it and the valve is compromised. If there is no change, the issue is likely elsewhere in the control circuit (wiring, gas control, or sensors), so do not keep operating with bypassing.
How do I handle corrosion on the tilt switch terminals?
If you find green/white residue on spade terminals, clean and reseat both sides of the connection, then re-test continuity at the switch and again at the gas valve side if you can access it safely. Corrosion can be intermittent, so a loose or dirty terminal can make the switch appear “faulty” during testing.
Do I need to leak-check after replacing the tilt switch or touching gas valve wiring?
After reassembly, perform a leak check on every gas connection you touched, using soapy water around the regulator connection and fittings near the valve. Only open the tank valve slowly, and if you see bubbles, close the valve, tighten, and recheck before lighting.
What flame and shutdown signs indicate I should stop and troubleshoot a different component?
Watch for flame behavior changes over time. After you light, check that the flame remains stable for several minutes and that it does not go out when you release the control knob (for models that have that control). If the flame is unstable or shuts down repeatedly, stop troubleshooting bypassing and proceed with fault isolation (switch, thermocouple, valve, or sensor).
Can I use the heater in mild wind while doing a short diagnostic bypass?
Avoid windy conditions when the tilt switch is bypassed for any diagnostic. Also keep the heater on stable, non-combustible ground and do not operate near curtains, railings, or overhead overhangs that can affect airflow and tipping behavior.