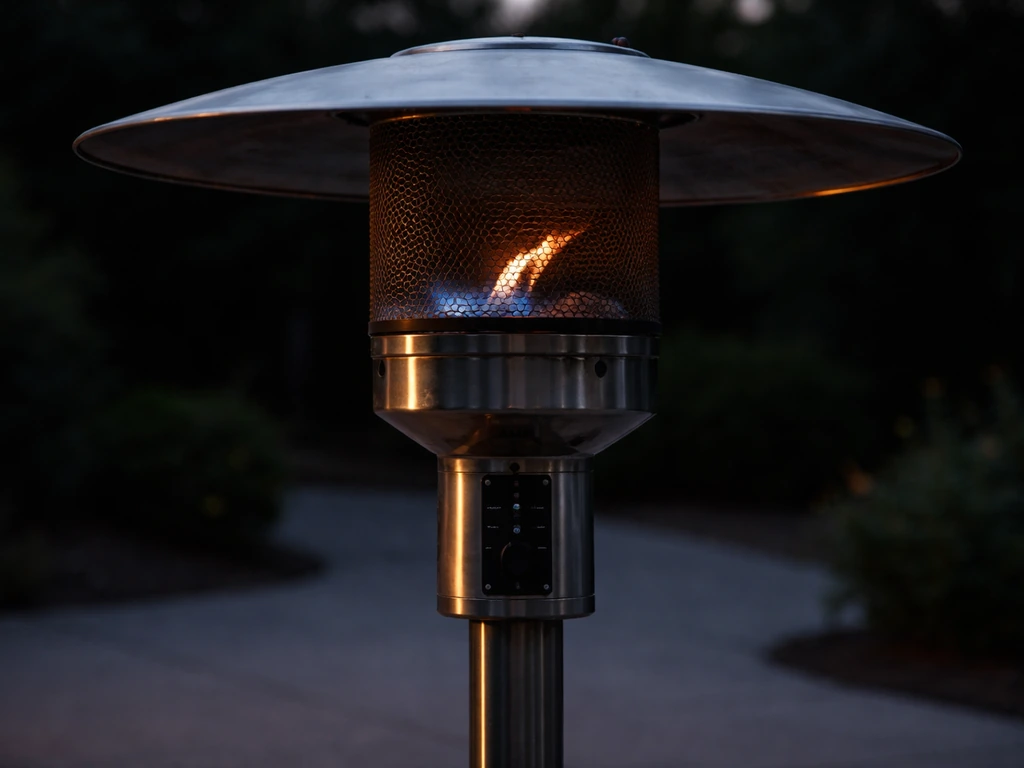
Your patio heater keeps shutting off because one of a handful of things is failing: the thermocouple or thermopile isn't generating enough voltage to hold the gas valve open, the ignition system has a weak or missing spark, the tilt sensor or overheat safety has tripped, or the gas isn't reaching the burner at the right pressure. Nine times out of ten it's the thermocouple. But before you order parts, it's worth spending 20 minutes working through the checks below, because the fix is sometimes as simple as cleaning a dirty pilot tip or resetting a tipped safety switch.
Why Does My Patio Heater Keep Shutting Off? Fixes

Grant Mercer
18 Jun 2026
The most common reasons a patio heater shuts itself off
Patio heaters are built to fail safe. Every shutdown mechanism on the unit exists to prevent a gas leak or fire, so when the heater goes out it's almost always telling you something specific. Here are the four categories that cover the vast majority of real-world shutdowns:
| Category | Typical Symptom | Likely Culprit |
|---|---|---|
| Flame sensing (thermocouple/thermopile) | Lights, holds for a few seconds, then shuts off when you release the knob | Weak, dirty, or failed thermocouple/thermopile |
| Safety shutoff (tilt switch, overheat) | Shuts off randomly or after being bumped; won't relight at all | Tilt sensor tripped or faulty; overheat switch activated |
| Ignition system (spark/igniter) | Clicks but won't light; no spark visible at electrode | Failed piezo igniter, broken wire, or fouled electrode |
| Gas/pressure (valve, regulator, supply) | Very weak flame, yellow flame, or no gas flow at all | Regulator in safety lockout, low tank, clogged orifice |
Wind is its own category worth flagging. Strong gusts can blow out a pilot flame faster than the thermocouple can respond, which then triggers a safety shutdown as if the heater failed on its own. If your heater only shuts off on windy evenings, that's the cause, not a component failure.
Safety checks before you touch anything
Do these before any troubleshooting, without exception. Gas appliances can kill you if you skip the basics.
- If you smell gas at any point: stop immediately. Turn the gas supply valve off at the tank or line, move away from the heater, and ventilate the area. Do not attempt to relight or diagnose until the smell is completely gone. Multiple patio heater manuals (Desa, Patio Comfort, GHP Group) are consistent on this: wait a full five minutes minimum for gas to disperse before doing anything else.
- After any shutdown, planned or accidental, wait at least five minutes before attempting to relight. This is the standard across virtually every propane patio heater manual and it exists to prevent igniting accumulated gas.
- Check for gas smell near the floor as well as at head height. Propane is heavier than air and pools low.
- Make sure the heater is on a stable, level, non-combustible surface before troubleshooting. A heater on an uneven deck surface may be constantly tripping its own tilt switch.
- Turn the control knob fully to OFF and close the tank valve before inspecting any components beyond the exterior.
- Do all of this in a well-ventilated outdoor space, not inside a garage or enclosed porch.
Check the ignition system first if the heater won't light at all
If you press the ignition button and nothing happens, or you hear a click but see no spark, start here. The ignition system on most freestanding propane patio heaters is a piezo spark igniter, a simple device with no battery that generates a spark from mechanical compression. They're reliable but they do fail, and the wire connecting the button to the electrode is a surprisingly common break point.
How to test the piezo igniter
- Turn the gas valve to OFF at the tank. Do not have gas flowing during this test.
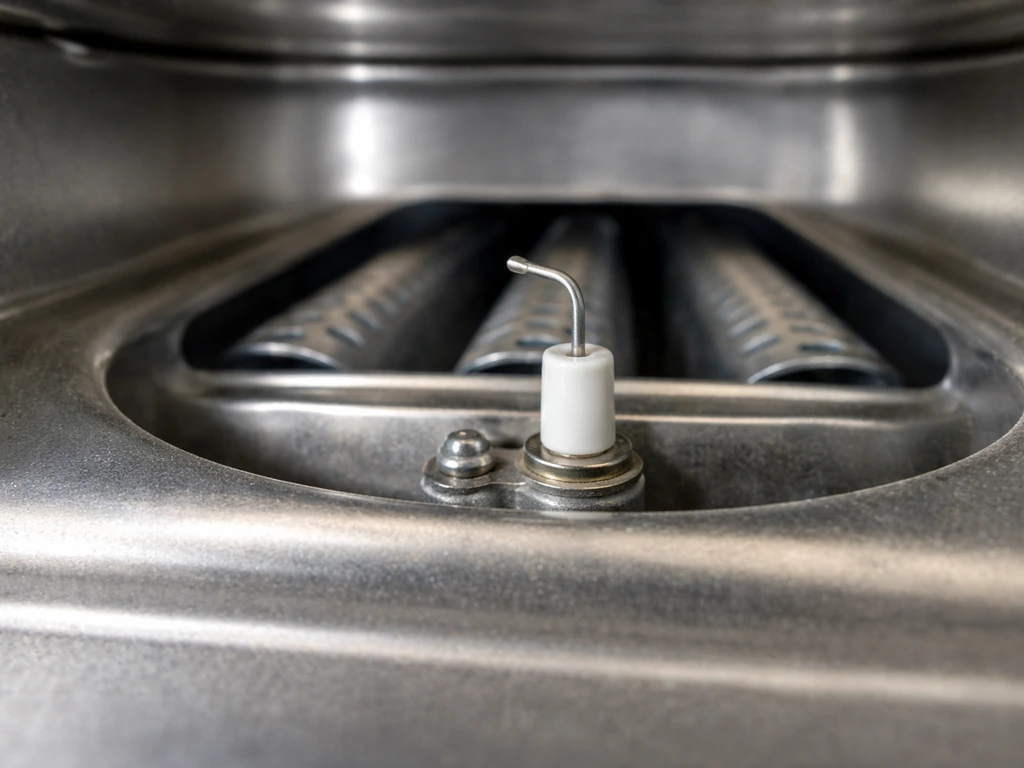
- Look through the burner grille or reflector opening and locate the igniter electrode. It's a small metal tip sitting close to the pilot or burner assembly.
- Press the ignition button and watch the electrode tip. You should see a sharp blue spark jump a small gap. If you see a weak orange spark or nothing at all, the igniter is suspect.
- For a more definitive test, use insulated pliers to hold the electrode tip approximately 1/4 to 1/2 inch away from any metal part of the heater body, then press the ignition button. A healthy piezo unit produces a visible blue spark across that gap. No spark means replace the piezo igniter.
- While you have access, trace the igniter wire from the button to the electrode. Look for kinks, cracks in the insulation, or a wire that has simply pulled off the terminal. A disconnected wire is a free fix.
- If there's spark at the electrode but the heater still won't light, the ignition system itself is working fine and the problem is elsewhere, usually gas delivery or the pilot/burner assembly.
Desa's own piezo igniter troubleshooting documentation calls out the same test: hold the electrode near the heater shell, press the button, look for spark. If there's none, replace the piezo. It's a $10 to $20 part on most models and straightforward to swap.
Clean the pilot and burner ports while you're in there
Desa manuals for multiple patio heater models specifically list 'dirty or partially clogged burner ports' and a fouled pilot/ODS area as causes of ignition failure and flame retention problems. Spiders love to nest in pilot orifices over winter, and debris buildup is common. With the gas OFF and tank disconnected, use a can of compressed air to blast out the pilot assembly and burner ports. A soft brush (an old toothbrush works) can clear visible debris around the electrode and pilot tip. Don't use anything metallic to poke at the orifice or you'll enlarge it and change the fuel-air mix.
Thermocouple and thermopile: the most likely reason it shuts off after lighting
This is the big one. If your heater lights fine, you hold the control knob in for the required time, but then it shuts off the moment you release the knob, the thermocouple or thermopile is the first thing to check. If the heater shuts off when you release the control knob, a stuck or sticky knob mechanism can prevent the valve from staying open long enough for safe operation. This is the scenario that trips up most people because the heater seems to be working, right up until it doesn't.
Here's how it works: the thermocouple is a small metal probe that sits directly in the pilot flame. When it gets hot enough, it generates a small millivolt electrical signal that tells the gas valve to stay open. If that signal drops below the threshold the valve needs, the valve closes and the gas shuts off. A healthy thermocouple generates around 25 to 30 millivolts or more. If it's generating less than 25 millivolts, the valve won't hold reliably. A failing unit might generate just enough to fool you into thinking it's working, then drop off after a minute or two as the flame fluctuates.
How to check the thermocouple
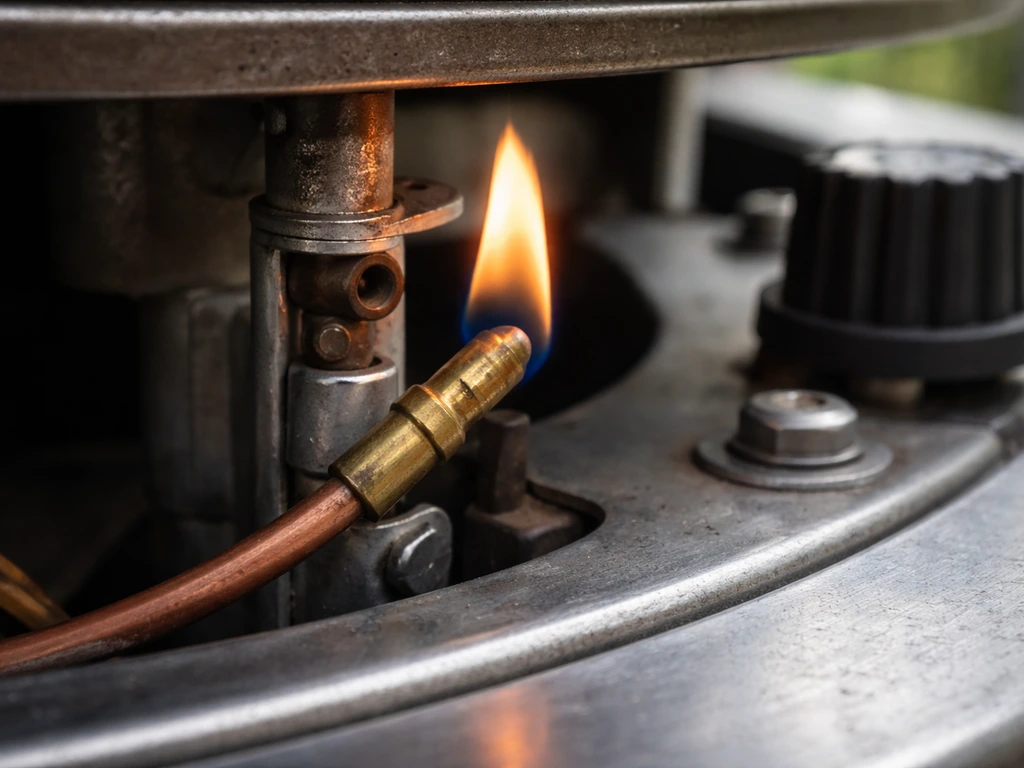
- Look at the pilot assembly. The thermocouple is the copper or metal-sheathed probe whose tip sits in or very close to the pilot flame. On most freestanding patio heaters it's held in place by a clip or bracket right next to the pilot burner.
- Check that the tip is actually sitting in the flame path, not bent away from it. A thermocouple that's physically moved even a few millimeters out of the flame won't heat properly. Bend it gently back into position if needed.
- Look for visible damage: a cracked sheath, a tip that's corroded black and brittle, or a probe that's been bent repeatedly. Any of these mean replacement.
- To test output with a multimeter: set it to DC millivolts. Light the heater and hold the knob in for the required time. Touch the multimeter probes to the thermocouple lead and its connection point on the gas valve. A reading below 25 millivolts means the thermocouple is weak and should be replaced.
- Inspect the connection where the thermocouple lead screws into the gas valve. A loose or corroded connection here causes the same symptoms as a failed thermocouple. Clean the connection and hand-tighten it snugly (don't overtighten, just firm).
- Thermopiles are a larger version of the same concept, used on units with electronic ignition or remote controls. They generate a higher millivolt output (typically 300 to 750 mV) and are tested the same way, but at the thermopile lead terminals.
Thermocouples are a universal repair part and nearly always available at hardware stores. Most patio heater models use a standard 18 to 30 inch thermocouple that costs $8 to $15. Bring the old one to the store or take a photo of the connection end and the length to match it. Installation is the reverse of removal: unscrew the lead from the gas valve, unclip the probe from the pilot bracket, thread in the new one, reconnect, and retest.
Wind is a thermocouple problem in disguise
If the thermocouple tests fine but the heater still shuts off intermittently outdoors, wind is the likely culprit. In a Harbor Freight recall, the CPSC notes that windy conditions can melt or malfunction a tank-top propane heater’s “tip switch” safety shutoff feature windy conditions can melt or malfunction a “tip switch” safety shutoff feature. A gust that disturbs the pilot flame for even a second can cool the thermocouple below the threshold and trigger a shutdown. Some heater models are more susceptible than others depending on how well the pilot area is shielded. Try operating the heater in a more sheltered spot as a diagnostic test. If it runs perfectly there but not in the open, you've found your answer.
Safety shutoff mechanisms: tilt sensor, overheat switch, and flame-out detection
Modern patio heaters have multiple safety systems layered in, and any one of them can cause a shutdown that looks like an ignition or gas problem. Understanding which safety mechanism is involved saves a lot of wasted troubleshooting time.
Tilt switch (tip-over safety)
The tilt switch is usually a small mercury or ball-bearing switch mounted in the upper column of the heater, near the burner assembly. Its job is to shut off the gas if the heater tips over. On most freestanding mushroom-style patio heaters, it sits inside the pole near the top, accessible by removing a panel or the emitter housing.
A tilt switch can trigger in three situations: the heater actually tipped, the surface it's on is uneven enough to angle the switch past its tolerance, or the switch itself is faulty. A faulty tilt switch behaves like an intermittent one, cutting out randomly even when the heater is perfectly level.
To reset a tripped tilt switch: make sure the heater is fully upright on a level surface, locate the switch in the upper column, and press and hold its reset button for 5 to 10 seconds. The heater should then allow normal ignition. If it trips again immediately, the switch is either faulty or the heater is genuinely off-level. The patio heater tilt switch reset process varies slightly by model, so checking your specific manual for the reset procedure is worth the two minutes it takes.
One important note: a tilt switch failure can mimic a thermocouple problem almost exactly. Both result in the heater shutting off when the control knob is released. The distinction is usually location: if resetting the tilt switch and making sure the heater is level solves the problem, you're done. If the heater continues to shut off even after a confirmed tilt switch reset on a level surface, shift your attention to the thermocouple. The patio heater safety switch topic covers this in more detail for readers who want to go deeper. If your shutdown is linked to the heater safety switch behavior, follow the patio heater safety switch guidance to diagnose and fix it safely.
Overheat shutoff
Some patio heater models include a thermal cutoff or overheat limit switch, typically mounted near the burner. If the heater runs unusually hot due to a blocked flue, restricted airflow, or a component failure, this switch opens and cuts the gas. It may reset automatically once the unit cools, which produces an annoying cycle of the heater running for a while then shutting off, cooling, and relighting. If your heater runs for 15 to 30 minutes and then shuts off repeatedly on a consistent timer-like schedule, an overheat condition is worth suspecting. Check that the reflector and emitter areas aren't blocked and that there's adequate clearance above and around the unit.
Flame-out detection and ignition lockout
More sophisticated heater models, like commercial infrared units and some of the newer electronic-ignition patio heaters, include control boards that manage multiple ignition attempts and then enter a lockout mode if ignition fails repeatedly. Detroit Radiant's DSRF series manuals, for example, describe a sequence of three ignition attempts followed by a soft lockout lasting 30 minutes before the unit will try again. If your heater won't respond to any ignition attempt and sits completely unresponsive, check whether it has a lockout indicator (usually an LED) or whether a hard reset by cutting power and restoring it clears the condition. Your manual will have the specific lockout reset procedure for your model.
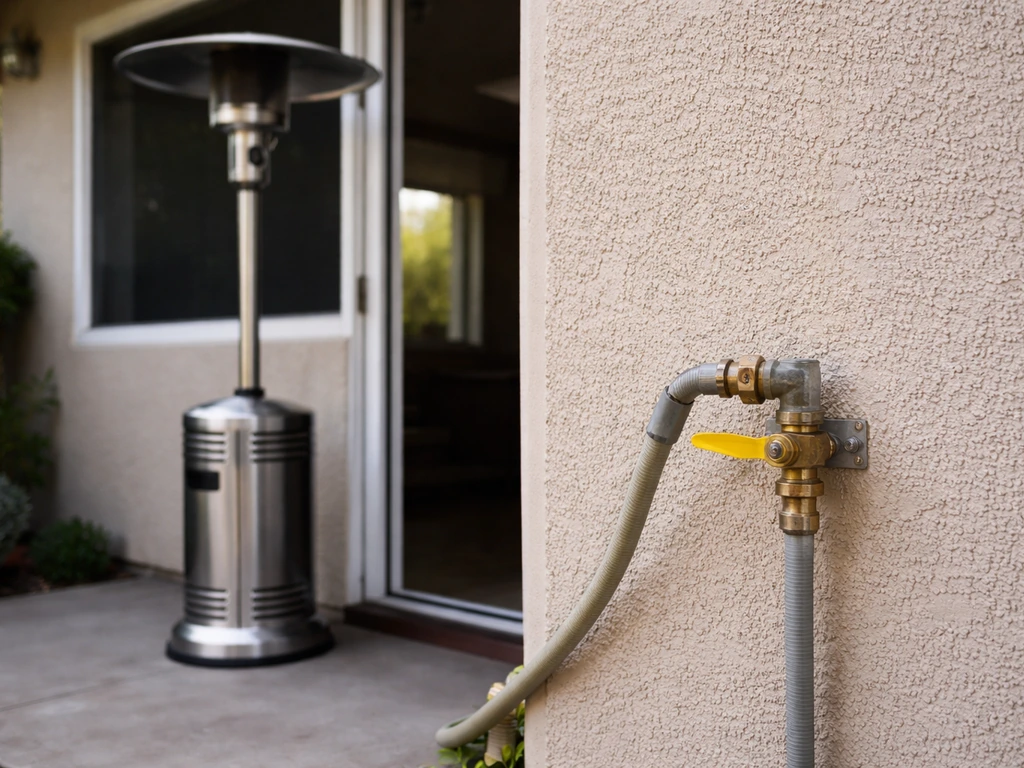
Gas regulator safety lockout
Propane regulators have their own built-in safety mode. If the tank valve is opened too quickly or there's a sudden pressure drop (like a hose fitting that wasn't fully tightened), the regulator can enter a bypass safety mode that severely restricts gas flow. Symptoms are a very weak or tiny flame, or no ignition at all even when the tank has plenty of gas. The fix is simple: turn everything off, close the tank valve, disconnect the regulator hose from the tank, wait 30 seconds, reconnect, and open the tank valve slowly. That usually resets the regulator. Also confirm the tank has gas by checking the gauge or gently lifting it to feel the weight.
How to restart, confirm your diagnosis, and decide if it's a DIY fix
Once you've worked through the checks above, here's a practical restart sequence and decision framework for what to do next.
The restart sequence
- Close the tank valve and wait 5 minutes. No exceptions, even if you think you know what's wrong.
- Check for any lingering gas smell at nose and floor level before proceeding. If you smell gas, stop and call a technician.
- Make sure the heater is upright and level. Reset the tilt switch if your model has one.
- Open the tank valve slowly (one full turn, not all the way open) to avoid triggering regulator lockout.
- Follow your manual's lighting sequence: typically push and hold the control knob in at the pilot/low position, press the ignition button repeatedly until the pilot lights, then continue holding the knob in for 30 to 60 seconds to let the thermocouple heat up before releasing.
- If the pilot holds after releasing the knob, turn up to the desired heat setting and observe for a few minutes.
- If it shuts off again, note exactly when: immediately on knob release (thermocouple), after a minute or two (thermocouple weakening or wind), after 15 to 30 minutes (overheat), or randomly (tilt switch).
DIY vs. calling a technician
Most of the issues covered here are genuinely DIY-friendly. Replacing a thermocouple, cleaning the pilot assembly, resetting a tilt switch, or swapping a piezo igniter are all reasonable tasks for someone comfortable with basic hand tools and willing to follow safety steps carefully. Parts are inexpensive and widely available.
Stop and call a qualified gas technician if any of these are true:
- You smell gas and can't identify where it's coming from after the heater has been fully off and vented.
- The gas valve itself appears to be leaking (soapy water bubbles at the valve body, not just a fitting).
- The control knob is physically stuck or damaged and won't turn to the OFF position. A stuck knob is a separate issue worth addressing carefully before anything else.
- The unit has visible fire damage, melted components, or a cracked burner assembly.
- You've replaced the thermocouple and the unit still shuts off, and the tilt switch tests fine, and the igniter is producing spark. At that point the gas valve itself may be failing, which is not a DIY part on most patio heaters.
- Your model has a control board or electronic gas valve and the lockout won't clear after the manufacturer's recommended reset. Electronic gas valves and control boards should be serviced by someone with the right tools and training.
One last thing: if your heater shuts off specifically when you release the control knob after the pilot is lit, that very specific symptom has its own focused troubleshooting path worth following. If the heater shuts off when you release the control knob after lighting the pilot, Desa’s owner’s manual advises waiting about 5 minutes for relighting and checking for gas leaks before attempting to light again blank" rel="noopener noreferrer">wait 5 minutes for relighting and check for leaks. It almost always points to either the thermocouple not heating up fully or the tilt switch cutting out, and the distinction between those two is important for getting to the right fix quickly.
FAQ
Is it safe to keep relighting my patio heater when it shuts off repeatedly?
Do not bypass safety devices or tape sensors in the “on” position. If the heater keeps turning off, treat it as a symptom of a shutdown input (pilot flame stability, thermocouple signal, tilt, or overheat), not something to override. If you need to confirm a suspected part, do a targeted test after you reset and relight, then stop if the shutdown repeats.
How can I tell which cause I have without replacing parts yet?
Check whether the shutdown is tied to knob release, wind, or a time window. Knob release shutdown points toward thermocouple or tilt switch behavior, wind-related shutdown suggests pilot flame disturbance, and shutdown on a repeatable schedule (for example 15 to 30 minutes) points toward an overheat cutoff.
Can dirty burner ports or a clogged pilot tip cause shutdown after the flame looks steady?
Yes, but only if you first shut off the gas and let the heater cool. Clean the pilot area and burner ports gently, then relight and hold the knob for the full amount of time your manual specifies. If it still shuts off immediately after release, cleaning may not address the root cause.
What should I do if I smell gas and the heater shuts off?
If you smell gas, don’t test for spark near the pilot. Shut off the tank valve, allow time for any gas to dissipate, and check for a loose connection or damaged hose/regulator coupling (look for hissing). Only proceed with ignition tests once you’re confident there is no active gas leak.
My heater clicks but won’t light, does that rule out the thermocouple?
A piezo igniter is often spark-only, so a weak or missing spark can still coincide with a perfectly working thermocouple. If you have repeated clicking but no visible spark at the electrode, focus on the igniter wire connection and the electrode gap before assuming gas valve or safety controls are failing.
Why does my pilot flame look fine but it still shuts off when I release the knob?
A “good flame” can still be unsafe if the thermocouple is not fully engulfed by the pilot flame. After lighting, watch the pilot flame position and stability for a minute, then observe what happens when you release the knob. If it drops out right away, you likely need to address flame contact or a weak thermocouple signal.
Will moving the heater help me identify whether wind is the real problem?
Use clearance and shielding as a diagnostic tool. Test the heater in a more sheltered spot, on a known level surface, and away from airflow from doors, fans, or open vents. If performance improves in shelter, wind pilot blowout or insufficient shielding is more likely than an internal failure.
How do I confirm a tilt switch reset actually fixed the issue?
Yes. Confirm the shutdown pattern after resetting: keep the heater fully upright on a level surface, press and hold the tilt reset button for the model’s stated duration, then relight. If it trips again immediately even on level ground, the switch is likely faulty rather than the heater being accidentally off-level.
Can I fix a weak thermocouple by repositioning it instead of replacing it?
If the thermocouple measures low, do not just “adjust it” by bending. Many thermocouples are sensitive to mounting position, and a poor fit can reduce heat transfer from the pilot flame. Replace the probe and verify the pilot flame contacts it properly after installation.
What symptoms suggest the regulator or tank setup, not the heater components?
For propane systems, pressure regulation problems can present as a tiny flame or repeated ignition issues. When reconnecting the regulator, open the tank valve slowly and make sure the hose connections are tight. If the heater still behaves poorly after the regulator reset sequence, the next step is to check for blockages in the pilot/burner ports and inspect for hose damage.
If it shuts off after running for a while, what are the most common non-part causes to check first?
Overheat cutoffs are often influenced by restricted airflow, blocked emitter or reflector areas, or incorrect clearance. Make sure the burner area is clear of debris, spider webs, and any coverings that trap heat, then restore the heater’s recommended clearance above and around the unit before relighting.