
A clogged pilot tube is one of the most common reasons a gas patio heater won't ignite or keeps going out. The fix is usually straightforward: shut off the gas completely, use a thin piece of wire or compressed air to clear the tube opening, clean the surrounding parts while you're in there, then reassemble and relight. Before lighting, blank" rel="noopener noreferrer">press down the control knob to LIGHT or pilot mode and hold it for the specified hold time, then check for the pilot flame through the pilot lighting hole if it doesn't light. Most people can do this in under 30 minutes with tools they already own.
How to Clean Patio Heater Pilot Tube Safely

Grant Mercer
8 Jul 2026
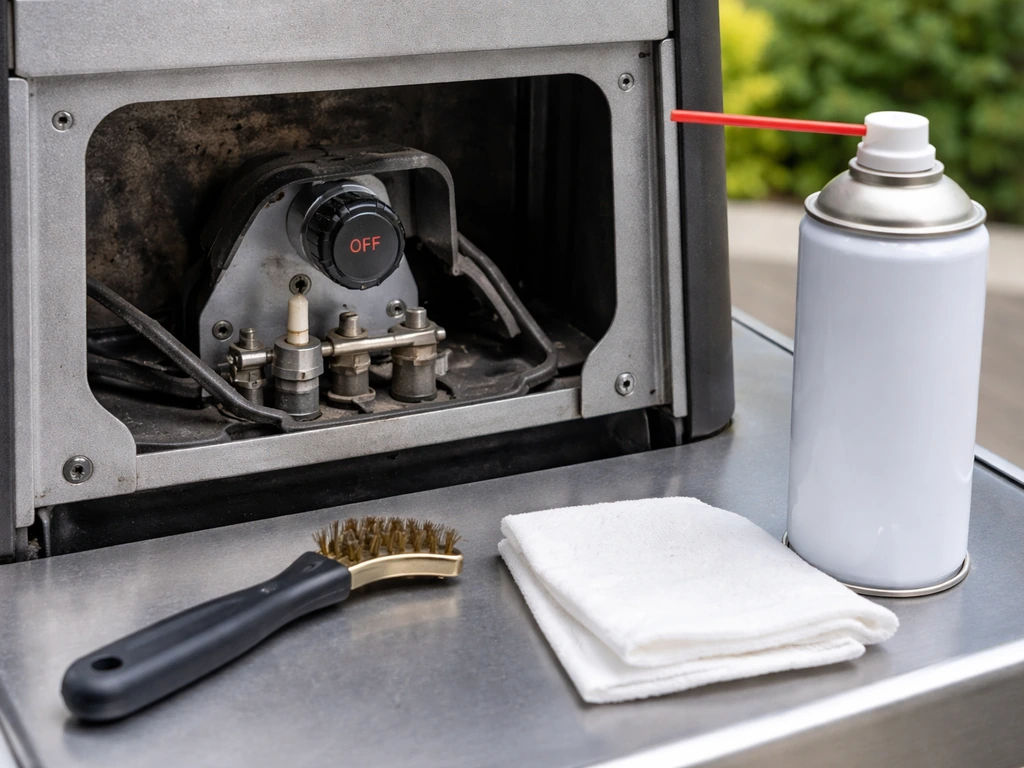
Safety first before you touch anything
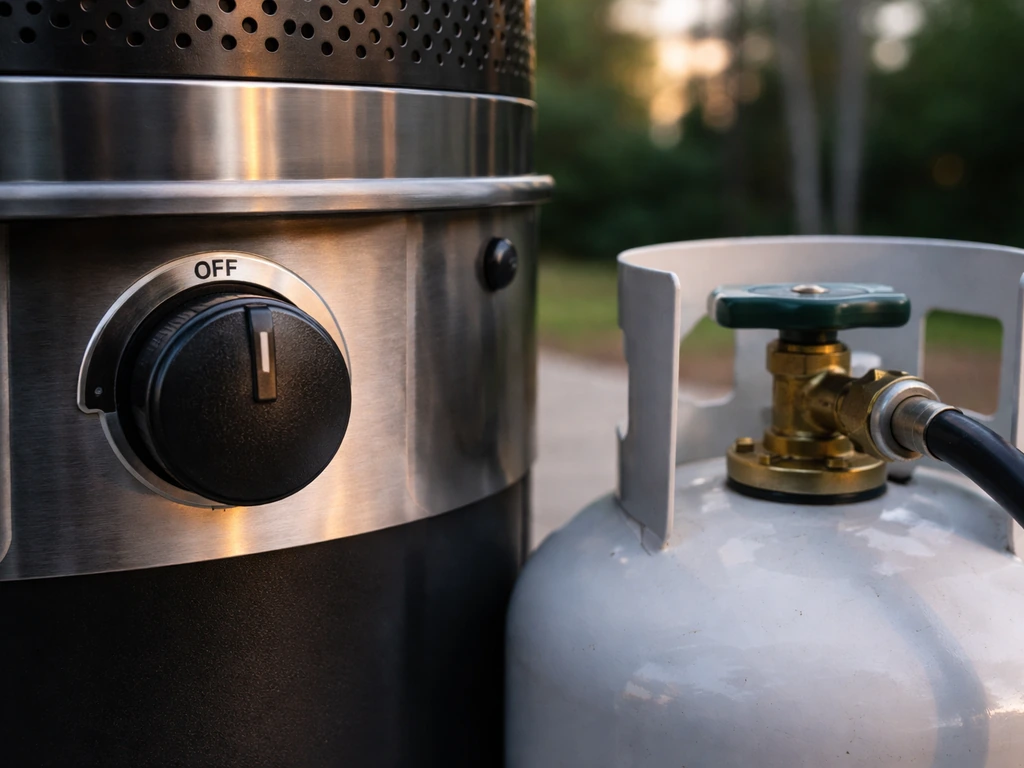
Before you open up the pilot assembly, you need to make sure there's no gas flowing and no residual heat. This isn't optional, gas leaks near an ignition source are genuinely dangerous, and rushing this step is how accidents happen.
- Turn the control knob to the OFF position.
- Close the propane tank valve fully by turning it clockwise until it stops.
- If you have a natural gas heater, close the inline shutoff valve on the supply line.
- Wait at least 5 minutes after shutting off gas before touching any components. This lets residual gas dissipate.
- Do the work outdoors in a well-ventilated area — never in a garage or enclosed space.
- Keep ignition sources (lighters, cigarettes, other flames) well away from the work area.
- If at any point you smell gas during the process and can't identify why, stop immediately, move away from the heater, and call your gas supplier or emergency services. Do not try to relight.
Once the gas is off and the unit is cool, you're safe to proceed. Don't skip the wait time, even with the valve closed, gas can linger in the line and around the pilot assembly for a few minutes.
Find your pilot tube before you start disassembling
Patio heaters come in a few different configurations, and knowing which one you have tells you exactly where to look for the pilot tube. Most residential patio heaters fall into one of these categories:
- Freestanding mushroom-style heaters: The pilot assembly is inside the lower burner housing, typically accessed by removing a panel or the burner reflector dome. The pilot tube is a small-diameter copper or steel tube that runs from the gas valve up to the pilot burner tip.
- Tabletop patio heaters: The pilot assembly is compact and usually visible once you remove the top cap or burner cover.
- Wall-mounted or ceiling-mounted heaters: These often have the pilot assembly behind a removable front panel near the burner.
- Natural gas built-in models: The pilot tube configuration is similar, but the gas supply is fixed — make sure the inline valve is closed before working.
Pull out your owner's manual if you have it. Manufacturers like DCS, Hampton Bay, and Fire Sense all include a dedicated pilot cleaning section or pilot assembly diagram. If you don't have the manual, search the model number (usually on a sticker near the base or gas valve) plus the word 'manual' to find a PDF. The pilot tube is the small-diameter tube that feeds gas directly to the pilot flame tip, it's distinct from the main burner supply line, which is larger. Look for a thin tube (often 1/8 to 1/4 inch in diameter) running up toward a small nozzle positioned near the thermocouple and igniter electrode.
What you need for the job
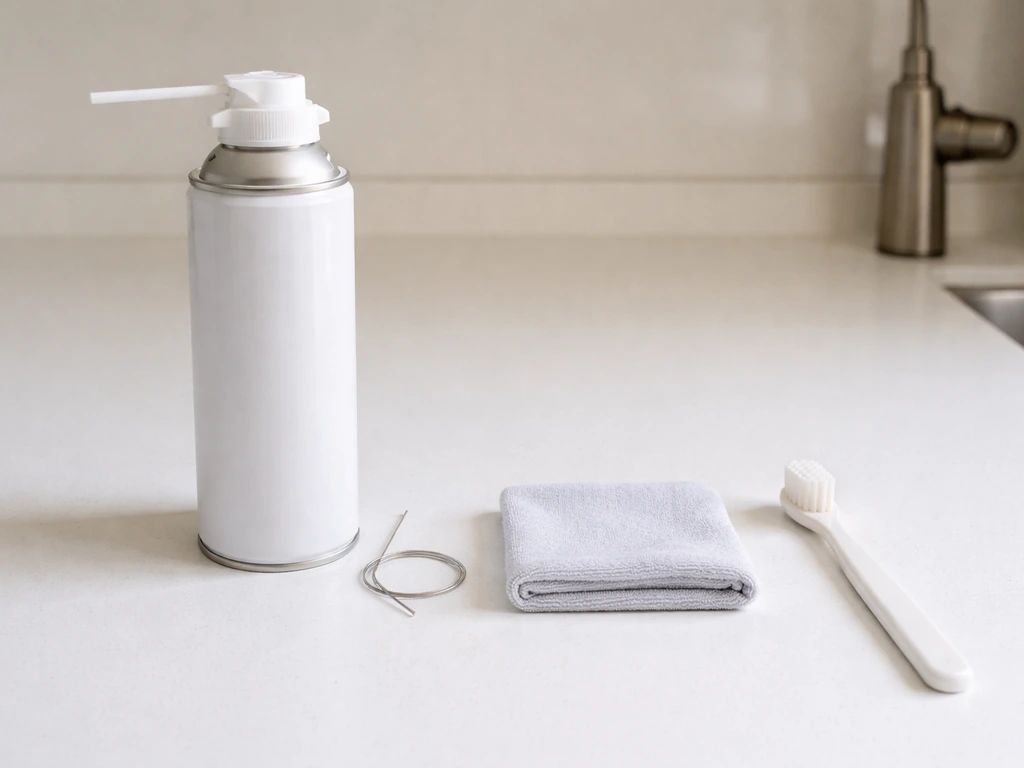
You don't need specialty tools for this. Here's what to gather before you start:
- A can of compressed air (the same kind used for keyboards)
- A thin wire or needle — a piece of guitar string, a sewing needle, or a strand from a wire brush works well. The goal is to fit inside the pilot tube orifice without widening it.
- A small wire brush or old toothbrush
- Clean cloths or paper towels
- Mild dish soap and water in a small container
- A can of gas appliance contact cleaner (optional but useful for corrosion or stubborn soot)
- Phillips and flathead screwdrivers
- Adjustable pliers or a small wrench set
- A flashlight or headlamp
- Leak detection spray or soapy water in a spray bottle (for testing connections after reassembly)
Avoid abrasive cleaners, steel wool, or any cleaner that leaves a residue. Some patio heater manuals specifically warn that abrasive products can damage the finish and internal components. Stick to the gentle options listed above.
How to clean the pilot tube, step by step
Bugs and spider webs are the number one culprit behind clogged pilot tubes, spiders love the warm, sheltered space inside the pilot assembly. Soot buildup and dust are close behind, especially on heaters that haven't been used in months. Here's how to clear it all out.
Step 1: Access the pilot assembly
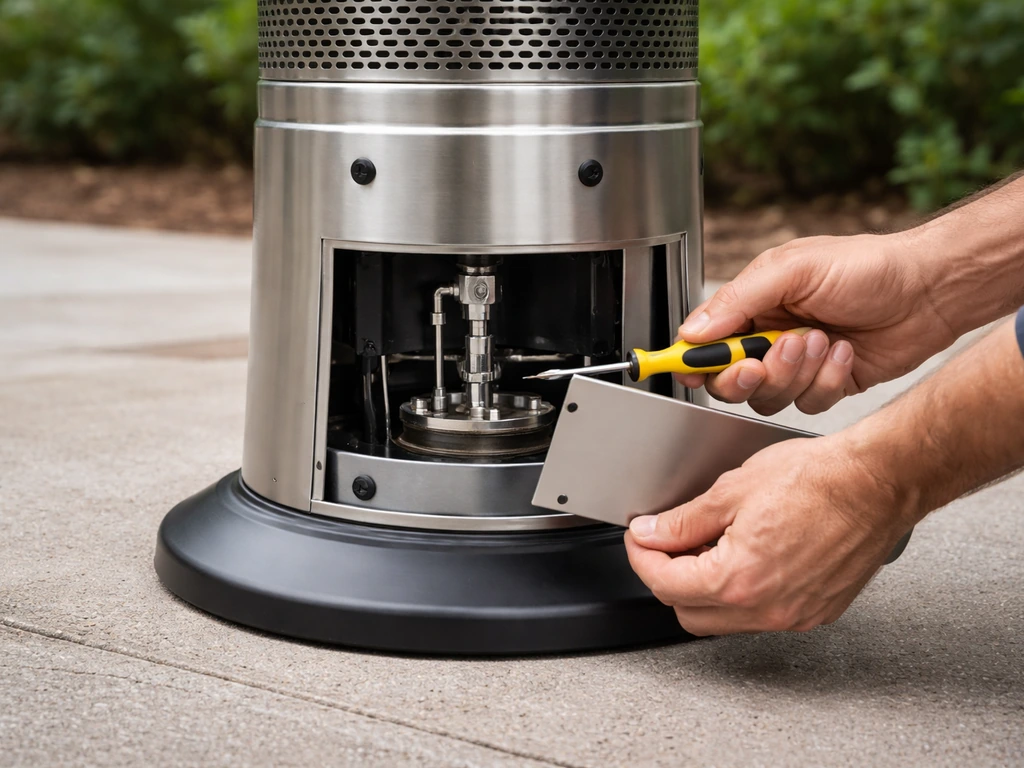
Remove whatever panel or cover is blocking access to the pilot assembly. On most freestanding mushroom heaters, you'll remove a few screws from the lower burner housing. Set the screws somewhere safe, they're easy to lose. Once you can see the pilot area, take a photo with your phone before touching anything. This gives you a reference for reassembly.
Step 2: Disconnect the pilot tube
The pilot tube connects to the gas valve at one end and terminates at the pilot burner tip at the other. On most heaters it's a push-fit or compression fitting at the valve end. Use your fingers or adjustable pliers (gentle pressure only) to disconnect it. Don't force anything, if it feels stuck, look for a small retaining clip or nut you may have missed.
Step 3: Clear the pilot tube orifice
The orifice is the tiny opening at the tip of the pilot tube where gas exits. This is almost always where the clog is. Take your needle or thin wire and gently insert it into the orifice opening. Use a light in-and-out motion, you're dislodging debris, not reaming the hole wider. You don't need much pressure. A spider web or piece of insect debris will come free with minimal effort. If there's hardened soot or corrosion, a brief spray of contact cleaner directly into the orifice first can help soften it.
Step 4: Blow out the tube
After working the orifice with the wire, hold the compressed air straw near the inlet end of the pilot tube and give it a 2-3 second burst. This blows any loosened debris out through the tip. Then flip it around and blow through the orifice end to clear anything sitting in the tube itself. Hold the tube up to a light and look through it, you should be able to see light clearly through both ends when it's fully clear.
Step 5: Clean the exterior of the tube
Wipe the outside of the tube with a damp cloth to remove soot and grime. If there's corrosion on the fittings, use the wire brush to clean the threads before reconnecting. Don't use water directly on the fittings, just a damp cloth on the tube body itself.
Clean the rest of the ignition parts while you're in there
Since you already have the pilot assembly open, spend a few extra minutes on the neighboring components. If you're curious about why this matters, learn how a thermocouple works on a patio heater so you can pinpoint what to check when the unit won't stay lit. A clean pilot tube won't help much if the thermocouple is coated in soot or the igniter electrode is fouled. These parts work together, and cleaning all of them in one session is much smarter than doing one at a time.
Pilot burner tip and surrounding area
Use the toothbrush to scrub the pilot burner tip and the area around the pilot flame outlet. Soot, debris, and spider web residue collect here and can partially block the flame or deflect it away from the thermocouple. The pilot flame needs to directly contact the thermocouple tip to keep the heater lit, even a small buildup can disrupt this. Wipe the area with a clean cloth when done.
Thermocouple tip
The thermocouple is the small metal rod positioned right next to the pilot flame. Its tip needs to sit directly in the pilot flame to generate the millivolt signal that keeps the gas valve open. If the tip is coated in soot, it can't sense heat properly and the heater shuts off as a safety measure, which is exactly the 'won't stay lit' symptom many people experience. Gently rub the thermocouple tip with a piece of fine-grit sandpaper (600 grit or finer) or the edge of a clean cloth to remove any oxide or soot layer. Don't bend it, just clean the surface. Cleaning the thermocouple thoroughly is worth doing alongside the pilot tube, and if you want to go deeper on thermocouple diagnosis, that's a separate process covered in guides specifically about how to clean and fix the thermocouple on a patio heater.
Igniter electrode
The electrode is the part that produces the spark when you press the ignition button. Look for carbon buildup or soot on the tip. Use the toothbrush and a dry cloth to clean it. Check that the electrode tip is positioned about 1/8 inch from the pilot burner, close enough to create a reliable spark but not touching. If the gap is too wide or too narrow, adjust it carefully by hand.
Burner ports and venturi tube
While you have access, take the compressed air can and blast out the burner ports (the small holes around the main burner ring) and the venturi tube opening at the base of the burner. Bugs and spiders love the venturi tube especially. A 2-3 second burst of compressed air into the opening is usually enough to clear any blockage. This prevents uneven flame patterns that can affect overall heater performance once you get the pilot running again.
Reassemble, relight, and check the flame
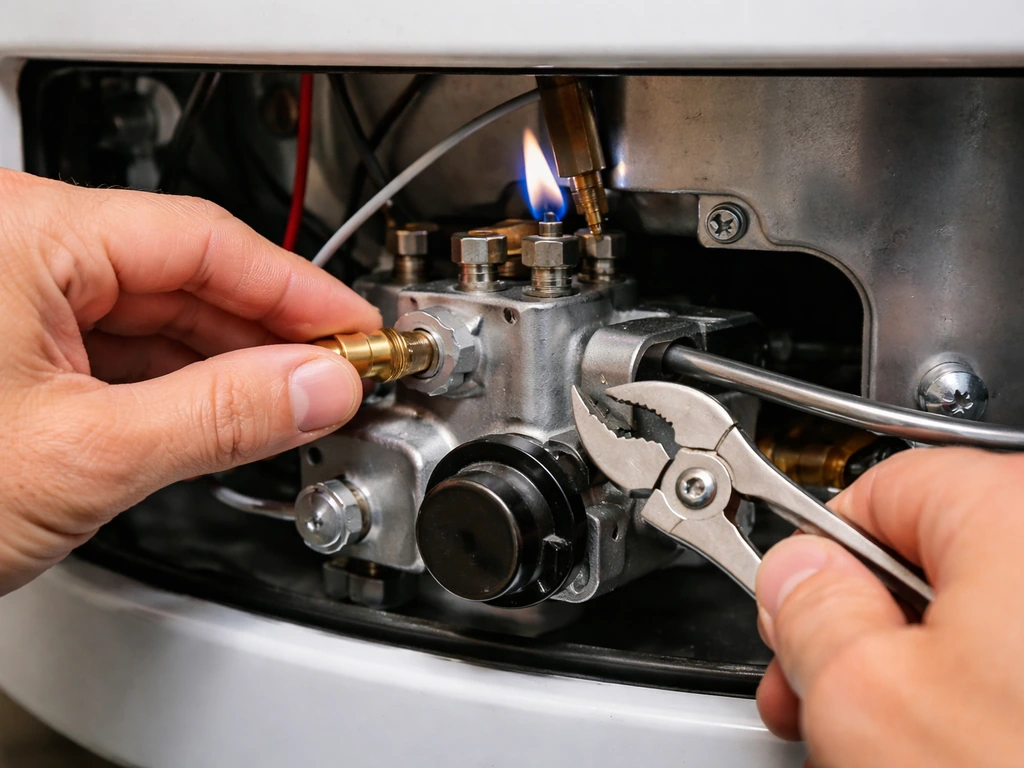
Take your time with reassembly. A loose fitting on the pilot tube is a gas leak waiting to happen, so be thorough.
- Reconnect the pilot tube to the gas valve and to the pilot burner tip. Hand-tighten first, then snug it with pliers — firm but not overtightened, since these fittings are often brass and will strip if you force them.
- Recheck the thermocouple position: the tip should sit directly in the path of the pilot flame, about 3/8 to 1/2 inch into where the flame will be.
- Recheck the electrode gap — approximately 1/8 inch from the burner.
- Reinstall any panels or covers you removed.
- Open the propane tank valve slowly, about one full turn.
- Spray the reconnected fittings with leak detection spray or soapy water. Look for bubbles. If you see any, close the valve immediately and retighten the fitting. Don't proceed until you have a bubble-free seal.
- Now follow the lighting procedure: press and hold the control knob in to the PILOT or LIGHT position. Hold it down — most heaters require a 30 to 60 second hold to allow air to purge from the line and for the thermocouple to heat up enough to hold the valve open.
- While holding the knob, press the ignition button repeatedly until the pilot lights.
- Keep holding the knob for a full 30 seconds after the pilot flame appears. Then slowly release. If the flame stays lit, you're good.
- If the pilot lights but immediately goes out when you release the knob, wait 5 minutes with the gas valve fully closed, then repeat the entire lighting sequence. This allows any remaining air in the line to clear.
A healthy pilot flame should be steady, blue with a small yellow tip, and positioned so it visibly touches the thermocouple tip. If the flame is very small, orange, or flickering erratically, something else is still restricting gas flow or the orifice isn't fully clear.
Still not working? Work through this before calling anyone
If cleaning the pilot tube didn't immediately restore reliable ignition, run through these checkpoints before assuming you need a new part or a technician. If your heater still won't ignite after cleaning and checking the pilot and gas supply, you may need to replace the battery in the ignition system replace battery in patio heater.
| Symptom | Most likely cause | What to check |
|---|---|---|
| Pilot won't light at all | No gas reaching the pilot | Is the tank valve open? Is the tank empty? Is the regulator seated correctly? |
| Pilot lights but goes out immediately on release | Thermocouple not generating enough signal | Is the thermocouple tip sitting in the flame? Is the tip clean? Is the thermocouple wire connection tight at the valve? |
| Pilot flame is very weak or orange | Partial orifice clog or low gas pressure | Re-clean the pilot tube orifice; check the regulator for damage or debris |
| Igniter clicks but no spark | Fouled electrode, bad wire, or dead battery | Check electrode gap and cleanliness; check igniter wire connection; replace the AA battery if your model uses one |
| Pilot lights but main burner won't come on | Main burner ports blocked or gas valve issue | Clean burner ports with compressed air; check the control knob is being turned fully to the HI position after pilot is established |
| Gas smell during or after lighting | Loose fitting or connection | Close all valves immediately, ventilate the area, and do not relight until all fittings are inspected and confirmed leak-free |
Check the regulator and gas supply
A clogged pilot tube is often the culprit, but a failing regulator produces almost identical symptoms. If the pilot tube is visibly clear and clean but you're still getting a weak or unstable flame, disconnect the regulator from the tank, wait 30 seconds, and reconnect it. This resets the regulator's internal safety mechanism, which sometimes trips when the valve is opened too fast. If the problem persists after a reset, the regulator itself may need replacement, a common fix on older heaters.
Thermocouple failure vs. a dirty thermocouple
A dirty thermocouple and a failed thermocouple produce the same symptom: the pilot goes out when you release the knob. Cleaning it first is the right move since it costs nothing. After you clean the thermocouple, confirm the tip is positioned in the pilot flame so the valve stays open. But if cleaning doesn't help and you've confirmed the thermocouple is properly positioned in the flame, the thermocouple itself may have failed and needs replacement. This is an inexpensive part and a DIY-friendly repair on most patio heater models.
When to stop and call a technician
Most pilot tube and ignition issues are genuinely fixable at home. But there are situations where you should stop and get a professional involved:
- You can smell gas and can't find the source after checking all fittings with soapy water.
- The gas valve body itself is damaged, cracked, or corroded — valves aren't DIY parts to repair.
- You've replaced the thermocouple, cleaned everything thoroughly, and reset the regulator, but the heater still won't hold a pilot flame.
- The pilot tube has a visible crack, kink, or hole anywhere along its length.
- Any component shows signs of heat damage, melting, or charring beyond normal soot.
- You're uncomfortable with any step in the process — there's no shame in stopping and calling a certified gas appliance technician.
If you smell gas at any point and can't identify and fix the source, treat it as a serious situation: shut everything off, move people and pets away from the area, don't use any electrical switches or ignition sources nearby, and call your gas supplier or local emergency services. That guidance applies regardless of what you were in the middle of fixing.
For most heaters, a thorough pilot tube cleaning combined with attention to the thermocouple and electrode is all it takes to get a reliable flame back. It's a repair that's well within reach for any homeowner with basic hand tools and a little patience, and it's a lot cheaper than buying a new heater or paying a service call fee for something you can fix yourself in an afternoon.
FAQ
How can I tell whether the clog is in the pilot tube or somewhere else in the pilot assembly?
After you clear the orifice and blow air through, the easiest check is sight. Hold the tube up to a bright light and confirm you can see light through both ends. If the tube is fully clear but the pilot flame is still weak or won’t stay lit, look at the thermocouple tip position and cleanliness, and check the igniter electrode gap, since those can mimic a “clog” symptom.
Is it safe to clean the pilot tube without disconnecting the propane tank?
You should not. Even if the control knob feels closed, you can still have gas flow through the valve path, and there can be residual gas in the line. Turn off the gas supply completely (and follow your heater’s shutdown steps), then wait for the unit to cool before opening anything.
Can I use a larger wire to “make sure” the pilot orifice is cleared faster?
No. Use a thin wire or gentle pressure, because enlarging the orifice can change the gas mixture and produce an unstable or unsafe flame. The goal is to dislodge debris, not ream the opening.
What should I do if the pilot tube fitting feels stuck when I try to disconnect it?
Stop forcing it. Many fittings are secured with a small clip or nut, or they are designed as push-fit with a specific release method. If it won’t come off by gentle hand pressure, re-check the parts diagram in your manual before applying tools.
Should I clean the pilot tube with water to remove soot and grime?
Avoid water on the fittings and internal gas components. Use a damp cloth only on the tube body and external surfaces, and keep moisture away from connections. If you used any cleaner, make sure it fully dries before reassembly and relighting.
How do I confirm the pilot flame is correct after cleaning?
A proper flame should be steady with a blue base and a small yellow tip, and it should visibly touch the thermocouple tip. If the flame is orange, flickering, or too small, re-check that the orifice is fully clear and that the thermocouple is positioned directly in the flame.
My heater still won’t ignite after cleaning the pilot tube. What’s the next most common thing to check?
Start with the ignition battery if your heater uses electronic ignition. If the pilot won’t light, weak battery power can prevent sparking even when the pilot tube is clean. Also verify the electrode gap is about 1/8 inch from the pilot burner, since an incorrect gap can cause misfires.
Why might the pilot go out when I release the knob, even if the pilot tube is clear?
That usually points to thermocouple issues or positioning. Clean the thermocouple tip of soot or oxidation, confirm it’s in the pilot flame, and check that it hasn’t been bumped out of alignment during reassembly. If it’s correctly positioned and clean but still fails to hold, the thermocouple itself may need replacement.
Can a regulator problem look like a clogged pilot tube?
Yes. Symptoms can be almost identical, including weak or unstable pilot flames. If the pilot tube or orifice is visibly clean and you still have poor ignition, you can try disconnecting the regulator from the tank, waiting about 30 seconds, then reconnecting to reset its safety mechanism. If it persists, the regulator may need replacement.
What’s the best way to avoid breaking anything when I clean and reassemble?
Take a photo before you touch parts, keep track of screws, and ensure all pilot tube connections seat firmly without overtightening. A loose fitting can create a leak, so double-check the fit before relighting and follow your manual’s reassembly order.
What if I still smell gas after cleaning or reassembly?
Treat it as a serious safety issue. Shut off the gas, keep people and pets away, and do not use any electrical switches or ignition sources nearby. If you can’t locate and fix the leak immediately, contact your gas supplier or local emergency services.
How often should I clean the pilot tube to prevent clogs from coming back?
If your heater sees seasonal storage, do a quick inspection and cleaning before the first use of the season. Bugs and webbing are the most common cause, so even a short “dust and debris” check during the off-season can prevent a full clog when you light it again.