If your patio heater lights but won't stay on after you release the control knob, the thermocouple is almost always the reason. It's a small temperature-sensing probe that sits in the pilot flame and generates a tiny electrical signal (around 25–30 millivolts) to keep the gas valve open.
How to Fix Thermocouple on a Patio Heater Safely

Grant Mercer
14 Jun 2026
If you want the quick version of how it works, the thermocouple acts as a safety sensor that responds to the pilot flame and keeps the gas valve open how does a thermocouple work on a patio heater. When it stops sending enough signal, the valve closes as a safety measure and the flame dies.
The good news: a thermocouple is one of the cheapest, most DIY-friendly parts on any patio heater, and you can usually replace it in under 30 minutes with basic hand tools.
Safety checks before you touch anything
Before you go poking around the burner assembly, run through these checks. They take five minutes and can prevent a serious accident.
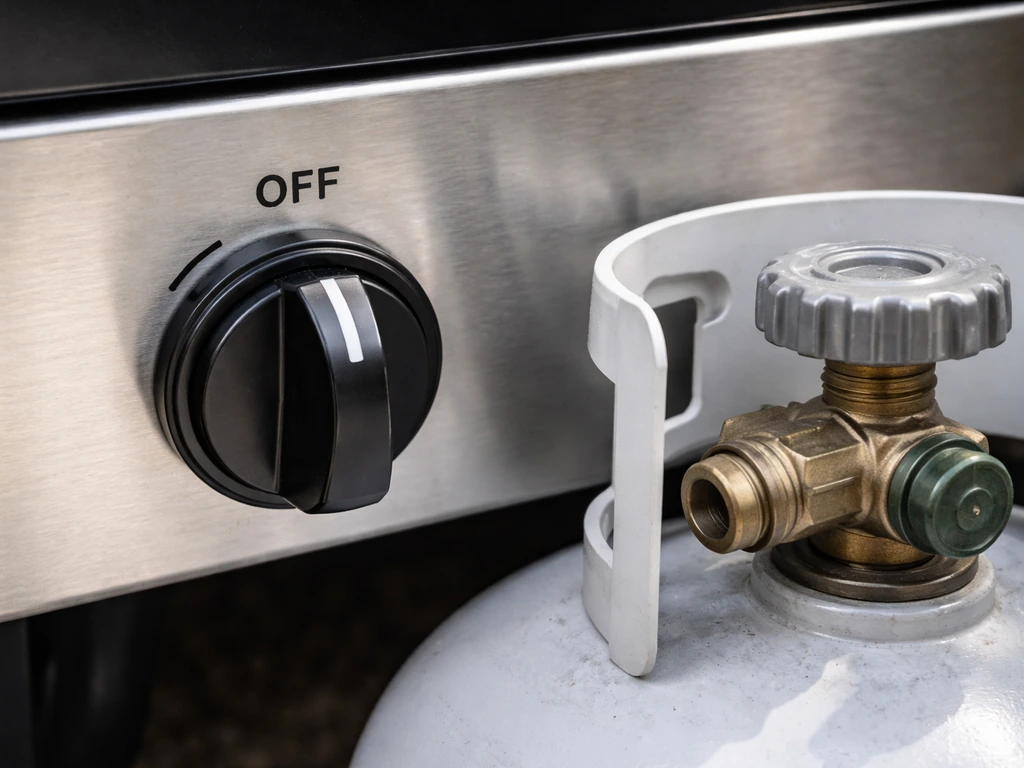
- Turn the control knob to OFF and close the tank valve completely. Never work on the gas system with the tank valve open.
- Smell for propane. If you detect even a faint gas odor near the heater, do not proceed. Move the heater outdoors away from ignition sources, leave the tank valve closed, and check for a leak before doing anything else.
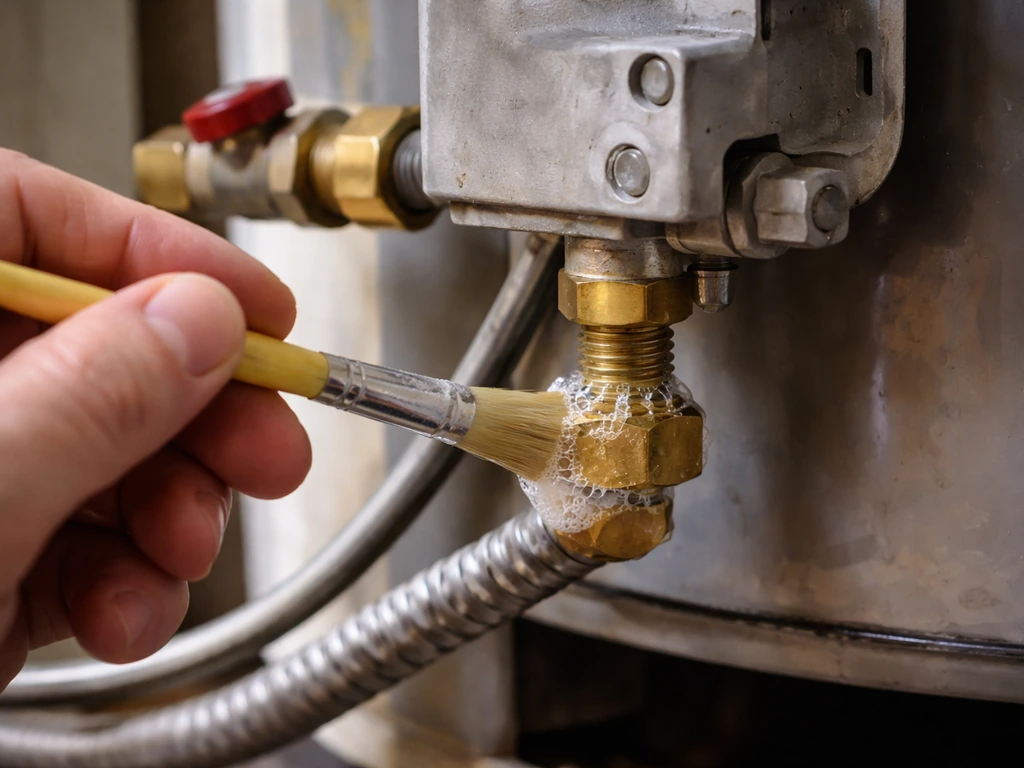
- Use soapy water (thick, not watered down) or a commercial leak-detector solution on every connection point: tank, hose, and regulator. Bubbling means you have a leak. Fix the leak first.
- Never use an open flame to check for leaks. Ever.
- Wait at least 45 seconds after turning off the heater before touching any part of the burner assembly. The thermocouple tip and surrounding bracket stay very hot.
- Let the heater cool completely before removing panels or working near the gas valve. You cannot safely diagnose or replace anything on a hot heater.
One more thing worth saying out loud: propane leaks are emergencies. PERC emphasizes treating propane odor or leak conditions as an emergency and acting immediately to reduce the risk of fire, explosion, serious injury, or death propane leaks are emergencies. If you smell gas and it doesn't clear quickly after closing the tank valve and moving outdoors, call your propane supplier or emergency services. Do not light anything, operate electrical switches, or go back inside nearby structures until it's cleared.
Is it actually the thermocouple? Ruling out other causes first
A thermocouple failure isn't the only reason a patio heater won't stay lit. Replacing it when something else is causing the problem is a waste of time and money. Here's how to narrow it down.
Check these before assuming thermocouple failure
- Gas supply: Is the tank low or empty? A near-empty tank won't sustain a pilot flame. Check the level and try a known-full tank if you're unsure.
- Tank valve and shutoff: The equipment shutoff valve must be fully open. A half-open valve creates a weak pilot flame that won't heat the thermocouple enough.
- Pilot tube blockage: A clogged pilot orifice produces a tiny, weak flame that can't generate enough heat. Cleaning the pilot tube is its own job and worth checking before replacing the thermocouple.
- Tilt switch: Most mushroom-style patio heaters have a tilt safety switch that cuts gas if the heater tips over. If this switch is faulty or stuck, the heater will shut off even when upright. Check that the heater is on a level surface and the switch isn't corroded.
- Regulator issues: A failing or tripped regulator restricts gas flow to the pilot. If the flame looks correct and healthy but the heater still shuts off, the regulator may be the culprit.
Signs that point specifically to the thermocouple
- The pilot lights and burns normally while you hold the knob, but the flame dies within 2–3 seconds of releasing it.
- The pilot flame is healthy and blue but doesn't seem to be sitting directly on the thermocouple tip — the thermocouple may be misaligned.
- You can see carbon buildup (black soot) or physical damage on the thermocouple tip.
- The thermocouple connection at the gas valve feels loose when you try it by hand.
- A multimeter set to DC millivolts reads below 25 mV at the thermocouple leads after holding the pilot for 30 seconds.
That multimeter test is worth doing before you buy a new part. Disconnect the thermocouple lead from the gas valve, light the pilot, hold it for 30 seconds, and measure the voltage at the thermocouple leads. A healthy thermocouple should read around 25–30 mV. Anything below 25 mV and replacement is the right call. If it reads zero or close to it, the thermocouple is almost certainly dead.
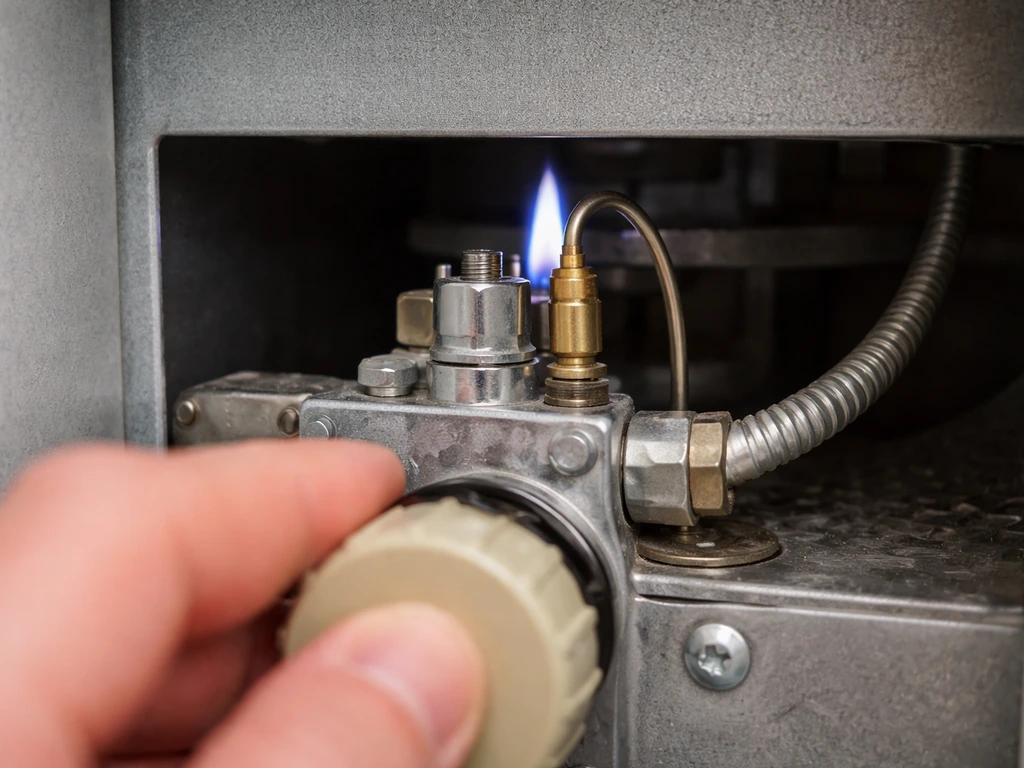
The alignment and connection fixes to try first
Before you order a replacement, check two quick things. First, look at where the pilot flame sits relative to the thermocouple tip. The flame should be touching the tip directly. If it's positioned slightly away or angled off, gently bend the thermocouple bracket toward the flame. Second, check the connection at the gas valve. A thermocouple nut that's too loose won't pass enough signal, and one that's over-tightened can actually crimp the connection and limit millivolt output. If it's very tight, try loosening it a quarter turn, then hand-tighten it just past finger-tight. Relight and test. This specific fix is called out in several AZ Patio Heaters manuals and solves the problem more often than you'd expect.
How to replace a patio heater thermocouple
Tools you'll need
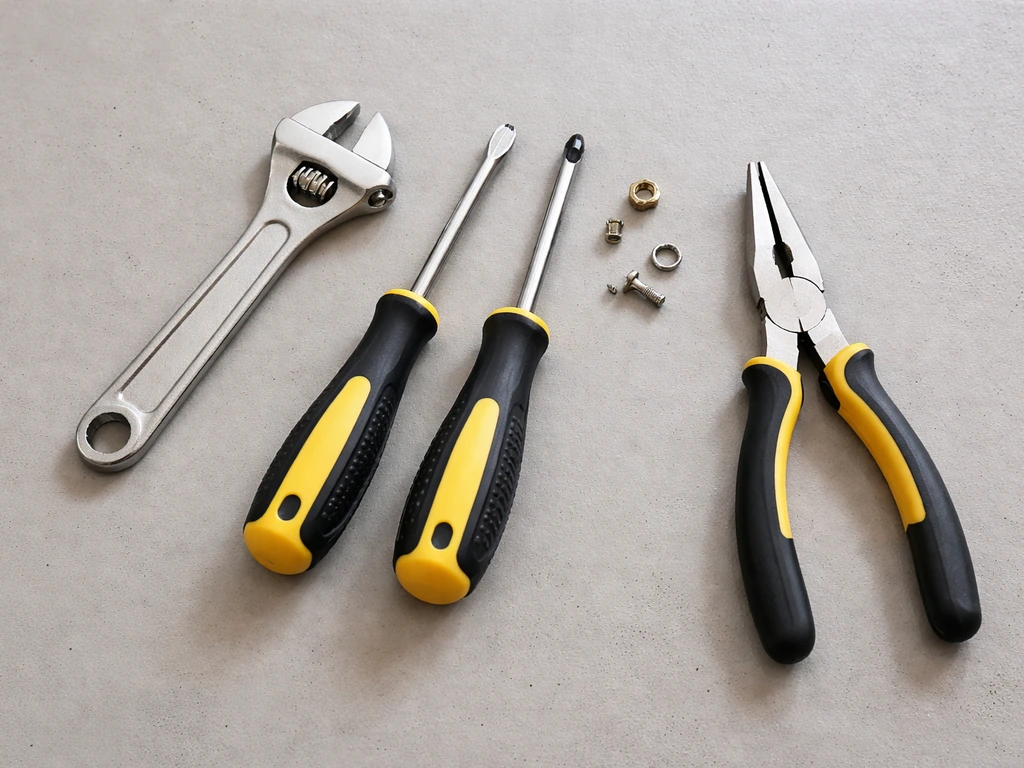
- Adjustable wrench or open-end wrench (typically 7/16" or similar for the thermocouple nut)
- Flathead and Phillips screwdrivers (for panel access)
- Needle-nose pliers (helpful for routing the new thermocouple)
- Multimeter (for testing before and after)
- Leak-detector solution or dish soap and water
- Replacement thermocouple (see matching section below)
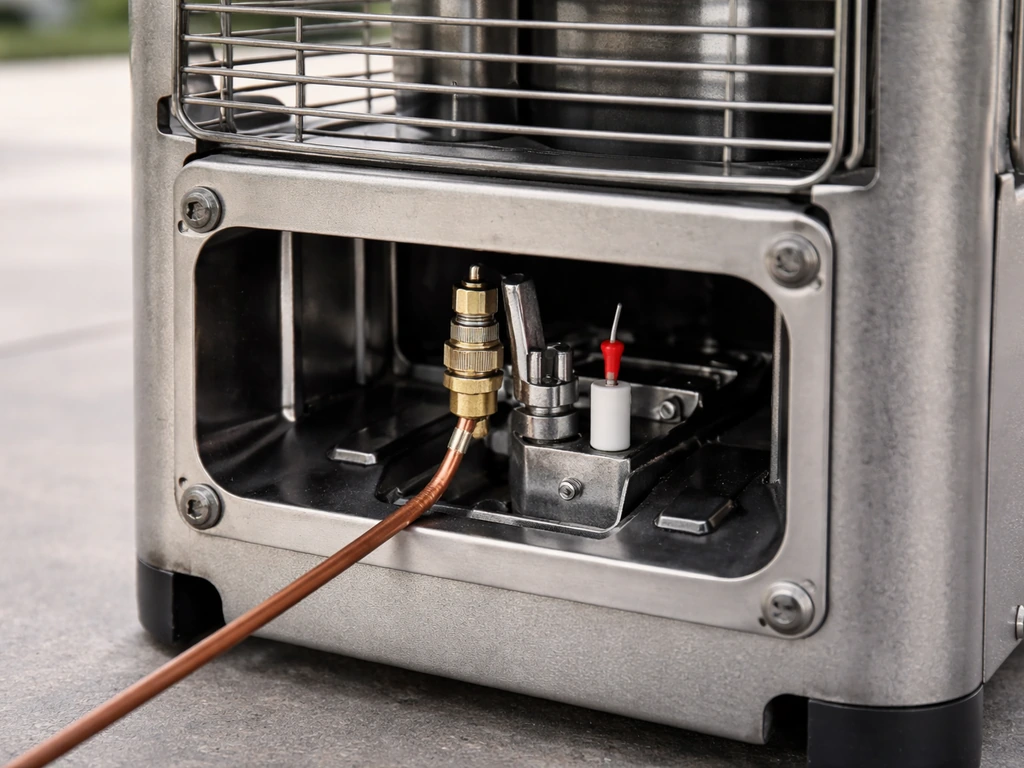
Accessing the thermocouple
On most mushroom-style freestanding patio heaters, the thermocouple is located in the burner head assembly at the top of the pole. You'll typically need to remove a decorative emitter screen or burner pan cover (usually held by two to four screws) to access the pilot assembly. On some models the control valve housing in the lower pole section also needs a panel removed. Take a photo of everything before you start so you know how it all goes back together.
Step-by-step replacement
- Close the tank valve and wait for the heater to cool completely. This is non-negotiable.
- Remove access panels or the burner pan cover to expose the pilot assembly and thermocouple tip.
- Trace the thermocouple from its tip (which sits in the pilot bracket near the pilot orifice) down to the gas valve connection. Note how it's routed so you can replicate it.
- At the gas valve, use a wrench to loosen the thermocouple connector nut. Turn counterclockwise. Do not force it — if it's stuck, apply gentle, steady pressure rather than jerking it.
- At the pilot bracket end, the thermocouple tip is usually held by a small clip or bracket. Slide or unclip it out of the bracket.
- Remove the old thermocouple and bring it with you when purchasing a replacement, or photograph the length and connection type.
- Route the new thermocouple along exactly the same path as the old one. Avoid sharp bends or kinks — these damage the internal wires.
- Push the thermocouple tip into the pilot bracket as far as it will go. The tip needs to sit fully in the bracket so the pilot flame contacts it properly.
- At the gas valve end, hand-start the thermocouple connector nut to avoid cross-threading. Then tighten with a wrench — snug but not torqued. Over-tightening is a real failure mode on these fittings.
- Reinstall any panels or covers you removed.
Choosing the right replacement thermocouple
Thermocouples are not universal, but most patio heaters use a fairly standard universal-style thermocouple available at hardware stores. The key things to match are: the overall length (measured from tip to the end of the lead), the connection type at the gas valve end (threaded nut is most common), and the tip/bracket style. Bring the old thermocouple to the store or measure it before ordering online. Common lengths for patio heaters run from about 18 to 36 inches.
If your heater is a branded model (Hiland, Fire Sense, Patio Comfort, AZ Patio Heaters, Dyna-Glo, and so on), check the manufacturer's replacement parts list first. Some brands specify OEM parts for safety and fit reasons, and using a generic that's slightly the wrong length can cause the tip to sit too far from the pilot flame. A thermocouple that doesn't get fully heated won't generate enough millivolts to hold the valve open, which puts you right back to the same symptom.
| Factor | What to check | Why it matters |
|---|---|---|
| Length | Measure old thermocouple tip to lead end | Too short won't reach the valve; too long creates kinks |
| Connection type | Threaded nut vs. push-in vs. clip | Wrong type won't attach to your gas valve |
| Tip diameter/bracket style | Match the bracket clip on the pilot assembly | Loose fit means the tip won't heat correctly |
| OEM vs. universal | Check your heater's manual for parts specs | OEM is safer for branded heaters with specific pilot geometry |
Testing after replacement: making sure it actually stays lit
Before you declare victory, run a proper leak test and ignition test. The operator's manual also calls for suspected areas to be leak tested and to perform proper safety checks before transport or covering run a proper leak test and ignition test. Open the tank valve slowly. Apply soapy water to every connection you touched, including the thermocouple nut at the gas valve. No bubbles means you're good. If you see bubbles, close the tank valve, tighten the connection slightly, and retest.
Now light the pilot. Hold the control knob in for a full 30 seconds before releasing. This is important: the thermocouple tip needs time to heat up and generate enough millivolts to hold the valve open. Releasing the knob too early is a very common mistake, and it will make you think the new thermocouple is also failing when it's actually fine. Hold for 30 seconds, then slowly release. The pilot should stay lit.
If the pilot holds after 30 seconds, turn the knob to the main burner setting and check that the burner ignites and stays on. Let it run for two to three minutes. If everything is stable, you're done. If the pilot still drops out after a 30-second hold on the new thermocouple, check the pilot flame position relative to the thermocouple tip again. The flame needs to directly contact the tip. A very slight bend of the thermocouple bracket toward the flame often makes the difference.
If you have a multimeter, rerun the millivolt test to confirm. A reading of 25–30 mV after a 30-second pilot hold means the thermocouple is doing its job. Anything below 25 mV on a brand-new thermocouple points to a gas valve problem rather than another thermocouple issue, and at that point a service call makes more sense than continuing to DIY.
On bypassing the thermocouple: what it means and why you shouldn't
People sometimes ask about bypassing the thermocouple because they're frustrated their heater keeps shutting off and they want a quick fix. It's worth explaining exactly what bypassing means: you would be permanently holding the gas valve open by eliminating the safety signal, so gas flows to the burner whether the pilot is lit or not. If the pilot goes out for any reason, gas continues flowing and builds up. The result can be a fire or explosion.
The thermocouple exists specifically to prevent this. Gas safety standards require that when a pilot flame is extinguished, the gas supply to the main burner shuts off within 2.5 minutes. Bypassing the thermocouple defeats that entire safety system. Hiland's owner's manual says it plainly: 'Do not bypass thermocouple safety.' That advice applies to every patio heater regardless of brand.
The reason the bypass idea keeps circulating is that people do it on furnaces and water heaters to test a gas valve temporarily, under controlled conditions, as a diagnostic step. That's a professional diagnostic technique, not a repair. Even in that context it's only done briefly and with close supervision. Leaving a patio heater running permanently with a bypassed thermocouple outdoors, around furniture, people, and propane tanks, is a genuinely dangerous situation.
If you've replaced the thermocouple, checked alignment, confirmed the gas supply and connections are good, and the heater still won't stay lit, the problem is almost certainly the gas valve itself. A faulty gas valve can't be fixed with a bypass, and it can't be safely repaired at home. Replacement valves for common heater models are available, but if you're not comfortable with gas system work, this is the point to bring in a technician or consider whether the heater is worth further repair investment.
What to do if none of this fixes it
If you've worked through all of the above and the heater still won't behave, here's where to look next. A dirty or blocked pilot tube can produce a flame that looks fine but isn't hot enough to heat the thermocouple properly, cleaning the pilot tube is a separate process but a logical next step.
Once the pilot tube is clean, follow the same pilot relight and timing steps to confirm the flame heats the thermocouple properly cleaning the pilot tube. If you suspect buildup from soot or grime, you may need to clean patio heater parts around the pilot and thermocouple area to get strong, consistent heat again cleaning the pilot tube.
If cleaning the pilot tube doesn't solve it, use the full process for how to fix a patio heater step by step. The regulator is another common culprit on older heaters: a tripped or failing regulator starves the pilot of gas pressure. If you suspect a regulator issue, follow the steps for replacing the regulator on your patio heater. Regulator replacement is straightforward and covered separately.
And if your igniter isn't sparking reliably in the first place, that's a different problem entirely from the thermocouple.
The good news is that patio heaters are repairable appliances, not throwaway products. A thermocouple costs a few dollars, takes 20 minutes to replace, and solves the problem in the majority of 'won't stay lit' cases. After you confirm the thermocouple is the cause, follow the steps for how to replace battery in patio heater thermocouple costs a few dollars, takes 20 minutes to replace. Work through the diagnosis methodically, replace the thermocouple correctly, and most heaters come right back to reliable operation without a service call.
FAQ
How can I tell if the problem is the thermocouple or the pilot flame, even before I replace anything?
After lighting, watch the pilot for consistency, then measure millivolts. If the pilot flame is properly touching the thermocouple tip but the reading stays below 25 mV after a 30-second hold, the thermocouple is the likely fault. If the reading rises and holds, but the pilot itself goes out early, focus on pilot alignment, a blocked pilot tube, or low gas pressure rather than replacing the thermocouple again.
What if my multimeter shows 25–30 mV, but the heater still shuts off when I release the knob?
That usually points to something other than the thermocouple signal, such as a poor connection at the gas valve, damage to the thermocouple lead near the crimp, or a gas valve issue. Re-check that the thermocouple nut is snug (not over-tightened) and rerun the ignition hold for the full 30 seconds, then perform the soapy-water leak test on the connections you touched.
Can I reuse the thermocouple if the tip looks dirty or slightly bent?
Often you should not reuse a thermocouple if it has tested low (below 25 mV) or if the end is heavily carboned. Minor bending is usually adjustable by gently bending the bracket so the flame contacts the tip. If the voltage output is still low after cleaning the area and re-aligning, replacement is the safer and more reliable fix.
How do I avoid damaging the thermocouple connection when removing and reinstalling it?
Use steady hand torque on the nut, stop when it is snug, then only make small adjustments. Over-tightening can crimp or deform the connection path and reduce millivolt output, which makes the new part seem “bad.” If the nut feels seized, avoid forcing it with pliers, and instead use appropriate tools carefully while holding the thermocouple body to prevent twisting.
The new thermocouple works for a while, then the heater starts shutting off again. What are common causes?
Most repeat failures come from the pilot flame no longer contacting the tip (bracket shifts, screen/pan changed, or the heater was moved) or from a gradually blocked pilot tube that reduces heat. Re-check flame contact visually, repeat the 30-second hold test, and do the soapy-water leak test to confirm the connection stayed tight.
What should I do if my heater has an igniter that keeps clicking, but the pilot never stays lit?
That behavior can be ignition system related rather than thermocouple related. Confirm you can get the pilot to light and then hold the knob for a full 30 seconds. If it will not reliably light, troubleshoot the igniter and pilot gas supply first, because a weak or inconsistent pilot will not heat the thermocouple long enough.
Is it okay to bend the thermocouple bracket aggressively to “force” the flame onto the tip?
Make small, controlled adjustments only. Aggressive bending can loosen the fit, distort the bracket, or create intermittent contact with the flame heating area. Aim for direct flame impingement on the tip, then retest with the 30-second hold and confirm with the millivolt reading if you have a multimeter.
How often should I replace the thermocouple on a patio heater?
There is no fixed schedule, it depends on usage and contamination. If millivolt output drops below about 25 mV or the heater consistently shuts off on release, treat it as failed. Regularly keeping the burner area clean and ensuring the pilot tube is not obstructed can reduce premature thermocouple wear.
Where should the pilot flame contact the thermocouple tip exactly?
It should be touching the tip directly, not hovering slightly away or only heating the bracket area. If the flame contacts the wrong spot, the thermocouple may produce a lower voltage and drop out when you release the knob, so visually verify contact after reassembly and after any cover or screen reinstall.