To clean a patio heater thermocouple, let the heater cool completely, turn off the gas, then gently scrub the thermocouple tip with fine-grit sandpaper or a soft wire brush to remove soot, carbon, and corrosion. Clean the connection point at the gas valve too, then reinstall everything snug, check that the tip sits directly in the pilot flame path, and test. That is the whole job. It takes about 15 minutes and fixes the most common reason a patio heater won't stay lit after you release the ignition knob.
How to Clean a Patio Heater Thermocouple Step by Step

Grant Mercer
23 May 2026
Why cleaning the thermocouple matters for patio heater ignition
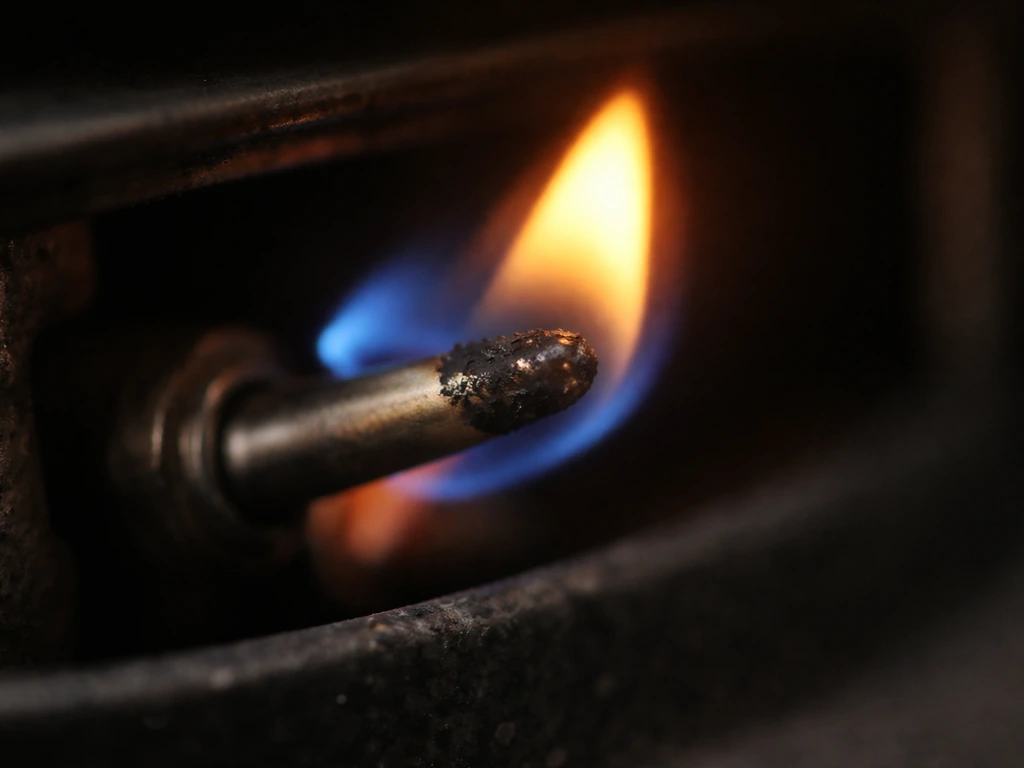
The thermocouple is a small metal probe that sits right in the pilot flame. When the flame heats the tip, it generates a tiny electrical voltage that signals the gas safety valve to stay open. If the tip is coated in soot, carbon buildup, or corrosion, it can't absorb heat efficiently. The voltage drops, the valve doesn't get a strong enough signal, and the moment you release the control knob, the gas shuts off and the flame dies. That is exactly the symptom most people describe: the heater lights fine while you hold the knob, then goes out 10 to 30 seconds after you let go.
Soot accumulates naturally from combustion, especially if your heater runs in dusty or humid conditions or sat in storage. Oxidation and surface corrosion build up over seasons. Oil or film from handling or nearby cooking can also coat the tip. Any of these will degrade how much heat transfers to the thermocouple, and all of them are fixable with a basic cleaning.
It is also worth knowing that a dirty thermocouple is not the only reason a heater won't stay lit. If you are specifically troubleshooting a propane patio heater that shuts off right after lighting, start with the thermocouple cleaning step outlined earlier not the only reason a heater won't stay lit. A blocked pilot tube orifice, a misaligned thermocouple that sits outside the flame path, wind interfering with the pilot, or a failing regulator can all produce the same symptom. Cleaning the pilot tube orifice also matters because a buildup can block the pilot flame from staying strong after you release the knob. Cleaning is the right first step because it is easy, free, and handles the most common cause. If it does not work, the troubleshooting path from there is clear, and I will walk you through it at the end.
Safety first before you touch the thermocouple
Working on any gas appliance requires a few non-negotiable steps before you pick up a tool. These are not suggestions.
- Turn off the gas completely. Close the valve at the propane tank by turning it clockwise until it stops. Do not just set the control knob to Off and assume no gas can reach the components.
- Let the heater cool down for at least 30 to 45 minutes. The thermocouple tip and burner area hold heat longer than you expect. Touching a hot thermocouple is a burn risk, and working near warm gas fittings is a safety risk.
- Work outdoors or in a very well-ventilated space. Even with the tank valve closed, residual gas can be present in the line. Never work on a gas appliance in a closed garage or shed.
- Do not use open flames, sparks, or power tools near the heater while you work. That includes not smoking nearby.
- After you finish and reconnect everything, check all gas connections with soapy water before lighting. Bubbles mean a leak. Stop and fix it before proceeding.
- If you ever smell gas strongly during the process, walk away, leave the area, and call your gas supplier or fire department. Do not attempt to find the source yourself.
Most patio heater thermocouples are accessible with basic hand tools and no special training. But if at any point a fitting is stuck, a connection looks damaged, or you are not confident in what you are seeing, stop and get a qualified technician involved. The repair itself is simple. The context (propane gas) means simple mistakes have real consequences.
How to locate and access the thermocouple
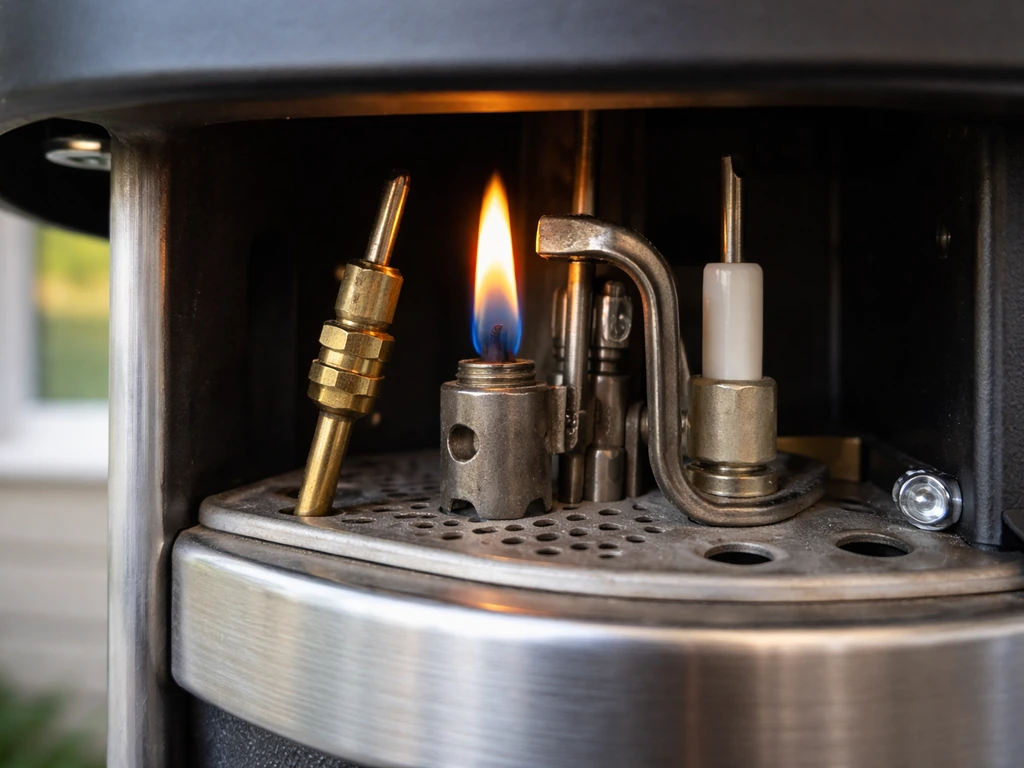
On a standard mushroom-style propane patio heater (the kind you see from AZ Patio Heaters, Patio Comfort, and most big-box brands), the thermocouple is located up in the heater head, right next to the pilot assembly. The tip sticks into the pilot flame path, and the other end connects via a thin copper or steel line down to the gas control valve.
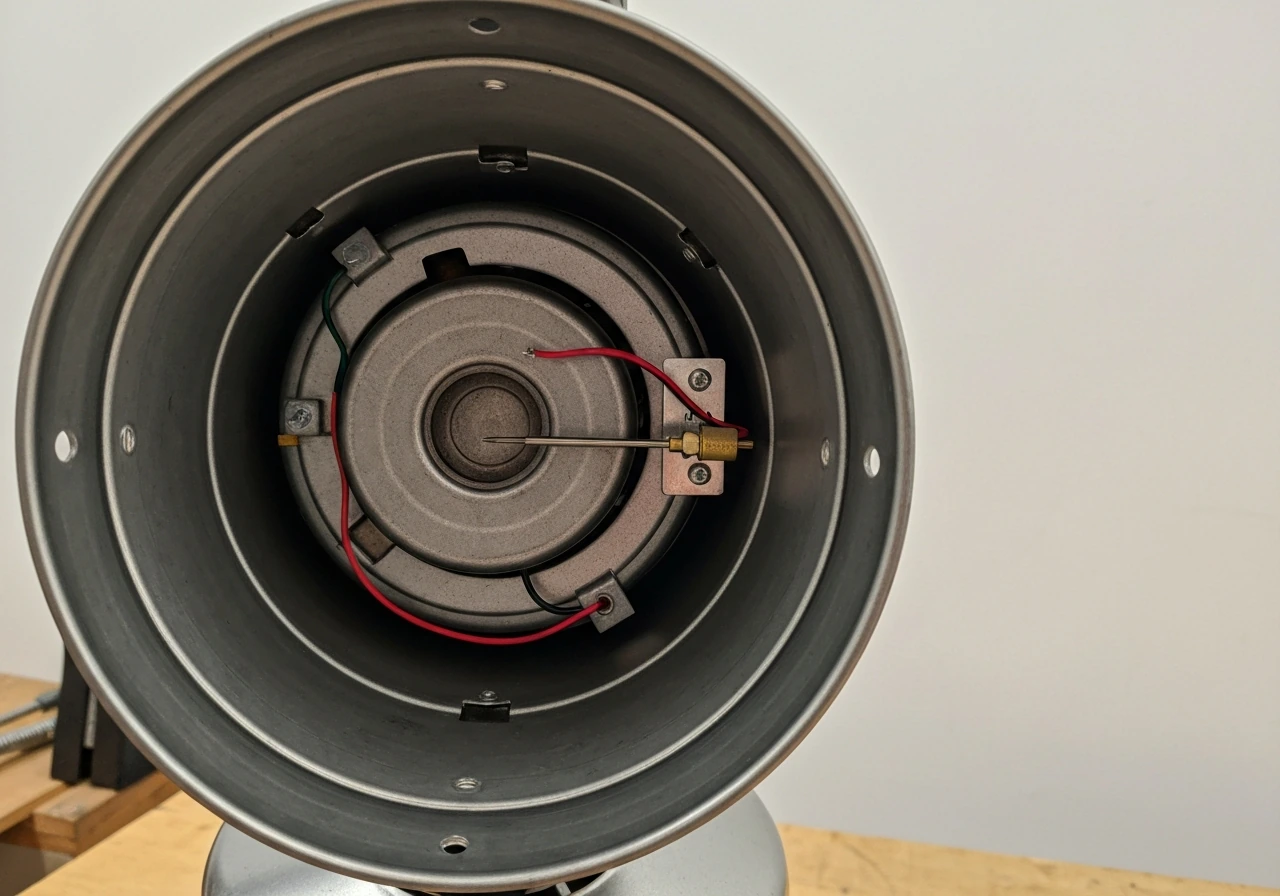
To get to it, you typically need to remove the emitter grid or reflector panel at the top of the heater head. On most models, this means unscrewing two to four screws around the rim of the head and lifting the grid off. Some models have a small access hole at the base of the head specifically for lighting the pilot, and you can sometimes see the thermocouple tip through there without full disassembly. Some heater designs also mention lighting the pilot through a base access hole, consistent with a head-assembly architecture where the pilot and thermocouple are inside the heater head with access/removal steps small access hole at the base of the head specifically for lighting the pilot. But for cleaning, you really want the grid off so you can see what you are doing and work without cramped access.
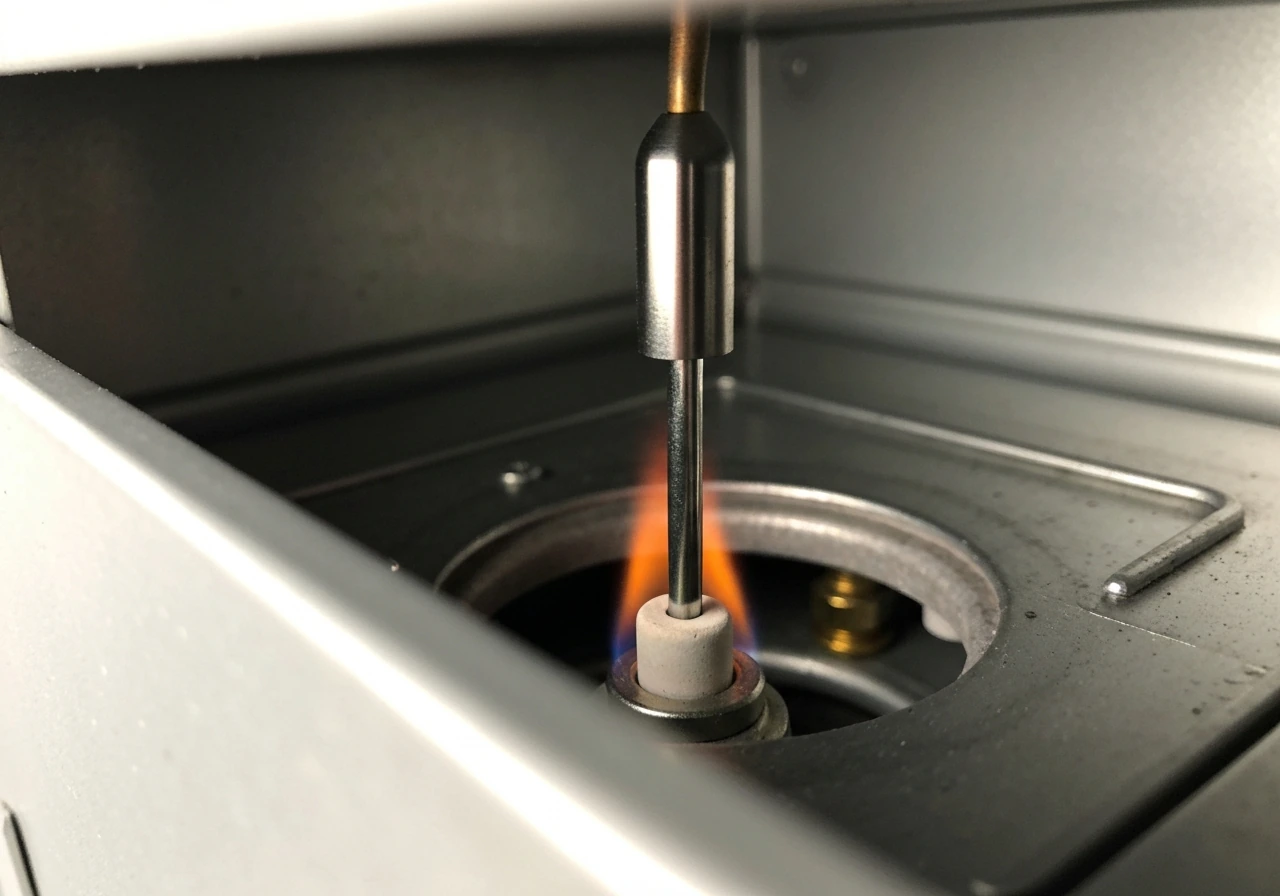
Once the grid is off, look for the pilot assembly: a small tube pointing upward with the thermocouple probe sitting just alongside or inside it. The thermocouple itself looks like a thin metal rod or tube, usually around 1.5 to 3 inches long, with a pointed or rounded tip. Trace it back and you will find the connection point at the gas control valve, which is a threaded fitting you can loosen with a small wrench, typically 5/16 inch or similar. On AZ Patio Heaters models, the manual specifically calls out that this connection can be loosened with a wrench for cleaning and maintenance.
You do not always need to fully remove the thermocouple to clean it. If you have good visual access and can reach the tip comfortably, you can clean it in place. If the tip is buried or awkwardly positioned, disconnecting it at the valve end and pulling it free makes the job much easier and gives you a chance to inspect the whole component.
Step-by-step cleaning for soot, corrosion, and buildup
Here is exactly what to do once you have the thermocouple tip accessible.
- Look at the tip closely. You are checking for a dull gray or black coating (soot and carbon), rough surface texture with reddish or greenish tint (corrosion/oxidation), or a oily or filmy residue. Any of these reduces heat transfer.
- Use fine-grit sandpaper (about 220-grit) or a small soft wire brush and gently buff the tip. You want to remove the surface buildup without gouging or deeply scratching the metal itself. Light, circular strokes work well. Think of it like polishing rather than scrubbing.
- After buffing, wipe the tip clean with a dry cloth or paper towel to remove any loose particles. Do not use water, cleaning solutions, or solvent sprays on the thermocouple tip or anywhere near the pilot assembly. Moisture inside these components causes problems.
- If you have a can of compressed air available, use it to blow out any debris from around the pilot orifice and the thermocouple mounting area. Patio Comfort's own maintenance guidance calls for compressed air as the approved method for clearing soot and debris from the heater head.
- Move to the connection point at the gas valve. If the thermocouple was disconnected, inspect the threaded fitting and the contact surface. Use a dry cloth or fine sandpaper to clean any corrosion or buildup from the fitting and the mating surface on the valve. AZ Patio Heaters' manual specifically flags this connection as a cleaning point, not just the tip itself.
- Check the full length of the thermocouple line for any obvious kinks, cracks, or damaged insulation. A physically damaged thermocouple will not respond correctly to cleaning and will need replacement.
What not to do: do not use water, WD-40, or any spray cleaner on the thermocouple or the pilot area. Do not sand aggressively enough to remove material from the tip itself, only the surface coating. And do not spray compressed air into the gas valve fitting.
Inspecting the thermocouple and checking proper reinstallation
Before you button everything back up, take a minute to inspect the thermocouple properly. A clean thermocouple that is bent out of position or has an internal failure will not fix your problem.
- The tip should look bright and metallic after cleaning, similar to how it would look when new. If heavy pitting, cracking, or severe corrosion remains after cleaning, the thermocouple is physically damaged and should be replaced.
- Check that the thermocouple tip is positioned directly in the pilot flame path. This is critical. The tip needs to be engulfed by the pilot flame, not sitting off to the side of it. Even a few millimeters of misalignment means the thermocouple never gets hot enough to signal the valve. Gently bend the mounting bracket if needed to center the tip in the flame.
- When reconnecting the threaded fitting at the gas valve, tighten it snug but do not overtighten. Finger-tight plus a quarter to half turn with a wrench is the right approach. Overtightening can damage the fitting or crack the thermocouple line.
- Reinstall the emitter grid or reflector panel and make sure it is seated and secured properly. Loose components can shift and affect flame behavior.
- Before turning the gas back on, do a visual check: all screws in place, thermocouple line not kinked or pinched, grid sitting flat.
Once everything is back together, open the tank valve slowly, wait about 30 seconds for the line to pressurize, then attempt to light the pilot following your heater's normal procedure. Hold the ignition knob in for a full 30 to 60 seconds after the pilot lights to give the thermocouple time to heat up fully before releasing. A freshly cleaned thermocouple should hold the pilot flame immediately or within a few attempts.
If it still won't stay lit: next troubleshooting steps and when to call a pro
If you cleaned the thermocouple, confirmed the tip is in the flame path, and the heater still goes out when you release the knob, the problem is one of a few things. If the thermocouple tip is not directly in the pilot flame path and the flame does not engulf it, the thermocouple may not generate enough safety heat to keep the valve open confirmed the tip is in the flame path. Here is how to work through them in order.
| Problem | Symptom | Fix |
|---|---|---|
| Thermocouple has failed internally | Pilot lights but heater shuts off every time after releasing knob, even after cleaning | Replace the thermocouple. Cleaning cannot fix an internally failed unit. |
| Blocked pilot tube or orifice | Pilot flame is very small, yellow, or uneven rather than a steady blue flame | Clean the pilot tube orifice with compressed air or a fine wire. A separate guide on cleaning the pilot tube covers this in detail. |
| Thermocouple misaligned | Pilot flame burns but tip is not fully in the flame | Gently bend the thermocouple bracket so the tip sits centered in the flame. |
| Regulator or gas pressure issue | Pilot lights but main burner flame is weak or heater shuts off under load | Check regulator condition. A faulty regulator restricts gas flow and may need replacement. |
| Wind or draft extinguishing pilot | Heater works fine indoors or on calm days but goes out in a breeze | Use the heater in a sheltered position or check for missing wind guards. |
The most common outcome when cleaning does not fix the problem is a failed thermocouple. If cleaning does not help, you can still use this guide as part of how to fix a patio heater that won’t stay lit. They do fail internally even when they look intact and clean, especially after several seasons of use. Replacement thermocouples are inexpensive, usually under $15, and they are a straightforward swap on most patio heaters. If your patio heater uses an igniter with a battery, you will need to replace the battery as well to restore reliable starting replace the battery in your patio heater. If you want to go that route, the process for how to fix a thermocouple on a patio heater follows the same access steps covered above, just with a new component going back in. The steps for how to fix a thermocouple on patio heater are the same as the access and cleaning process described above, just with a replacement part.
If you have replaced the thermocouple, cleaned the pilot tube, confirmed good gas pressure, and the heater still will not stay lit, that is the point to stop and contact a qualified appliance technician. At that stage, the problem is likely in the gas control valve itself, and that is not a DIY component to open or repair. If it still will not stay lit, you may also need to check the regulator, and learning how to replace regulator on a patio heater can help you address that next how to replace regulator on patio heater. A faulty valve is also a safety issue, not just an inconvenience, so do not keep relighting the heater hoping it resolves.
It is also worth doing an annual maintenance pass on the whole heater, not just the thermocouple. Clearing air openings of spider webs and debris, checking the emitter grid for damage, and confirming the pilot assembly is clean and aligned will prevent most ignition problems before they start. Think of the thermocouple cleaning as one part of that yearly routine rather than an emergency fix you only do when something breaks.
FAQ
How can I tell if my thermocouple is really dirty versus bent out of place?
After cooling, check the tip position relative to the pilot flame tube. If the tip is centered in the flame path but still looks dark or crusty, it is likely soot or carbon. If the tip is shiny but sits slightly off to the side or too high, the issue is misalignment or a bent probe, not buildup.
Is it safe to clean the thermocouple while the heater is still warm?
No. Let the heater cool fully before loosening fittings or touching the thermocouple. Cleaning a hot assembly can cause burns and can also make residue smear, which makes the next ignition test less reliable.
What if I see heavy rust or pitting on the thermocouple tip?
Light surface corrosion can often be reduced with gentle abrasion, but deep pitting or a tip that looks structurally damaged usually means reduced performance even after cleaning. If the heater still shuts off after the normal hold time (30 to 60 seconds), plan on replacement rather than repeating aggressive cleaning.
Can I reuse the thermocouple connection to the gas valve if I loosen it?
Usually yes if the threads and fitting faces are intact, but avoid overtightening. Reinstall snugly only. If you notice damaged threads, cross-threading, or a connection that feels uneven, stop and have a technician inspect it.
Should I clean the pilot orifice too, or is thermocouple cleaning enough?
Thermocouple cleaning is the first step because it fixes the most common failure mode. But if the pilot flame is weak, small, or yellow, you should also clean the pilot orifice and remove any soot near the pilot assembly, since blockage can prevent a steady flame that heats the thermocouple.
What flame behavior should I expect after cleaning (and after holding the knob)?
After you light the pilot and hold the knob long enough for heating, the flame should stay on when you release. If it goes out immediately or within a few seconds, the thermocouple heating signal is still not strong, which points to misalignment, remaining buildup, or a failing thermocouple.
How do I avoid damaging the thermocouple when sanding?
Use only fine-grit abrasion and stop as soon as the dark coating is removed. Do not sand aggressively enough to change the tip shape or remove significant material, and do not buff so hard you polish off the entire end face and edges.
Can I use contact cleaner or any aerosol product on the thermocouple?
Avoid any sprays on the thermocouple and pilot area. Sprays can leave residue that insulates or contaminates the safety components. Stick to dry brushing and very light abrasion on the tip only, then reassemble.
Is compressed air ever okay to clear the pilot area?
Do not blow compressed air directly into the gas valve fitting. If you need to clear debris near the pilot assembly, use gentle, targeted removal (for example, wiping with a dry cloth or using a soft brush) so you do not push contaminants into the valve.
What hold time should I use after lighting, and does it differ by model?
In most setups, hold the ignition knob in for 30 to 60 seconds after the pilot lights to allow the thermocouple to reach operating temperature. If your model manual specifies a different hold time, follow the manual, since valve response can vary.
After cleaning, my heater still won’t stay lit, what’s the fastest next check?
Confirm the tip is still fully in the pilot flame path after reassembly, then try again using the correct hold time. If the tip position is correct and the pilot still drops out, move to thermocouple replacement as the next likely fix rather than repeatedly cleaning.
When should I stop DIY work and call a technician?
Stop if you cannot loosen or reseat fittings without forcing them, if you find visible damage to the gas control valve area, if the pilot flame behavior is abnormal (for example, consistently yellow or extremely weak after cleaning), or if the heater fails after a thermocouple replacement. Gas control components are not safe to open or repair casually.
Do I need to replace the battery for an igniter after thermocouple cleaning?
Only if your model uses a battery igniter and you suspect weak starting. A battery issue can prevent reliable ignition even when the safety system would otherwise work. If you have to hold the knob longer just to get consistent lighting, replace the battery and retest.
How often should I do this cleaning as part of maintenance?
A good rule is at least once per season, especially if you store the heater outdoors or use it in dusty or humid conditions. Also do a quick visual check during the annual pass to make sure the pilot assembly and thermocouple tip are not coated before problems start.