
To ignite a propane patio heater safely, turn the control knob to the pilot position, press and hold it in to open the gas valve, then press the igniter button one to three times while continuing to hold the knob down for 20 to 30 seconds so the thermocouple can heat up. Once the pilot stays lit on its own, slowly turn the knob from pilot to your desired heat setting. If the igniter fails to spark, you can light the pilot manually with a long match or a grill lighter. That is the core process, and everything below expands on it so you can handle the quirks, failures, and safety steps that come up in real-world use.
How to Ignite Patio Heater: Safe DIY Steps, Troubleshooting

Grant Mercer
21 Jul 2026
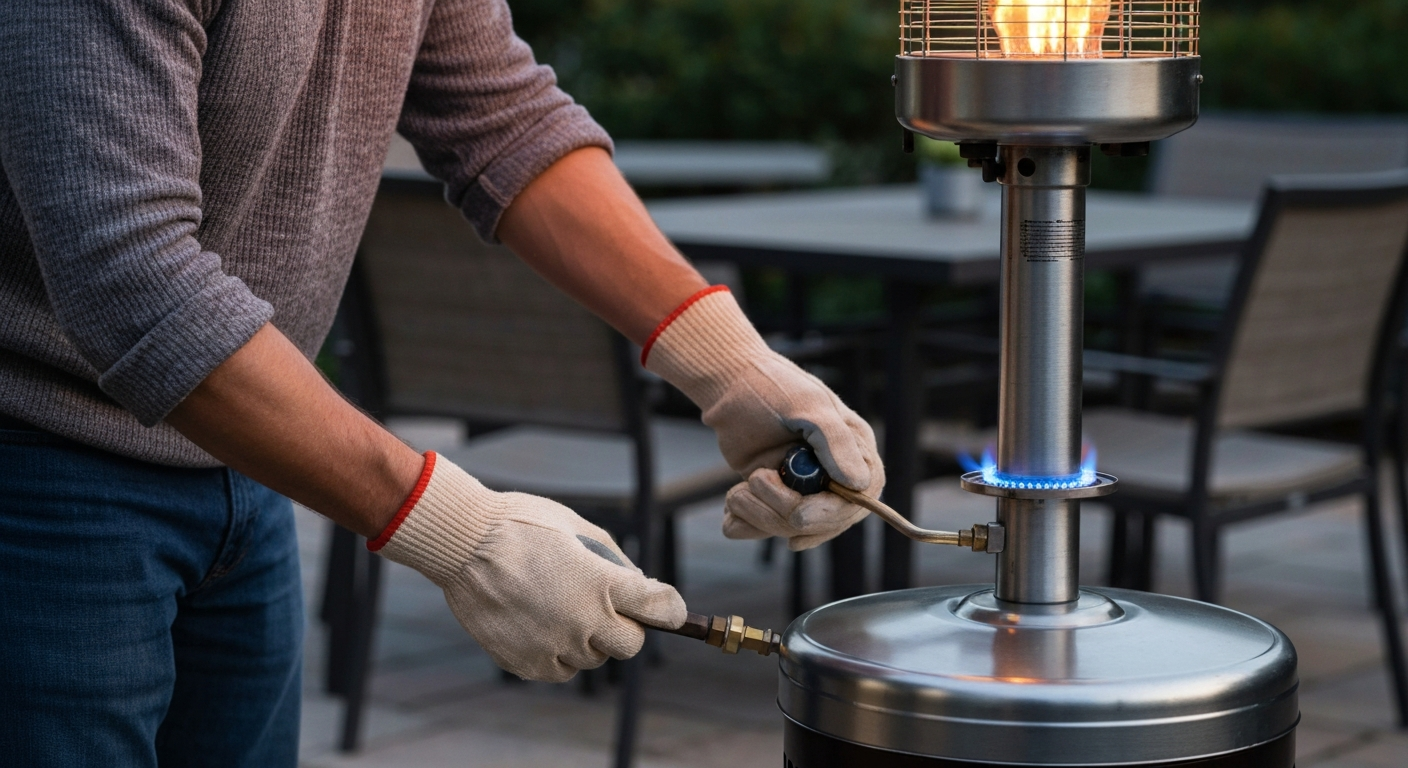
What this guide covers and who it's for
This guide is written for homeowners and DIYers who want to light their gas patio heater correctly, understand why it is not lighting, and fix simple ignition problems without calling a technician. It covers propane and natural gas heaters, all three common ignition systems (piezo push-button, battery/electronic spark, and standing pilot models), and the most frequent failure points: dead igniters, pilot that will not stay lit, weak spark, clogged orifices, and regulator issues. If you own a Hiland, Hampton Bay, Fire Sense, or a generic mushroom-style tower heater, the procedures here apply with minor brand-specific differences noted along the way.
Safety is the first priority throughout. Propane and natural gas are serious hazards if handled carelessly, but they are not mysterious. Treat every step deliberately, do not rush the leak test, and follow the stop-work criteria in the next section before you go any further if you have concerns about your equipment. NFPA 54 (National Fuel Gas Code) and NFPA fact sheets on outdoor heater safety treat outdoor gas appliances as combustible‑appliance installations and require compliance with applicable LP‑gas and installation requirements to ensure safe use and installation NFPA 54 (National Fuel Gas Code) & NFPA fact sheets on outdoor heater safety.
Stop here if any of these conditions apply
Some situations are beyond safe DIY work. Read this list before touching the heater.
- You smell gas and cannot immediately identify a loose connection. Shut off the cylinder valve, leave the area, avoid operating any light switches or electrical devices, and call your gas supplier or local fire department from a safe distance.
- The supply hose is cracked, kinked, crushed, or shows visible deterioration. Do not attempt to light the heater. Replace the hose and regulator assembly first.
- The regulator shows corrosion, physical damage, or has been submerged in water. Replace before use.
- The cylinder is dented, shows rust through the steel, has a damaged valve collar, or is past its requalification date (stamped on the collar). Take it to a certified propane dealer.
- A soapy-water leak test reveals bubbles at any connection and you cannot eliminate the leak by gently re-seating the connection. Stop and replace the faulty part.
- The gas valve body is cracked or the control knob is broken off or jammed in an open position. This requires a qualified gas appliance technician.
- You are working with a hard-piped natural gas supply line and need to modify or repair the gas line itself. That work requires a licensed plumber or gas fitter.
If none of those apply, you are in DIY territory and can proceed with confidence.
Types of gas patio heaters and how their ignition systems work
Propane vs. natural gas
The vast majority of portable patio heaters run on propane from a standard 20-pound cylinder seated inside the base. Natural gas models are plumbed directly to a home gas line and are typically permanently installed on a patio. The ignition procedure is nearly identical between the two types, but natural gas models do not have a cylinder to check or a regulator to seat, so several pre-start steps are simplified. Portable propane units are designed to operate at a regulated outlet pressure not exceeding 11 inches of water column (about 2.74 kPa), which is standard for low-pressure LP appliances in North America under ANSI/CSA standards.
Piezo (push-button) igniters
A piezo igniter is a purely mechanical device. When you press the button, a spring-loaded hammer strikes a piezoelectric crystal, generating a high-voltage spark at the electrode without any battery or external power. These are simple, reliable when new, and commonly found on mid-range and budget heaters. Over time the spring weakens, the crystal fatigues, or the electrode corrodes, and the spark becomes too weak to ignite the gas reliably. You can test whether the igniter is working by pressing it in a dark space and watching for a visible blue spark at the electrode tip.
Battery/electronic spark igniters
Electronic ignition systems use a small battery, commonly one AAA or AA cell, and an electronic step-up module that produces a series of rapid sparks at the electrode. The Fire Sense model 1031510, for example, uses a single AAA battery installed under the red igniter button. For model-specific ignition steps and the AAA battery location, see a short guide on how to turn on Fire Sense patio heater. These systems produce a clicking sound when activated and are more consistent than piezo buttons, but they depend entirely on battery condition and good wiring connections. A dead battery is the single most common cause of no-spark on battery-ignition heaters.
Standing pilot and IPI models
Some heaters use a small standing pilot flame that must be lit and proven before the main burner can open. The pilot flame heats a thermocouple or thermopile, which generates a small DC voltage that proves the flame is present to the gas valve. A working thermocouple typically produces 15 to 30 millivolts; a thermopile produces 325 to 750 millivolts open circuit. If either falls below the valve's minimum threshold, the valve will not open or will not stay open, and the pilot will go out when you release the control knob. Modern Intermittent Pilot Ignition (IPI) modules automate this process and add spark timing and flame-sensing logic.
Tools, parts, and supplies to have on hand
Most ignition work requires only basic tools. Having the right parts ready before you start saves a second trip to the hardware store.
| Item | Used for | Est. cost | Task difficulty | Est. time |
|---|---|---|---|---|
| AAA or AA battery (check model) | Electronic igniter replacement | $1–$3 | Easy | 2 min |
| Adjustable wrench or 1" open-end wrench | Regulator connection, thermocouple nut | $10–$20 if not owned | Easy | 5 min |
| Dish soap + water (1:3 ratio) | Leak test solution | < $1 | Easy | 5–10 min |
| Multimeter with DC millivolt range | Thermocouple/thermopile testing | $20–$40 | Moderate | 15 min |
| Replacement thermocouple | Pilot will not stay lit fix | $8–$20 | Moderate | 20–30 min |
| Spare O-rings (regulator kit) | Regulator/hose seal replacement | $5–$10 | Easy | 10 min |
| Orifice cleaning needle / compressed air | Clogged burner injector cleaning | $5–$15 | Moderate | 20 min |
| Long match or grill lighter | Manual pilot lighting | $3–$6 | Easy | 5 min |
| Fine wire brush or emery cloth | Electrode cleaning | $3–$8 | Easy | 5 min |
If you own a Hiland heater, note that their replacement pilot assemblies (such as the TTHP-PAS kit) bundle the thermocouple, venturi tube, and igniter wire together, which simplifies ordering. Hampton Bay replacement parts are available through Home Depot's parts service using the model number from the label on the base.
Pre-start safety checklist
Run through this checklist every time you start the heater after it has been stored, moved, or left unused for more than a few days. It takes about five minutes and prevents most lighting failures before they happen.
- Gas supply: Confirm the propane cylinder is not empty. Lift it slightly; a full 20-lb cylinder weighs about 37 pounds total. If it feels nearly empty, replace or refill before proceeding.
- Cylinder seating: The cylinder must sit flat and fully seated in the base compartment with the valve pointing straight up. A tilted or improperly seated cylinder can stress the regulator connection and cause leaks.
- Regulator orientation: Connect the regulator by hand-tightening the POL fitting (left-hand thread, turn counterclockwise to tighten) or the QCC1 type-1 fitting (right-hand thread, turn clockwise). Do not use a wrench on QCC1 fittings; hand-tight is correct.
- Hose condition: Inspect the entire length of the hose for cracks, kinks, abrasion, or crush damage. A kinked hose restricts gas flow and is a common cause of low flame or failure to light. Replace any hose showing damage.
- Regulator condition: Look for corrosion, impact damage, or frost (which can indicate a flow restriction). If the regulator has been flooded or stored wet, replace it.
- Tilt/anti-tilt switch: Most tower patio heaters have a tip-over safety switch at the base. Make sure the heater is on a firm, level surface so the switch is not falsely triggered. If the heater is level but still will not stay lit, the tilt switch may be faulty.
- Clearances: Position the heater at least 24 inches from any combustible surface, wall, or overhead obstruction. Check the manual for your specific model; some require more clearance above the burner head.
- Ventilation: Never use a propane patio heater in an enclosed space. It must be used outdoors or in a well-ventilated open-sided structure. Carbon monoxide accumulation in enclosed spaces is a life-threatening risk.
How to perform a leak test before lighting
A leak test is not optional. Do it every time you connect a new cylinder or reconnect the regulator after storage. Mix roughly one part dish soap with three parts water in a small bowl or spray bottle. Open the cylinder valve fully (turn counterclockwise until it stops), but do not try to light the heater yet.
- Apply the soapy solution generously to the regulator-to-cylinder connection and the regulator-to-hose connection. Use a brush, sponge, or spray bottle to saturate both joints.
- Watch for 30 seconds. Bubbles forming and growing indicate a gas leak at that joint. Small soap film bubbles that do not grow are from the application itself and are not a problem.
- If you see bubbles, close the cylinder valve immediately. Try gently hand-tightening the connection and retest. If bubbles persist, the fitting, O-ring, or regulator is faulty. Replace the defective component before proceeding.
- Never use an open flame to check for leaks. This is explicitly prohibited in every manufacturer manual and can cause a fire or explosion.
- If you smell gas at any point and cannot immediately identify the source, treat it as an emergency: close the cylinder valve, step away from the area, do not operate any switches, and call your gas supplier or fire department.
Once the leak test is clean with no bubbles at any connection, you are ready to light the heater.
Step-by-step ignition using a built-in igniter
The following procedure covers the standard ignition sequence for propane tower and tabletop patio heaters with either a piezo push-button or battery/electronic igniter. For a concise step-by-step walkthrough on how to start patio heater, see the linked guide. For a step-by-step walkthrough, see how to turn on a patio heater. The sequence is essentially the same for both types. For electronic battery igniters like the Fire Sense models, verify the battery is installed and fresh before you start.
Piezo or push-button ignition
- Open the cylinder valve fully by turning it counterclockwise. If it is a QCC1 quick-connect regulator, the valve opens automatically when the regulator is properly connected.
- Turn the control knob to the PILOT position. On most heaters this is marked with a flame icon or the word PILOT. Press the knob firmly inward and hold it depressed. This manually opens the pilot valve.
- While holding the knob in, press the igniter button once. Listen and look for a click and a small blue pilot flame near the burner head or at the base of the emitter. If the heater is at eye level, crouch down to see the pilot port.
- If no flame appears after the first click, press the igniter button again up to three more times, with one to two seconds between presses. Keep the control knob held in throughout.
- Once the pilot flame is visible, continue holding the knob depressed for a full 20 to 30 seconds. This is the time required for the thermocouple to heat up and generate enough millivoltage to signal the gas valve to stay open.
- Slowly release the control knob. The pilot should remain lit. If it goes out immediately, press the knob back in, relight, and hold for a full 30 seconds this time. Releasing too soon before the thermocouple is hot is the most common reason the pilot dies.
- Once the pilot holds, turn the control knob from PILOT to LOW, then to your desired heat setting. The main burner should ignite from the pilot flame within a few seconds.
- If the main burner does not light within 5 seconds, turn the knob back to OFF, wait 5 minutes to allow any accumulated gas to dissipate, then repeat from step 1.
Battery/electronic ignition (e.g., Fire Sense models)
- Locate the battery compartment, typically underneath or beside the red igniter button. Install a fresh AAA battery (or AA, depending on your model) with the correct polarity.
- Follow steps 1 through 8 above exactly as written. The only difference is that pressing the igniter button produces multiple rapid clicks instead of a single click, due to the electronic module cycling.
- If you hear rapid clicking but see no spark at the electrode, the battery may still have some charge but not enough for the module. Replace the battery before diagnosing further.
Manual lighting when the igniter fails
If the built-in igniter produces no spark after you have replaced the battery and inspected the electrode, you can light the pilot manually with a long match or a long-neck grill lighter. This is a legitimate and safe method, but it requires more care because you are introducing an open flame near the gas port. Read these precautions before starting.
Safety precautions for manual lighting
- Use only a long match (at least 10 cm) or a long-neck grill lighter. Never use a short match or a standard pocket lighter that puts your hand near the burner.
- Never hold your face over or near the burner opening when introducing the flame.
- If gas has been flowing for more than 3 to 5 seconds without igniting, stop. Turn the knob to OFF, wait 5 full minutes, and start fresh. Do not try to ignite accumulated gas.
- Keep bystanders, children, and pets back at least 6 feet during manual lighting attempts.
- Never attempt manual lighting if you can smell gas strongly before you have opened the control knob. This indicates a pre-existing leak that must be resolved first.
Manual lighting procedure
- Light your long match or ignite your grill lighter before touching the control knob. Have it ready and burning.
- With the flame lit, reach in toward the pilot port or burner ring opening. On tower heaters, there is typically an access hole at the base of the emitter dome or on the burner assembly where you can insert the lighter.
- Turn the control knob to PILOT, press it in, and immediately bring the lit match or lighter tip to the pilot port. The pilot should ignite within 1 to 2 seconds.
- Once the pilot lights, remove the lighter or match and hold the control knob in for 20 to 30 seconds to heat the thermocouple. Then release the knob slowly to confirm the pilot holds.
- If the pilot does not catch within 3 seconds of bringing the flame to the port, release the control knob, withdraw the lighter, and wait 5 minutes before trying again.
- With the pilot holding, turn the knob to your desired heat setting and confirm the main burner lights.
Estimated time for manual lighting once you are comfortable with the procedure: 3 to 5 minutes per attempt. If you find yourself relying on manual lighting regularly, that is a signal to repair or replace the igniter rather than treating the workaround as a permanent solution.
Diagnosing why the heater won't ignite or won't stay lit
Work through this diagnostic flow symptom by symptom. Each symptom has one or two most-likely causes and a concrete check to confirm.
No spark at the igniter
- For battery/electronic igniters: replace the battery first. This resolves the problem the majority of the time.
- Check the wiring between the igniter button and the electrode. Look for disconnected, pinched, or corroded wire terminals at both ends.
- Inspect the electrode tip. If it is covered in white scale, rust, or carbon deposits, clean it gently with fine emery cloth or a small wire brush. The electrode gap should be approximately 1/8 to 3/16 of an inch (about 3 to 5 mm) from the burner ground. If the gap is too large, no spark will bridge it.
- Look at the ceramic insulator around the electrode rod. If it is cracked, the high voltage shorts to ground through the crack instead of arcing at the tip. A cracked insulator means the electrode assembly must be replaced.
- For piezo igniters: if the button clicks but produces no visible spark even after cleaning the electrode, the piezo crystal is likely fatigued. Replace the push-button assembly.
Pilot lights but goes out when you release the knob
- Most likely cause: you did not hold the knob in long enough. The thermocouple needs 20 to 30 full seconds of pilot flame before it generates sufficient millivoltage. Try again and time it with a watch.
- If holding for 30 seconds still results in the pilot going out, the thermocouple may be weak or failing. Disconnect the thermocouple lead from the gas valve and measure its output in DC millivolts with a multimeter while the pilot is lit and the valve is manually held open. A healthy thermocouple reads 15 to 30 mV under load. Below about 8 to 10 mV, most gas valves will not hold open.
- Check that the pilot flame is actually impinging on the thermocouple tip. The flame should visibly touch the metal probe. If the flame is too small or aimed off to the side, it will not heat the thermocouple adequately. A small pilot orifice clog can reduce flame size; clean with compressed air or an orifice needle.
- Replace the thermocouple if millivolt output is consistently low. It is a straightforward repair: disconnect the lead at the valve (usually a push-in or threaded nut connection), unscrew the thermocouple probe from its bracket, and thread in the new unit. Hiland sells these as part of pilot assembly kits.
Main burner won't light from a good pilot
- Check for a clogged main burner injector (orifice). Debris, insect nests, and corrosion are common culprits. Turn off the gas and inspect the orifice visually. Clear blockages with compressed air; if that fails, use an orifice cleaning needle. Never use a drill bit or wire that could enlarge the orifice.
- Inspect the hose for kinks. A kinked hose reduces gas pressure to the main valve and is a noted cause of low or absent main burner flame in Hampton Bay troubleshooting documentation.
- Check the cylinder level. A nearly empty cylinder may hold enough pressure for a pilot but not for the main burner. Replace or refill the cylinder.
- If the carryover ports (the small holes that carry the pilot flame to the main burner ring) are blocked with scale or debris, the flame cannot travel to the main burner. Clean these ports with compressed air.
Heater lights but flame is very low or yellow
- Inspect and straighten any hose kinks. A restricted hose is the most common cause of low main burner flame.
- Test with a fresh or fuller cylinder. Low tank pressure causes weak flame.
- Check the regulator: if the regulator has gone into bypass/lockout mode (sometimes called 'flow limiting'), close the cylinder valve, disconnect the regulator, wait 30 seconds, reconnect, and open the valve slowly. This resets most residential regulators.
- A yellow or orange flame on a gas patio heater (which should burn blue) often indicates incomplete combustion from a partially clogged burner or incorrect air-to-gas ratio. Clean the burner tube and venturi opening.
Tilt switch issues
Tower patio heaters have a tip-over safety switch at the base that cuts gas flow if the heater tilts beyond a safe angle. If your heater is perfectly level but still shuts off or will not stay lit, the tilt switch may be stuck, corroded, or wired incorrectly. To test it, listen for a faint click when you gently rock the base by a few degrees. No click suggests the switch is stuck in the open (off) position. Replacement tilt switches for common brands are inexpensive and typically involve two wire connectors. Confirm the replacement is rated for the same current and voltage as the original.
Brand-specific notes for Hiland, Hampton Bay, and Fire Sense
These three brands cover a large share of the residential patio heater market. Here are the most common quirks I have encountered with each.
Hiland
Hiland tabletop and standing heaters use a piezo igniter with a separate pilot assembly. Their HLDS032-BB and similar models have a detailed parts list in the owner manual, and Hiland sells replacement pilot assemblies that include the thermocouple, venturi tube, and igniter wire as a matched set, which is worth doing if any one of those components has failed rather than replacing parts individually. Hiland HLDS032-BB Tabletop Patio Heater User Manual (and Hiland parts listings) provides model-specific assembly, shutdown and leak-test procedures, parts lists, and replacement pilot assembly details including thermocouple, venturi tube, and igniter wire. Hiland manuals include a specific procedure for turning off the pilot light that differs slightly from generic instructions, so consult the model-specific manual before servicing.
Hampton Bay
Hampton Bay heaters (sold through Home Depot) come with a comprehensive Use and Care Guide that includes the soapy-water leak test procedure and a troubleshooting table. For step-by-step starting instructions specific to Hampton Bay units, see a focused guide on how to start a Hampton Bay patio heater. Their documented corrective actions for ignition failure specifically call out clogged burner injectors, low gas pressure, and a bent or twisted supply hose. The manual instructs users to wait 5 minutes before relighting after a failed attempt, which is longer than some other brands specify, and is worth following precisely. Parts are available through the Home Depot parts service line using the model number.
Fire Sense
Fire Sense model 1031510 and similar units use a single AAA battery for electronic ignition. The battery is installed directly under the red igniter button, which is a less obvious location than many users expect. The Fire Sense manual also explicitly states that any installation or repair beyond basic operation should be done by a qualified service person, so for anything beyond battery replacement, electrode cleaning, or thermocouple testing, follow that guidance. Their manuals include the same emergency gas-smell protocol: shut off gas, do not operate switches, leave the area, call emergency services.
Where to find your model's manual
The model and serial number label is almost always on a sticker inside the base compartment or on the underside of the base plate. Once you have that number, search the brand's website or a dedicated patio heater manual lookup resource. Having the actual manual matters because orifice sizes, electrode gaps, regulator specifications, and parts numbers vary by model. Generic ignition advice will get you most of the way there, but for parts ordering and torque specifications, the model-specific manual is definitive.
Routine maintenance to prevent ignition failures
Most ignition failures I see are preventable with a simple annual maintenance routine. This takes about 30 to 45 minutes and significantly extends the life of the igniter, thermocouple, and burner.
- At the start of each season, replace the igniter battery if the heater uses an electronic module. A new battery costs less than a dollar and eliminates the most common no-start complaint.
- Clean the electrode tip with fine emery cloth or a small wire brush. Remove any carbon deposits or white scale. Verify the electrode gap is 1/8 to 3/16 inch.
- Inspect the thermocouple probe tip for scale buildup or corrosion. Gently clean with fine sandpaper. If the thermocouple is more than three or four seasons old, consider replacing it proactively.
- Blow out the pilot orifice and main burner injector with compressed air. Insects, specifically wasps and spiders, commonly nest in burner tubes during storage and cause partial blockages.
- Inspect the hose end to end for cracking, brittleness, or abrasion. Most manufacturers recommend replacing the hose and regulator assembly every five years regardless of appearance.
- Check all wiring connections at the igniter module, electrode, tilt switch, and thermocouple. Reconnect any loose push-in terminals and look for corrosion on terminal pins.
- Wipe down the burner head and emitter screen. Grease, debris, and moisture affect combustion quality and can cause erratic flame behavior.
- When storing for winter, cap or tape the burner tube opening to prevent insects from nesting, and store the regulator and hose indoors to protect the rubber from cold-weather cracking.
Comparing ignition systems: which is easiest to maintain?
| Ignition type | Requires battery? | Most common failure | DIY fix? | Typical lifespan |
|---|---|---|---|---|
| Piezo (push-button) | No | Worn spring/fatigued crystal or corroded electrode | Yes, electrode cleaning or button replacement | 3–7 years with maintenance |
| Battery/electronic spark | Yes (AAA or AA) | Dead battery, then wiring faults | Yes, battery swap; wiring is moderate | 5–10 years on the module |
| Standing pilot + thermocouple | No | Thermocouple degradation or pilot orifice clog | Yes, thermocouple replacement is straightforward | 3–5 years on thermocouple |
| IPI (intermittent pilot ignition) | Sometimes | Module failure or grounding issue | Partial; module replacement is moderate-difficult | 7–12 years on module |
For straightforward DIY maintenance, battery/electronic systems are the easiest to keep running because the most common failure (dead battery) takes 30 seconds to fix. Piezo systems are runner-up because they require no consumables but need periodic electrode attention. Thermocouple-based pilot systems have a predictable wear part that is cheap and easy to replace. IPI modules are the most capable but the most difficult to diagnose without equipment.
When to stop DIY work and call a professional
Beyond the stop-work criteria at the top of this guide, there are a few situations where continued DIY troubleshooting is not the right call. If you have replaced the thermocouple, cleaned the orifices, verified the electrode gap, replaced the battery, and the heater still will not stay lit or will not produce a main burner flame, the gas valve itself is likely faulty. Gas valve replacement on a patio heater requires correct valve matching, gas-tight connections, and a post-repair leak test, and it sits at the boundary of what I would call reasonable DIY work. If the cost of a replacement valve approaches the cost of a new heater, that is a practical signal to replace rather than repair. For any repair involving the gas supply line on a natural gas model, always use a licensed gas fitter.
FAQ
What is the safest first step before attempting to ignite a gas patio heater?
Do a pre-start safety check: ensure valve(s) are closed, cylinder/regulator is seated and hand‑tight, hose is undamaged and un-kinked, and the area is well ventilated and free of combustibles. Do a soapy‑water leak test at regulator/hose and cylinder/regulator connections (≈1 part dish soap to 3 parts water); bubbles indicate a leak — if you smell gas, stop, shut off gas, leave the area and call the gas supplier or emergency services.
How do I ignite a patio heater with a piezo (push-button) igniter?
1) Open the cylinder valve slowly or put the natural‑gas supply on. 2) Turn the heater gas control knob to the ‘pilot’ or ‘light’ position and depress it to start gas flow. 3) While holding the control in, press the piezo button repeatedly until you see a spark and the pilot lights. 4) Keep holding the knob for 20–30 seconds to heat the thermocouple, then release and turn to ‘on’. If no spark is visible, shut off gas and troubleshoot the igniter (battery not applicable; piezo may be seized or misaligned).
How do I ignite a patio heater with a battery/electronic igniter (AAA/AA)?
1) Confirm battery is installed and fresh. 2) Open the gas supply slowly. 3) Set control to ‘pilot’/‘light’ and depress it to allow pilot gas. 4) Press the red/electronic igniter while the pilot gas flows; you should see repeated sparks at the electrode and the pilot should light. 5) Hold the control 20–30 seconds then release and set to ‘on’. If no spark, replace battery, inspect wiring and electrode gap (~1/8"–3/16"), then retest with gas off to verify spark presence.
What if my heater uses a standing pilot (pilot‑light) and it won’t stay lit?
Common causes are a weak/failed thermocouple/thermopile, dirty pilot orifice/pilot tube misalignment, or poor valve seating. Diagnostic steps: 1) Inspect and clean the pilot orifice with compressed air or a fine needle. 2) Check pilot flame — it must impinge on the thermocouple tip. 3) With pilot lit, measure millivolts at the thermocouple/thermopile per valve/manufacturer specs (thermocouple ~15–30 mV min; thermopile hundreds of mV). Replace thermocouple/thermopile if readings are low or inconsistent. If unsure, call a qualified service person.
How do I manually light a patio heater if the built‑in igniter fails (safe procedure)?
1) Perform the safety checks and leak test. 2) Open gas supply and set control to ‘pilot’ or ‘light’ and depress to allow pilot gas. 3) Use a long barbecue lighter (never a short match or lighter) to introduce flame at the pilot or burner ports while still depressing the control. 4) After pilot lights, continue holding 20–30 seconds then release and set to ‘on’. If you smell gas or ignition is delayed, shut off and investigate before retrying.
What troubleshooting flow should I follow when there is no spark at all?
1) Confirm gas is off. 2) For battery igniters: replace battery and test. 3) Inspect wiring, connectors, and grounding; tighten loose wires and remove corrosion. 4) Check electrode position/gap and insulator for cracks. 5) For piezo: check mechanical striker and linkage for seized or broken parts; test by watching the piezo action when button pressed. 6) If no spark after these checks, replace the igniter module/piezo assembly or call service.