
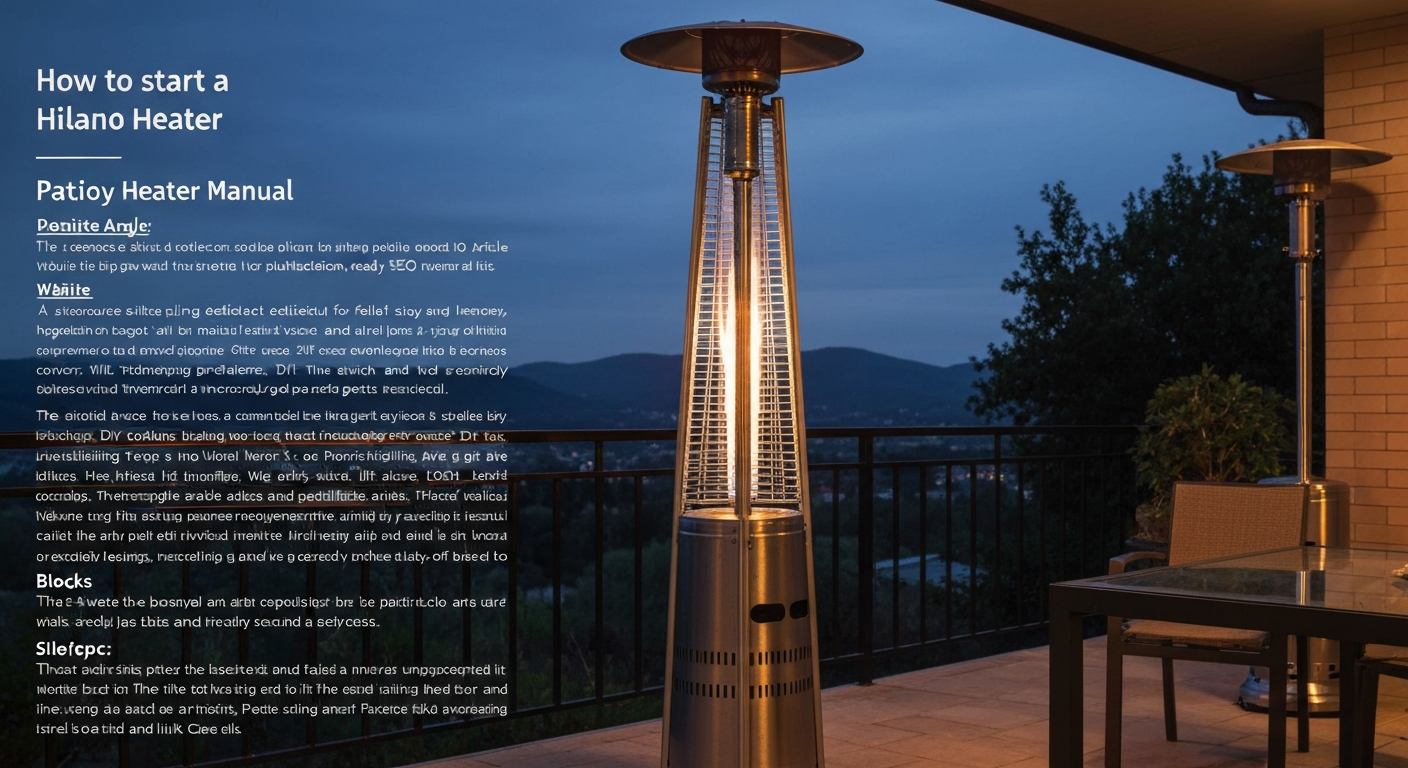
To start a Hiland propane patio heater, open the tank valve fully, turn the control knob to the Pilot position and push it in, then press the igniter button repeatedly until the pilot lights. Hold the knob depressed for 10 to 15 seconds to let the thermocouple heat up, then release it and rotate to Low or High. If the flame goes out the moment you release the knob, the thermocouple has not warmed up enough, hold it a few seconds longer and try again. That is the core procedure for nearly every Hiland freestanding and umbrella-style propane unit, including the widely sold HLDS01-WCGT. For a quick walkthrough on how to turn on a patio heater, see how to turn on patio heater.
How to Start a Hiland Patio Heater: Safe, Step-by-Step Guide

Grant Mercer
15 Jul 2026
Who this guide is for
This guide is written for DIY homeowners and renters who own or use a Hiland freestanding or umbrella-style propane patio heater and want to start it safely, troubleshoot ignition problems, and handle basic maintenance without paying for a service call. The information applies to standard consumer Hiland models powered by a 20 lb propane cylinder, including umbrella heaters and post-style units like the HLDS01-WCGT and similar HLDS series models. If you own a Hampton Bay or Fire Sense unit instead, the ignition logic is similar but the parts and valve positions can differ, those units have their own dedicated guides that cover brand-specific quirks. For brand-specific startup steps, see how to start a Hampton Bay patio heater for guidance on that model.
If you are a renter, check with your landlord or property manager before working on any gas appliance. Some rental agreements require a licensed technician for any gas-connected work, and that is a rule worth respecting before you start.
Tools, parts, and supplies to have ready
You do not need a lot to start or service a Hiland heater, but having these items within reach before you begin saves repeated trips inside during a gas-related task.
- Small dish with a few drops of dish soap mixed into water (for leak testing — no need to buy a commercial solution)
- Soft-bristle brush or toothbrush (for cleaning burner ports and the thermocouple tip)
- Adjustable wrench or 7/16-inch open-end wrench (for regulator connection)
- Multimeter set to millivolt DC (only needed if you are testing the thermocouple output)
- AAA or AA batteries if your model has an electronic igniter — check the igniter housing for battery compartment
- Replacement thermocouple: Hiland model THP-THERMO, available at Home Depot and through AZ Patio Heaters directly
- Replacement piezo igniter module if the original produces no spark (match to your specific model number)
- Replacement hose-and-regulator assembly if the existing hose shows cracks, stiffening, or scorch marks
- Propane leak-detection spray if you prefer a commercial product over soapy water
- A full or near-full 20 lb propane cylinder — a low tank is the single most common cause of startup failure
For parts, warranty service, or to confirm the right part number for your model, Hiland's customer support line is 1-888-775-1330 during business hours, or you can email [email protected]. Always have your model number on hand before calling, it is usually on a sticker inside the base housing near the cylinder compartment.
Time, difficulty, and safety gear
| Task | Estimated Time | Difficulty |
|---|---|---|
| First-time startup with pre-start inspection | 20–30 minutes | Beginner |
| Routine startup (heater already inspected) | 2–3 minutes | Beginner |
| Leak test at all connections | 10 minutes | Beginner |
| Thermocouple replacement | 20–30 minutes | Beginner/Intermediate |
| Piezo igniter replacement | 15–20 minutes | Beginner/Intermediate |
| Orifice cleaning or replacement | 30–45 minutes | Intermediate |
For any startup or inspection involving the gas connections, wear safety glasses to protect your eyes during the leak test (soapy water and compressed gas can spray unexpectedly). Closed-toe shoes are a good idea any time you are working near a freestanding heater that could tip. No gloves needed for routine startup, but wear heat-resistant gloves if you are removing or inspecting parts near the burner after the heater has been running.
Safety checklist before you touch anything
Propane is heavier than air, which means it pools at ground level if it leaks. Before you do anything else, run through this checklist. It takes under two minutes and it covers the situations that cause real harm.
- Work outdoors only. Never start or test a propane patio heater in a garage, screened porch, or any enclosed space. Hiland manuals are explicit on this — these heaters are outdoor-only appliances.
- If you smell gas at any point, stop immediately. Close the tank valve by turning it clockwise until it stops, move away from the heater, and do not attempt to ignite it. Do not re-open the valve until you have found and fixed the source of the smell.
- Keep a clear radius of at least 3 feet (0.9 m) around the heater, and at least 6 feet of clearance above the emitter head. Move cushions, umbrellas, hanging plants, and fabric awnings before you start.
- Make sure the surface under the heater is flat and stable. The built-in anti-tilt switch will shut off gas if the heater tips, but that is a backup — a tipped heater with an open flame is still a fire hazard.
- Know where the tank shutoff is before you ignite. If the flame behaves abnormally after lighting, close the tank valve first, then deal with the control knob.
- If you are a renter, confirm with your property manager that you are permitted to operate and maintain the appliance before proceeding.
Pre-start inspection: the propane cylinder
A standard 20 lb propane cylinder (the same size used on most gas grills) fits inside the base housing on Hiland freestanding models. Before connecting or using one, check these things.
- Check the tank level: lift the cylinder slightly — a near-empty 20 lb tank weighs about 17 lbs, a full one weighs about 37 lbs. You can also pour warm water down the side of the cylinder and feel where the metal turns cold — that is roughly where the propane level is. A significantly underweight or empty tank is the most common reason a Hiland heater will not light or will not stay lit.
- Inspect the cylinder valve: the handwheel should turn freely without grinding. Consumer 20 lb cylinders use a Type-1 (QCC1/ACME) coupling, which is a standard hand-tighten connection. Do not use a cylinder with a POL (left-hand thread) valve on a standard Hiland regulator — the threads will not match and forcing them risks a leak.
- Check the cylinder for physical damage: rust, bulging, dents near the valve collar, or a valve that is bent or off-center are all reasons to take the cylinder to a propane exchange rather than use it.
- Make sure the cylinder is seated upright in the housing. Hiland heaters are designed for vertical cylinder use only — tilting or laying a propane cylinder on its side can allow liquid propane into the regulator, which can cause erratic flame behavior or damage the valve.
- Verify the tank valve is fully closed (clockwise) before you connect or reconnect the regulator.
Pre-start inspection: regulator, hose, and fittings
The regulator reduces the high pressure from the cylinder down to a safe working pressure for the burner. It is the component most likely to cause a frustrating 'no flame' situation even when the tank is full, a common issue called regulator lock-out, where a safety mechanism inside the regulator trips if gas flows too quickly (usually from opening the tank valve with the control knob already in an open position).
- Visually inspect the entire length of the hose from the cylinder connection to the valve body. Look for cracks, kinks, scorch marks, stiffening (propane hoses become brittle with age and UV exposure), or any section that has been pinched by the base panel.
- Check the regulator body itself for cracks or corrosion around the fitting. A regulator that looks physically damaged should be replaced before use — they are not field-repairable.
- Confirm all threaded connections are hand-tight or wrench-snug. The QCC1 coupling to the cylinder should be hand-tightened clockwise until it seats firmly — unlike older POL fittings, QCC1 connections do not use left-hand thread.
- If the regulator has been stored or not used for a season, reset it before connecting to gas: with the tank closed and the control knob on the heater in the Off position, connect the regulator, then open the tank valve slowly and fully. Opening slowly reduces the chance of tripping the over-pressure safety inside the regulator.
- If you have previously stored the heater outdoors, also check the gas orifice (the small brass fitting at the top of the burner tube) for spider webs or insect nests. This is a real and common problem — a blocked orifice will produce a clicking igniter with no flame, which is easy to mistake for an igniter failure.
Pre-start inspection: leak test and tilt switch check
How to do the leak test
Run a leak test any time you reconnect the cylinder, replace a hose or regulator, or return to a heater that has been in storage. The procedure takes about five minutes and can prevent a dangerous situation.
- Make sure all burner valves and the control knob on the heater are in the Off position.
- Open the cylinder valve slowly and fully.
- Mix a small amount of dish soap with water in a cup until it is slightly sudsy.
- Using a small brush, sponge, or your fingers, apply the soapy solution to every gas connection: the cylinder-to-regulator coupling, the regulator body, along the hose, and the hose-to-valve fitting at the heater base.
- Watch each connection for 15 to 30 seconds. Steady or growing bubbles at any point mean gas is leaking at that joint.
- If you see bubbles: close the cylinder valve immediately, tighten the connection or replace the leaking component, and retest before proceeding. Do not attempt to light the heater if you cannot eliminate the leak.
- If there are no bubbles, close the cylinder valve, wipe off the soap residue, and proceed to startup.
Checking the tilt (anti-tip) switch
Hiland patio heaters include a tilt switch, a mechanical or magnetic safety device that interrupts gas flow if the heater tips past a certain angle. If this switch is stuck in the 'tripped' position (which can happen after a windstorm knock-over or rough handling during storage), the heater will never hold a flame regardless of how long you hold the pilot knob.
To check it: with the heater fully upright and on level ground, confirm the base is not resting at even a slight angle. The tilt switch on most Hiland models is mounted in the base or lower column, a ball bearing or pendulum inside a housing completes an electrical circuit when the heater is level. If the heater appears perfectly upright but still will not hold the pilot, gently rock it a few degrees in each direction and try again. On some models the switch housing can be accessed by removing the base panels (a few screws), and you can visually confirm the switch contact is seated. If the switch is visibly damaged or the mechanism is bent, replace it rather than bypass it, this is a genuine safety device.
Safe conditions to proceed and when to stop immediately
Before every single startup, run through this short checklist. If you hit any of the Stop items, do not attempt to light the heater.
| Check | Safe to Proceed | Stop — Do Not Light |
|---|---|---|
| Gas smell present? | No gas odor | Any detectable gas smell — close valve, move away |
| Leak test result? | No bubbles at any connection | Any bubbles found — fix leak first |
| Tank level? | Tank has fuel (weighted check passes) | Tank is empty — swap cylinder |
| Hose and regulator condition? | No cracks, kinks, or scorch marks | Any physical damage visible — replace before use |
| Tilt switch status? | Heater is plumb and level on stable ground | Heater is on uneven surface or switch is suspected tripped |
| Surroundings clear? | 3 ft clearance all sides, 6 ft above emitter | Combustibles within 3 ft, awning or overhang above |
| Location? | Fully outdoors, open air | Indoors, garage, screened-in porch, or enclosed space |
| Control knob position before opening tank? | Knob is in Off position | Knob is open — reset to Off before opening tank valve |
If every condition in the 'Safe to Proceed' column is met, you are ready to light the heater. Keep the cylinder valve within reach during the entire startup process. The moment something looks or smells wrong, close the tank valve first and then figure out the problem.
Step-by-step ignition procedure
The following procedure applies to Hiland freestanding and umbrella propane heaters with a push-button piezo or electronic igniter. For a concise step-by-step primer, see how to start patio heater (08fbacae-602f-4fa7-ad70-617ae2ab0c0e). The control knob will typically have positions marked Off, Pilot, Low, and High. If your model uses a rotary valve with different labeling, the logic is identical, find the Pilot position (usually the smallest gas flow setting, accessed by pushing in while turning).
- Open the cylinder valve by turning the handwheel counterclockwise until it stops. Open it fully — a partially open valve can restrict flow and mimic a regulator problem.
- Wait 5 seconds for the gas to reach the valve. Do not press any igniter buttons yet.
- Turn the control knob to the Pilot position. On most Hiland models, this means rotating counterclockwise from Off to the Pilot marking, then pressing the knob inward. You should feel it depress — keep it held down throughout the next steps.
- Press the igniter button once per second, watching the pilot burner (the small flame orifice near the main burner head). You should hear clicking and see a spark. If your model has an electronic igniter, make sure the battery compartment has fresh batteries before troubleshooting the igniter itself.
- Once the pilot flame appears, continue holding the control knob depressed for a full 10 to 15 seconds. This is the thermocouple warm-up period. The thermocouple generates a small millivolt signal when heated by the pilot flame, and that signal holds the gas valve open. Release too soon and the valve closes, extinguishing the flame.
- After 10 to 15 seconds, slowly release the control knob. Watch the pilot flame — it should remain lit.
- If the pilot stays lit, rotate the control knob from Pilot to Low to ignite the main burner. You will hear a soft 'whomp' as the main burner lights. Let it warm up on Low for 30 seconds before moving to High.
- If the pilot goes out when you release the knob, repeat steps 3 through 6, this time holding for a full 20 seconds. A cold thermocouple on the first startup of the season sometimes needs a longer heat-up period.
- Once the main burner is running at your desired setting, leave the area clear for at least 10 minutes during initial use to confirm stable operation.
Piezo vs. electronic igniters: what's different
Most Hiland consumer models use a mechanical piezo igniter, a spring-loaded hammer inside the igniter module that strikes a crystal and generates a spark without any battery. Some newer or upgraded models use an electronic (battery-powered) spark module instead. Knowing which type you have changes how you troubleshoot a no-spark situation. For OEM procedures and parts for electronic igniter replacement, see the Fire Sense / Pro‑Series user and replacement guidance (electronic igniter replacement procedures), parts & manuals hub Fire Sense / Pro-Series user and replacement guidance (electronic igniter replacement procedures) — parts & manuals hub.
| Igniter Type | How to Identify | No-Spark Diagnosis | Fix |
|---|---|---|---|
| Piezo (mechanical) | One-piece push button, no battery compartment | Press button with gas OFF and watch electrode for visible spark | Clean/reposition electrode wire, or replace piezo module |
| Electronic (battery) | Separate module with battery compartment (AAA or AA) | Check and replace batteries first, then check wiring connections | Replace batteries, reseat wire connectors, or replace module |
To confirm a piezo igniter is working: close the tank valve completely, then press the igniter button while watching the electrode tip at the pilot burner with the area shaded. You should see a small blue-white spark. If there is no spark, the electrode wire may have slipped out of position or corroded at the tip. Clean the tip with a dry cloth, ensure the wire end is seated within 3 to 5 mm of the pilot flame target, and try again. If there is still no spark, the piezo module itself has failed and needs to be replaced, these are inexpensive parts available through AZ Patio Heaters and most hardware stores. If sparks occur but the pilot will not light, the problem is fuel delivery, not the igniter.
Common ignition failures and how to fix them
Clicking but no flame
This is the most frequently reported Hiland problem and it almost always comes down to one of three causes: the tank is near-empty or the valve was opened with the control knob in an open position (causing regulator lock-out), the orifice is blocked by a spider web or insect nest, or the gas has not had enough time to reach the valve after opening the cylinder.
To reset a locked-out regulator: close the tank valve, turn the heater control knob to Off, wait 30 seconds, then open the tank valve slowly again with the control knob in the Off position. This re-pressurizes the system without triggering the over-pressure lockout. Then proceed with the ignition steps above. If clicking-but-no-flame persists after the reset, remove the emitter head cover and inspect the pilot orifice with a flashlight. A thin wire or a can of compressed air can clear a blocked orifice, do not enlarge the hole with a drill bit or nail, as the orifice size is calibrated.
Pilot lights but goes out when you release the knob
This is a thermocouple issue nearly every time. The thermocouple tip is not getting hot enough to generate the millivolt signal required to hold the gas valve open. Start by holding the pilot knob for longer, try 20 to 25 seconds on the next attempt. If the pilot still drops out, the thermocouple may be dirty, misaligned, or failing. The tip of the thermocouple should sit directly in the pilot flame. If it is bent away from the flame, carefully bend it back so the tip is engulfed by the flame, not just beside it.
If repositioning does not fix it, test the thermocouple output with a multimeter set to millivolt DC. Disconnect the thermocouple lead at the valve, light the pilot manually (use a long lighter if needed), hold it for 30 seconds, then measure across the thermocouple terminals. A healthy thermocouple should read 20 to 30 mV. Below about 15 to 20 mV, the valve will not hold reliably. At that point, replace the thermocouple. The Hiland THP-THERMO is a direct replacement available at Home Depot and through the manufacturer.
Main burner lights but the flame is weak or uneven
A weak or lopsided main flame usually points to low tank pressure, a partially blocked burner, or a partially blocked orifice. Check the tank weight first, a near-empty tank loses pressure in cold weather especially, and the flame height drops noticeably. If the tank is full, inspect the burner ports (the small holes around the burner ring) for debris, carbon buildup, or insects. Use a soft brush to clean the ports with the tank valve closed. Do not use water directly on a burner that has recently been lit.
Flame goes out during use
Mid-use flame outages on a Hiland heater are typically caused by one of three things: a gust of wind that blows out the pilot, the tilt switch triggering from movement or an uneven surface, or a low/empty tank. If the heater is in a breezy spot, consider repositioning it so the pilot is on the sheltered side or use a wind guard. If the tilt switch is triggering from vibration rather than actual tipping, check whether the heater is on a completely stable, level surface. Pavers that rock slightly underfoot are a common culprit.
Thermocouple vs. thermopile: know which one you have
Most Hiland consumer models use a single thermocouple, which generates a small millivolt signal (20 to 30 mV when healthy) that directly holds the safety valve open. Some models with more sophisticated valve/control systems use a thermopile instead, a stack of thermocouple junctions in series that produces a higher voltage and can power additional electronics. The practical difference for replacement is significant: the parts are not interchangeable, and testing thresholds differ. Your manual will specify which type is installed. If you cannot locate the manual, look at the wiring on the valve body. A single thin wire going to a small probe near the pilot = thermocouple. Multiple wires or a larger probe with two terminals = likely thermopile. When in doubt, contact Hiland support with your model number before ordering a replacement.
Basic maintenance to do every season
Hiland heaters are more reliable and longer-lived with a simple annual inspection. None of these tasks require special tools or gas certification.
- Clean the burner ports with a soft brush to clear any debris, rust scale, or insect blockages.
- Inspect the reflector and emitter screen for warping, rust holes, or cracks that could affect heat distribution or create a fire hazard.
- Clean the thermocouple tip with fine steel wool or a dry cloth to remove oxidation, which can reduce its millivolt output.
- Inspect the full length of the gas hose for cracking, stiffening, or discoloration. Replace it at the first sign of deterioration — do not patch a gas hose.
- Check the igniter electrode position and clean any carbon deposits from the tip.
- Remove any insect nests from the pilot orifice and the main orifice. A thin wire or can of compressed air works well.
- Disconnect and store the propane cylinder separately when the heater is not in use for more than a few days, especially during winter storage.
How to find your Hiland model number and manual
The model number sticker on Hiland heaters is usually on the inside of the base housing, near the cylinder compartment, or on the underside of the base panel. Common model prefixes include HLDS and THP for parts. Once you have the model number, manuals are available through AZ Patio Heaters (the Hiland distributor) at azpatioheaters.com, or by calling 1-888-775-1330. Many Hiland manuals are also indexed in retailer documentation at Home Depot's product pages for the specific model.
If your heater predates current online listings and you cannot find the exact manual, the ignition procedure and safety device layout described in this guide apply broadly to all Hiland propane freestanding and umbrella models. The control valve positions (Off, Pilot, Low, High) and the thermocouple hold-down procedure are standard across the range.
When to stop and call a technician
Most Hiland ignition problems are solvable at home. But there are specific situations where the right move is to stop, set the heater aside with the tank valve closed, and contact either Hiland's customer support or a qualified gas appliance technician.
- You smell gas and cannot identify or eliminate the source after a thorough leak test.
- You can see visible damage to the regulator body, the valve assembly, or the hose that you cannot replace with a direct OEM part.
- The heater repeatedly fails to stay lit after you have replaced the thermocouple and verified the tilt switch — this can indicate an internal valve fault.
- The cylinder valve itself is stuck, leaking, or behaving abnormally — this is a cylinder issue, not a heater issue, and the cylinder should go to a propane exchange.
- Any repair requires disassembling the gas valve body or modifying the gas train — this is beyond reasonable DIY scope and potentially in violation of CSA/ANSI Z83.26 safety standards that these heaters are certified under.
- You are a renter and any repair beyond basic ignition troubleshooting is outside what your rental agreement permits.
Hiland (AZ Patio Heaters) can be reached at 1-888-775-1330 for parts, warranty questions, and service referrals. For warranty claims, the email contact is [email protected]. If the heater is out of warranty and the repair cost approaches the replacement cost, a new unit is often the more practical choice, but for most Hiland models, a thermocouple, igniter module, and fresh hose assembly will resolve the vast majority of startup and stay-lit failures for well under $40 in parts.
FAQ
What safety checks should I do before starting a Hiland propane patio heater?
Operate outdoors only on a stable, level surface and keep combustibles at least 3 ft (0.9 m) away. Verify the cylinder is a proper 20 lb propane tank, seated and secured in the housing. Inspect hose, regulator, valve and fittings for cracks, dents or corrosion. Confirm the tip/tilt (anti‑tilt) switch and pilot area are unobstructed. Smell for gas; if you detect a strong gas smell, stop and do not light — close the cylinder valve and call qualified service. Have a soapy‑water leak solution ready for connection checks.
How do I perform a quick leak check on the tank, regulator and hose?
Close all burner/control valves, open the cylinder valve briefly, then apply soapy‑water (dish soap + water) to the regulator/hose and cylinder coupling. Watch for steady bubbles at connections. If bubbles appear, turn the cylinder off, do not operate, tighten or replace the faulty part and retest. If the leak persists, contact qualified service.
What are the pre‑start checks specific to Hiland units?
Confirm cylinder valve fully closed before connecting, confirm regulator and hose are the correct Type‑1/QCC1 or proper connector for your cylinder, inspect the pilot/orifice area for debris or insects, ensure the tilt switch is seated and that the unit is perfectly vertical, and make sure batteries are installed for electronic igniters or that piezo igniter components are intact.
How do I light a Hiland patio heater with a push‑button (piezo) igniter?
1) Open the cylinder valve slowly. 2) Turn the control knob to 'Pilot' and push it in. 3) While holding the knob depressed, press the piezo button repeatedly until you see the pilot light. 4) Keep the control knob depressed for 10–15 seconds to allow the thermocouple to heat and prove. 5) Release the knob — if pilot stays lit, turn the knob to 'Low' or 'High' to light the main burner. If no pilot appears after several attempts, follow troubleshooting steps.
How do I start a Hiland heater with an electronic/battery igniter?
Install fresh batteries per manual. Open the cylinder valve slowly. Turn control to 'Pilot' and press/hold per model instructions, then press the electronic spark button until pilot lights. Hold the pilot control depressed for 10–15 seconds for thermocouple/thermopile to heat, then release and set to main burner. If no spark, check/replace batteries and inspect wiring to the igniter module.
What if I see spark but the pilot won't light?
If you get visible sparks but no flame, likely fuel delivery problem: confirm tank has fuel and valve is open, check regulator for lock‑out (close then reopen slowly), inspect and clear debris from pilot orifice and burner ports, and verify correct hose/regulator assembly. If problems persist after cleaning and a new tank, stop and call service.