
Installing a patio heater comes down to four things: picking the right heater for your space, placing it safely, connecting the fuel or power correctly, and running a proper first-light check before you ever sit underneath it. See our guide on how to set up a patio heater for a step-by-step walkthrough and checklist to get yours running safely. For step-by-step plans and parts lists, see our guide on how to build a patio heater. Most freestanding propane heaters take about 30 minutes to assemble and hook up yourself. Natural-gas hard-plumbed heaters and permanently wired electric units are a bigger project and often need a licensed pro for at least part of the work, but the planning, site selection, and commissioning steps are still very much in DIY territory.
How to Install Patio Heater: DIY Guide for Homeowners

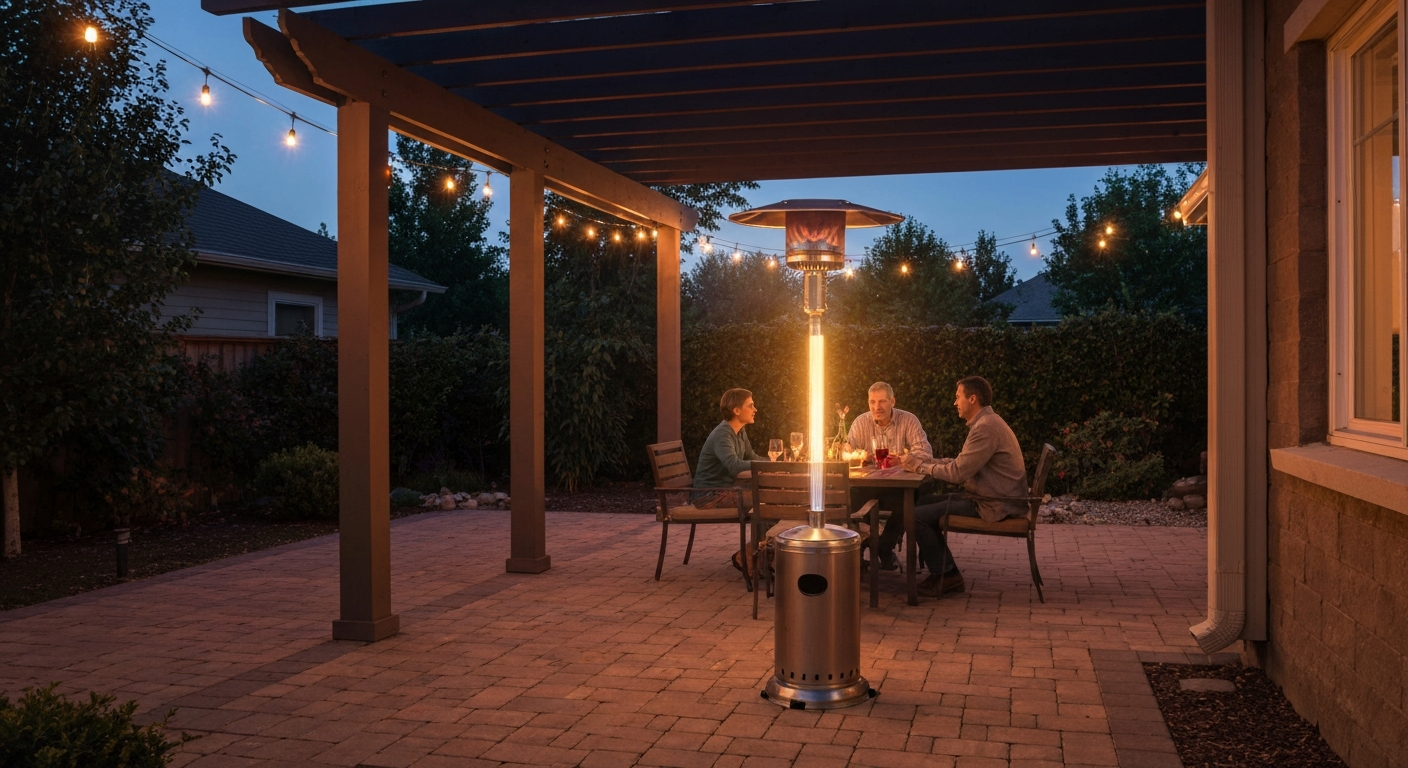
What patio heaters actually are and how they heat
A patio heater converts fuel or electricity into radiant or convective heat and directs it at people rather than heating the surrounding air. Gas models (propane and natural gas) burn fuel at a burner, and the heat radiates outward from a reflector dome or emitter panel. Electric infrared models use a resistive element to produce infrared radiation the same way the sun does: it warms objects and people it hits directly, without heating the air in between. That distinction matters a lot outdoors where air warmth just blows away. Understanding the basic operating loop (fuel supply, igniter, thermocouple flame-sensing, and tilt switch safety cutoff) also helps you troubleshoot problems later when the heater won't stay lit or refuses to ignite at all. For a clear, illustrated breakdown of components and heat transfer, see how does a patio heater work.
Heater types, fuel options, and BTU sizing
Before you install anything, you need to match the heater type to your space. Each type has a different installation footprint, fuel connection, and maintenance profile. Here is how the main options compare:
| Type | Fuel / Power | Typical Output | Best For | DIY Install Difficulty |
|---|---|---|---|---|
| Freestanding propane | 20 lb propane cylinder | 40,000–46,000 BTU/hr | Open patios, portability needed | Easy (30–60 min) |
| Natural gas hard-plumbed | Home gas line | 30,000–50,000 BTU/hr | Permanent outdoor kitchen/patio installs | Moderate to Hard (permit often required) |
| Electric plug-in infrared | 120V outlet | 1,000–1,500 W (3,400–5,100 BTU) | Small spaces, covered patios, apartments | Easy (minutes) |
| Electric fixed infrared (hardwired) | 240V dedicated circuit | 1,500–6,000 W (5,100–20,500 BTU) | Large covered patios, commercial installs | Moderate (licensed electrician often required) |
| Tabletop propane | 1 lb propane canister | 7,500–11,000 BTU/hr | Small tables, occasional use | Very easy (no assembly) |
| Wall/ceiling mount gas or electric | Natural gas or 240V | 25,000–50,000 BTU/hr | Covered patios, pergolas, restaurants | Moderate to Hard |
For BTU sizing, a rough field rule is 1,000 BTU per square foot for open patios in mild climates. For a 10x10 ft (100 sq ft) patio you want roughly 40,000–46,000 BTU, which is exactly what a standard full-size freestanding propane heater delivers. In windy or colder climates, add 25–50% or choose a model with a higher output and a focused reflector. For covered or enclosed patios where heat is retained, you can size down. Electric infrared heaters are rated in watts: plan on about 10 watts per square foot under a covered patio where walls trap some heat.
Choosing the right heater for your space
Coverage area, portability, and your existing infrastructure should drive the decision, not just price. If you're still deciding which model fits your needs, see our guide on how to buy a patio heater for step‑by‑step shopping advice. A freestanding propane heater is the easiest install and gives you the freedom to move it, but you are managing cylinder swaps every 8–10 hours at full output. A natural-gas unit eliminates cylinder runs but ties you to a fixed location and a gas line extension that likely needs a permit. Electric fixed heaters are the cleanest to operate and the easiest to integrate with a timer or smart switch, but a 240V hardwired unit needs a dedicated circuit and often a breaker panel upgrade.
Mounting height also changes the experience. A 7-ft freestanding heater puts the emitter about 6.5 ft above floor level and heats a circle roughly 10–18 ft in diameter. A ceiling-mounted infrared heater in a 9-ft covered patio shoots radiant heat straight down and can cover a rectangular zone precisely. For pergolas and half-open structures, overhead mounting of gas or electric infrared panels is frequently the best solution, but you need to verify that the structure can support the weight and handle the required clearances to combustible framing above.
If portability matters at all, go propane freestanding or tabletop. If you have a covered, permanent outdoor room and access to natural gas or a 240V feed, a hard-plumbed or hardwired unit gives you better heat coverage per dollar over the long run.
Permits, local codes, and when to call a pro
This is the part most DIYers skip and later regret. Gas and electrical work have clear legal lines that vary by jurisdiction, but the pattern is consistent: if you are extending a gas line or adding a new circuit, you almost certainly need a permit and possibly a licensed contractor.
For natural gas, the National Fuel Gas Code (NFPA 54 / ANSI Z223.1) is the foundation document in most U.S. jurisdictions, and it requires an accessible manual shutoff valve for each appliance located within 6 ft (1.8 m) of the unit. Any new gas piping run beyond a very short appliance connector triggers a permit in most cities. For example, the Los Angeles Department of Building and Safety requires a plumbing permit for any gas piping installation except for piping under 6 feet between an existing gas outlet and an appliance in the same room. Similar rules apply in virtually every U.S. municipality. Propane installations fall under NFPA 58 (Liquefied Petroleum Gas Code), which governs cylinder storage limits, regulator requirements, and overpressure protection.
For electrical, the National Electrical Code (NEC / NFPA 70) Article 424 covers fixed electric space-heating equipment. A permanently installed electric patio heater is treated as a continuous load, which means the branch circuit conductors and breaker must be sized at 125% of the heater's nameplate amperage. See NEC 2023 Code update summary, Article 424 (fixed electric space‑heating) for the 125% continuous‑load sizing and the disconnect requirement in Article 424.19 NEC 2023 Code update summary — Article 424 (fixed electric space‑heating). NEC 424.19 requires a disconnecting means that opens all ungrounded conductors. NEC 210.8 requires GFCI protection for outdoor receptacles. If you are simply plugging a 120V infrared heater into an existing GFCI-protected outdoor outlet, that is fully DIY. If you are running new 240V wire to a hardwired heater, that needs a licensed electrician in most jurisdictions.
- Freestanding propane connected to a manufacturer-supplied regulator/hose: no permit required in most jurisdictions
- Natural gas extension beyond 6 ft of existing outlet: permit required, licensed gas fitter or plumber typically mandatory
- Hardwired 240V electric heater on a new dedicated circuit: electrical permit required, licensed electrician recommended
- Plug-in 120V electric heater on an existing GFCI outdoor outlet: no permit required
- Wall or ceiling gas mount connected to existing gas outlet within 6 ft: check local AHJ — rules vary
- Any installation in a condo, HOA community, or rental property: check rules before starting
When in doubt, call your local building department. A permit is cheap compared to an insurance denial after a fire, and inspectors in most areas are used to dealing with patio heater questions.
Site selection and clearance planning
Where you place the heater has as much impact on safety and performance as the unit itself. Gas combustion products need to disperse safely, radiant heat needs a clear path to people, and no combustible material should be within the manufacturer-specified clearance zone. Most full-size freestanding propane heaters require a minimum of 24–36 inches of clearance to the sides and 36–48 inches of clearance above the emitter head. Always defer to the specific clearance numbers in your model's manual, they vary.
Overhead obstructions are the most commonly ignored clearance. A fabric umbrella, a wood pergola ceiling, or a vinyl shade sail directly above a gas patio heater is a fire hazard. Even if the heater passes a single-use test, repeated heat cycling degrades fabric and wood over time. Do not position any gas heater under a closed structure unless it is specifically listed and rated for that installation type.
Wind is the enemy of patio heater efficiency and safety. Freestanding heaters are top-heavy and vulnerable to tipping in gusty conditions. Most models include a tip-over or tilt switch that cuts gas flow if the unit tips more than roughly 30 degrees, but that is a last-resort safety device, not a wind management plan. Position the heater away from open corners or fence gaps that channel wind. On hard surfaces like concrete or pavers, anchor the base using a weighted base ring, ballast bag, or concrete anchor bolt through the base plate. On wood decks, use lag bolts into a joist or beam if the base has mounting holes.
- Check the ground surface: concrete, pavers, and composite decking are generally fine; avoid soft ground without staking or a base plate
- Measure overhead clearance before siting any gas heater under a roof, awning, or pergola
- Keep the heater away from furniture, drapes, cushions, and potted plants within the clearance zone
- On windy sites, plan for a base anchor or ballast rather than relying on the tilt switch
- For wall or ceiling mounts, verify the mounting surface is structural (stud, joist, or masonry) — not just drywall or thin cladding
- Check floor surface level: a heater on an uneven surface is more likely to tip
Tools, materials, and safety gear you need before you start
Get everything on the bench before you begin. Running back and forth to the hardware store mid-install is how people take shortcuts they later regret.
- Adjustable wrench or two open-end wrenches (for gas fittings: 3/4" and 1" are common sizes)
- Phillips and flathead screwdrivers (for assembly panels and junction box covers)
- Teflon (PTFE) tape rated for gas service — yellow tape, not white plumbing tape
- Leak-detection solution or dish soap mixed with water (for checking gas connections)
- Torque wrench or torque screwdriver (for anchor bolts and mounting hardware)
- Hammer drill and appropriate masonry or wood bits (for base anchoring)
- Wedge or screw anchors sized to the base plate holes and the surface material
- Multimeter (for checking voltage and continuity on electric heater installations)
- Non-contact voltage tester (before touching any electrical wiring)
- Safety glasses, work gloves, and closed-toe shoes
- Fire extinguisher rated ABC — keep it within reach during first-light
- A copy of your specific heater's installation manual — download it from the manufacturer's site if you don't have the paper version
On the gas side, never use white plumber's PTFE tape on gas fittings. Yellow gas-rated PTFE tape is specifically made for gas service; the white version is not rated for fuel gas and can deteriorate or allow micro-leaks. For threaded gas connections on natural gas lines, pipe dope (gas-rated thread sealant) is actually preferred by many installers and inspectors over tape because it flows into the threads more reliably.
Installing a freestanding propane heater
This is the most common DIY install and it is genuinely straightforward if you follow the sequence carefully. Most freestanding propane heaters arrive with the pole in sections, a base, an emitter head, a reflector, and a regulator/hose assembly already certified for that model. Do not substitute a generic hose and regulator from a hardware store unless the manufacturer explicitly allows it, the regulator must deliver the correct outlet pressure (typically around 11 inches water column, approximately 2.74 kPa) and must meet UL 144 requirements for LP-gas pressure regulators.
Assembly steps
- Lay out all parts and check them against the parts list in the manual before starting
- Assemble the base and lower pole section first, following the manual's bolt sequence — do not fully tighten until all sections are aligned
- Thread the gas supply tube through the center of the pole as you add each section (most models route the tube internally)
- Attach the emitter head and reflector following the manual's bracket sequence; most use 2–4 bolts with lock washers
- Connect the regulator/hose assembly to the burner inlet fitting inside the pole — hand-tighten first, then snug with a wrench (do not over-torque; brass fittings strip easily)
- Attach the other end of the regulator to the propane cylinder valve using the POL fitting or QCC1 fitting as supplied — hand-tight plus 1/4 turn is typically correct for these connectors
- Level the base and verify the tilt switch plunger moves freely — the switch should click or reset to the upright position when the unit stands straight
- Anchor the base as described in the site section: ballast ring, lag bolts, or wedge anchors depending on surface
Cylinder hookup and first-use checks
With the cylinder connected, perform a leak test before the first ignition. Open the cylinder valve slowly (about 1/4 turn) without igniting. Apply leak-detection solution to every threaded connection: the cylinder valve-to-regulator connection, the regulator body, and the burner inlet fitting at the top of the pole. Watch for bubbles for at least 30 seconds. Any bubbling means gas is escaping, close the valve immediately, disassemble the joint, check the fitting for damage, re-tape or re-seal, and retest. Only proceed to ignition once all connections are bubble-free.
For first ignition, follow the exact sequence in your manual. The general procedure on most piezo-igniter models is: open the cylinder valve fully, push and hold the control knob in (to open the gas valve and bypass the thermocouple), rotate to the pilot or ignite position, press the igniter button while still holding the knob in, and hold for 30–45 seconds after the flame appears to let the thermocouple heat up. Release slowly. If the flame goes out immediately on release, the thermocouple has not reached operating temperature. Hold longer. If it fails three times in a row, check for low gas pressure, a blocked pilot orifice, or a faulty thermocouple.
Installing a natural-gas hard-plumbed heater
Hard-plumbing a natural-gas patio heater is a more involved project, and in most U.S. jurisdictions any new gas piping beyond a short appliance connector requires a permit pulled by a licensed plumber or gas fitter. That said, the planning, layout, and commissioning work is absolutely something a capable DIYer can contribute to and understand. Even if you hire a plumber for the pipe run, knowing how this works lets you specify it correctly and verify it was done right.
Planning the gas run
Start by calculating the total BTU load of all appliances on the run (grill, heater, fire table, add them up) and measure the total equivalent pipe length from the meter to the farthest appliance. NFPA 54 and the International Fuel Gas Code (IFGC) publish pipe sizing tables by pipe diameter, equivalent length, and BTU capacity. A typical 40,000 BTU patio heater 30 feet from the meter needs at minimum 3/4-inch black iron or CSST (corrugated stainless steel tubing) depending on the full load calculation. Under-sizing the pipe is one of the most common causes of a natural-gas heater with weak flame and poor performance.
NFPA 54 requires an accessible manual shutoff valve for each gas appliance, located within 6 feet (1.8 m) of the unit. For an outdoor patio heater, this typically means a ball valve on the stub-out before the appliance flexible connector. The flexible connector itself is limited to a maximum of 6 feet in length per NFPA 54 and must be listed to ANSI Z21.54 for gas hose connectors. Do not route a flexible connector through a wall, under the floor, or anywhere it cannot be inspected.
Pressure testing and commissioning
After all piping is installed but before connecting the appliance, the system must be pressure-tested. The standard test for new residential gas piping is to pressurize the system (typically to 1.5 times the working pressure, or at minimum 3 psi for low-pressure systems per NFPA 54) and hold for a defined period while monitoring for pressure drop. Your inspector will specify the exact test pressure and hold time. This test must happen before the inspector signs off, and the heater must be connected and leak-tested at operating pressure before the final inspection.
Once gas is live to the appliance, follow the manufacturer's commissioning procedure. For most outdoor gas infrared heaters (such as those listed to ANSI/CSA Z83. ANSI/CSA Z83.26-20 • CSA 2.37-20, Gas‑fired outdoor infrared patio heaters (ANSI webstore description) is the consensus product standard manufacturers use for certification/listing of gas patio heaters, defining heater types (tabletop vs patio), mounting types, maximum input ratings, allowable fuel and pressure ranges, and wind/altitude annexes ANSI/CSA Z83.26-20 • CSA 2.37-20 — Gas‑fired outdoor infrared patio heaters (ANSI webstore description). 26), this includes verifying the supply pressure at the appliance inlet (typically between 7 and 11 inches WC for natural gas), checking the burner flame pattern against the manual's description, and confirming the safety shutoff (thermocouple or thermopile) holds the valve open after warmup. If the heater repeatedly shuts off after 1–2 minutes, the thermocouple/thermopile is the first thing to check, it is also the most common field service item on gas patio heaters.
Anchoring a hard-plumbed unit
Wall and ceiling-mounted gas heaters (like Bromic Platinum or similar models) must be attached to structural members, not just cladding. Use fasteners rated for the load: Simpson Strong-Tie or Hilti wedge anchors into concrete provide documented tensile and shear values per their technical data sheets, select the anchor diameter and embedment depth to match the heater's weight plus a safety factor. On wood-framed covered patios, lag screws of at least 3/8 inch diameter into a structural rafter or ledger board are standard. Always follow the mounting bracket template in the manufacturer's manual.
Installing electric patio heaters
Electric heaters are the most straightforward from a fuel-connection standpoint, but the electrical side has its own rules and risks. A plug-in 120V infrared heater that draws under 12 amps can go on any GFCI-protected outdoor outlet. A hardwired 240V unit is a different story.
Plug-in 120V models
For plug-in models (commonly 1,000–1,500W, ~8–13 amps), verify the outlet is GFCI-protected as required by NEC 210.8 for outdoor receptacles. Check that the circuit is not already loaded with other high-draw devices. Do not use extension cords rated below 14 AWG, and never use indoor extension cords outside. Mount the heater at the manufacturer-specified height and angle using the supplied bracket, most manufacturer brackets for wall-mounted electric infrared heaters include adjustment slots so you can aim the heat zone at seating areas. Infratech and similar manufacturers typically specify a minimum 6 inches of clearance from the ceiling and 18 inches from side walls, with minimum mounting heights that vary by wattage.
Hardwired 240V fixed heaters
Fixed electric heaters in the 2,000–6,000W range (common for serious outdoor installations) require a dedicated 240V branch circuit. Per NEC Article 424, size the circuit conductors and breaker at 125% of the heater's full-load amperage because this is a continuous load. For a 4,000W (4kW) heater at 240V: 4,000 ÷ 240 = 16.7 amps full load × 1.25 = 20.8 amps, so you need a 25-amp or 30-amp breaker and conductors rated accordingly. NEC 424.19 requires a disconnecting means that opens all ungrounded conductors, visible from or lockable from the heater location. Running this circuit requires an electrical permit in most jurisdictions, and I would recommend hiring a licensed electrician for the panel and wiring work even if you do the mounting and bracket work yourself.
For wall and ceiling mounting of electric heaters, the structural anchoring rules are the same as for gas units: into studs, joists, or masonry with hardware sized to hold the heater weight with a significant safety margin. Most electric infrared heaters weigh 8–25 lbs depending on wattage, which is manageable, but the bracket must also handle vibration and the occasional bump from outdoor furniture or wind.
First ignition, commissioning checks, and common faults
Whether gas or electric, every new install needs a deliberate commissioning check before regular use. For gas heaters, this means a full leak test at operating pressure, a confirmed ignition sequence, and a verification that the safety shutoff holds after warmup. For electric heaters, it means confirming correct voltage at the supply, checking that the thermal cutout resets properly, and verifying the heater reaches operating temperature without tripping the breaker.
The most common commissioning faults and their fixes are worth knowing upfront:
| Symptom | Most Likely Cause | Fix |
|---|---|---|
| Heater won't ignite at all | Depleted cylinder, closed valve, or failed piezo igniter | Check cylinder pressure, ensure valve is open, test igniter spark with lights off |
| Ignites but won't stay lit | Thermocouple not hot enough, or faulty thermocouple | Hold control knob in longer (45–60 sec); if still fails, replace thermocouple |
| Gas smell without ignition | Loose fitting or over-pressured connection | Close cylinder valve immediately, test all fittings with leak solution, do not ignite |
| Heater shuts off when bumped or moved | Tilt switch triggered | Return unit to level, ensure tilt switch plunger moves freely and resets |
| Weak flame, low heat output | Under-sized gas supply, low cylinder pressure, or partially blocked orifice | Check cylinder fill level, verify regulator pressure, inspect and clean orifice |
| Electric heater trips breaker immediately | Circuit overloaded or short in heater element | Verify dedicated circuit, check heater element for damage, call electrician if circuit issue |
| Electric heater warms slowly or unevenly | Incorrect mounting angle or blocked emitter | Adjust mounting bracket angle per manual, clean emitter surface |
If you smell gas and cannot immediately identify and stop the source, do not attempt to ignite or troubleshoot. Leave the area, shut off the cylinder or main gas supply from a safe distance if you can do so without approaching the leak, and call your gas utility. This is not a situation for troubleshooting on the spot.
Optimizing heater placement for warmth and efficiency
Once the heater is installed and commissioned, placement fine-tuning makes a real difference. Infrared heaters work best when aimed directly at the seating area, typically at a 30–45 degree downward angle from wall or ceiling mounts. Freestanding heaters should be positioned so the emitter head is roughly centered over the seating group, not pushed to the edge of the space. Avoid placing the heater directly behind a prevailing wind direction where it blows flame away from the thermocouple.
For covered patios and pergolas, combining a radiant overhead heater with wind screens or privacy panels on two to three sides dramatically increases the perceived warmth. The panels retain the heat that the heater generates rather than letting it dissipate immediately. For more tips on how to warm up an outdoor patio, see our guide to maximizing radiant heat and wind protection. This is a common approach for keeping a patio usable through winter months, and it works with any heater type.
Routine maintenance to keep your heater safe and reliable
A properly installed patio heater needs only a small amount of regular attention to stay in good condition. Most issues that bring people to a troubleshooting guide (heater won't stay lit, igniter not working, flame too low) are caused by deferred maintenance rather than mechanical failure.
- Before each season: inspect the regulator hose for cracks, brittleness, or kinks — replace it if you see any damage; hose life is typically 5 years maximum
- Clean the burner orifice with a small wire brush or compressed air to remove spider webs and debris (a leading cause of ignition failure in heaters stored outdoors)
- Check and clean the thermocouple tip — carbon buildup on the thermocouple sensor reduces its output voltage and causes the valve to drop out
- Test the tilt switch annually by gently tipping the heater beyond 30 degrees with the gas open — the flame should extinguish immediately
- Inspect all threaded gas connections with leak solution at the start of each season
- For electric heaters: wipe emitter surfaces with a dry cloth; inspect the power cord or wiring for cracking, rodent damage, or moisture intrusion
- Cover the heater when not in use, but never store a propane cylinder indoors or in an enclosed garage — store upright, outdoors, in a ventilated area away from ignition sources
When to stop and call a professional
Most of what this article covers is genuinely within DIY reach. But there are clear stopping points where the risk-to-reward math changes. If you encounter any of the following, step back and call a licensed plumber (for gas) or a licensed electrician (for electrical work):
- Any new gas piping run that your local AHJ requires a permit for — attempting unpermitted gas work can void your homeowner's insurance and create real liability if anything goes wrong
- A gas connection at the meter or at any fitting inside an existing gas line (this is licensed plumber territory everywhere)
- Hardwired 240V circuits where you are not confident in your electrical knowledge — a miswired heater can cause electrocution or fire
- A persistent gas smell that does not trace to a specific loose fitting after a proper leak test
- A cracked or deformed regulator body — replace the entire manufacturer-specified assembly, not just the hose
- Any structural question about whether a ceiling or wall can support the heater's weight and wind load
The goal of doing this yourself is a safe, working heater that you understand and can maintain. If a step in the process requires expertise that goes beyond your current skill level, getting that step done professionally is still a win, you have handled everything around it and you know exactly what you have.
FAQ
Which national codes are essential for writing a safe DIY patio-heater installation article in the U.S.?
Primary U.S. codes: NFPA 54 / National Fuel Gas Code (appliance piping, shutoffs, pressure testing, connector limits) and NFPA 58 / Liquefied Petroleum Gas Code (propane cylinder/regulator/hose, outdoor portable appliance rules). Also reference the National Electrical Code (NFPA 70 / NEC) for permanently installed electric heaters (Article 424) and GFCI/protection rules (NEC 210.8). These codes determine legal/technical requirements and are used by AHJs and manufacturers.
What product and certification standards must I consult for gas patio heaters?
ANSI/CSA Z83.26 (CSA 2.37) is the consensus product standard for gas-fired outdoor infrared patio heaters and is the basis for listings. Also check relevant UL/NRTL standards for components (e.g., UL 144 for LP-gas regulators). Manufacturer listings and test/label data will reference these standards — use them to confirm allowable fuels, pressures, mounting types, and altitude/wind annexes.
Which electrical standards and guidance are required for electric patio heaters?
NEC (NFPA 70) is required: Article 424 governs fixed electric space‑heating equipment (disconnecting means, continuous-load sizing at 125%, branch-circuit sizing). NEC 210.8 requires GFCI protection for many outdoor receptacles. Also consult applicable UL standards for heaters (UL 2021 for fixed/location-dedicated, UL 1278 for portable) and the heater manufacturer's electrical data.
How important are manufacturer installation manuals and what should I extract from them?
Manufacturer manuals are essential and legally prescriptive for each model: they provide required clearances, mounting heights, approved mounting hardware/anchors, regulator/hose specifications, maximum hose lengths, wiring diagrams, commissioning and troubleshooting procedures (leak tests, tilt/thermocouple behavior). Always follow the specific manual for the model you describe; treat it as the primary technical source for that product.
Which practical engineering references should I use for gas piping and sizing?
Use NFPA 54/IFGC piping sizing tables and accepted engineering references for low-pressure natural-gas capacity (e.g., EngineeringToolBox or equivalent tables). For accurate designs follow code tables or an approved engineering method: calculate total connected load, equivalent lengths for fittings, and select pipe size per code or a qualified gas fitter/plumber.
What sources should I cite for propane regulator, hose and connector rules?
Cite NFPA 58 (LP‑Gas Code) and UL 144 (LP‑Gas regulators) along with manufacturer regulator/hose assembly instructions. Manuals for consumer patio heaters consistently require use of the factory-supplied regulator and list max hose lengths — use those manufacturer constraints and the NFPA/UL requirements when advising on regulator selection and overpressure protection.